Introduction
Importing transactions into CharityEngine will allow any transactions that did not take place on a CharityEngine form or entered manually into CharityEngine to be managed and tracked in CharityEngine. This will prevent users from navigating different platforms to view the organizations transactions.
Before importing, users must prepare the data in a way that is acceptable to import. This means that the file is either a text file (.txt) or an Excel workbook (.xls or .xlsx) and contains fields that are in CharityEngine. If you are not including a unique identifier to match transactions to a contact, the system will match based on the information provided.
Table of Contents
- Introduction
- Prerequisites
- Prerequisites - Best Practices for Data Preparation
- Preparing your file import
- Instructions: Importing New Contacts with an External ID
- Instructions: How to Import Transaction Records
- Instructions: How to Evaluate Bad Records
- Instructions: Additional Transaction Import Elements
- FAQs & Other Recommended Readings
Prerequisites
- CRITICAL NOTE: Preparing your data is an important exercise to ensure your data is properly formatted and will be prepared for importing
- NOTE: In order to import Transaction type records the minimum required fields will include Amount and CharityEngine Contact ID or Amount and First Name/Last Name; if your data does not contain First/Last Name, you will need to create business rules to append a placeholder value (i.e. "No Name"). Please note, repetitive usage of a placeholder will create duplicate name records and may impact your data governance and CharityEngine matching logic.
- If the user has imported contacts with Sync External ID, this value can also be used in order to connect transactions with contact records
Prerequisites - Best Practices for Data Preparation
When preparing your data, data cleansing practices are incredibly important to ensure you are importing good, clean data for your database. Here are a few examples to assist with data cleansing prior to import.
-
- -Does each row contain a unique transaction amount and CharityEngine Contact ID (or First Name/Last Name or (coming soon) External ID)
- Minimum import requirement is a transaction amount and contact fields for importing to Transaction table
- Please review for rows containing null values within your data import as these may result in importing errors
- -Does each row contain a unique transaction amount and CharityEngine Contact ID (or First Name/Last Name or (coming soon) External ID)
-
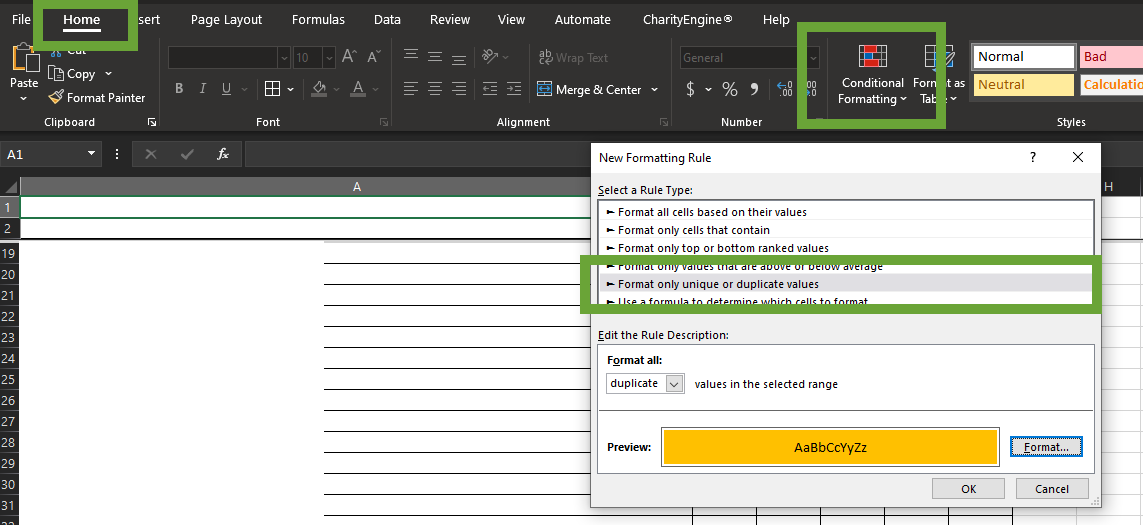
- Conditional Formatting in Excel:
- -Select the cells you want to check for duplicates
- -In Excel click Home > Conditional Formatting > Highlight Cell Rules > Duplicate Values
- -In the box next to values with, pick the formatting you want to apply to the duplicate values, and then click OK
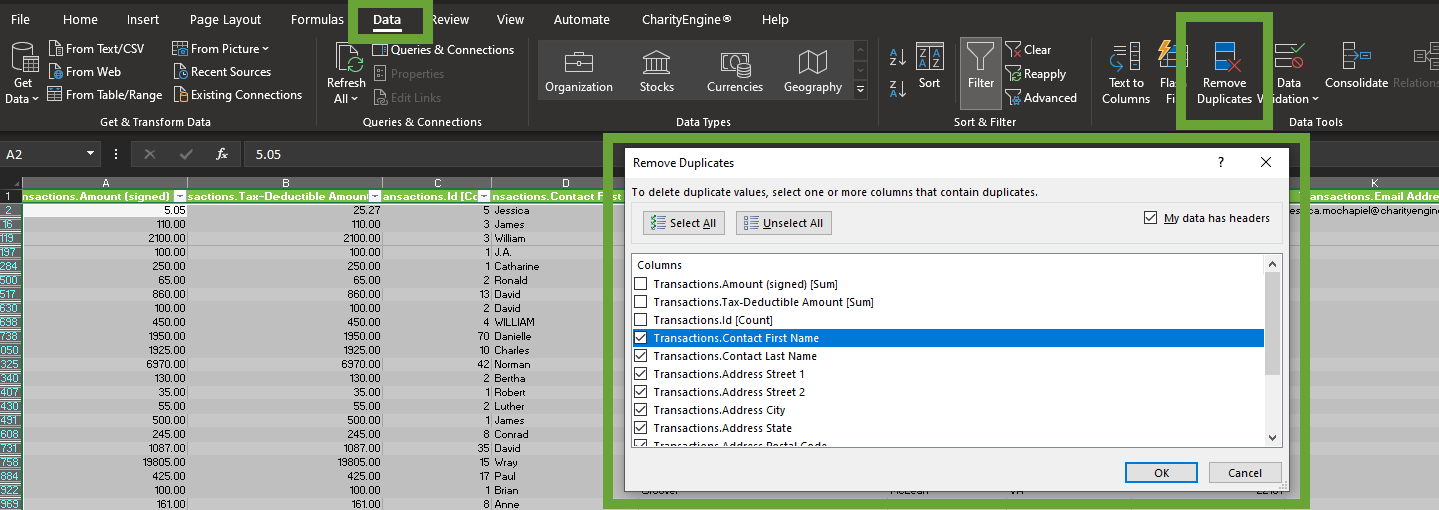
- Removing Duplicates in Excel:
- In Excel click Data > Remove Duplicates
- In the popup box, select your columns for matching values
- Conditional Formatting in Excel:
-
- Sort & Filter in Excel: Leverage the Excel Sort and Filter options under the Data Ribbon

- Sort & Filter in Excel: Leverage the Excel Sort and Filter options under the Data Ribbon
-
- Text to Columns Excel features to modify data including splitting fields (i.e. splitting a first name and last name)

- Text to Columns Excel features to modify data including splitting fields (i.e. splitting a first name and last name)
-
- Amount - each line for import must contain a value, $0.00 or negative amounts are acceptable AND
- Contact (available options)
- CharityEngine Contact ID (if associating with an existing contact record)
- Customer First Name AND Customer Last Name (if creating a new contact - note, CharityEngine matching logic will also attempt to locate existing records where FN and LN match)
- Coming Soon: External ID (if associating with an existing contact record that contains an External ID)
- Note: If you your first name and/or last name field does not contain a value, you will need to determine the appropriate value to include as a placeholder. For example, a null name may be reflected as "Missing Name". Please proceed with caution as repetitive usage of a placeholder can create duplicative values and may impact contact merging as well as management of data governance. CharityEngine strongly recommends evaluating usage and evaluation of data that may be missing name elements for effectiveness.
Preparing your file import
When importing transaction records, preparation is an important activity to ensure you have clean data for your CharityEngine database. When importing Transactions for your donation records, the minimum requirement is:
- Amount and
- Contact
- CharityEngine ID or
- First Name/Last Name or
- (coming soon) External ID
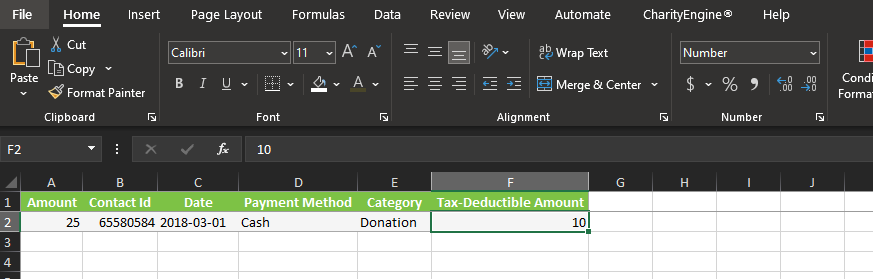
The following table will provide you with basic transactional data elements for importing. Provided below are details for the translated CharityEngine Field name. Please also notate importing requirements as outlined within Description.
| Table Import | Field Section | CharityEngine Field | Required | Description |
| Transaction | Transaction Detail | Amount | Yes | Transaction amount must not be null - can include positive, negative, and value of 0; numeric value expected |
| Transaction | Donor Info | Contact Id | Yes (or one alternative below) | CharityEngind ID for person, organization or household |
| Transaction | Donor Info |
First Name |
Yes (or alternative above or below) | Use if creating new contact record; if CharityEngine matching can locate existing contact record with First Name/Last Name, will assign donation to the contact id Note: If using this option, must contain both a first and last name |
| Transaction | Attribution | Synch Contact External Type ID and Synch Contact External ID |
Yes (or alternative above) | Note: If using an external synch id, ensure configuration steps to set up or locate the External Type ID |
| Transaction | Transaction | Date | valid formats include MM/DD/YYYY or YYYY/MM/DD | |
| Transaction | Transaction | Payment Method | Expected options: ACH, Cash, Check, Credit Card, Echeck, Wire Transfer, PayPal, In-Kind, Soft Credit, Other, None; null values will be imported as Cash | |
| Transaction | Transaction | Category | Expected options: Acquisition, Advocacy, Auction, Case Intake, Contact, Donation, Enrollment, Event Registration, Grassroot Event Application, Job Application, Membership, Other, Polls & Survey, Volunteer Note: If leveraging CharityEngine self-guided migration, limited to one time Donations and Event related donations |
|
| Transaction | Transaction | Tax-Deductible Amount | Transaction amount must not be null - can include positive, negative, and value of 0; numeric value expected |
Click Here to Download a Transaction (CharityEngine ID) Import Template:
Click Here to Download a Transaction (First Name/Last Name) Import Template:

Click Here to Download a Transaction (Sync External Contact ID) Import Template:
Important: Please see Instructions: Importing New Contacts with an External ID section to configure the External ID Type value. Use this value for any contact with an external ID required for import. This value should be used within field "Sync Contact External Type Id"
Instructions: Importing New Contacts with an External ID
If you are importing contacts which contain a unique identifier from a prior CRM or database, please follow these steps to configure an external id import. This step is critical if the historical id is important to reference on the contact record and/or if this id is used to associate historical transactions based upon this unique value.
Step 1: Navigate to the Configuration App > Contacts > External ID Types > Create New
Step 2: Create a Name (required) - this is an internal reference . Select Class. Select your CRM/Database from the dropdown menu, or select Other.
Step 3: Click SAVE to secure your changes.
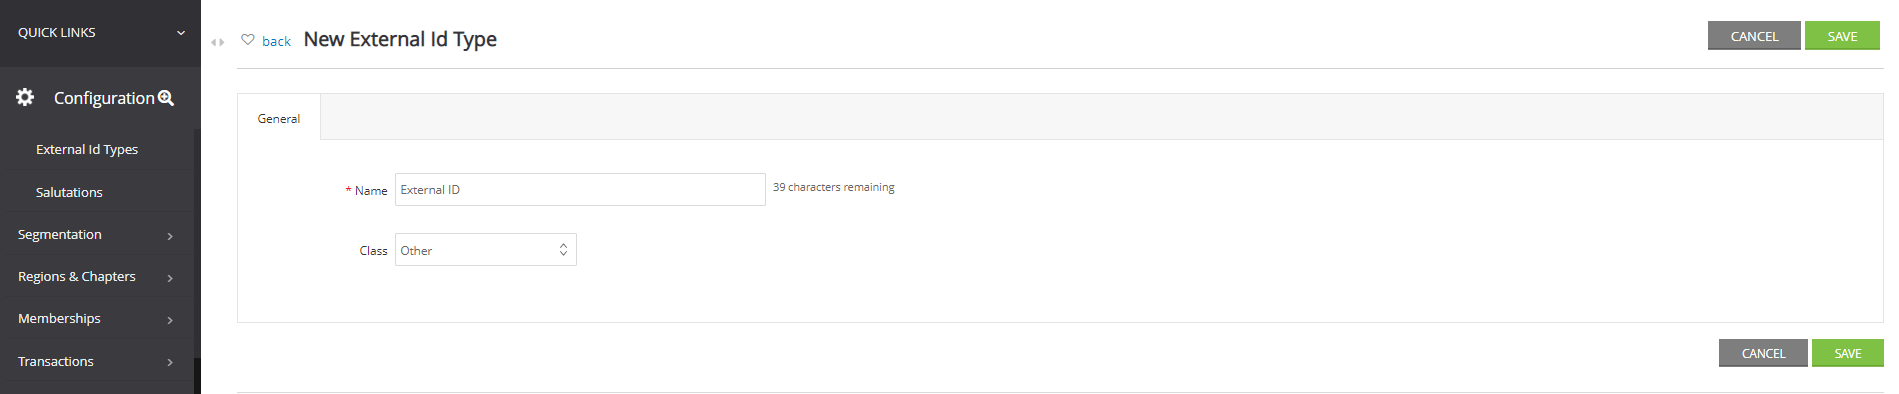
Step 4: Navigate back to the listing screen to locate the new External Id Types. This value will be used in the Contact-Organization Import WITH External ID. This value should be used with CharityEngine field: Sync External Type Id

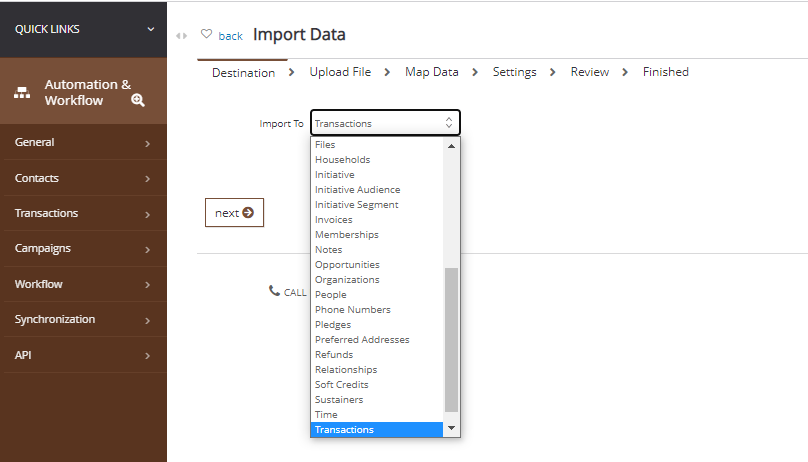
Instructions: How to Import Transaction Records
Now that you have cleansed your data, added your external synch ID (if applicable), and added your contacts to the import template, you are ready to begin importing. CharityEngine recommends importing a small sample to begin. This allows the user to QA and verify the data has imported as expected.
The user can choose to leverage the Import (new) or Import (classic). Classic workflow guides end user to map fields manually and then import the source file. Alternatively, new import flow guides end user to upload source file and then user will be guided to map based upon the column headers.
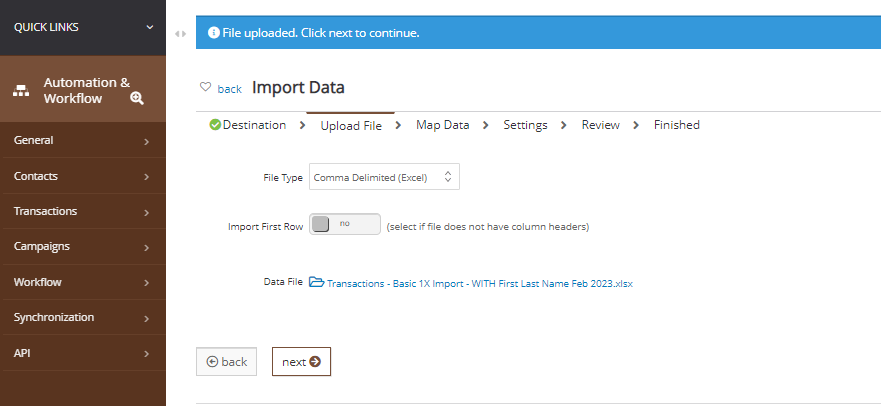
Importing with Import (new)

-
-
- Leverage Existing Template to locate any prior templates for faster mapping
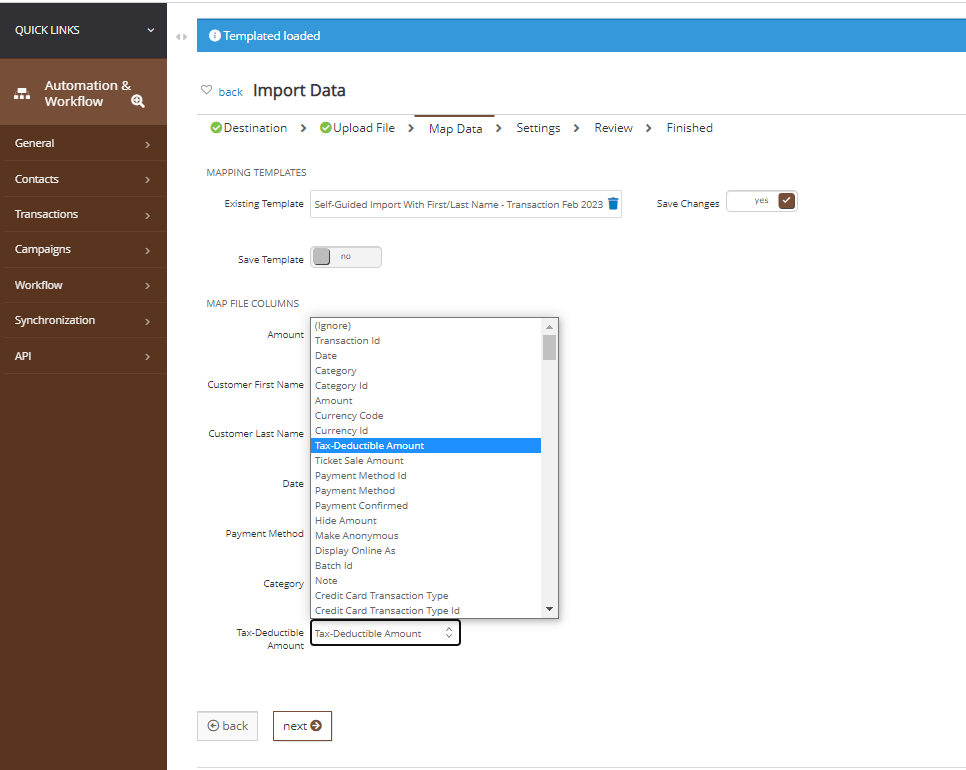
- MAP FILE COLUMNS:
- Use the drop down from each column to select the appropriate field selection for mapping
- Select IGNORE if you wish to have the importer skip importing/updating the contact record
- To save the template for future use, ensure Save Template is toggled to Yes. This will allow you to save time by loading the template instead of adding the fields one by one. This will also be helpful if you plan to import a sample and then complete a full import. Or if using an existing template, adjust Save Changes to adjust for any modifications of column mapping changes that may be needed for future reference.
-
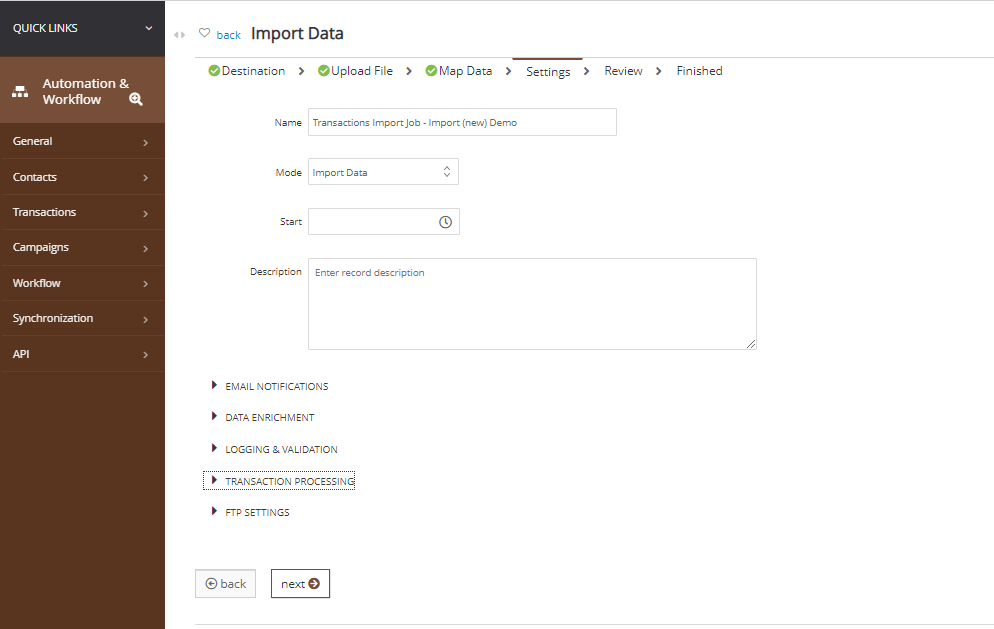
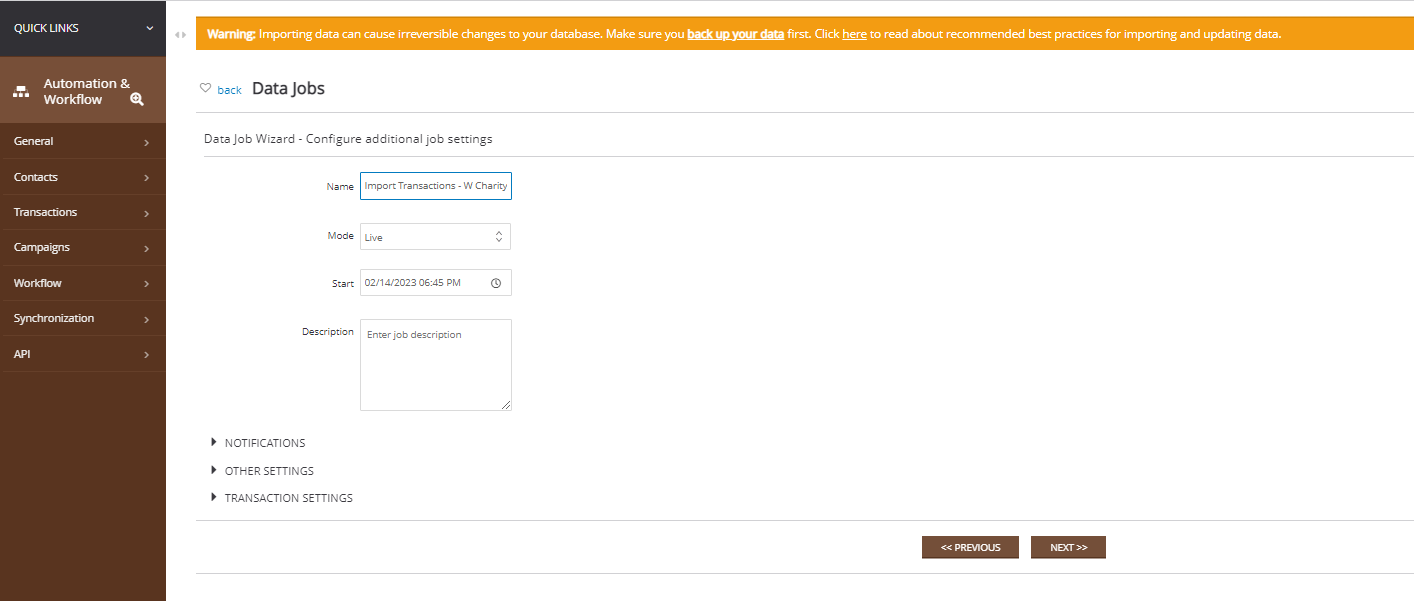
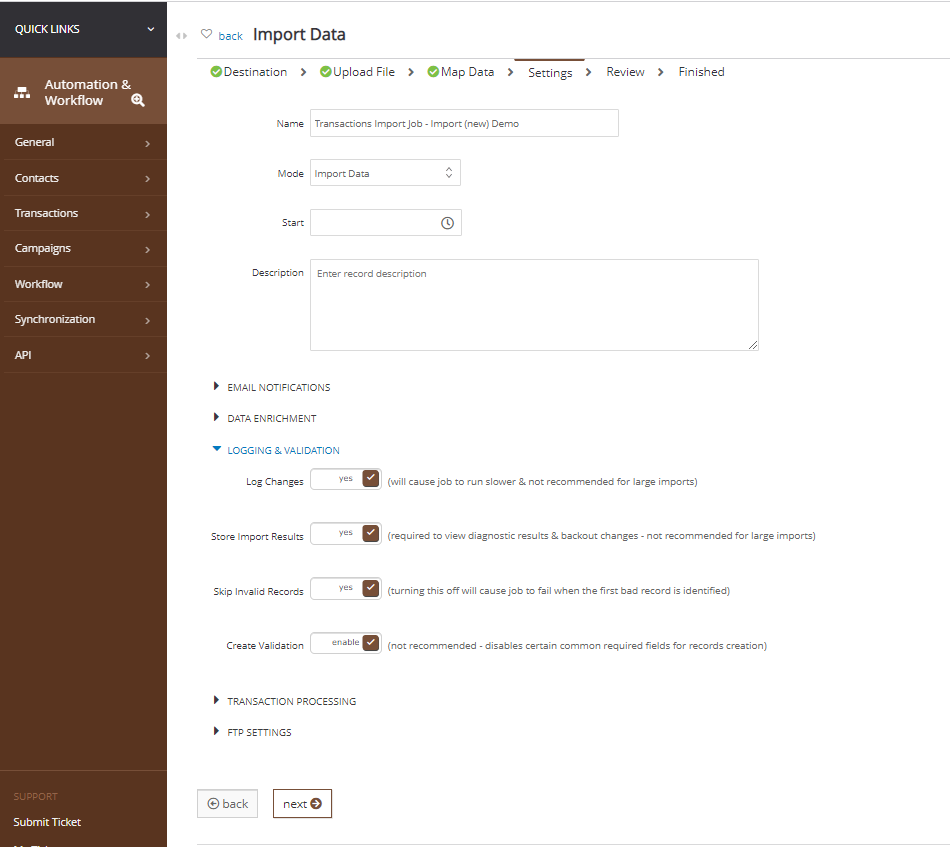
Step 6: Next, prepare your settings for import. Modify the Name of the import job (optional), Mode: Import Data (preset), Start if you wish to schedule in the future (optional). Click next to proceed.
-
-
- Selection of the Store Import Results can be used (and is required) if the user requires the ability to view diagnostic results and/or to backout changes. Please note this will cause data jobs to run slower and not recommended for large import.
-
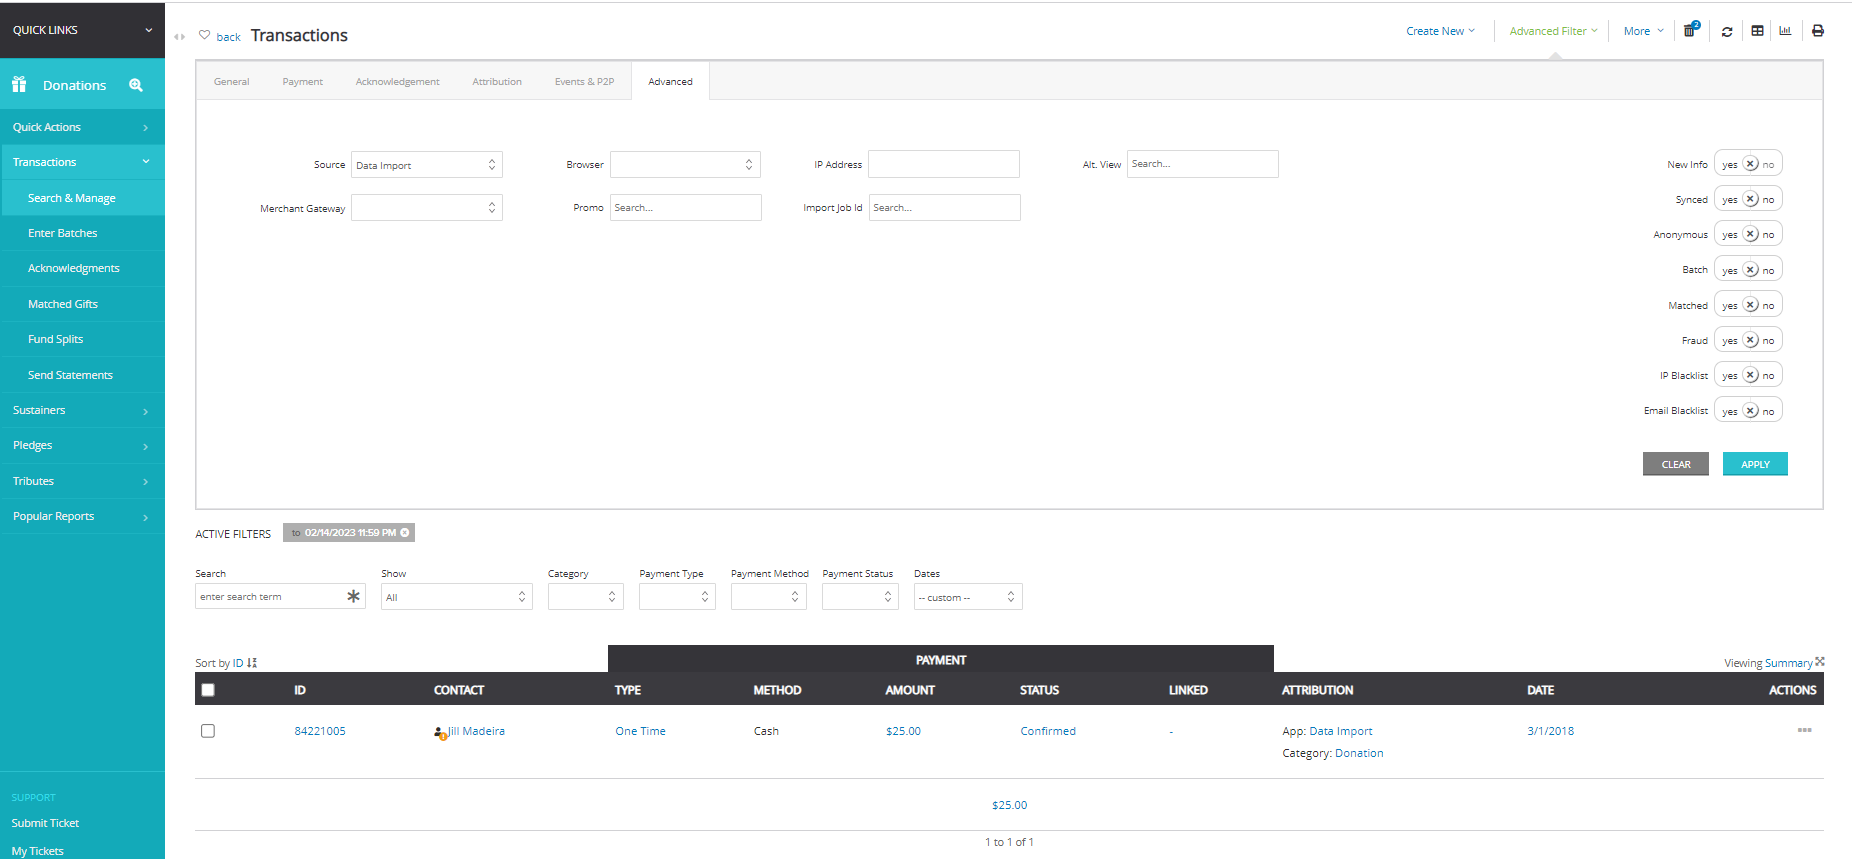
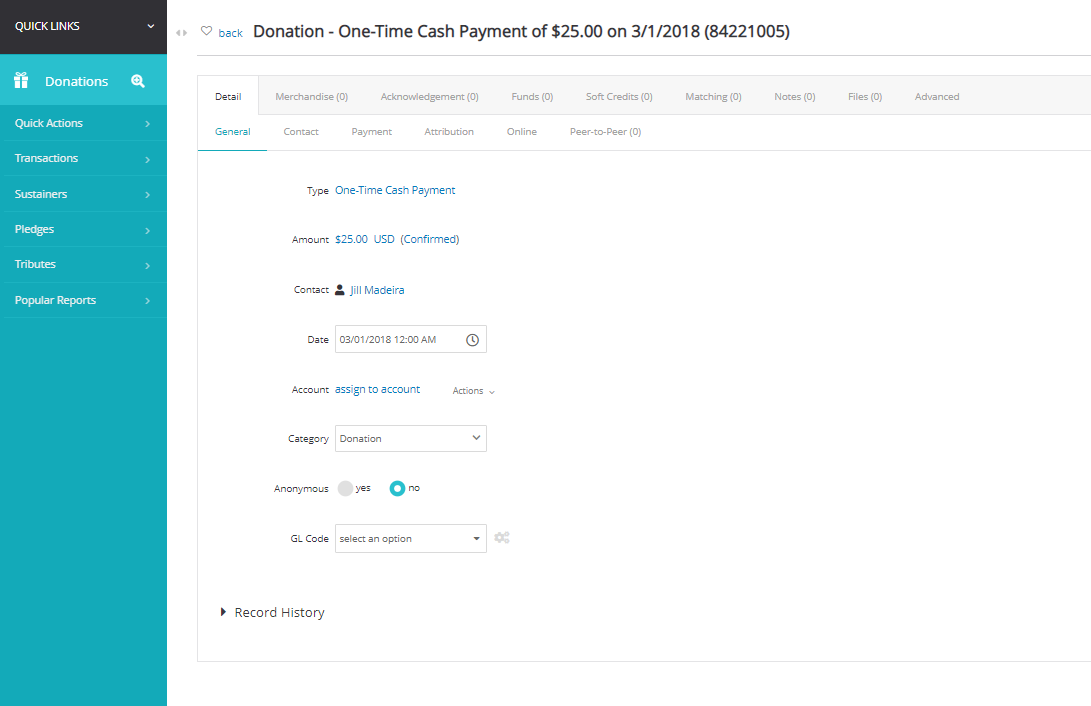
Also Navigate to the Donations App > Transactions > Search & Manage and use the quick filter to review and QA your contact import records

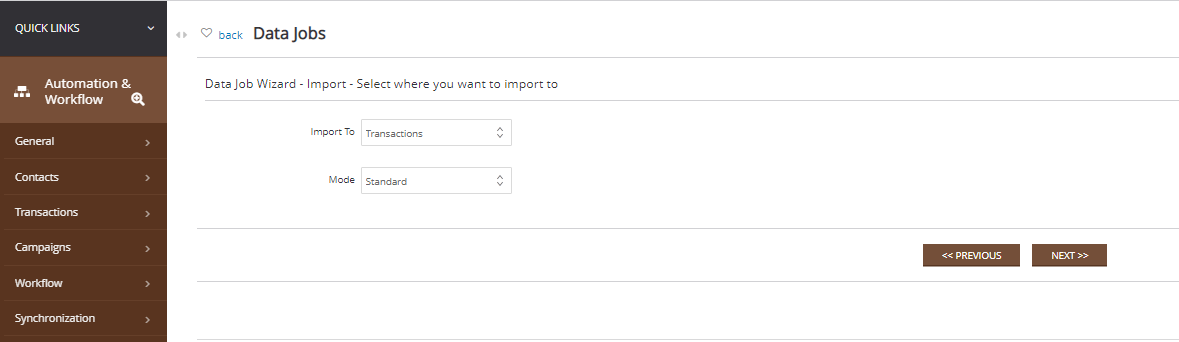
Importing with Import (classic)

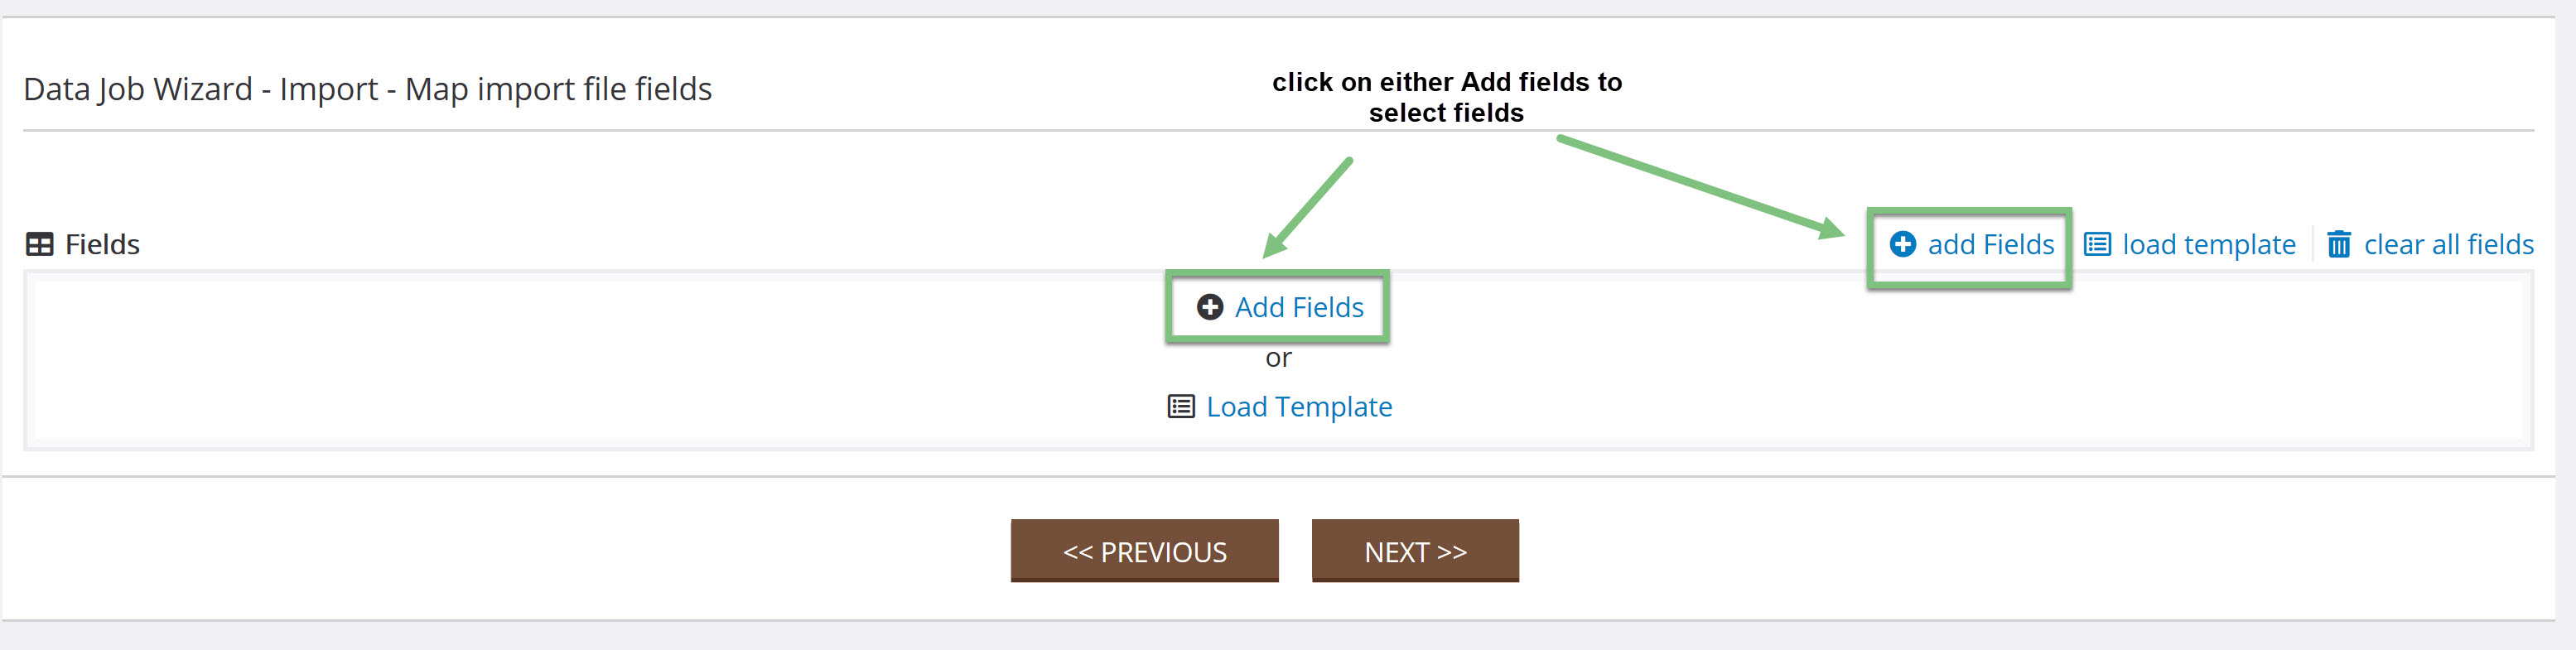
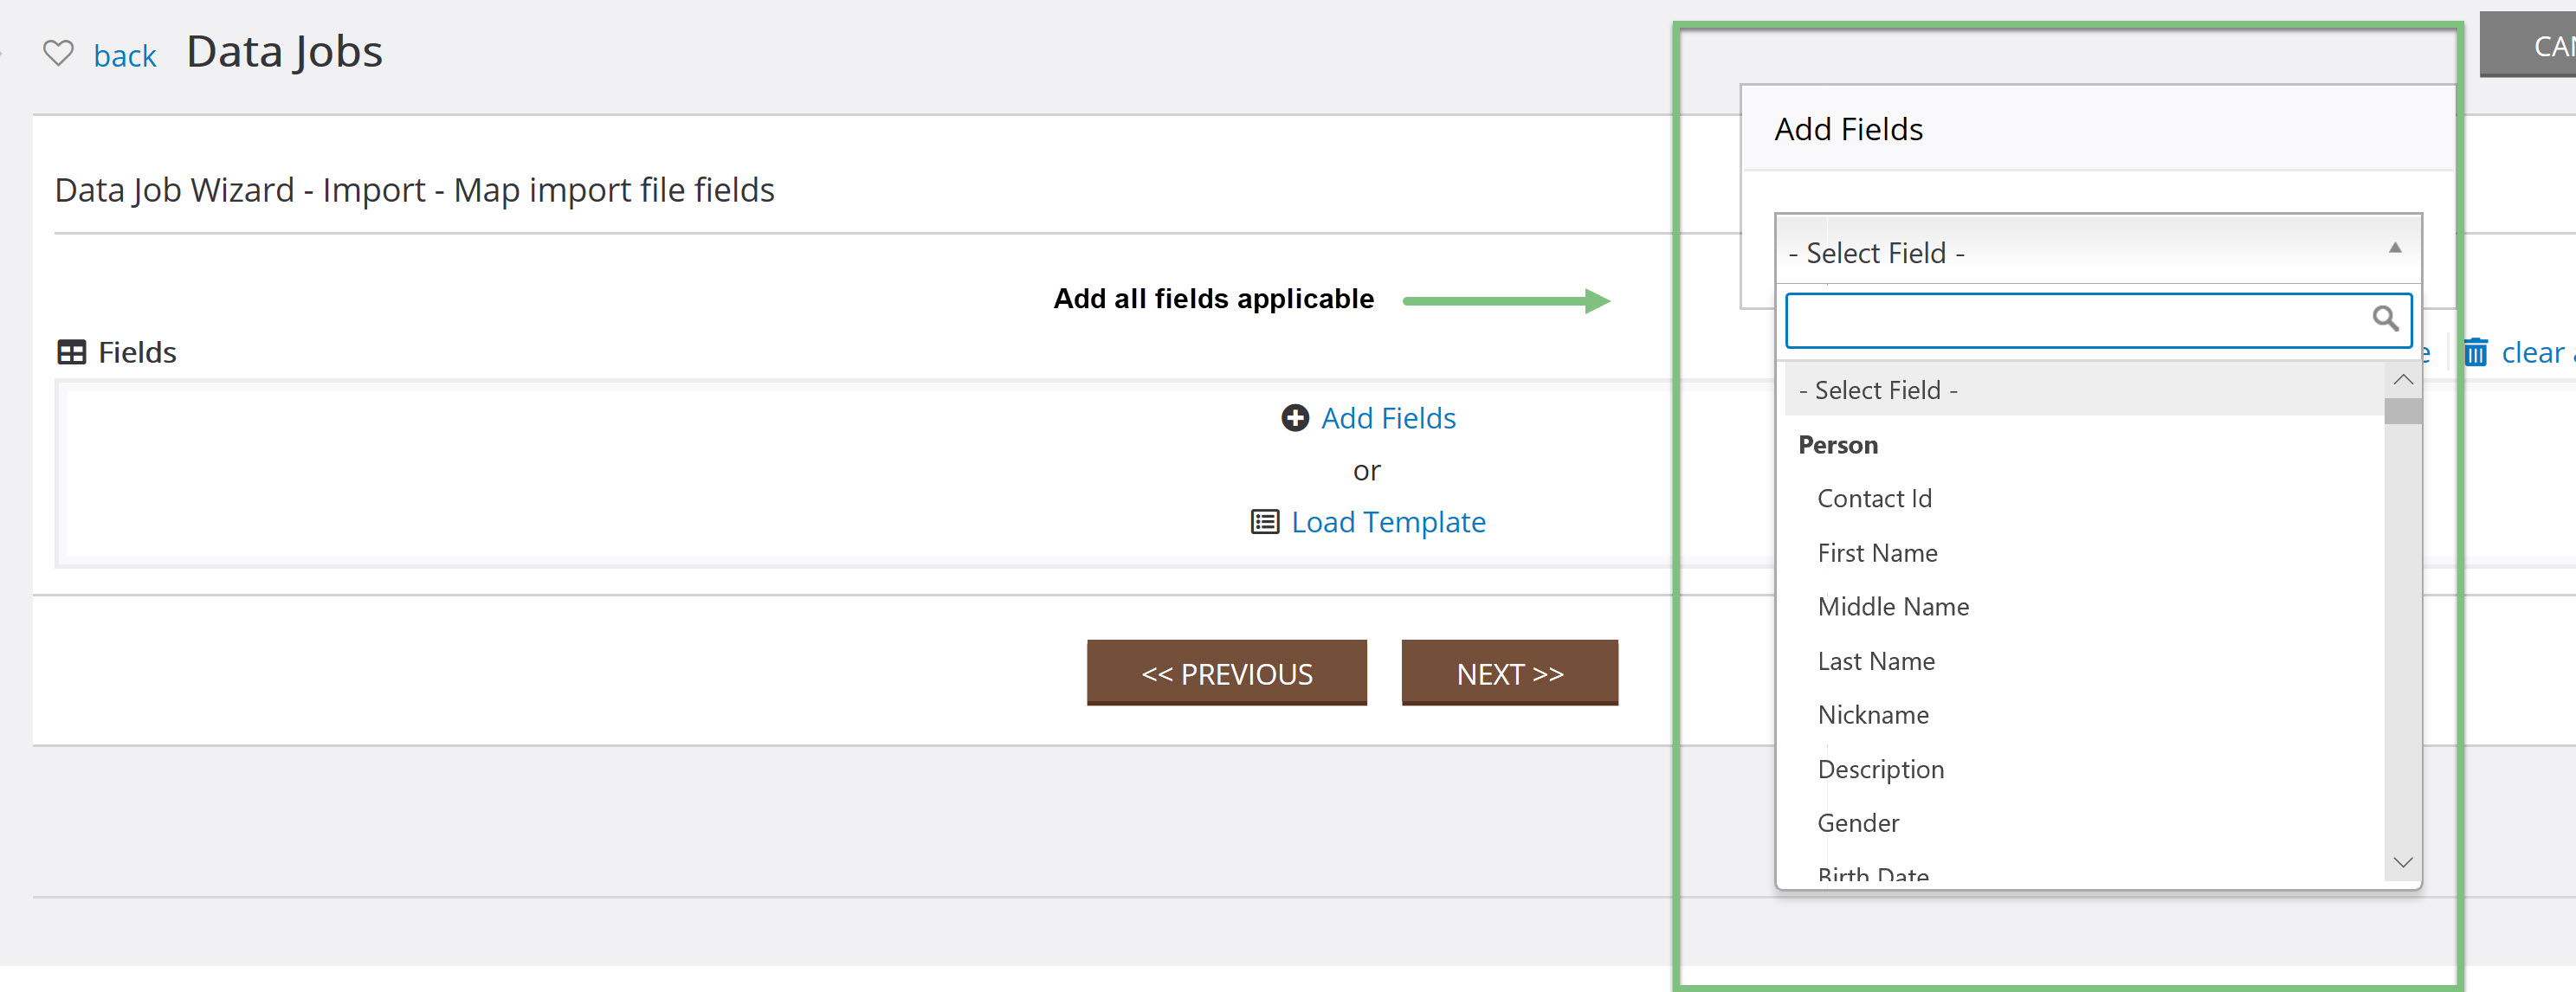
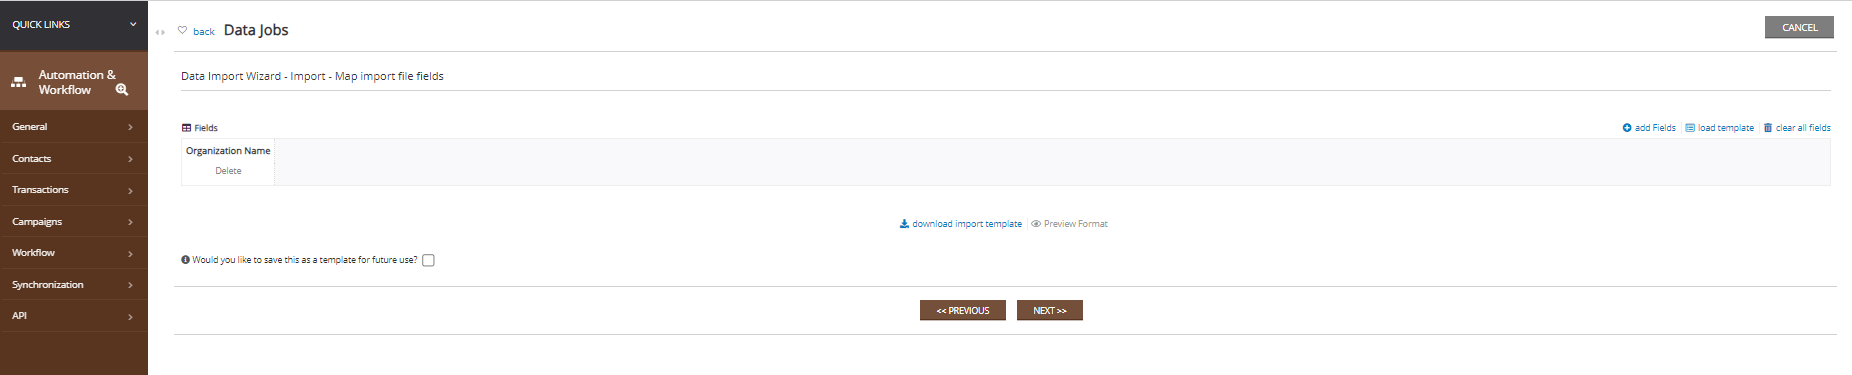
Step 3: Add field sections for the import file. The fields will be dependent on the data in the file. Click Add Fields and a drop-down will appear for the field selection.
-
- Your fields will appear as you select them. Use the arrows to reorder the fields and use the delete button to easily remove the field from the template.
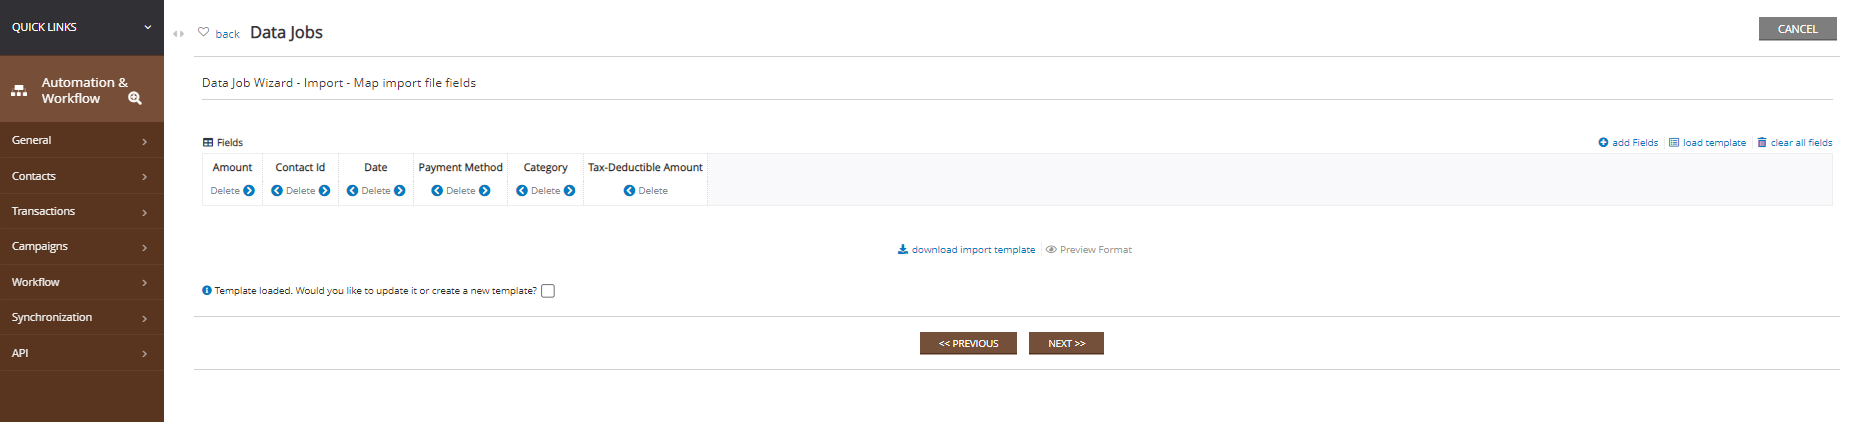
Note: If you have a template saved, click Load Template to use a pre-existing template.
Step 5: Once you have selected your data elements for your import, you can click on download import template to begin migrating your data to the import template. This action will create an Excel document where you can enter your transaction information. If you have downloaded a template from above, you can save your file to your local network and proceed to Step 7.
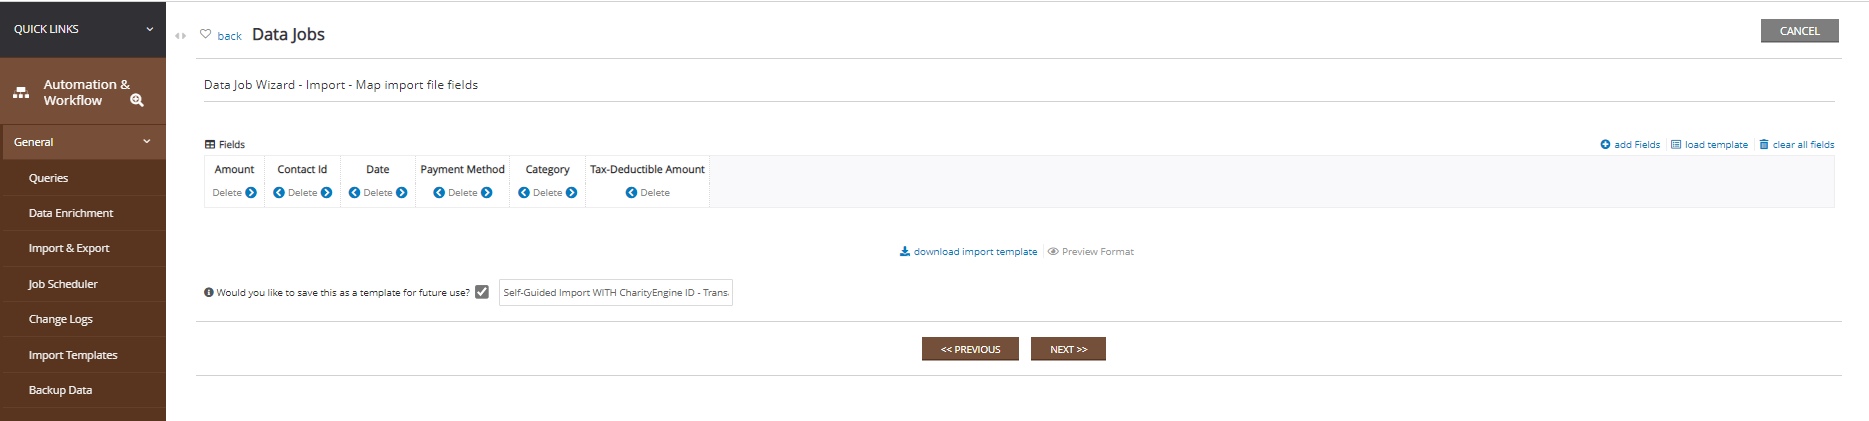
Step 6: Prepare your Excel file for import, entering one donation record per line. Once complete, save to your local drive.

-
- The fields selected in Data Jobs picker do not match the field counts of the import template
- A row/rows contain data but do not contain an import header
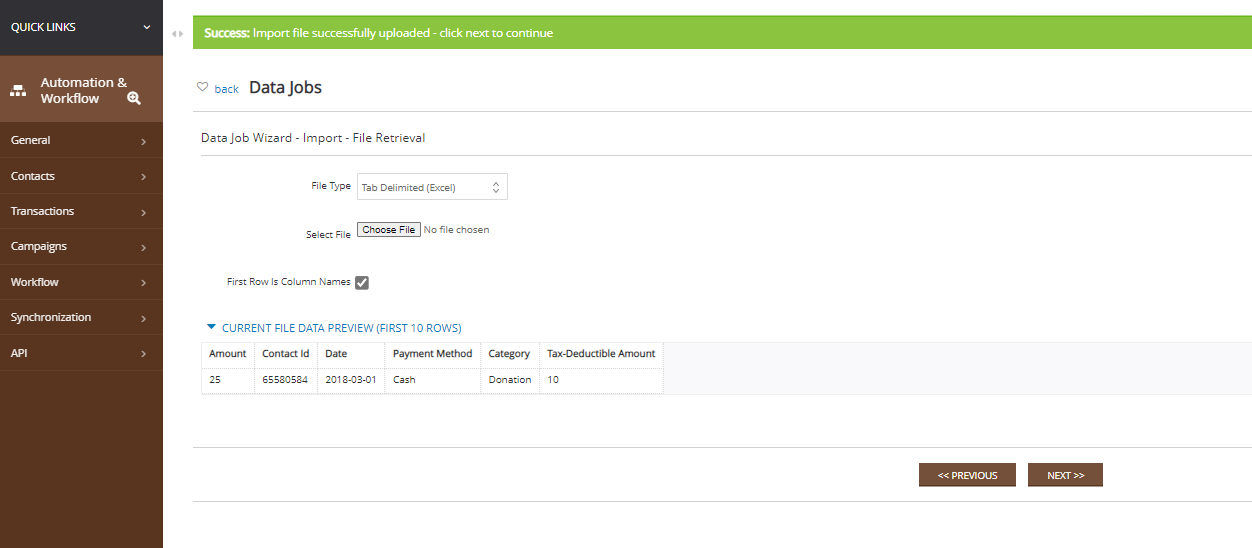
Step 11: Once the file has been uploaded, you will have the ability to name, add a description. Once complete click NEXT.
-
-
- Selection of the Store Import Results can be used (and is required) if the user requires the ability to view diagnostic results and/or to backout changes. Please note this will cause data jobs to run slower and not recommended for large import.
-
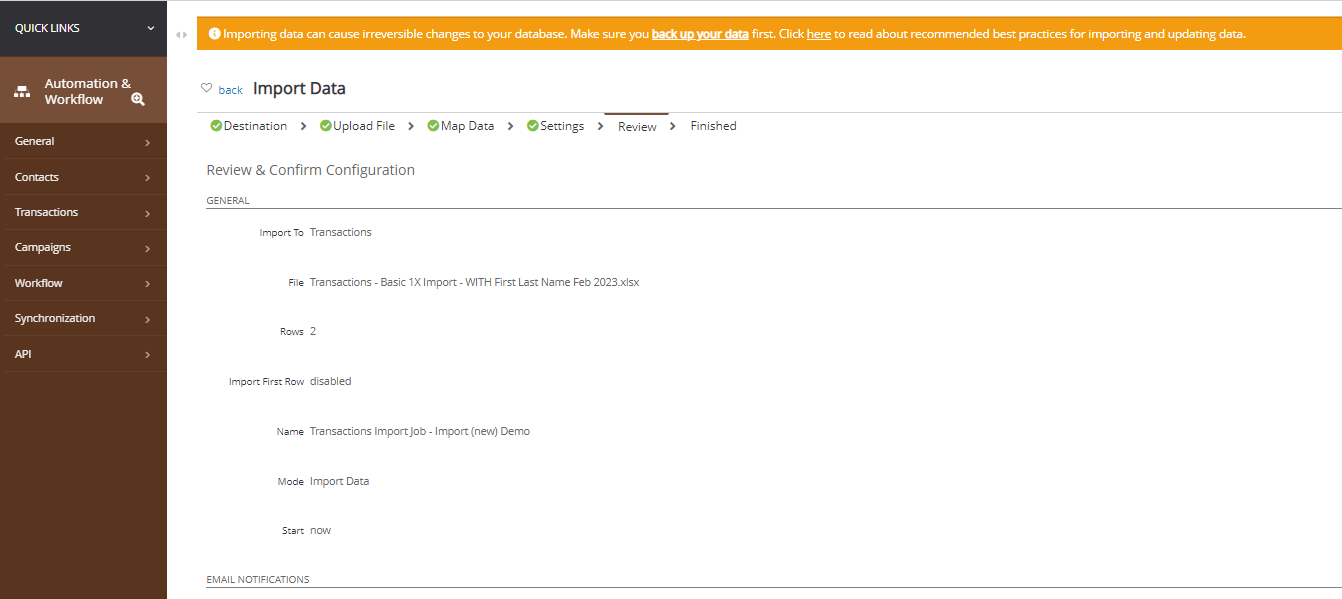
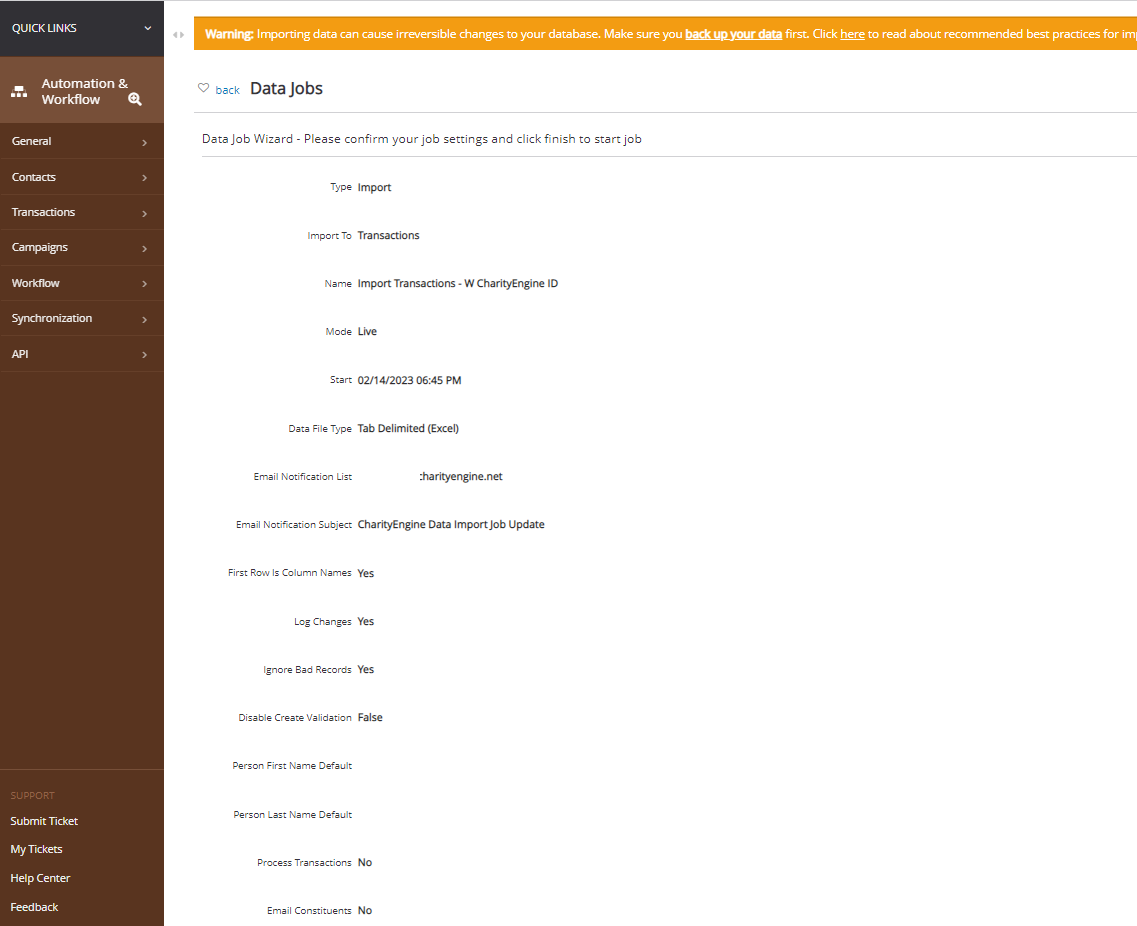
Step 12: Confirm your job settings and click FINISH to start your Data job import.
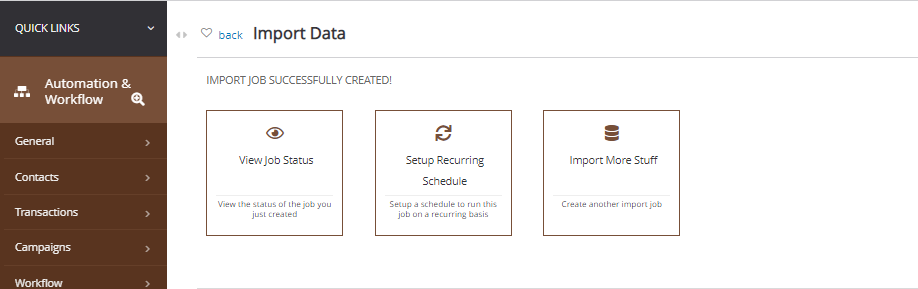
Step 13: A pop-up will appear that will prompt you to View the Job Status, Schedule Job, or Import More Data.

Also Navigate to the Donations App > Transactions > Search & Manage and use the quick filter to review and QA your contact import records
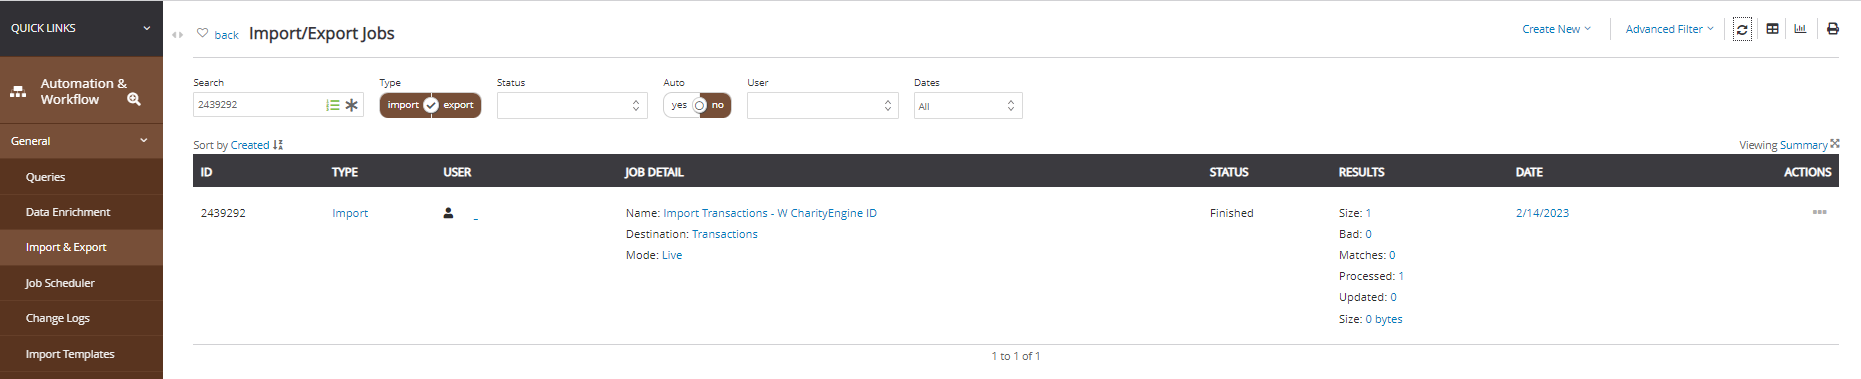
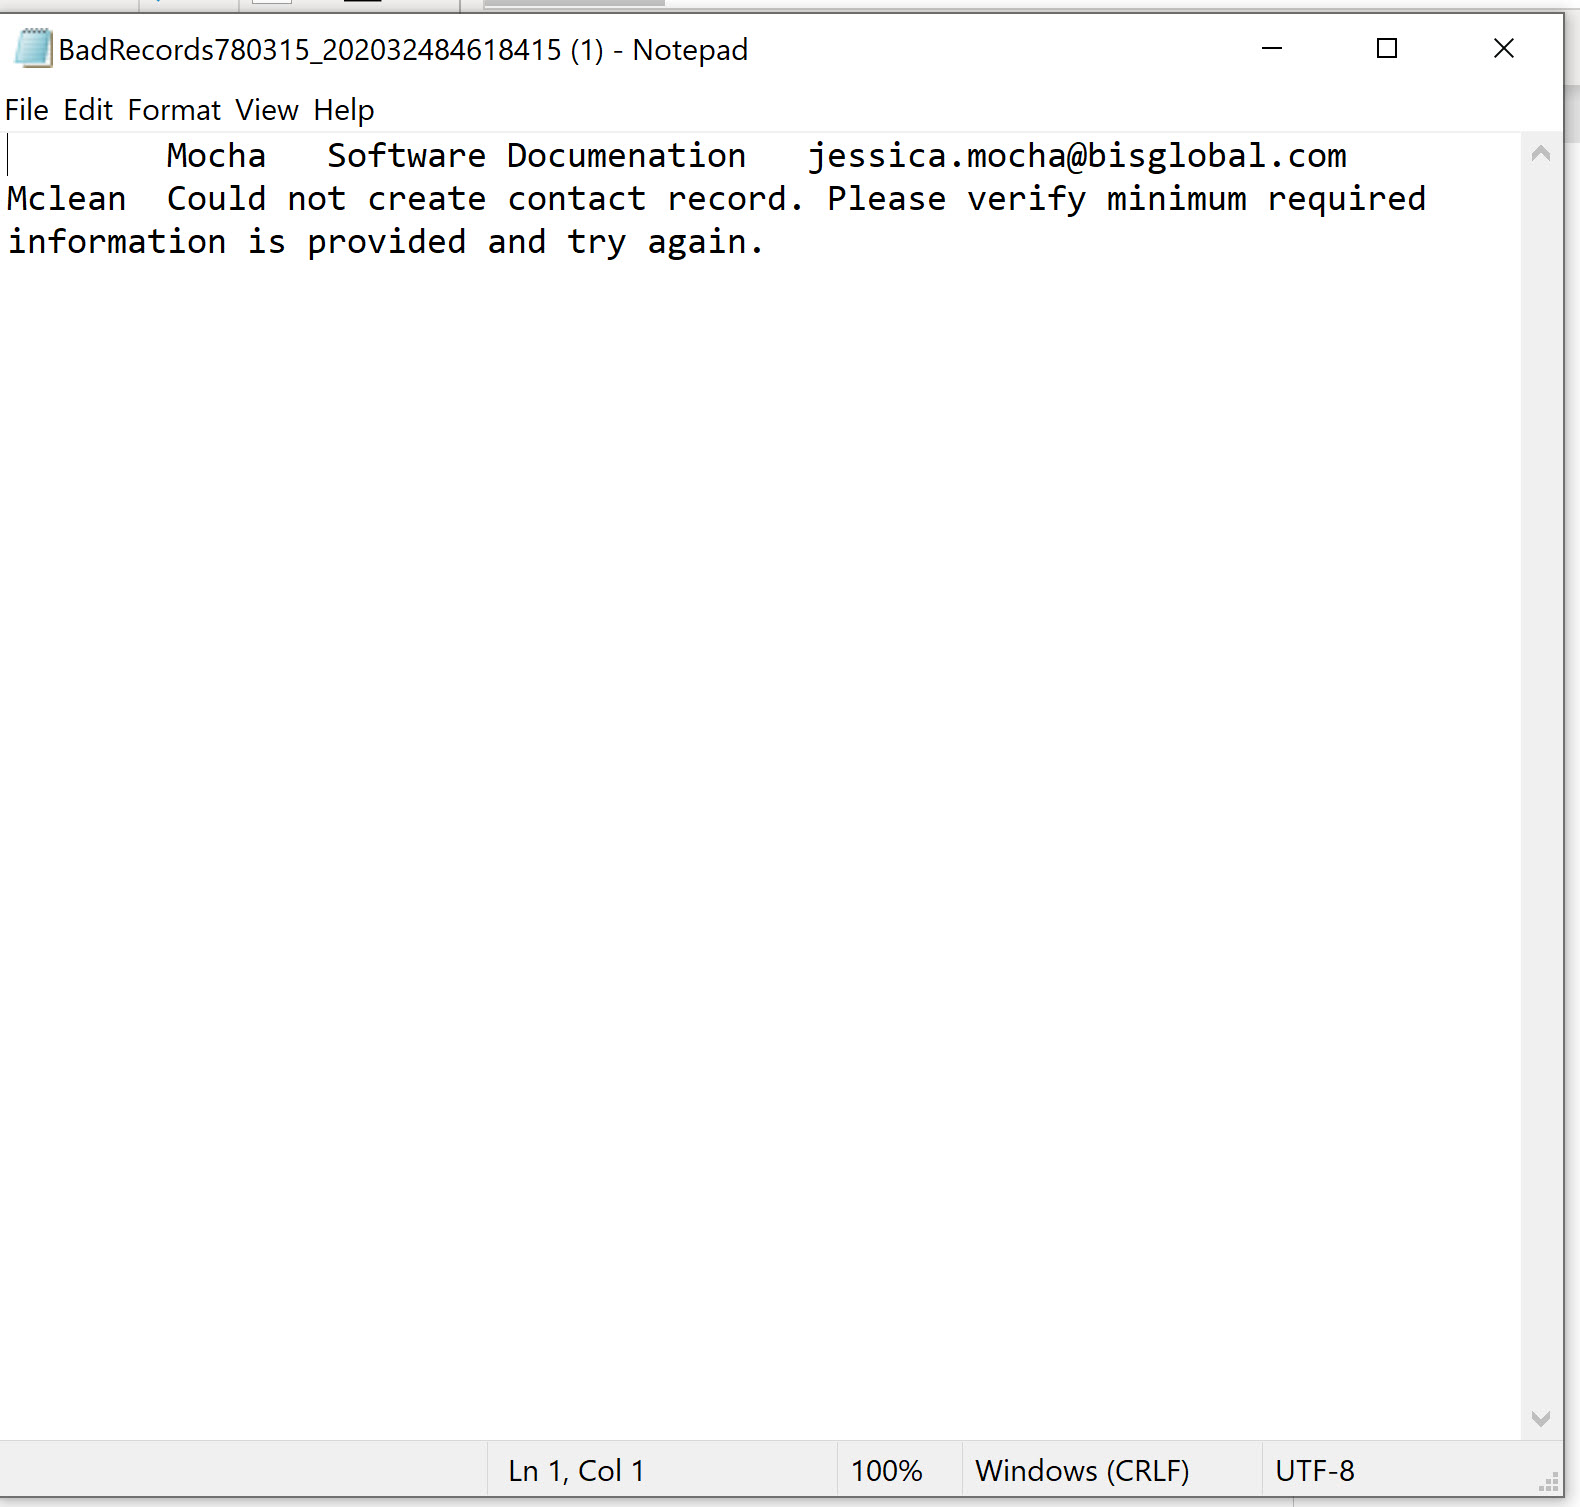
Instructions: How to Evaluate Bad Records
If you import
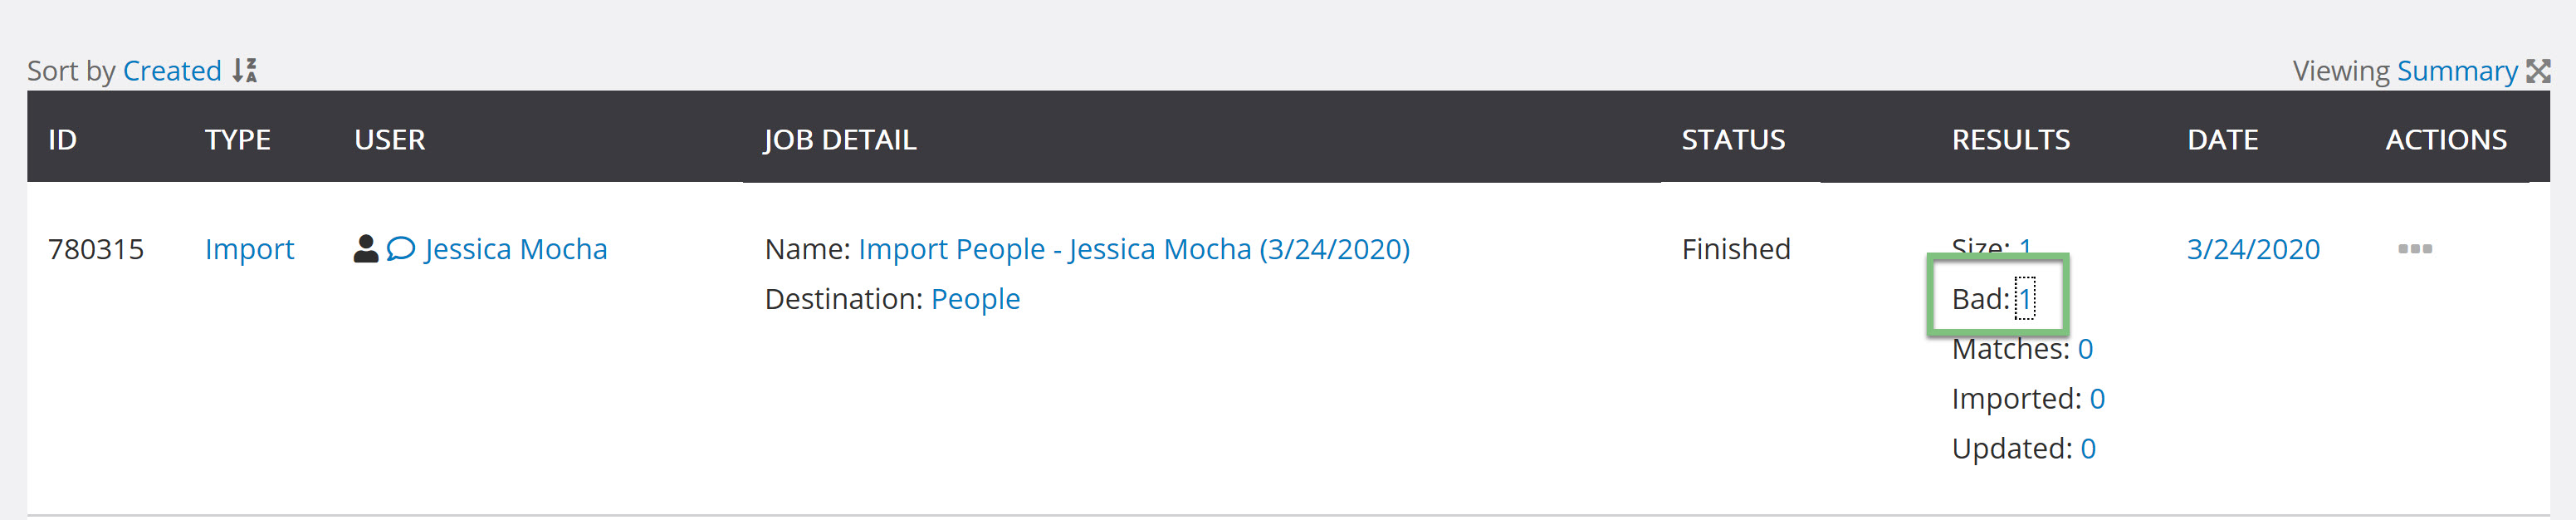
By clicking the number next to Bad, you will be able to see the file error. This will appear in a NotePad pop-up advising you what error was made. once you have found the error, you will be able to fix your file and try to import again.
Instructions: Additional Transaction Import Elements
If you elect to import additional fields for transaction record creation, below are a few most frequently used elements.
| Table Import | Field Section | CharityEngine Field | Required | Description |
| Transaction | Transaction | Amount | Yes | Transaction amount must not be null - can include positive, negative, and value of 0; numeric value expected |
| Transaction | Donor Info | Contact Id | Yes (or one alternative below) | CharityEngine ID for person, organization or household |
| Transaction | Donor Info | First Name and Last Name |
Yes (or one alternative above or below) | Use if creating new contact record; if CharityEngine matching can locate existing contact record with First Name/Last Name, will assign donation to the contact id Note: If using this option, must contain both a first and last name |
| Transaction | Attribution | Synch Contact External Type ID and Synch Contact External ID |
Yes (or alternative above) | Coming Soon Note: If using an external synch id, ensure configuration steps to set up or locate the External Type ID |
| Transaction | Check | Check Number | alpha/numeric value | |
| Transaction | Check | Check Date | formats include MM/DD/YYYY or YYYY/MM/DD | |
| Transaction | Attribution | Fund Name | If existing within CharityEngine requires exact match of name (Configuration App > Transactions > Funds); if Fund Name does not exist, will be created upon import | |
| Transaction | Attribution | Initiative Id | Requires set up of initiative prior to import and us of initiative id for import (Campaign App > Create & Publish > Initiatives) |
FAQs & Other Recommended Readings
Q. I have duplicate transactions records. What are the next steps for data cleansing once a contact record has been imported?
A. Through CharityEngine's contact matching feature, users have several options for managing the review, merging, or deletion of duplicate records. See our article Workflow & Automation: Data Governance – Contact Management (Merge, Delete, Inactive)
Q. I need to import Contact - People. What resources are available for support?
A. Please see our article Data Importing: How to Import Contact - People Data
Q. I need to import Contact - Organizations. What resources are available for support?
A. Please see our article Data Importing: How to Import Contact - Organization Data
Q. I need to import Contact - Household. What resources are available for support?
A. Please see our article Data Importing: How to Import Contact - Household Data
Q. I need to import Contact - Transactions. What resources are available for support?
A. Please see our article Data Importing: How to Import Transaction Data
Q. I need to delete an import file. Is that available?
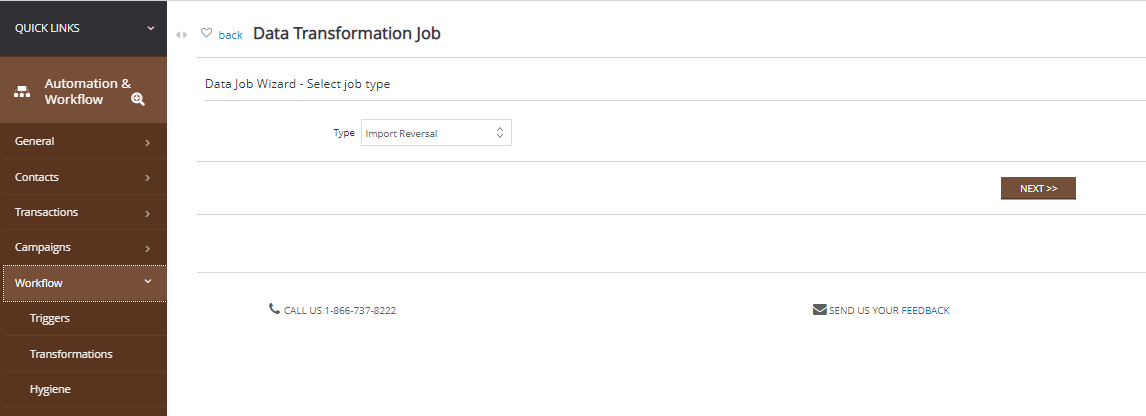
A. Yes. When initially importing, from the Settings step, expand the LOGGING & VALIDATION option and toggle Store Import Results to yes. Note: this is not recommended for large imports.
If this step was completed, then the user can leverage Automation & Workflow > Workflows > Transformations > Create New > Type: Import Reversal > NEXT > Import Job (select identified job) > NEXT > Name: name of transformation job (other fields optional) > NEXT > confirm the job > FINISH
Q. When importing, I need to create a new person AND an associate with a new organization. How can I achieve this?
A. This requires a three step approach in which you create the person record and the transactions, create the organizational record, and then link the person to the organization. Once the transaction is created and the organization has been created, then you can associate the person with the organization. Begin by importing the transaction detail and leverage Customer First Name and Customer Last Name to create a new contact record.

Next, create the organization through Automation & Workflow App > General > Import & Export > Create New > Import (new) or Import (classic) > Import To: Organizations
Next, capture the Person Contact ID and the Organization Contact ID and append the organization to the person record using the Automation & Workflow App > General > Imports & Export > Create New > Import (new) or Import (classic) > Import To: People then use the fields Contact Id and Linked Employer Id
Q. How can I import split funds on a transaction?
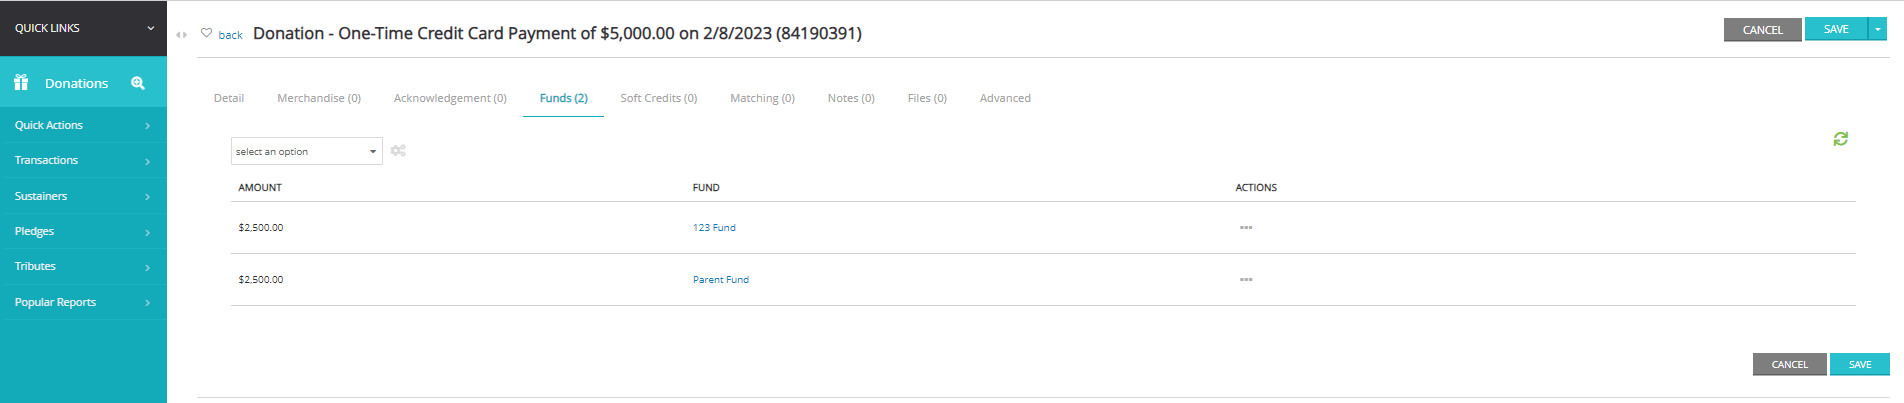
A. To begin, the user will require all transaction IDs in which a split fund will be applied. In addition, the user will need the Fund IDs and the allocate dollars to split. To begin, initiate an import file through the Automation & Workflow App > General > Imports & Export > Create New > Import (new) or Import (classic) > Import To: Transactions then use the fields Transaction Id and Fund Id: Amount (csv)(add).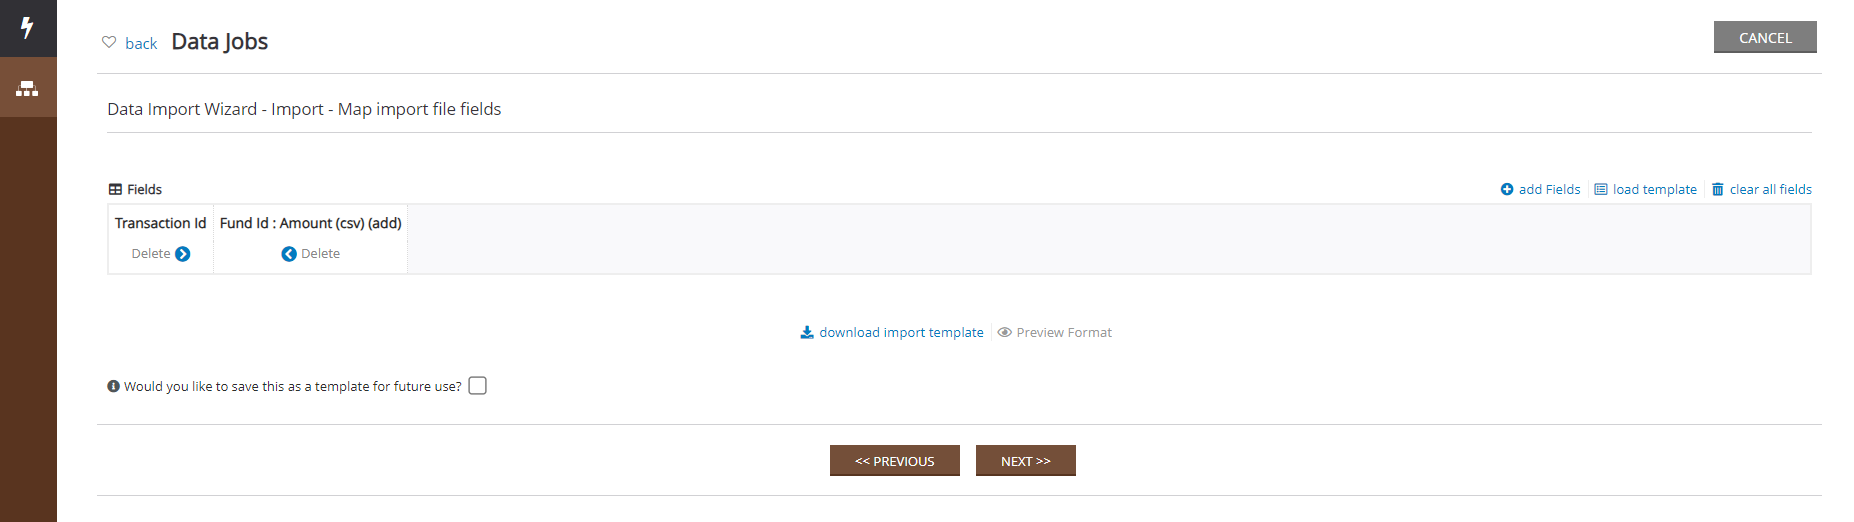
As the the Fund Id: Amount (csv)(add) will require a text file, save the source file for the import as a text file. Review the text file to ensure there are no errant quotes or other unnecessary characters.
Example of transaction 84190391 (totaling $5,000) with two fund splits of $2,500 for Fund ID 188131 and 193079
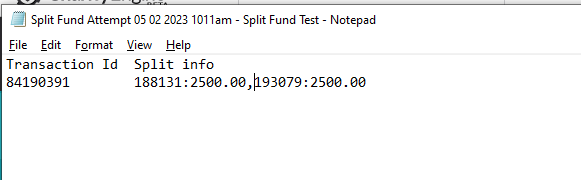
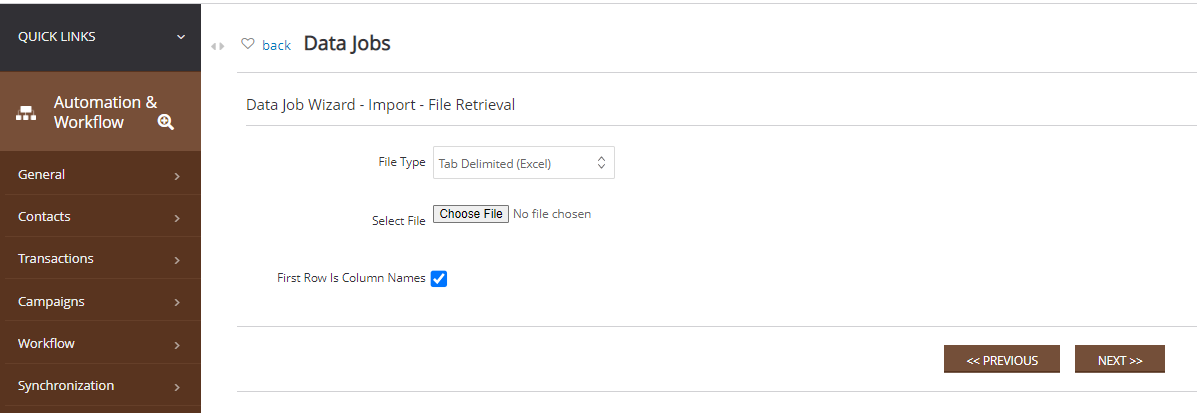
Leverage the File Type: Tab Delimited (Text)

The transaction record will now reflect as follows: