Contact Management: How to Add a Tribute to a Web Form
Table of Contents
Creating a Basic Tribute Form
You can also expose the option for donors to provide a gift as a tribute within your web form. Those tributes will automatically attribute any transactions.
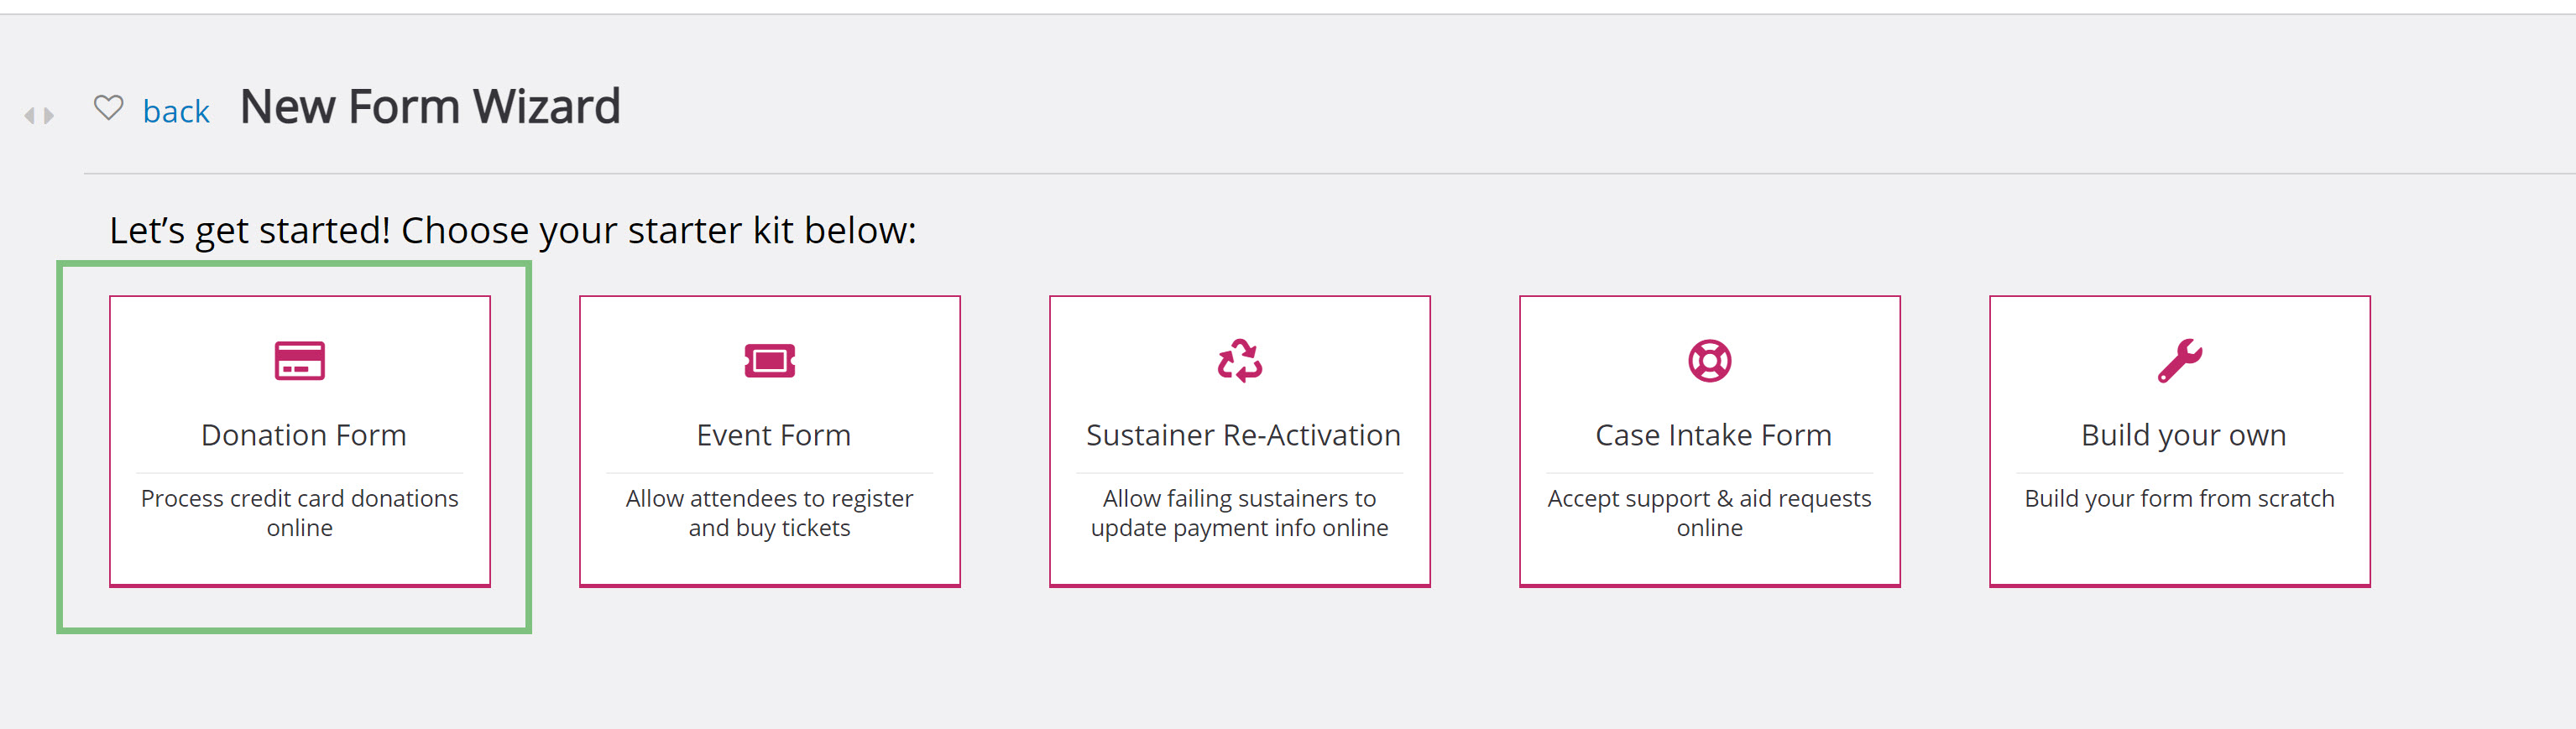
Step 1: To begin, navigate to the Online App > Web Forms > Search & Manage > Create New > Donation Form
Step 2: Once the form is created, navigate to the Layout tab where you will see Tribute as a default option.

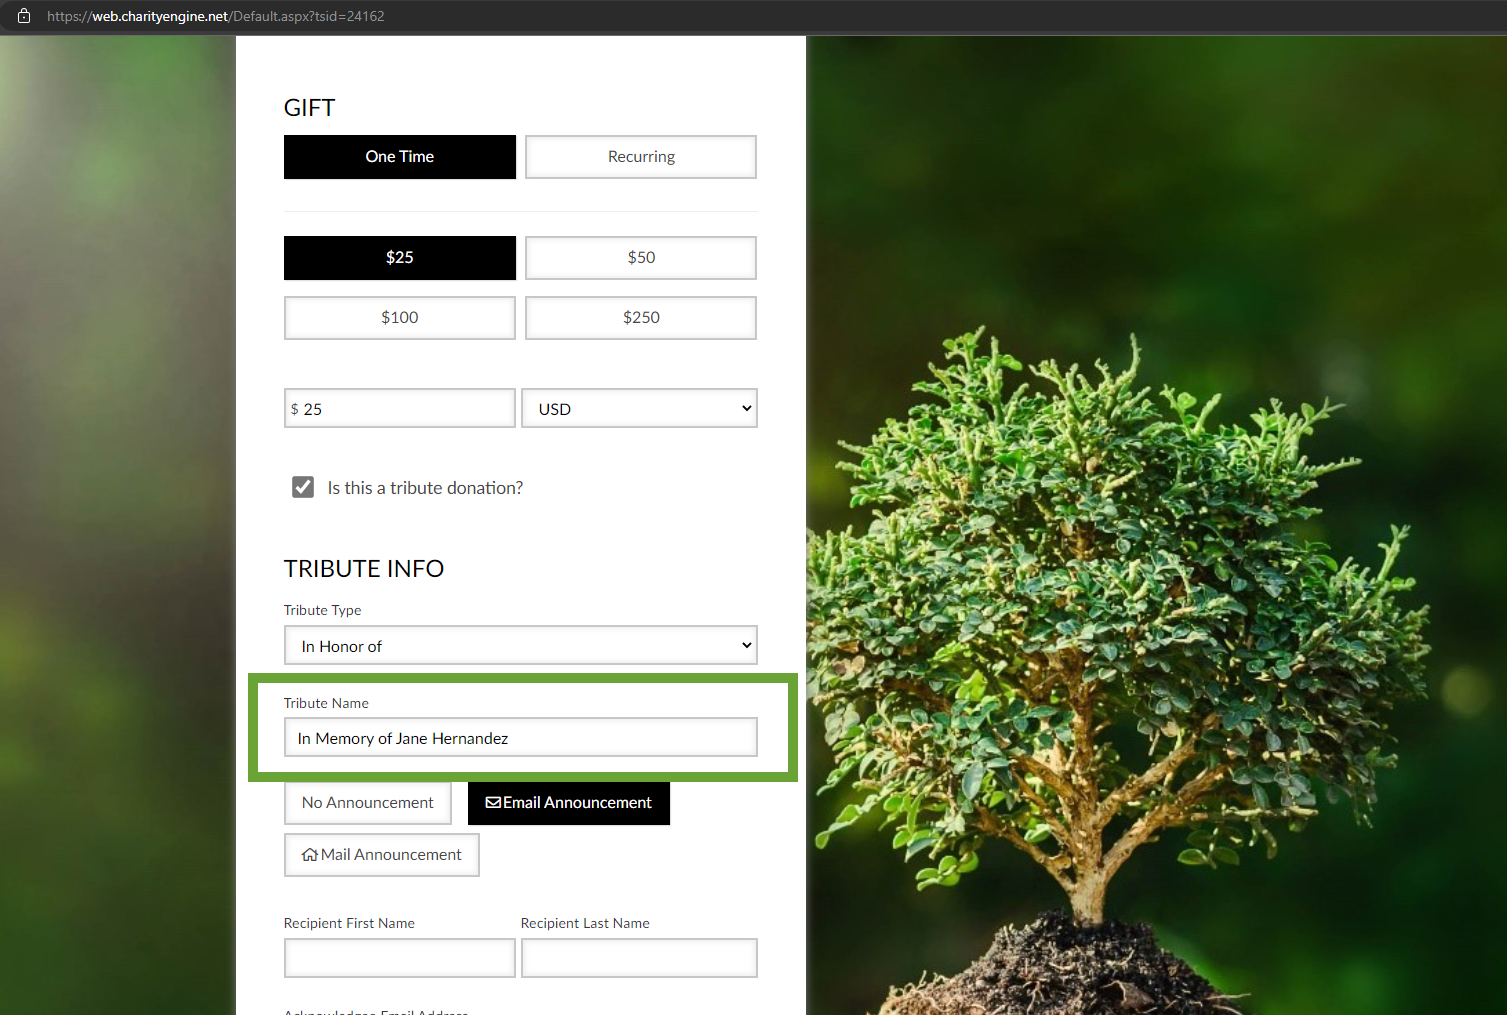
Step 3: From here, your donors will be able to enter a tribute donation using In Honor of, In Memory of, or On Behalf of
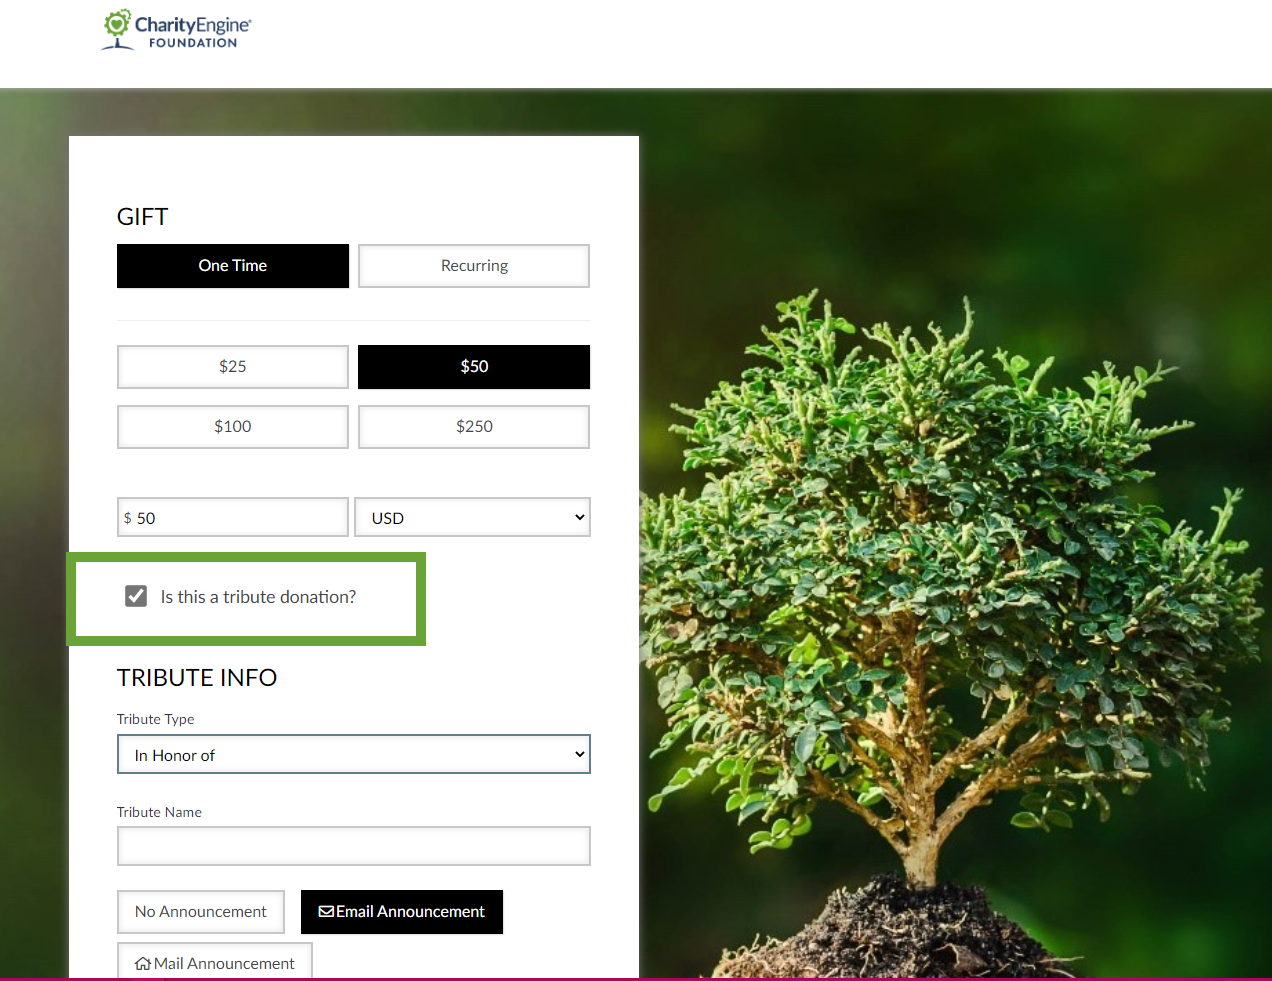
Note: Your donor will also have the ability to acknowledge the tribute by selecting No Announcement, Email Announcement, or Mail Announcement. The option for email or mail announcement will guide the donor to enter the acknowledgee's information as well as provide a personalized message. The out of the box configuration also allows the user to customize the end user label but simply updating the box to the right.
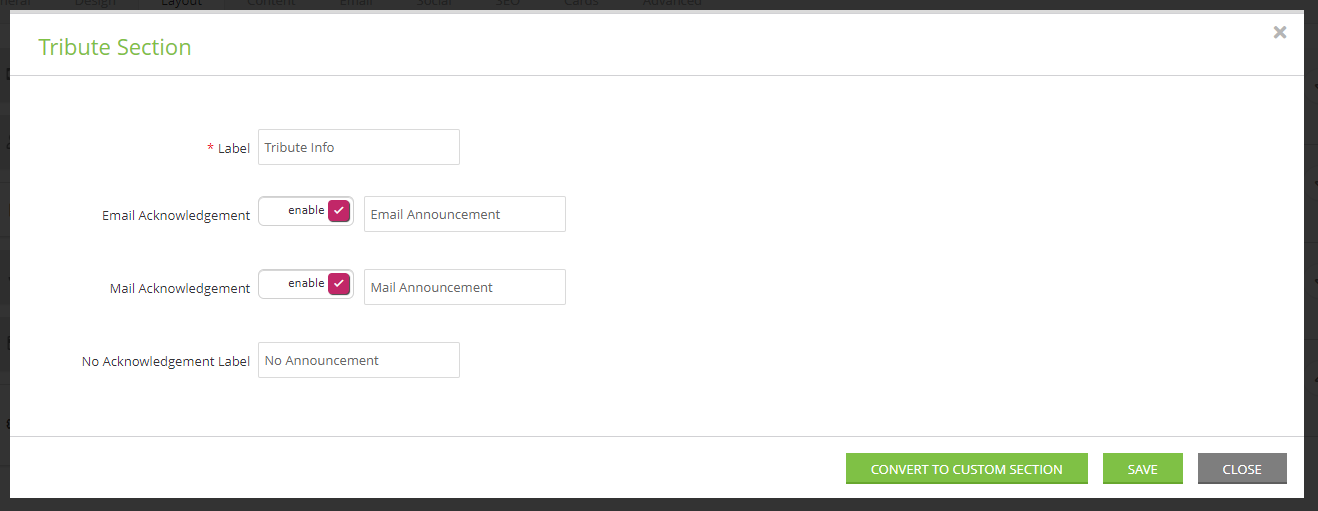
If you wish to customize the option/user facing label for email and/or mail announcement - manage the Tribute using the Pencil. A Tribute Section pop-up box will appear allowing you to disable the acknowledgement options. Click SAVE to secure.

Creating a Tribute Form - Attributed to a Specific Tribute
Following the steps above, you also have the ability to assign a web form to automatically attribute to a specific tribute.
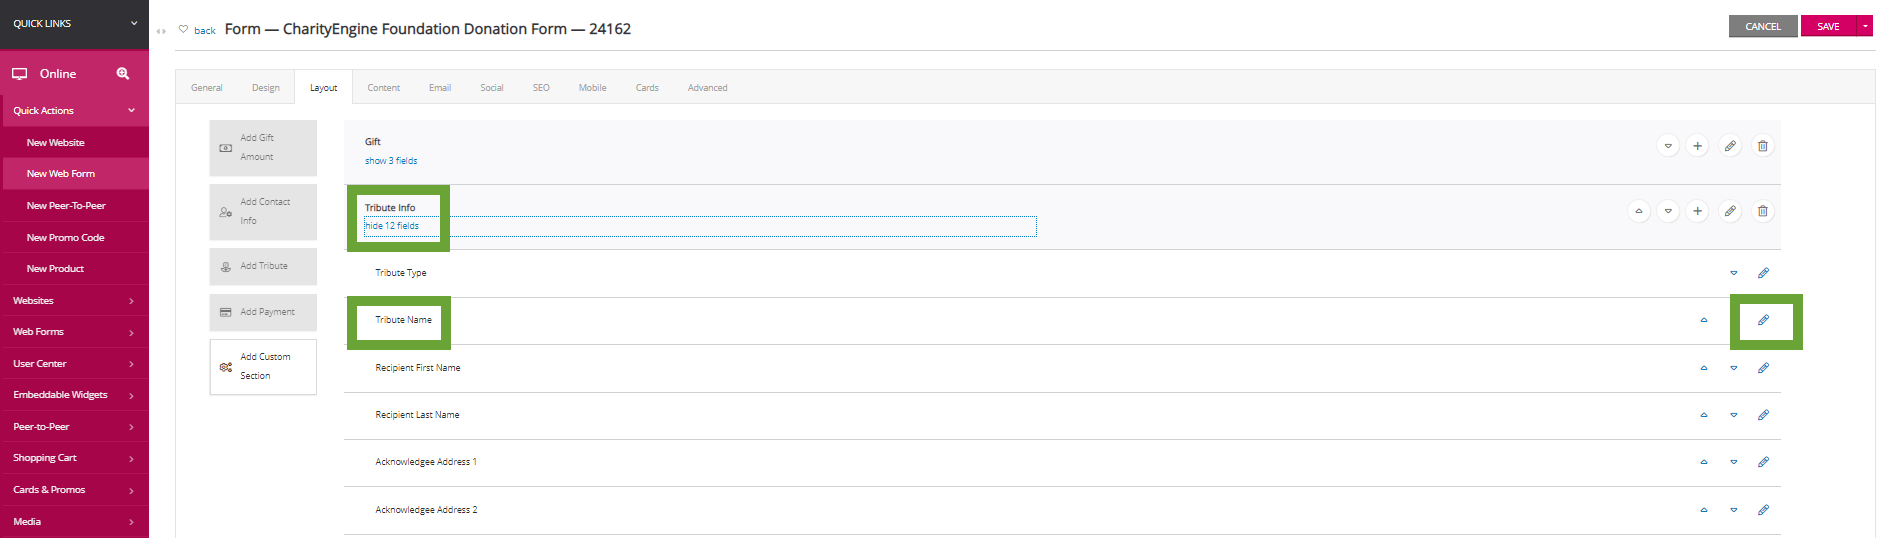
Step 4: On your newly created web from, you will need to manage the tribute section fields to ensure that the tribute name is the default. To do this, navigate to the Layout tab > Tribute Info > Click on show 12 fields > Manage the field Tribute Name by selecting the Pencil.
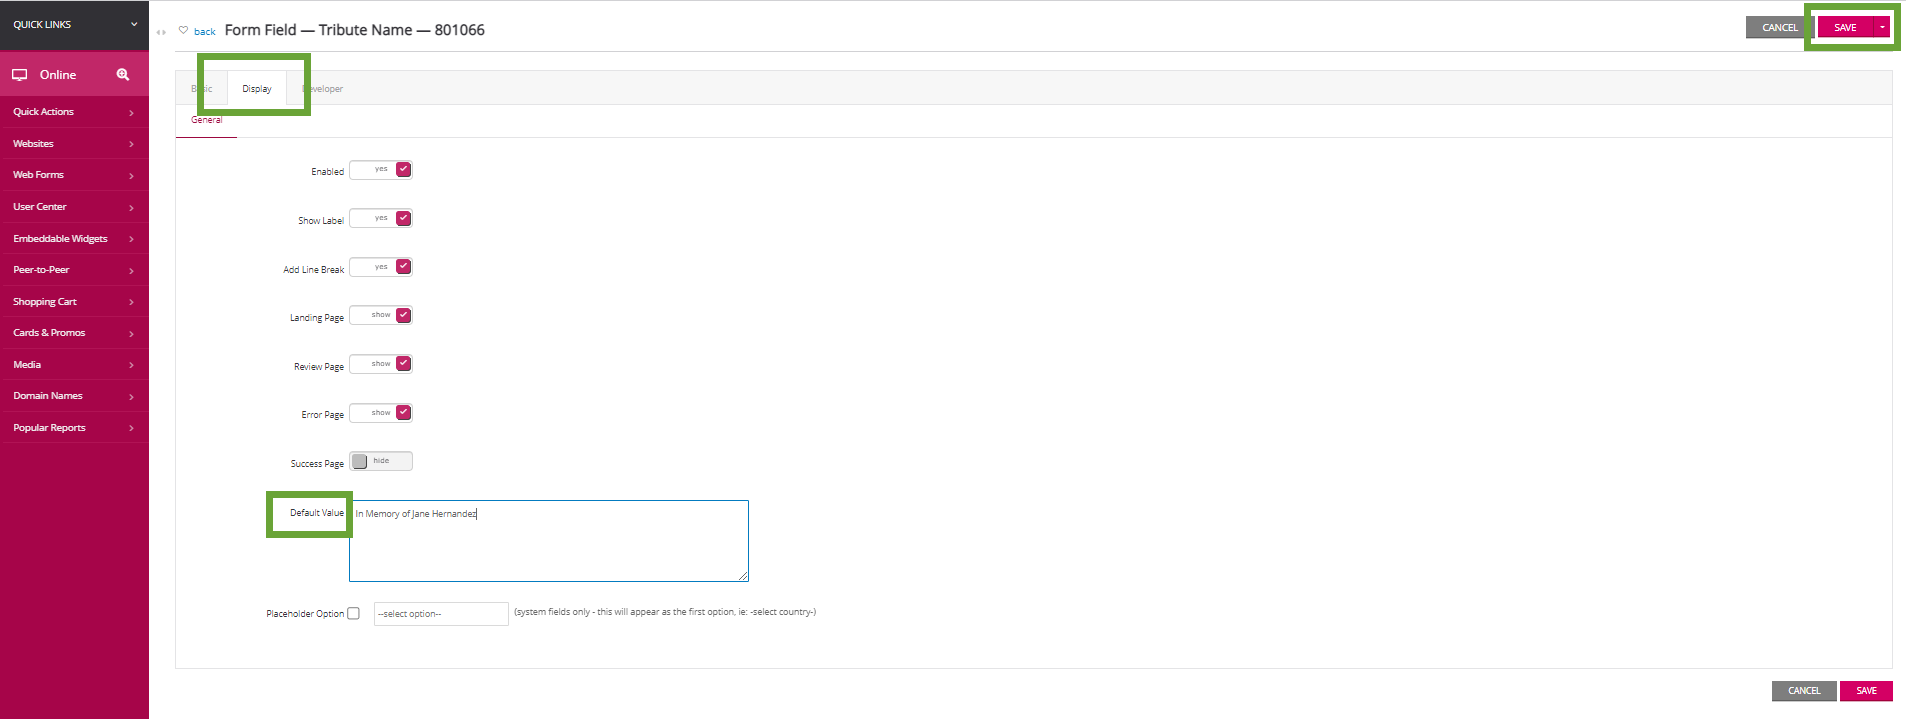
Step 5: To set the default tribute name, navigate to the Display tab > within Default Value enter the Tribute Name to be displayed. Click SAVE to secure the change.
Step 6: Click SAVE and click back to return to the web form.
Step 7: You will now need to create a new field to set the default tribute ID to ensure the transaction is linked to the correct tribute. Note: If you do not do this, a new tribute will be created every time a submission is made on the form.
To create a new field, navigate to the Layout tab > Tribute Info section > click on the + sign to add a new field

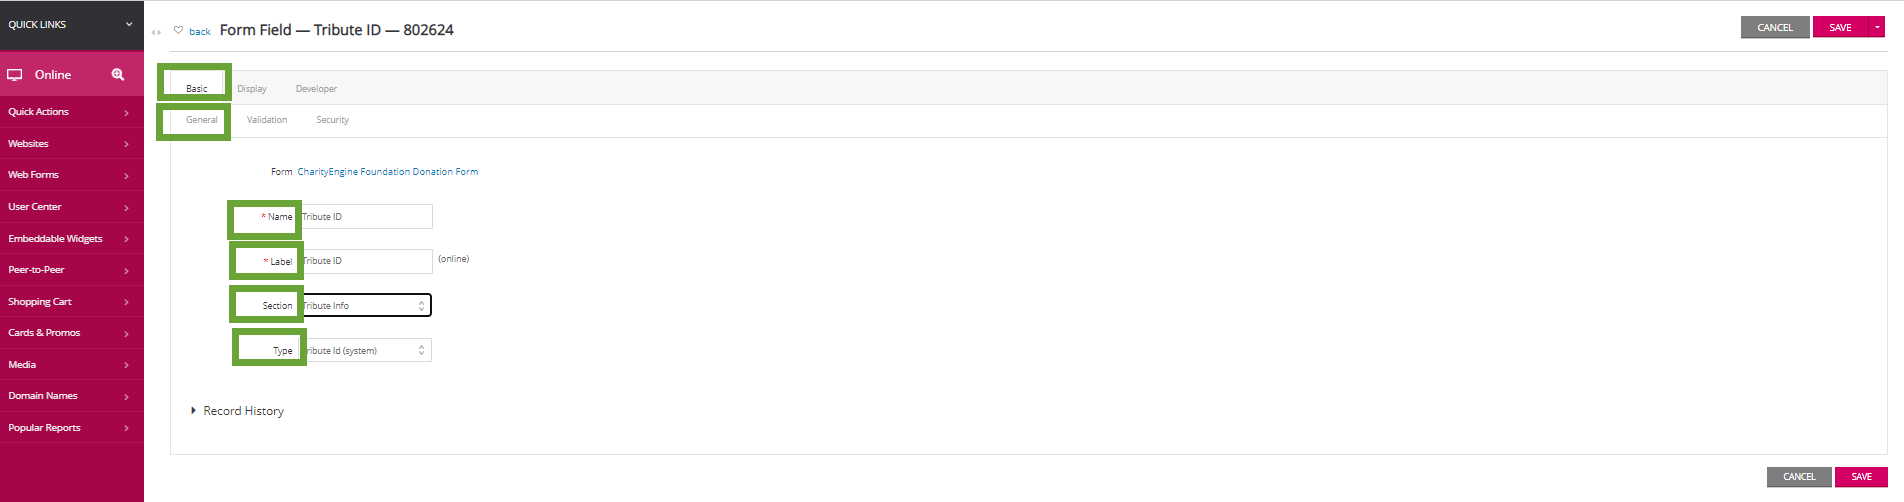
Step 8: On the Basic tab > General sub-tab, create the following:
- a Name called Tribute ID
- a Label called Tribute ID
- the Section should be identified as Tribute Info
- and from the drop down under Type, locate and select Tribute Id (system) as the type
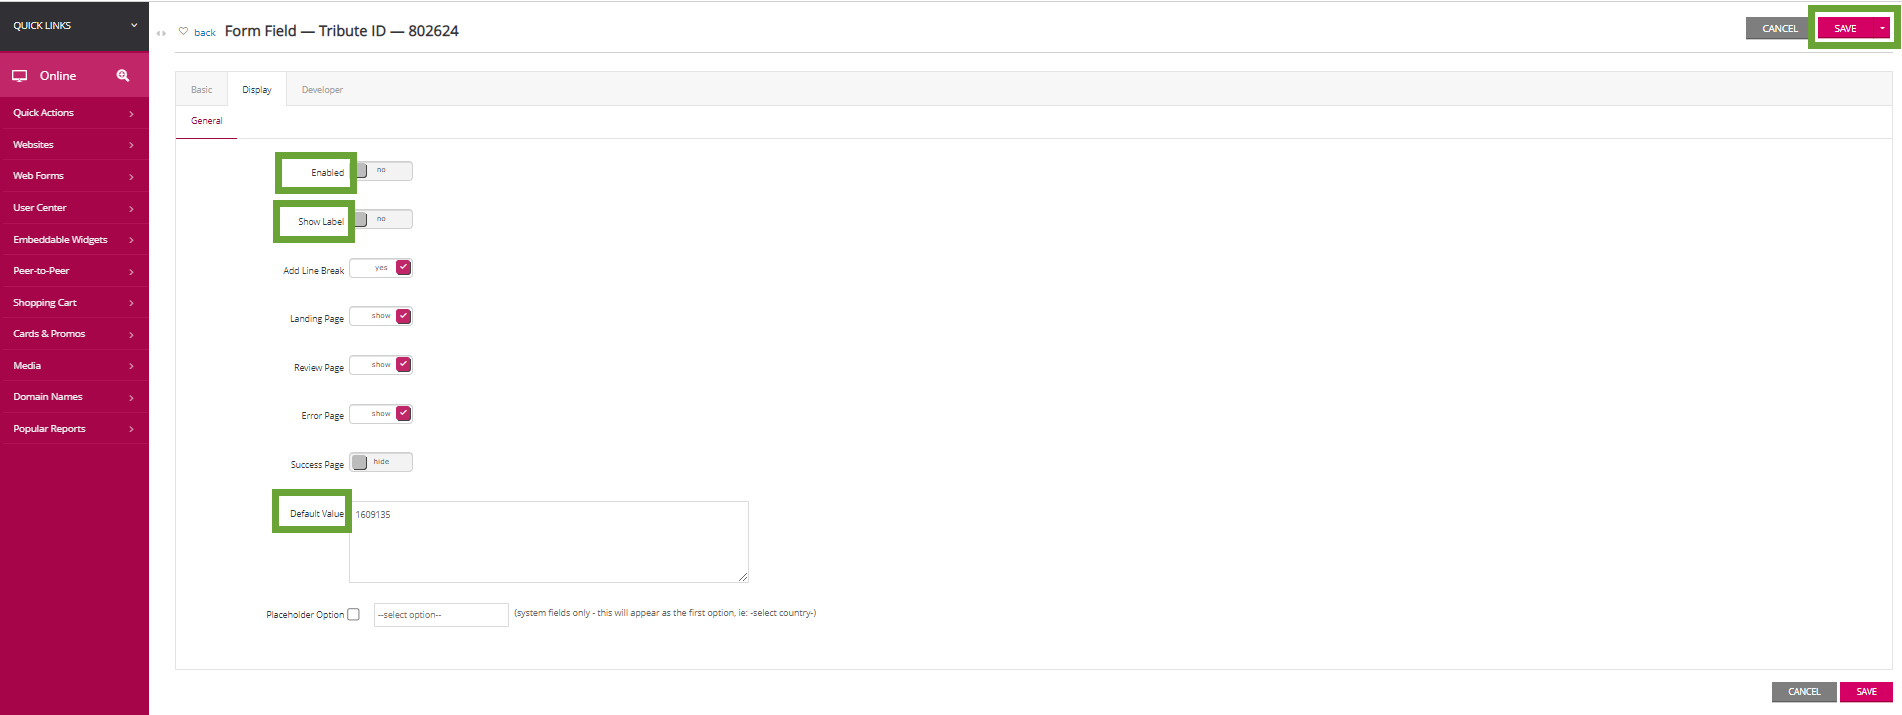
Step 9: Next, navigate to the Display tab, and
- Toggle Enable to No (ensures the value is not displayed to the end user)
- Toggle Show Label to No (ensures the label is not displayed to the end user)
- enter the Tribute Id into the Default Value (located from the Donations > Tribute > Search & Manage listing screen)
- click SAVE to secure the change
Step 10: Now when the form is submitted, the tribute will automatically be attributed to the transaction.
Example - web form for end user
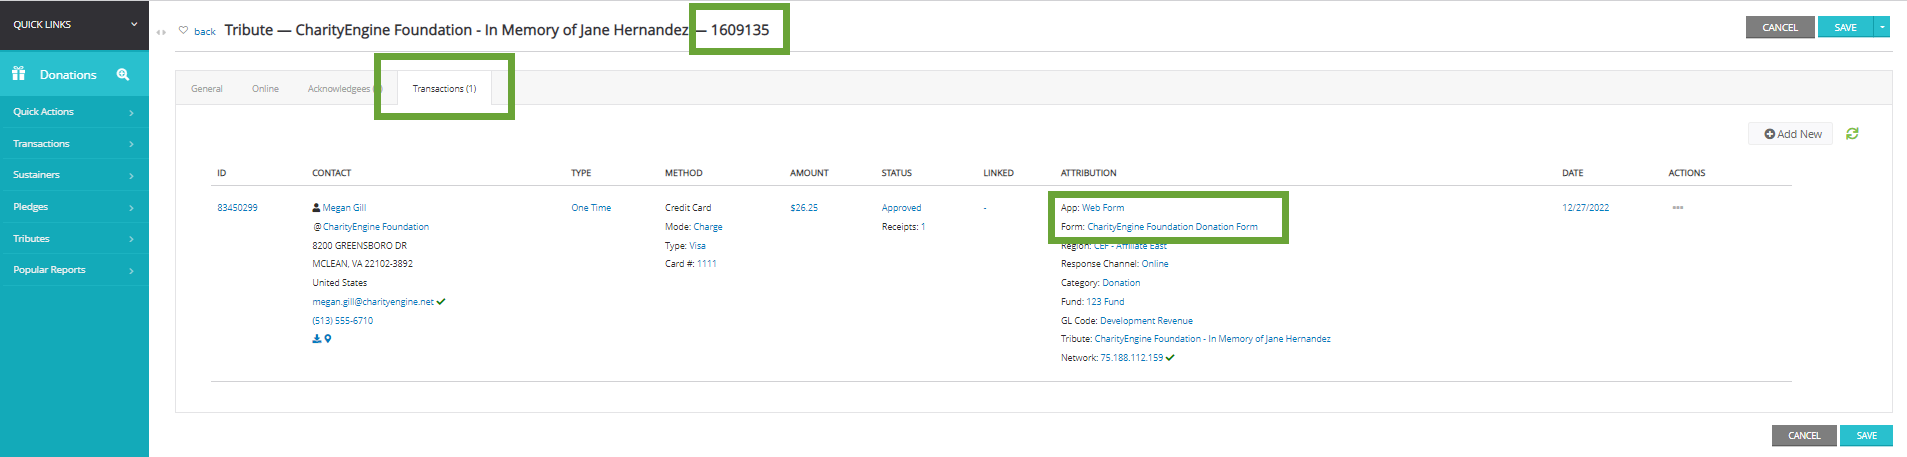
Example - From the Donations App > Tribute > Search & Manage > locate the tribute > navigate to the Transactions tab - noting submission of tribute is via web form from CharityEngine Foundation Donation Form