Introduction.
CharityEngine®’s Recycle Bin feature grants users greater control and
Table of Contents
Deleting Contacts
Checkboxes
Check the boxes next to the contacts you wish to delete.
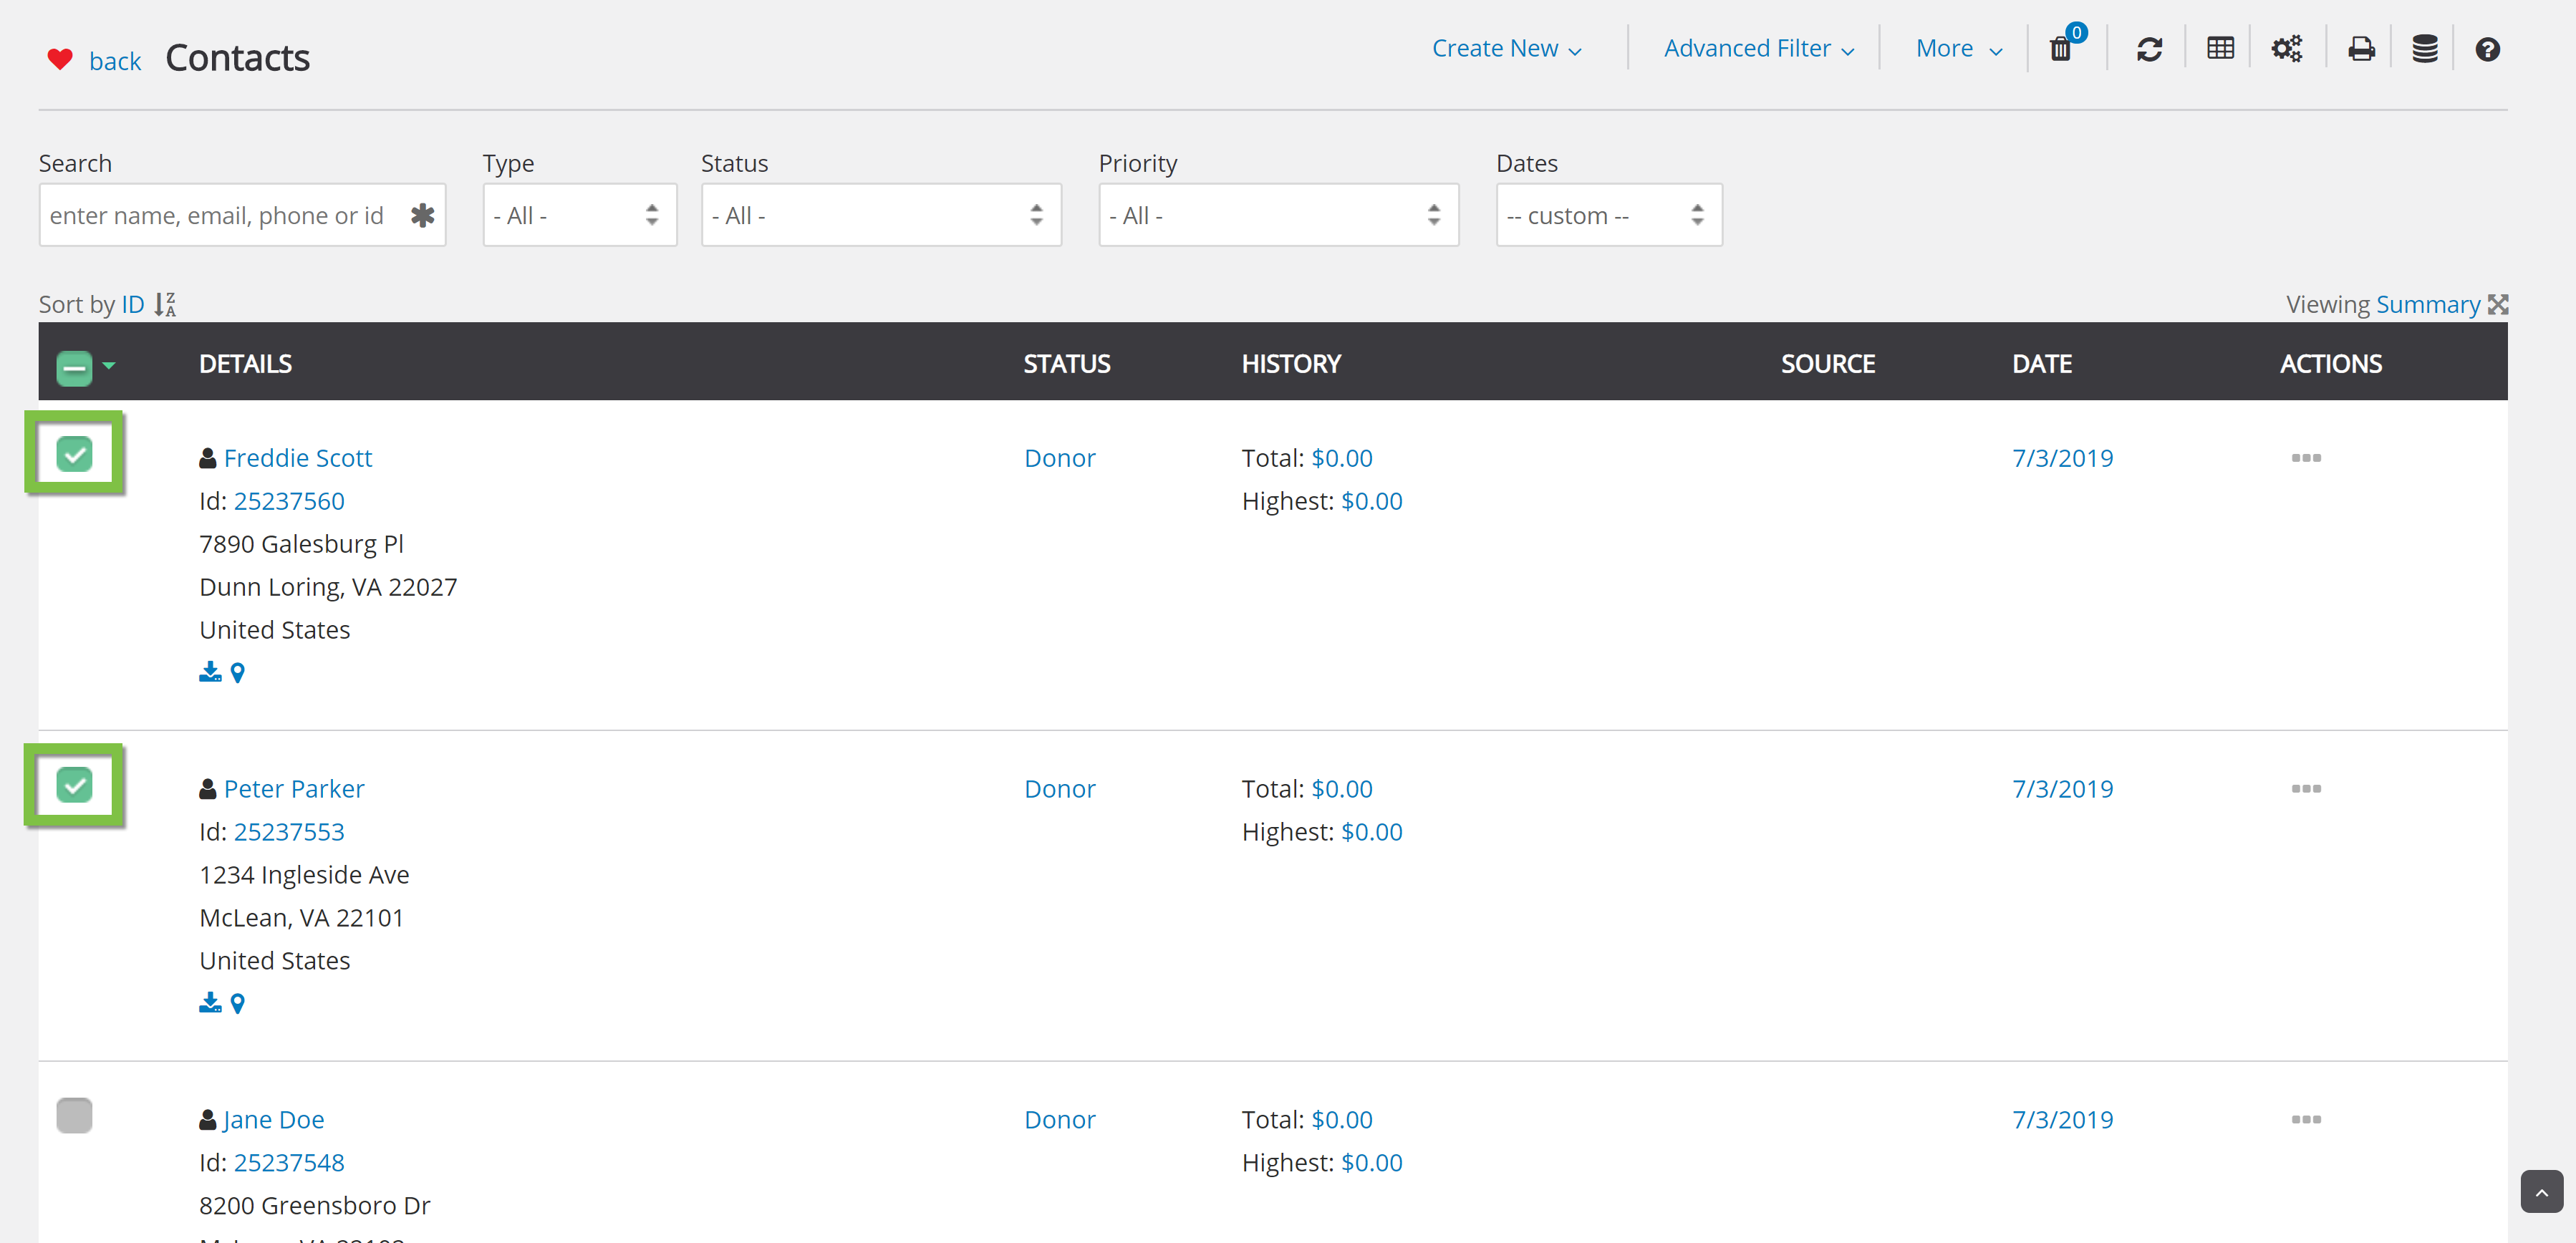
Click the arrow next to the top checkbox to show the menu of options. Choose to either Delete Selected or Delete All. Delete Selected will delete only the contacts that you have checked. Delete All will delete every contact available under the filters you have selected.
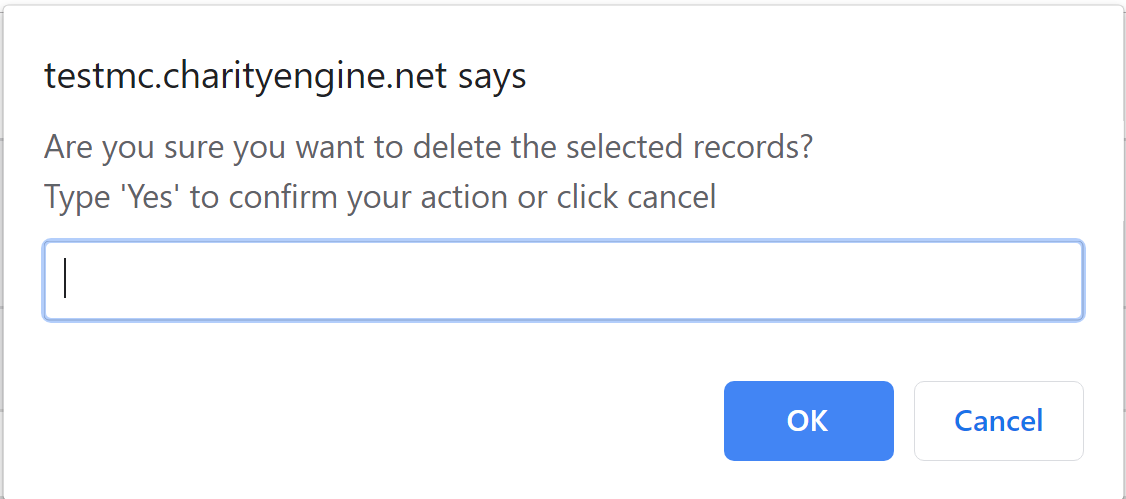
When you click Delete All or Delete Selected, a pop-up box will appear prompting you to confirm that you want to delete. To confirm the deletion, type Yes in the box.
A banner will appear confirming the deletion. It will also provide a link to view the deleted records in the Recycle Bin.

After a number of contacts

Deleting Individual Contacts
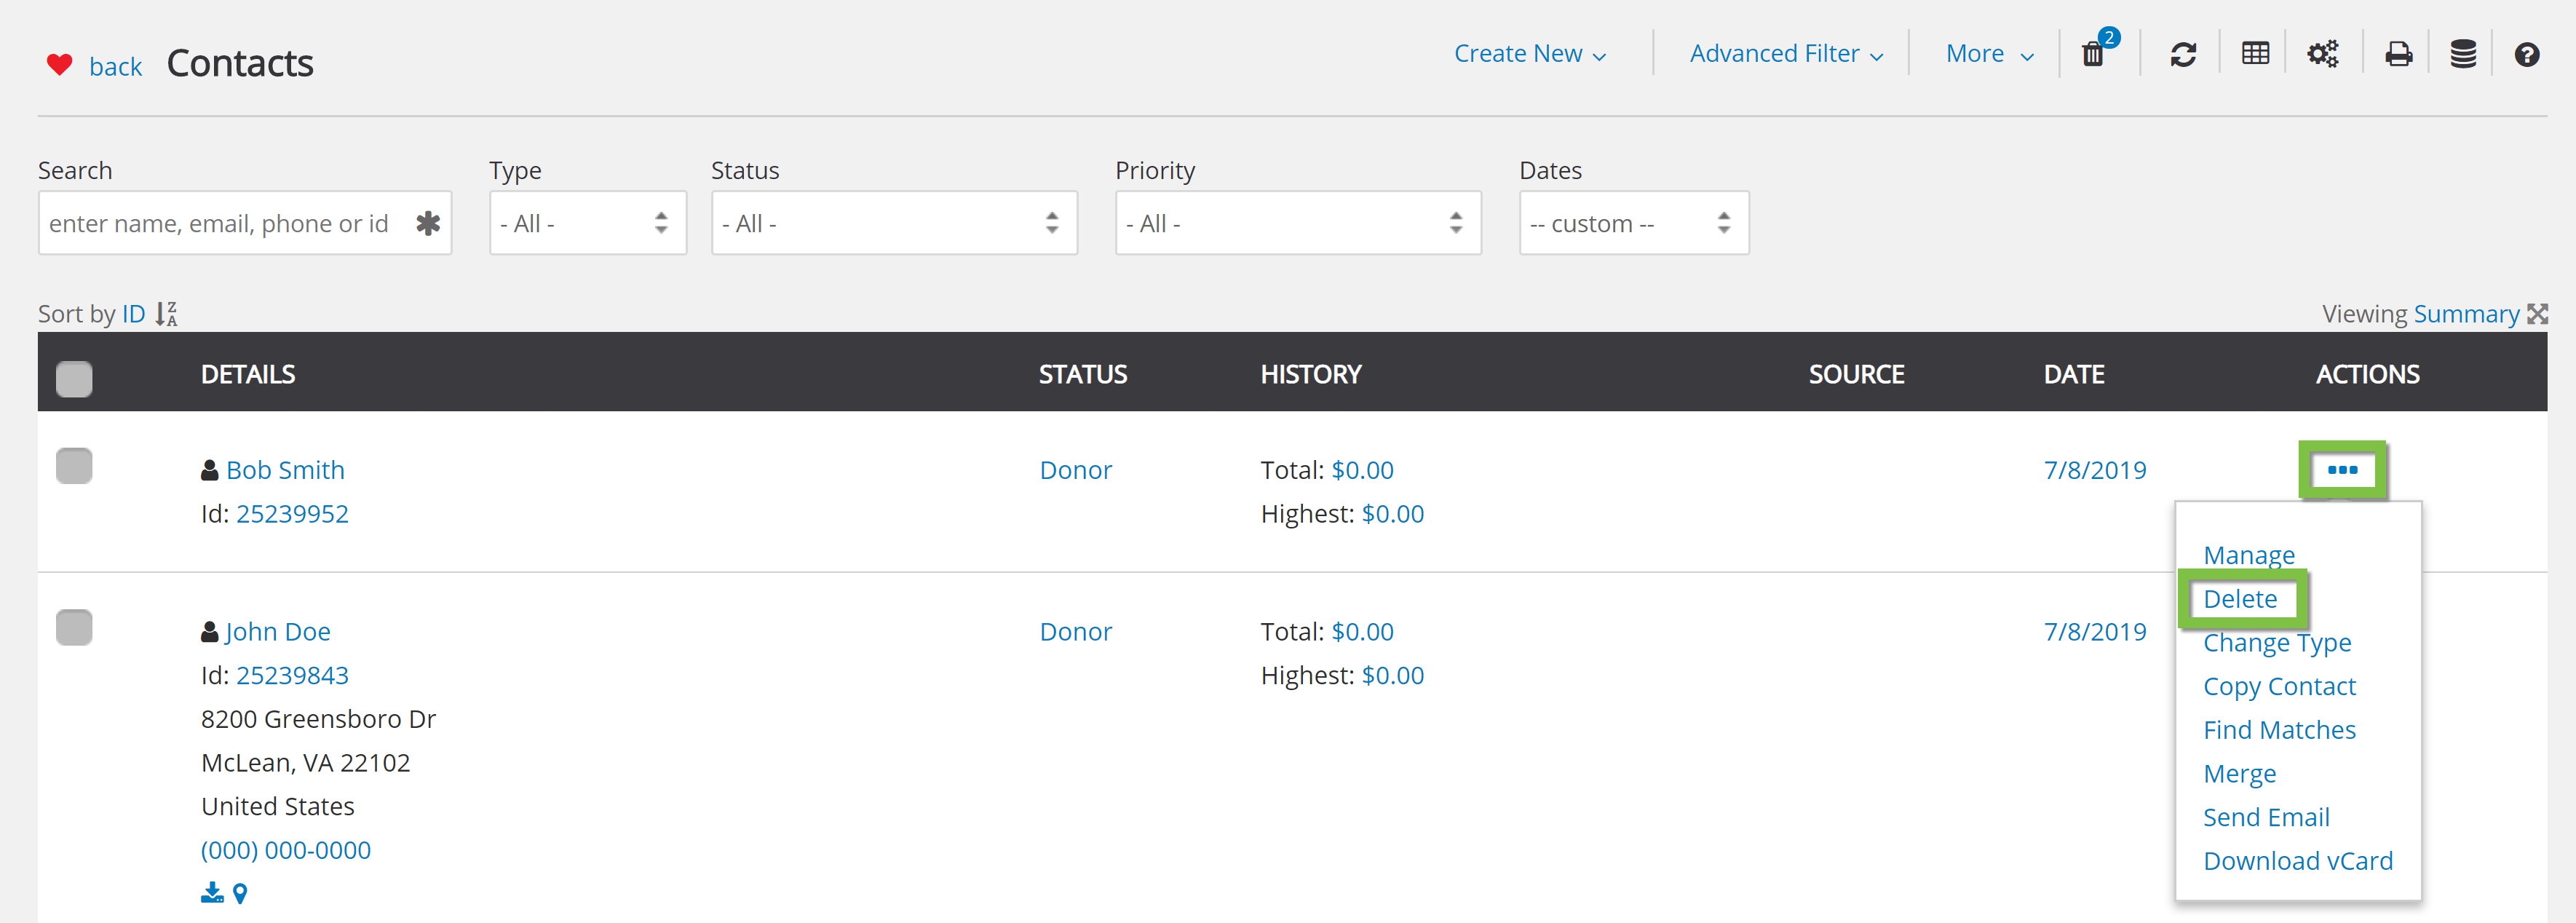
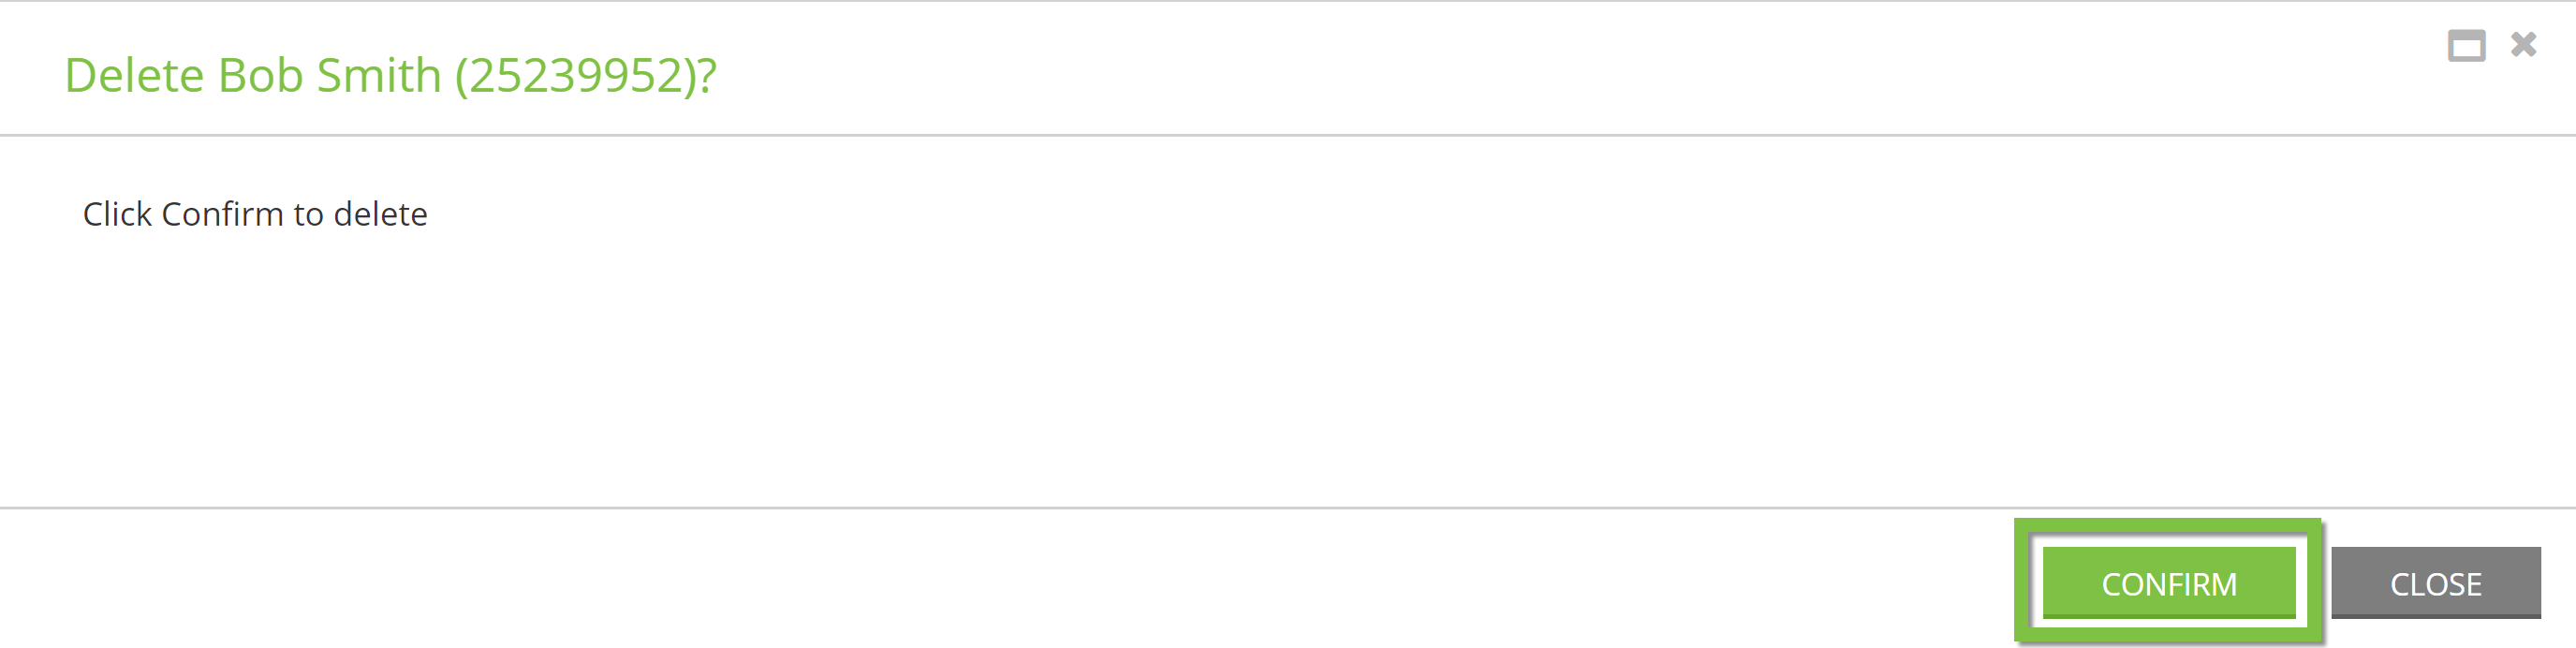
To delete individual contacts, hover over the three dots to the right of a listing and click Delete.
A pop-up box will appear to confirm the deletion. Click Confirm to delete the contact.
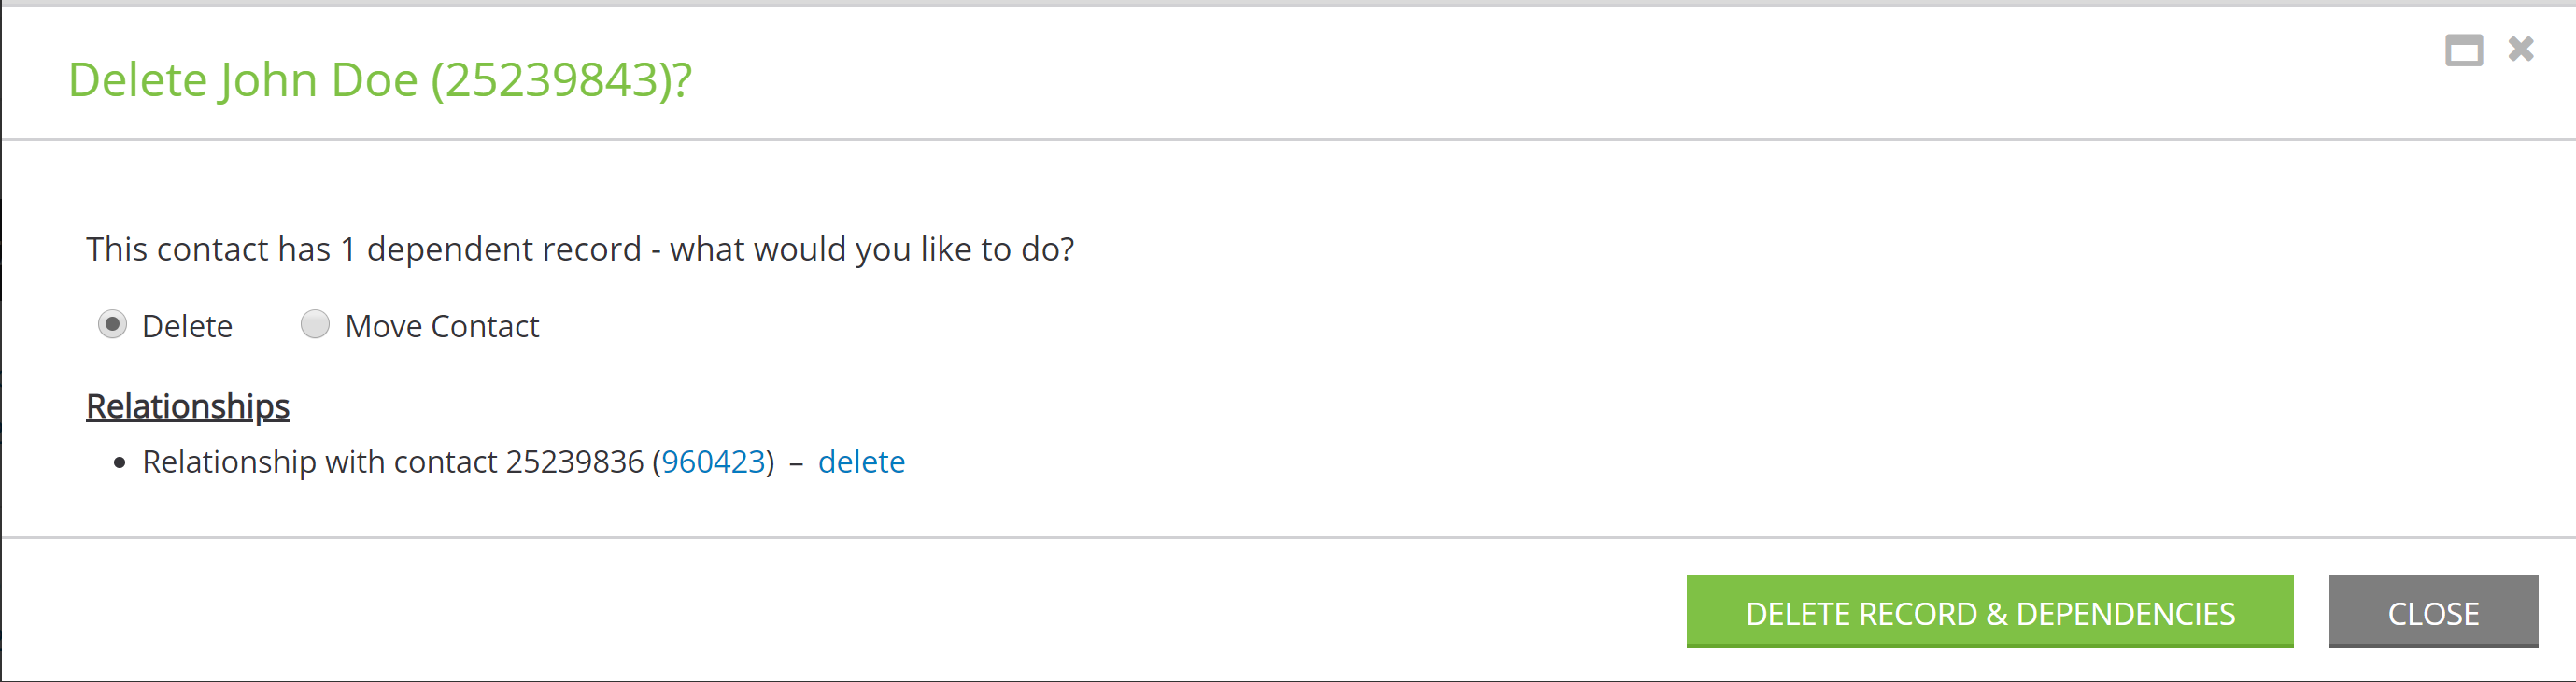
Contacts with Dependencies
If a contact has a dependency, such as a spousal relationship, you cannot bulk delete them using the checkboxes. You must individually delete them. When you hover over the three dots and click Delete, a confirmation box will appear. You can choose to either delete both the contact and the dependency or move the contact.
NOTE: Moving the contact is best when the contact has a transaction attached to it. If you move the contact instead of deleting it, the transaction will simply be moved to another contact.
Deleting Transactions
Checkboxes
Check the boxes next to the contacts you wish to delete.
![]()
Click the arrow next to the top checkbox to show the menu of options. Choose to Confirm Selected, Process Selected, Acknowledge Selected, or Delete Selected.
When you click Delete Selected, a pop-up box will appear prompting you to confirm that you want to delete. To confirm the deletion, type Yes in the box.

After a number of transactions

Deleting Individual Transactions
To delete individual transactions, hover over the three dots to the right of a listing and click Delete.
![]()
A pop-up box will appear asking you if you would also like to cancel the invoice associated with the transaction. Toggle Yes or No, and then click Delete.

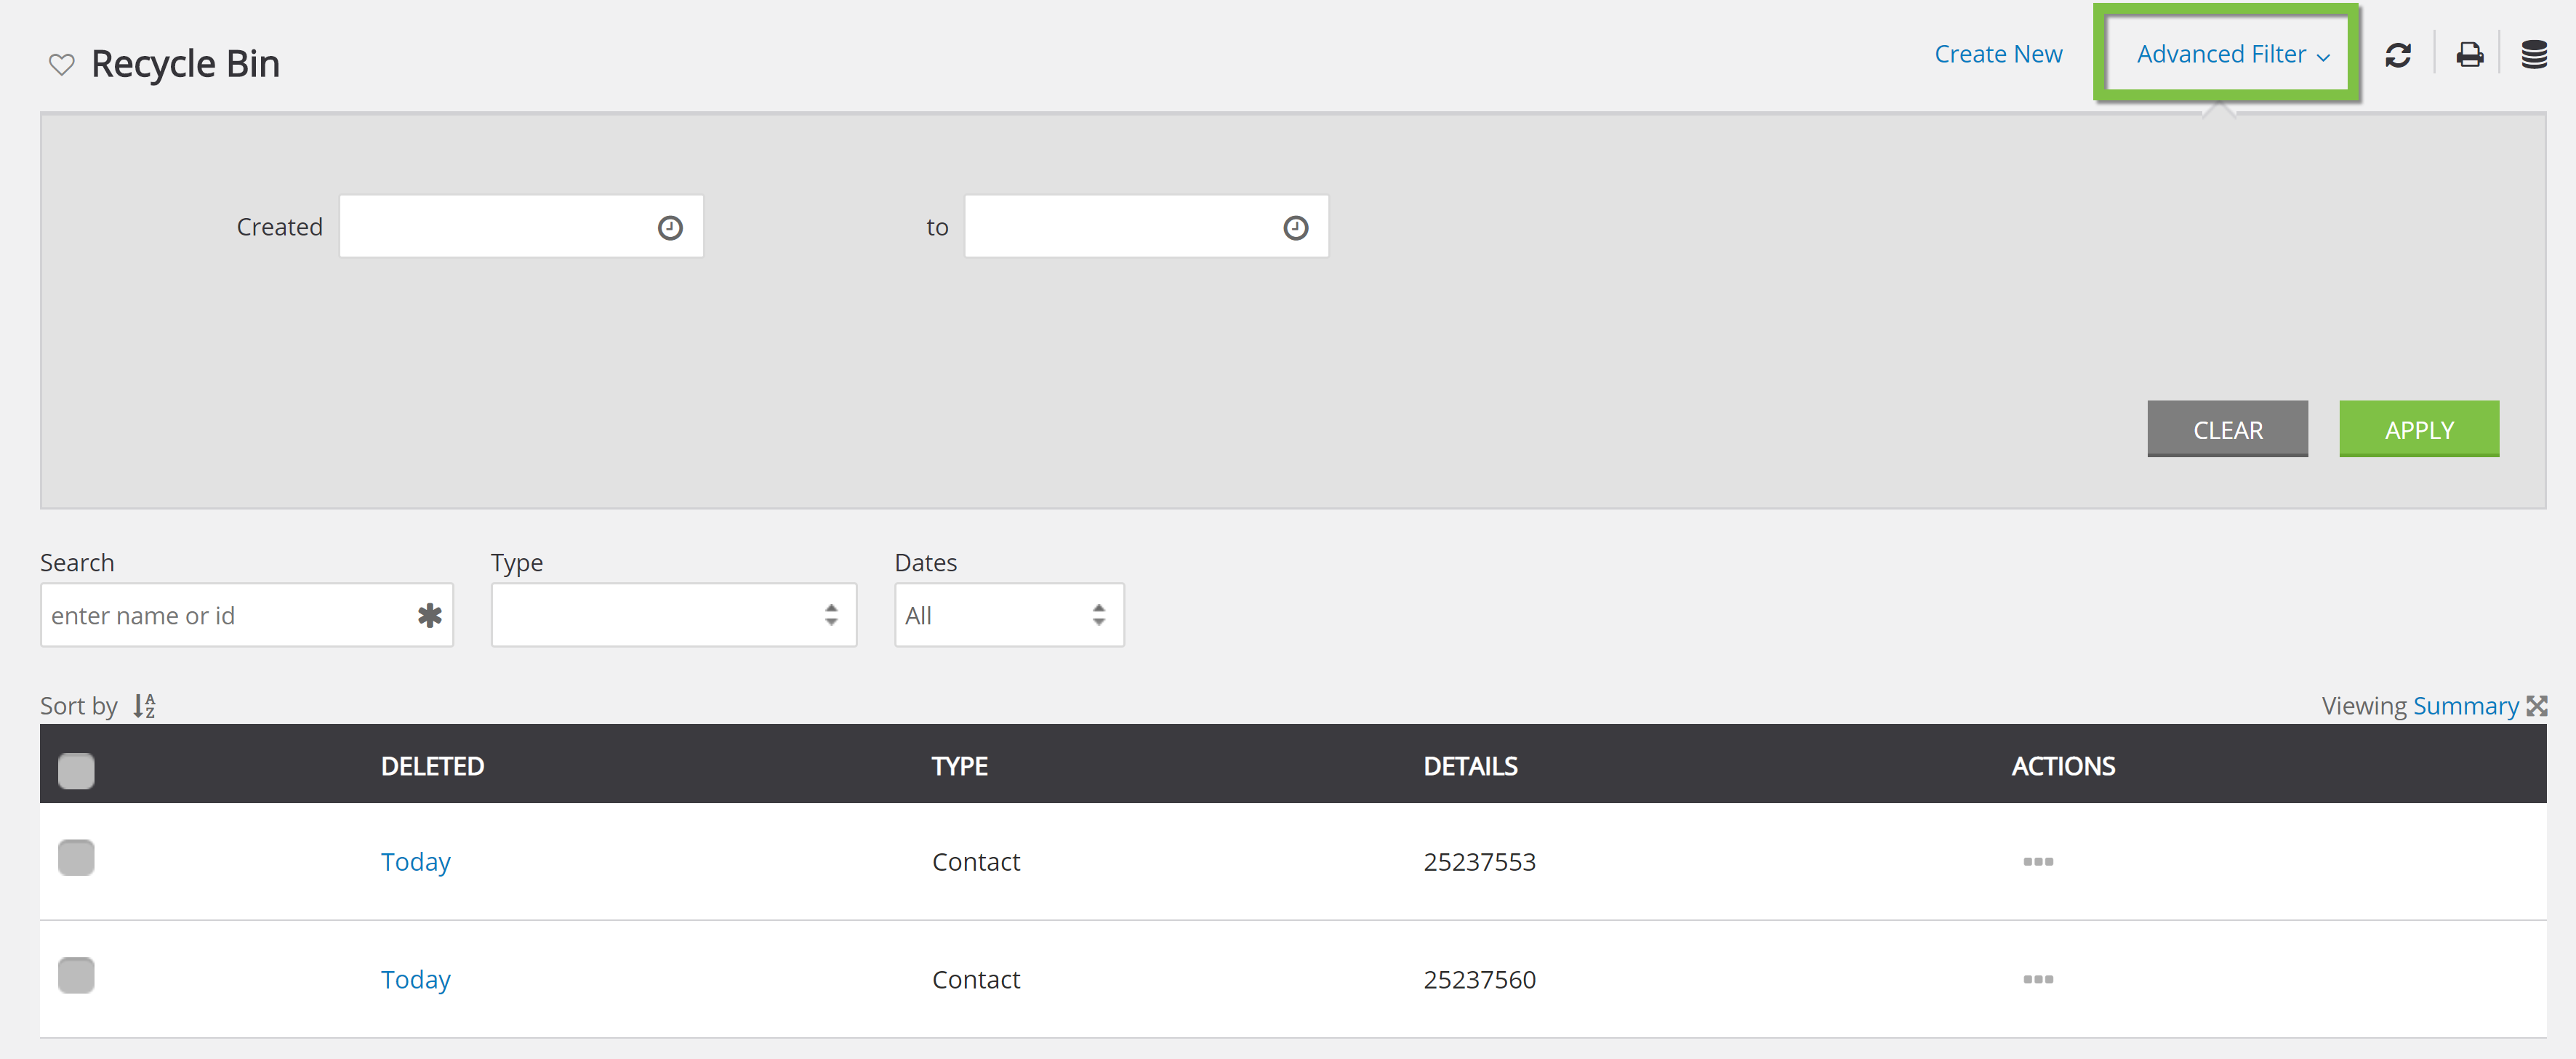
Recycle Bin Home Page
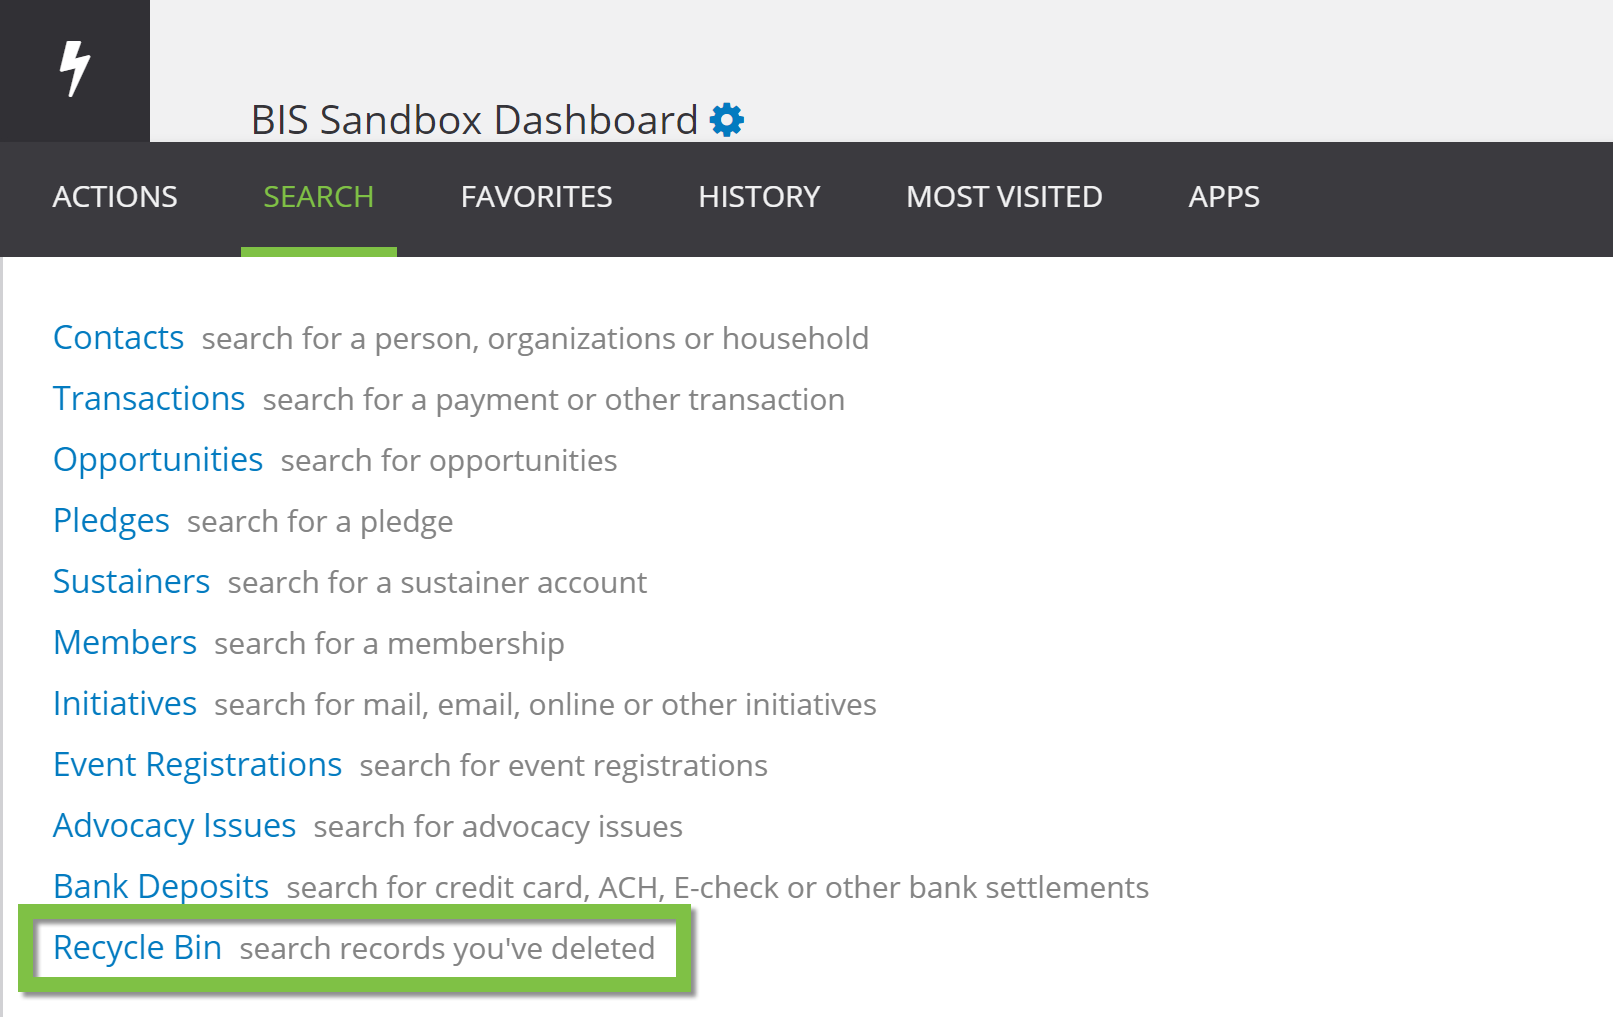
View the newly deleted records in the Recycle Bin. Find it by navigating to Quick Actions > Search > Recycle Bin. You can also access it by clicking the Recycle Bin icon at the top of various pages.
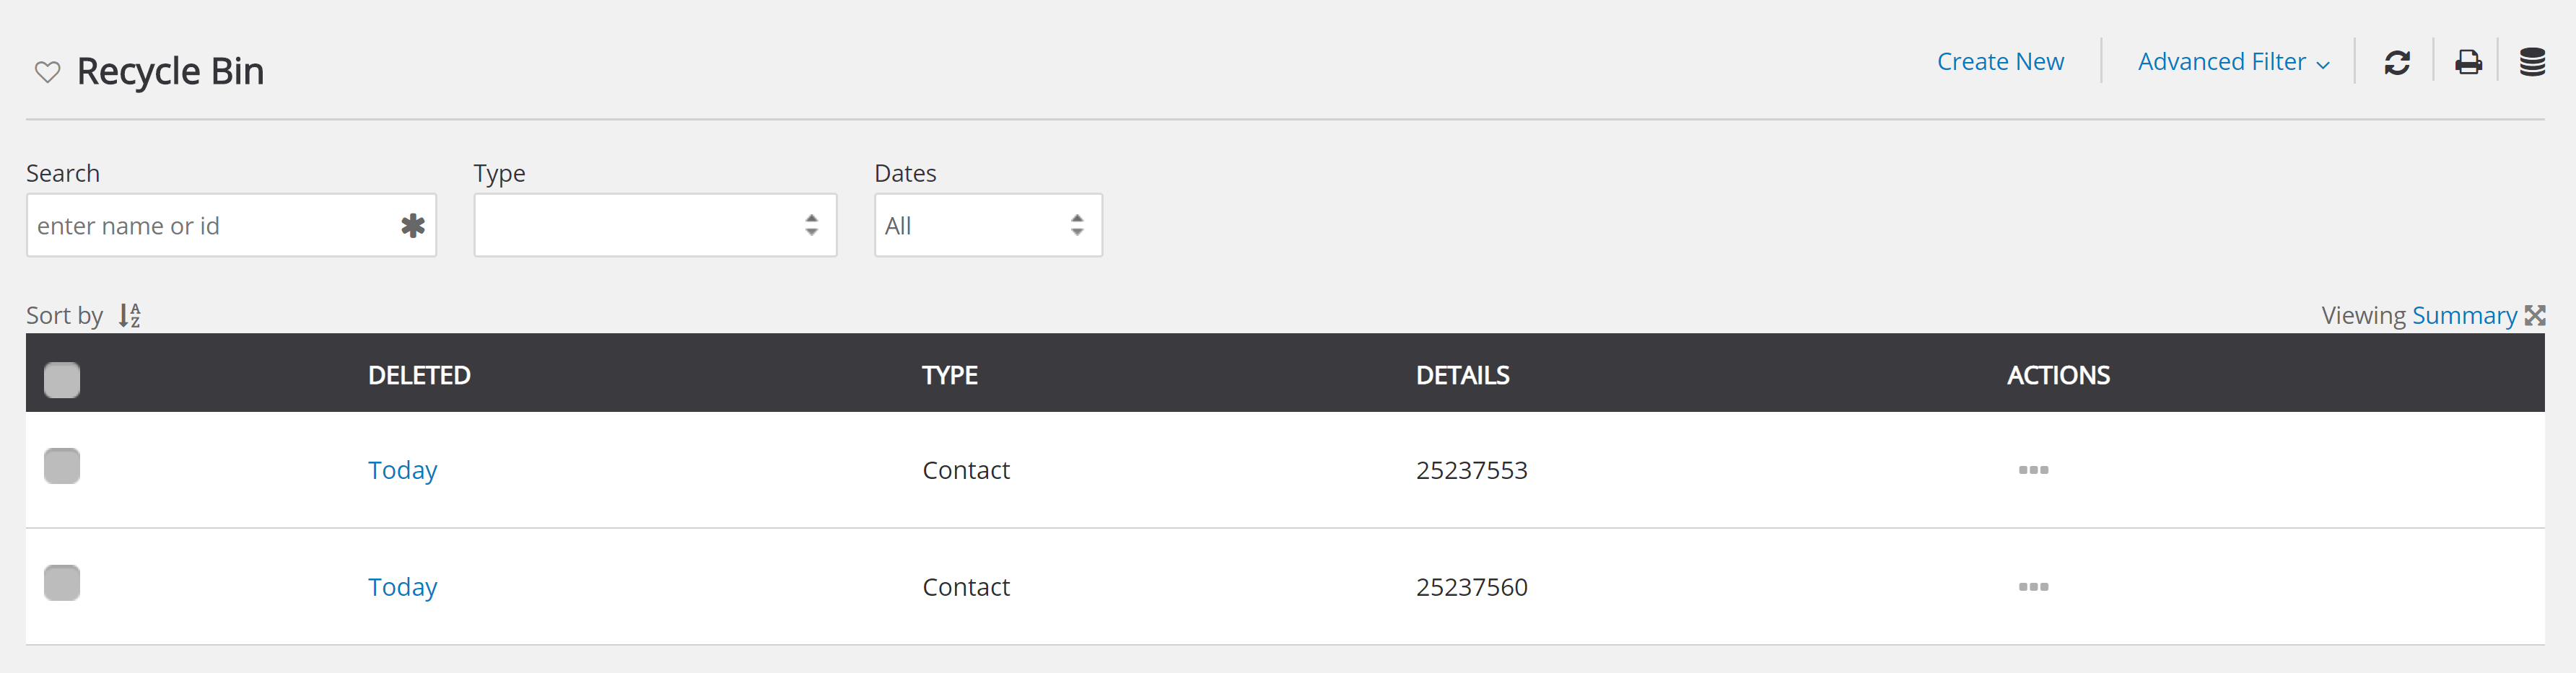
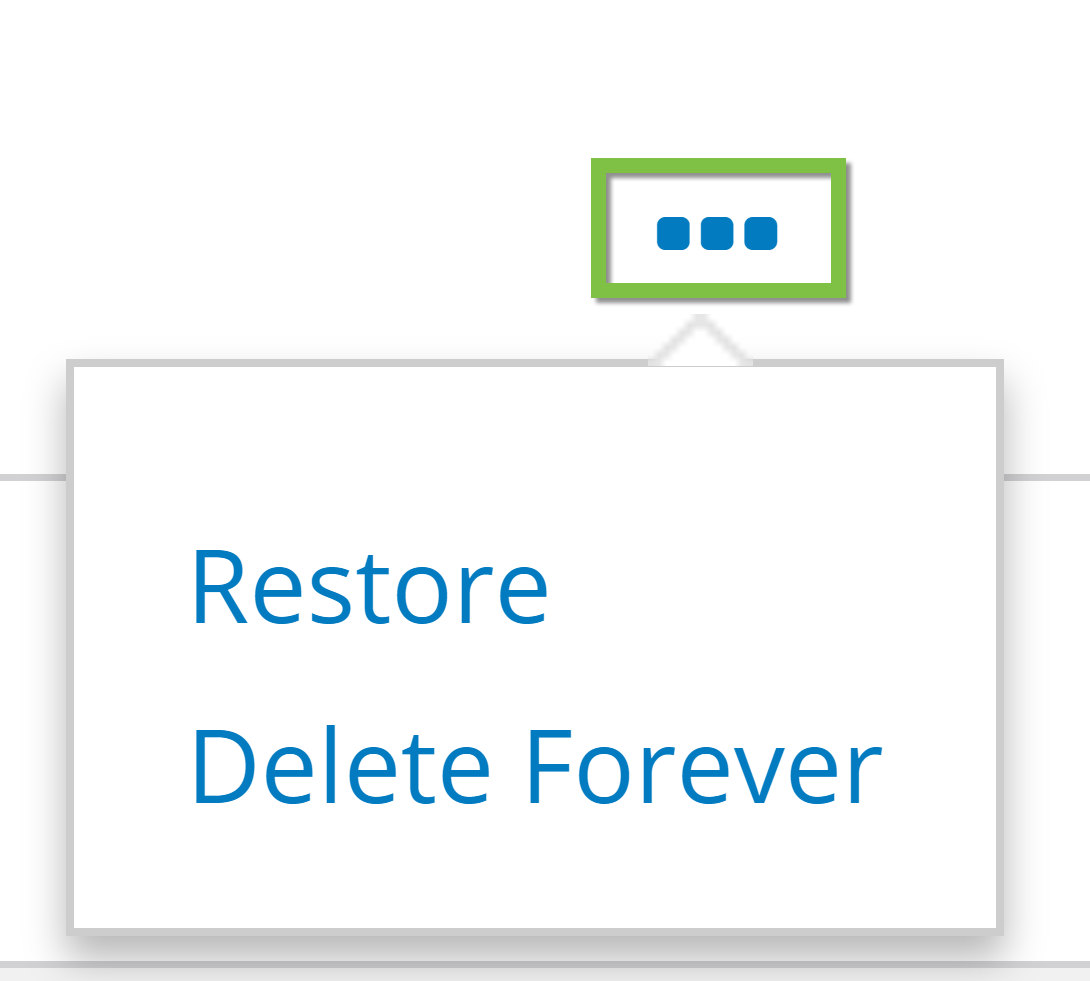
Hover over the three dots to the right of a listing. Choose whether to restore the listing or delete it permanently.
You can also check the boxes and bulk restore or

Advanced Filter
Use the Advanced Filter to find a specific deleted item.
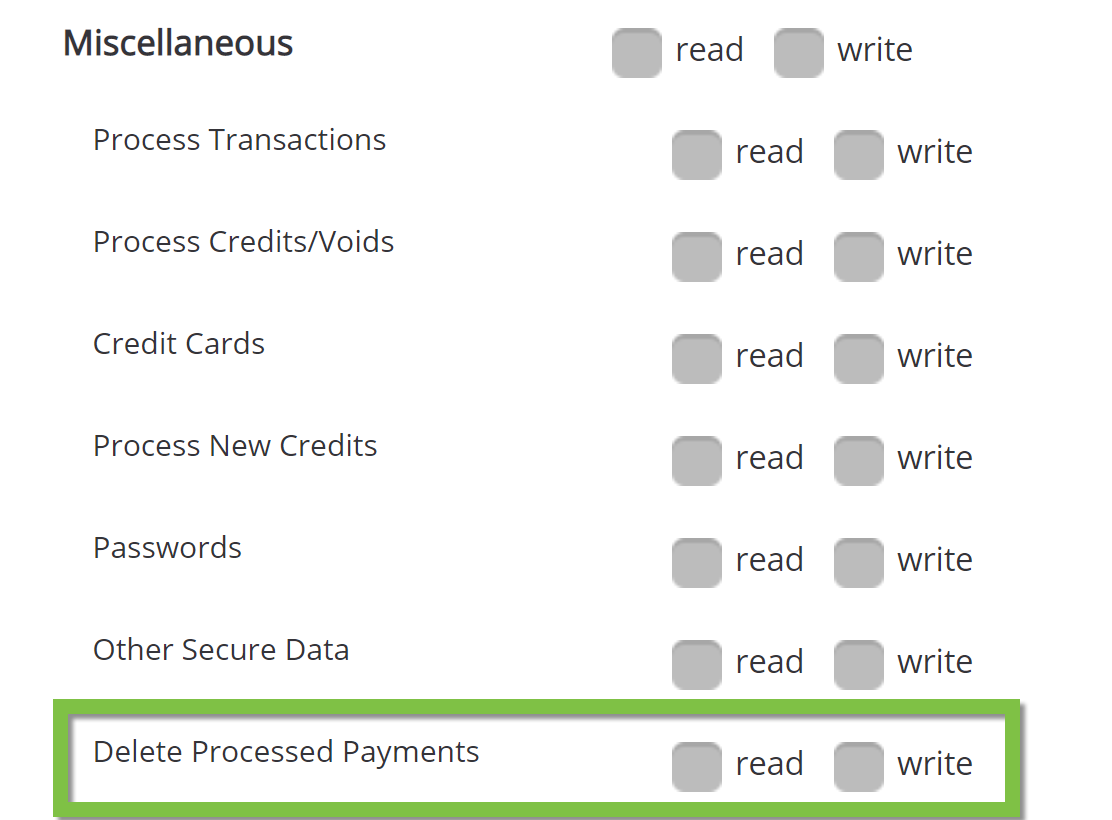
Permissions
CharityEngine® has put
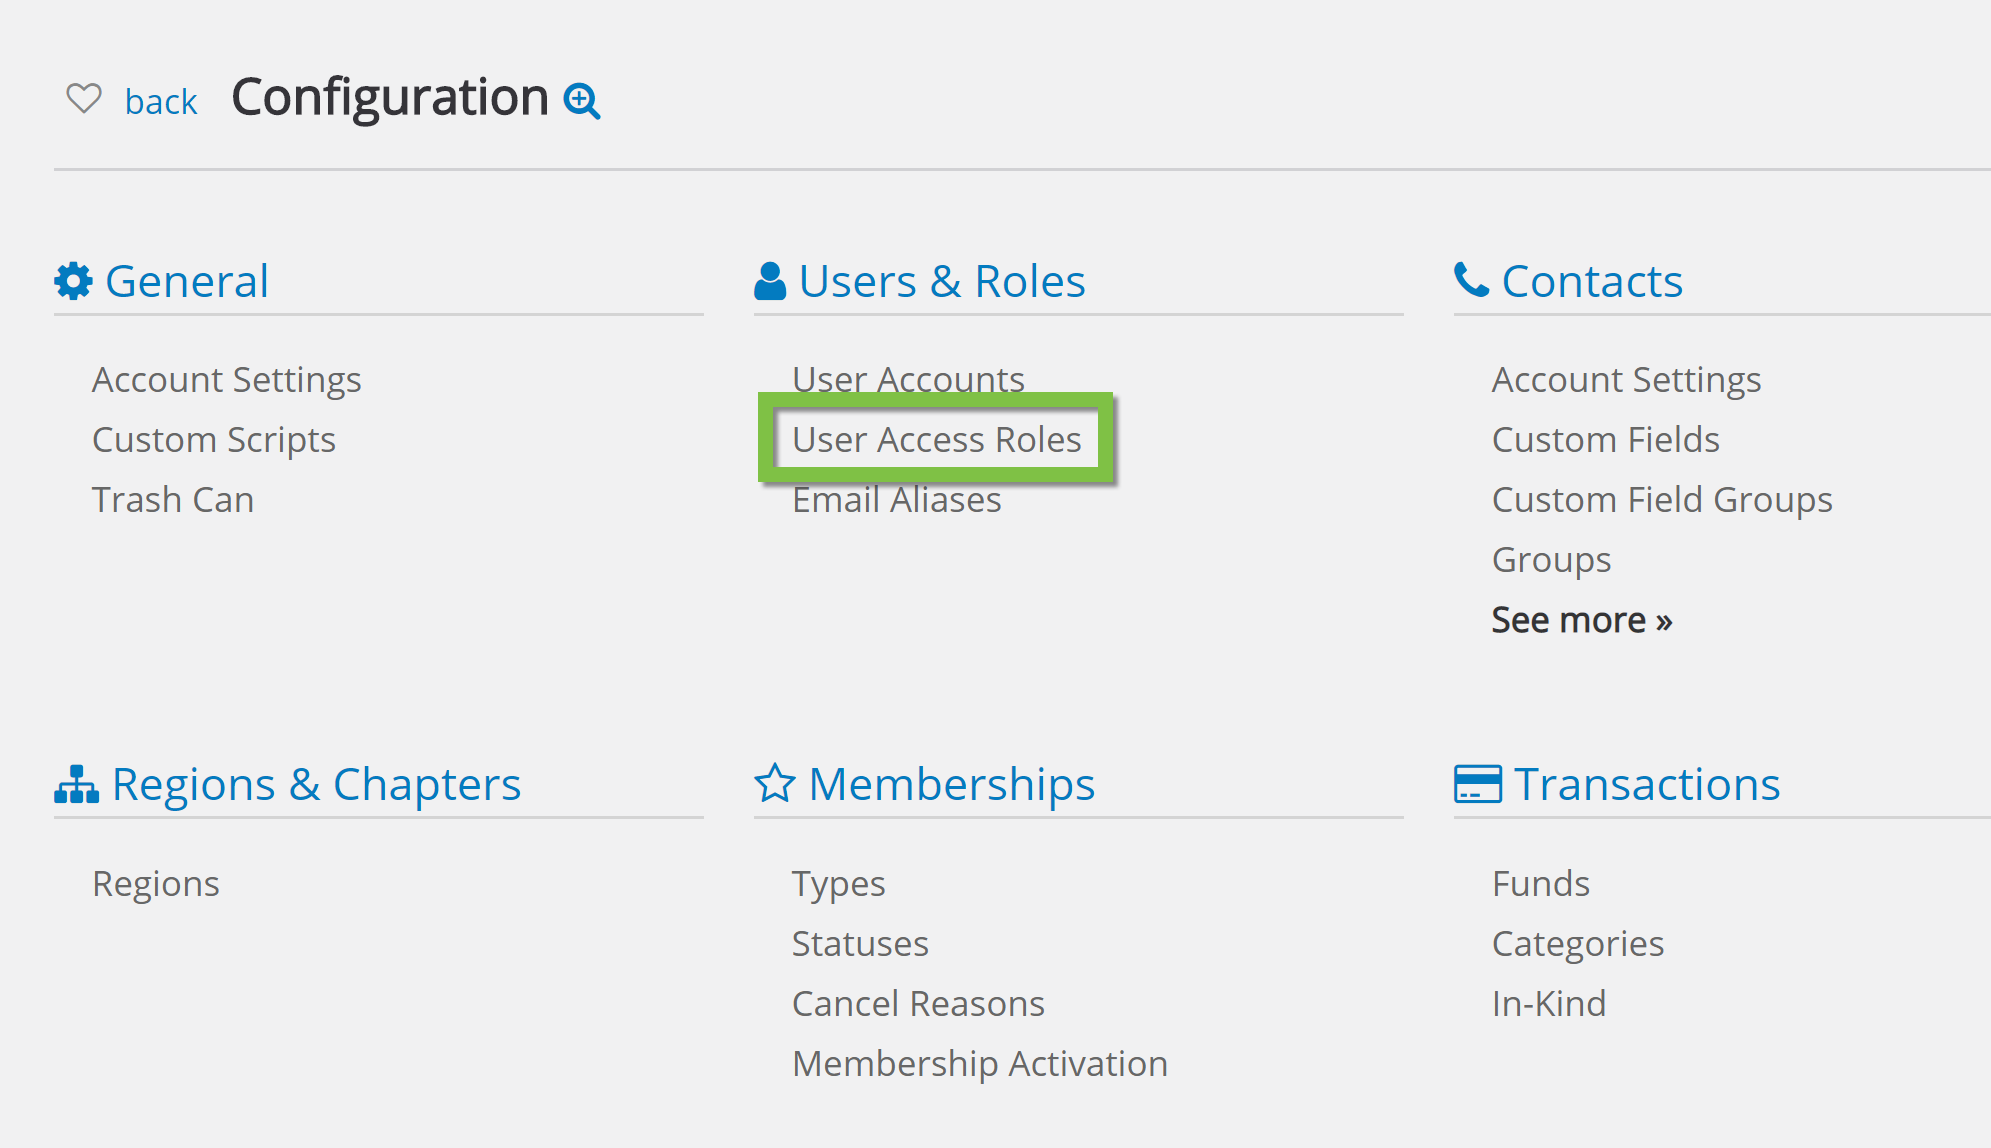
Find the role you wish to edit, hover over the action options, and click Manage.

Click into the Permissions tab and choose the CharityEngine drop-down.
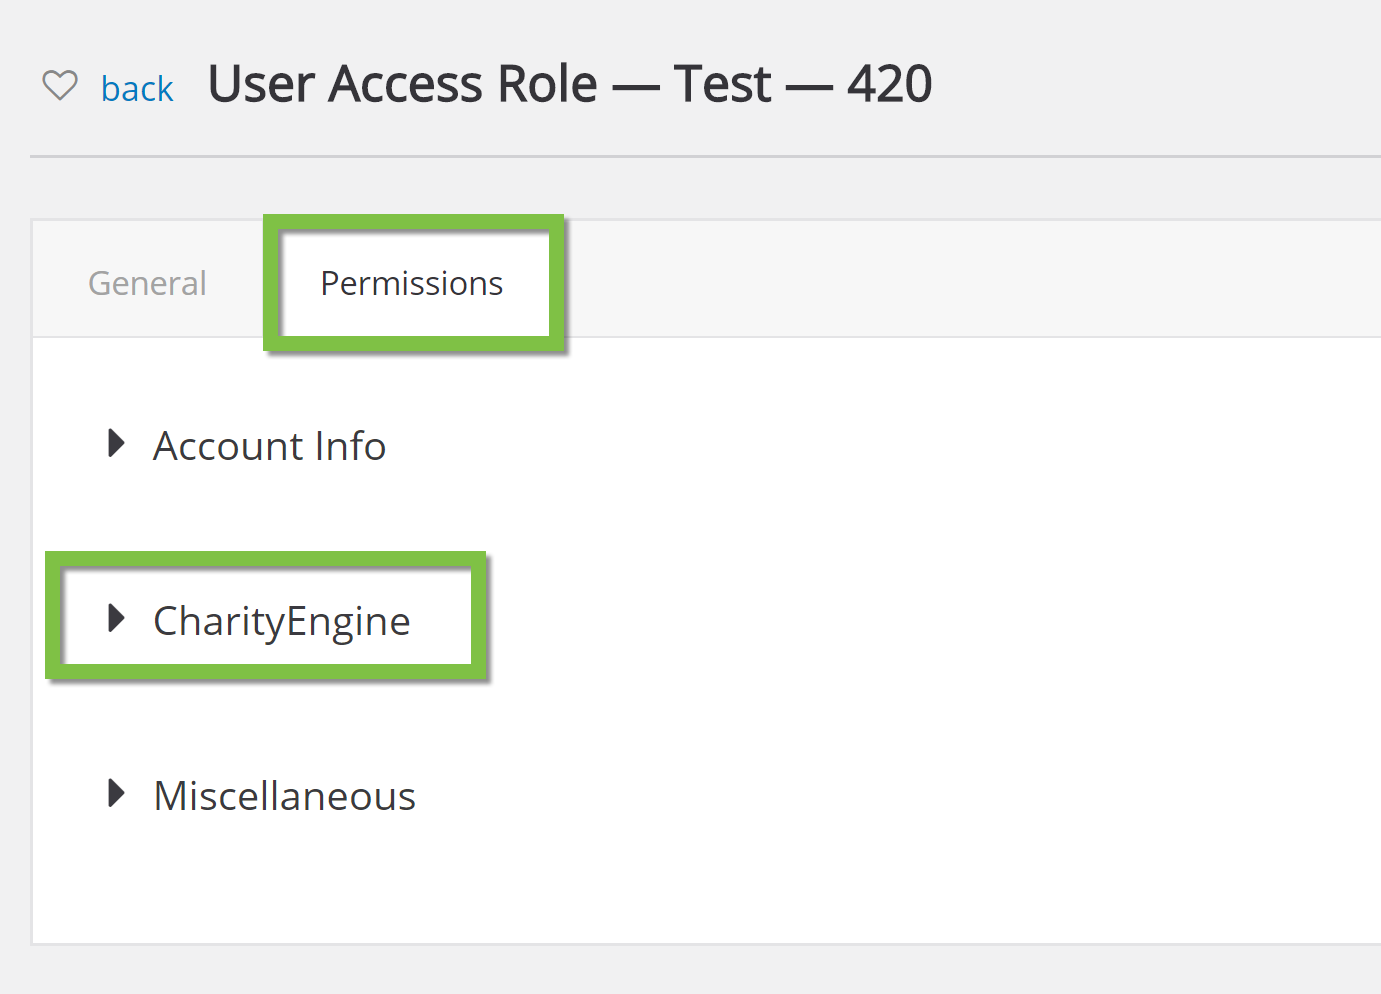
Under the Miscellaneous section of the CharityEngine drop-down is the option to turn on the reading and writing permissions for deleting transactions (namely, permission to delete them).