Introduction
Have you updated your homepage URL or have a campaign you want your donors to be directed to? By creating a URL Redirect, your visitors will be directed to a specific webpage. Any time a donor tries to navigate to the URL, they will be redirected to the new URL. This can help promote any new campaigns or fundraisers you may have.
Prerequisites
In order to use URL redirects for vanity URLs, you must have the vanity URL already set up within your CharityEngine account as well as have them in your contract. If you are interested in using vanity URLs, please reach out to your account manager.
Table of Contents
Configuring URL Redirects for Web Forms
If you are no longer use a CharityEngine webform and want to navigate your donors to a new form, you will be able to create the offline Redirect easily by navigating to the Online application and under the Web Forms section click on Search & Manage then locate your old form. Click on the name of the form to manage it. On the General tab make sure you toggle the form to inactive.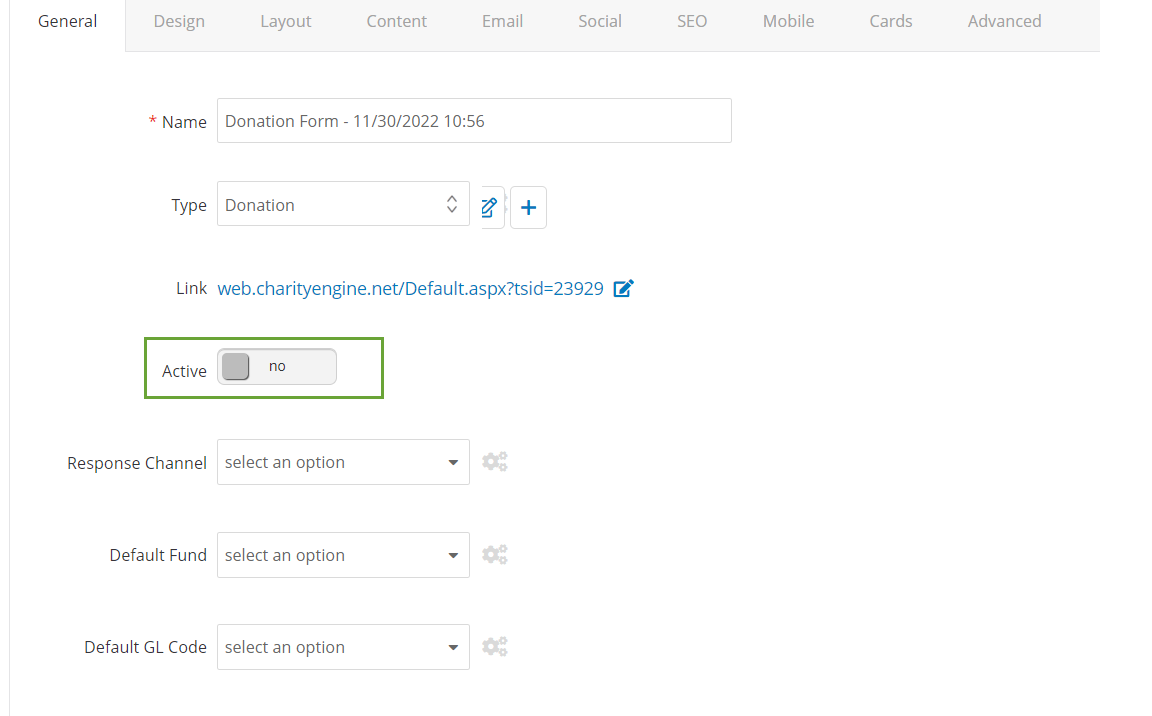
After the form has been made inactive, expand the Offline Settings and check the Redirect Box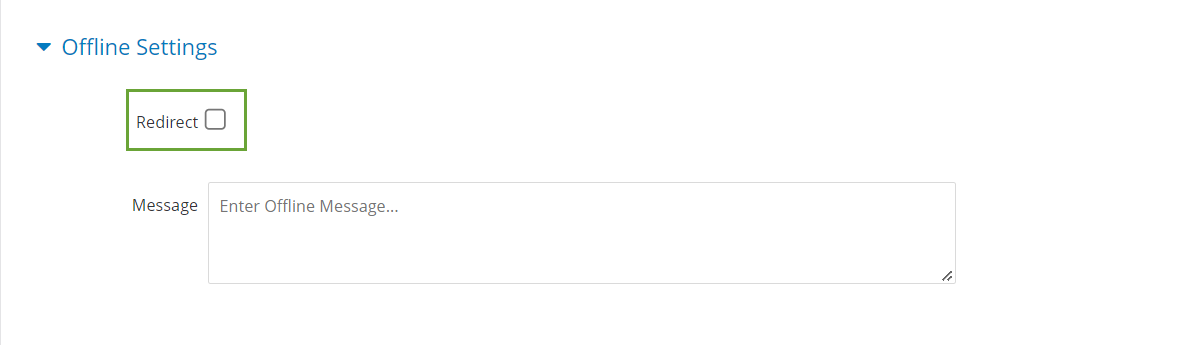
A text box will appear where you can place your new form URL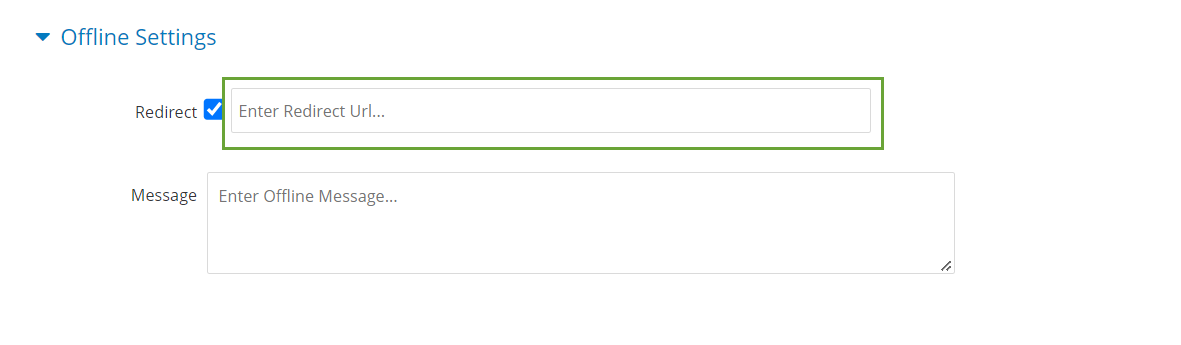
By entering the new URL, anytime someone navigates to the old URL, they will be sent to the new website. This is a great way to ensure you are not loosing out on donation even if the old URL is still published or if the donor only remembers the old one.
Configuring URL Redirects for Websites with a Vanity URL
If you are using a Vanity URL and not a CharityEngine shared domain (ex. web.charityengine.net) then follow the below steps to create your URL redirect. This will allow you to navigate your donors to the correct site without having the change any other settings on your website.
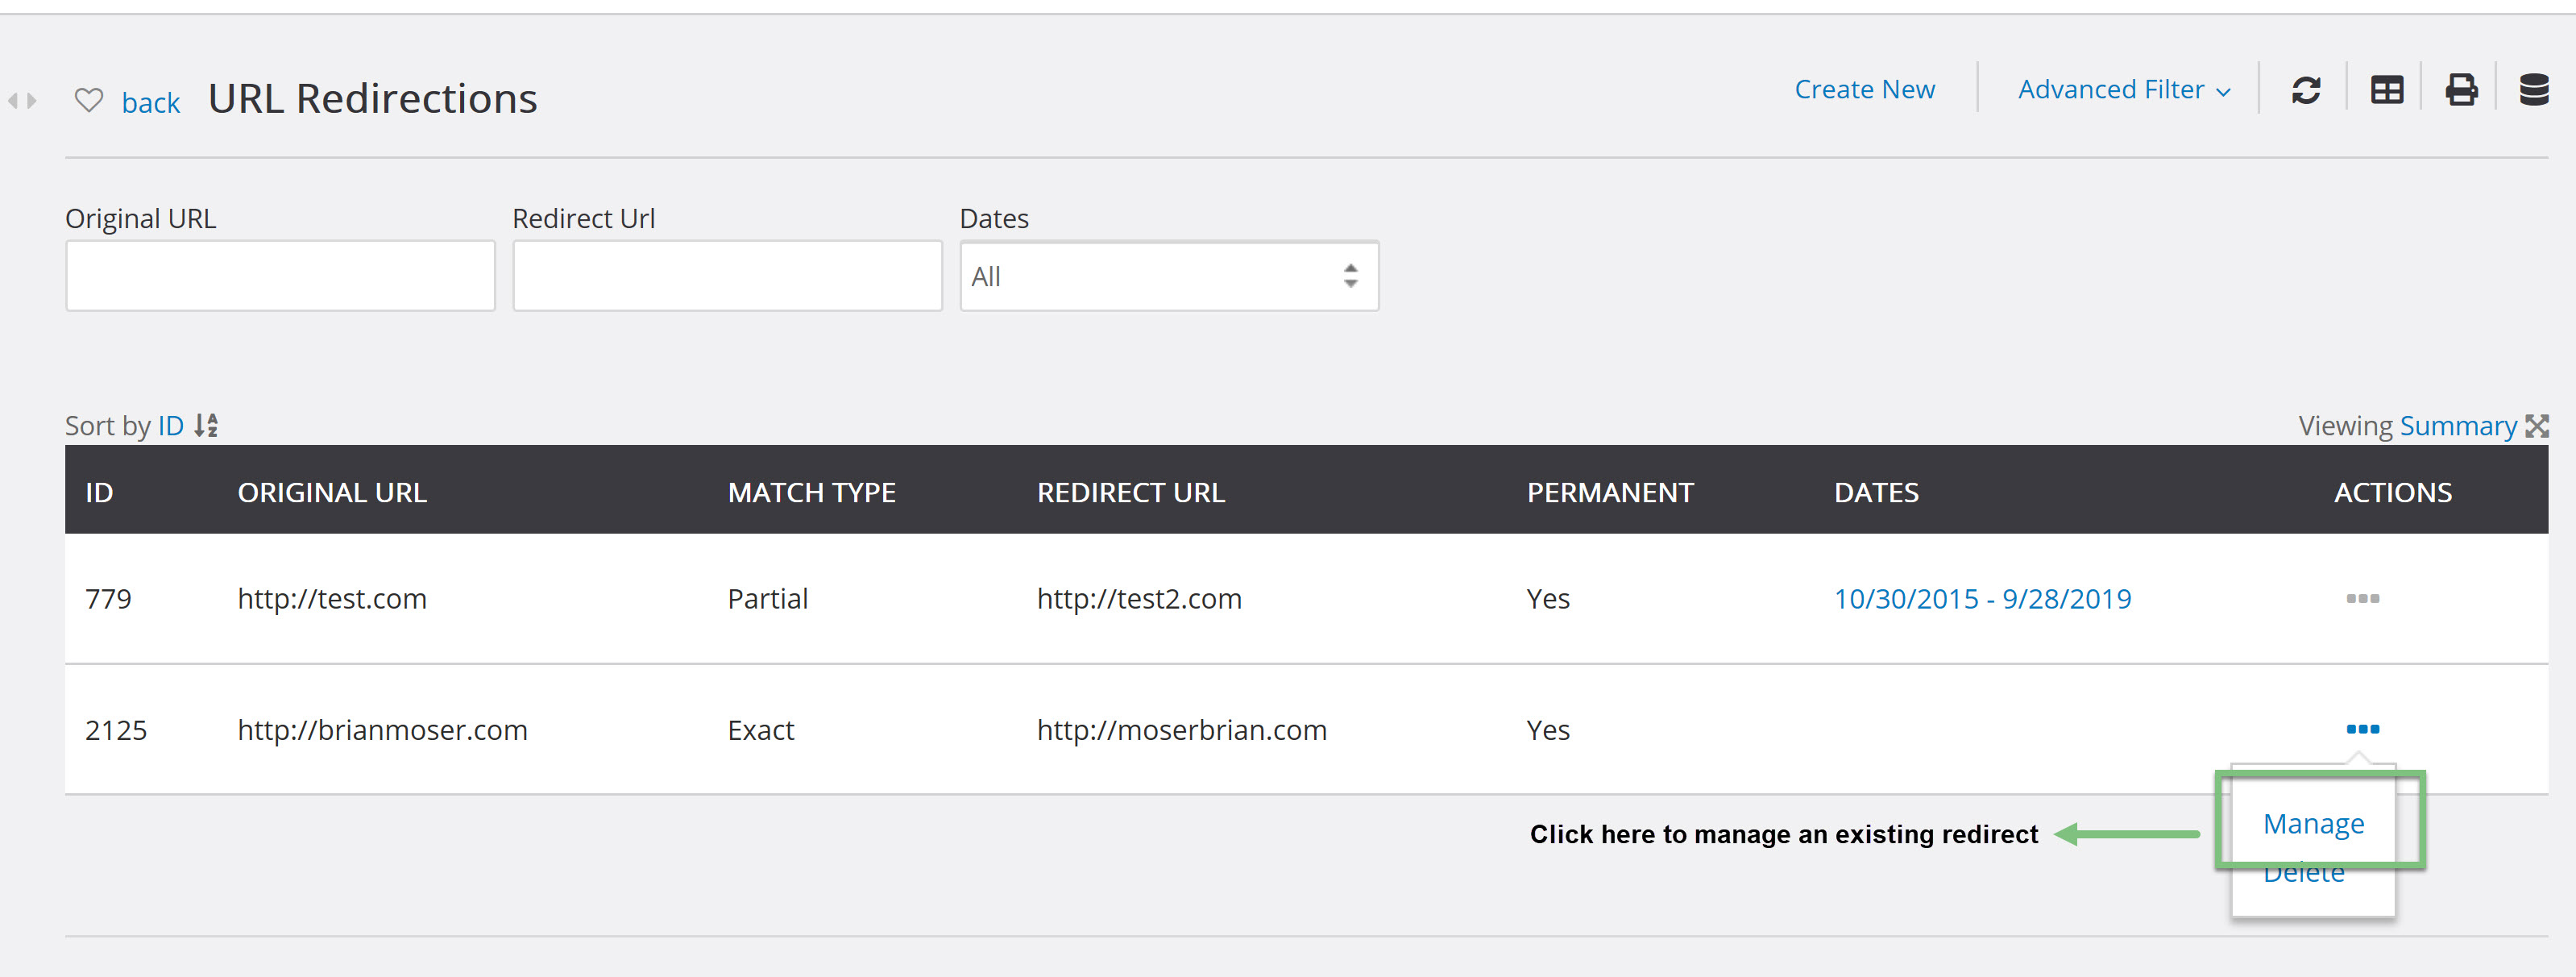
You will now be able to enter the original URL and the Redirect URL, as well as decide if this is a permanent redirect or one that will have a start and stop date.
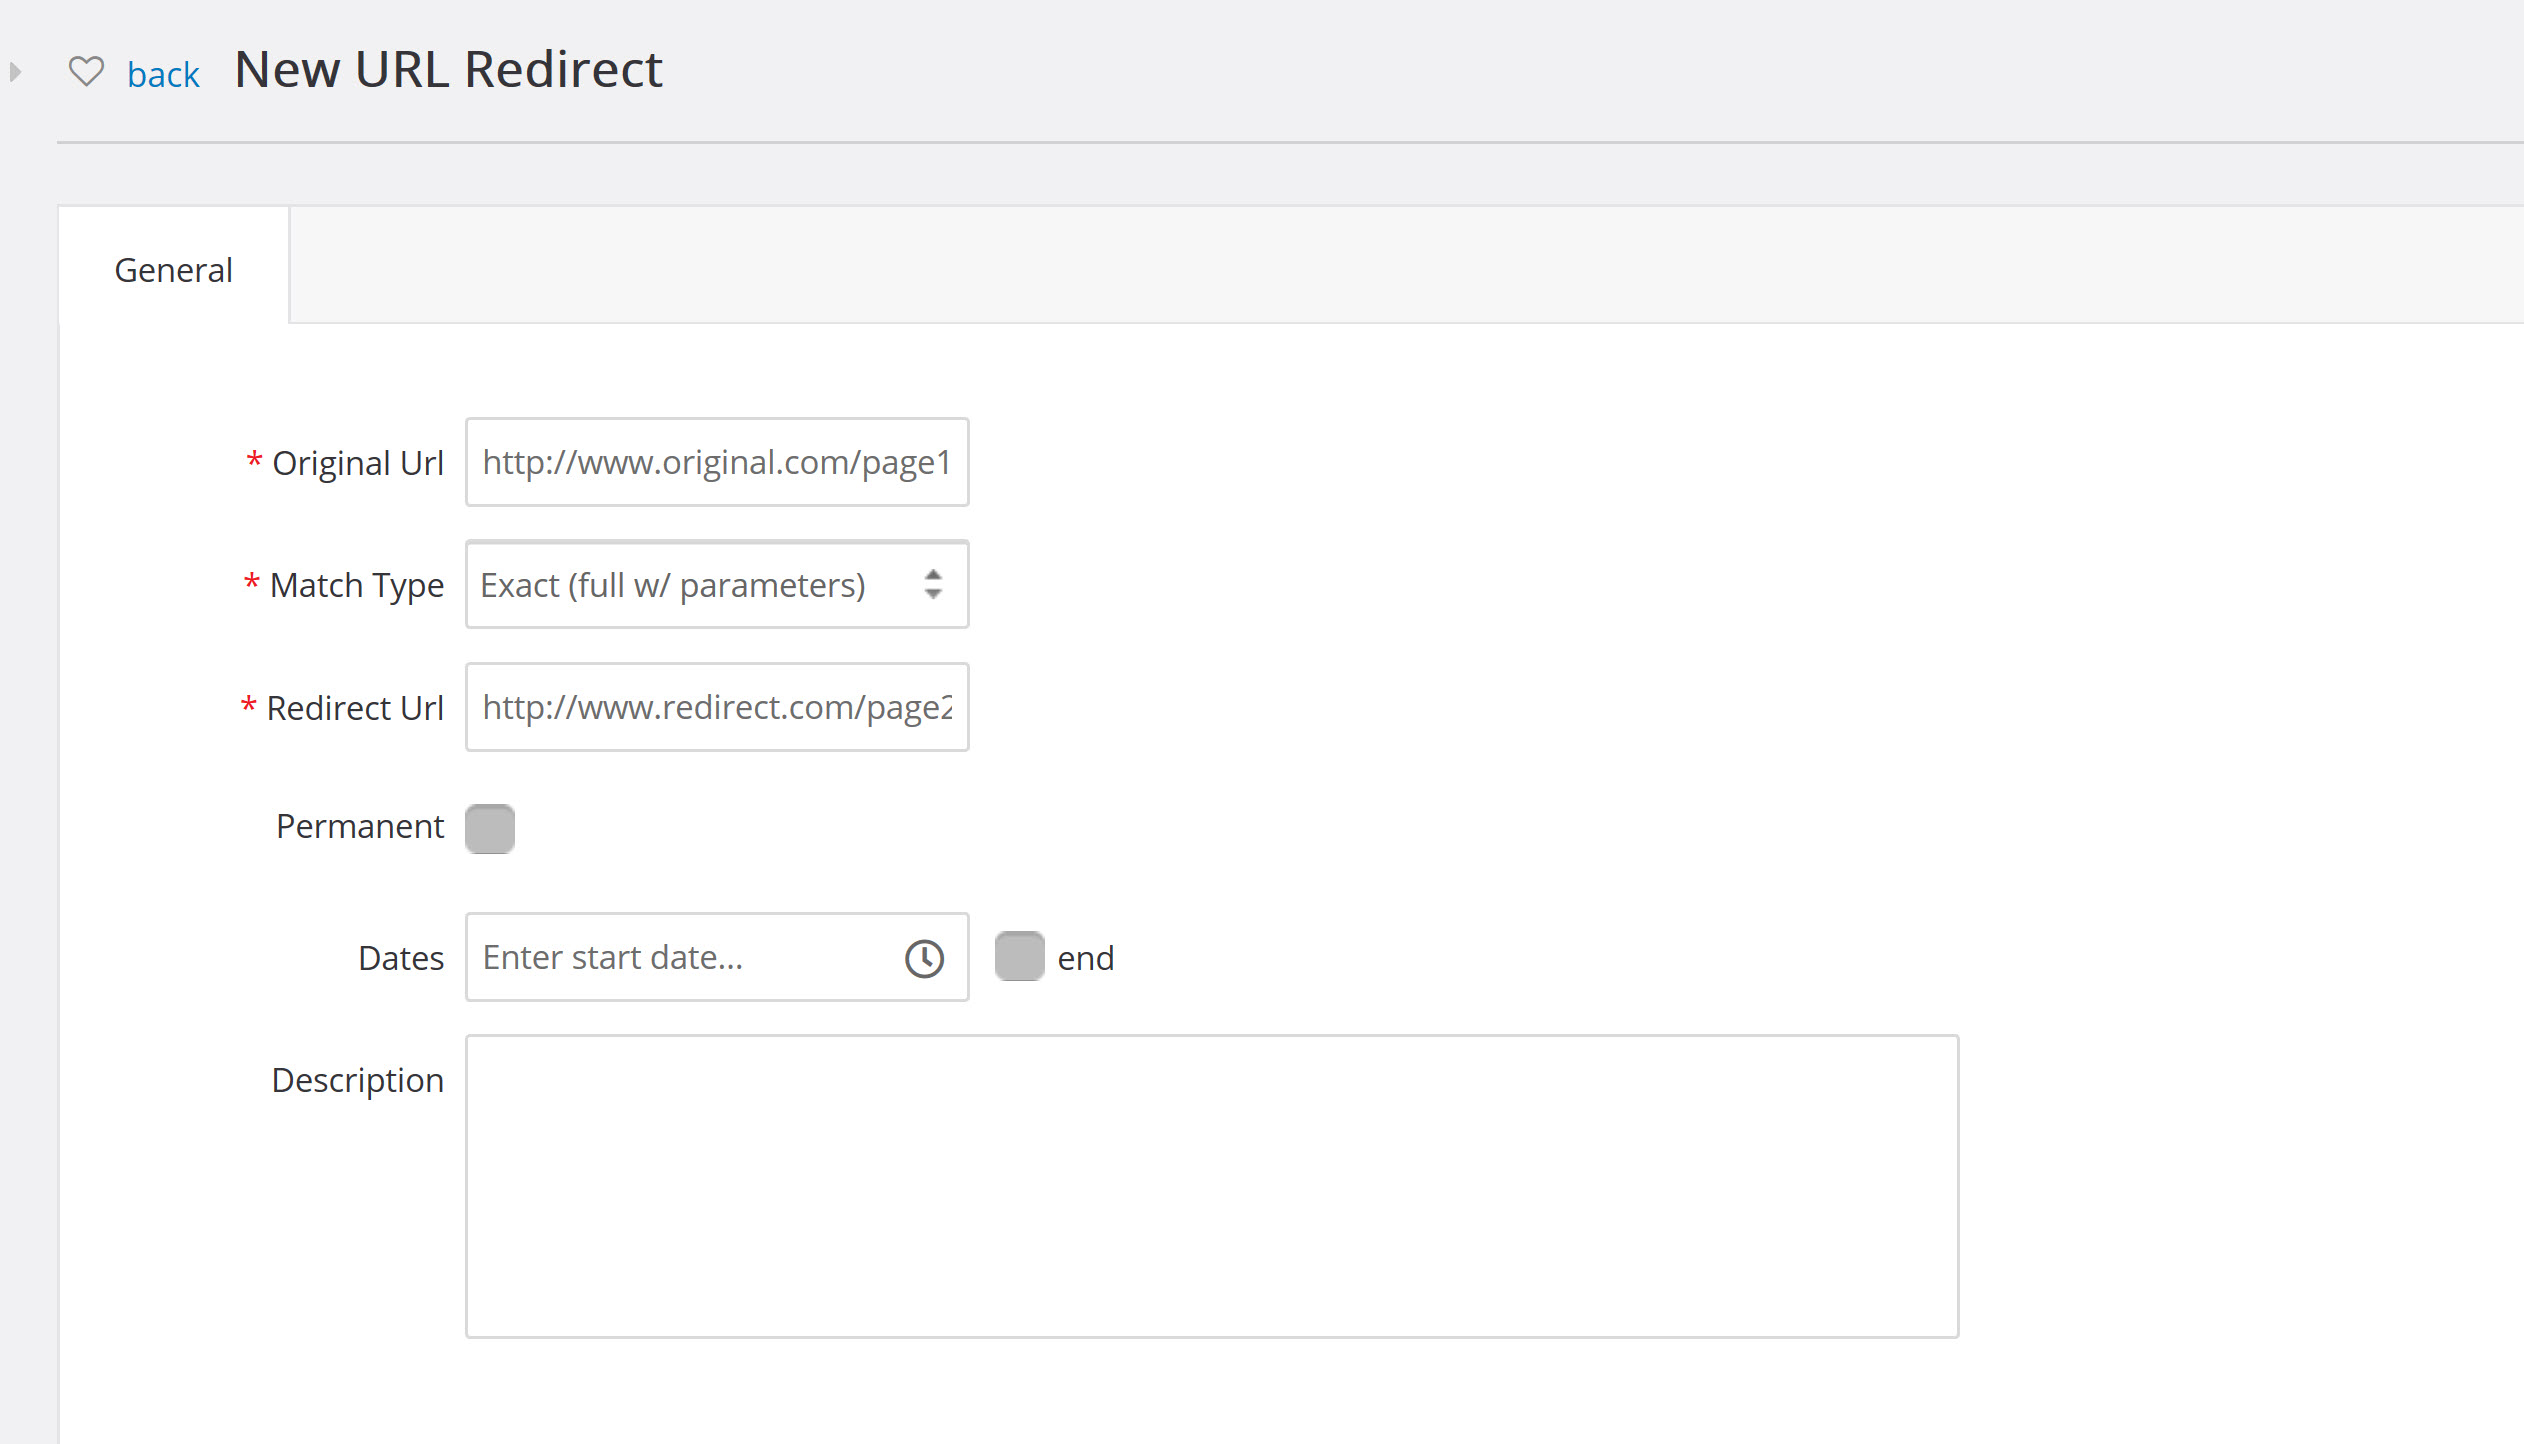
The Original URL: The URL that your donor has entered to navigate to, such as your home webpage.
Redirect URL: The URL the donor will be direct to if they have navigated to the original URL.
For Example, if you have a campaign you want all donors to be navigated to, you will enter the home page URL as the original and the URL for the campaign as the redirect.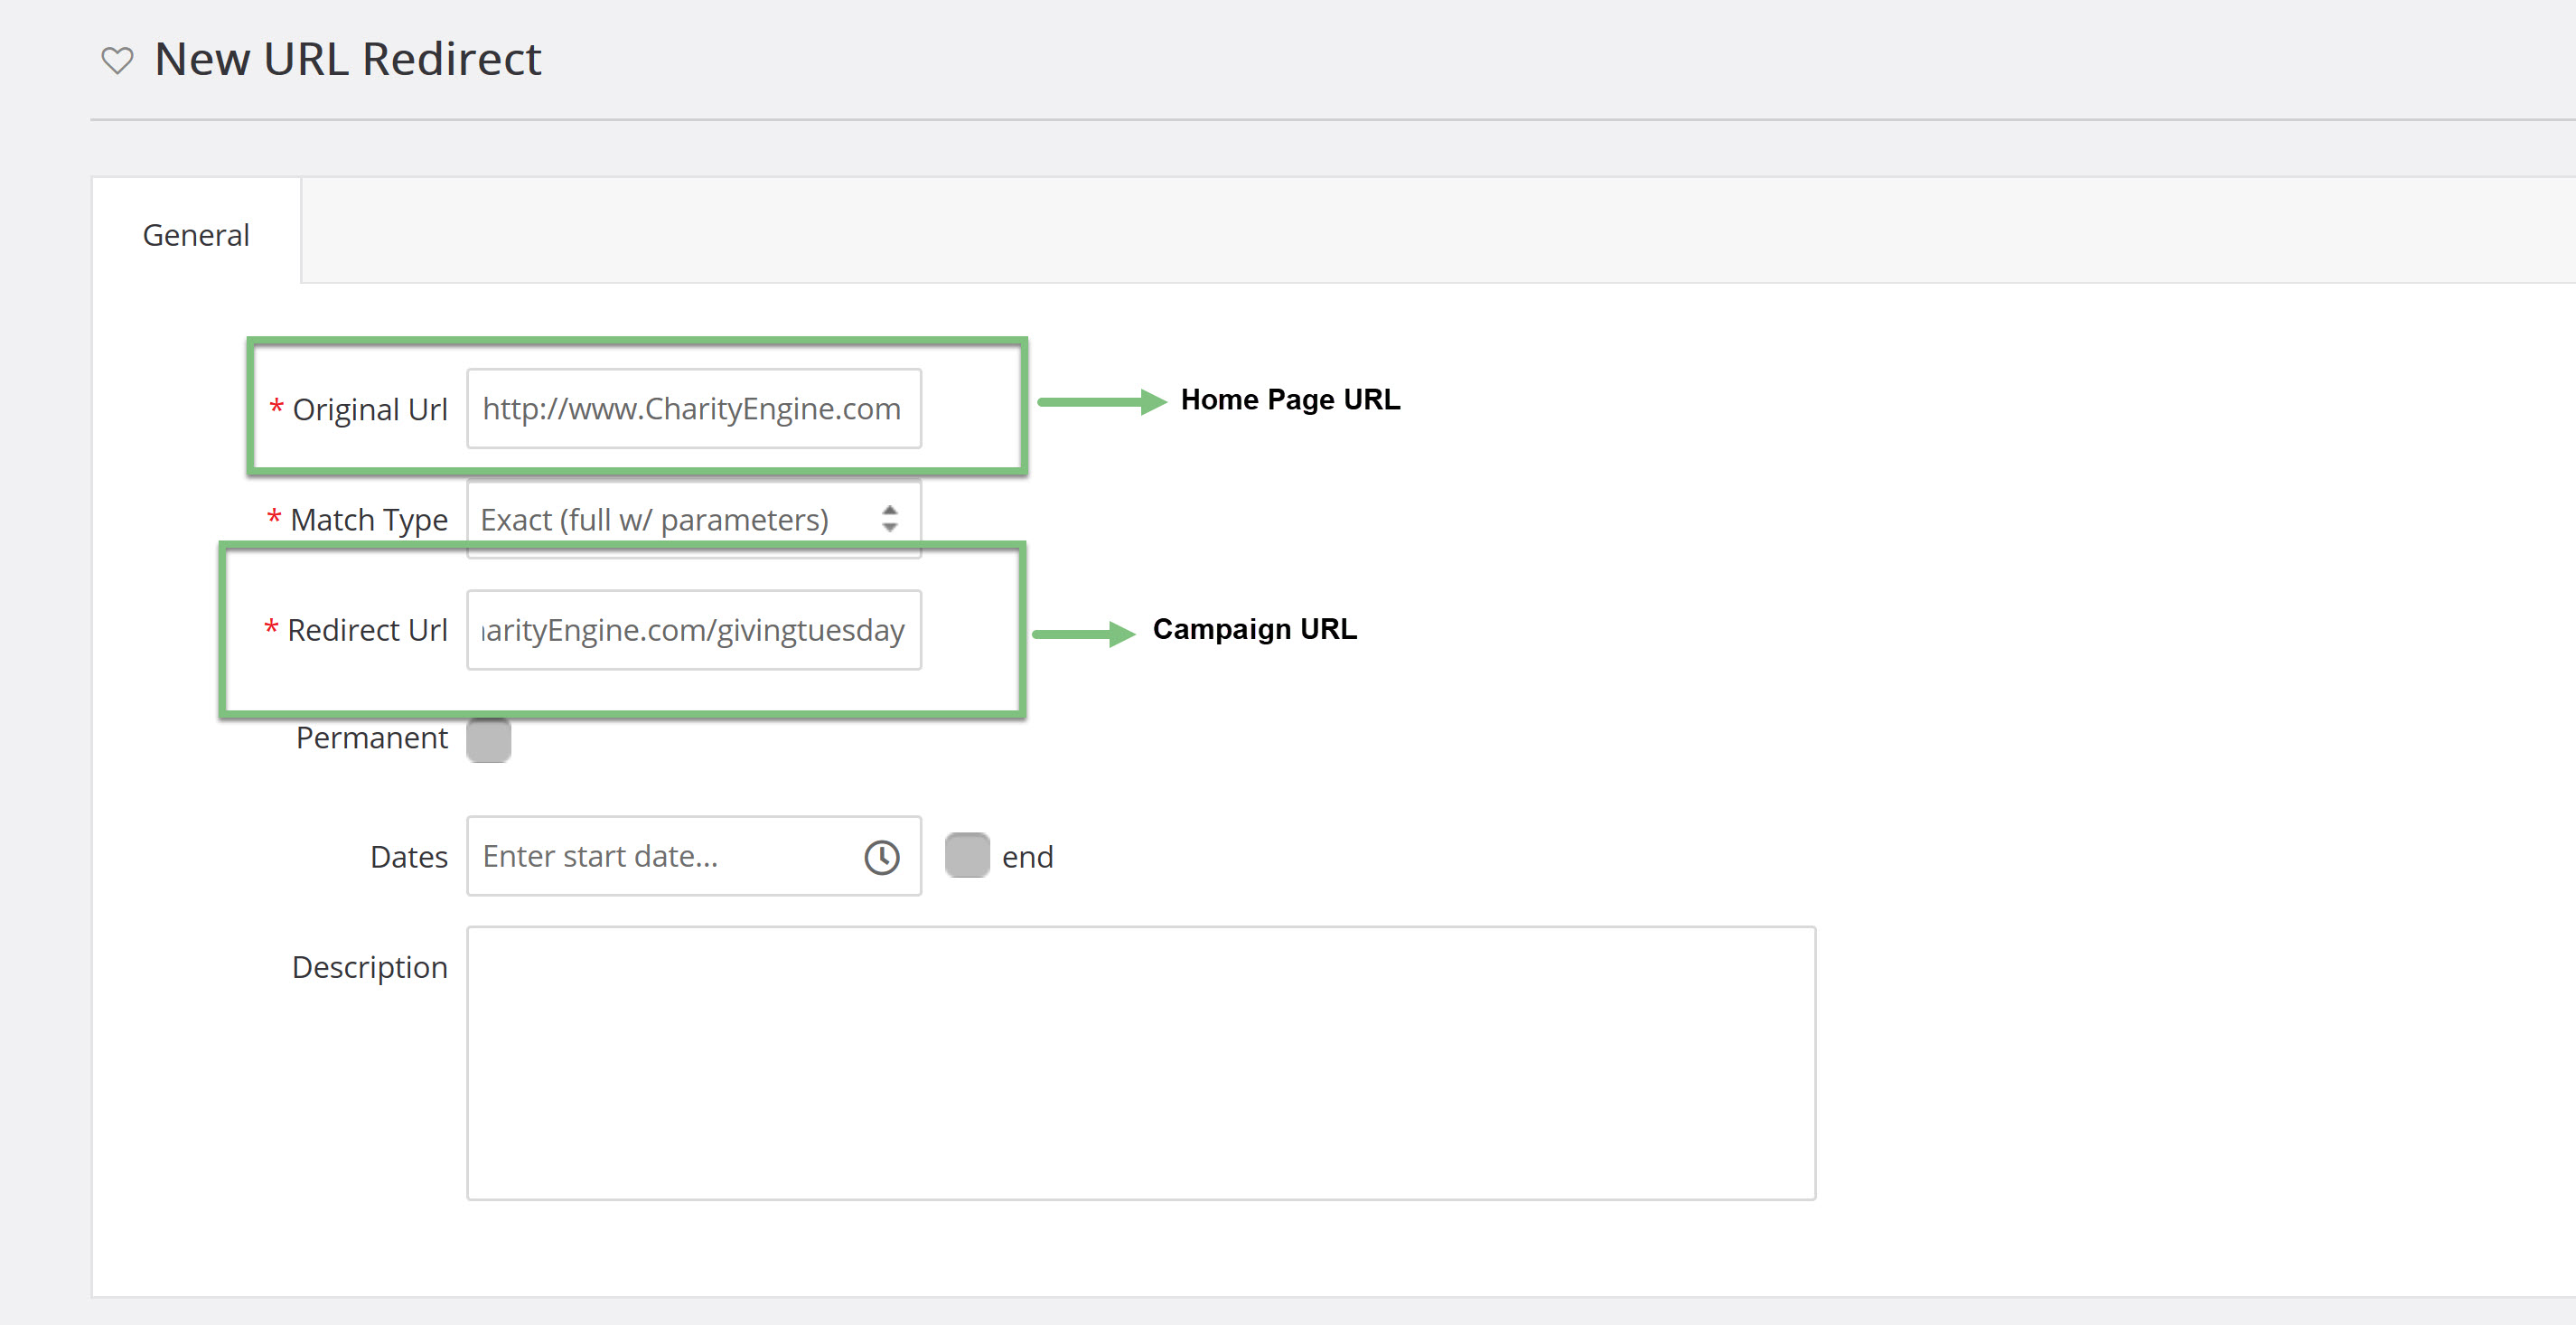
You will also want to configure the Match Type as either Exact or Partial.
If you select exact, the URL the donor enters will need to match exactly what you have configured to be redirected to the new URL.
If you select Partial, if the URL entered has most of the same characters, the donor will be redirected to the new URL
The last configuration you will need to make before saving your work is deciding if this is a permanent redirect, or if this will have a start and end date.
If this redirect is due to a new home page URL, you would check the box for permanent.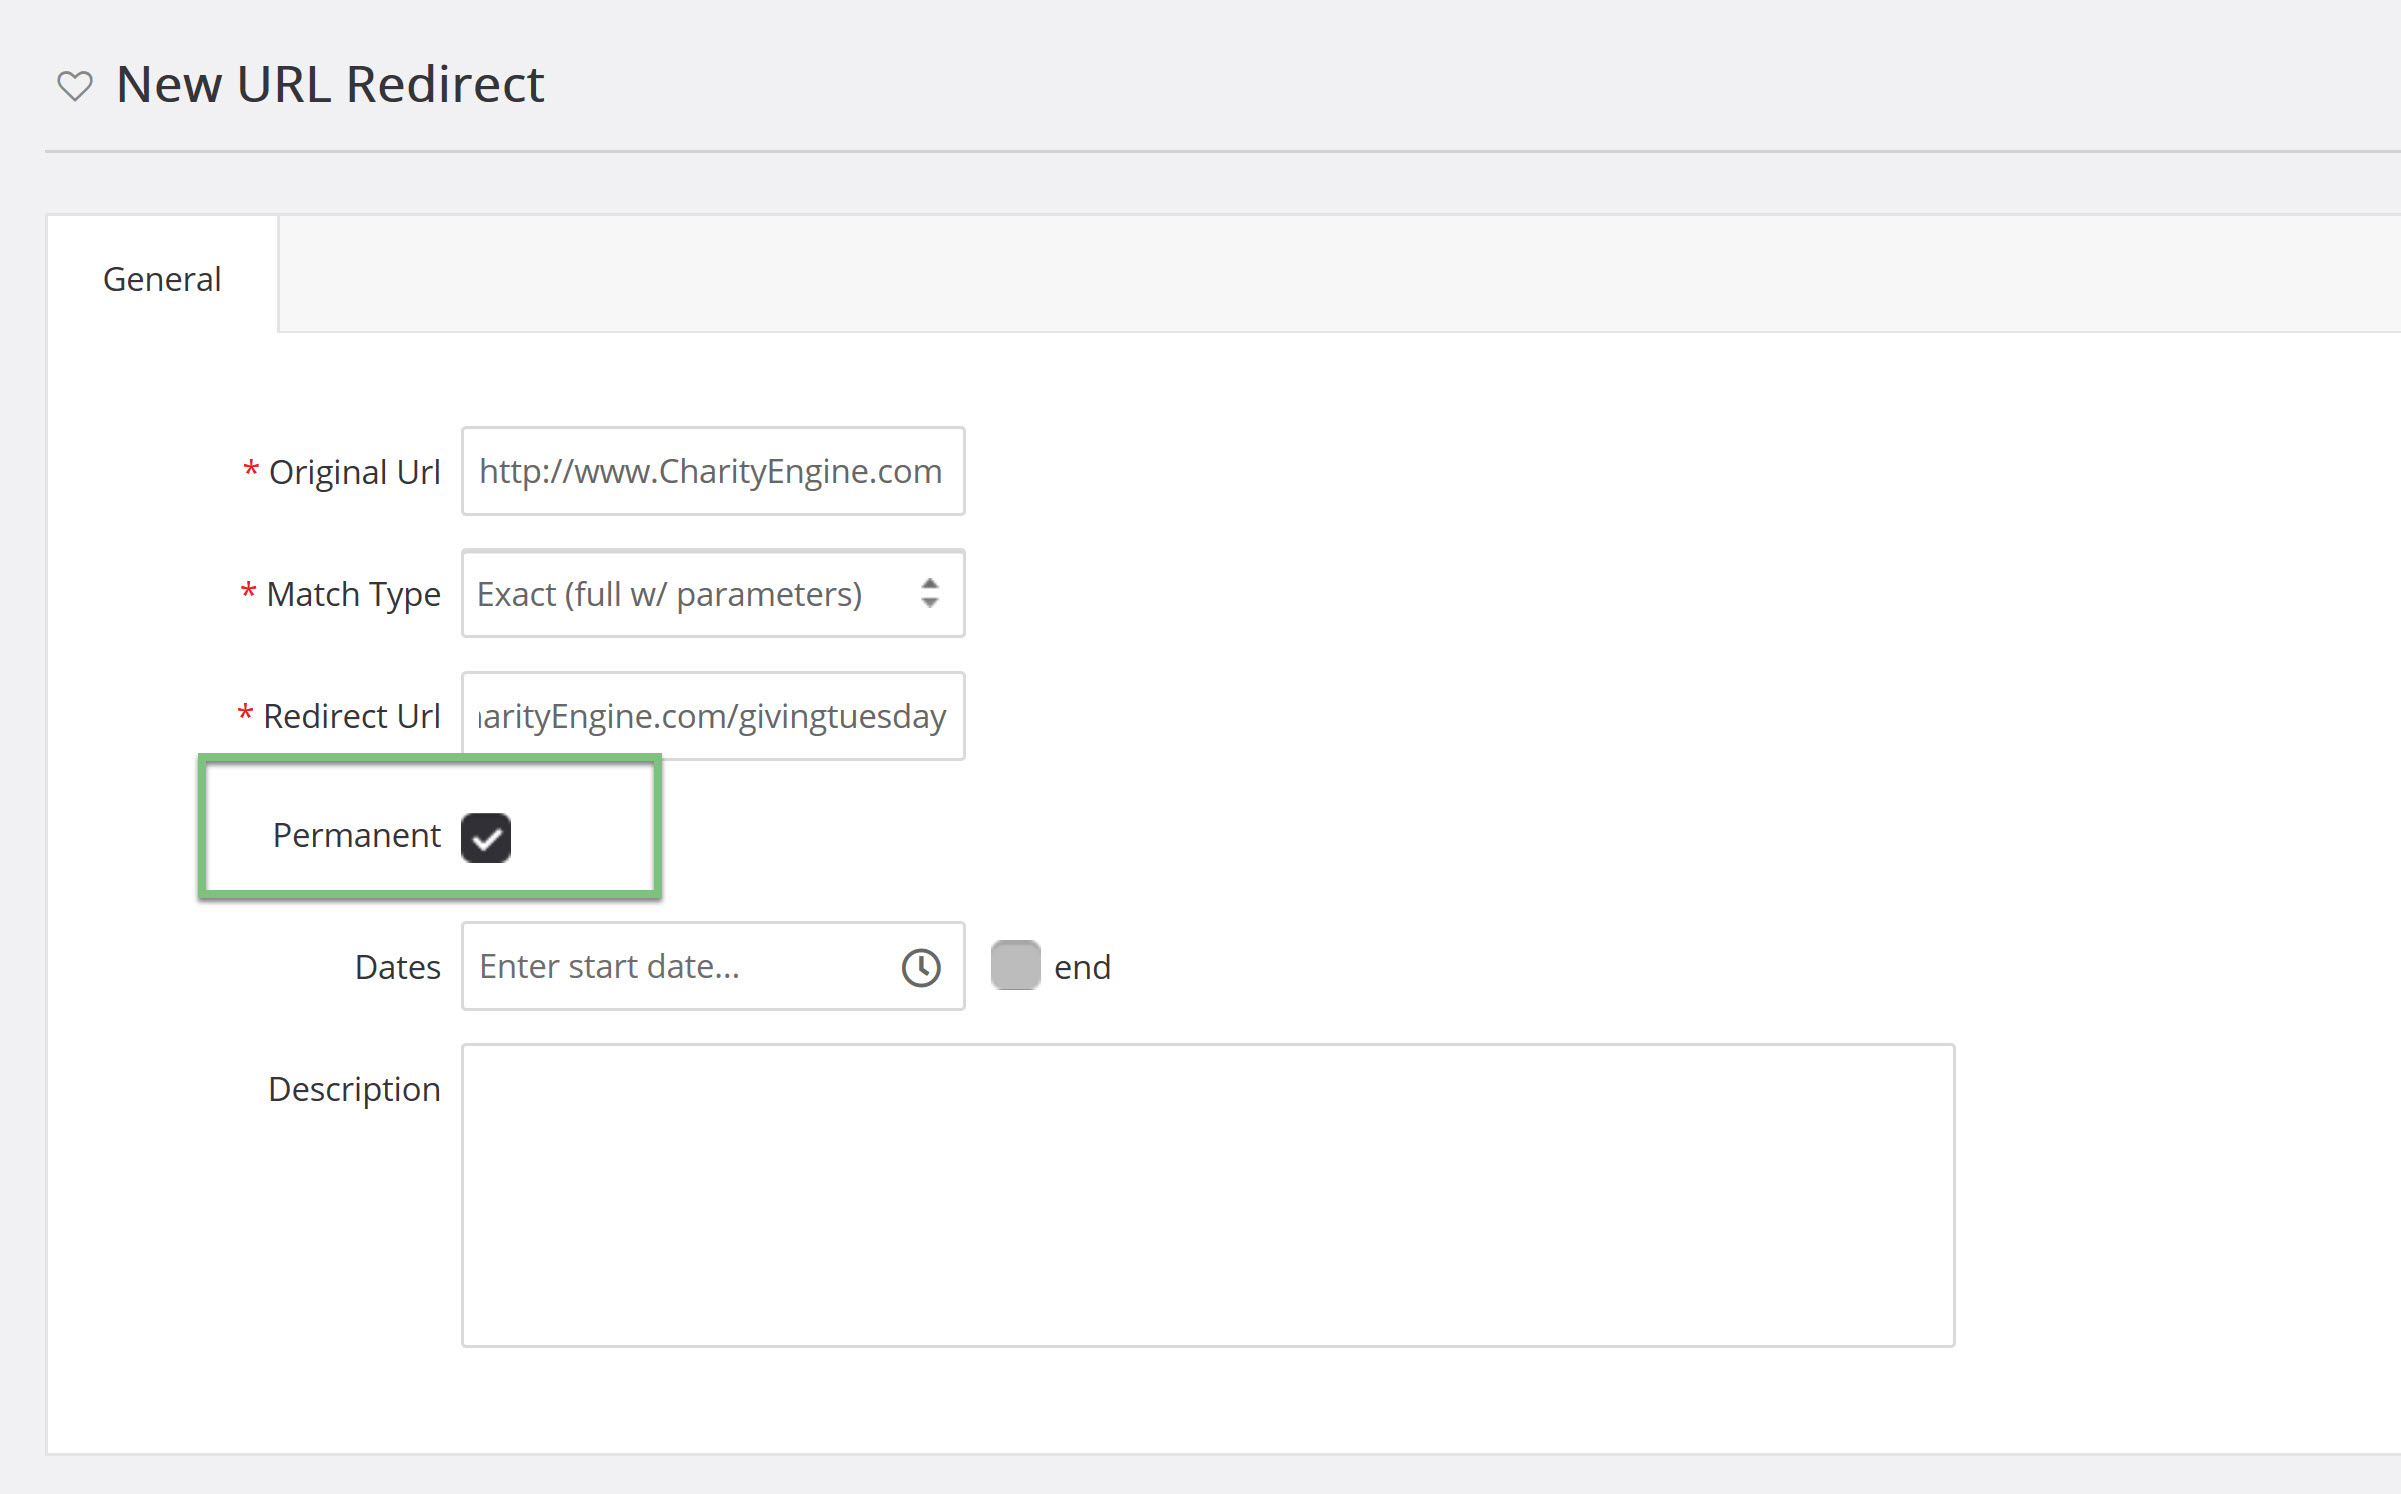
If this redirect is for a campaign, like Giving Tuesday, you may only want your donors to be redirected for the duration of the campaign. Enter your start and end dates to only have this redirect for a specific duration of time.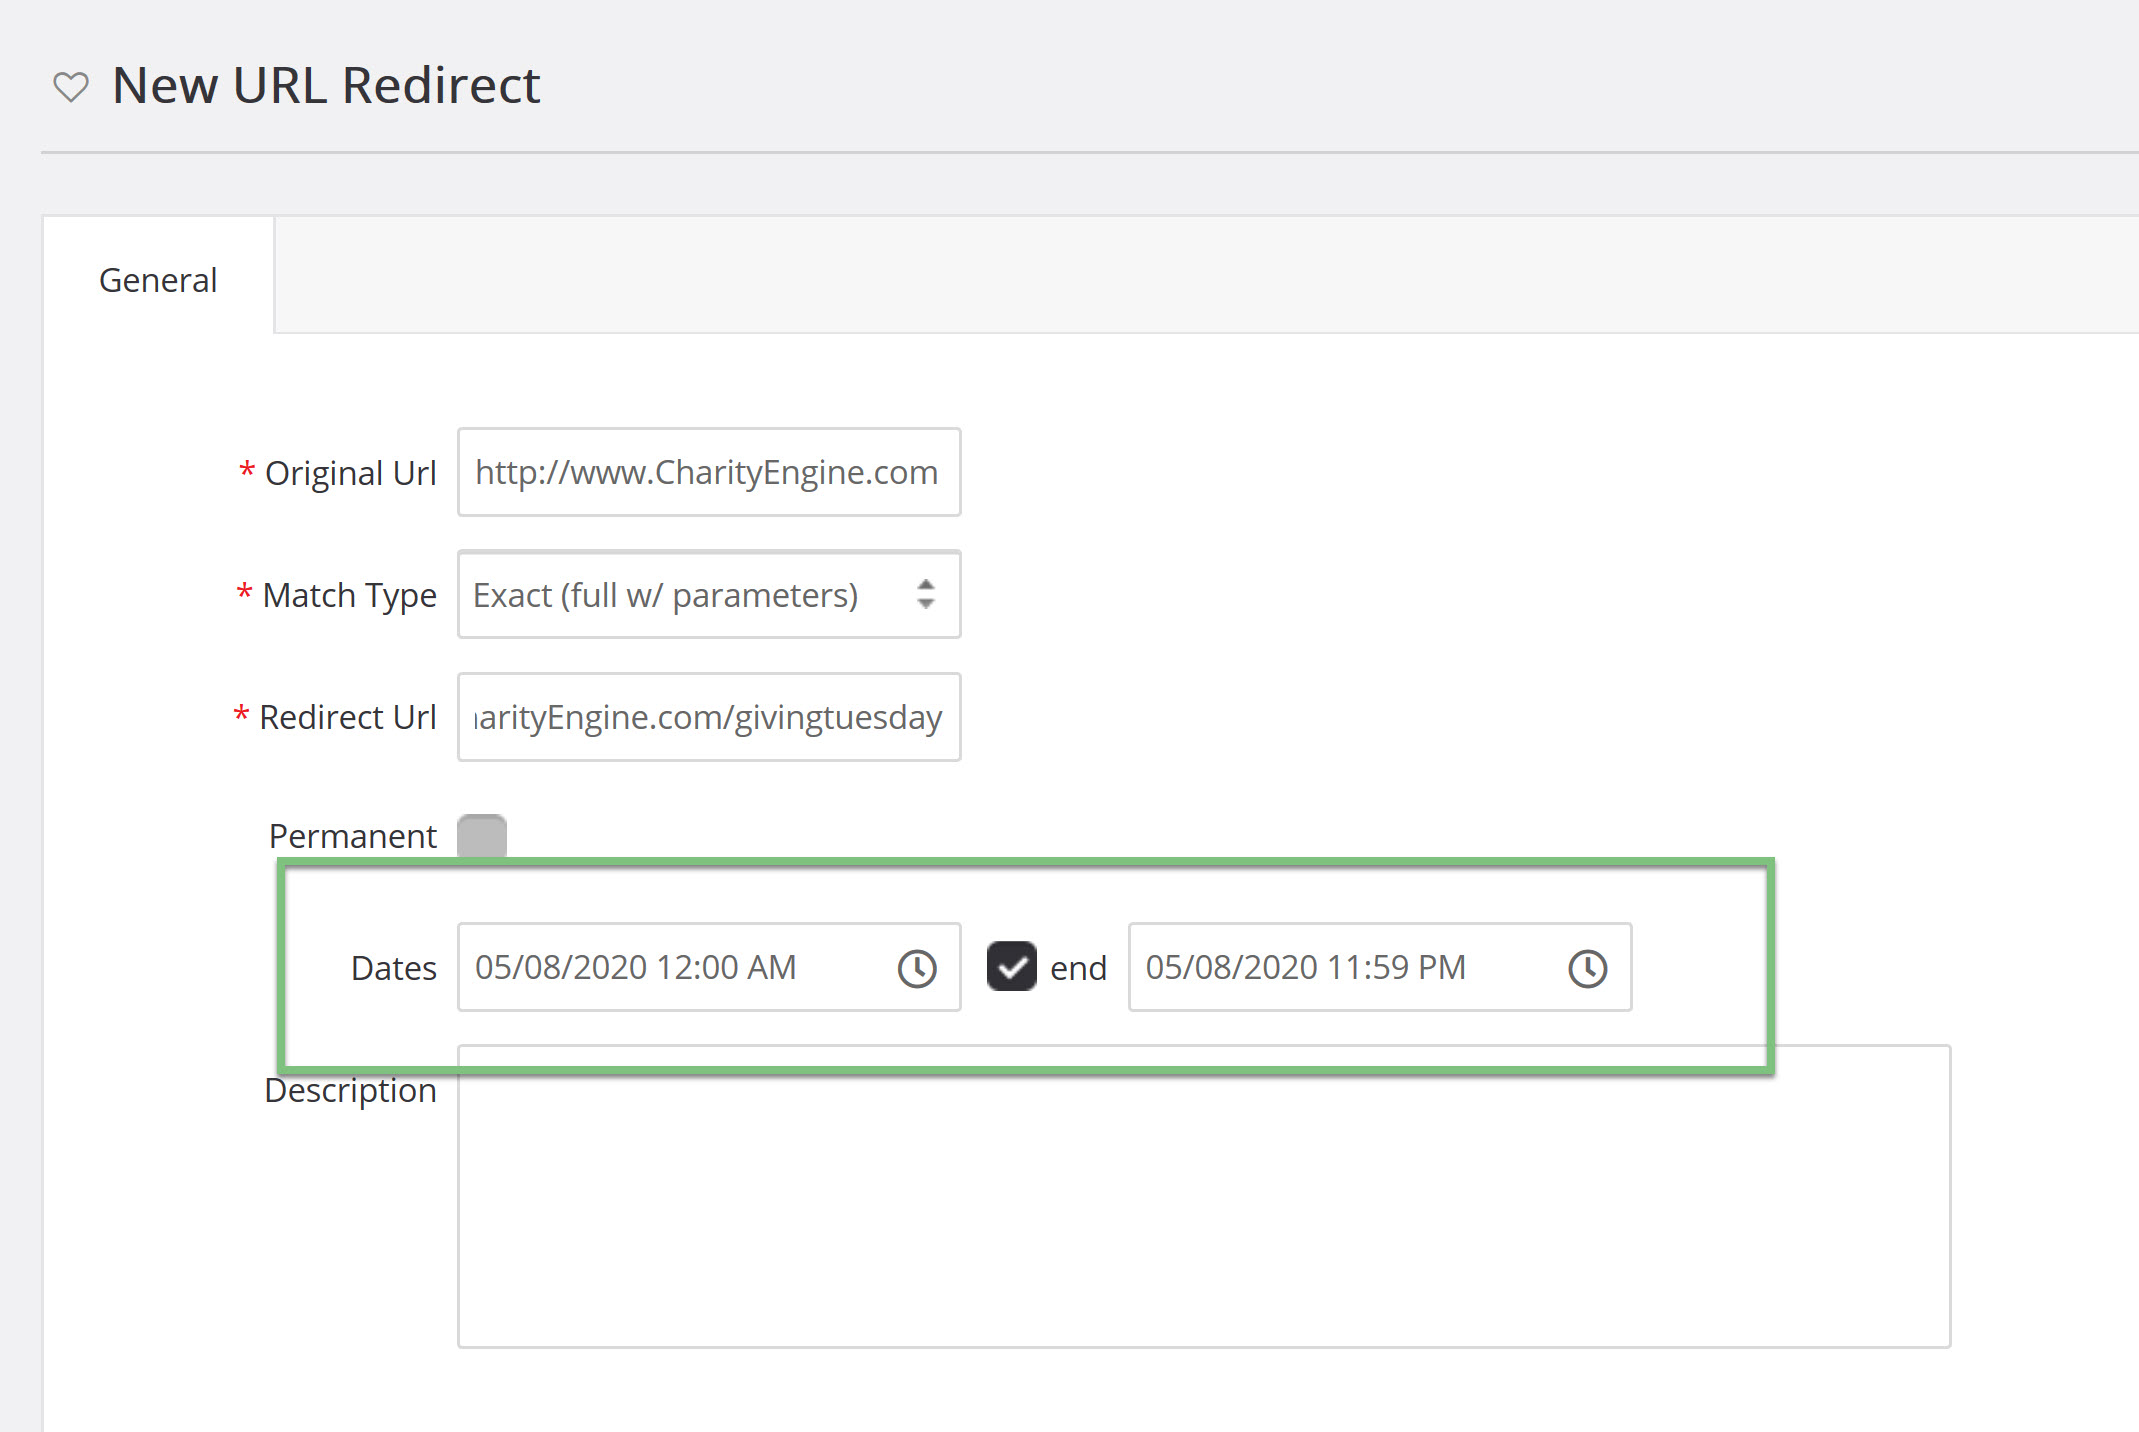
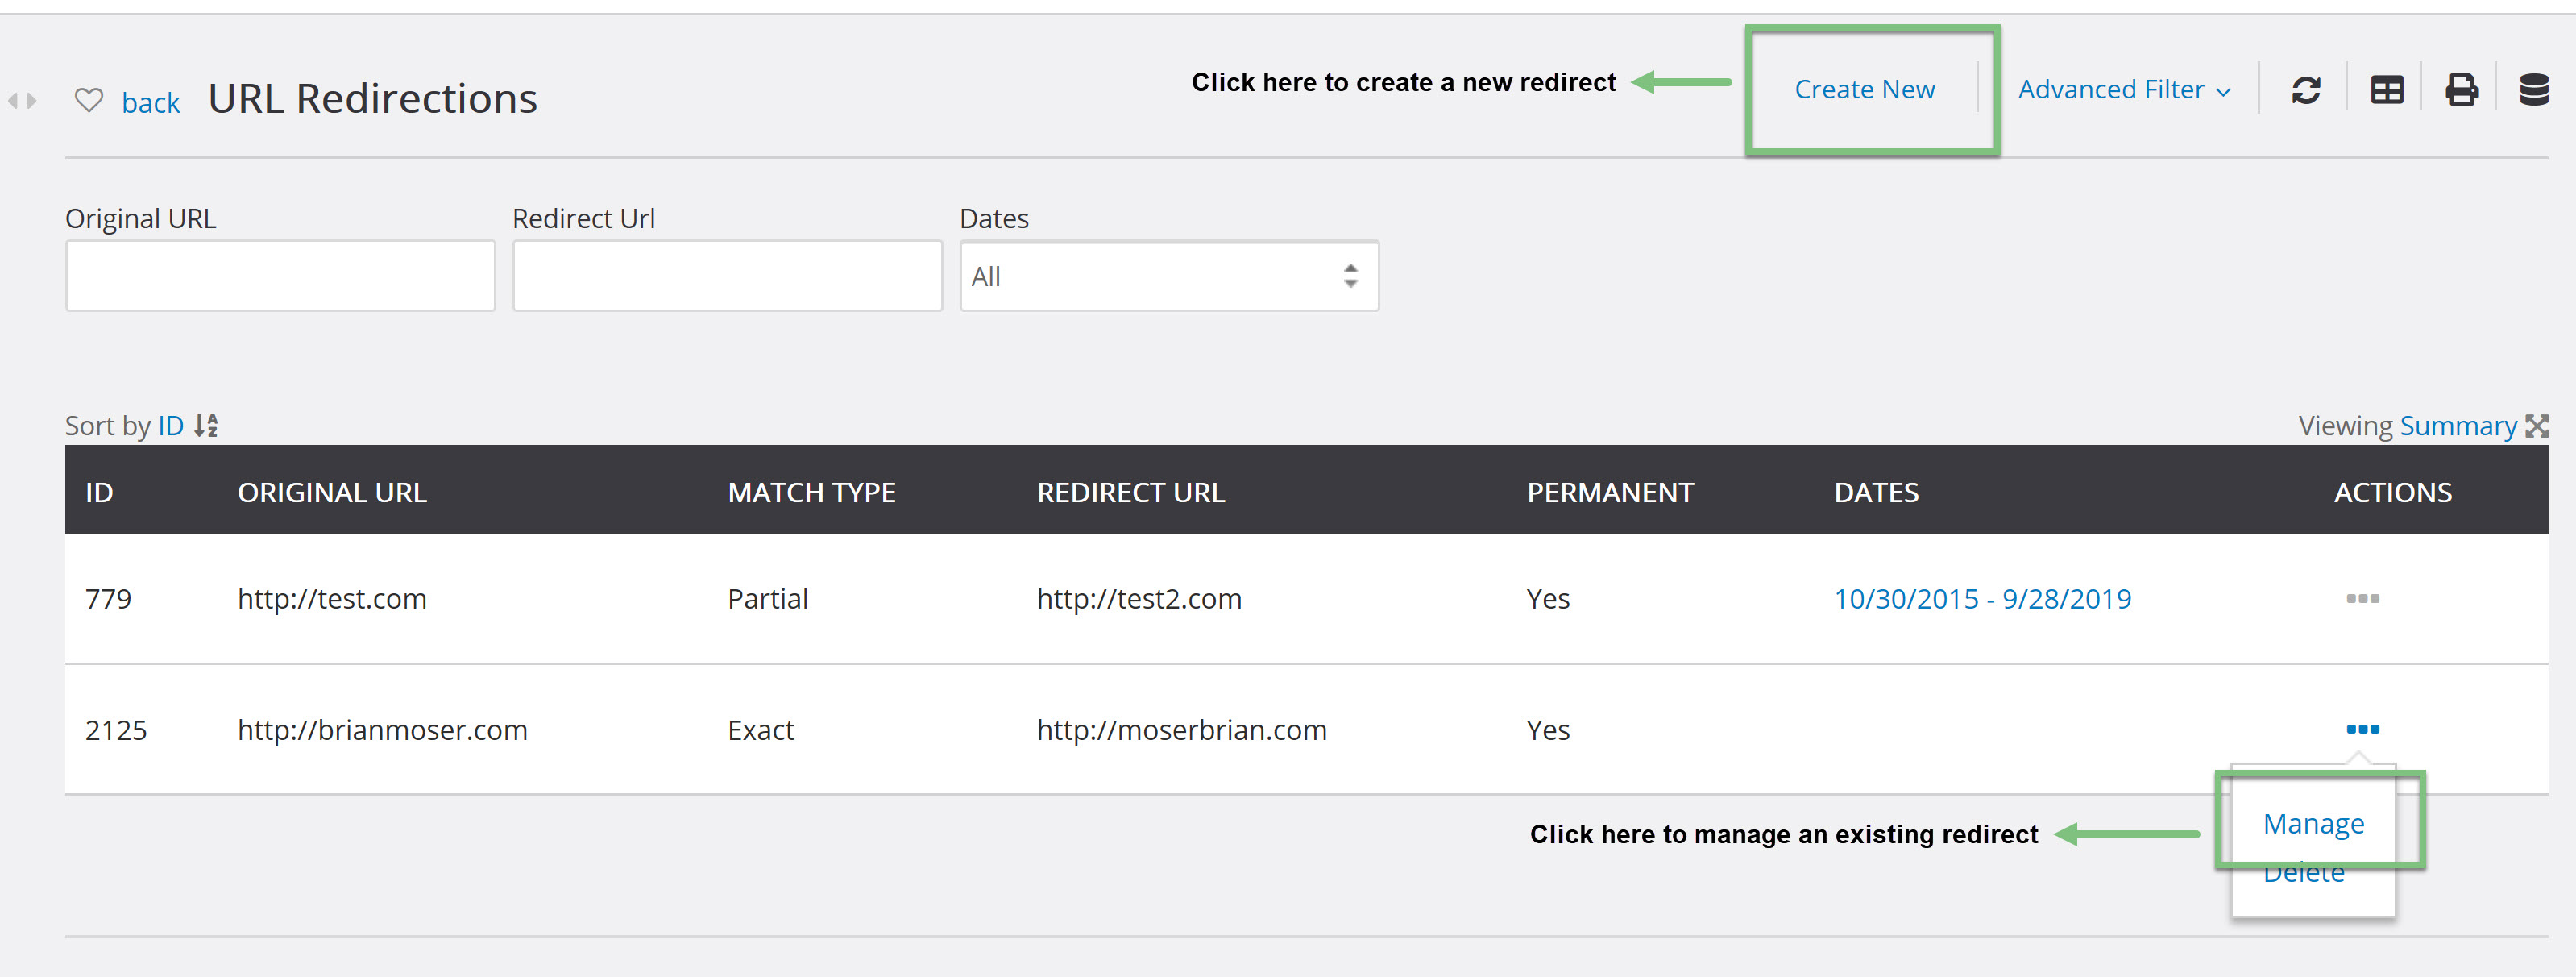
If you need to make any changes, such as change the redirect from permanent to have an end date, or change your end date, this can be done at any time by clicking the manage button under the actions column.