
Introduction
When creating your form, one thing you will want to consider is creating opt-in lists for contacts to subscribe to. This can be done in two different ways, either automatically assigning a contact to an opt-in list once they agree to receive emails, or allowing the contact to select the opt-in list they want to subscribe to, which is more of a manual process.

Table of Contents
Prerequisites
It is not required to create the opt in list prior to creating your web form, however it will be easier to add the list to the form if it already exists. If you need assistance in creating a opt in list, please read this articleInstructions: Automatic Opt In Assignment
Step 1: Begin by accessing the identified web form. Navigate to the Online App > Web Forms > Search & Manage > locate the web form for update > ACTIONS > Manage
Step 2: For both creating a manual or automatic list, you will need to navigate to the Advanced Tab on the form
Step 3: Navigate to the Data sub-tab
Step 4: Click on Opt-In List
Step 5: For automatic assignment of contacts to an opt-in list, select the list you want them to be added to from the Available List drop-down and click ADD.
Step 6: The list will now appear below.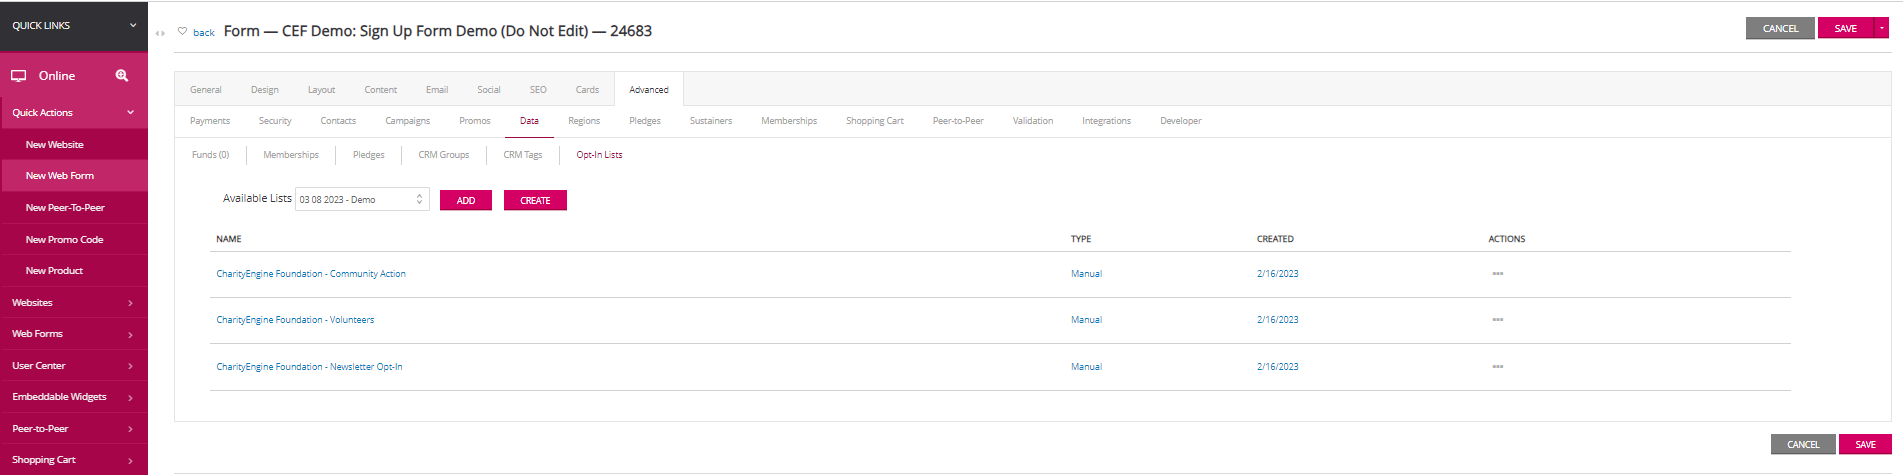
Note: You can add multiple lists for contacts to be added to. If you are automatically adding the contacts, contacts will be added to all the lists.
Instructions: User Selected Opt In Assignment
Step 1: Begin by accessing the identified web form. Navigate to the Online App > Web Forms > Search & Manage > locate the web form for update > ACTIONS > Manage
Step 2: If you would like your contacts to manually add themselves to opt-in lists, repeat set up as outlined above.
Step 3: Now, once you have added the list to the form, click on Auto listed under the Type column. 
Step 4: This will now reflect type as Manual
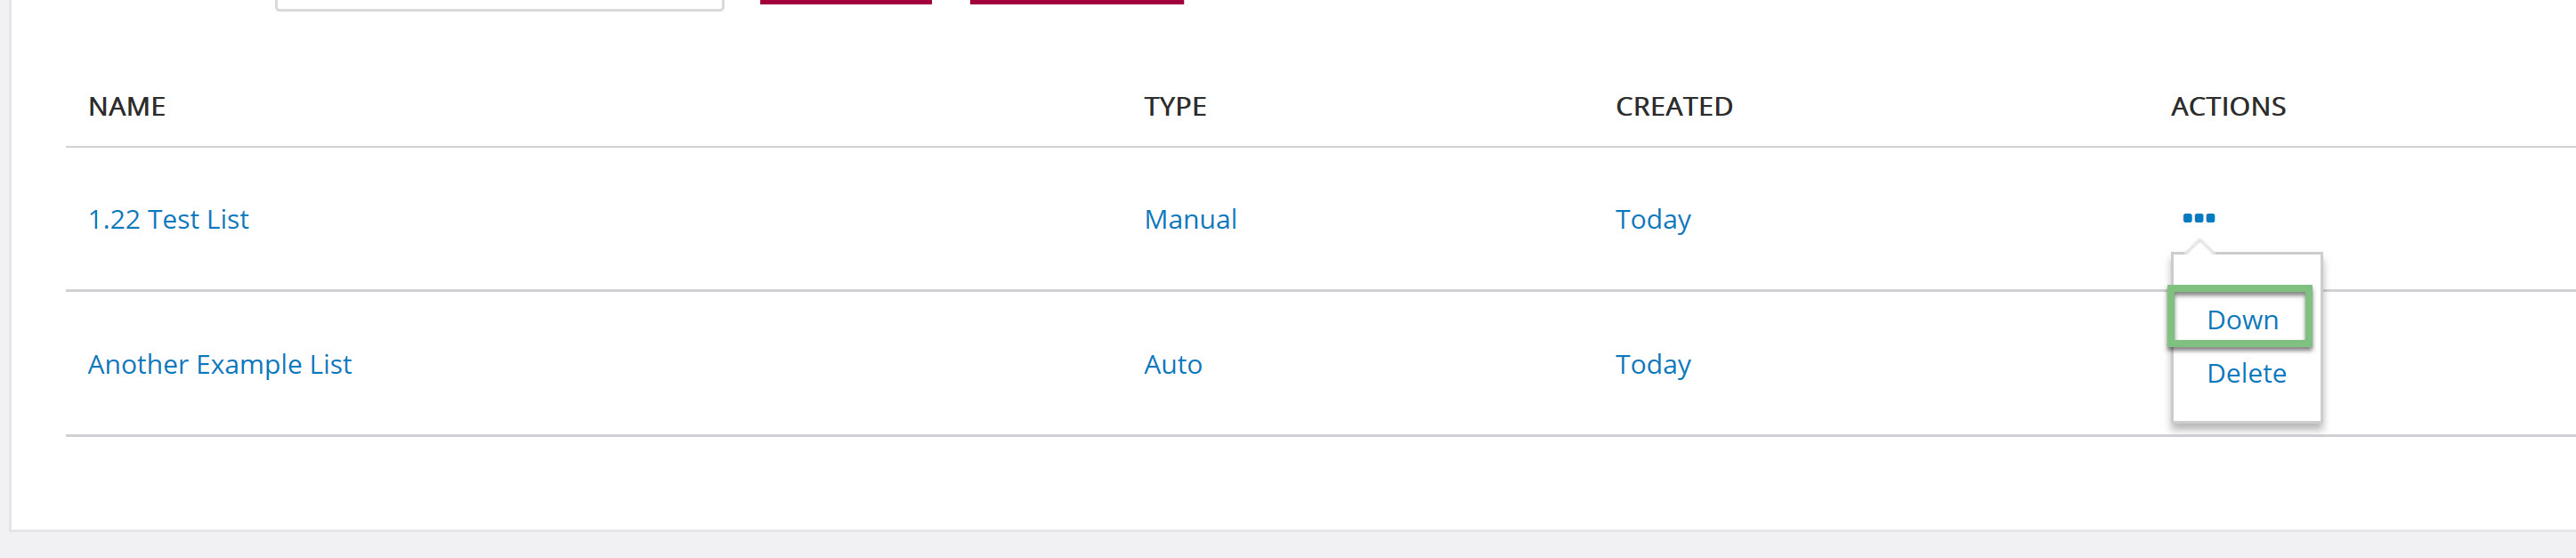
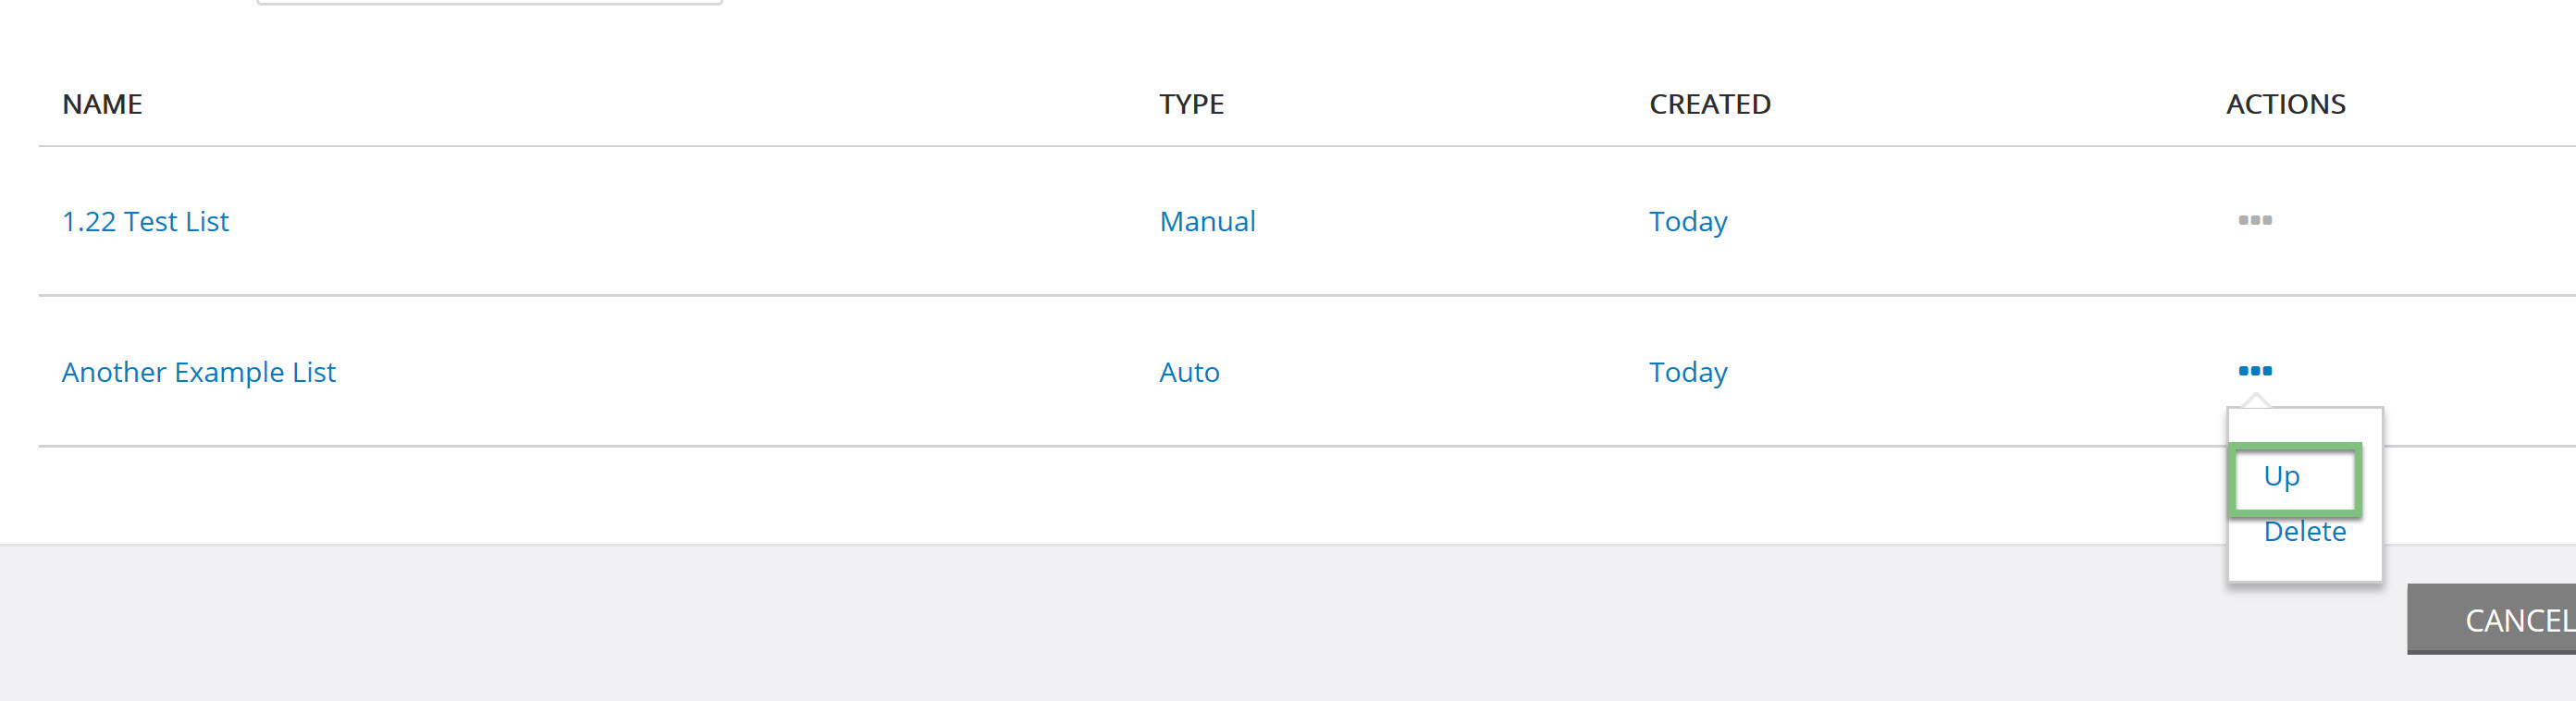
Note: The manual options provide an extra confirmation that the contact would like to be submitted to the opt-in list. If multiple lists are available, donors can choose which list(s) they wish to be added.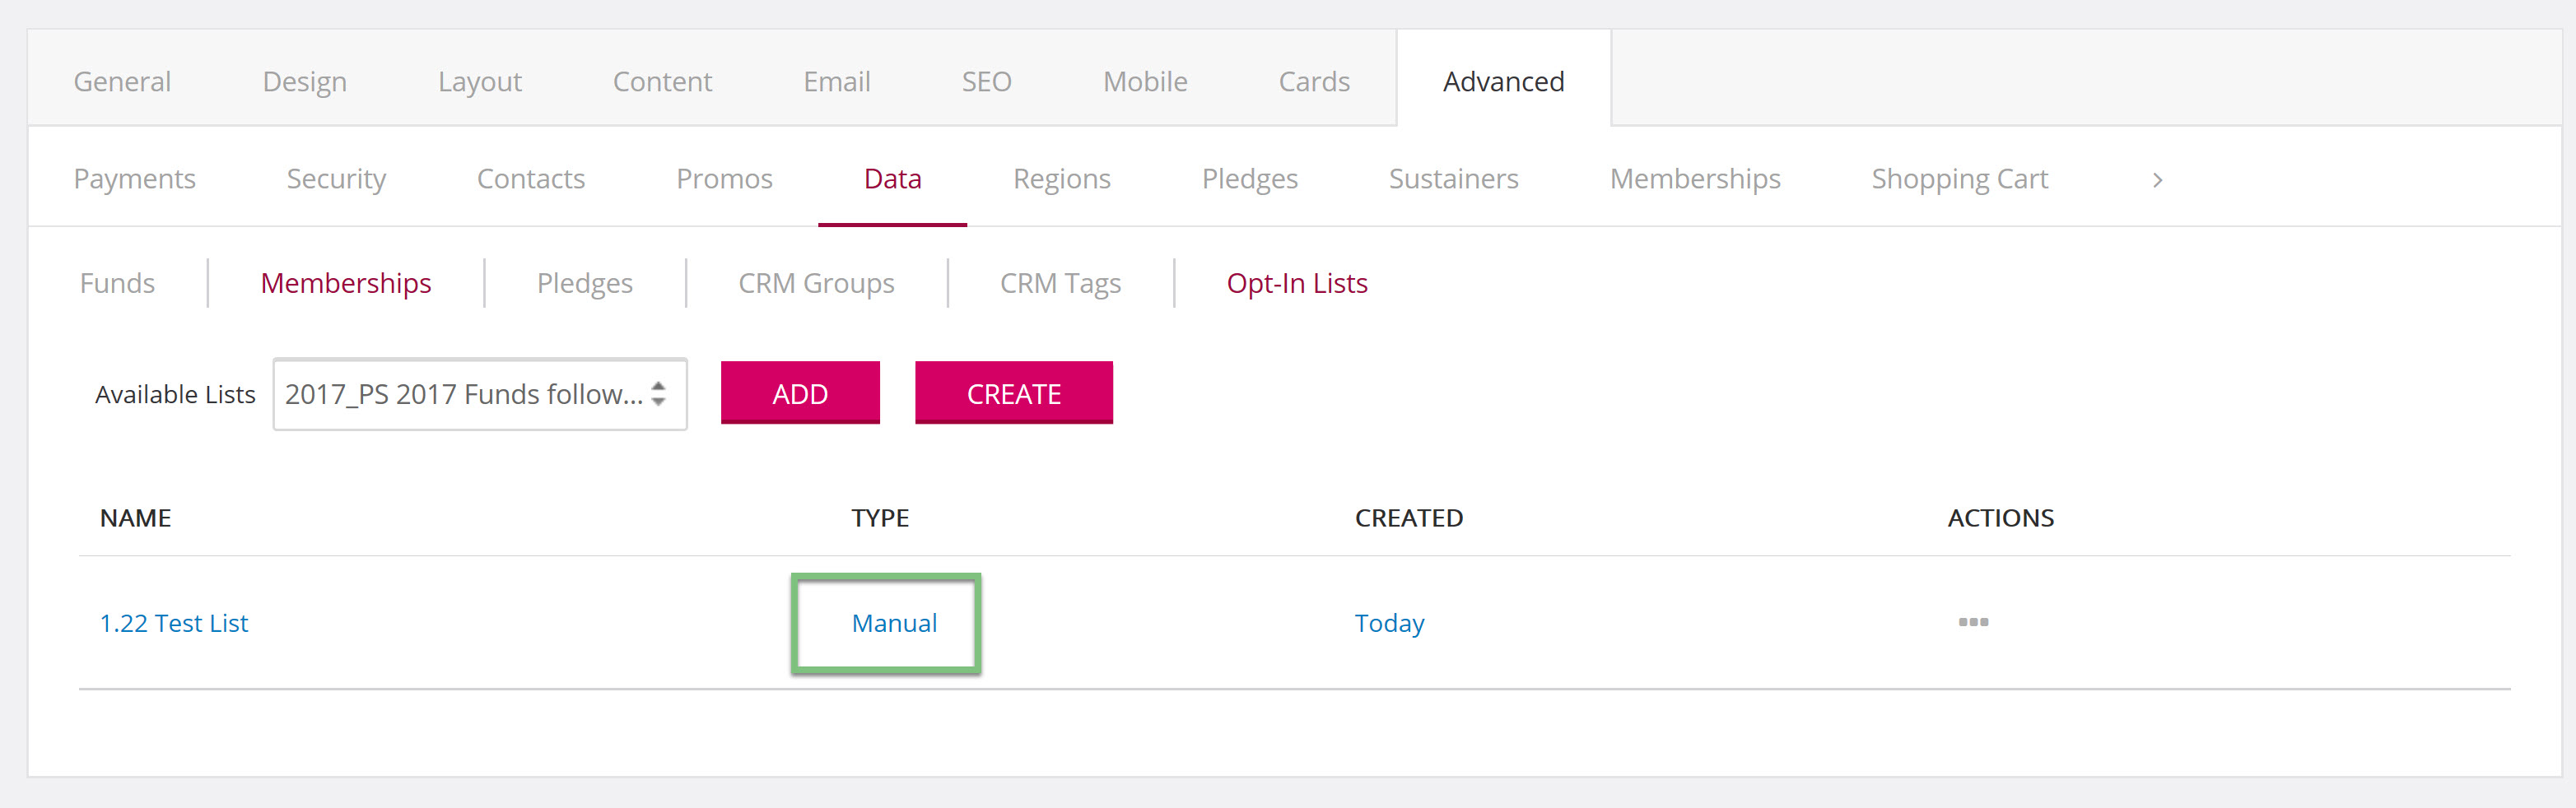
Step 5: If you have added multiple lists, you will be able to reorder how the contact will see them on the form under the actions column. Click Down or Up to move the list.
Note: the Up and Down option will only appear if multiple lists have been added.
Step 6: Navigate to the Layout Tab and create a new field under the section you want the list selection to appear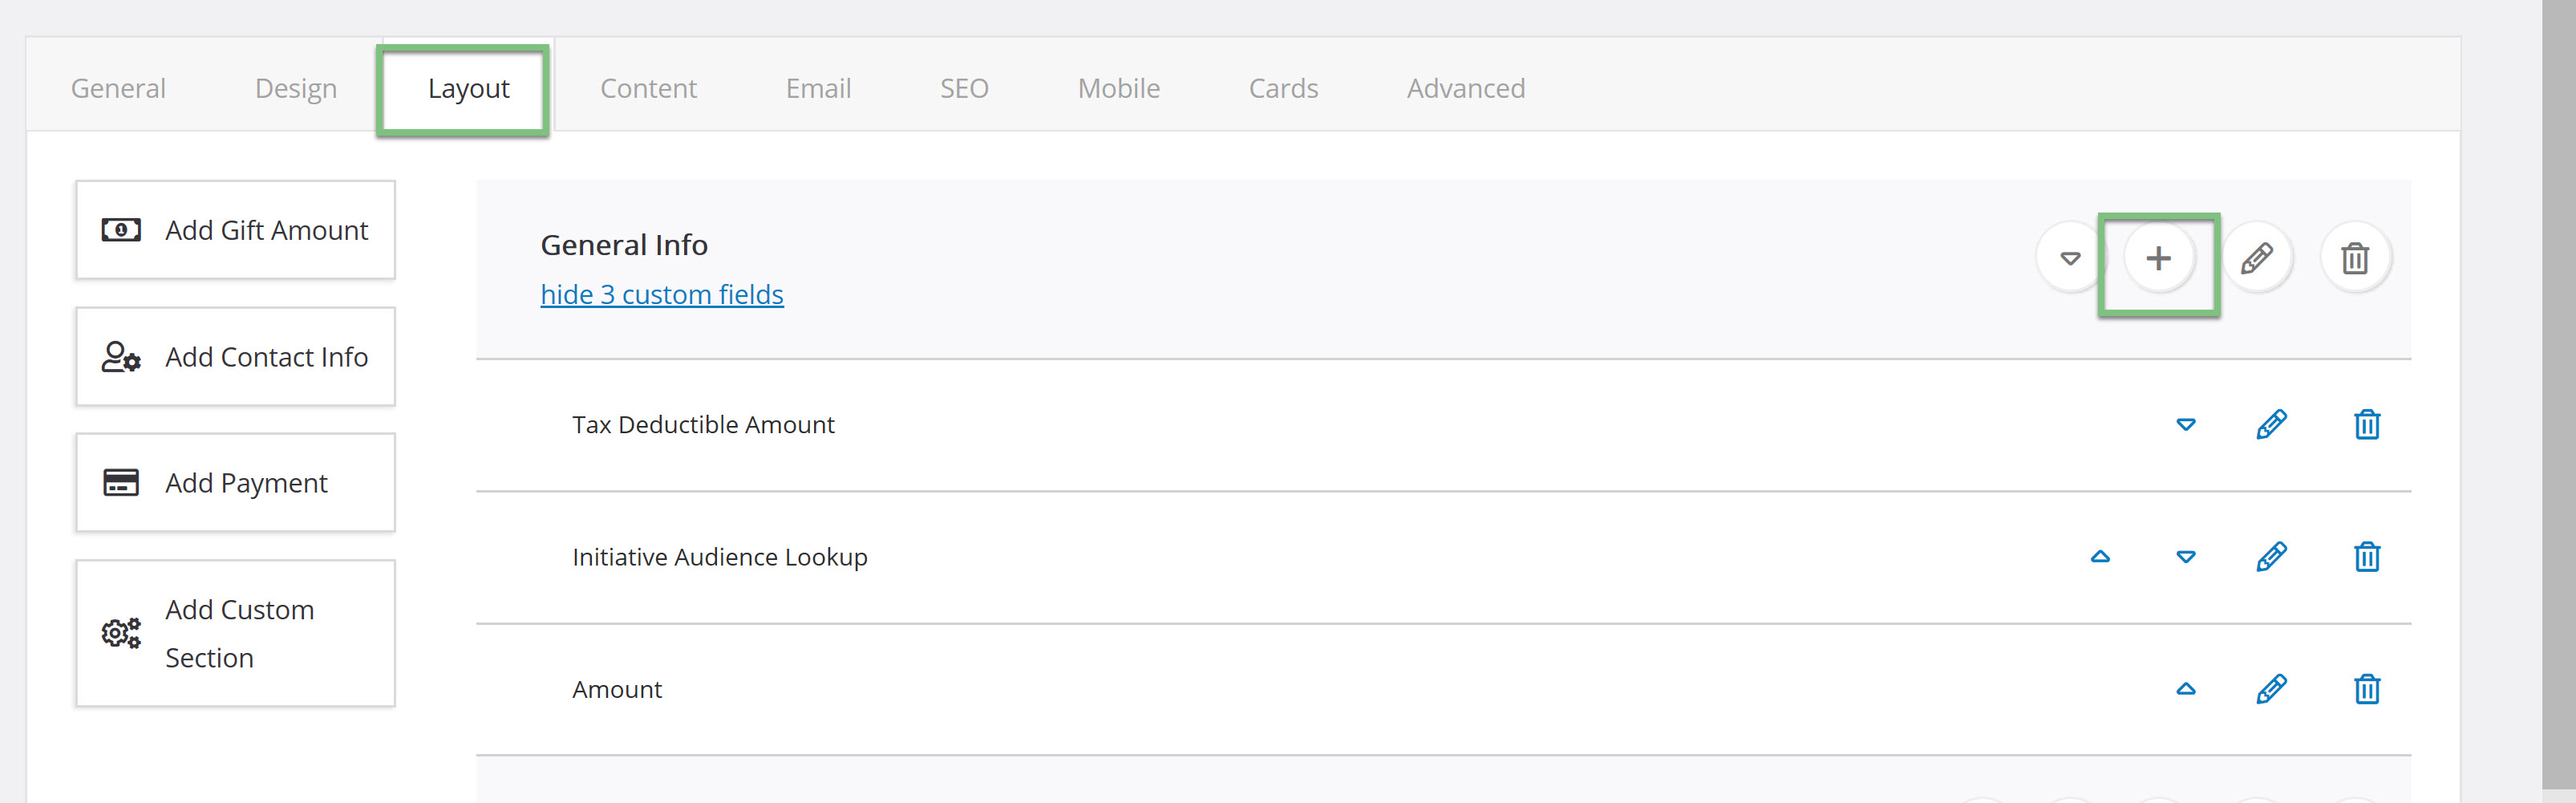
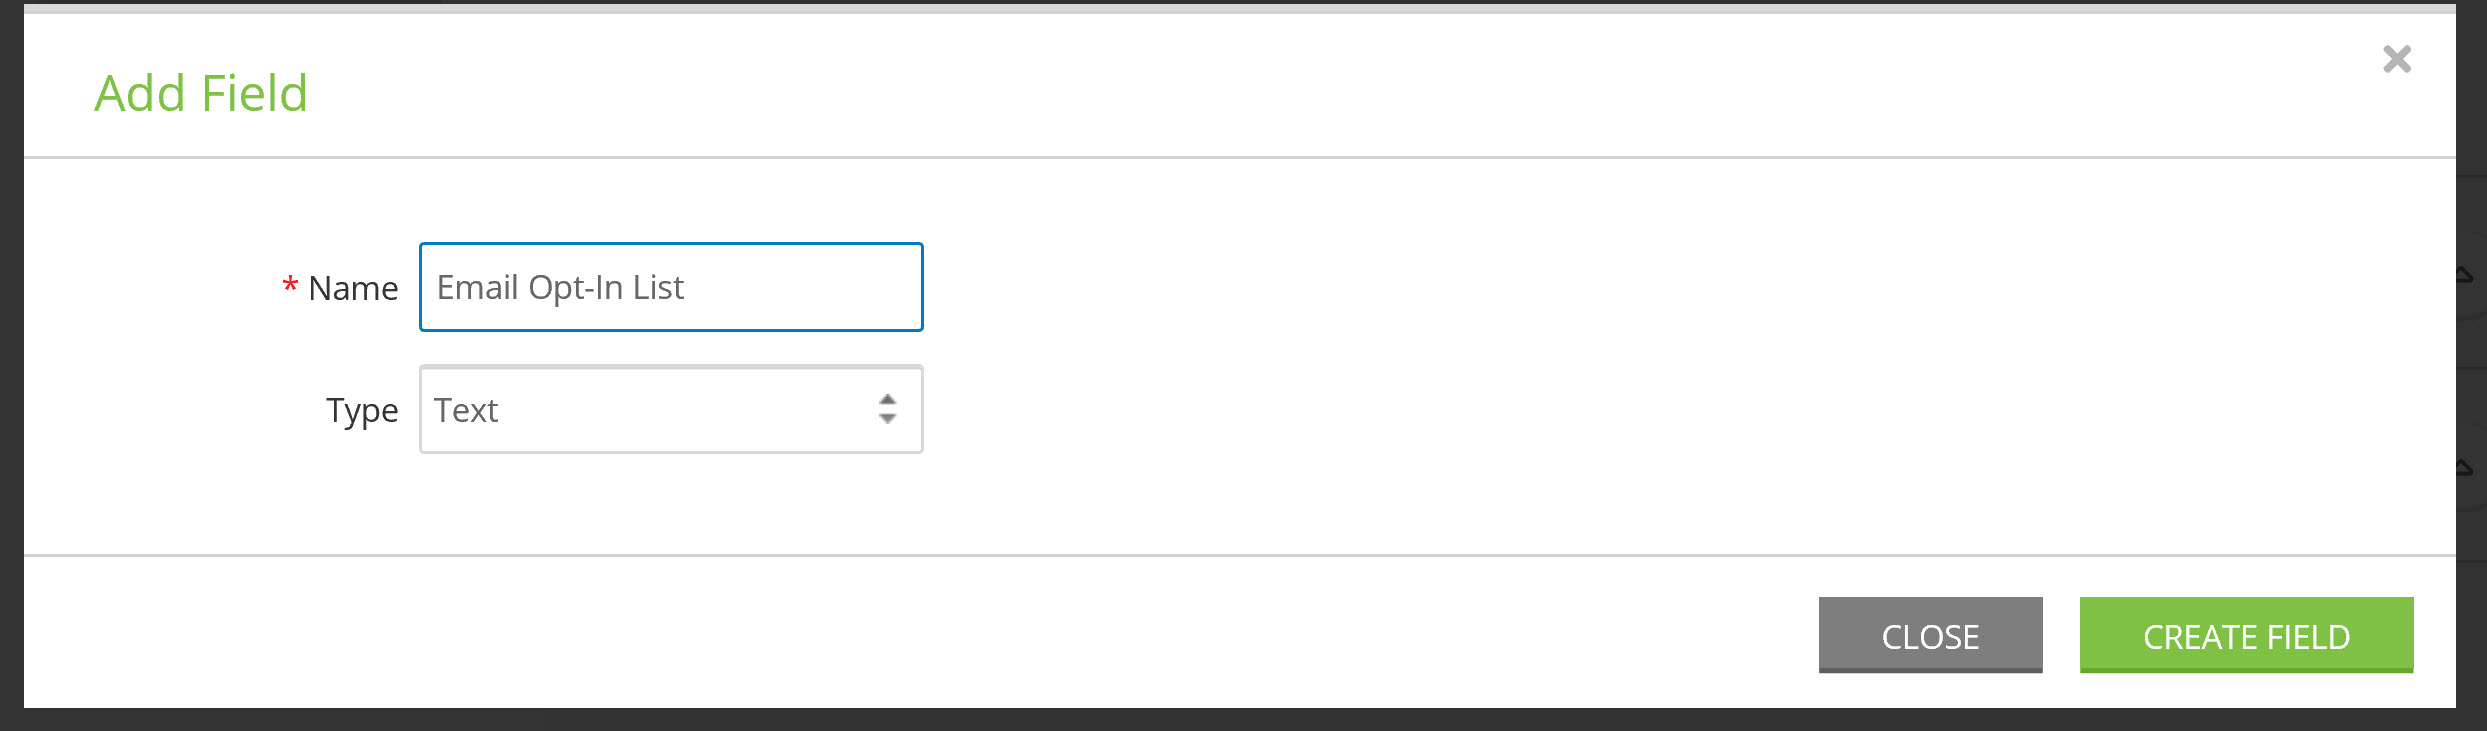
Step 7: You will need to name the field and create the field
Note: Do not worry about the Type drop-down as you will have to change this within the advanced settings of the field.
Step 8: To display the lists in this field section, click on the Pencil icon to manage the field.
Step 9: Use the Type drop-down to change the type of field to Email Opt-In List.
Step 10: Click SAVE to secure the changes.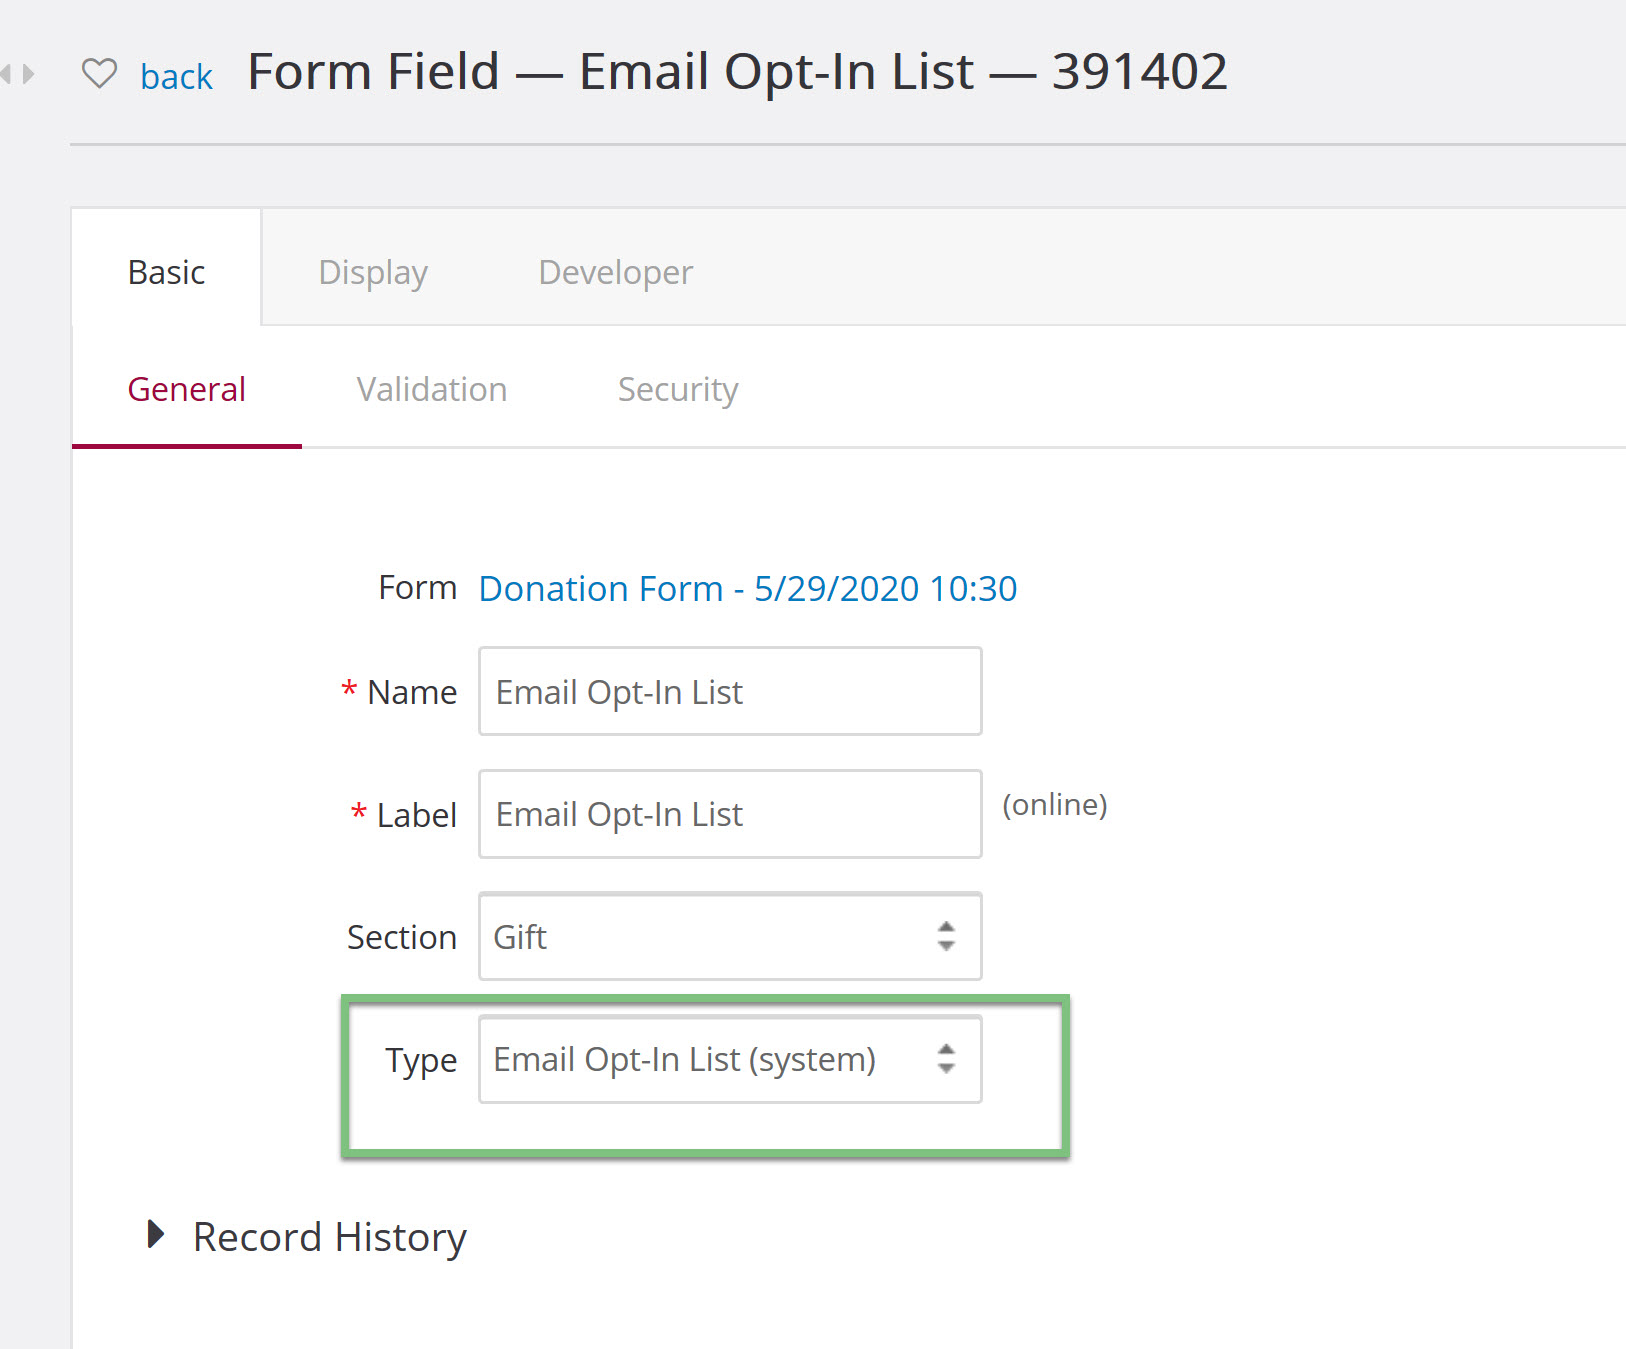
Step 11: When you view your form online, you will now see checkboxes with the Opt-In lists you created previously.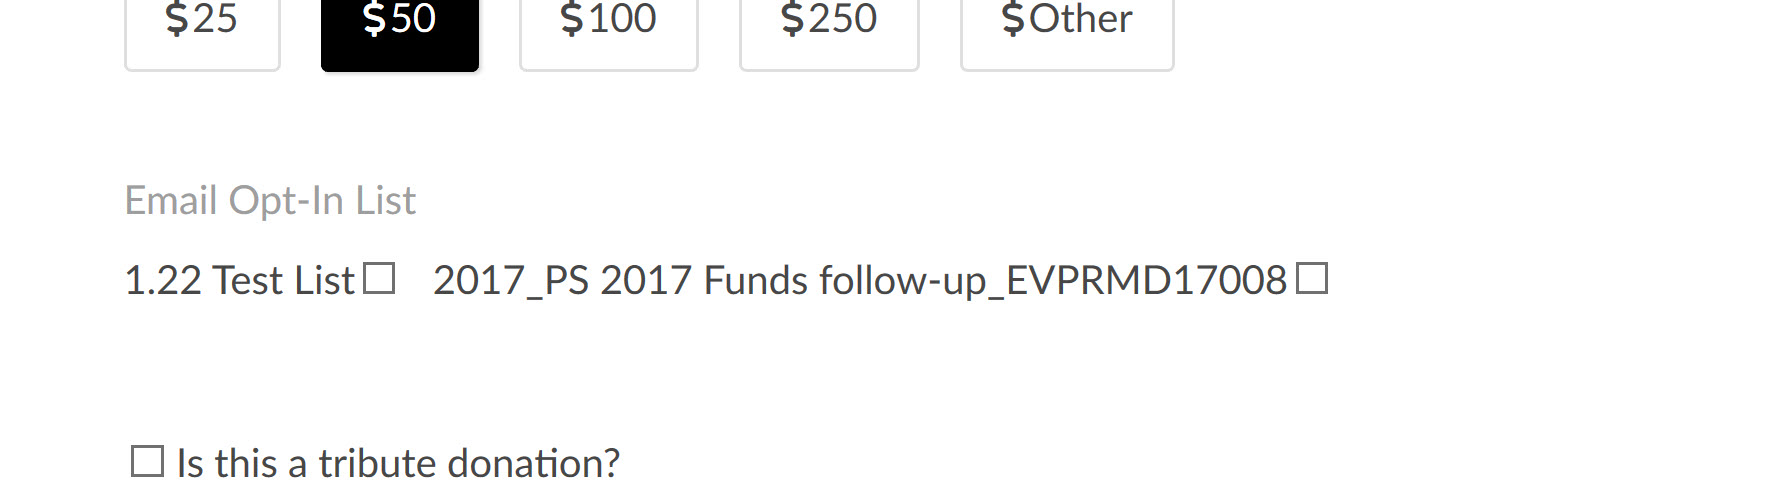
FAQs & Additional Reading
Q. How do I create an SMS/Text Message opt in list for user opt in?
A. Learn more in our article Web Forms: How to Create an SMS Opt-In Form for SMS Campaigns
