Introduction
This Quick Start Guide shows the fastest way to get an event and its registration form up and running together, so an organization can start taking registrations right away. Additional configuration – promo codes, sessions, auctions, volunteer management, and more – can always be layered on afterward, and is covered in separate articles. This guide is our best practice for getting started with events: it shows the functionality quickly and allows a full end-to-end test of the registration experience, so all that's left afterward is to further refine the event as needed.Table of Contents
Why Create the Event and Form Together?
Rather than building a web form and an event separately, the Event Form option creates the web form, the event, and its tickets all at the same time – typically in under two minutes. By the end of that short setup, there's a fully functioning web form that can take registrations, take donations, send a receipt with event information, display a success page, and create a registration against the event, all without any additional configuration.
Instruction - Create a New Event and Form Together
Step 1: Navigate to Online > Web Forms > Search and Manage.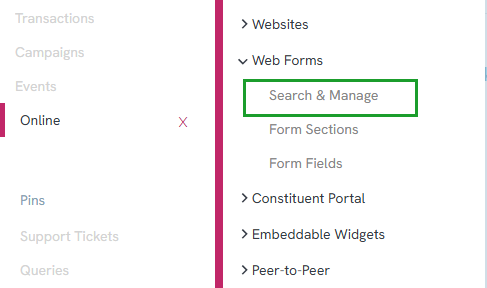
Step 2: Click the plus icon to create a new record.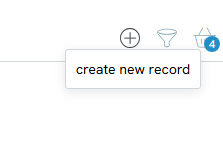
Step 3: In the Create New wizard, select Event Form.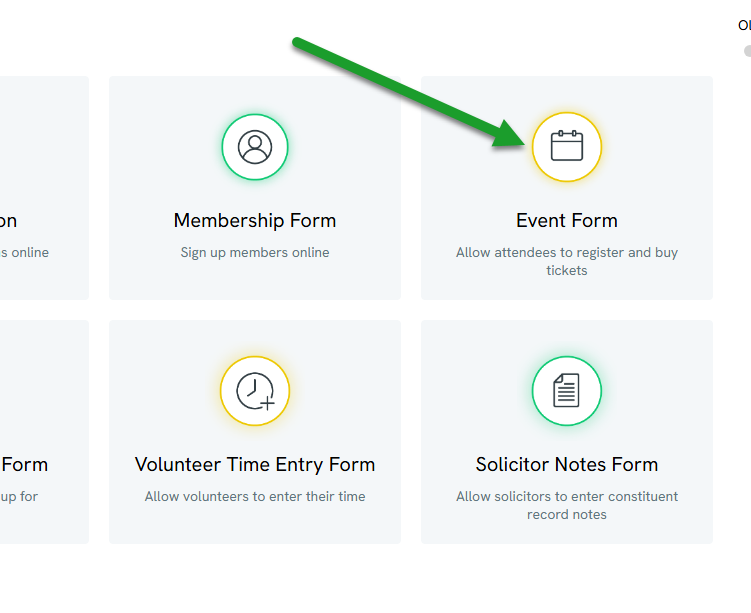
Step 4: In the pop-up, on the first step, choose whether this form is for an existing event or a new event. This example is obviously for a new event. Enter the Event Name, Start Date, and End Date. The event creator is automatically added as the event manager. A Description is recommended, since it defines the event in more human terms, and additional contact details (phone numbers, emails) can be added as well.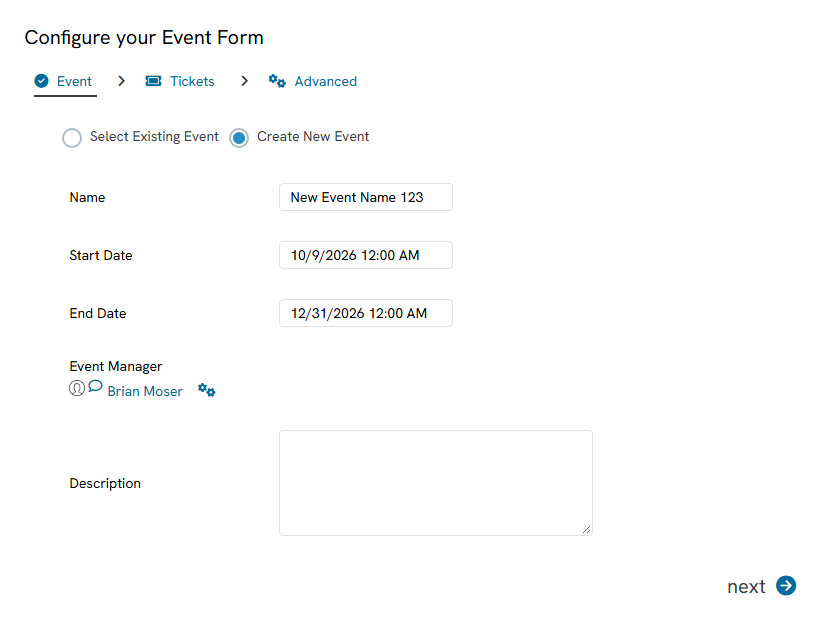
Step 5: Click Next.
Step 6: On the Tickets step, create at least one ticket by entering a Name and Price. If the ticket has a limited quantity, enter it in Number Available (0 means no limit); if limited, a Sold Out Message can also be added. Additional tickets can be added here as well (for example, a second ticket with a smaller limited quantity).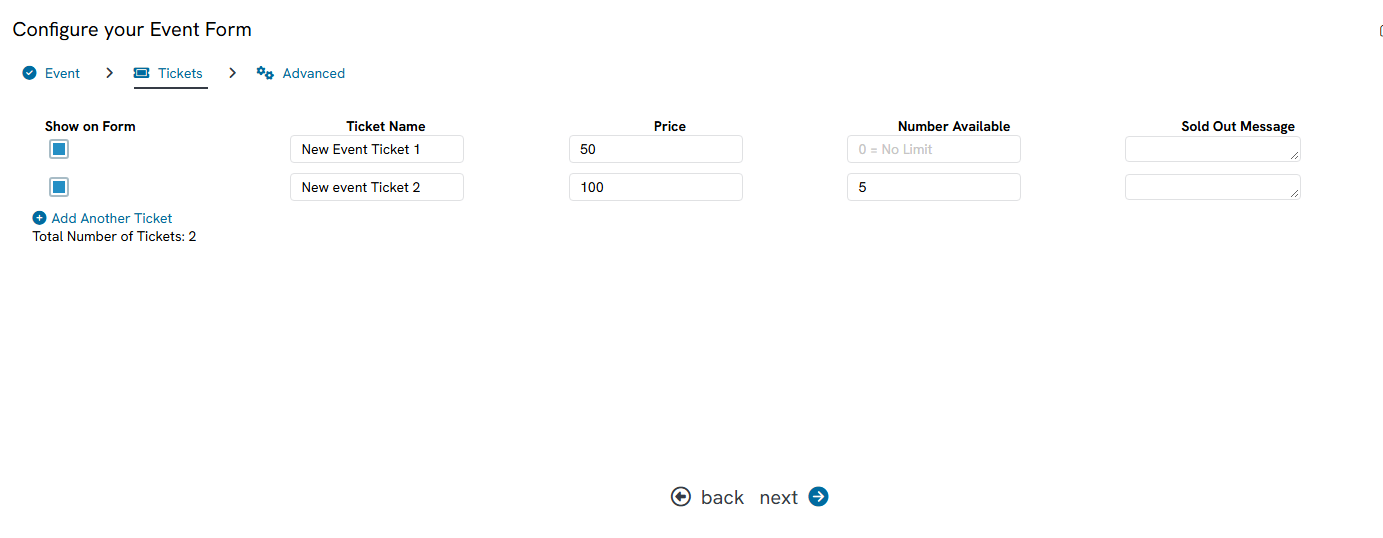
Step 7: Click Next.
Step 8: Review the remaining options. Promo Codes and Sessions are covered in separate articles and aren't required to get started. The Additional Donation field is worth leaving set to Yes, since many registrants also want to give extra revenue toward the event.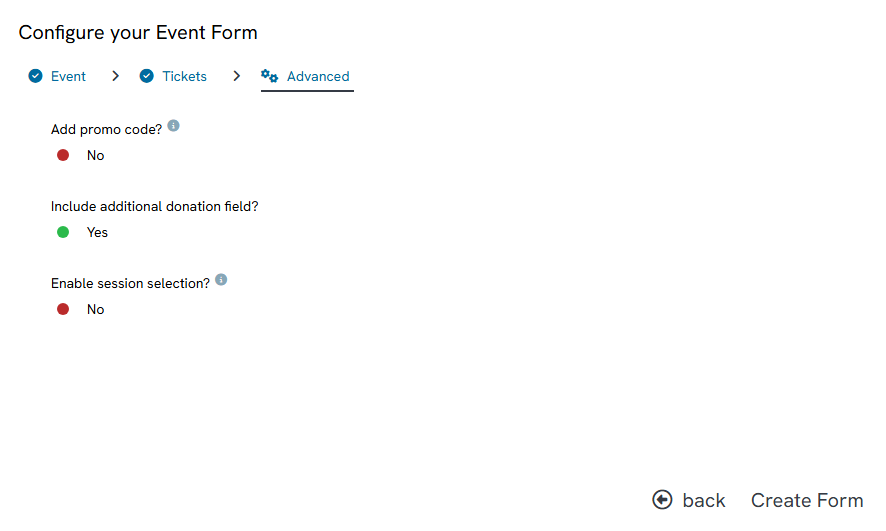
Step 9: Click Create Form. The event and the form are created together, and the view opens directly on the new web form.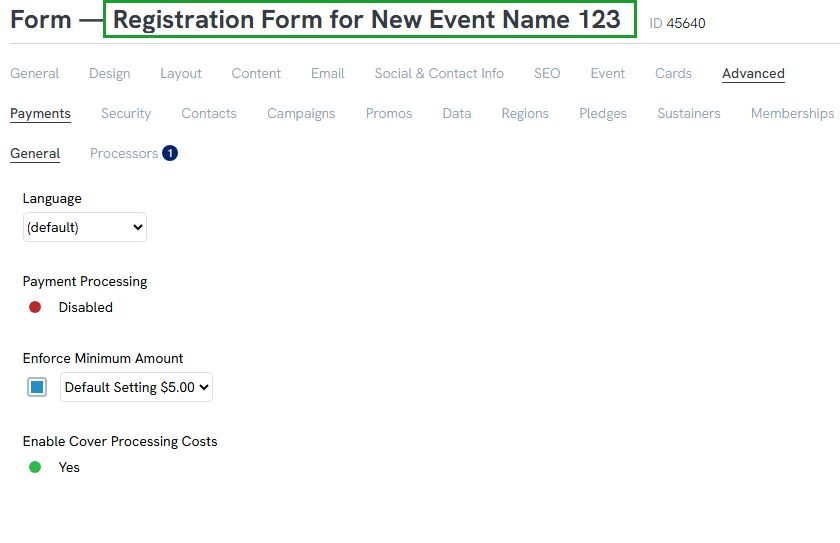
Instructions - Test the Form End-to-End
Step 1: On the new form, click the Advanced tab and set Payment Processing to Disabled. This puts the form into test mode, so a full checkout can be completed and cleaned up afterward (test transactions and contacts can simply be deleted) as if no testing occurred.
NOTE: Do not forget to turn the payment processing back on before the form goes live.
Step 2: Click Save.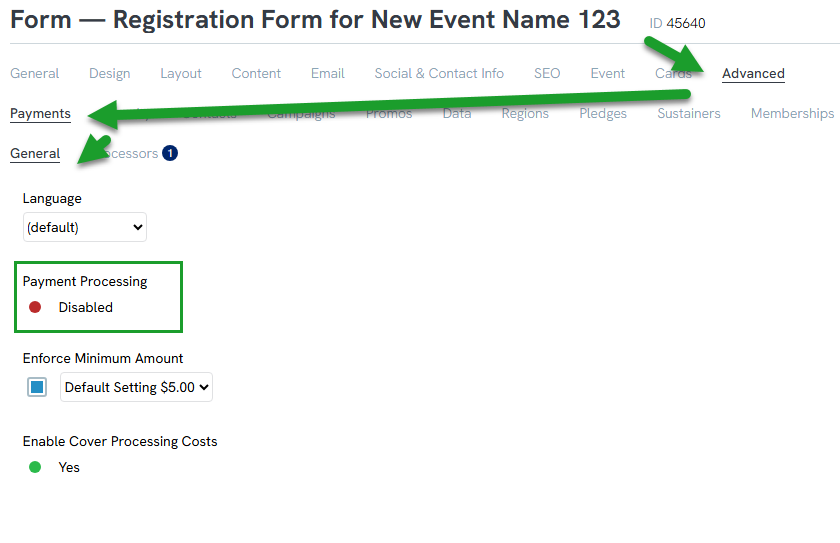
Step 3: Return to the General tab and click the link to open the live form. The event ticket(s) and the additional donation field should appear exactly as configured.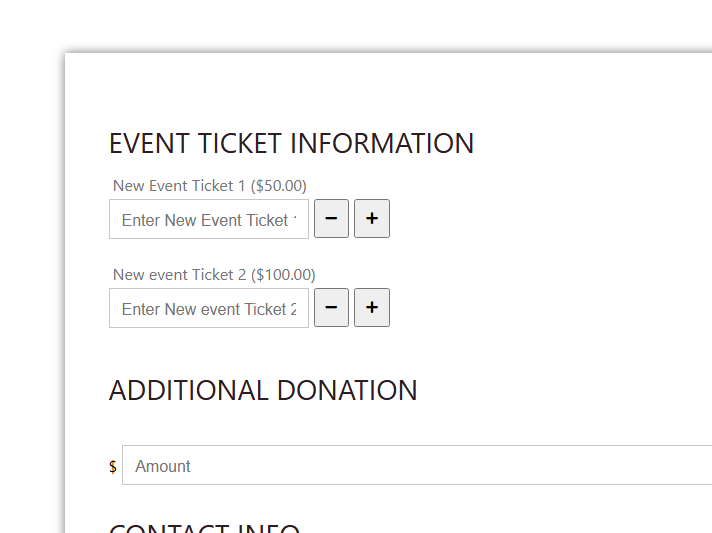
Step 4: Register on the form as a test: select a ticket, optionally enter an additional donation amount, and fill out the contact information.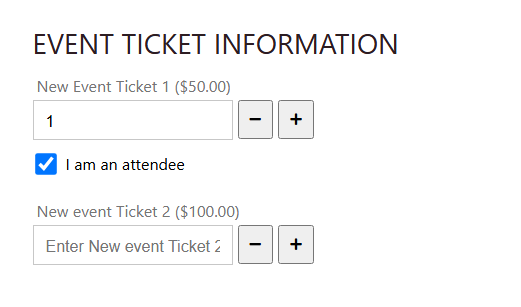
Step 5: Enter payment details using the Visa test card number – 4 followed by sixteen 1's – with any future expiration date, any name on the card, and any 3-digit CVV.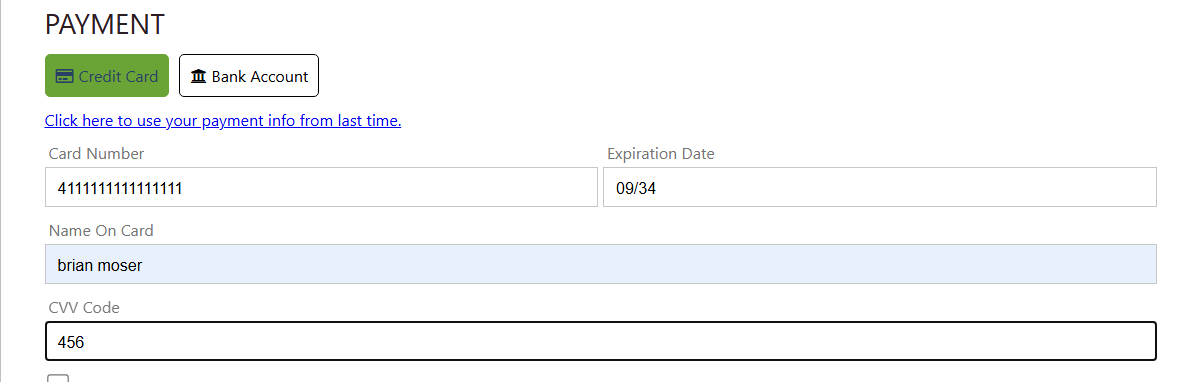
Step 6: Complete checkout and review the Web Form Success Page, which displays the amount, date, transaction ID, and event name.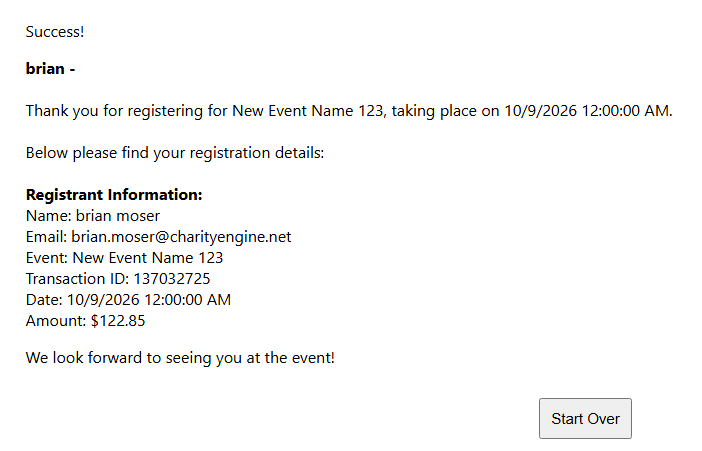
Instructions - Verify the Registration and Transactions
Step 1: Navigate to Online > Web Forms > Search and Manage, bring up the form just created, hover over the ellipsis (three dots) menu, and click Transactions.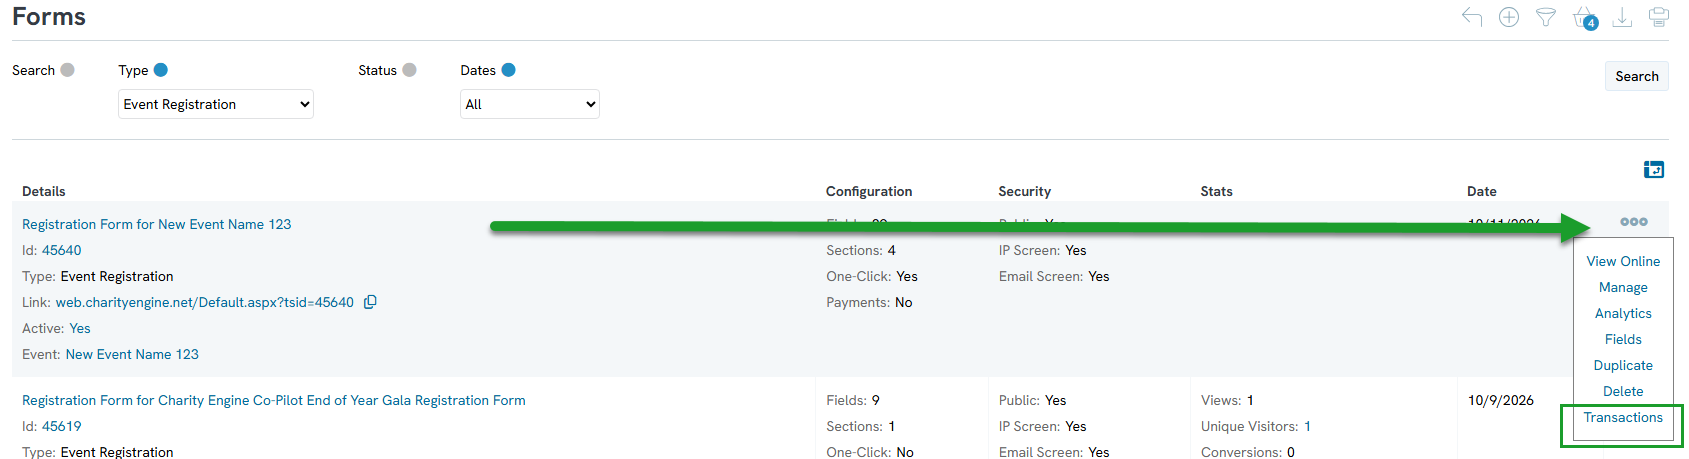
Step 2: Review the resulting transactions to confirm everything lines up – for example, that the event name, GL code, and fund attributions are correct, the dollar amounts add up as expected, and there's a soft credit recorded for both the registration amount and any additional donation.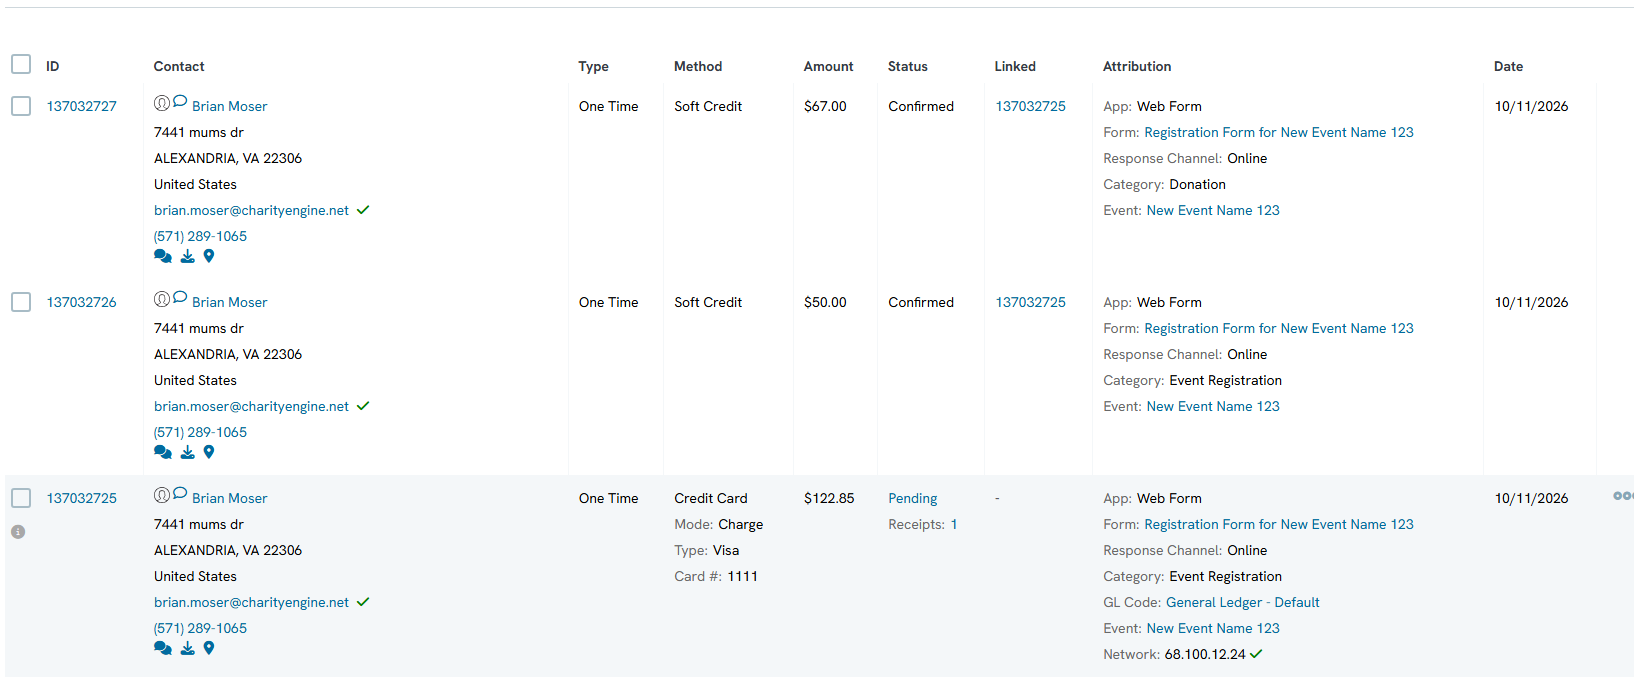
Step 3: Navigate to Events > Events > Search and Manage and find the event just created. Its registration and revenue statistics should now reflect the new registration.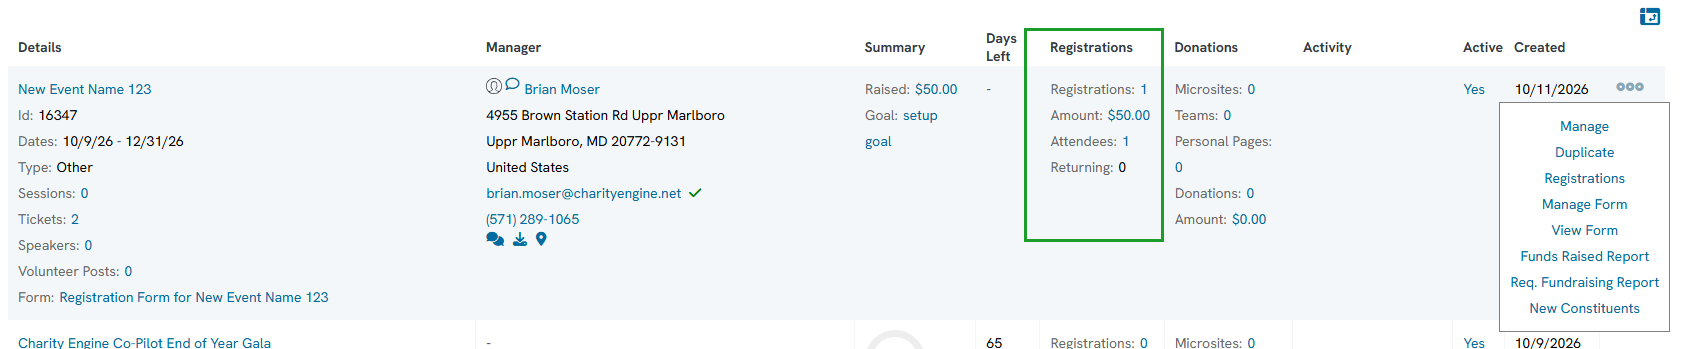
Step 4: Hover over the ellipsis (three dots) menu on the event and click Registration to view the registration screen, confirming the test registration appears and is ready for event check-in.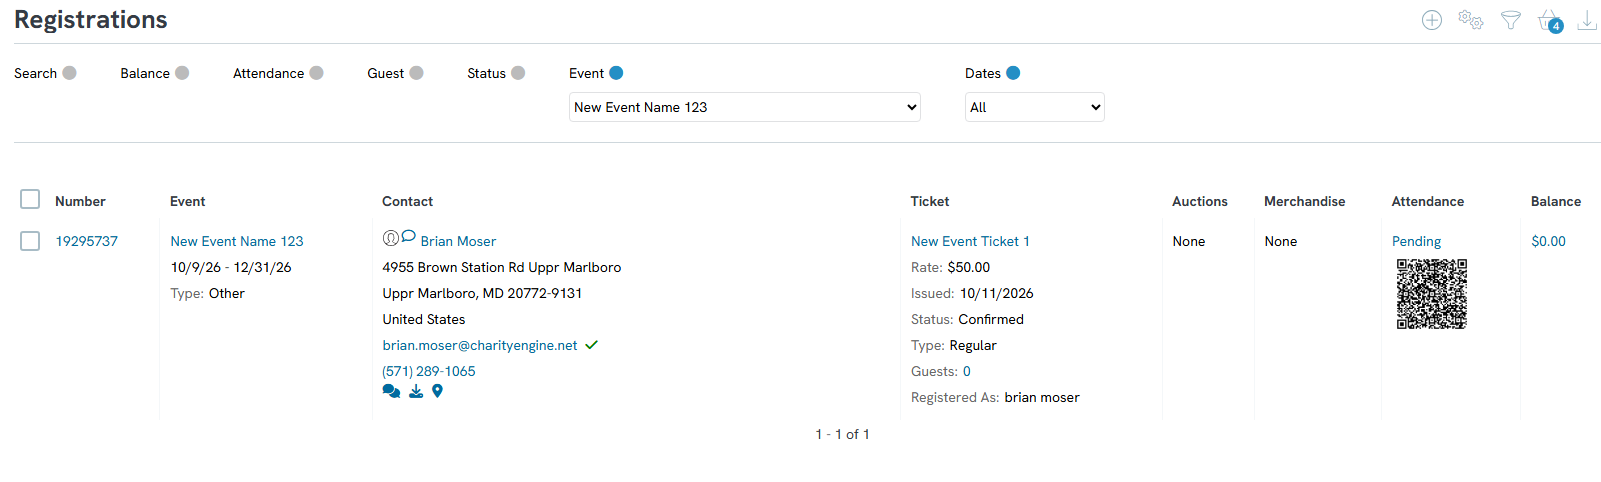
Note: A confirmation email is also sent out containing the same information shown on the Web Form Success Page.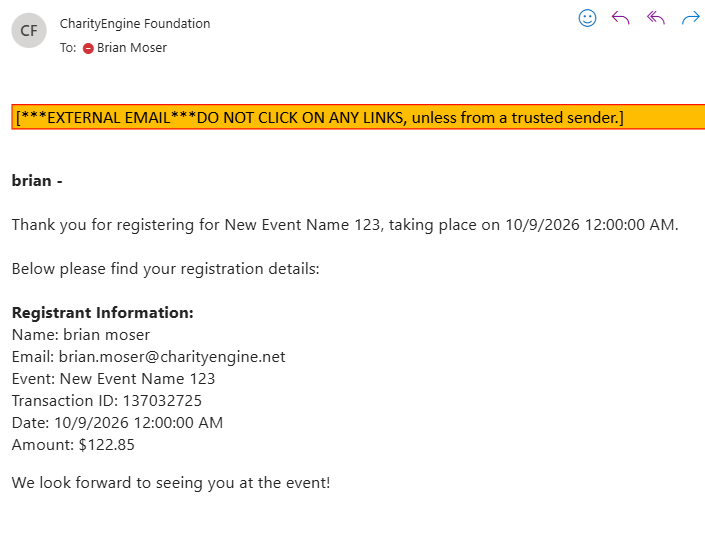
FAQs & Additional Reading
Q. Do I need to create the event and the web form separately?
A. No. The Event Form option creates a new event, its tickets, and the registration form together in one guided setup.
Q. What test card number can I use to test checkout?
A. A Visa test card number: 4 followed by sixteen 1's, with any future expiration date, any name, and any 3-digit CVV.
Q. Will test registrations and transactions affect real data?
A. No. With Payment Processing disabled (test mode), any test transactions and contacts created during testing can be deleted afterward, leaving no trace.
Q. What can I configure further once the event is up and running?
A. Promo codes, sessions, seatings and tables, auctions (including silent auctions), and volunteer management (forms, collections, assignments, and posts), as well as further ticket configuration – each covered in their own articles.
