Introduction
Users can personalize an email creative with more than the standard global tokens that pull directly from a contact's record. Custom tokens allow users to pull in data that lives outside the contact record – such as an event registration's ticket type, ticket price, or event start date – and drop it directly into an email. To do this, three pieces need to come together: a query-based audience, an email creative, and an email blast that connects the two. Because the audience is built in Query Builder, this feature requires some familiarity with that tool. Users unfamiliar with Query Builder are encouraged to ask someone at their organization with prior experience, request training, or reach out to Support. Support can help troubleshoot but cannot build a query on a user's behalf.Table of Contents
Global Tokens vs. Custom Tokens
Global tokens are the tokens available by default in every email creative's token picker. No extra setup is needed to use them because their data comes directly from the contact record – for example, a member's name, member ID, birth date, or address. Organization-level information, such as social tokens, is also available as a global token.
Custom tokens cover everything that isn't part of the contact record itself – for example, an event's start date, start time, ticket type purchased, or ticket price. This information doesn't exist on the contact record, so it has to be pulled in through a query and connected to the email as its audience source before those tokens will appear in the token picker.
Instruction - Build the Custom Tokens Query
Note: In this audience example, we're going to send an email to some event registrants.
Step 1: Navigate to Automation > General > Queries.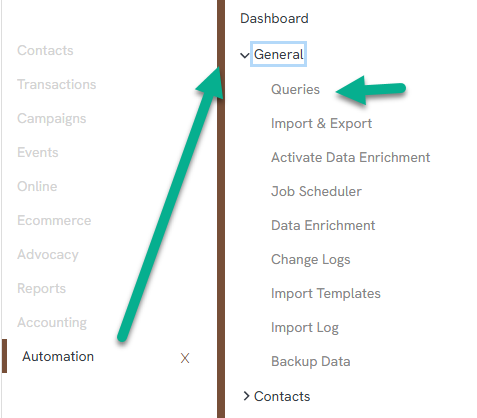
Step 2: Create a new query by clicking the "+" button and set the query type to Registration (an Events Registration query). This type is required to expose registration-level fields, such as ticket type and ticket sale price – a general Events query will not include this data.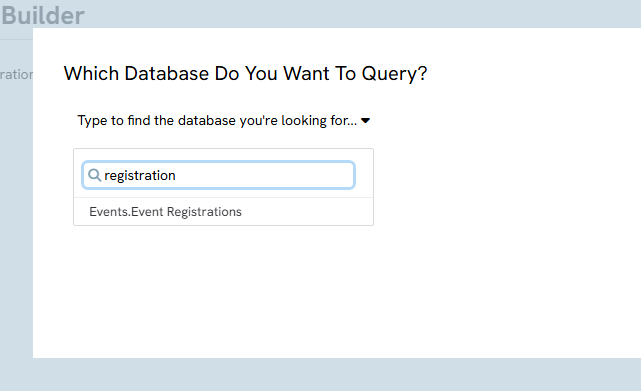
Step 3: Locate the specific event to pull registrants from and note its Event ID. Add the Event ID as a filter so the query only returns contacts registered for that event.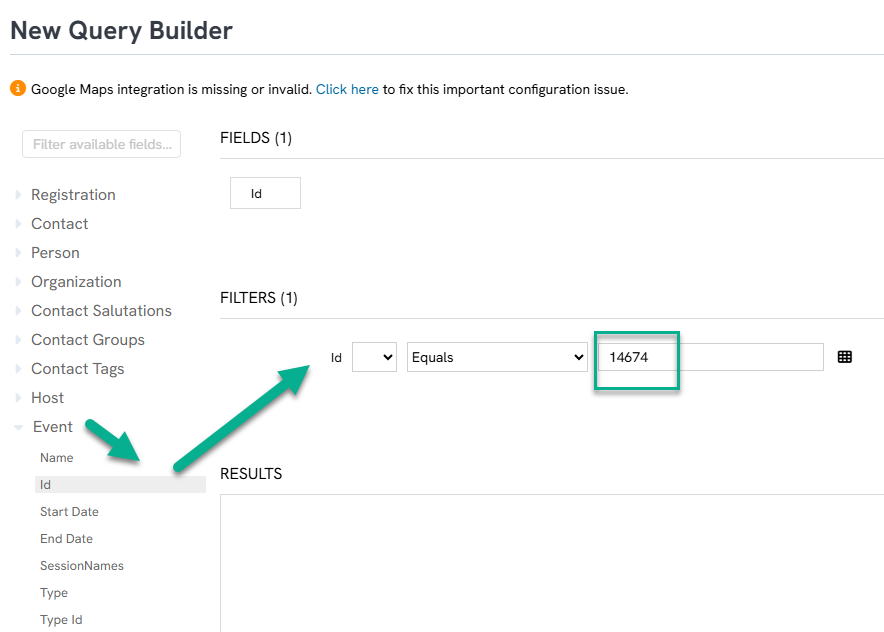
Step 4: Build out the fields to return in the query's select list. At minimum, add from the Contact grouping the Contact ID (required by all query types to use custom tokens). Then add the custom fields needed for the email – for example, contact Full Name, and from the Event grouping, Event Name and Event Start Date; and from the Registration grouping, Ticket Type and Ticket Sale Price.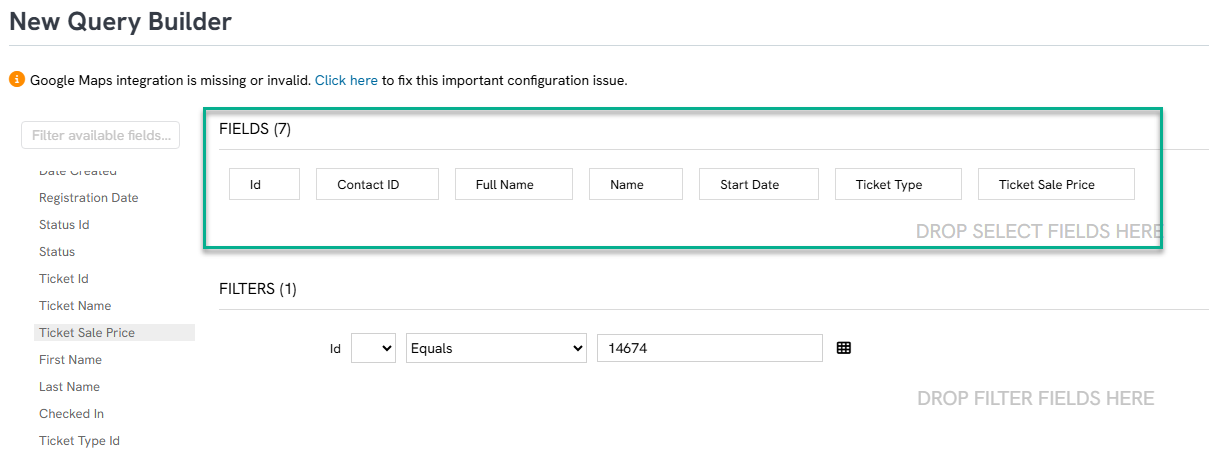
Step 5: Click Run to confirm the query returns the expected values (for example, ticket sale price, ticket type, event start date, and event name).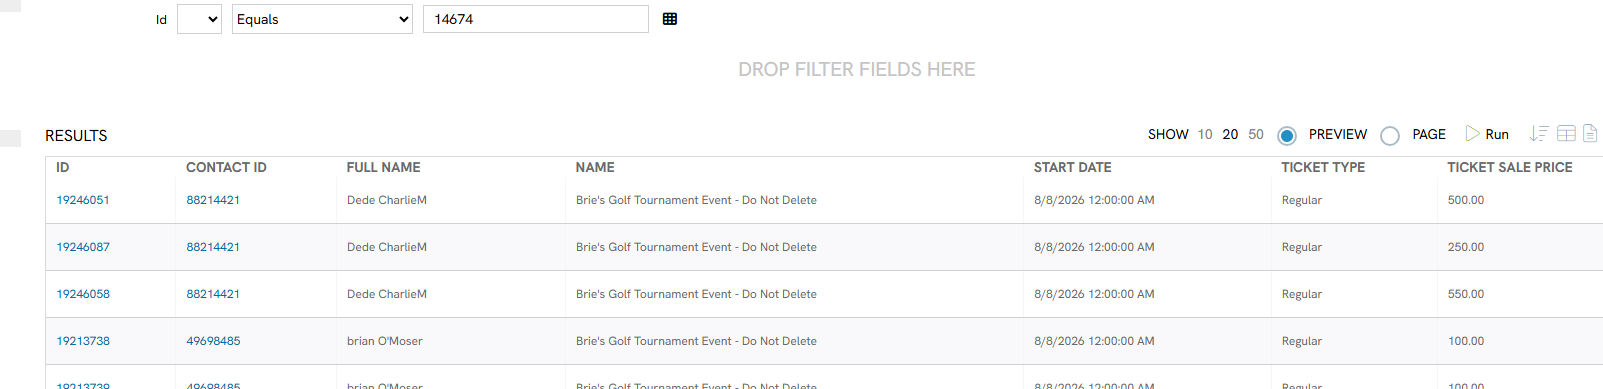
Step 6: Save the query with a descriptive name (for example, "Email Custom Tokens"). Every field added in Step 4 beyond what's required becomes an available custom token once this query is used as an email's audience source.
Instruction - Add Custom Tokens to an Email Creative
Step 1: Navigate to Campaigns > Create and Publish > Creatives.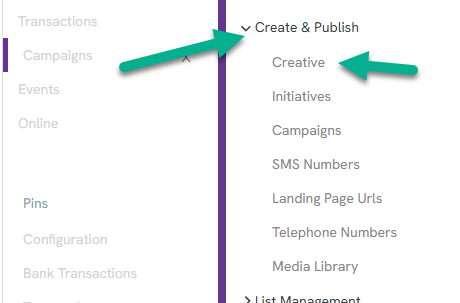
Step 2: Click the plus icon to Create New, then select Email Message.
Step 3: Give the creative a subject line and click Save.
Step 4: Click the ellipsis (three dots) menu and select Save and Send Email Blast.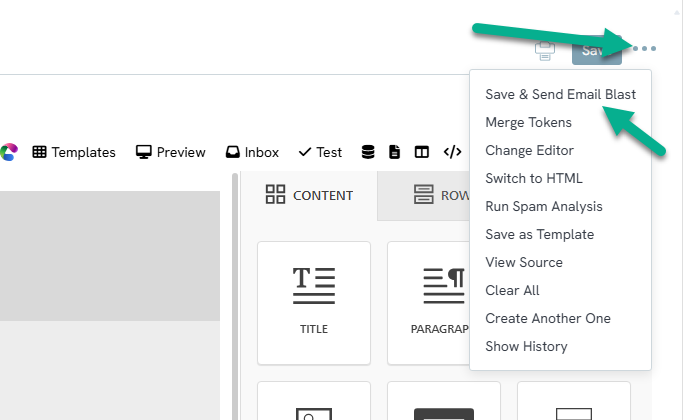
Step 5: On the Audience Source step of the Email Blast workflow, select the query-based list built in the previous section (for example, "Email Custom Tokens"). This step is what tells CharityEngine which audience's query fields should be connected to this email.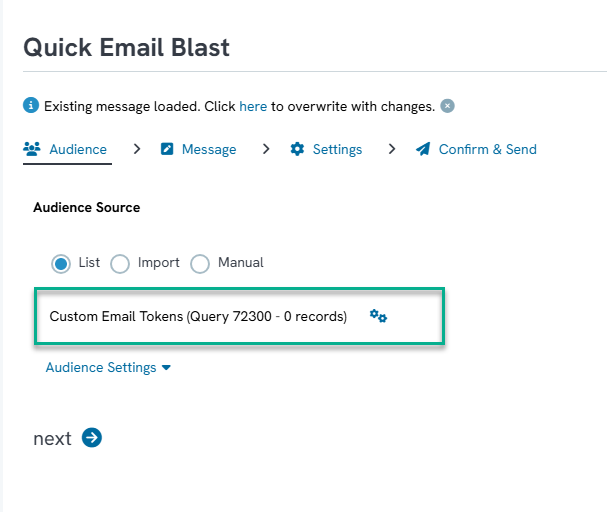
Step 6: Click Next to move to the Message step. This is the same WYSIWYG editor used in the Email Creative module, but the Token Picker will now also display the custom tokens supplied by the selected audience source (for example, registration ticket sales price, registration ticket type, registration event start date, and registration event name).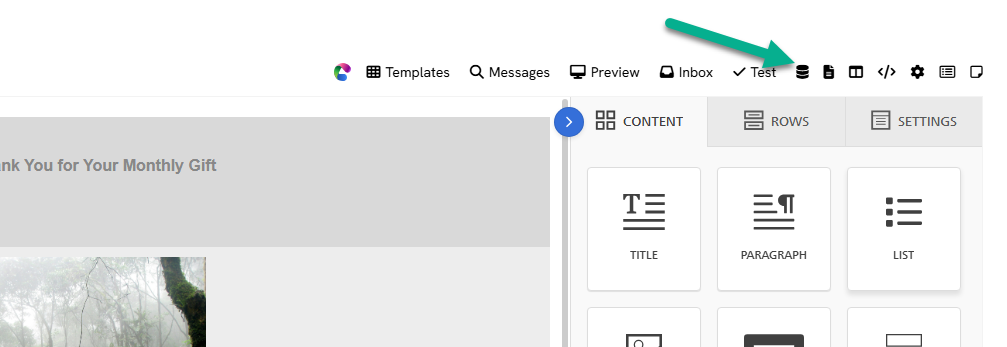
Step 7: Select the desired tokens and click Copy the Selected Tokens, then paste them into the appropriate place in the email creative.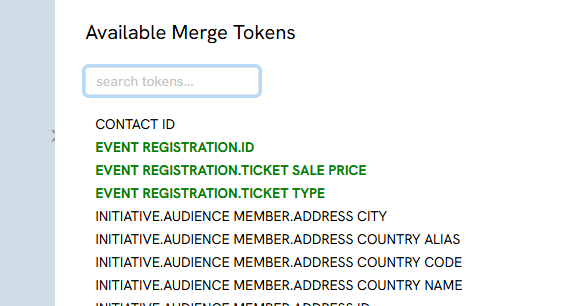
Step 8: Click Next to proceed to the Settings step. The screen will briefly show a loading message while the tokens are saved to the email – this is expected.
Step 9: Once the tokens are saved, close the Email Blast workflow tab and abandon it. There is no need to complete or send the blast at this stage – the tokens have already been saved to the creative.
You can now close this tab to abandon the email blast send: 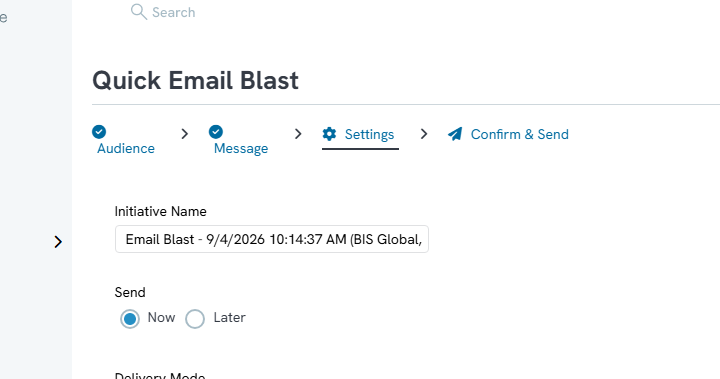
Step 10: To confirm, navigate back to Campaigns > Create and > Publish Creatives and locate the creative (filtering by creatives created today can help). Open the creative to confirm the custom tokens have been applied. The email is now ready to send once any remaining copy, images, or approvals are finalized.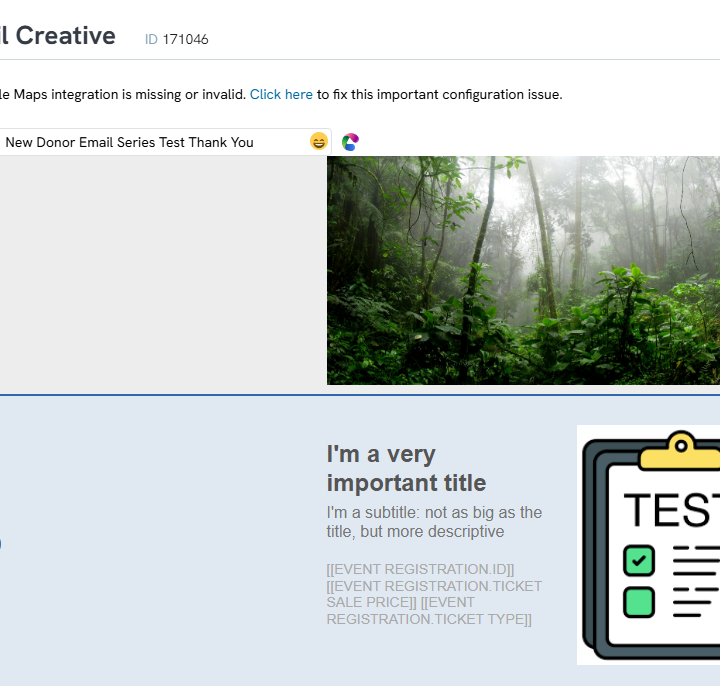
Instructions - Test Custom Tokens by Sending a Sample Email
Step 1: Navigate to Automation > General > Queries and search for the query used as the email's audience source.
Step 2: Open the query to manage or edit it.
Step 3: To isolate a test send to a single contact, go to the Contact grouping, add the Contact ID field to the Filters, and enter the Contact ID of the record to test with (for example, a contact with a test registration already on file).
Step 4: Click Run to confirm the query returns only the expected record.
Here you can see I have a test registration, so I simply add my contact ID to the filters to run this test only to me: 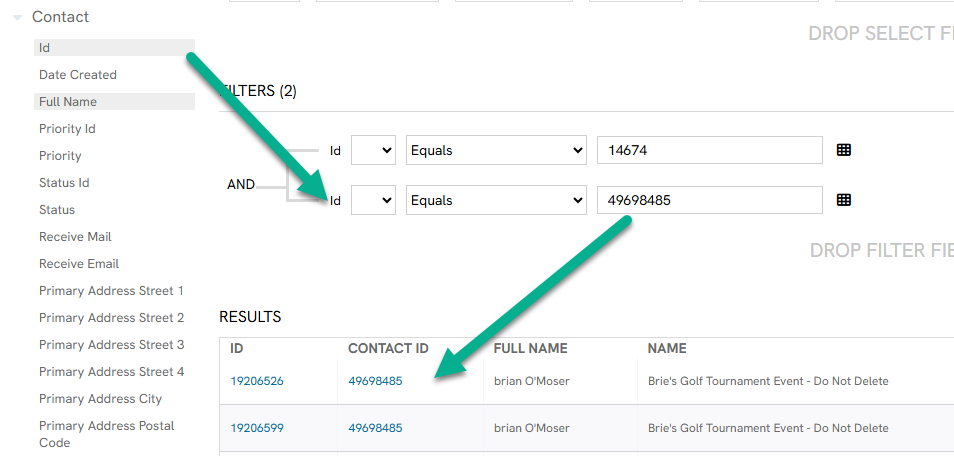
Step 5: Save this as a new audience with a distinct name (for example, "Email Custom Tokens Test") so the original audience source is left unchanged.
Step 6: Navigate back to Campaigns > Create and Publish > Creatives, click the ellipsis (three dots) menu on the creative containing the custom tokens, and select Email Blast.
Step 7: On the Audience Source step, select the new test audience, then click Next. The tokens will already be present in the creative from the earlier save.
Step 8: Proceed to the Settings step, then Confirm and Send.
Step 9: Click Process, then Continue. The email will send to the one test contact.
Step 10: After a short delay, check that the delivery status shows the expected audience count and a successful delivery, then open the received email to confirm the custom token values rendered correctly (for example, the registrant's ticket price, ticket type, and the event's date and time in place of the token placeholders).
Here is my test email. I added these tokens directly after each other, but you see the idea here. The ticket price was 200, then you see the event date, etc. 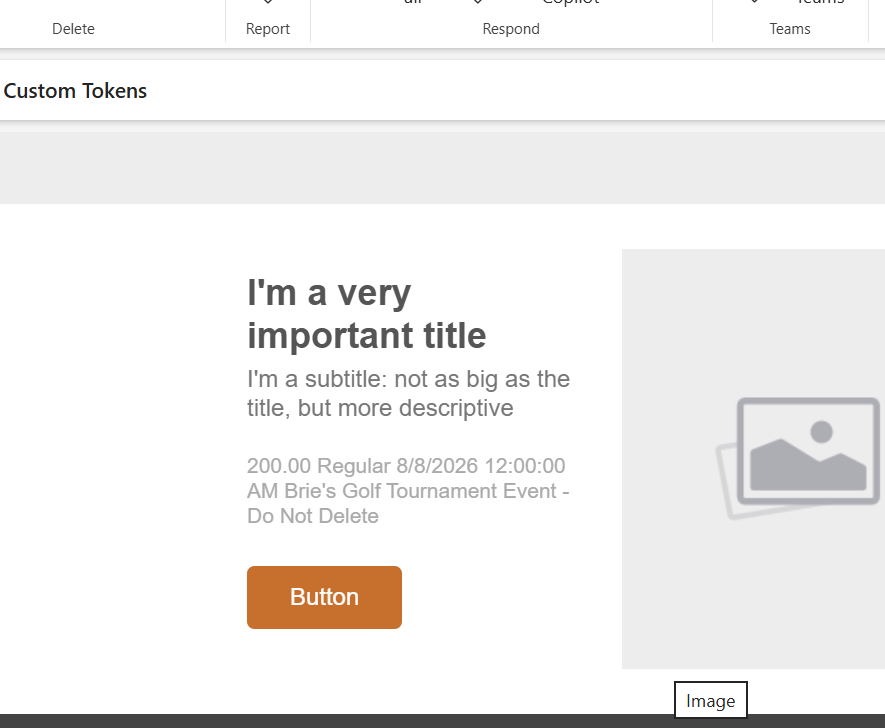
FAQs & Additional Reading
Q. Do I need Query Builder experience to use custom tokens?
A. Yes. Custom token values are supplied by a query, so building or editing that query requires some familiarity with Query Builder. If unfamiliar, ask someone at your organization with prior experience, request training, or reach out to Support – Support can help troubleshoot but cannot build the query for you.
Q. What's the difference between a global token and a custom token?
A. Global tokens pull data directly from the contact record and require no setup. Custom tokens pull data that isn't part of the contact record (such as event registration details) and only appear in the token picker once a query-based audience source has been connected to the email.
Q. Do I have to actually send the Email Blast just to save custom tokens to a creative?
A. No. Proceed through the Audience Source and Message steps, then advance to the Settings step to let the tokens save. At that point the workflow can be closed and abandoned without sending.
