
Introduction
Creating and sending emails can be a stressful task, however we have created a helpful guide. This guide will contain articles within the Help Center that cover the basics of creating an email, selecting your audience, the email blast workflow, and how to review the email analytics once the email has been sent.
Table of Contents
Help Center - Legacy User Interface
Click here to access the Help Center new user interface article
Prerequisites
As a bulk email sender, your organization is responsible for monitoring and addressing performance results related to blocked delivery related to Spam traps (Typo, Pristine), opt out requests, etc. Failure to take action may result in Email Service Providers (ESPs) delivering your email to Spam/Promotional inboxes or, in extreme cases, blocking delivery. Please read more about Email Deliverability Best Practices to learn more about steps you can take to ensure proper email sending practices.
How to Create Lists for Emails
The first step in sending an email is knowing who the receiver of the email is going to be. Lists are an easy way to compile your audience and can be created through opt-in lists or by using query builder to segment a list.
To create an opt-in list, navigate to Campaigns > List Management > Opt-in list.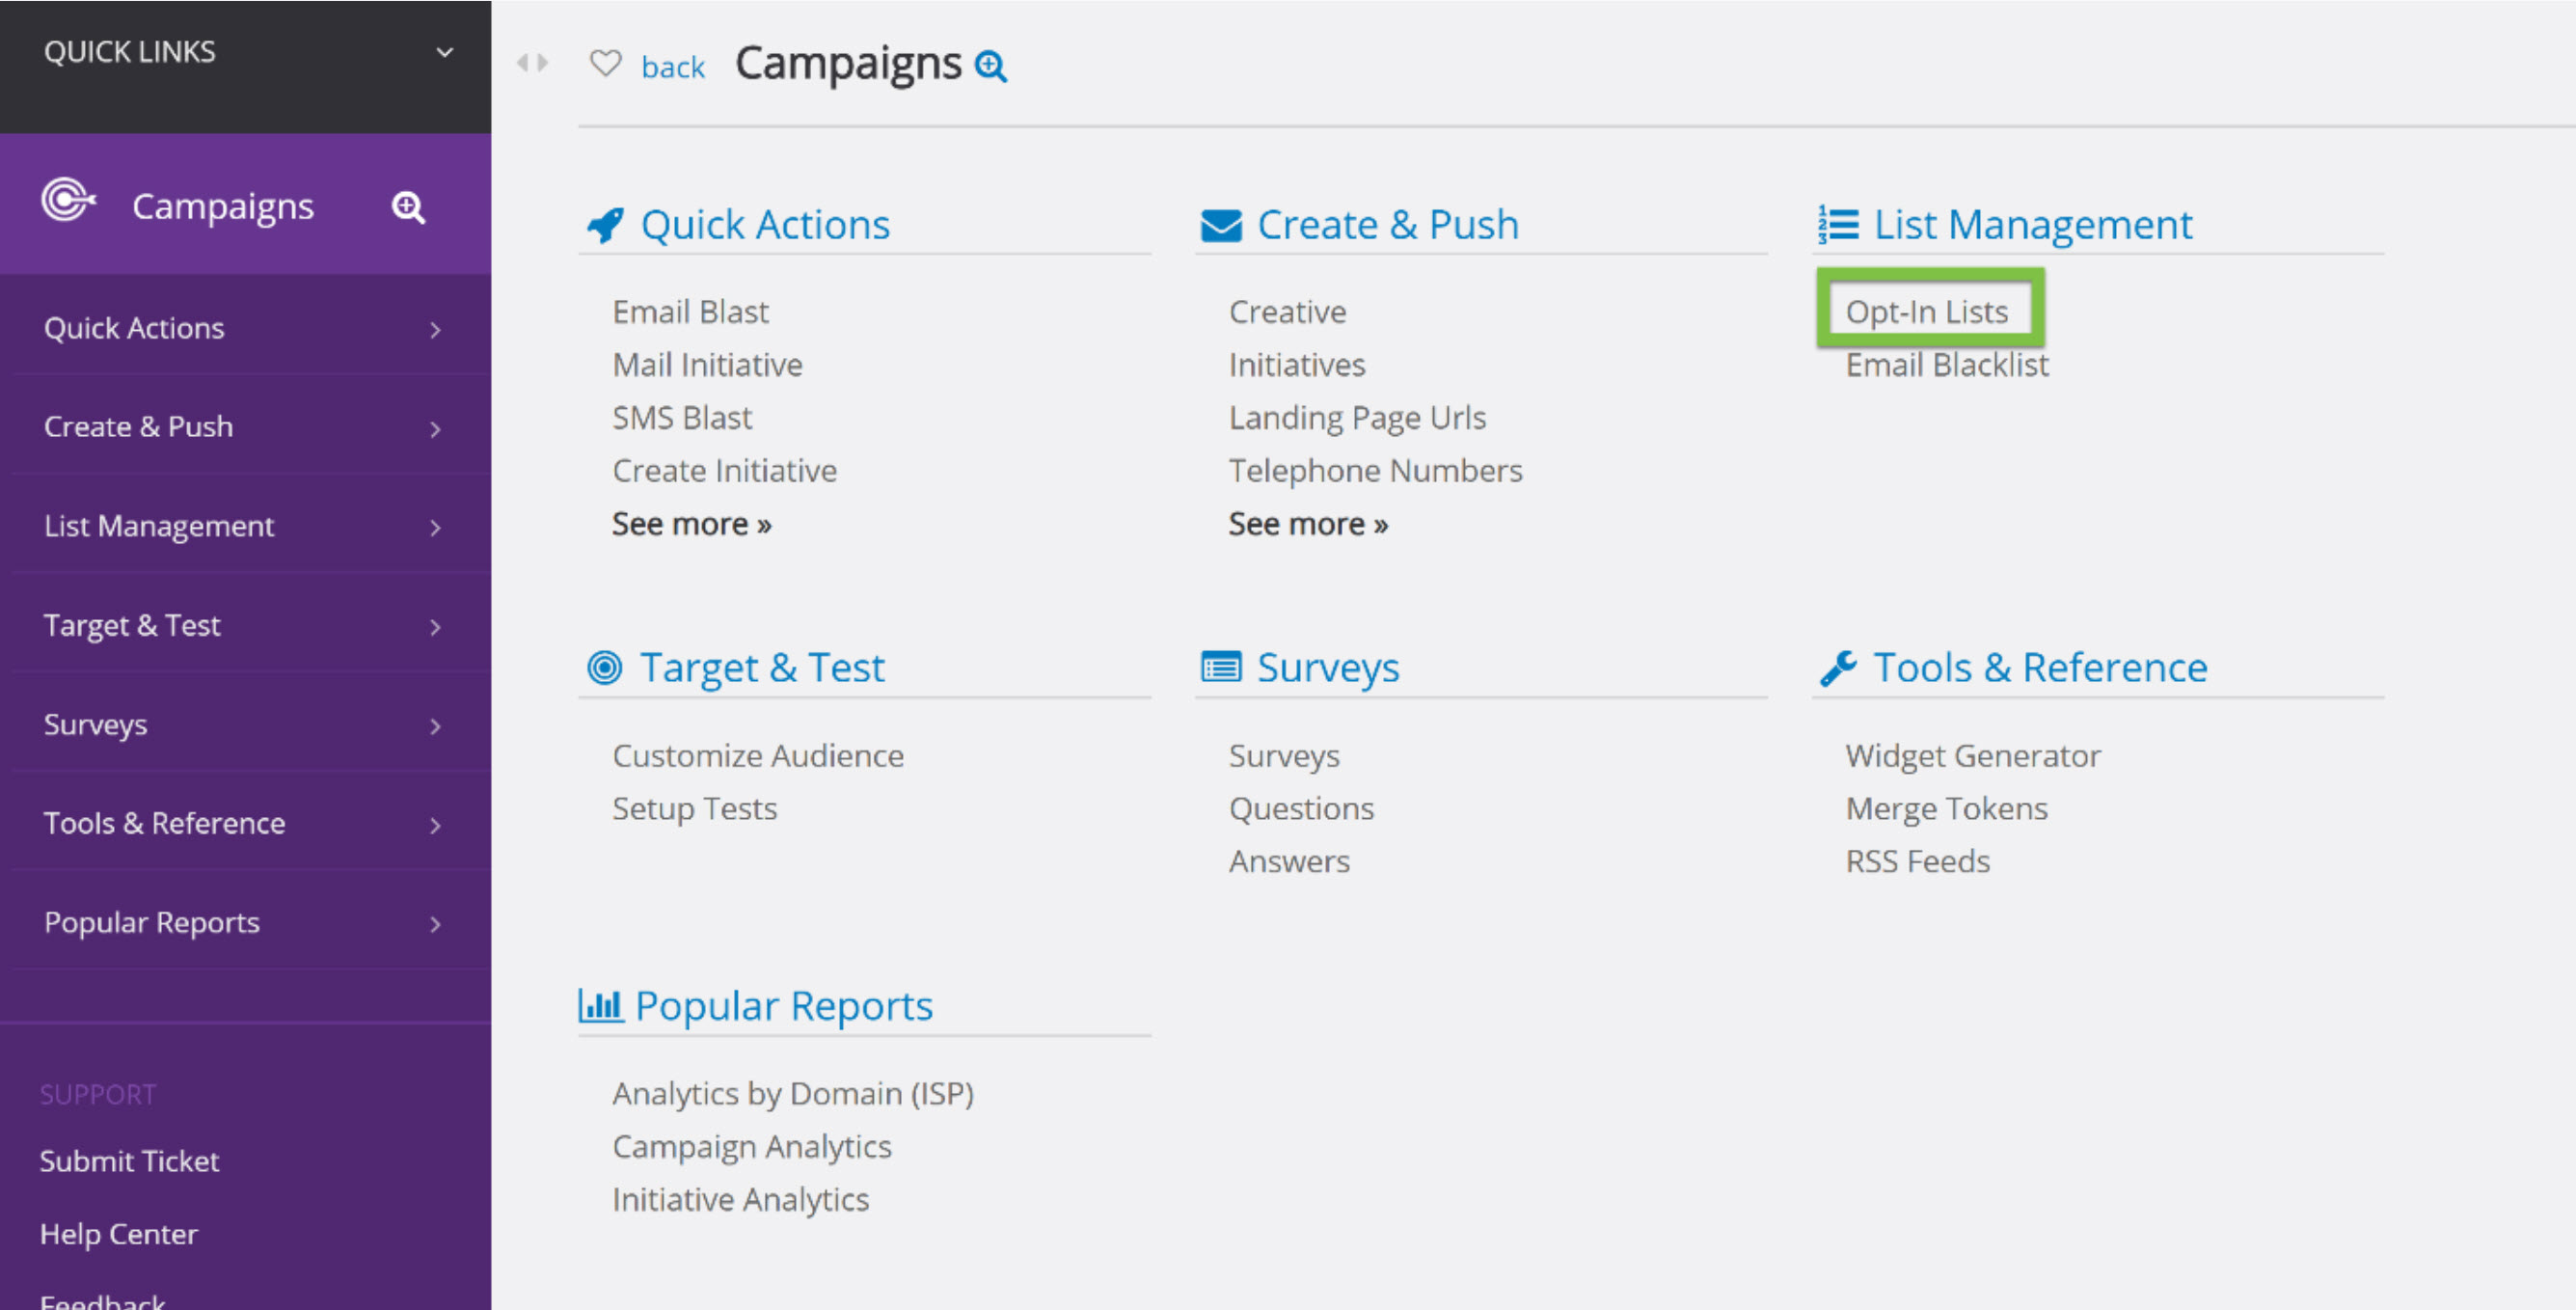
The opt-in list can then be added to the User Center for contact to opt-in to.
The second way to create a list is by using query builder to segment an already created opt-in list. This is a great way to send emails to contacts who have donated recently or made a significant donation, but not send the email to the entire list. For more information on how to segment a list using query builder, read Using Query Builder to Segment Lists
Note: it is important to note that if you have configured opt-in lists to appear in User Center contacts can easily opt-out of lists by toggling to no. To learn more about configuring User Center, read this article

Selecting an Audience
Selecting an Audience is one of the most important steps when sending an email. The audience can be selected by either choosing a opt-in list or query based list, importing a list, or manually inserting the contacts emails. Use the radio buttons to select List, Import, or Manual to select your audience.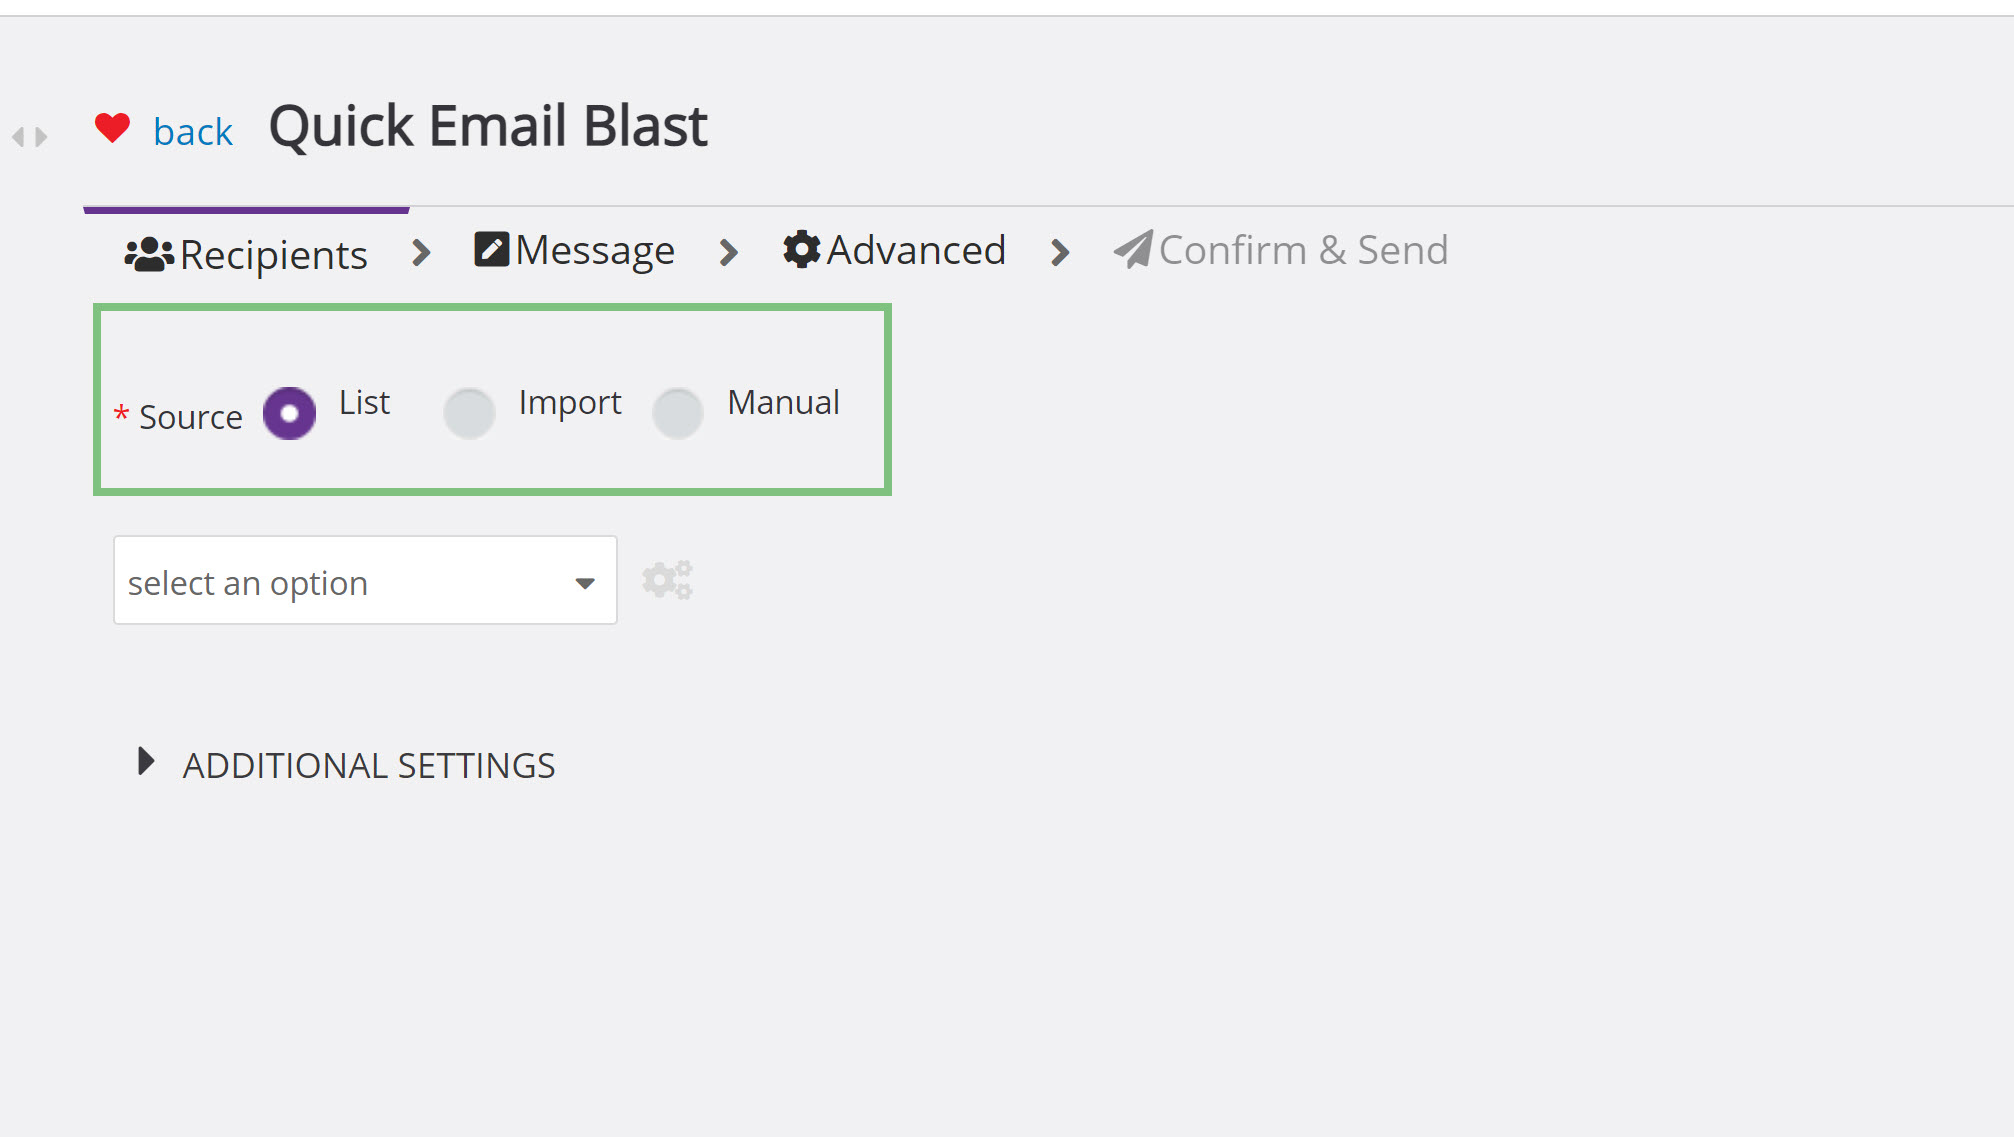
for more information on how to select your audience, read Selecting Email Audience in our Help Center
Creating the Email
Once you have selected your audience, it is time to create the body of the email. CharityEngine’s Email builder makes the task of creating an email very easy and provides templates to users to insert their information and images into.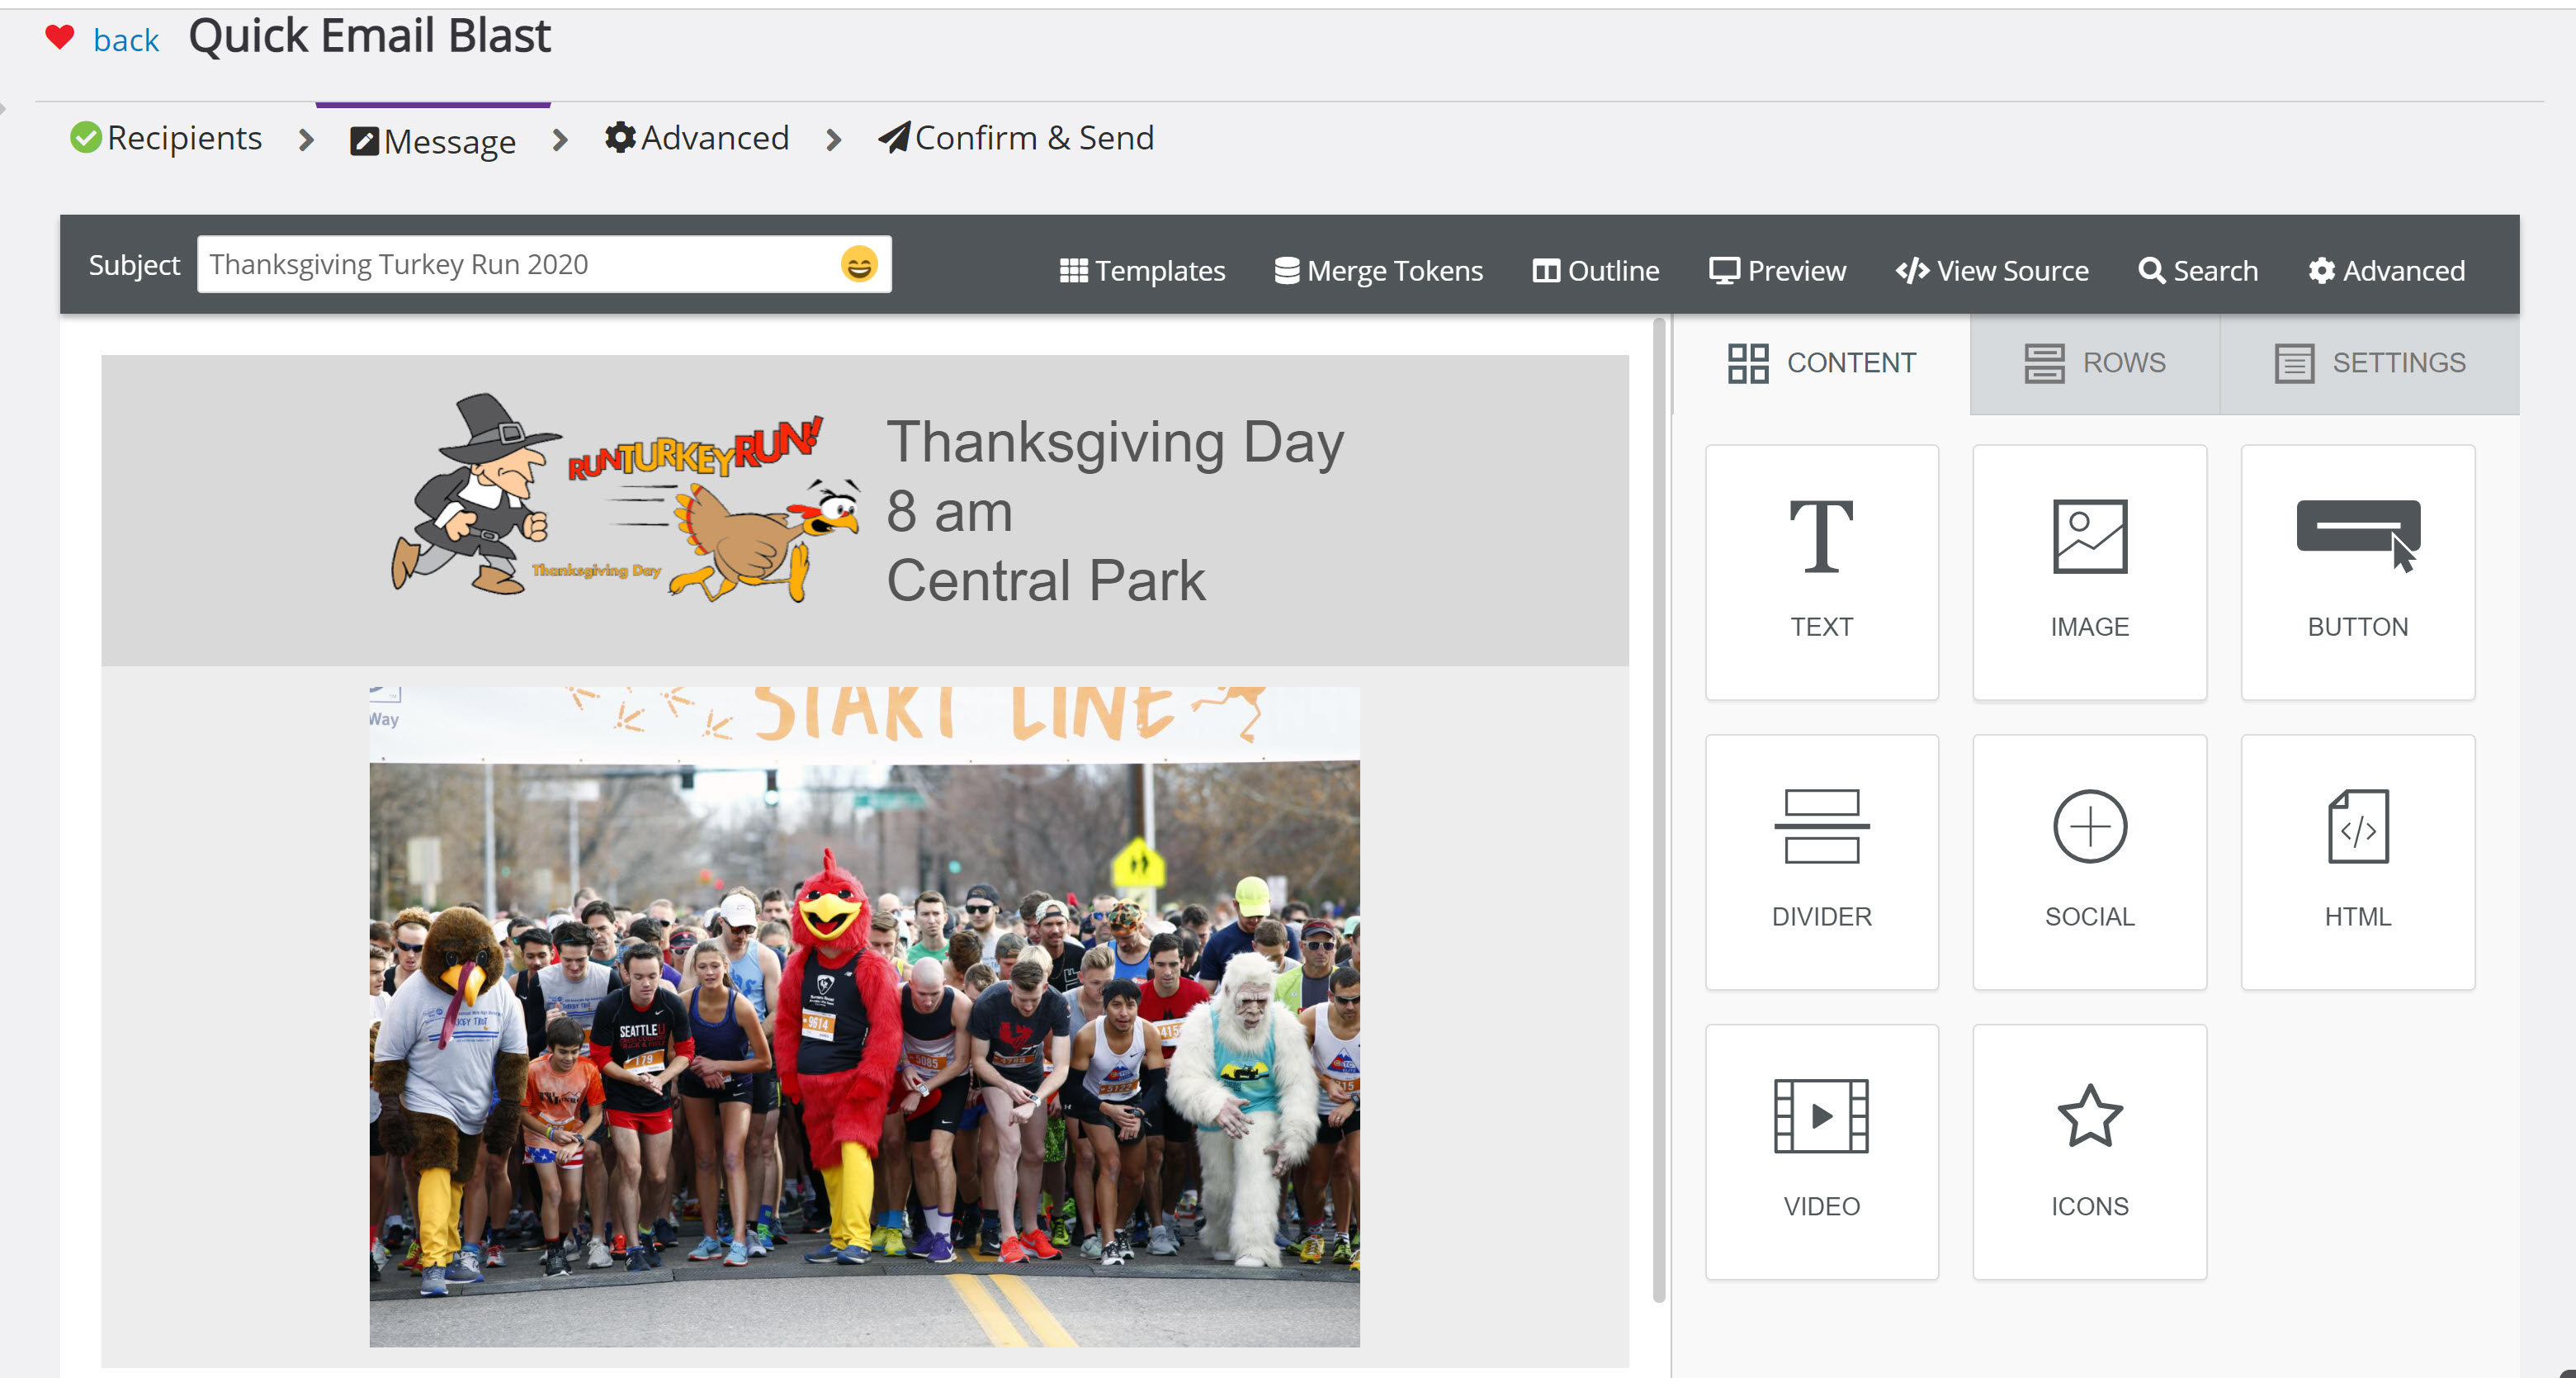
To learn how to use our email builder and what is out-of-the-box, take a minute to read Campaigns & Marketing: Creatives - Crafting and Managing Compelling Pieces for Non-Profit Campaigns
When creating an email, it is also important to note that tokens can be used to populate data. These tokens can be system tokens or custom tokens. Users can add tokens to emails to populate data by clicking Merge Tokens in the Email Builder. For assistance in adding tokens to emails, read Adding Tokens to an Email

Email Blast Workflow
Prior to sending your email, there are several tasks that CharityEngine suggest preforming, such as testing your email, scheduling your email, and establishing your audience.
Testing your email prior to sending is a crucial step and will prevent emails that are not ready for viewing due to grammar issues or broken links from being sent. The email should be sent to the creator and at least one other organization contact to review any errors.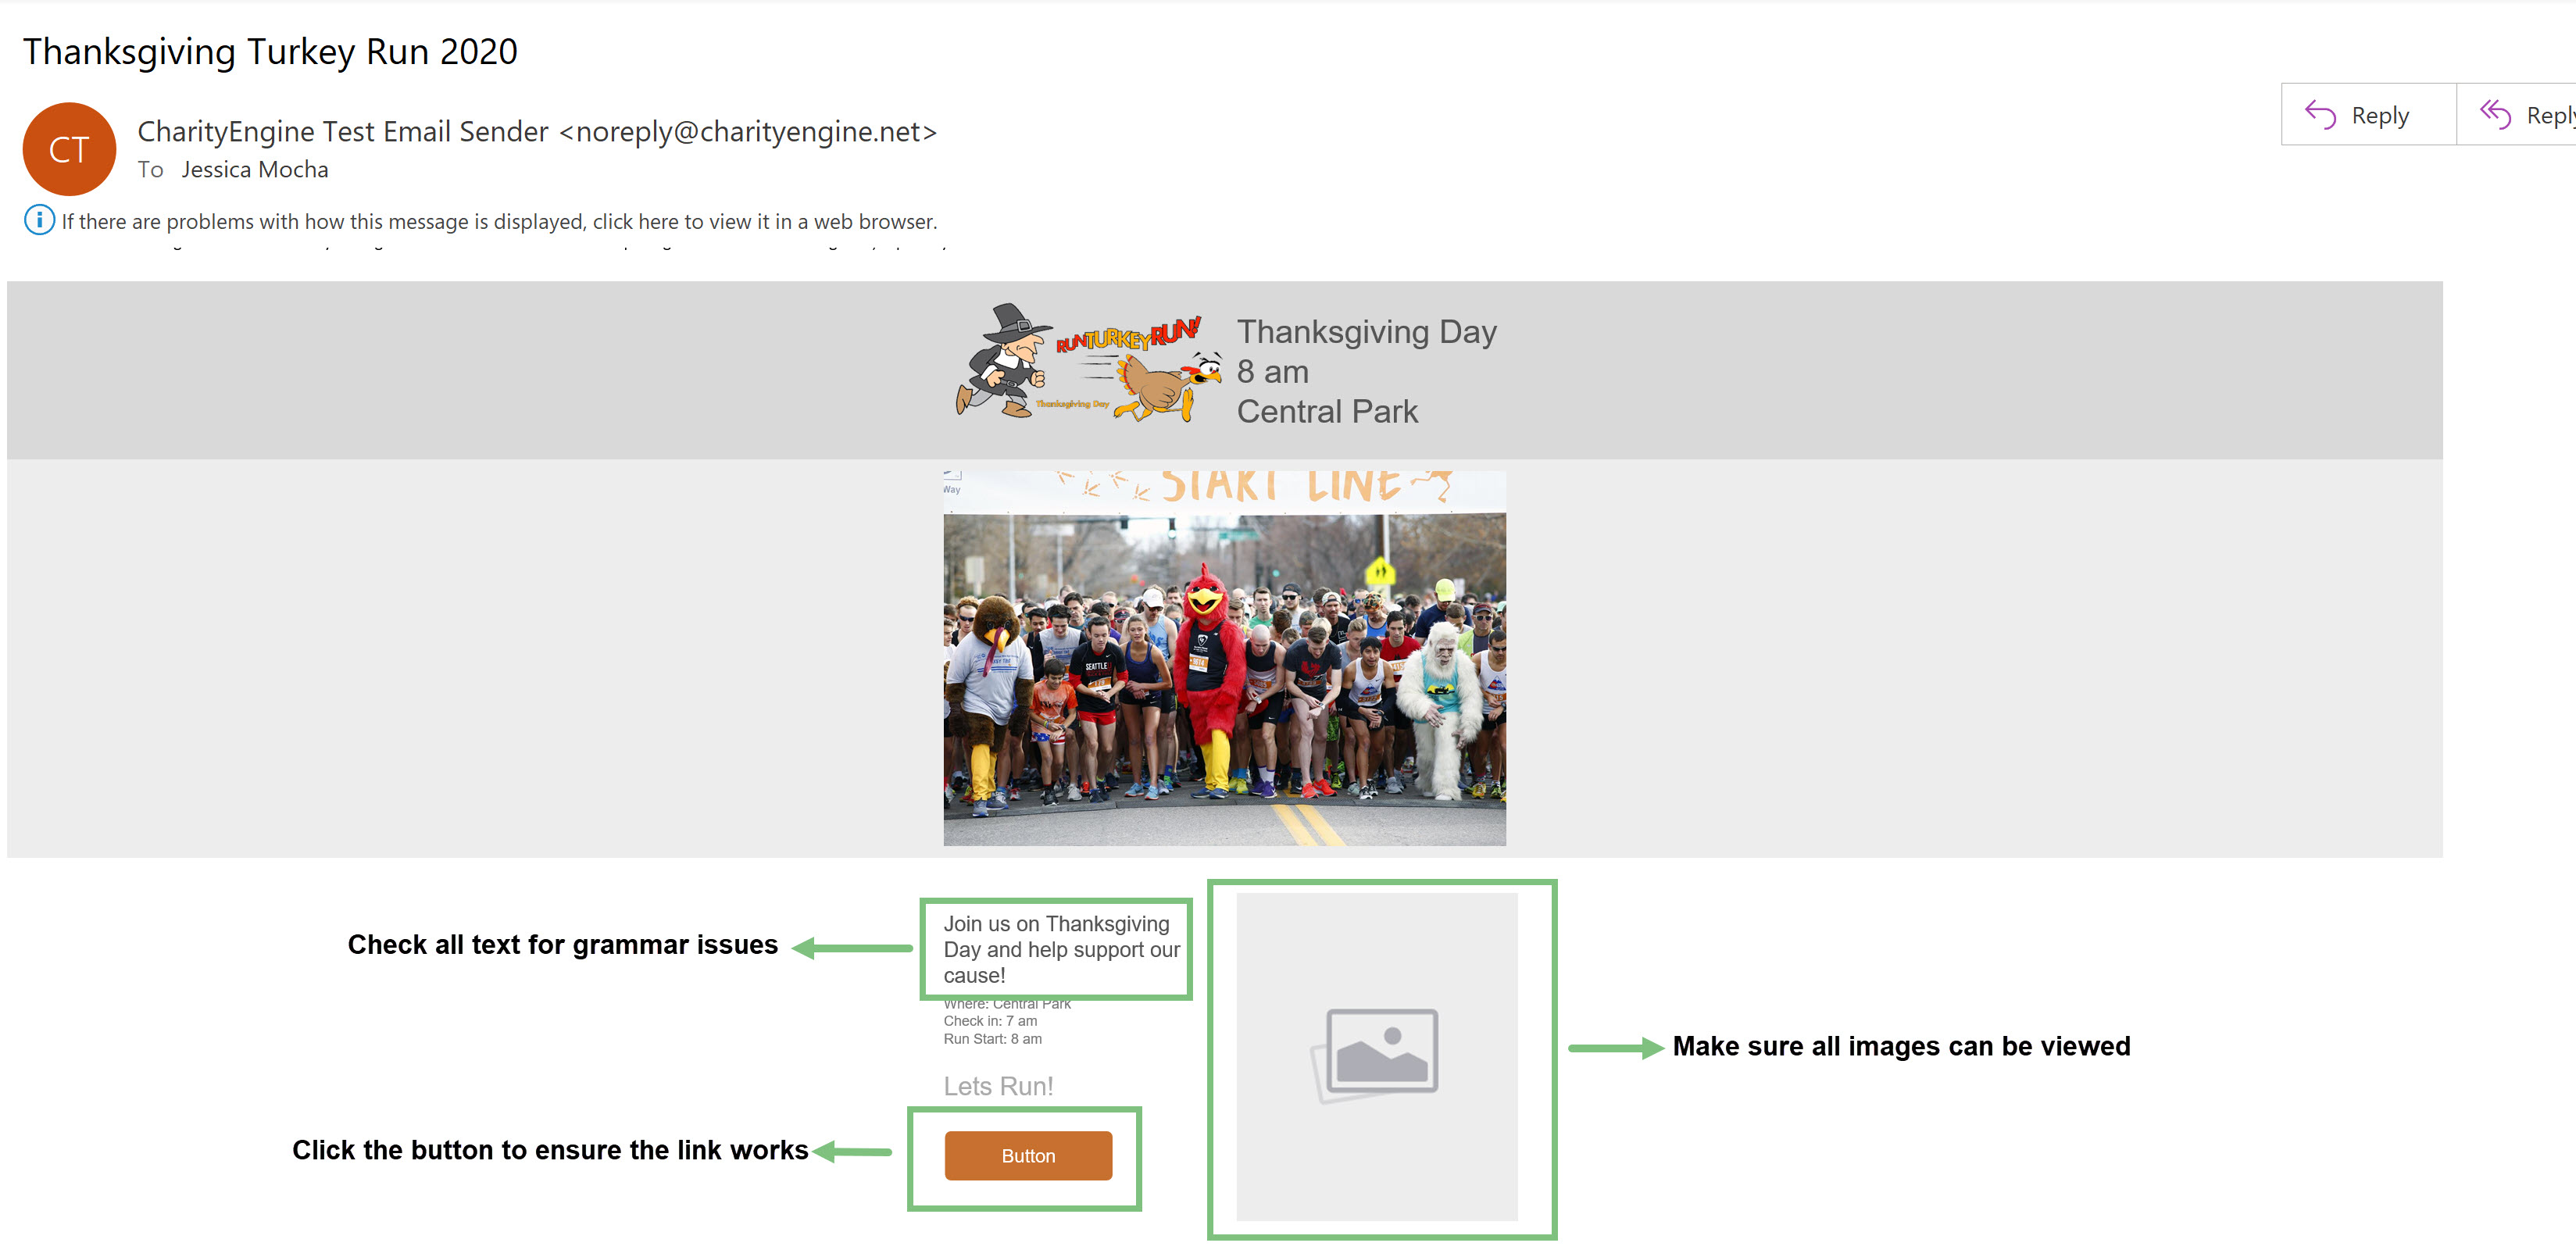
For assistance in testing emails, read Campaigns & Marketing: Sending - Mastering the Art of Testing and Sending Campaigns for Non-Profits
As mentioned previously in the guide, you will also want to ensure you have selected the correct audience for the email. Selecting an audience can be done by selecting a query based list, an opt-in list, importing the list, or manually entering the emails. For assistance in selecting your audience read this article.
Once the email has been tested and the audience has been selected, you can schedule your email to be sent. Scheduling the email to be sent at a certain time allows you to create the email ahead of time and send it later. This feature will save users time when it comes to sending emails.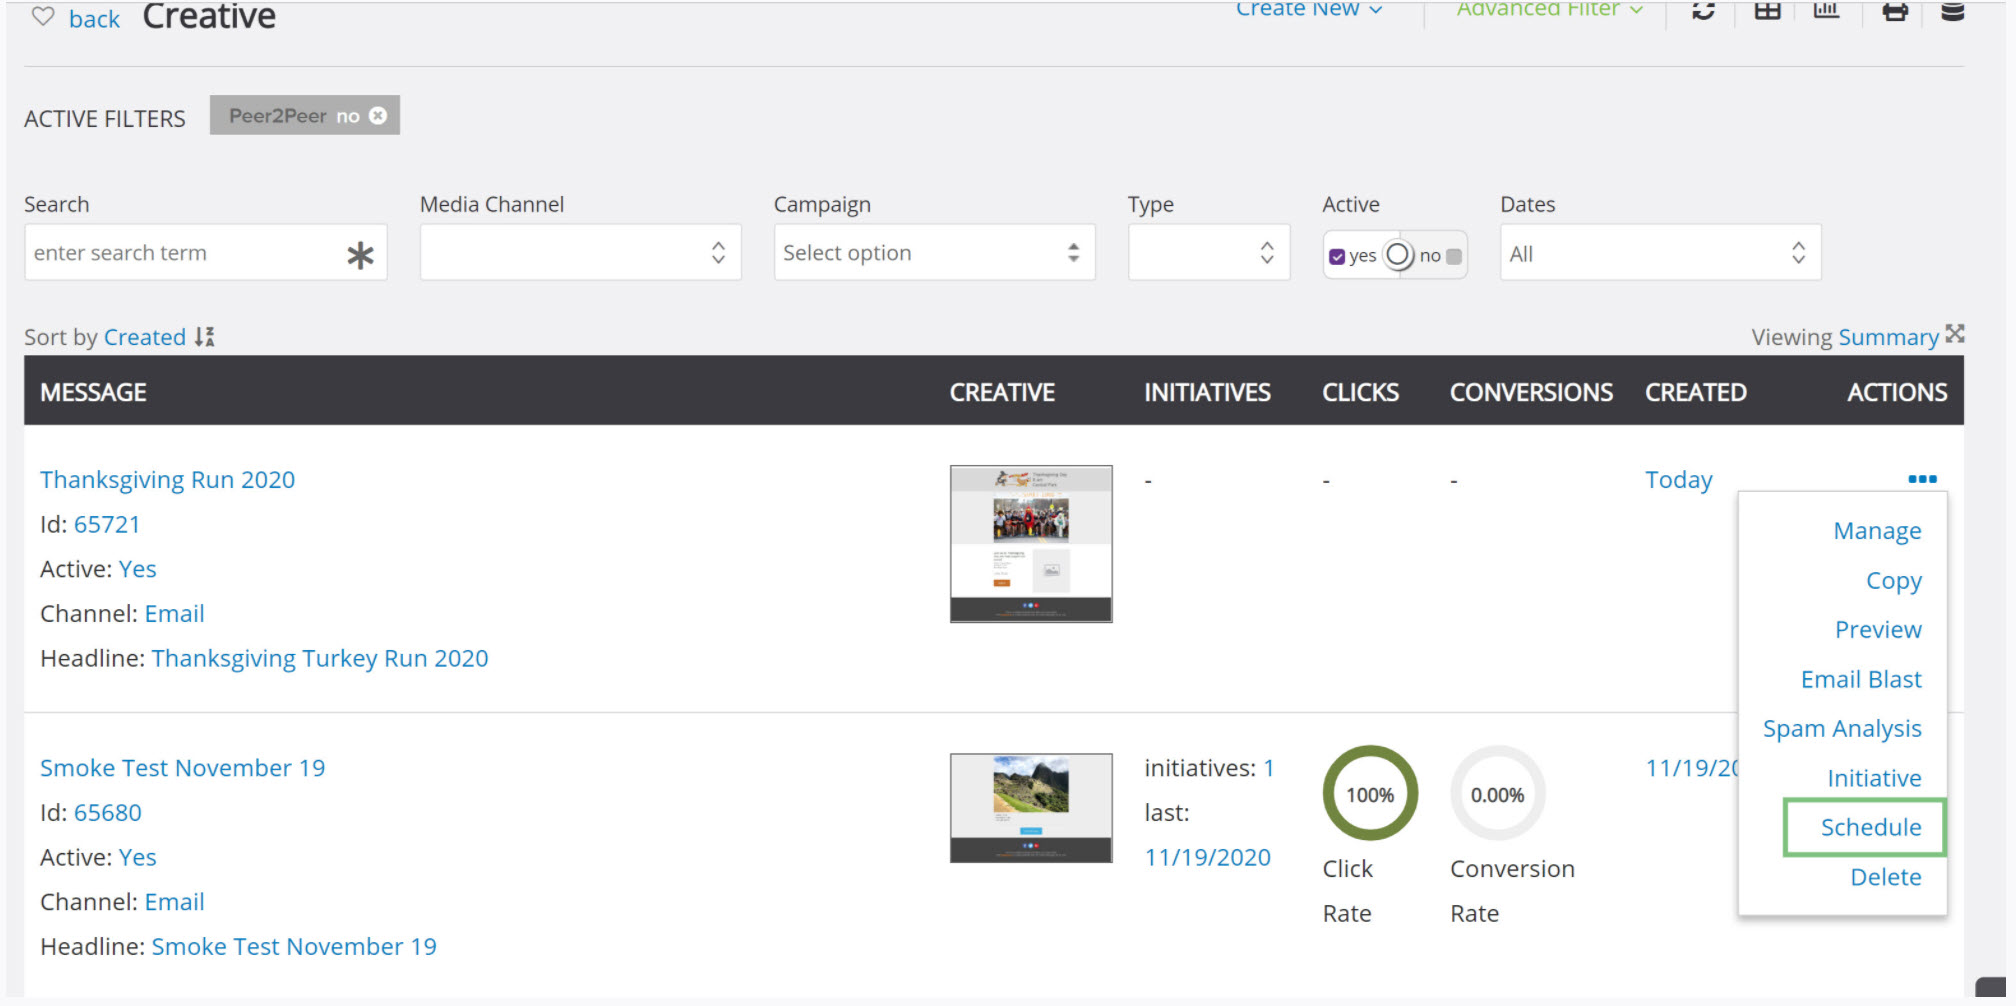
For assistance in scheduling an email, read Campaigns & Marketing: Sending - Mastering the Art of Testing and Sending Campaigns for Non-Profits
The final preparation of an email campaign can be the most nerve wracking, it can be hard to know when you’re really ready to send your initiative. That’s why we have creating a checklist that contains the elements you need to think about before you send an email to your list. Think of it as a quality-assurance check of your CharityEngine Campaigns.
Email Analytics
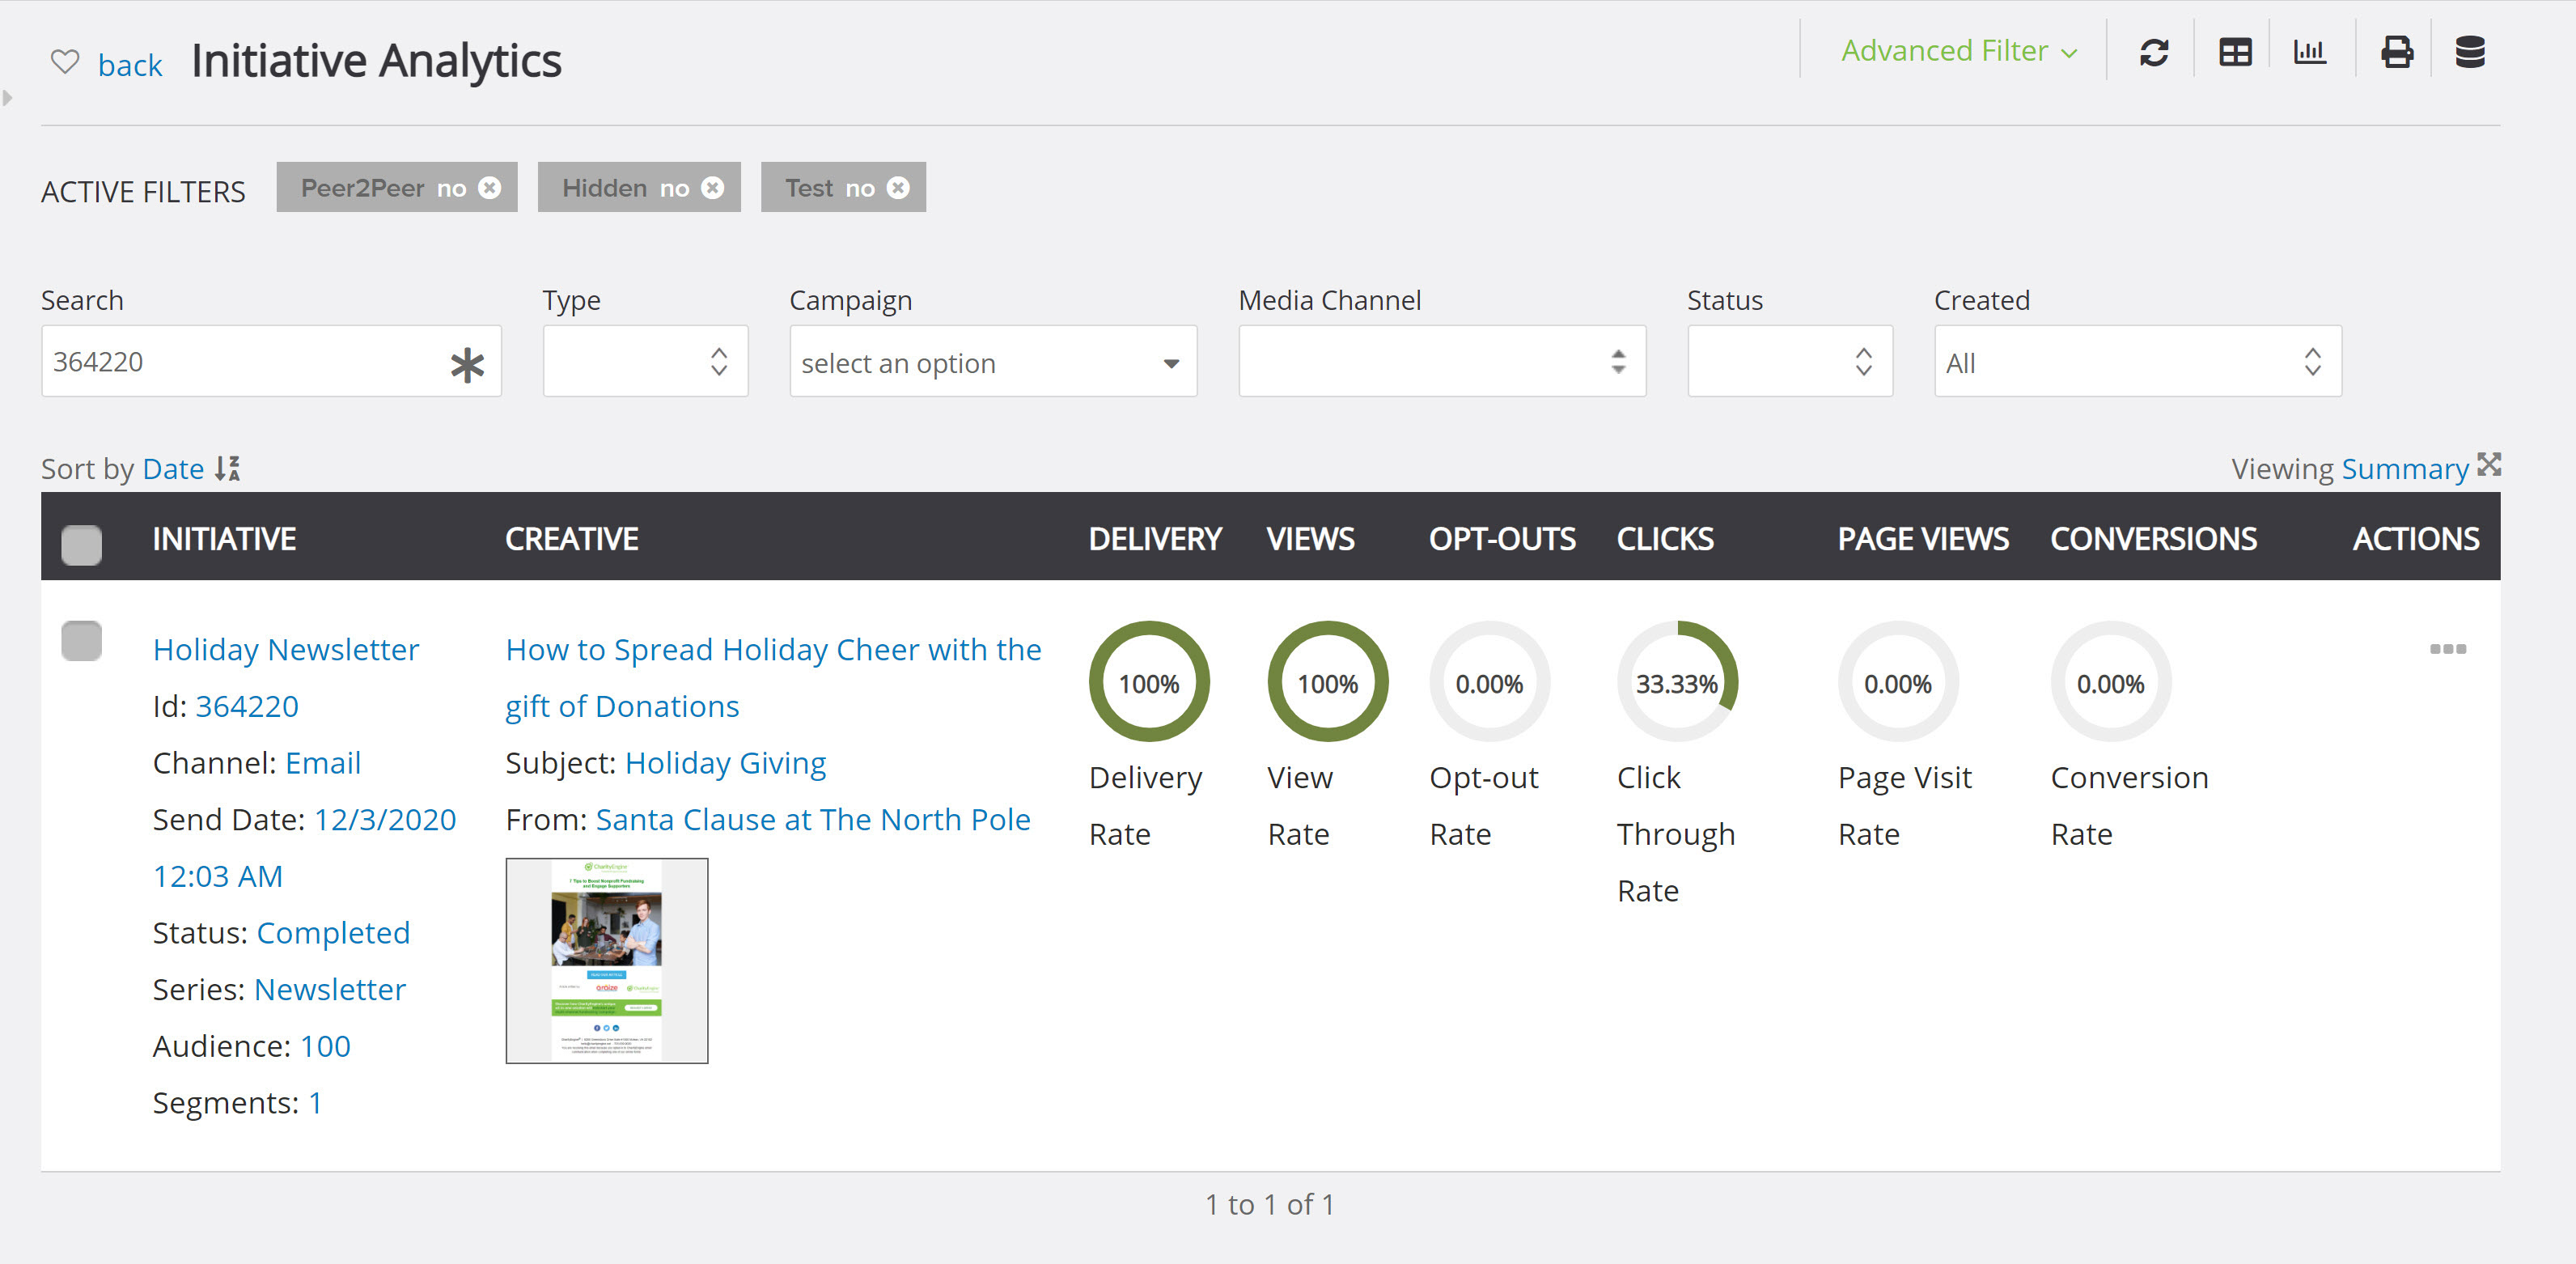
After an email has been sent, it is always important to check the email analytics to view how well the email performed. By viewing this information, you can gain knowledge on what works and what does not when it comes to sending emails. The most important data to look at is the delivery rate, the conversion rate, the opt-outs, and the actual audience size.
There are two places in CharityEngine that users will be able to see the analytics of their emails, Initiatives and in Reports & Analytics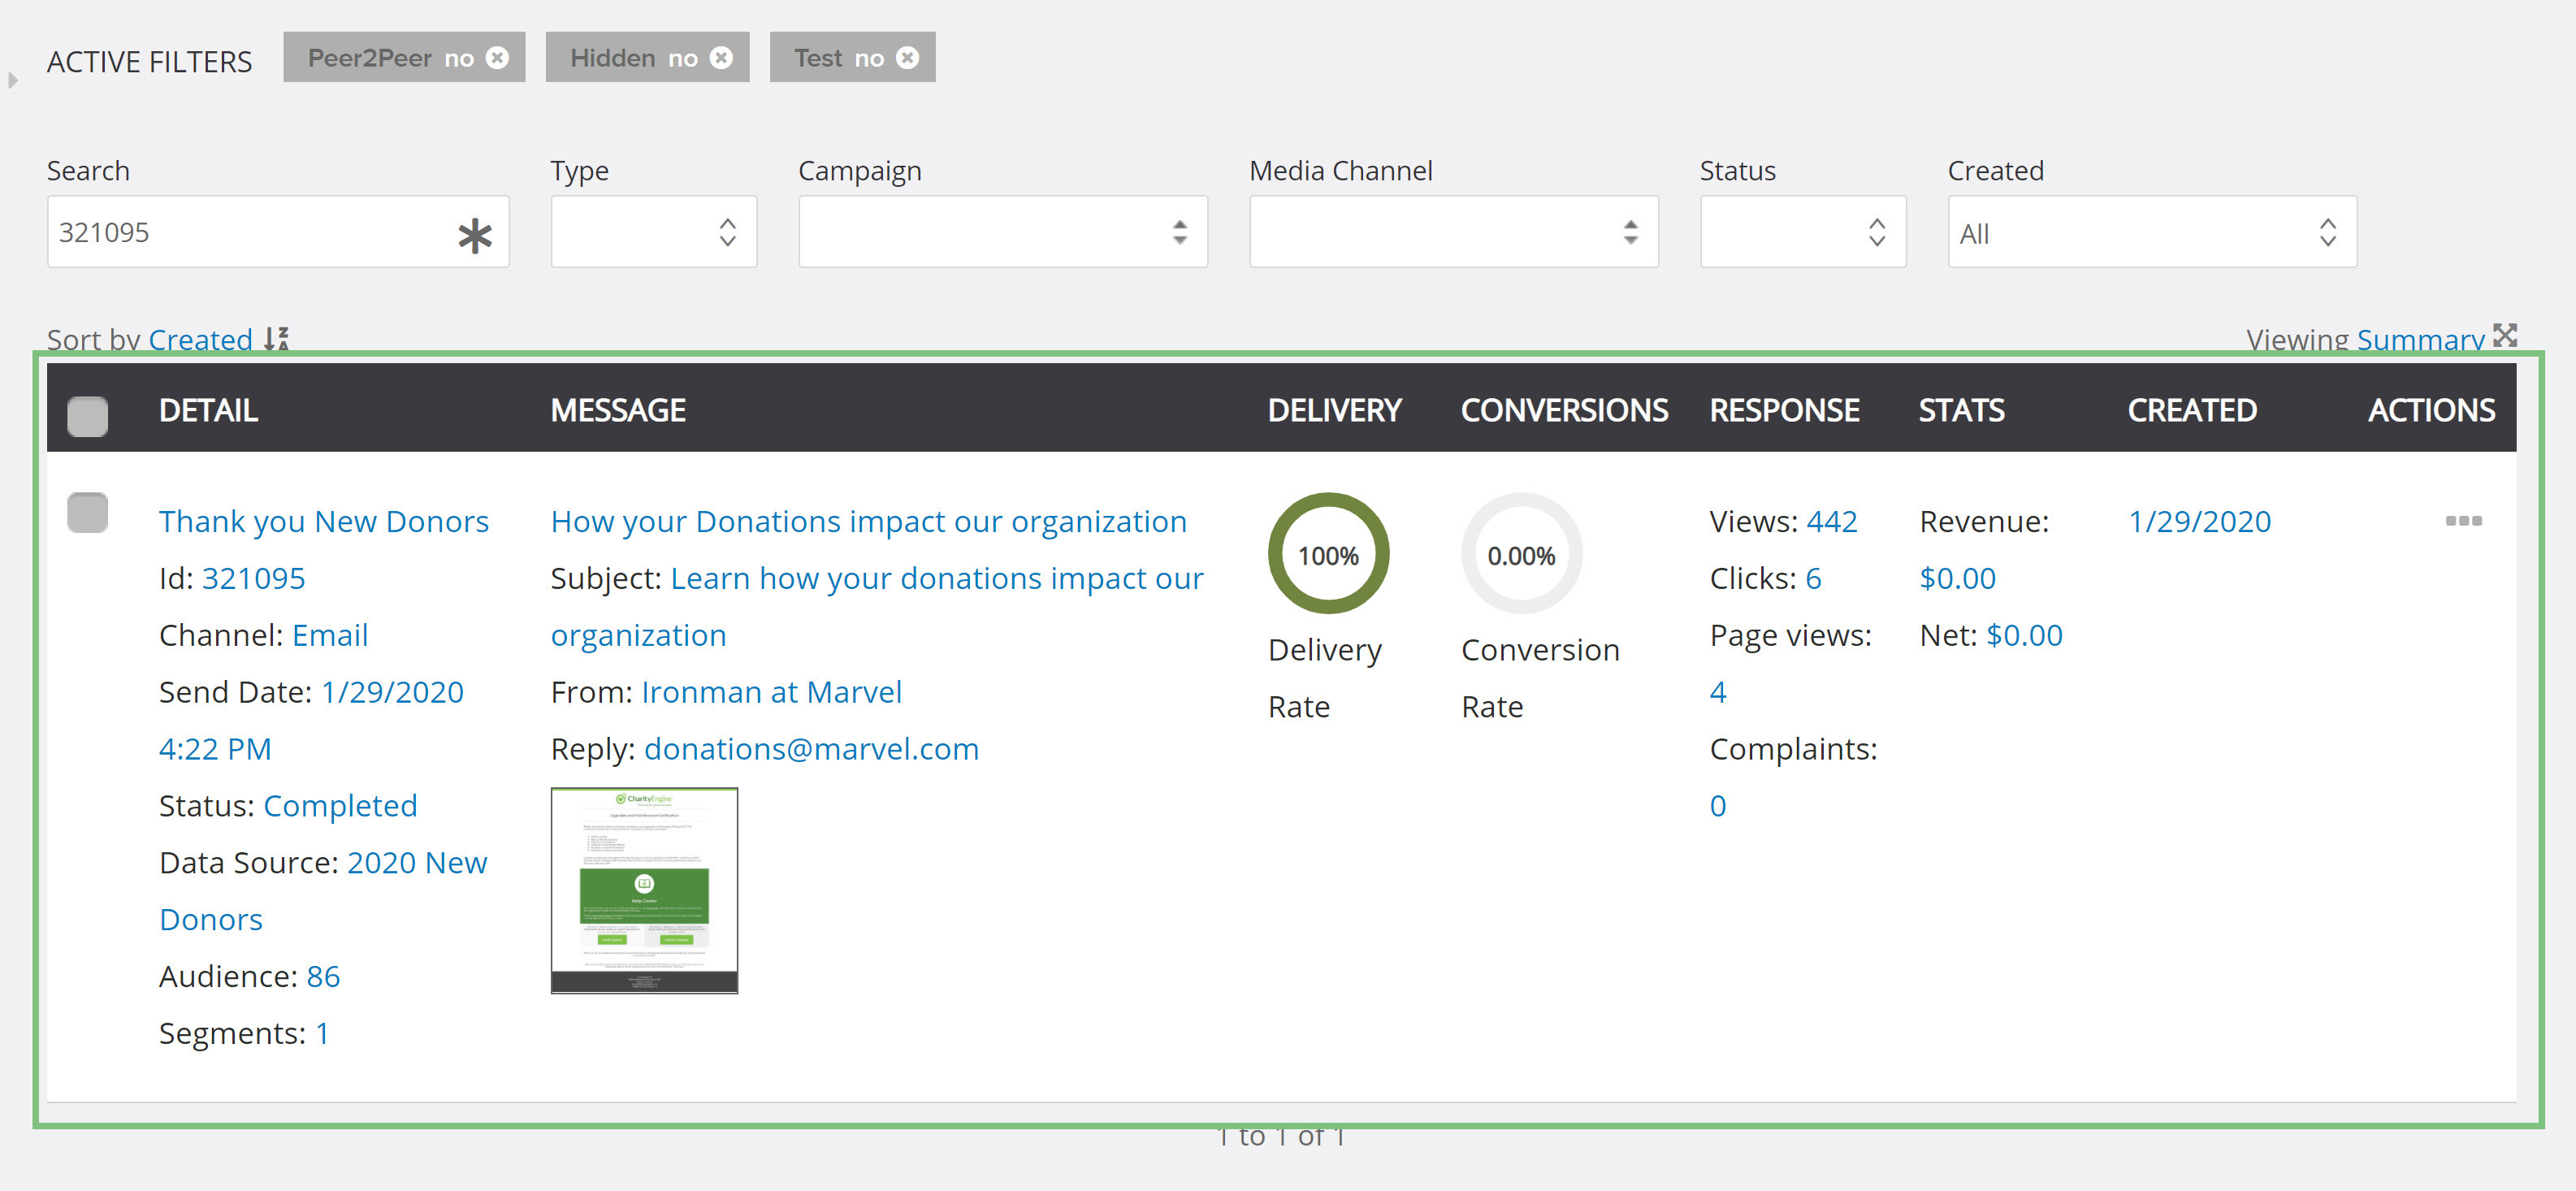
FAQs & Additional Reading
Monitoring of email delivery rates is an important aspect to ensure future delivery success. Please actively review results/failures and take appropriate actions to correct failures. Learn more about Email Deliverability Best Practices.

