Email Campaigns: How to Build Opt In List - Using Query Builder to Segment Existing Lists
Introduction
You may find the need to target specific donors within your regular Opt-In List as way to communicate with a portion of your mailing list. Using query builder to segment an opt-in list is a great way to send emails to selected contacts within a specific email opt-in list. Reason to segment your opt-in list may include communicating with contacts who have recently donated, made a significant contribution, or attended recent events.
Or explore our FAQs for additional options to create and build your opt-in list.
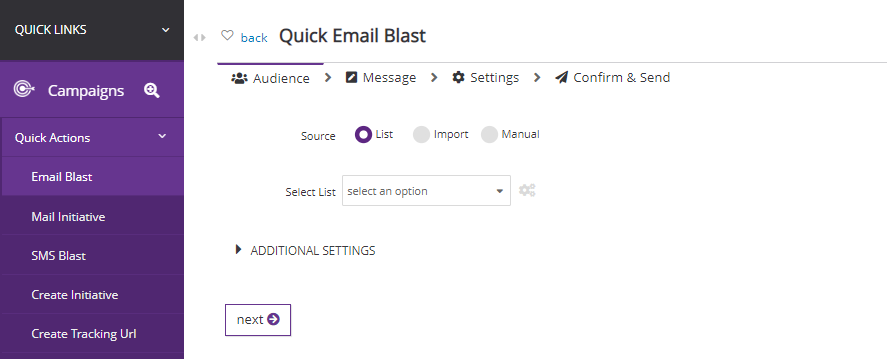
Table of Contents
Prerequisites
No additional prerequisites are required for these steps.
How to use queries to segment an existing opt-in list
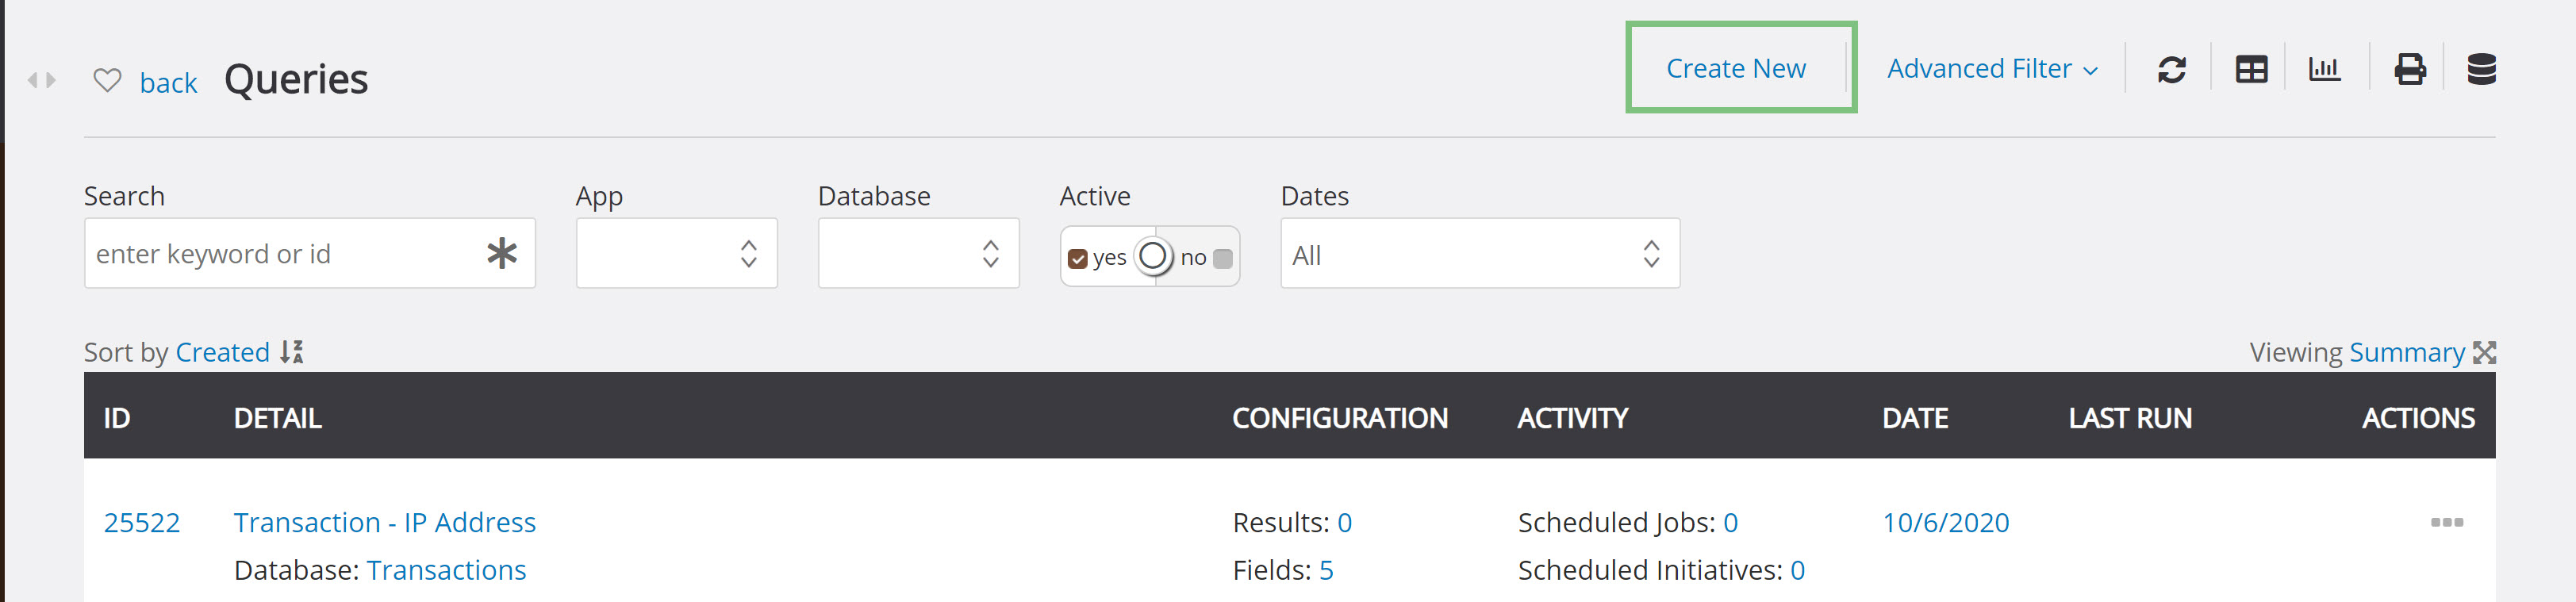
Step 1: To segment an opt-in list, begin by navigating to Workflow & Automation > General > Queries and click the Create New button.
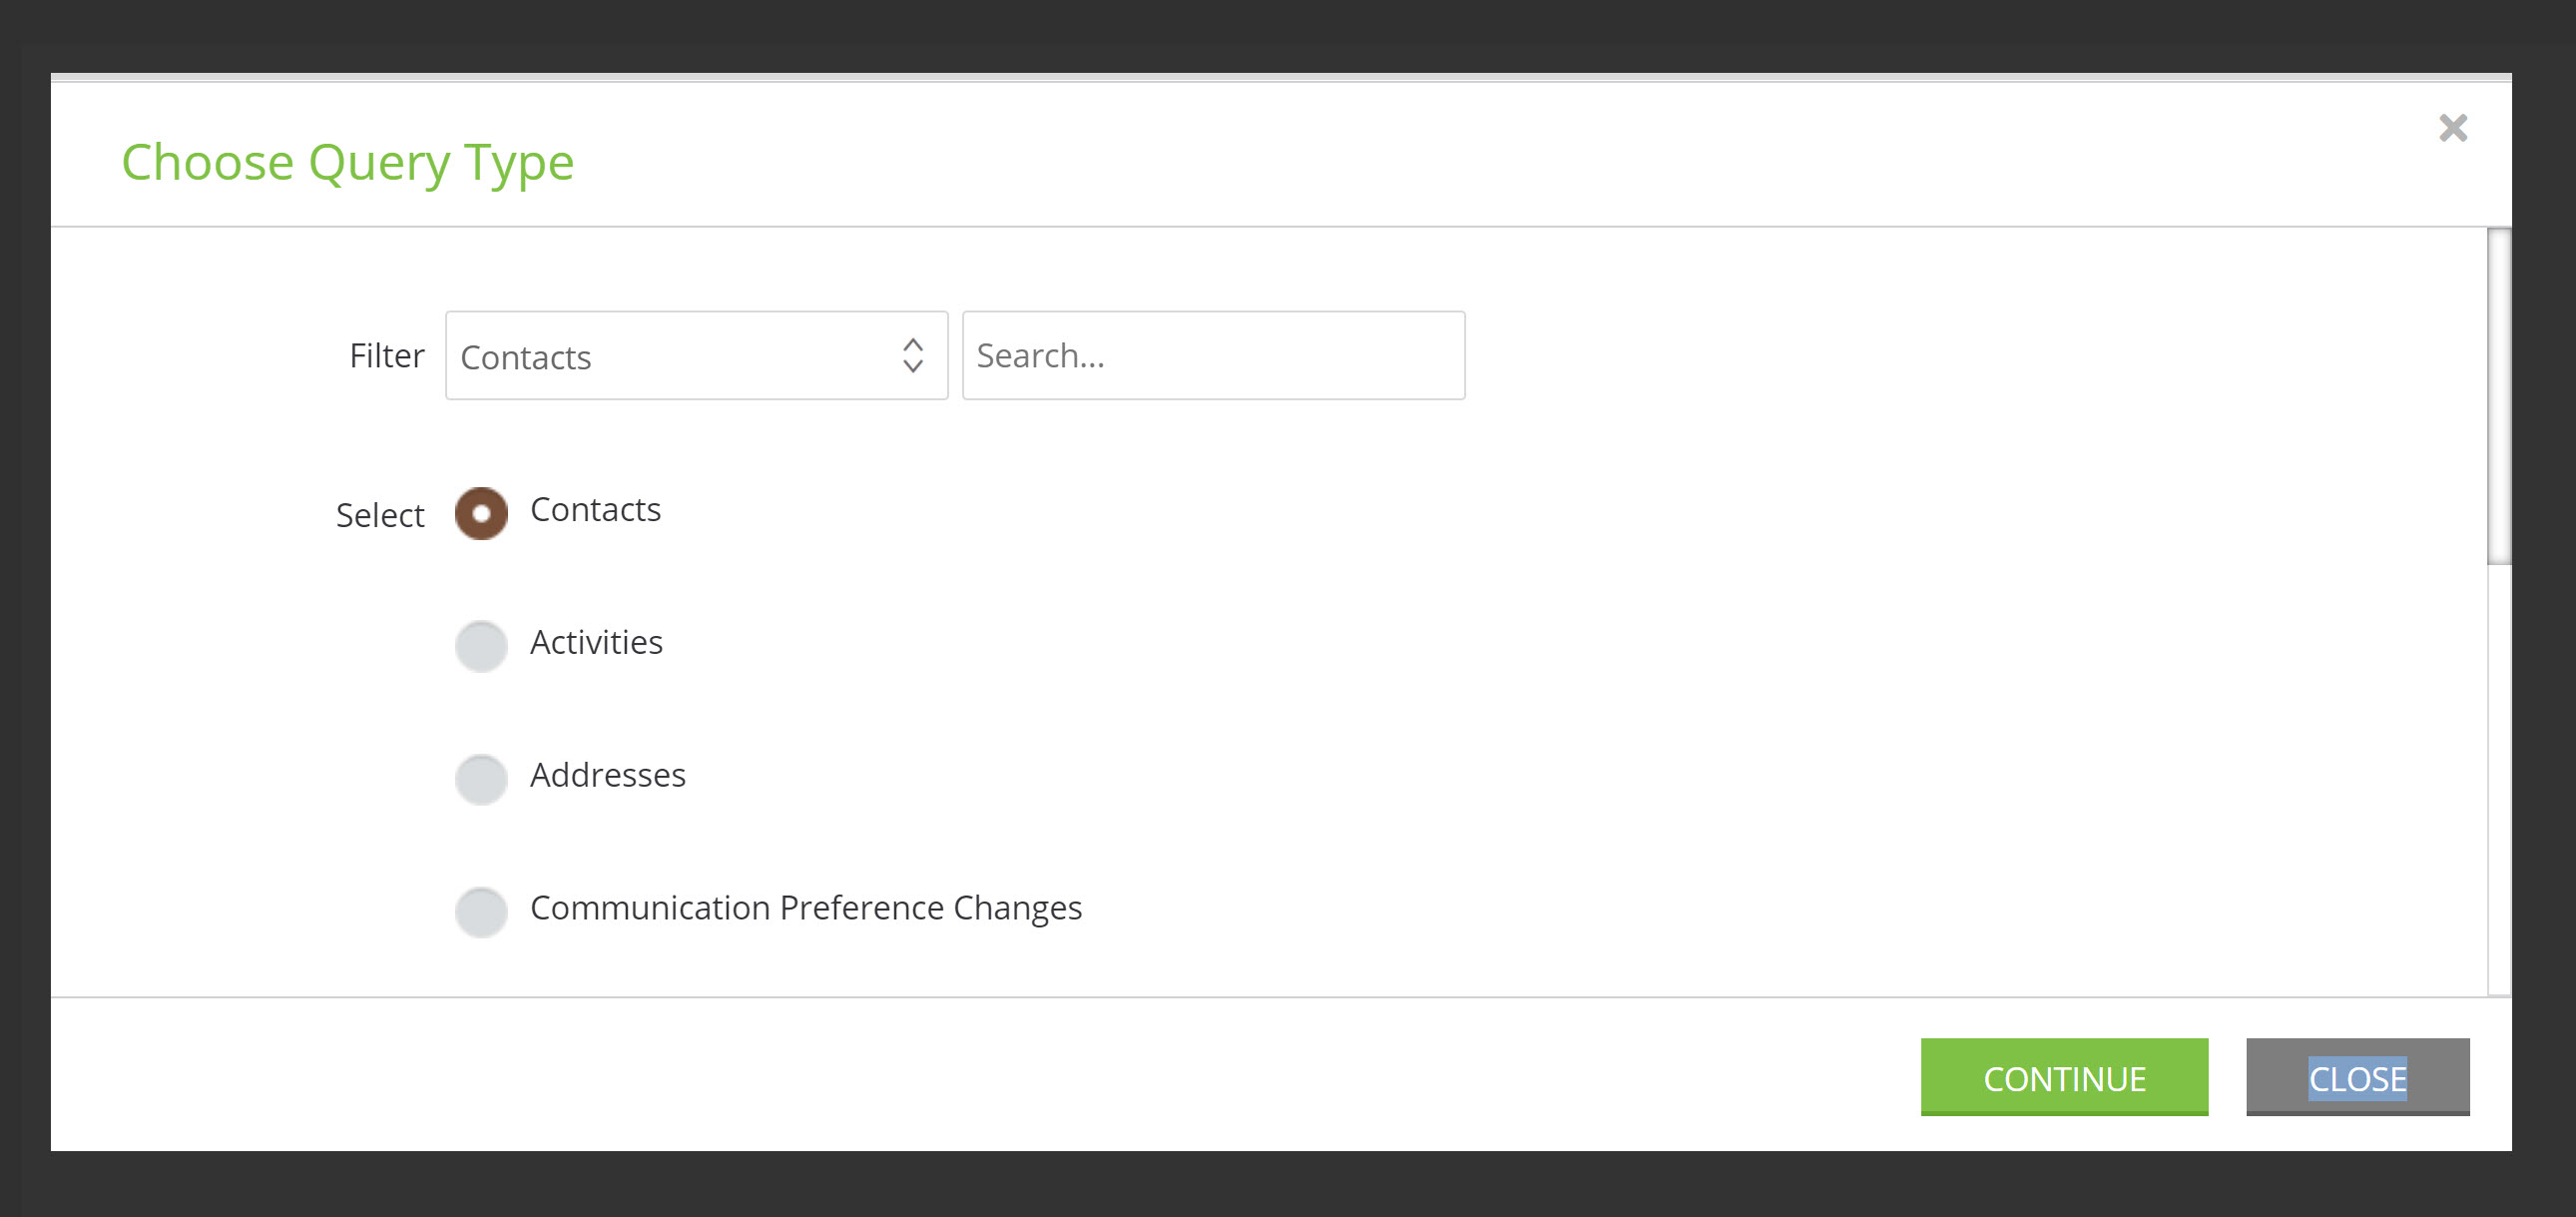
Step 2: Select
-
- Filter: Contacts
- Select: Contacts
- Click CONTINUE
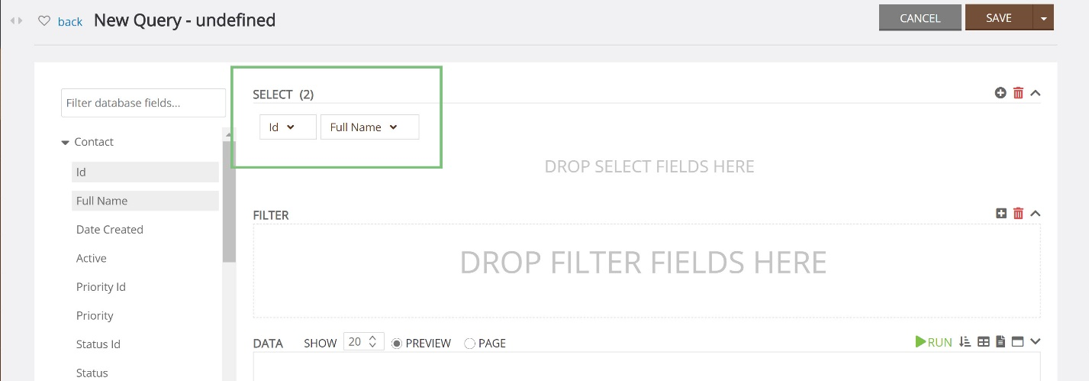
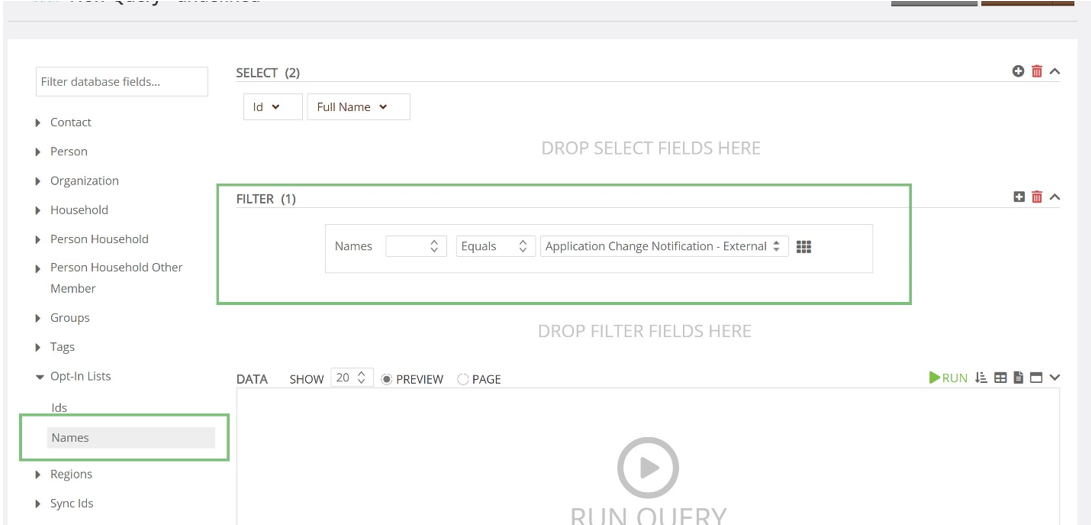
Step 3: Begin building your query by adding data elements to the Select section. Simply drag and drop or double click to select. Select your relevant data points needed for your output including Id and Full Name.
Step 4a: Under Filter, you will begin to add the filters to create the subset for your sending needs. To begin, we will select Names from the Opt-In Lists drop down. Again, simply drag & drop or double click to add. You can also select Ids if you know your Opt-In List ID.
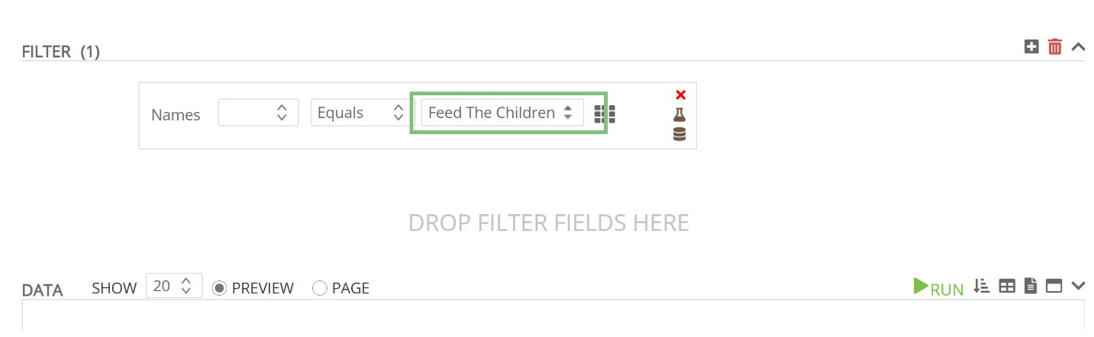
Step 4b: Use the drop-down feature to select the opt-in list you wish to segment. In this example, we will be segmenting the existing "Feed The Children" opt-in list.
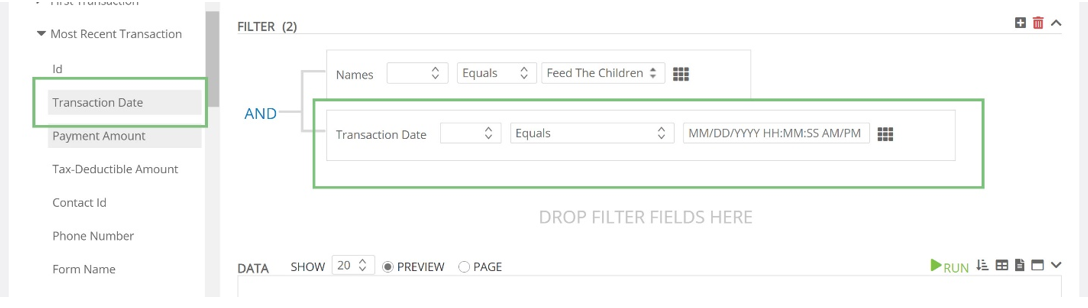
Step 5: To further segment our list, we will identify donors within this opt-in list who have made a transaction within the last year.
-
- Locate Transaction Date from within the Most Recent Transaction option
- Drag & drop (or double click) to add this FILTER.
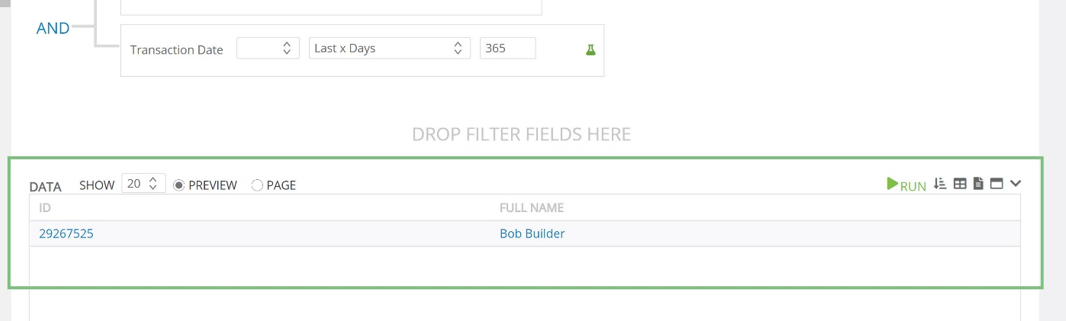
- Next, hover on the data filter to reveal the formula icon and then select Last X Days from the dropdown.
- Please note the presentment of AND to join the filter of Opt-In List = "Feed The Children" AND Transaction Date = Last 365 Days. The AND can be clicked on to reveal other logic functions
- Note: Once you select Formula, you can also select Years vs. Days to achieve the same result
Step 6: Click RUN to initiate your query. Your list will now provide a CharityEngine Contact ID and the Contact's Full Name for any donor who is assigned to the "Feed The Children" opt-in list AND who has made a donation in the last 365 days.
Step 7:
-
- In the top right-hand corner, click In the Query Settings box, create a Name (description is optional).
- Click SAVE & CLOSE
- The query will now be available for email sending purposes.

-
- Campaigns > Create & Publish > Creative > Select Existing or Create a New Creative
- Or select Campaigns > Quick Actions > Email Blast
- Or select Campaigns > Quick Actions > Email Blast
- Campaigns > Create & Publish > Creative > Select Existing or Create a New Creative
Step 9: When selecting your Source/Audience, select Source: List and from Select List to use the drop down to locate your query name (i.e. Segmented Opt-In list- within 1 year)
You can create an opt-in list and choose Membership Type "Linked". Campaigns>List Management>Opt-In Lists
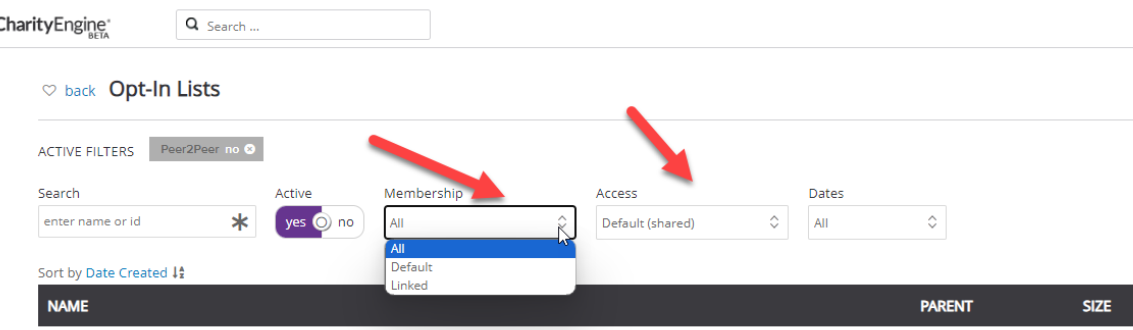
This will allow you to link "Child" lists to this list. For example, if you had Opt-In lists "A" and "B" and you wanted to create a new list "AB" which included everyone on both lists, you could create that list as Membership Type "Linked". Once you do that, from the "AB" list management screen there will be a new tab "Linked". Here you can add the other 2 lists to be linked to this one. Alternatively, you can go to the Manage page for the A or B lists and choose "AB" as the Parent List.
You can create an opt-in list and choose Membership Type "Linked". Campaigns>List Management>Opt-In Lists
This will allow you to link "Child" lists to this list. For example, if you had Opt-In lists "A" and "B" and you wanted to create a new list "AB" which included everyone on both lists, you could create that list as Membership Type "Linked". Once you do that, from the "AB" list management screen there will be a new tab "Linked". Here you can add the other 2 lists to be linked to this one. Alternatively, you can go to the Manage page for the A or B lists and choose "AB" as the Parent List.
Frequently Asked Questions & Further Reading:
Q. Is there a feature to simply trigger a donor's email to be added to an opt-in list?
A. Using our Trigger feature within Automation & Workflow is a great way to add to your opt-in list at your chosen frequency. Visit our trigger tool article here for more information.
Q. Is there a feature to add a large volume of donors to an opt-in list?
A. Using our Importer tool within Automation & Workflow is also another great way to add contacts to your opt-in list in bulk. Visit our article to learn how to add many contacts to an opt-in list here.
Q. How do I use the Email Blast feature?
A. Using our Campaign tool will allow you to easily create an email and quickly reach your donors. Visit our article on how to create a simple email here.
