Introduction
The purpose of this help center article is to guide users on why and how to import external bulk validation services such as, National Change of Address (NCOA), updates to contacts within CharityEngine.
Table of Contents
Prerequisites
User will have identified preferred vendor, required subscriptions, and identification of needed data required by vendor.
Instructions - Preparing Data for Export
The following instructions will demonstrate an example for NCOA, but can be applied to other bulk data appends. As a first step, obtaining the data required by the vendor should be performed. This should include the unique address id for ease of use for importing once returned from the vendor.
Step 1: Access the Automation & Queries App > General > Queries > Create New > Filter:Contacts > Select: Addresses > Continue
Step 2: Select required fields and filter
In this use case, the user will be locating all mailing addresses which have opted into receiving mail.
Note, if the returned file requires the user to update/append an existing address, include the Address ID when sending to the vendor.
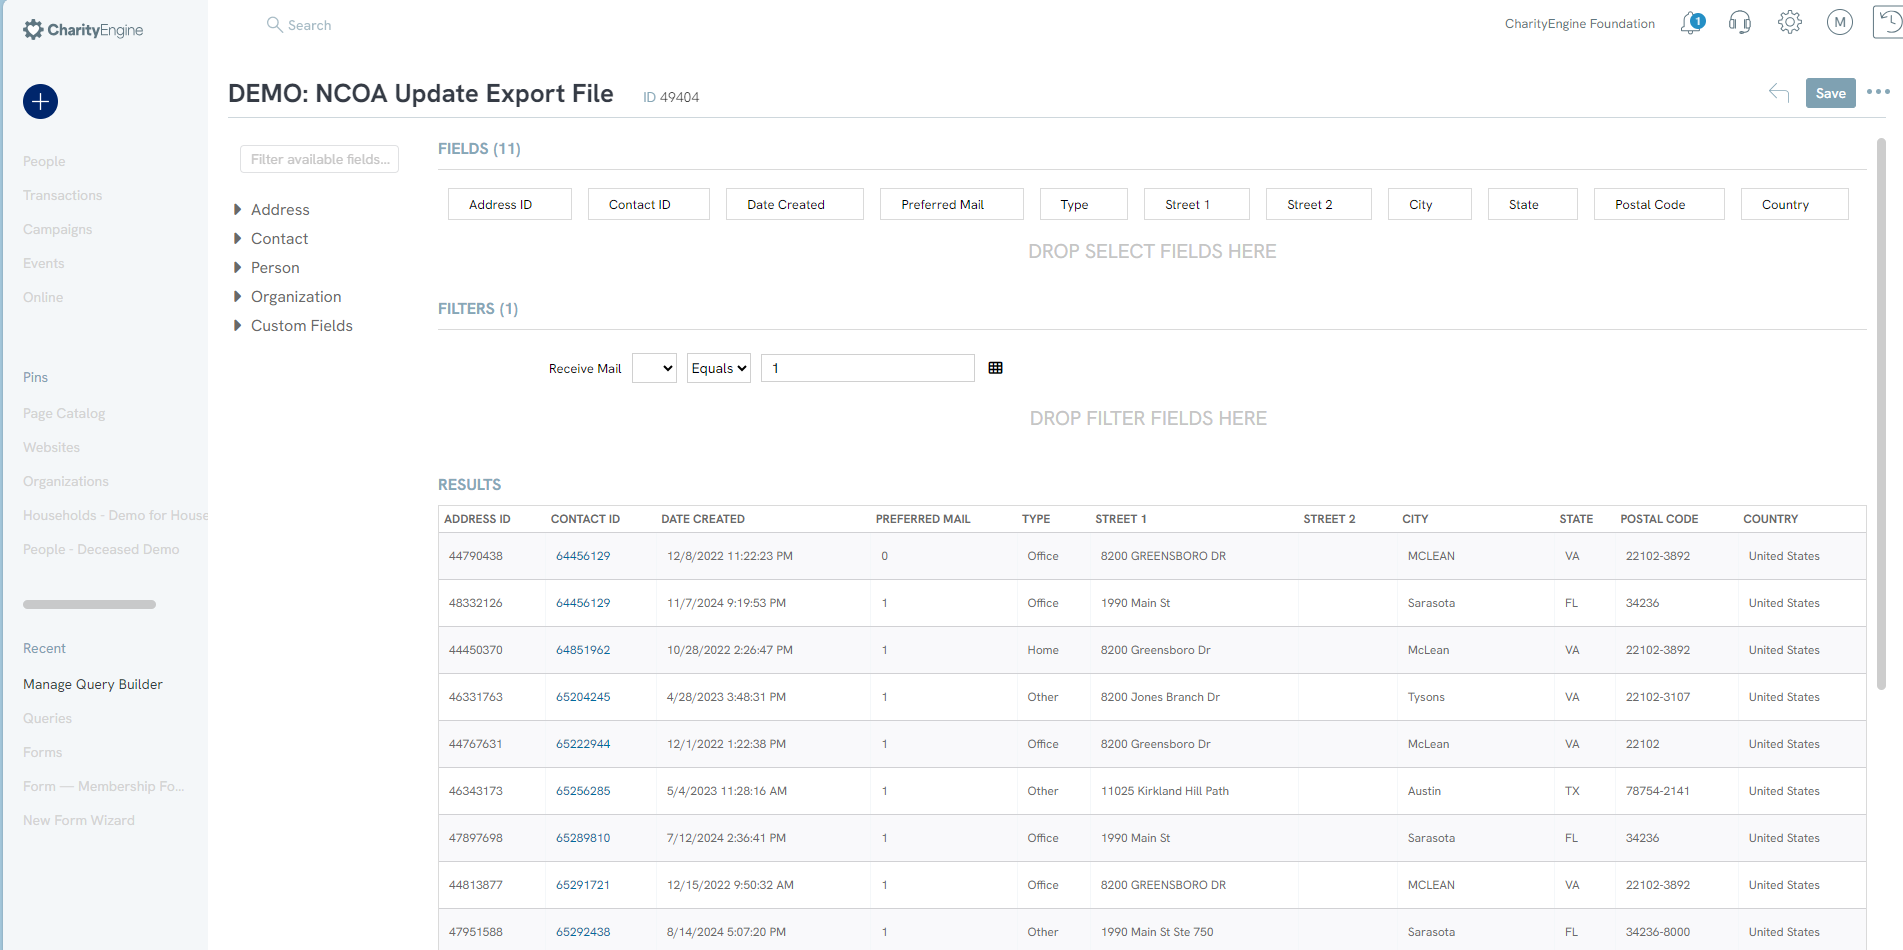
Step 3: Once all data has been identified, select SAVE to name and secure the query.
Step 4: From the SAVE drop down, select Export Data or Schedule Report to create an output file.
Instructions - Importing/Appending Vendor Returned Data
The following instructions will demonstrate an example for NCOA, but can be applied to other bulk data appends. Once the data has been returned by the vendor, the user can then append or import the data sets. By using the unique Address ID and/or Contact ID, the user can easily append the updated address.
Step 1: Review the file provided by the vendor. Ensure data is formatted appropriately to avoid importing errors.

Step 2: Access Automation & Workflow App > General > Import/Export Jobs > Create New > Import
Step 3: Select Import To: Addresses > NEXT
Step 4: For File Type: Excel (or appropriate file type) > Data File: select the location > NEXT
Step 5: Map File Columns
Note: By using "Address ID", the importer will 'append' the vendor's data to the existing Address ID
Note: If you wish to create a new mailing address, ensure the data set includes settings such as "Preferred Mail" to set as a value of 1 (or preferred) address for the contact. When creating a new address, include the CharityEngine Contact ID to append to an existing CE ID.
