Introduction
Leveraging CharityEngine's Automation application can provide you with the tools you need to create powerful data transformations, helping you to further minimize manual work, maximizing automation - so you can focus on fundraising. Leveraging the Data Transformation feature allows users to quickly and easily adjust specific data field for updates or corrections.
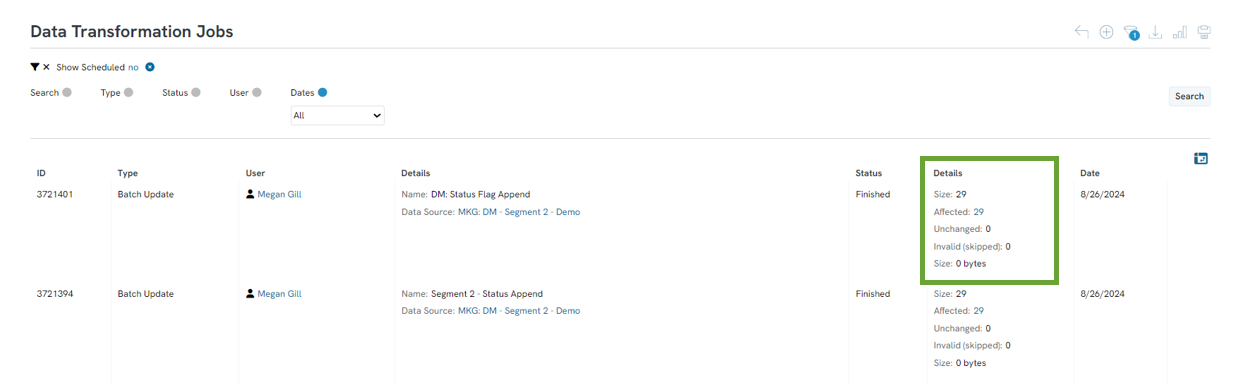
Table of Contents
Prerequisites
- Warning: Transforming data can cause irreversible changes to your database. Make sure you back up your data first.
- Creation of a query to identify your needed data element for transformation is required.
- Objects and fields may be limited in the transformation feature - please review the transformation elements to verify needed transformations
Instructions - Identification of data field requiring bulk update/modification
As an element of data governance, you may find instances in which a data element requires modification in a bulk instance. In this example, we have identified the need to adjust the initiative of a series of transactions. Please note that this feature can be useful for data transformations related to contact records, person records, opportunity records, subscription records, transaction records or invoice records. We will leverage the transformation feature for adjustment to transaction records to adjust and correct initiative attributions. To begin our use case, we will leverage the query filter Donations and select type as Transactions.
Before preforming the data transformation, you must create a query that contains all the transactions which require an update.
Step 1: Access the Automation App > General > Queries > Create New > Filter: Donations > Select: Transactions > Continue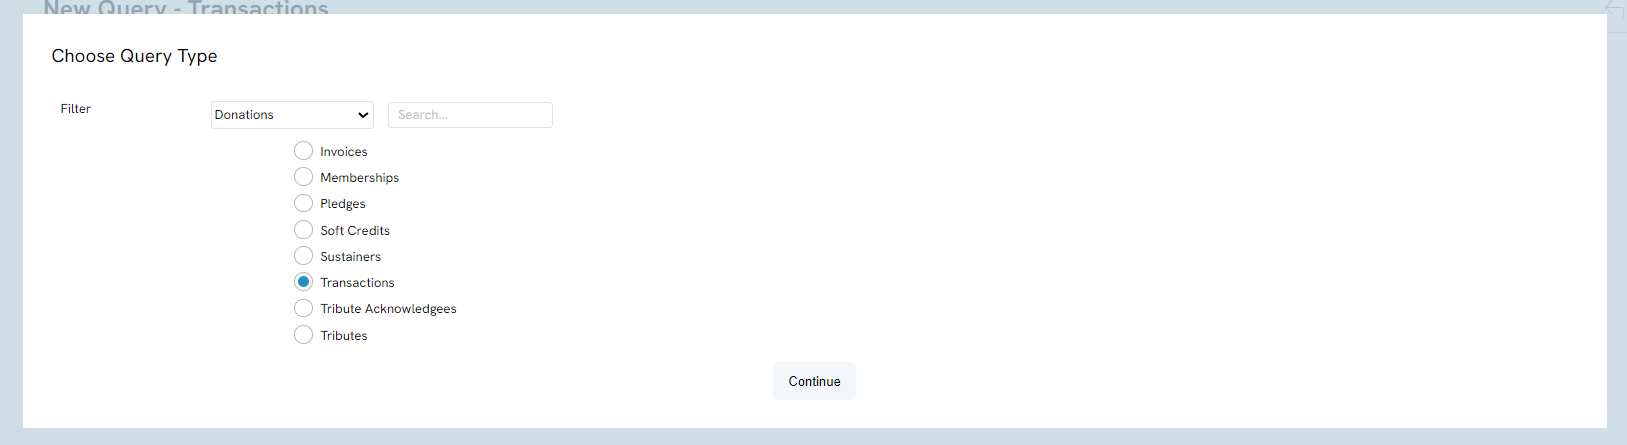
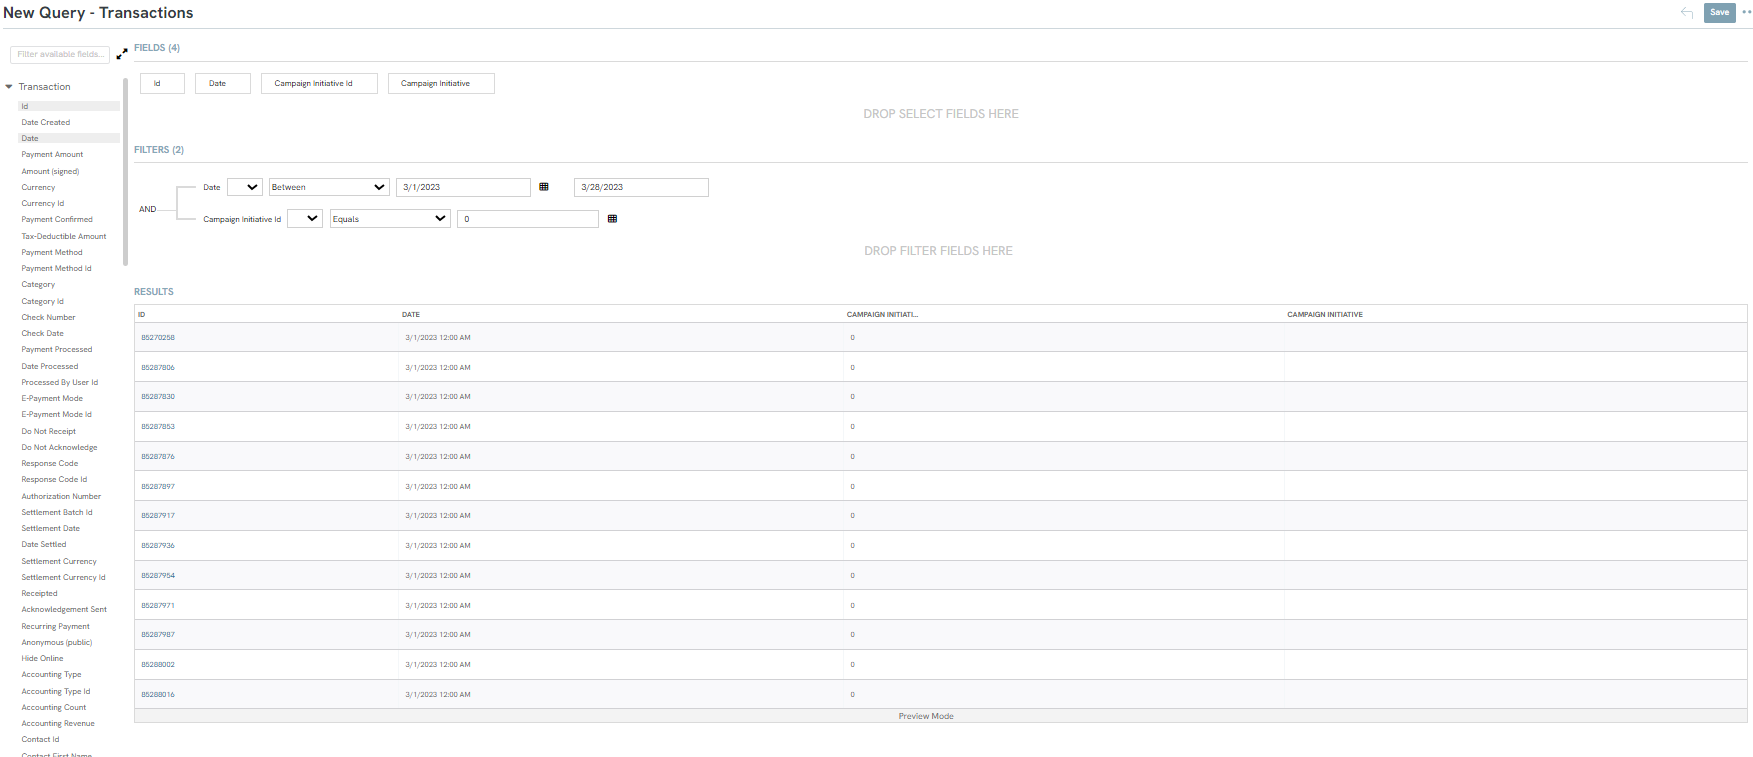
Step 2: In order to leverage the transformation tool, your query must contain a unique values that will allow the transformation tool to easily identify a unique values. When available, leverage the primary key, whether that is Contact ID for contact transformations, or Transaction ID for transaction transformations, etc. Build your query to include the primary key or identifier and your targeted list. In this example, we are identifying all transactions between 03/01/2023 - 03/24/2023 with an initiative ID = 0
Step 3: Next you will add a Free Form Field to populate the value you wish to have updated on all transactions. To create the Free Form Field, click the Plus Sign in the Select area.
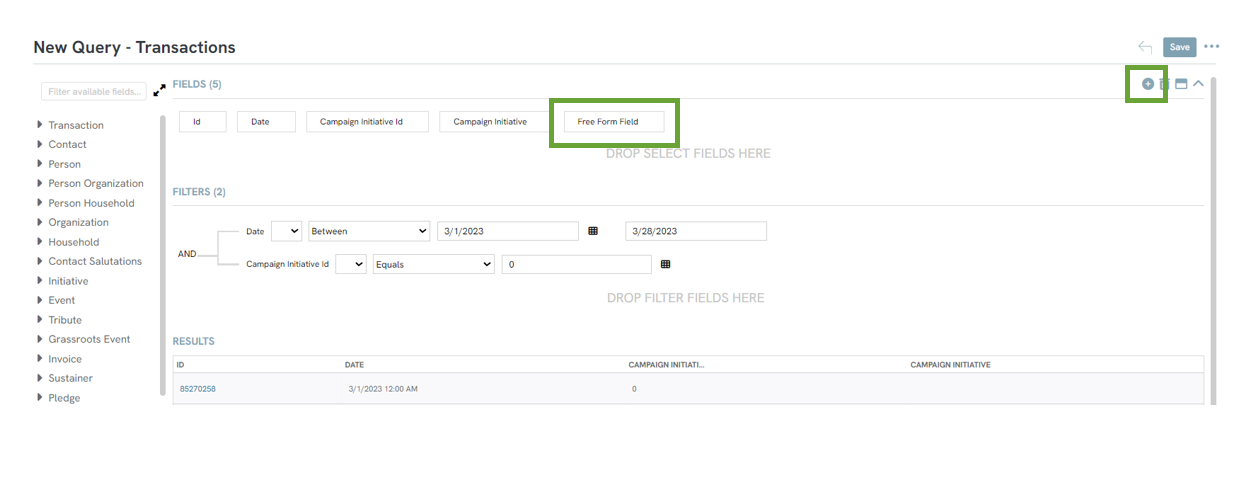
Step 4: Click in the field to rename the field and click the Down Arrow to set the desired value for which the field should be updated. In this example, we will modify all transactions in the query to reflect Initiative ID 566613. Click RUN to populate the field. 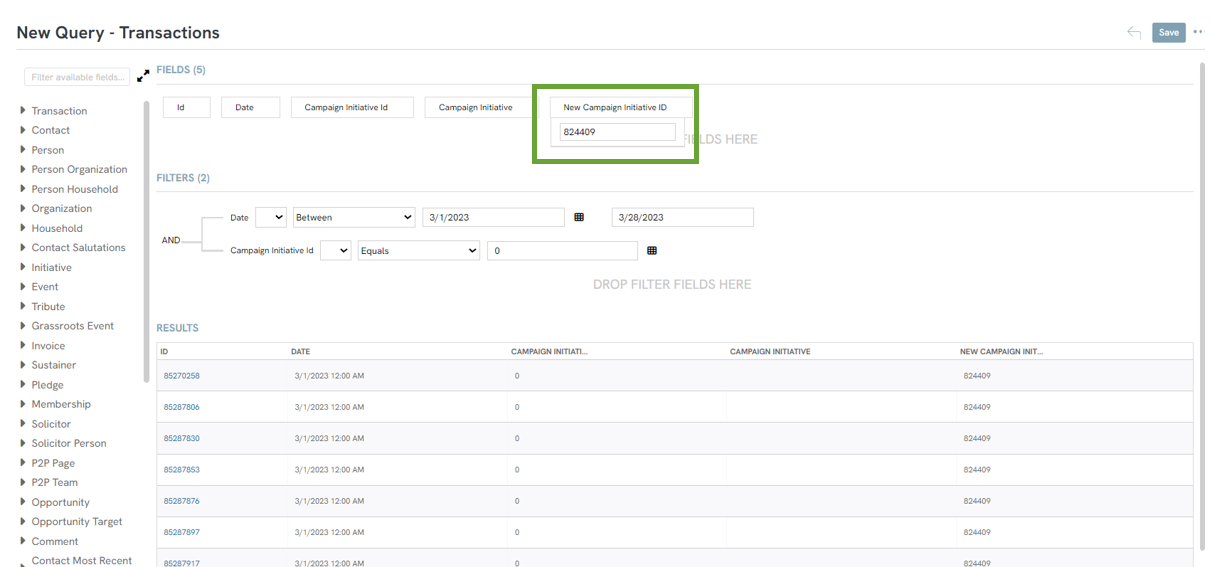
Step 5: Click SAVE > Name of query > SAVE
Instructions - Initiating a data transformation
Once your query is created, you can initiate the data transformation feature.
Step 1: Navigate to the Automation App > Workflow > Transformations > Plus Sign (Create New)
Step 2: Select Type: Bulk Update > NEXT
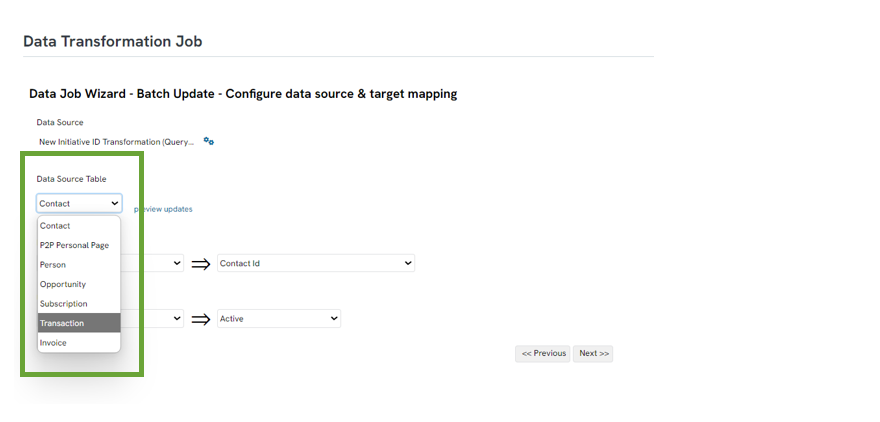
Step 3: Select your data source as created in the above instructions and use the drop down to select your data type. In this example, we will transform transaction records.
From this drop down the user will see the available objects (or tables) which can be used for data transformations. Selecting the object will also expose the specific fields available for transformation. (Step 5 below)
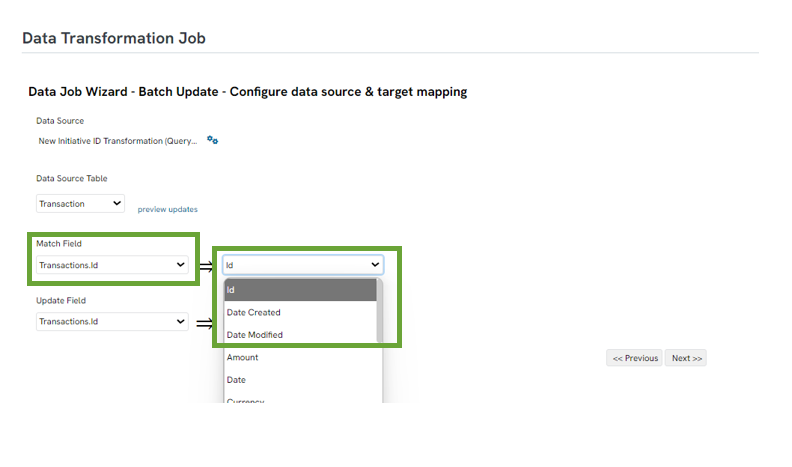
Step 4: Next select the Match Field to identify your primary key for matching ids for update. The primary key must match the primary key from the query to the primary key in the object. In this example we will leverage the Transaction ID (from the query data source) and match to the ID from the available transaction data fields.
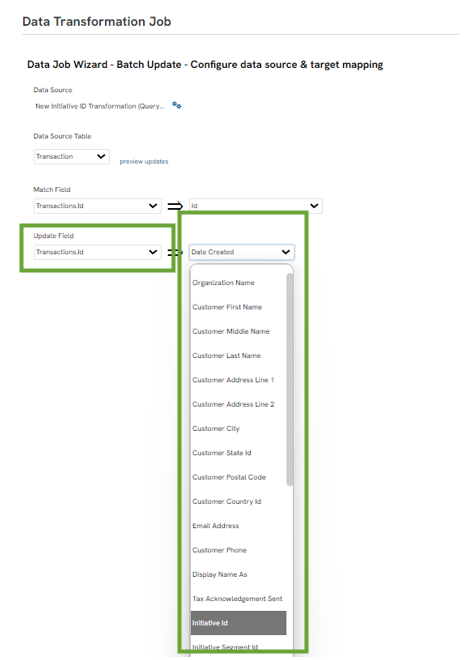
Step 5: Next identify the fields for update.
- Leverage the Update Field to identify the field within the query which contains the new value for update.
- Use the => field to identify the field (within the data table) you wish to have updated with the value above.
Step 6: leverage the preview updates to review the changes prior to transforming the data set to ensure confirmation of intended changes
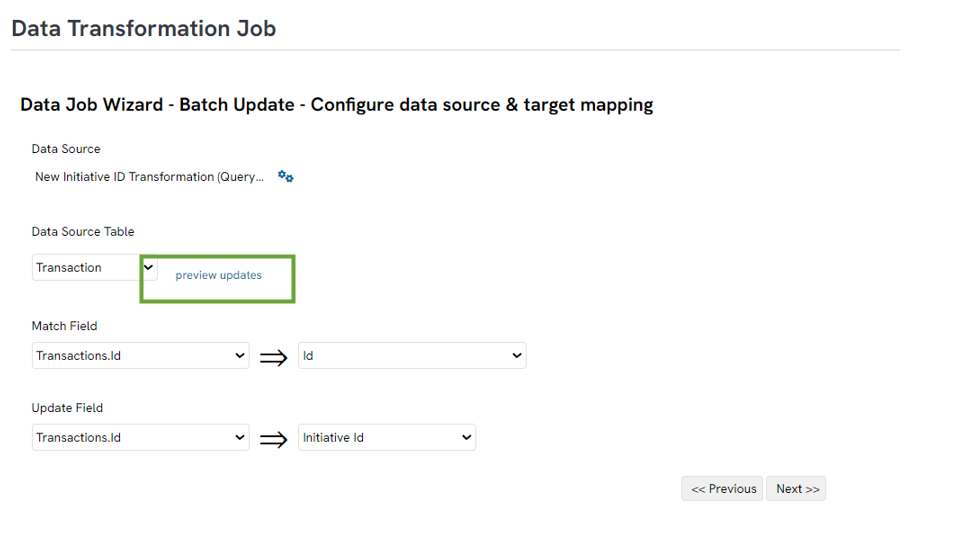
Step 7: Click NEXT to proceed with the data transformation.
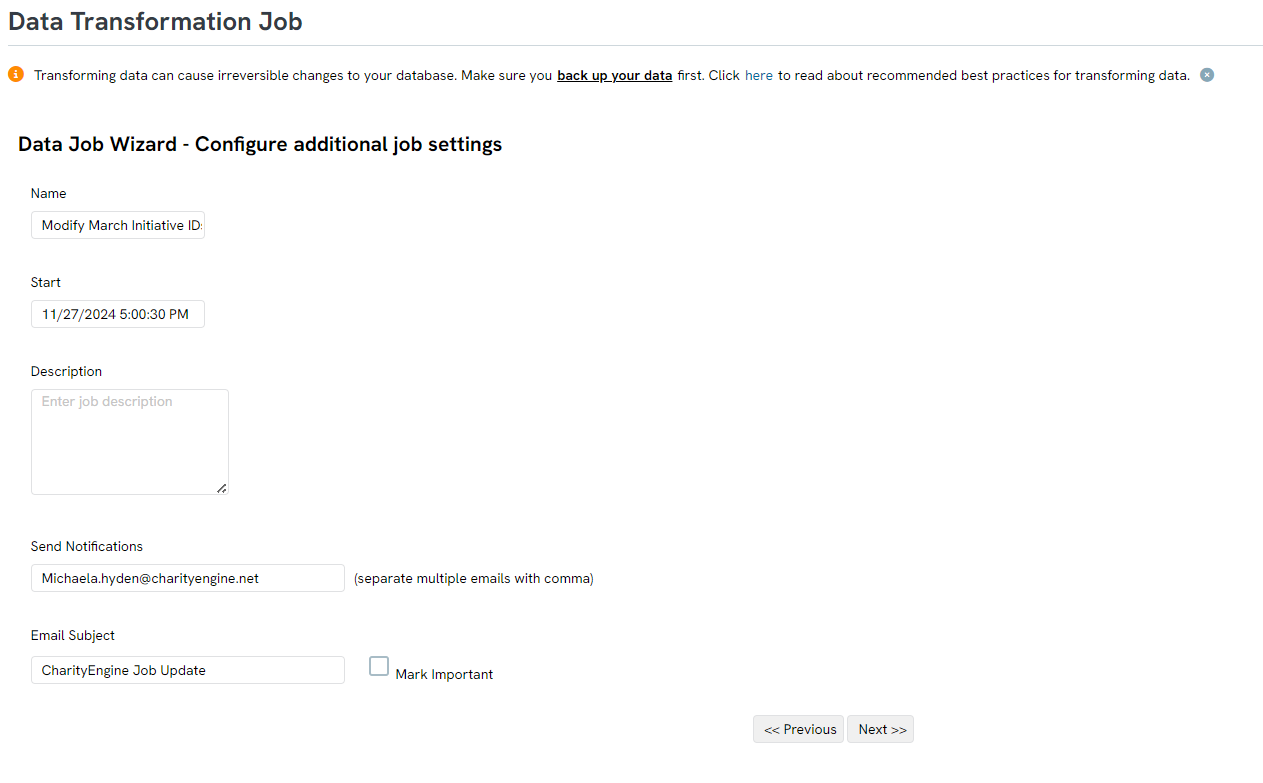
Step 8: Name your job and other attributions and click NEXT to proceed.
Step 9: Click FINISH to initiate your data transformation job.
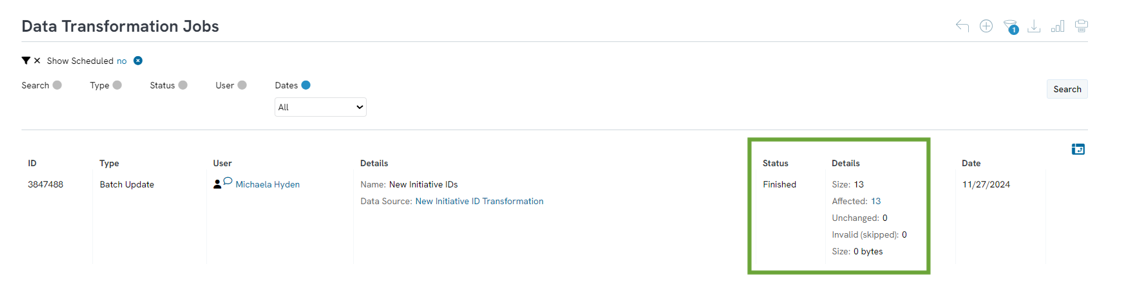
Step 10: You will be returned to the Data Transformation Job listing screen where you can monitor your job update. If you elected for email notification, an email will be delivered upon completion of the update.
Step 11: Upon completion of the data transformation job, the DETAILS section will provide you with a summary of source file size, affected records, unchanged records, and invalid records. Click through to see details of the changes.
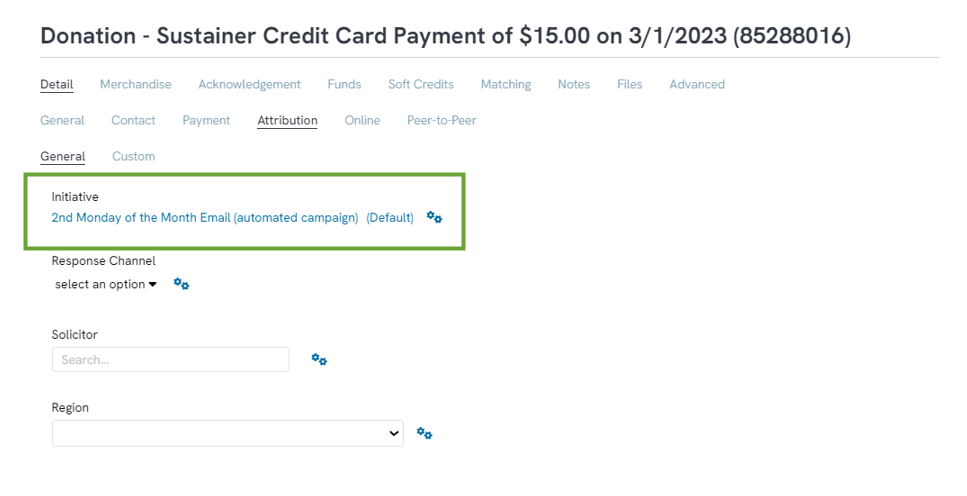
Step 12: In a QA of the updates, we can see that the Initiative ID was successfully updated to reflect initiative 824409- 2nd Monday of the Month Email.
Note: You will only be able to change to one new value at a time. The above example, if you require multiple updates to initiative IDs, this can only be completed through multiple Data Transformation jobs.
