Data Governance: Updating Contact Records Through the Transaction or Contact Screen
Introduction
As an organization, you may find that a contact has updated or changed their contact information in subsequent transaction. This may include an updated mailing address or email address. Within CharityEngine, our Donations app can alert end users of updated contact information through the transaction listing screen. On this screen you can filter for transactions that contain new information for contacts in the database. This will allow you as an organization to evaluate the need to update the contact record with their new information - or the user can dismiss the alert and take no action.

Table of Contents
Prerequisites
- Warning: Transforming data can cause irreversible changes to your database. Make sure you back up your data first.
- If your contact records have custom fields, please note, when using the match/merge feature on the Contacts listing screen, your custom fields will only maintain the surviving record's data point (i.e. record 1 contains custom field: Favorite Color = Yellow and record 2 contains custom field: Favorite Color = Blue, if the surviving record will be record 2, the Favorite Color = Blue)
Instructions: Updating Contact Records via the Transaction Listing Screen
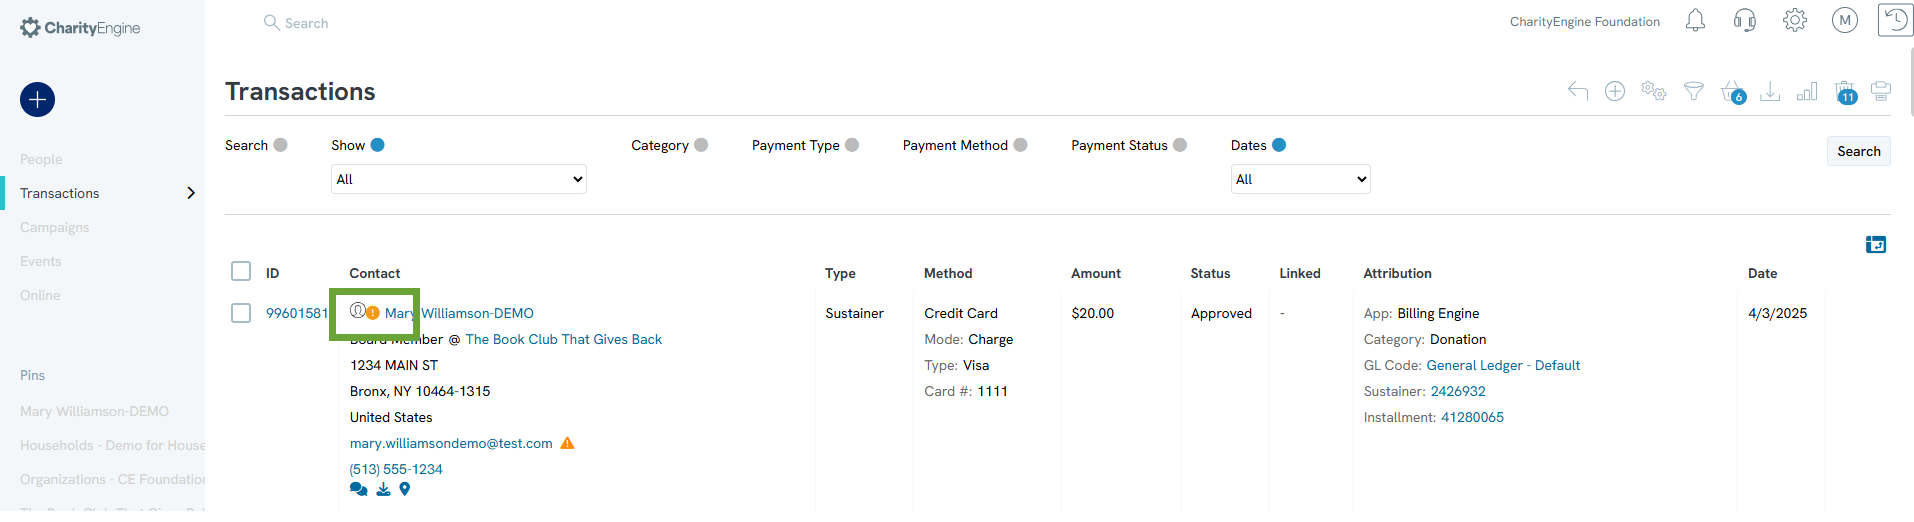
Step 1: To identify transactional records in which contact information may be new to existing contact records, navigate to the Transactions App > Transactions > Search & Manage > in the blue bar locate and click on New Info Alerts.

Step 2: Click on the orange circle icon to expose the New Contact Information Detected box
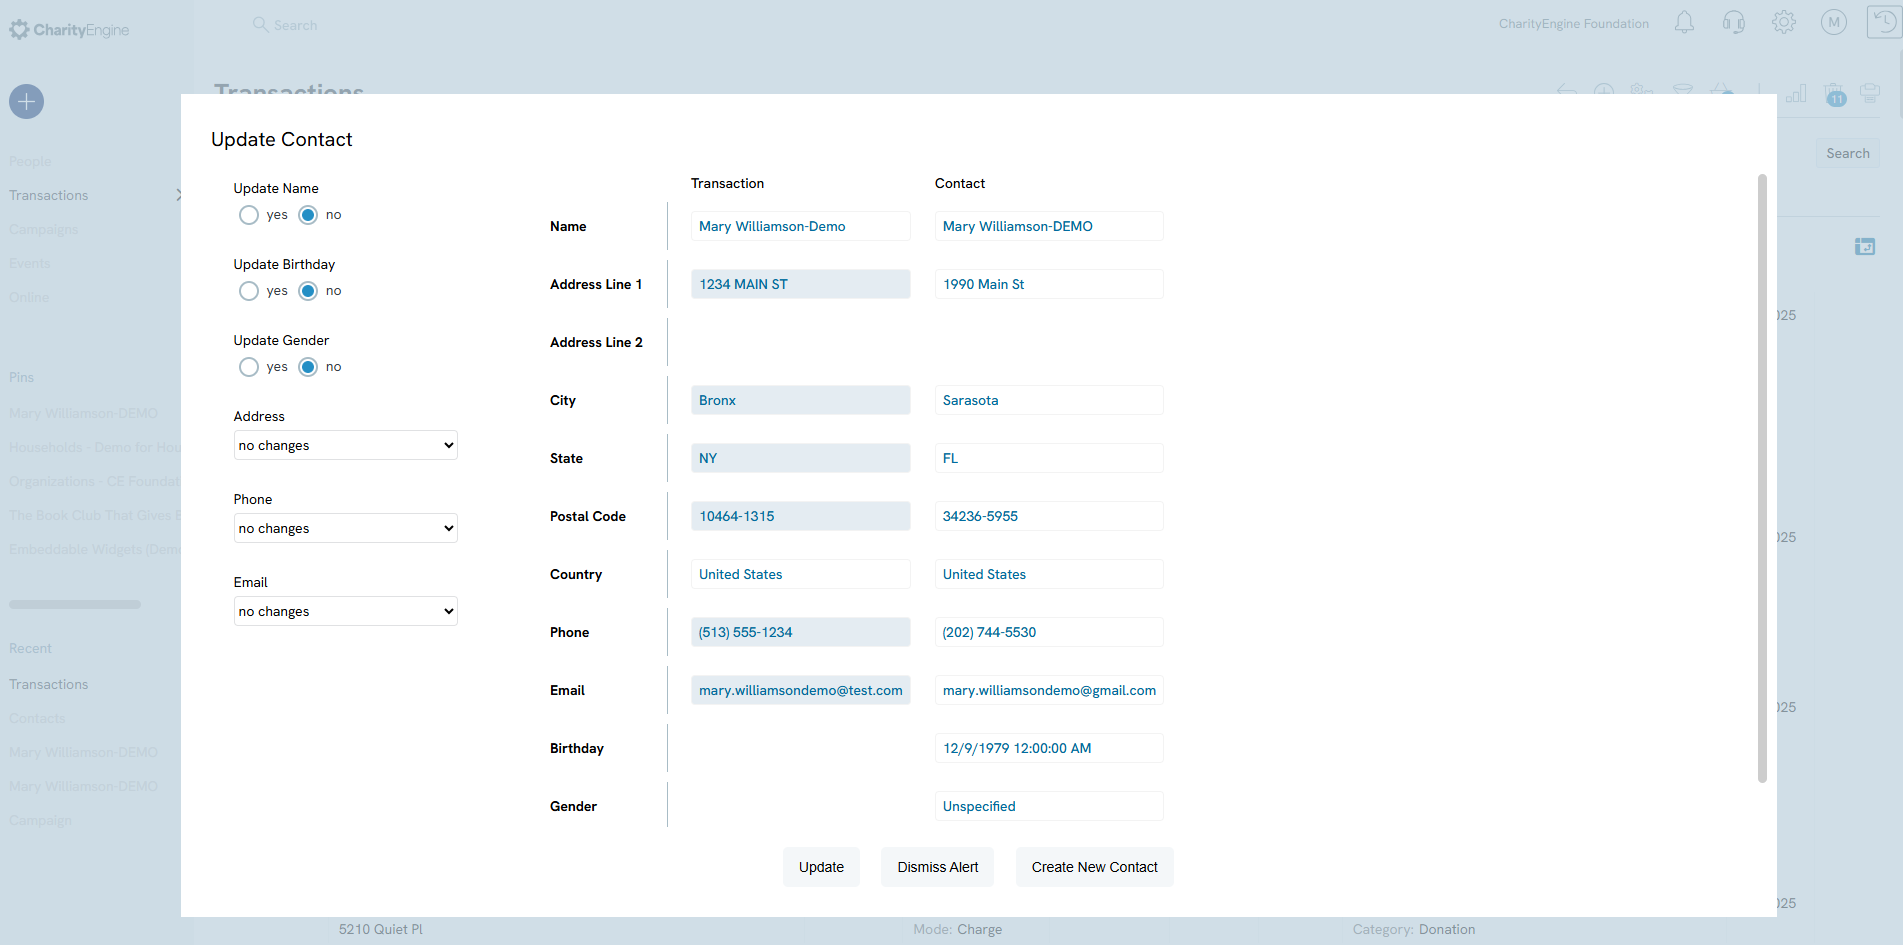
Step 3: From this view, the user can compare the Transaction Record and a comparison to the existing Contact Record which is already on file.
Step 4: The user can then
-
-
-
UPDATE CONTACT: A pop-up box will then allow the user to update -
- Name - yes/no
- Address - no changes, overwrite primary, add as primary (demote current), or add as secondary
- Phone - no changes, overwrite primary, add as primary (demote current), or add as secondary
- Email - no changes, overwrite primary, add as primary (demote current), or add as secondary
- Birthday - yes/no

- Click UPDATE to secure changes.
- Updates will provide a Sucess: Contact successfully updated
-
REASSIGN CONTACT will a brand new contact ID within CharityEngine with the assigned contact information.
-
DISMISS will ignore the contact updates and remove from future assessments.
-
-
Instructions: Updating/Merging Contact Records via the Contacts Listing Screen
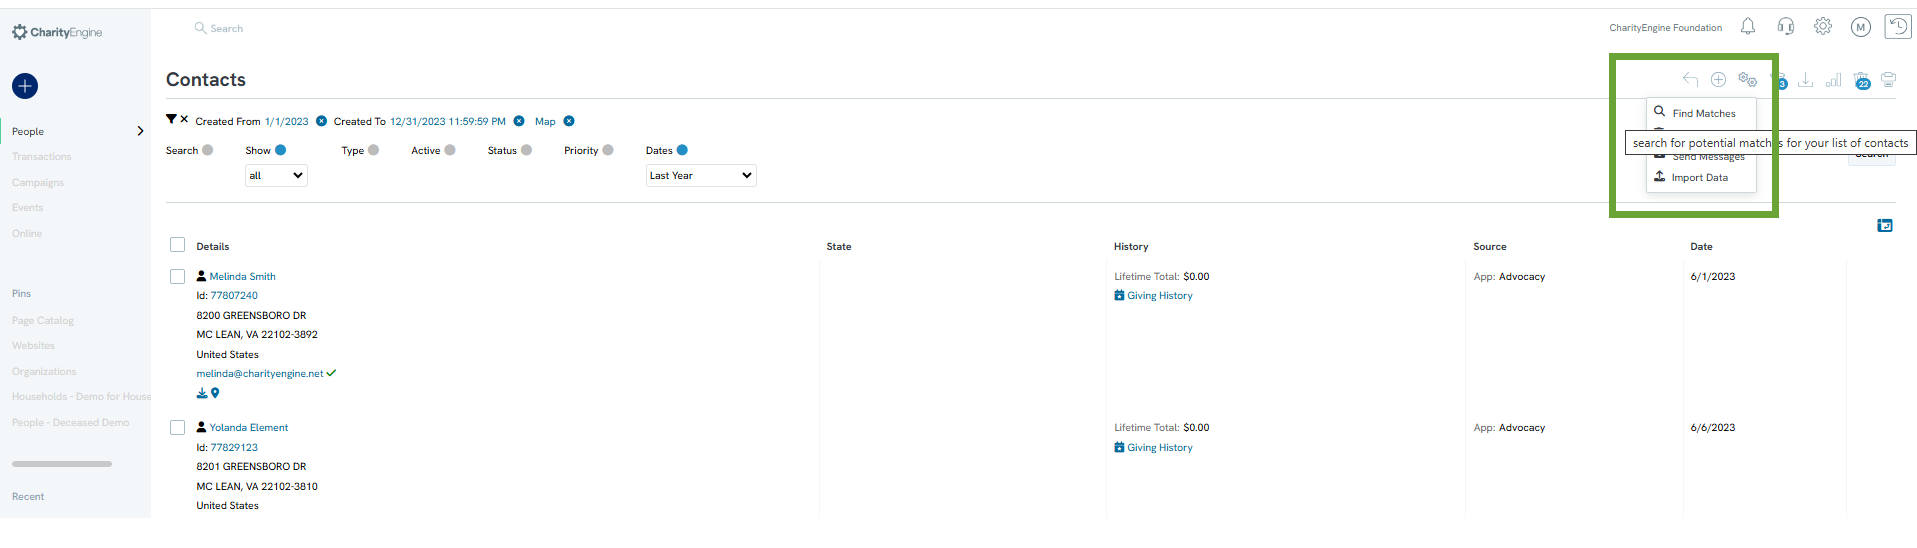
Step 1: To identify transactional records in which contact information may be new to existing contact records, navigate to the People App > Organizations & People > Contacts > complete Search. Then locate Actions in the top right-hand corner > select Find Matches. Please wait while a match analysis is completed.
in the top right-hand corner > select Find Matches. Please wait while a match analysis is completed. NOTE: Your matching will be based upon the records presented on the listing screen. You can navigate to the bottom of the screen to expand your contact count to grouping of 10, 20, 50, 100, 500 contact records. The matching functionality will look for matches across your full database.
Step 2: If any matches are located, a blue bar will provide a status of total matches. use the Click here to access the matches. This will present all matches identified.

Step 3: Matched results will be presented with an orange exclamation point. To begin the review process, click on the orange exclamation point.

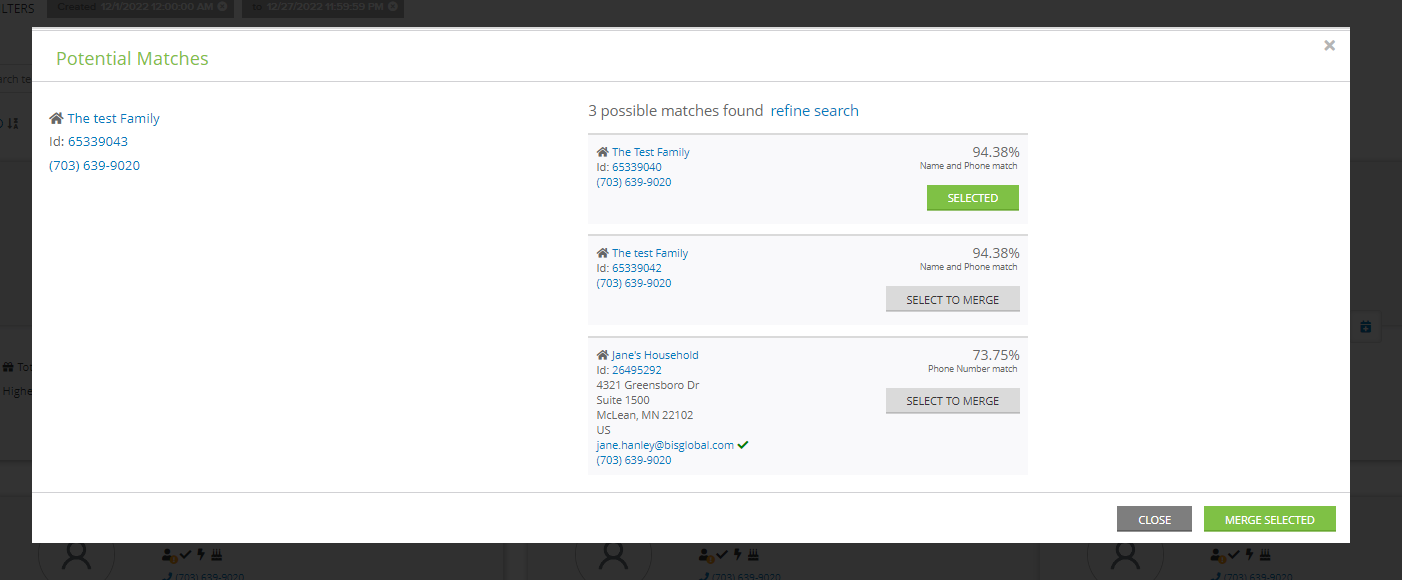
Step 4: The original contact will be presented in the top left of the popup box. Potential matches will be presented to the right.
The match presented will provide a percentage match rate along with the matches identified (i.e. name, phone number, address, etc.)
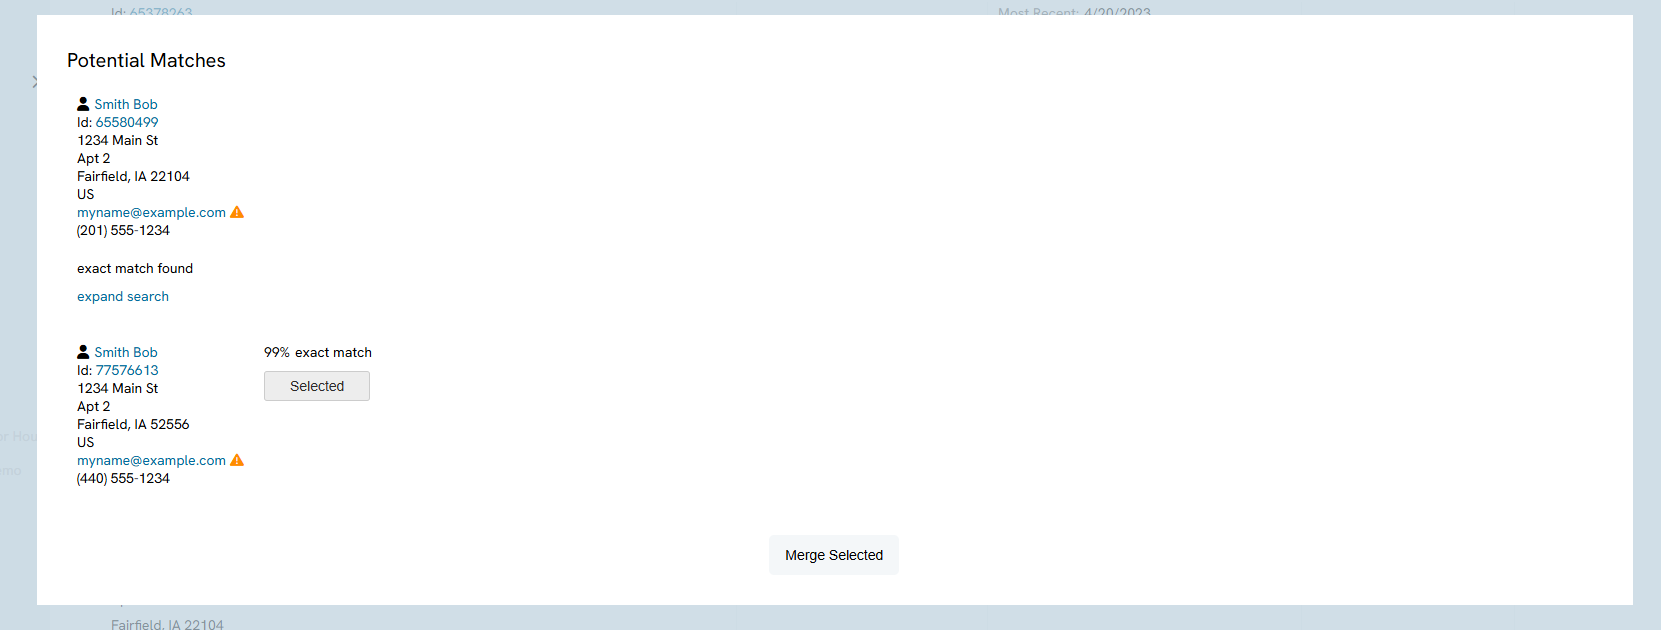
Step 5: Compare the matches to the original and select one or more by clicking on Select to Merge. Once selected, the value will reflect Merge Selected. Once you have completed your review, select Merge Selected to initiate the merge process.
Note: to unselect, simply click on the Selected to return to original state.
Step 6: In the pop-up, toggle to select specific demographic elements to be maintained on the record. Select Merge Now.
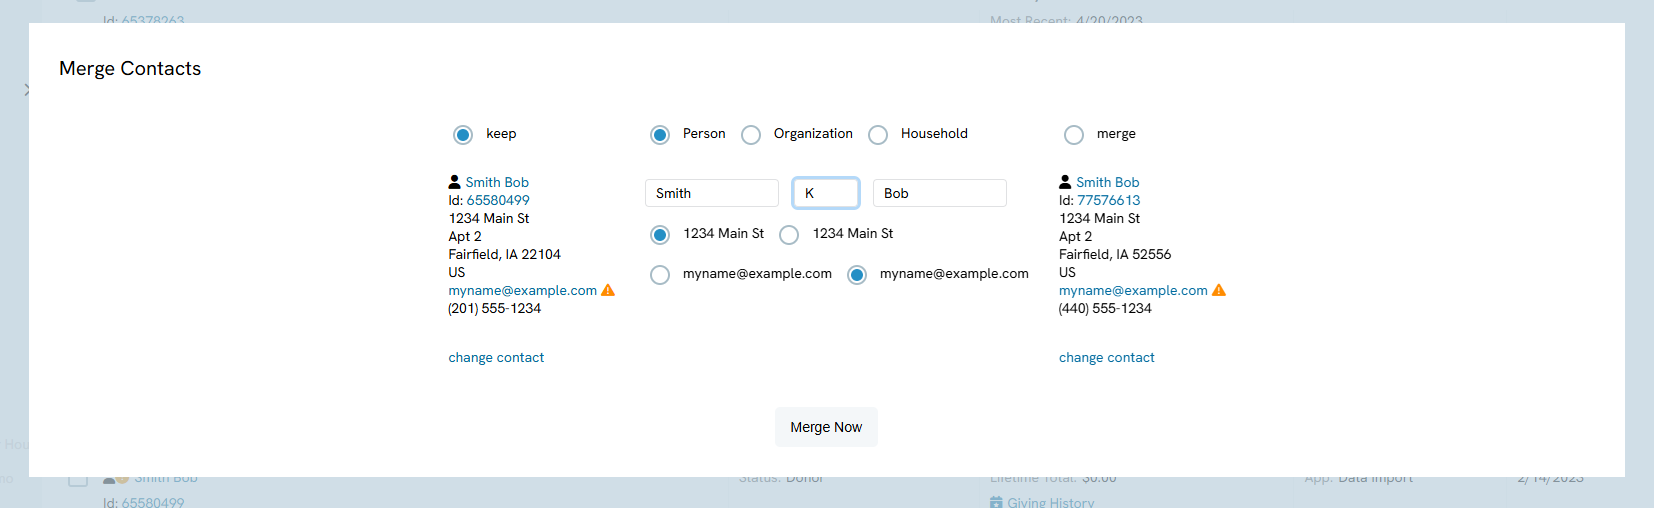
Step 7: Confirm your selection by selecting OK
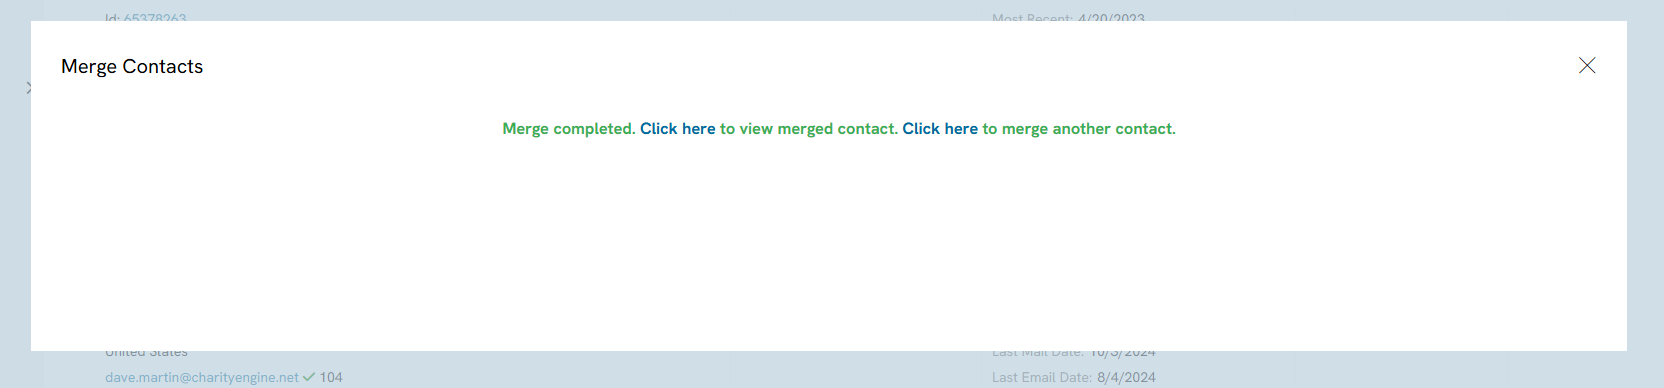
Step 8: You will receive a Success message. If an additional match is identified, you will be prompted for review.
Either continue to merge the existing record or select Close to continue to review your remaining contacts.
FAQs and Further Reading
Q. Are there other methods to identify the New Info Alerts?
A. Yes - there are a few methods, including that outlined above. You can also access the New Info Alerts by accessing the Transactions App > Transactions > Search & Manage > Actions
A. Yes - there are a few methods, including that outlined above. You can also access the New Info Alerts by accessing the Transactions App > Transactions > Search & Manage > Actions
-

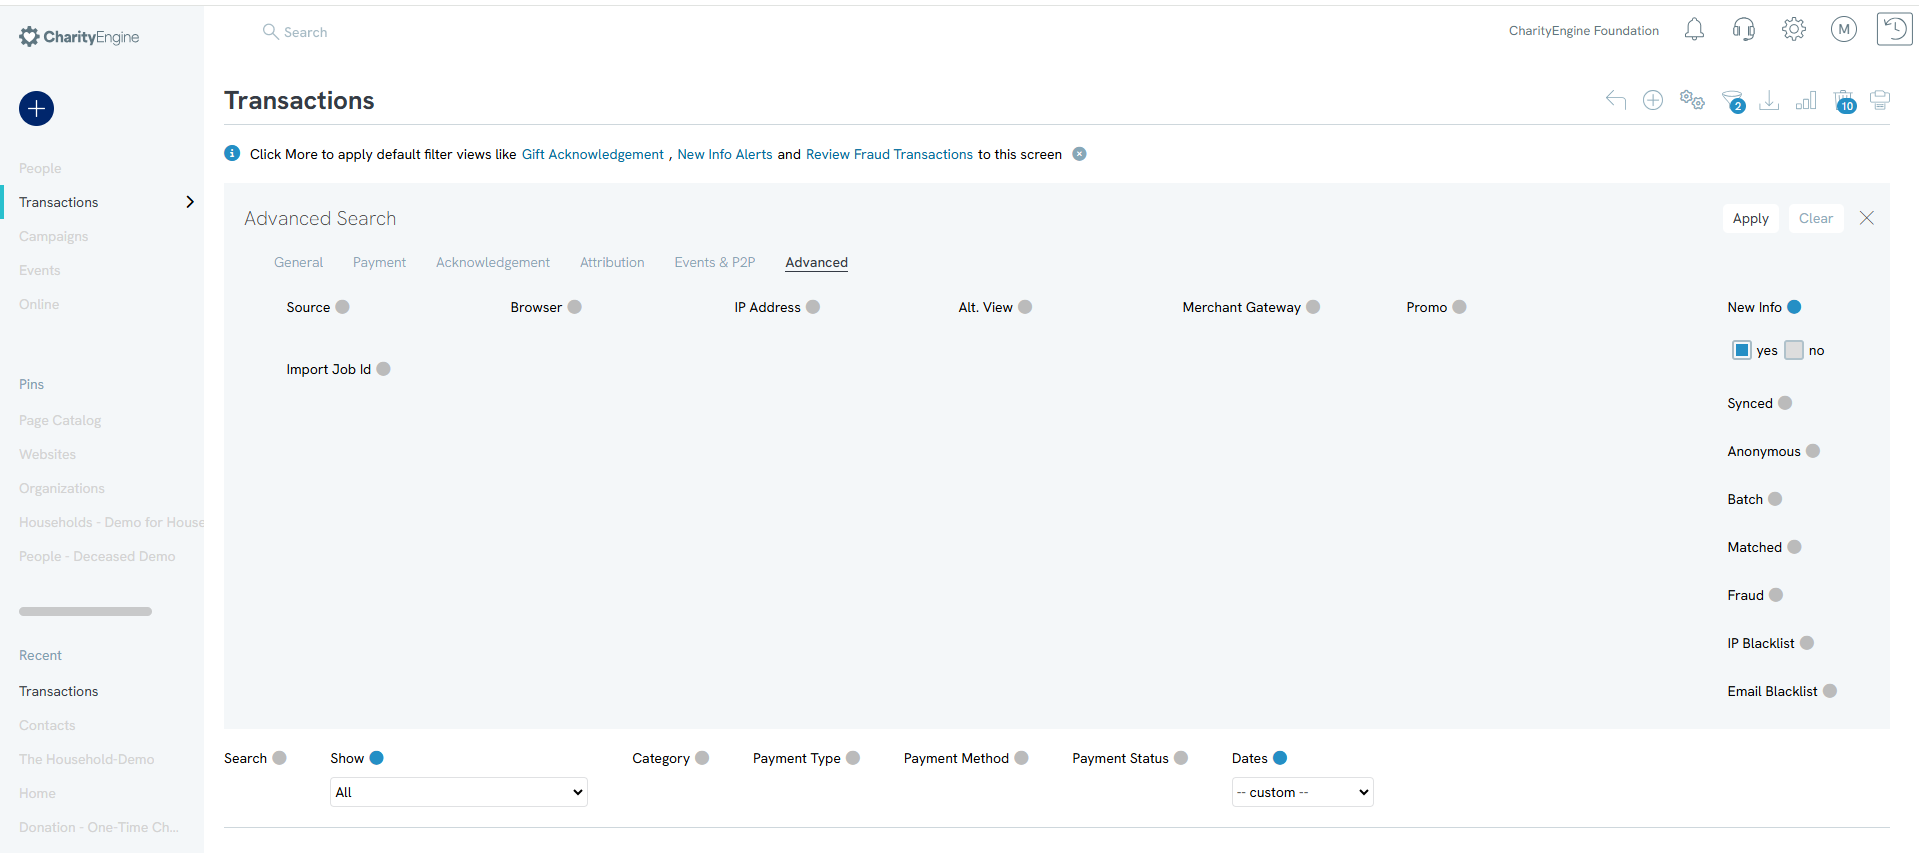
- alternatively, access the Transactions App > Transactions > Search & Manage > Advanced Filter > Advanced tab > New Info = yes > APPLY
Q. Is there contact matching logic to care for duplicate contact records?
A. Yes. Please read our article here for more on our robust contact matching and merge functionality.
Q. My contact records contain custom fields. What is the best practice if I want to maintain the record and history of this information when merging?
A. If you wish to maintain the custom field values, we recommend exporting your custom field details prior to merging. If you wish to override the surviving record with the prior custom field value, you can append the data point or choose to append as a note to the surviving record. Both can be accomplished through an Import action.
