Introduction
Being September 1, 2023 there are new regulations for sending SMS messages to donors. The below article will guide you to ensure you meet regulatory requirements.
Table of Contents
How to Add SMS Opt-In to a Donation Form
When creating a Donation Form or modifying a Donation Form, follow the instructions below to add in for a donor to be able to opt-in to SMS messaging.
Step 1: In the Donation Form navigate to the Layout
Step 2: Under Contact Info, select the “+”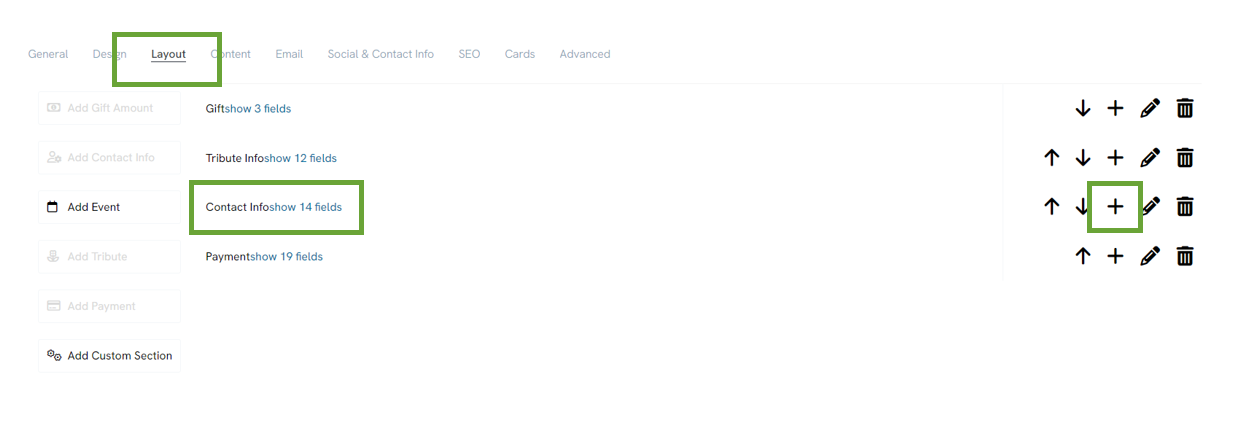
Name the field "SMS Opt-In". Then click Create Field.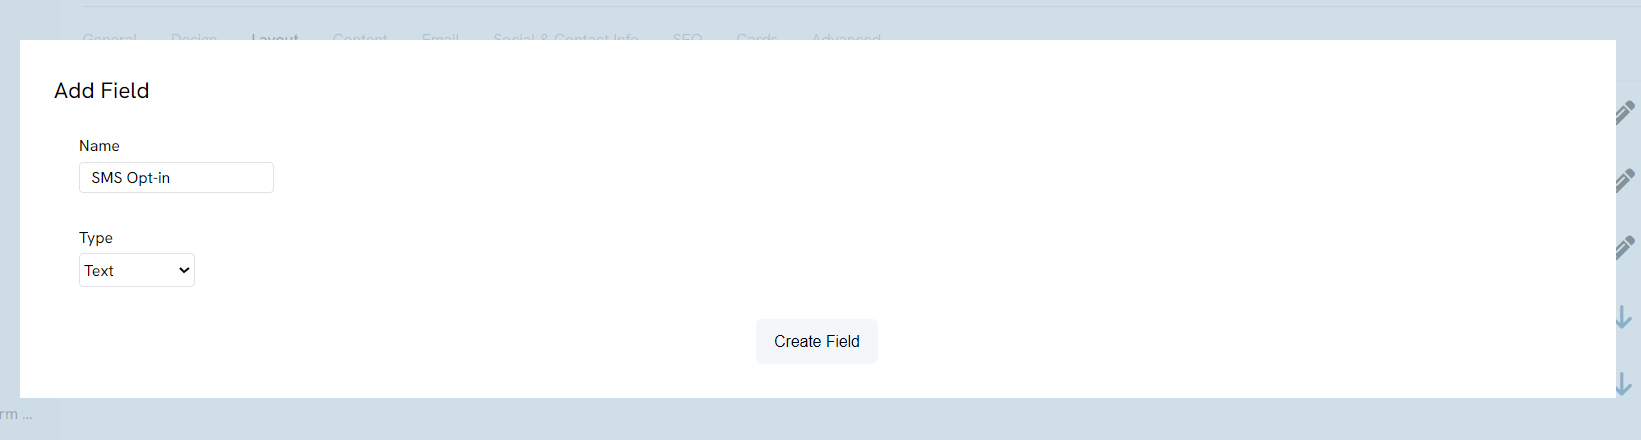
Step 3: Under the Contact Info field, locate the new field and click the pencil icon on the left to edit the field. 
In the Basic Tab, edit the label to say, "Yes, I would like to receive SMS communications."
Then change the type to be "check box".
Next, change the data type to "true/false"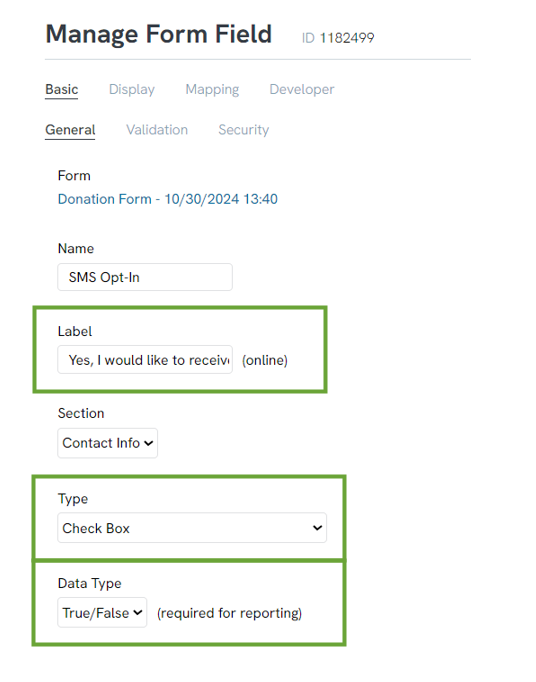
Under the Display tab, switch Show Label to no.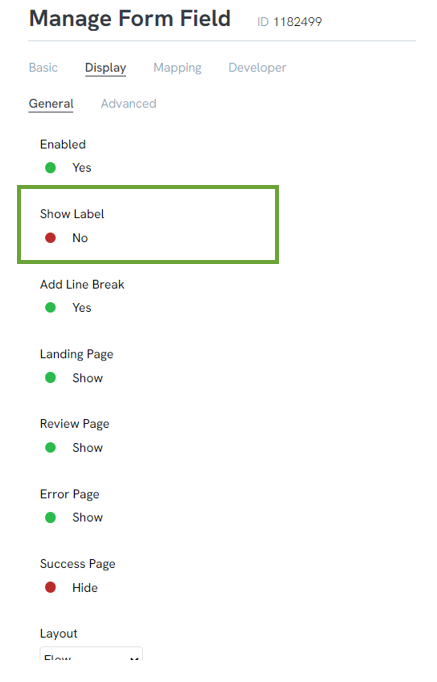
In the same location, under Advanced, click the blue "here".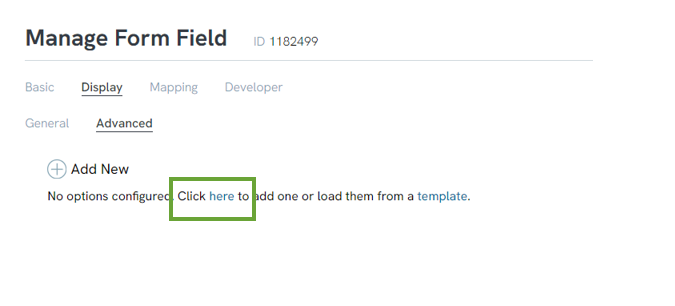
In the label field write, "Yes, I would like to receive SMS communications."
In the Value field, type "1"
Click Save, then close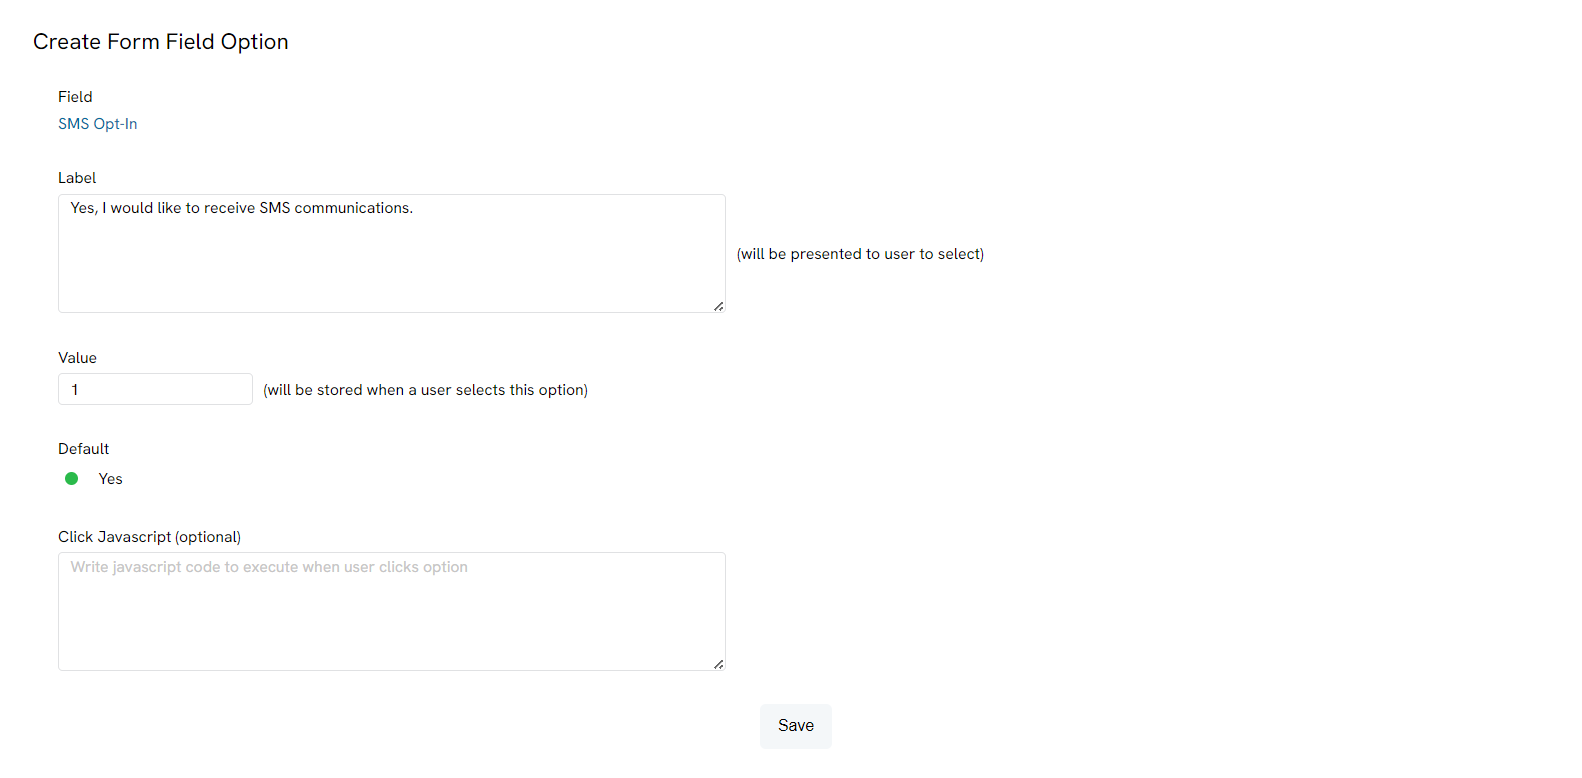
In the Mapping tab, in the Content subtab, find the SMS Opt-In and ensure it is switched to "yes"
Step 4: Click Save in the top right corner to save the changes you made to the form field.
How to Create a Communication Series for Newly Opted-In Contacts
Due to regulation, it is required that you allow individuals who opt in to SMS messages to be able to opt out. The steps below will help you create a communication series that will notify your donors of their opt in status and allow them the opportunity to opt out.
Creating the Sub Query
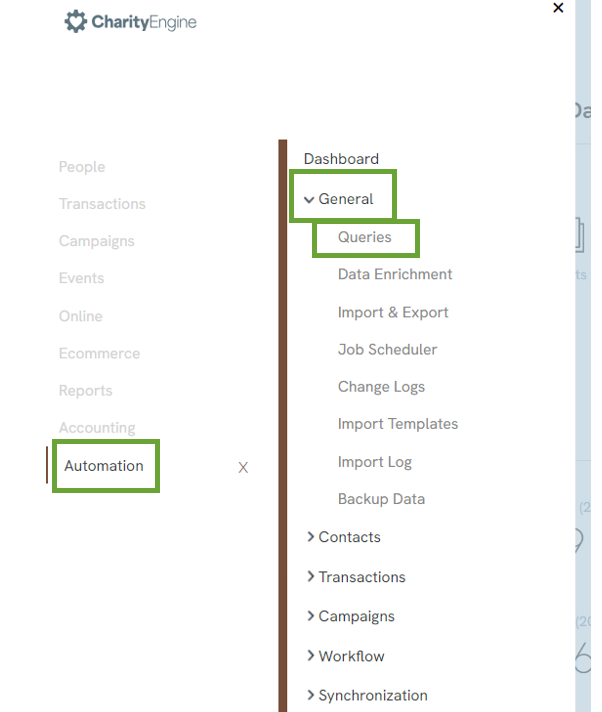
Step 1: Start by going to the Automation appStep 2: Under General click on "Queries"

Step 3: In the top right click the plus sign to create a new query.

Step 4: We will use the Contacts table as our filter and select the Communication Preferences Change as the table.
Step 5: In Select, move Contact ID, Preference, Change, and Date Created
Step 6: Under Filter we will:
- Select Preference and set it to equal SMS
- Select Change and set it to equal Opt In
- Select Date Created
- Hover over the Date Created field and click the beaker icon to the right
- Where the field reads "Maximum", click the drop down to change it to say "Today"


Step 7: Save Query as "SMS Opt In Today"
Create the Contact Query for Communication Series
Step 1: Start by going to the Automation appStep 2: Under General, click on "Queries"
Step 3: In the top right click the plus sign to create a new query.

Step 4: We will use the Contact table as our filter and select to use Contacts as the table.
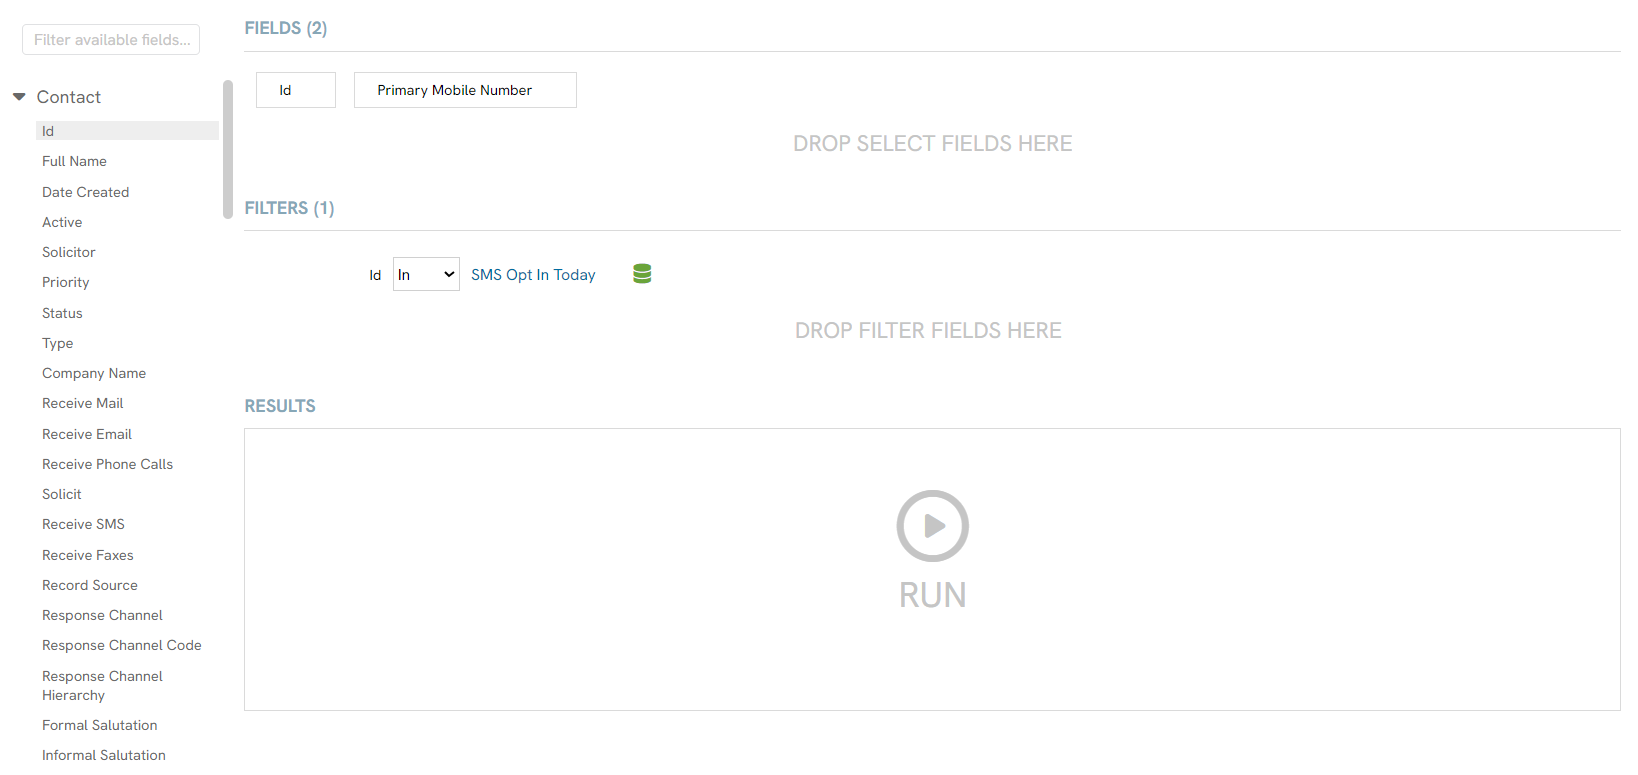
Step 5: In Select move Contact ID and Primary Mobile Number
Step 6: For the filter section move Contact ID then:
- Click the stack icon to the right on the filter
- Search for the sub query that was created in the steps above
- Add the query to the filter
Step 7: Save this query as "Contacts for SMS Contact Series"
How to Create the SMS Opt In Communication Series
The first part to creating the communication series is creating the SMS message that will be sent out to donors as they opt in.
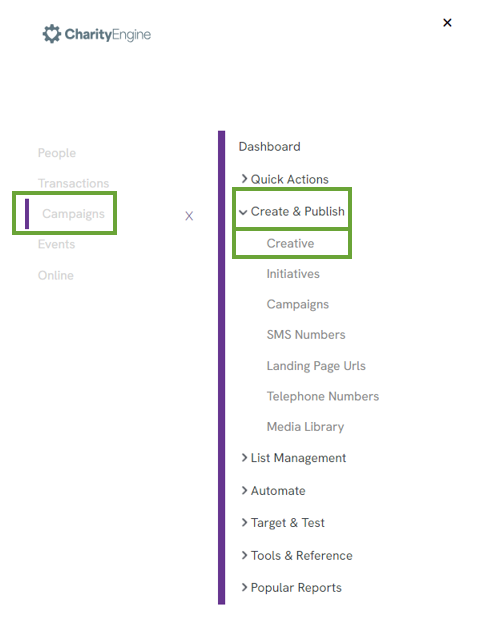
Step 1: Navigate to the Campaigns AppStep 2: Under Create and Publish, click on “Creative”
Step 3: In the top right, click on the plus sign and select “SMS Message”
Step 4: Name the message “SMS Opt In”
Step 5: Under Content create the SMS message you would like your donors to receive upon opt in.
Note: You must include a concluding message instructing donors how they can opt out. An example of this is, “To opt out of receiving SMS messages respond STOP to this text. Data and message rates may apply.”
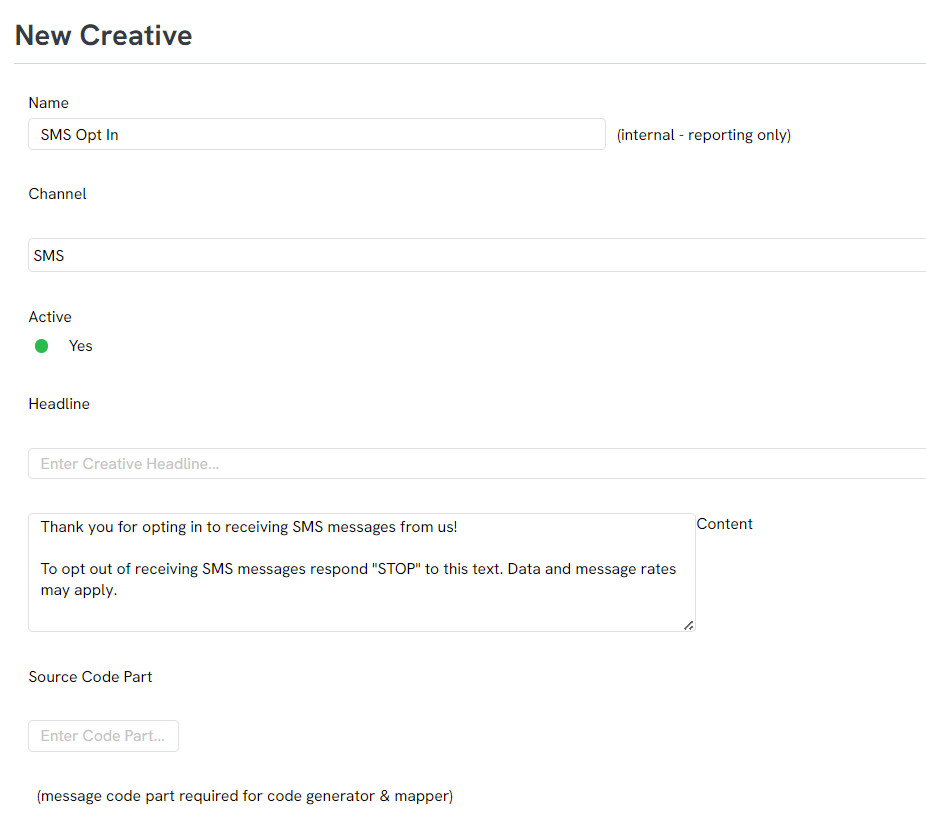
Step 6: Click Save.
Now we need to set up the communication series to be sent out as donors choose to opt-in to SMS.
Step 7: Navigating to the Campaign app, Under Automate select Communication Series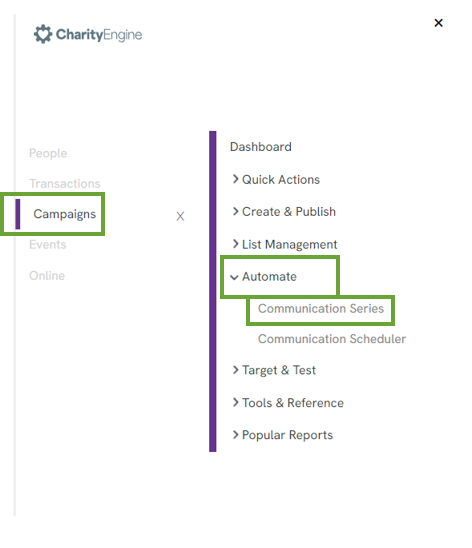
Step 8: In the upper right corner, click the plus sign.
Step 9: Click on Advanced, and then continue
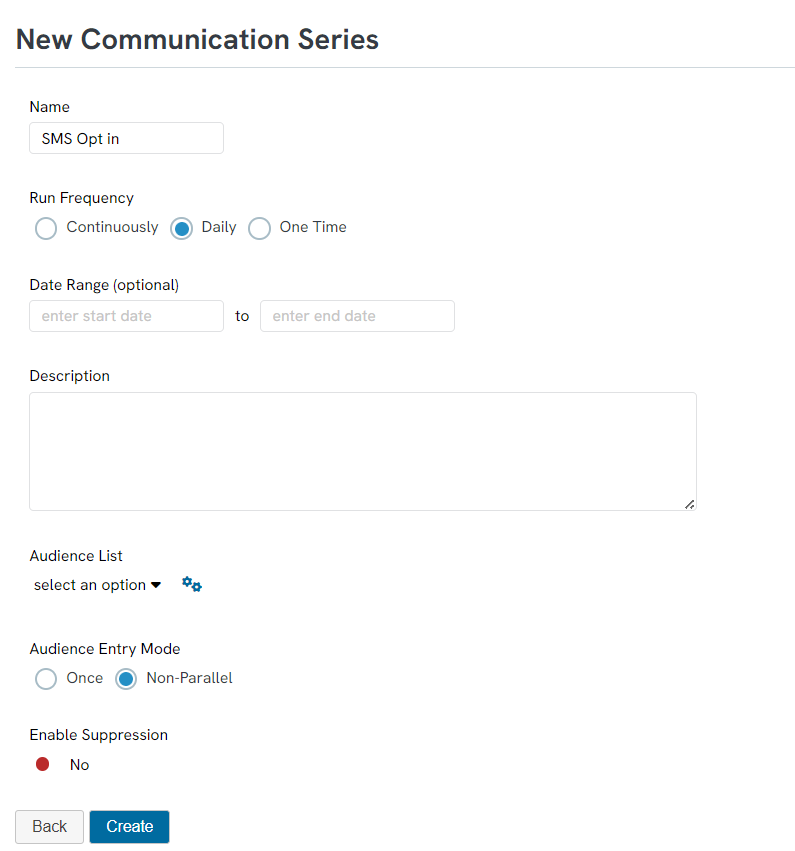
Step 10: Create a name for the communication series
Step 11: Change the frequency to “Daily”
Step 12: Change the Entry to “Non-parallel”
Step 13:Click Create
Step 14: Add your audience
- Hover over the "Start" and click the pencil icon.
- Search for the query made above "Contacts for SMS Contact Series"
- Click Save.
- Hover over the step and click on the pencil icon. Under the "Creative" section select Select Message
- Search for the name of the communication you just created
- Select the message
- Add a phone number
- Click Save and Close
Step 16: Save and confirm the Communication Series Settings.
Q: What if I currently am an organization utilizing SMS?
A. You will need to create a query to identify anyone who has opted in to text messages. Then you will use that as your list to send an SMS via SMS blast with a message informing the donor, they are opted in to receiving text messages from your organization. Be sure you include in the message that if the donor would not like to receive text they can respond “STOP” to the text to opt out.
