Introduction
If your organization has CharityEngine Shopping Cart in your contract, before you can utilize the shopping cart you will have to create a fulfillment center. This is where your products will come from and can be a warehouse, your headquarters, or even a home office. Without a fulfillment center, you will not be able to create products.
Prerequisites
In order for you to set up a fulfillment center, you have to have Merchandise and Logistics provisioned in your account and added to your contract. If you do not currently have this application, please reach out to your account manager or our support team to discuss adding this service.
Table of Contents
Instructions
To create a fulfillment center, navigate to the Ecommerce application and under Fulfillment Center click on Search and Manage then click on Create New. You will need to enter basic information pertaining to your center such as name, address, phone number, and email, then click save
General Tab

Additional Settings
Once you click save, you will be able to further configure your fulfillment center. You will be able to configure the shipping, packaging, and notifications pertaining to the products that will come from your fulfillment center.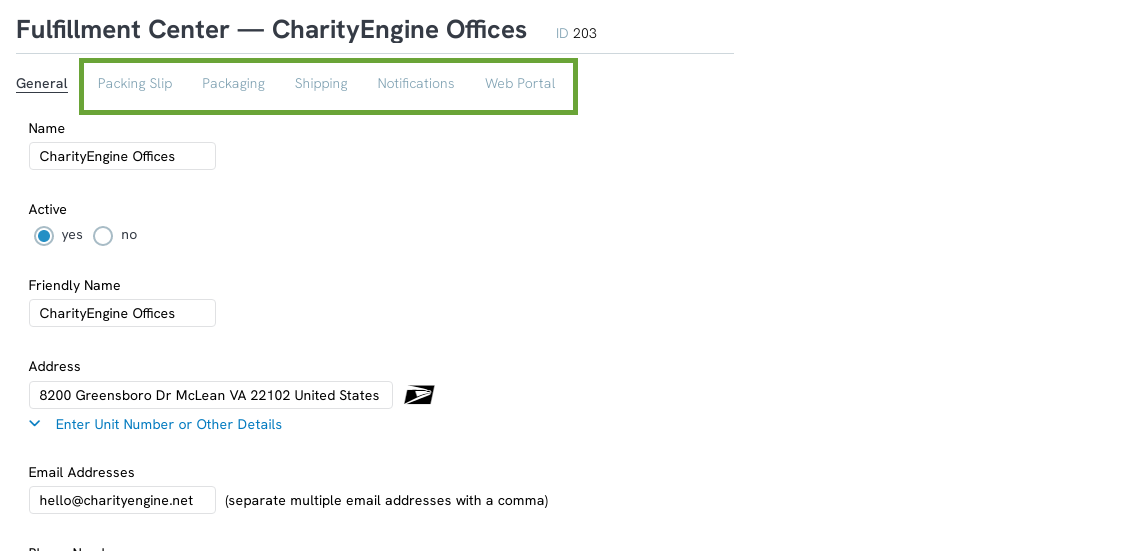
On the Packaging Tab, you will be able to enable auto-packaging, which will select the type of package that will be needed based on the number or the size of the products.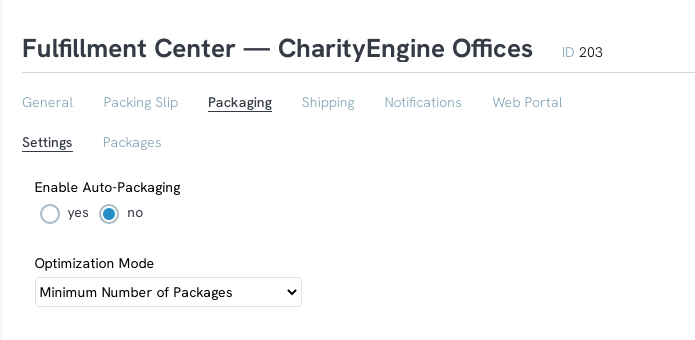
Additionally, you will be able to create the packages on the Packages subtab. Click on Create to create a new package type.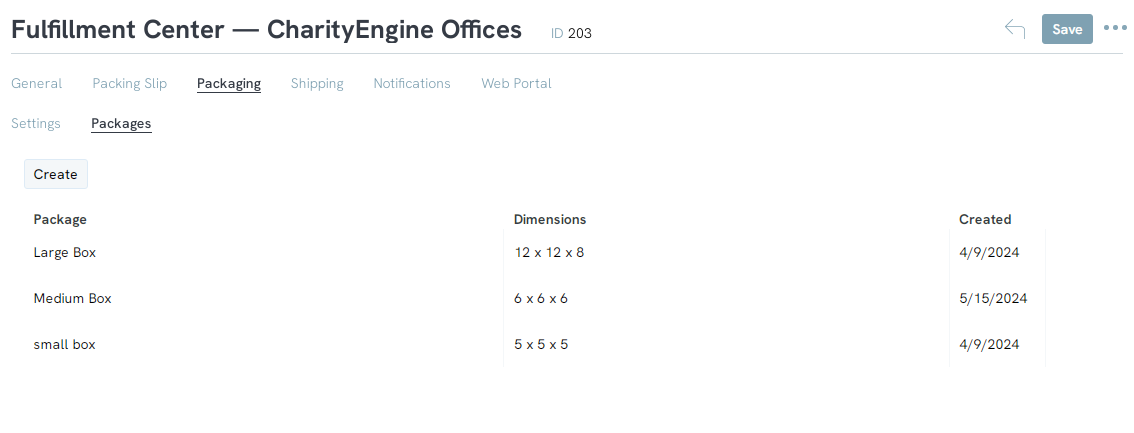
When you create a new package, you will name the type, and input the dimensions of the package as well as the max weight. The dimensions and weight are important especially if you are utilizing auto packaging and selected to optimize by weight and dimensions of the products.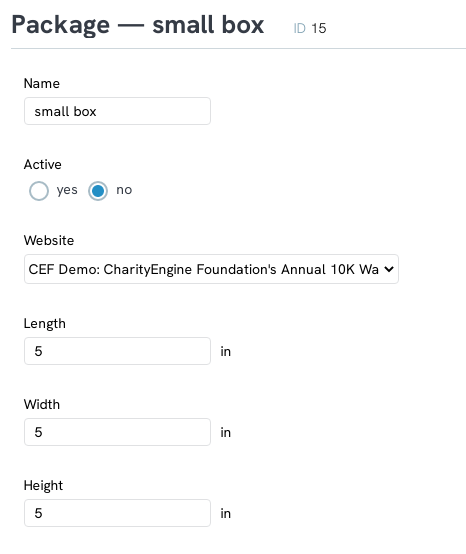
On the Shipping Tab, this is where you will set up your shipping costs and determine if you want custom shipping that your organization sets, or if you will utilize dynamic shipping with a postal carrier. If you are using dynamic carrier shipping rates, you will have to have an account with either UPS, USPS, or FedEx for the rates to apply. Select either Custom or Dynamic form the Dom Calculation Mode and the Intl. Calculation mode to set the shipping rates for domestic and international.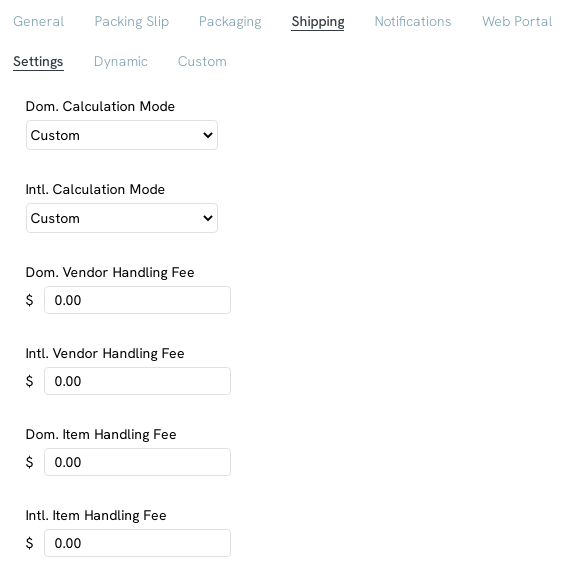
Next, you can set the vendor and item handling fees if you want the donor to cover these fees, otherwise leave these fields blank.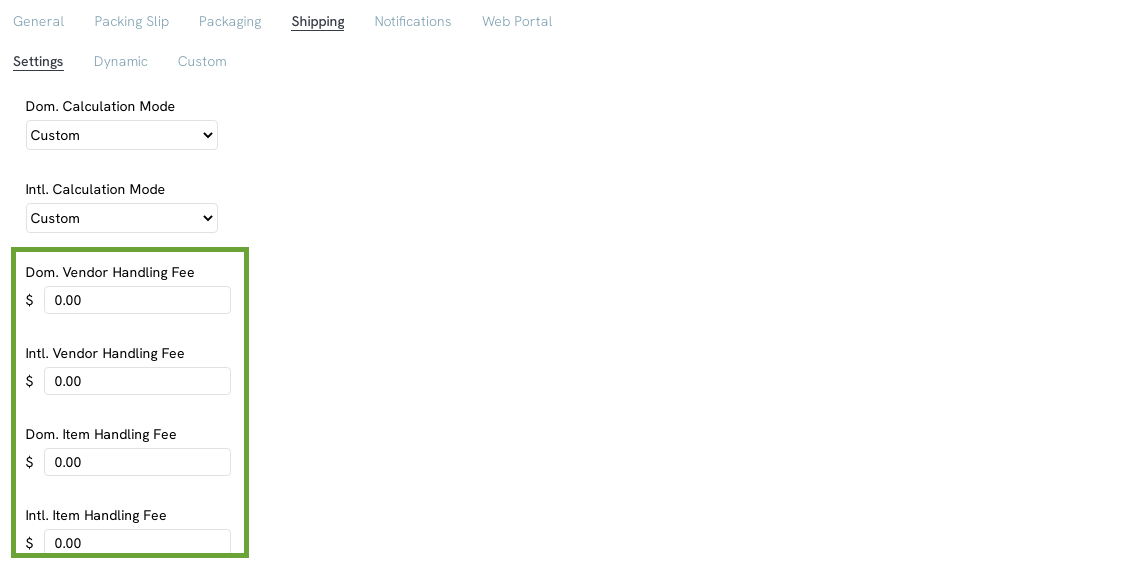
Lastly, you will need to determine if the calculation mode will be based on weight or the price of the items and if that is per item or the cart total. The prices for shipping will change depending on the selections you choose.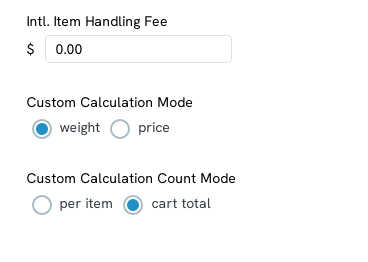
Once your basic shipping options have been set, you will need to either add the carrier options if you are select dynamic shipping rates on the Dynamic Tab or enter in your custom rates on the Custom tab.
Dynamic: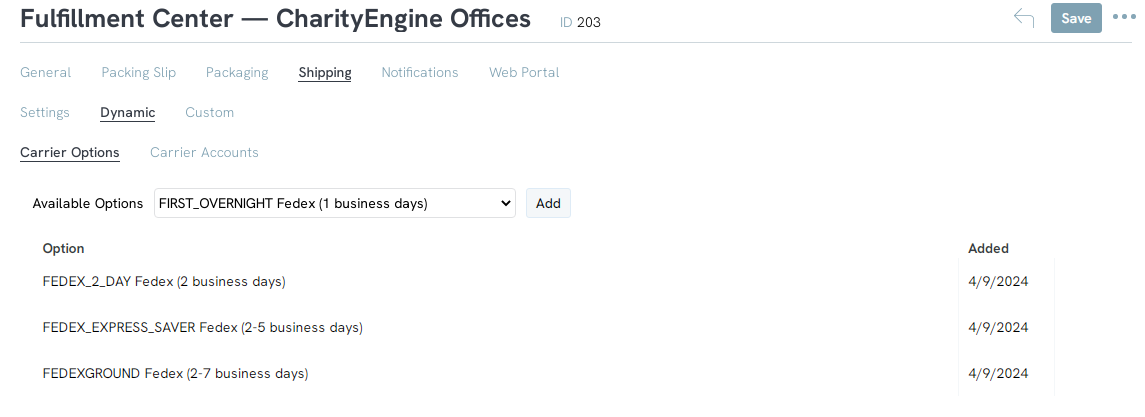
Custom: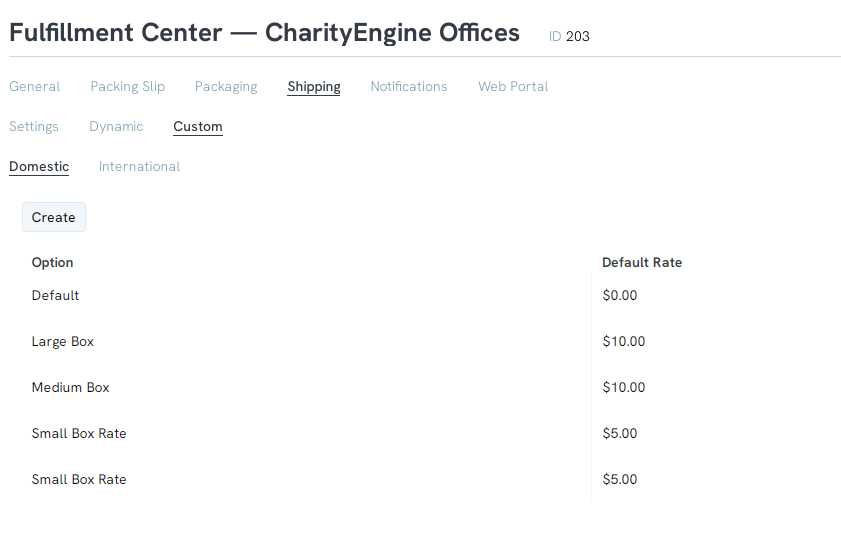
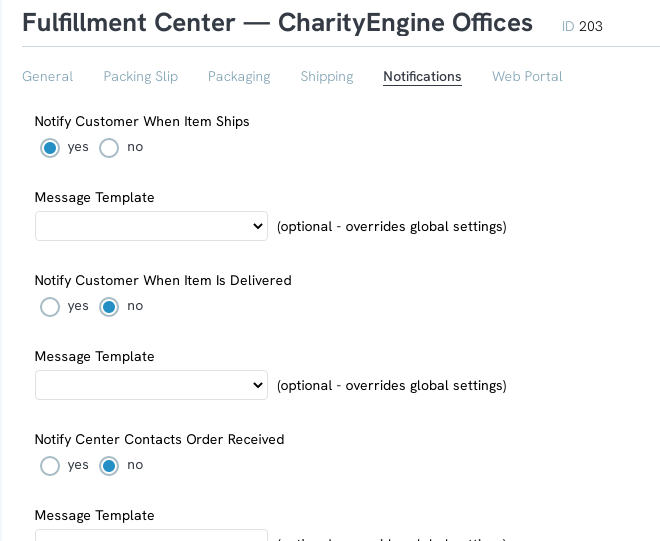
The last tab you will need to configure is the notification tab. This is where you will enable messages to be sent to the customer and fulfillment center when the order has been received by the center and when the package ships and is delivered. Use the radio buttons to enable or disable messages and select the messages that will be sent to each party.