Introduction
While CharityEngine hosts a variety of fields within a contact record, your organization may find a need to create a custom field. Creating a custom field in CharityEngine allows the organization to enter and track information about their contacts that is important to their organization’s reporting and operations. Prior to creating a custom field, you will need to create a Custom Field Group(s) which will allow you to group custom fields on the contact summary page. This will allow you to group certain fields that are similar or contain data that coincides with other data in the group.
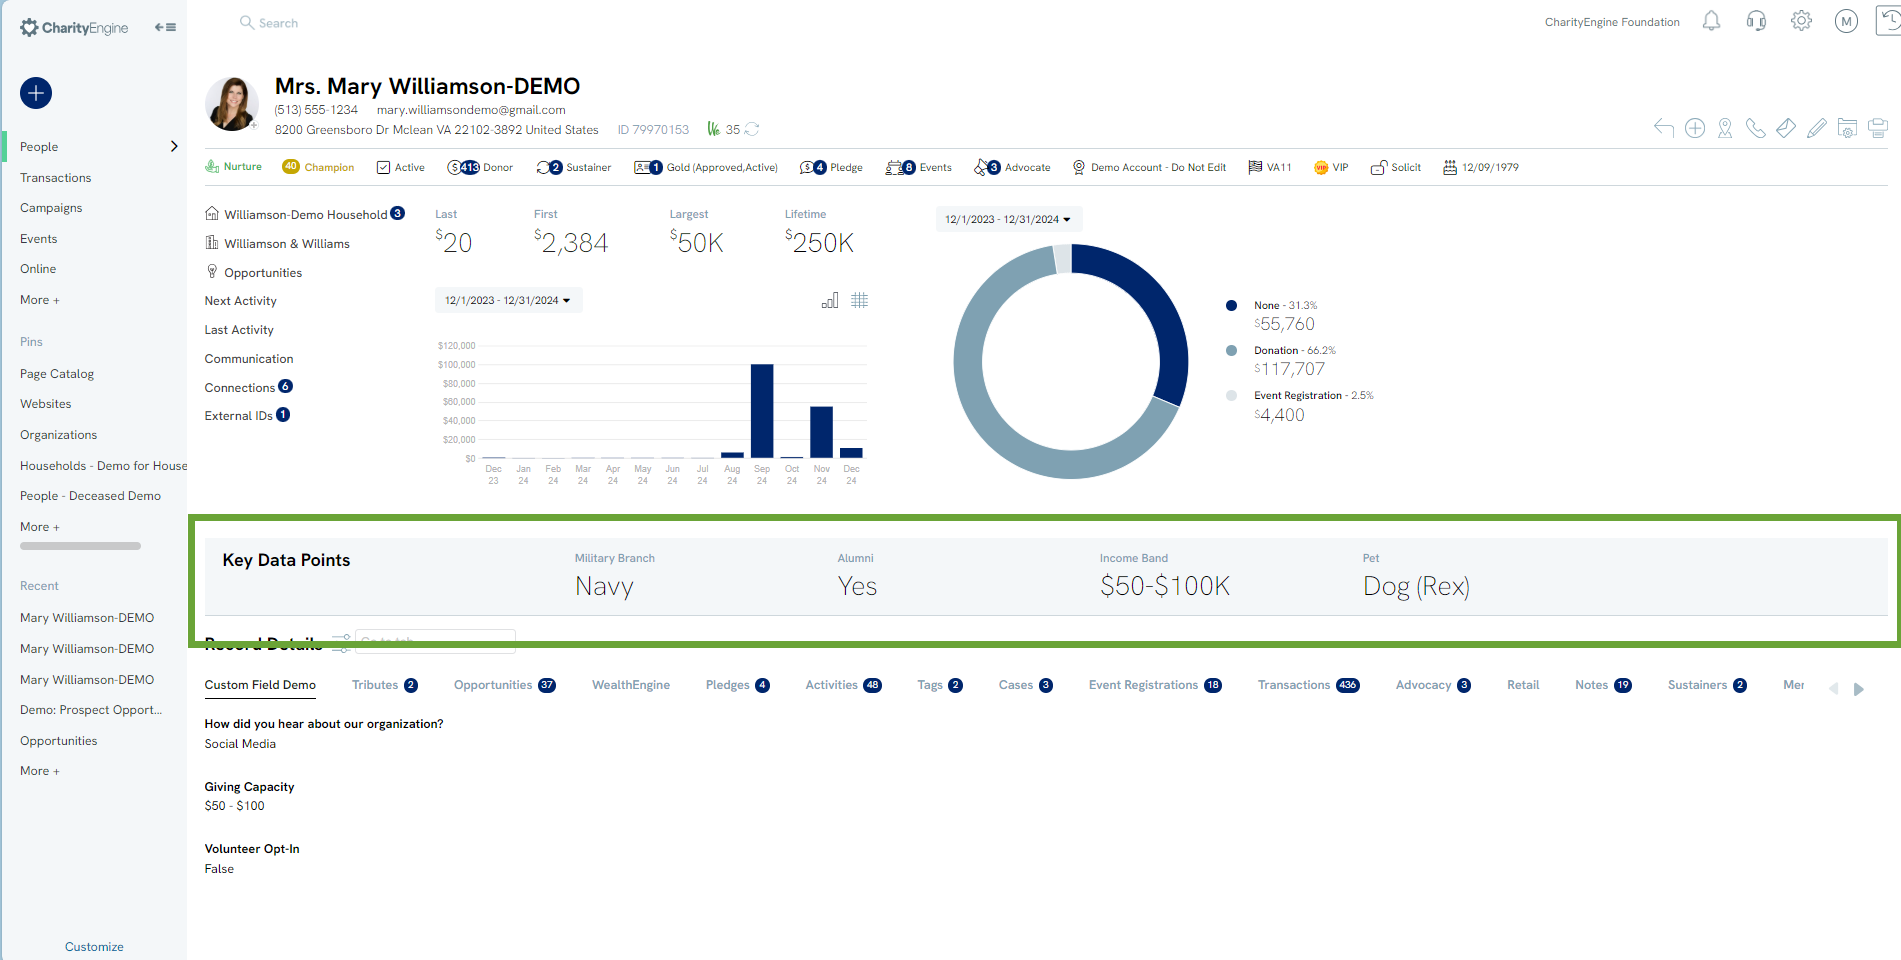
Table of Contents
Prerequisites
- You will need to create a custom field group prior to creating a custom field.
- If a custom field group does not have any fields associated with it, it will not be displayed on the contact summary screen
- Structuring Your Custom Fields: When establishing custom fields, the order in which a custom field is entered into the Configuration > Contacts > Custom Fields will be reflective of the way in which your end-user visually sees the custom field. Please plan accordingly as you enter custom fields considering the easiest method for your end-user.
- Critical Notation: Deleting Custom Fields: If a custom field or custom group is deleted, please be aware that all associated values will be deleted from the constituent's record. Please take care to review data exports to ensure data can be deleted prior to removal of the custom field.
- Option - Rich Text vs. Text Box: If you have a field that allows free-form text capture by your end-user and/or constituent, leverage Rich Text to capture dynamic information.
- Consider the structure of your custom fields prior to entering your new fields; use the following guidance for the type of available custom fields:
| Required | Assignment Options | Data Type | Display | Options | Advanced | |
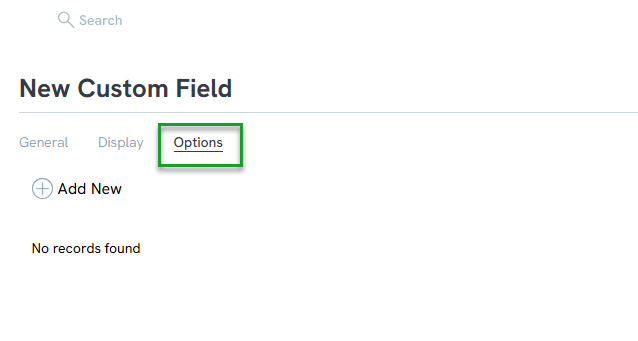
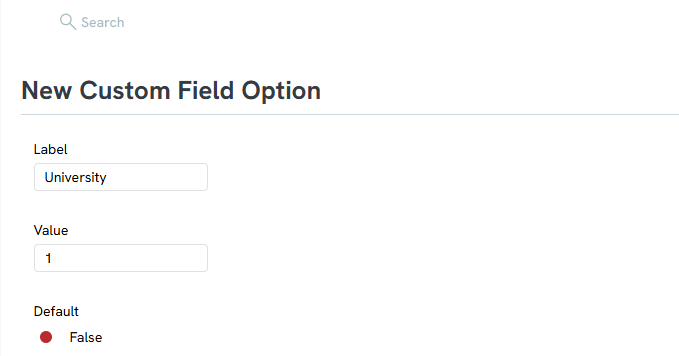
| Check Box | Yes/No | Organization, People, and/or Household | Datetime, Decimal, ID list, Integer, Text, True/False, ZipCode | Show in Group and/or Show on Summary | Option Name, Option Value, Default Option (yes/no) | N/A |
| Computed | N/A | Organization, People, and/or Household | Datetime, Decimal, ID list, Integer, Text, True/False, ZipCode | Show in Group and/or Show on Summary | N/A | Data Source (Query), Column (from query), Computed Value Column (from query) |
| Date | Yes/No | Organization, People, and/or Household | N/A | Show in Group and/or Show on Summary | N/A | N/A |
| Date Time | Yes/No | Organization, People, and/or Household | N/A | Show in Group and/or Show on Summary | N/A | N/A |
| Drop Down | Yes/No | Organization, People, and/or Household | Datetime, Decimal, ID list, Integer, Text, True/False, ZipCode | Show in Group and/or Show on Summary | Option Name, Option Value, Default Option (yes/no) | N/A |
| Radio Button | Yes/No | Organization, People, and/or Household | Datetime, Decimal, ID list, Integer, Text, True/False, ZipCode | Show in Group and/or Show on Summary | Option Name, Option Value, Default Option (yes/no) | N/A |
| Read Only | Yes/No | Organization, People, and/or Household | Datetime, Decimal, ID list, Integer, Text, True/False, ZipCode | Show in Group and/or Show on Summary | N/A | N/A |
| Rich Text | Yes/No | Organization, People, and/or Household | N/A | Show in Group and/or Show on Summary | N/A | N/A |
| Text Box | Yes/No | Organization, People, and/or Household | Datetime, Decimal, ID list, Integer, Text, True/False, ZipCode | Show in Group and/or Show on Summary | N/A | N/A |
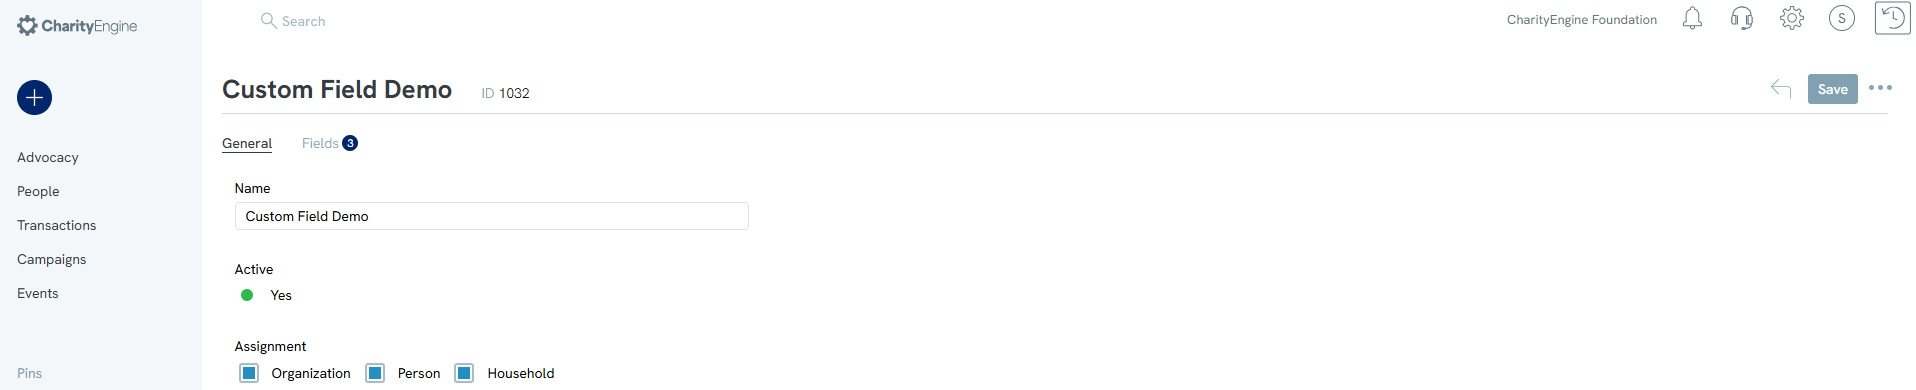
Instructions - How to Create a Custom Objects
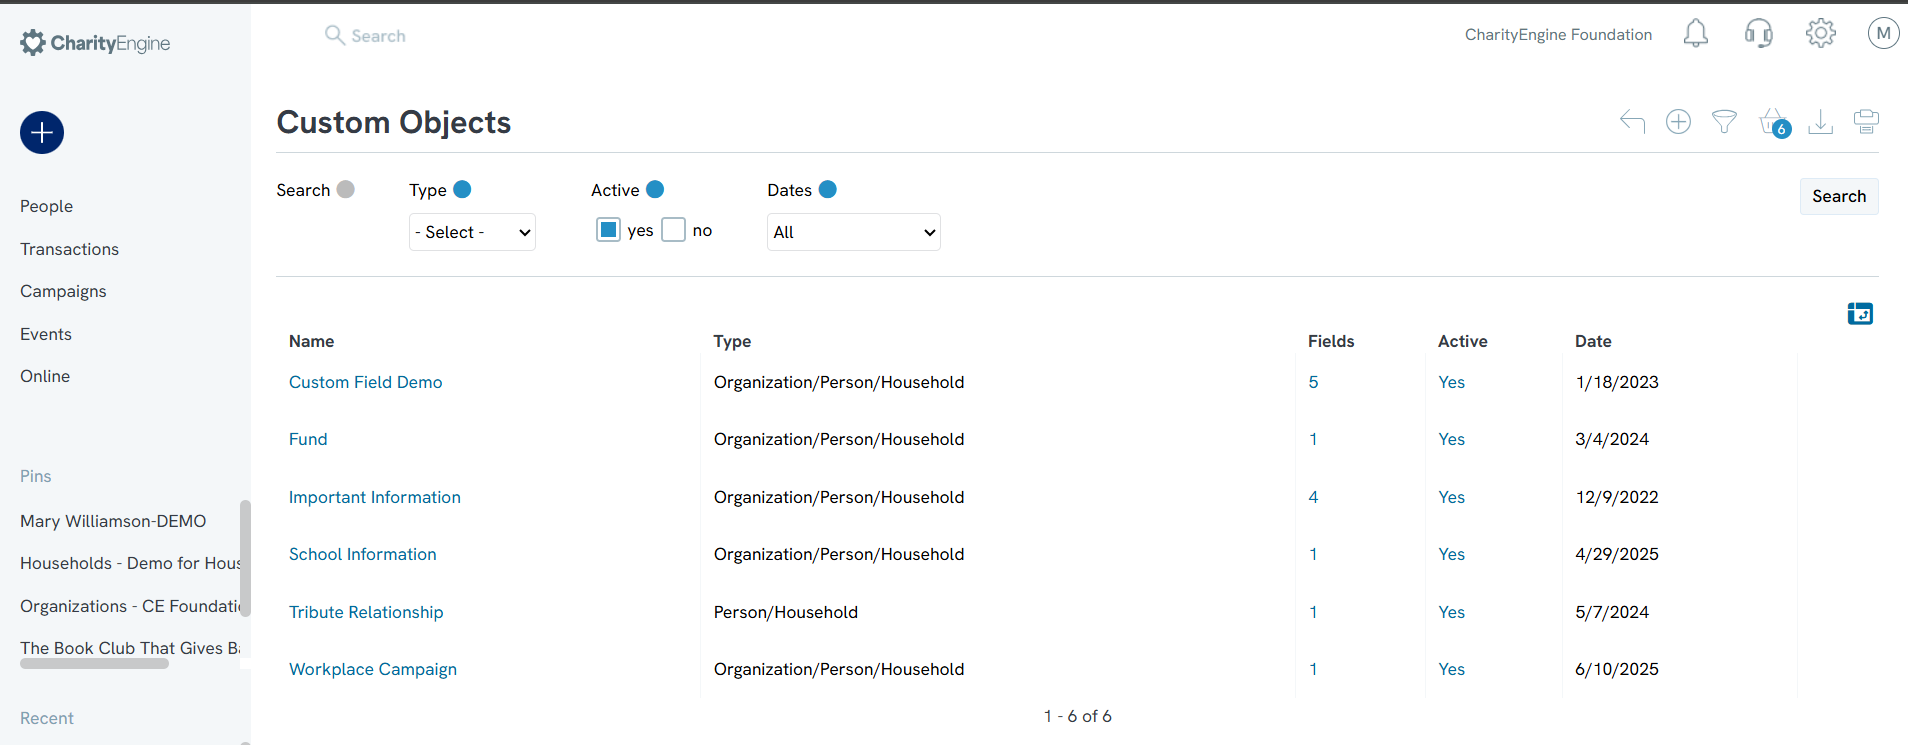
- Use the check boxes to make the custom field group available on organizations, person, and/or household records.
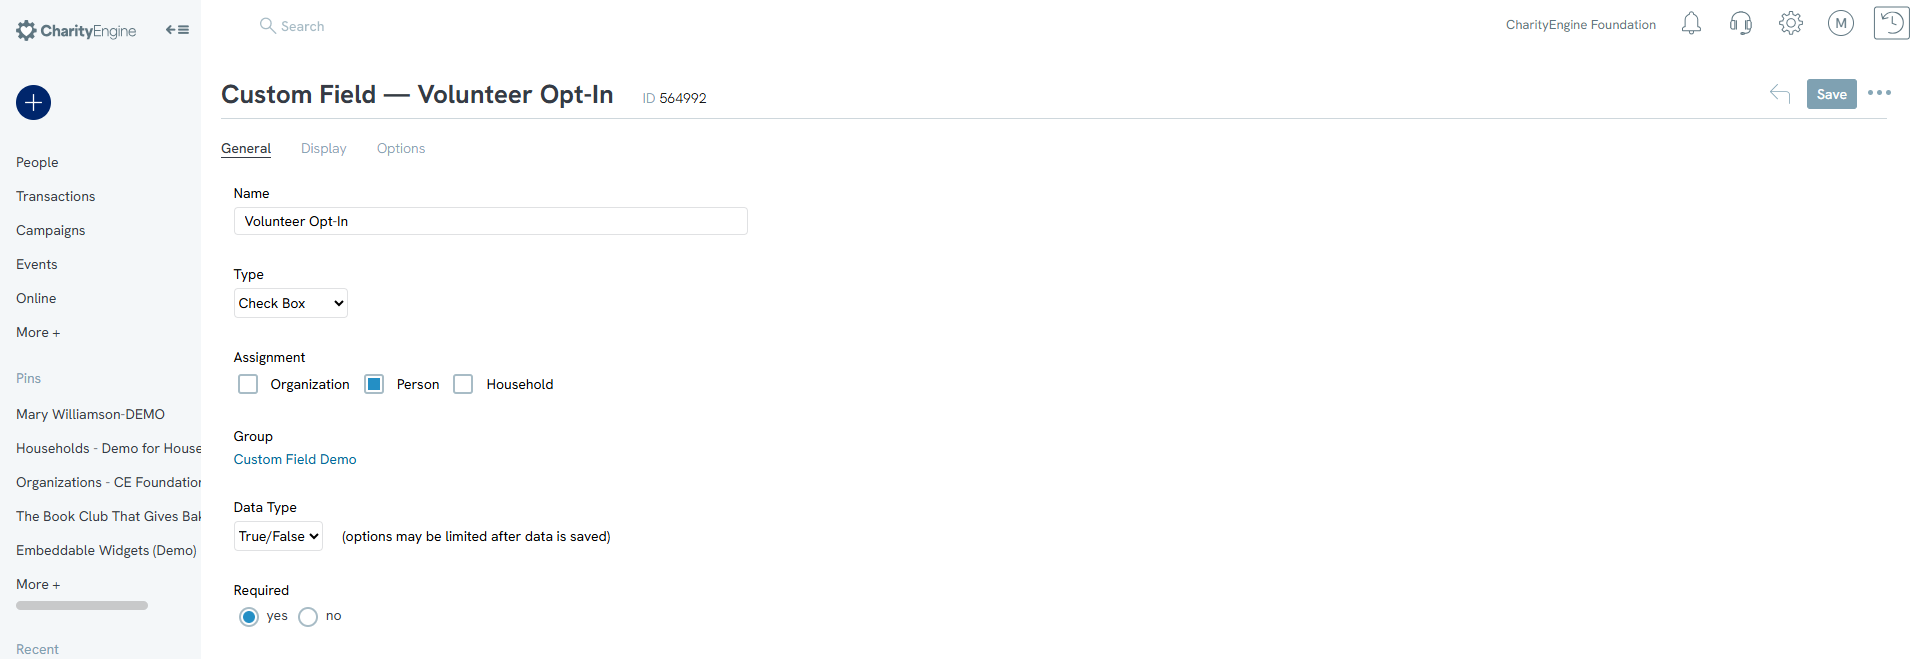
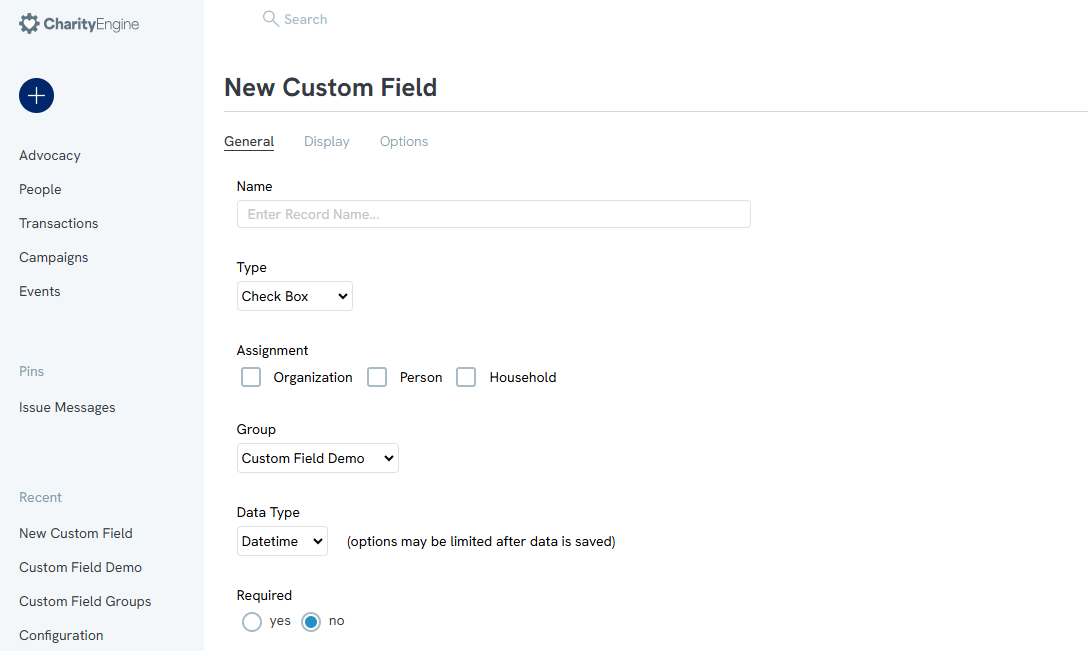
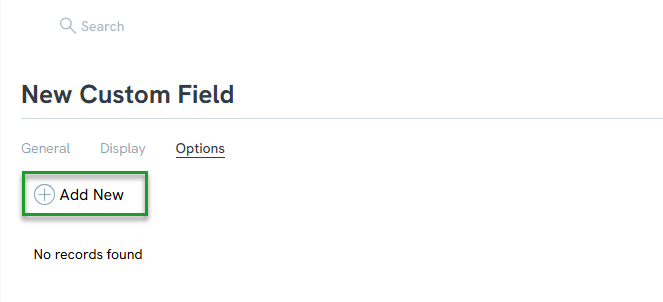
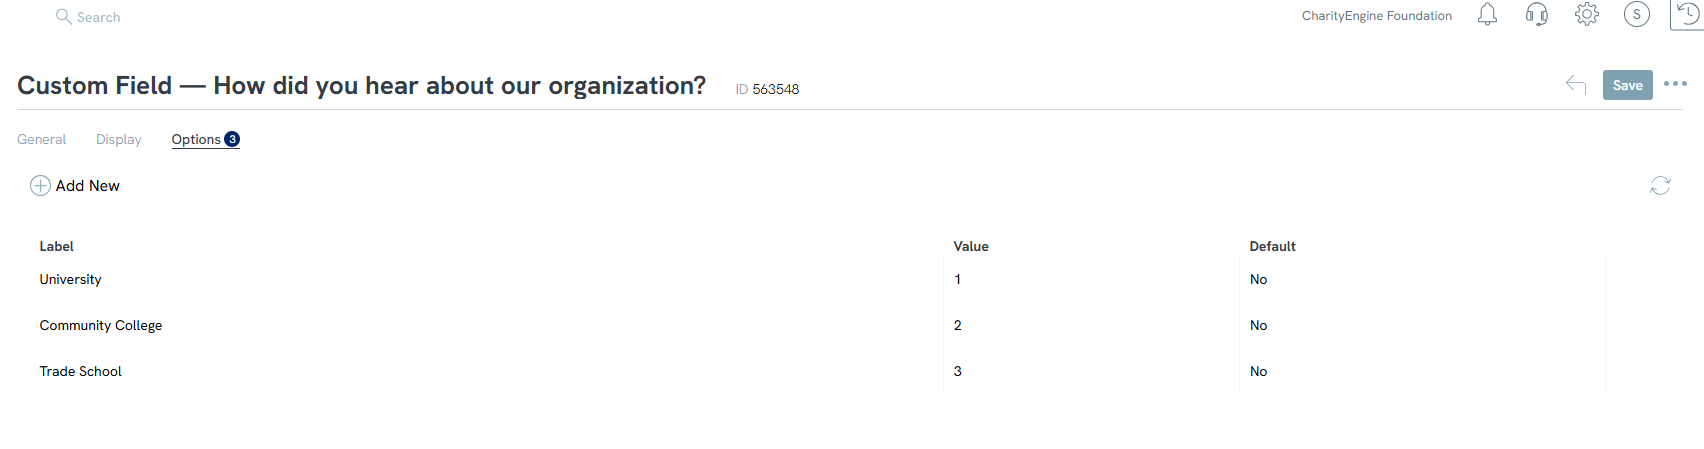
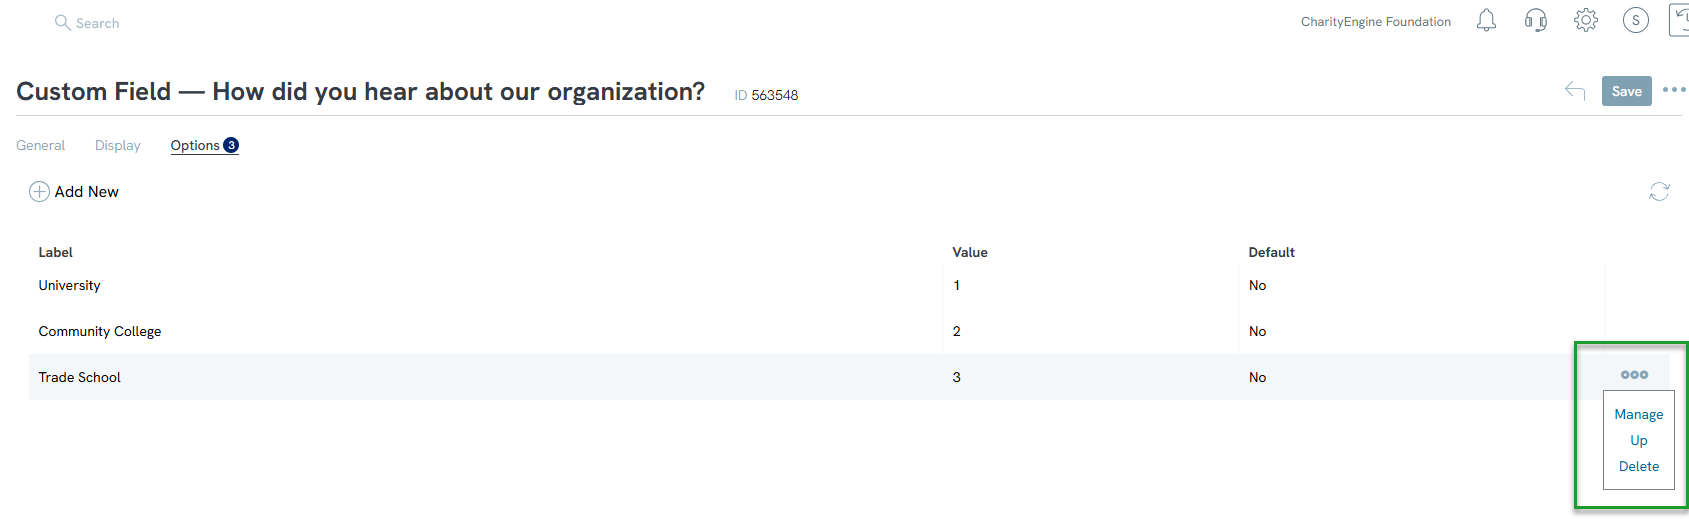
Instructions - How to Create a Custom Field
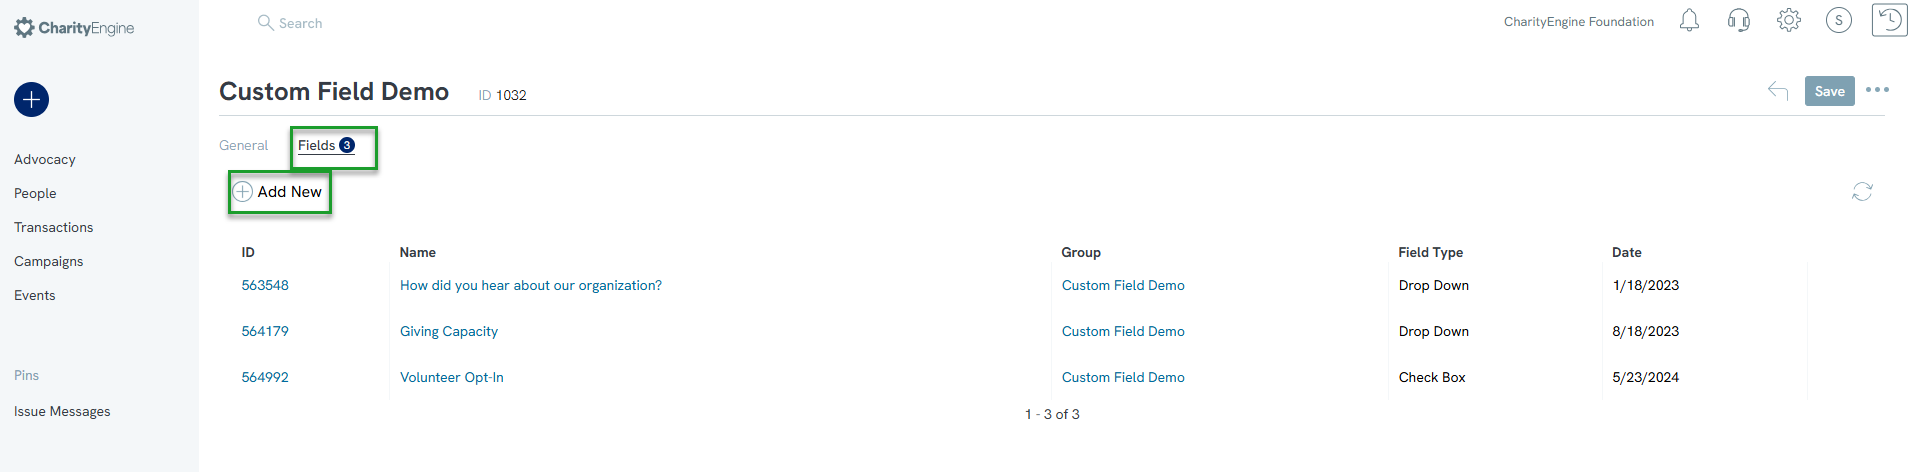
- Note: only select that the custom field is required if it is TRULY required, otherwise this may lead to frustration when editing and creating contacts if it is not filled in. Click SAVE to secure your changes.
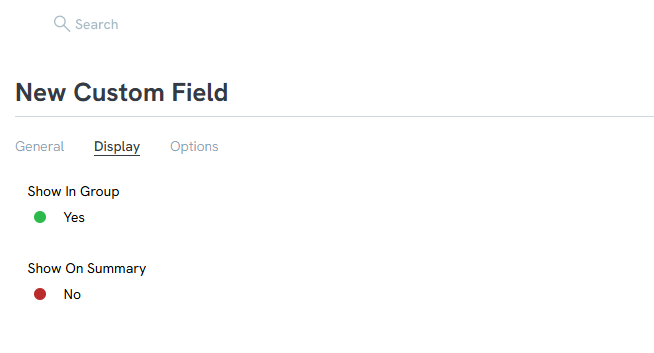
- Show in Group: You can display like fields within a Custom Field Group to improve the ease of use for the end-user. Simply toggle the option to On. And ensure you have associated the field with your assigned Custom Field Group value.
- Show on Summary: You can display your custom field in the contact's Summary Panel by selecting the Show on Summary toggle. You can select up to 5 custom fields to display on the contact's Summary Panel.
Instructions - How to Leverage Calculated Custom Fields
Calculated Custom Fields are a great way to automatically collect and show information from your contacts that would otherwise be difficult to maintain. For example, by creating a calculated custom field, you could find out how many volunteer hours a contact has over a period of time very easily. CharityEngine will be able to pull information from the database and provide you with an answer.
Important Note: Calculated Custom Fields will take overnight for update to the contact record.
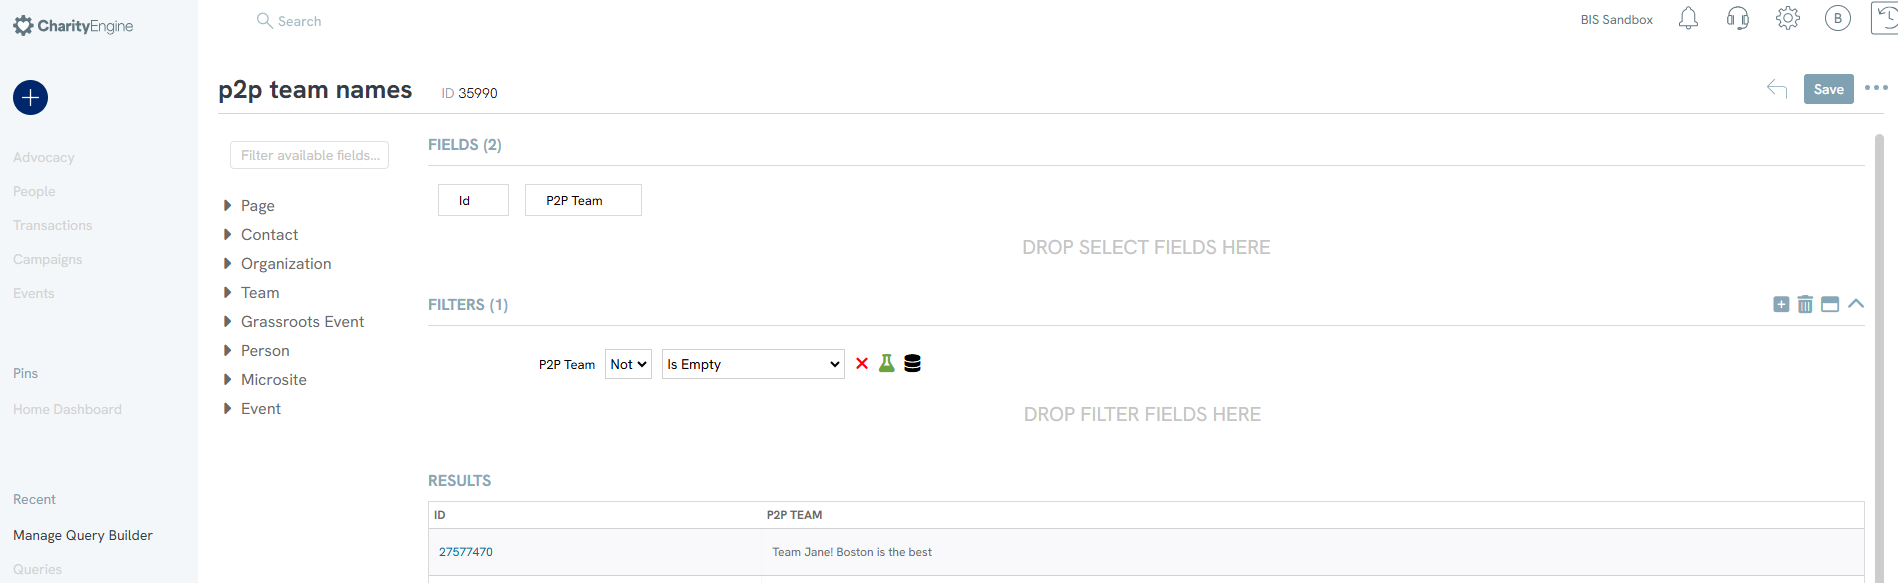
Step 1: Create a query for your the calculated field - in this example, displaying a Team Name on the contact record based upon Peer to Peer participation. Navigate to Automation & Workflow > General > Queries > Create New > Filter > Select > CONTINUE
Step 2: The query must contain Contact ID and then add the additional field to be added to the calculated custom field
Step 3: Click SAVE and Name the query
Example:
Step 4: To create a calculated custom field, navigate to the Configuration App > Contacts > Custom Fields > Create New
Step 5: Enter the:
- Name (required)
- Select the Type = Computed
- Assignment selecting Organization, Person, and/or Household
- The custom field Group name
- Data Type
- This selection is dependent on the type of data you are collecting, for example, if you are collecting numerical data from queries, integer would be the best option. If you are collecting data about giving history or money, then decimal is the best option.
Step 6: Click SAVE to continue creating the calculated custom field.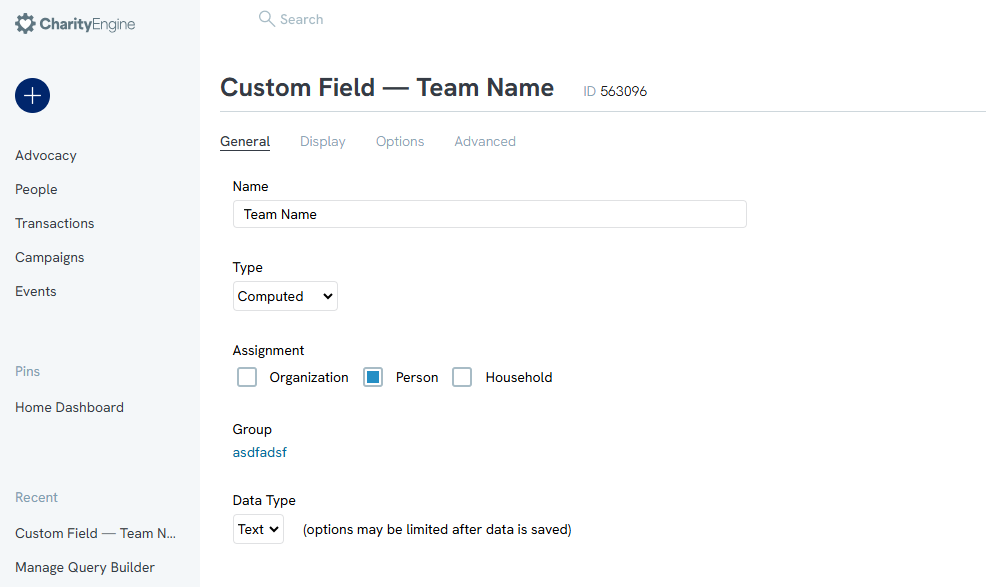
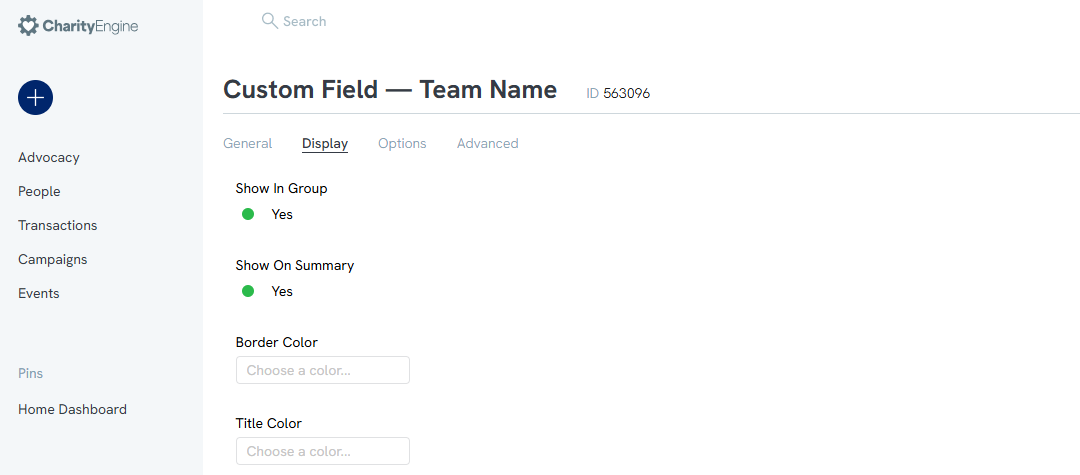
Step 7: Navigate to the Display tab and determine if the field should Show in Group and/or Show on Summary
Step 8: Once you have set the configurations on the General tab, navigate to the Advanced tab to select the query you wish to pull data from. Use the data source drop-down to search for the query created in Step 1.
- Contact Id Column select the query data field which contains the Contact Id
- Computed Value Column select the value to be displayed in the custom field when present on a Contact Id

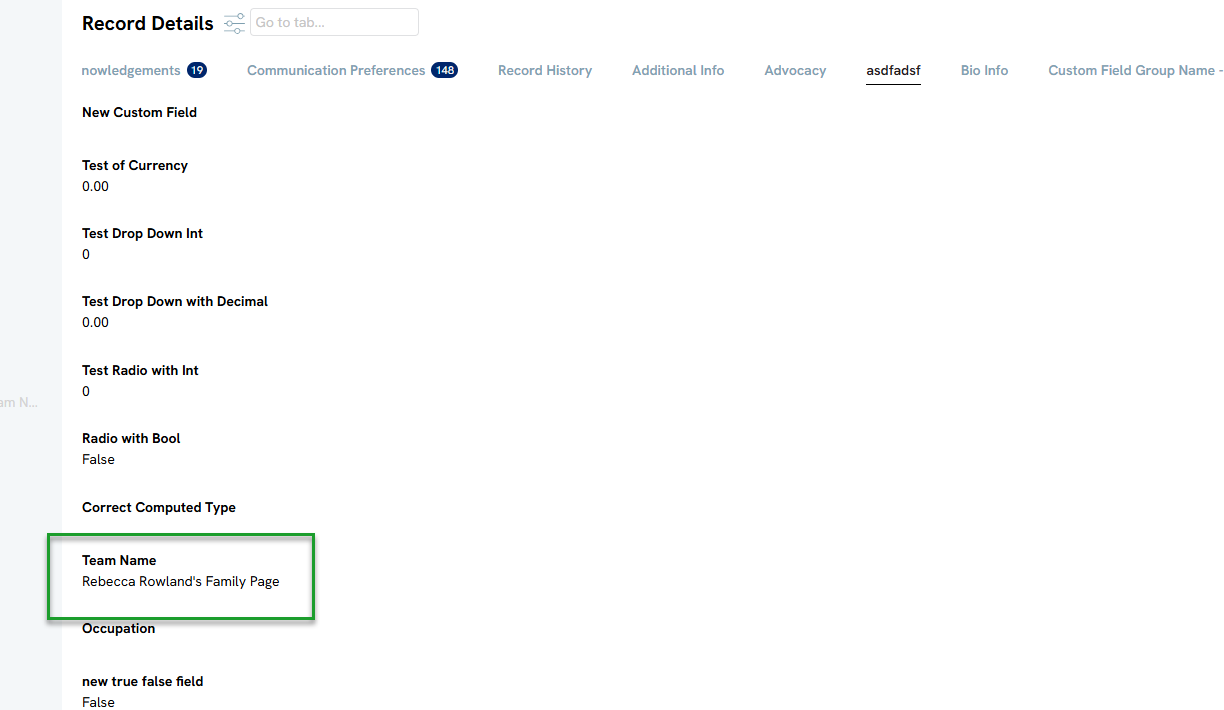
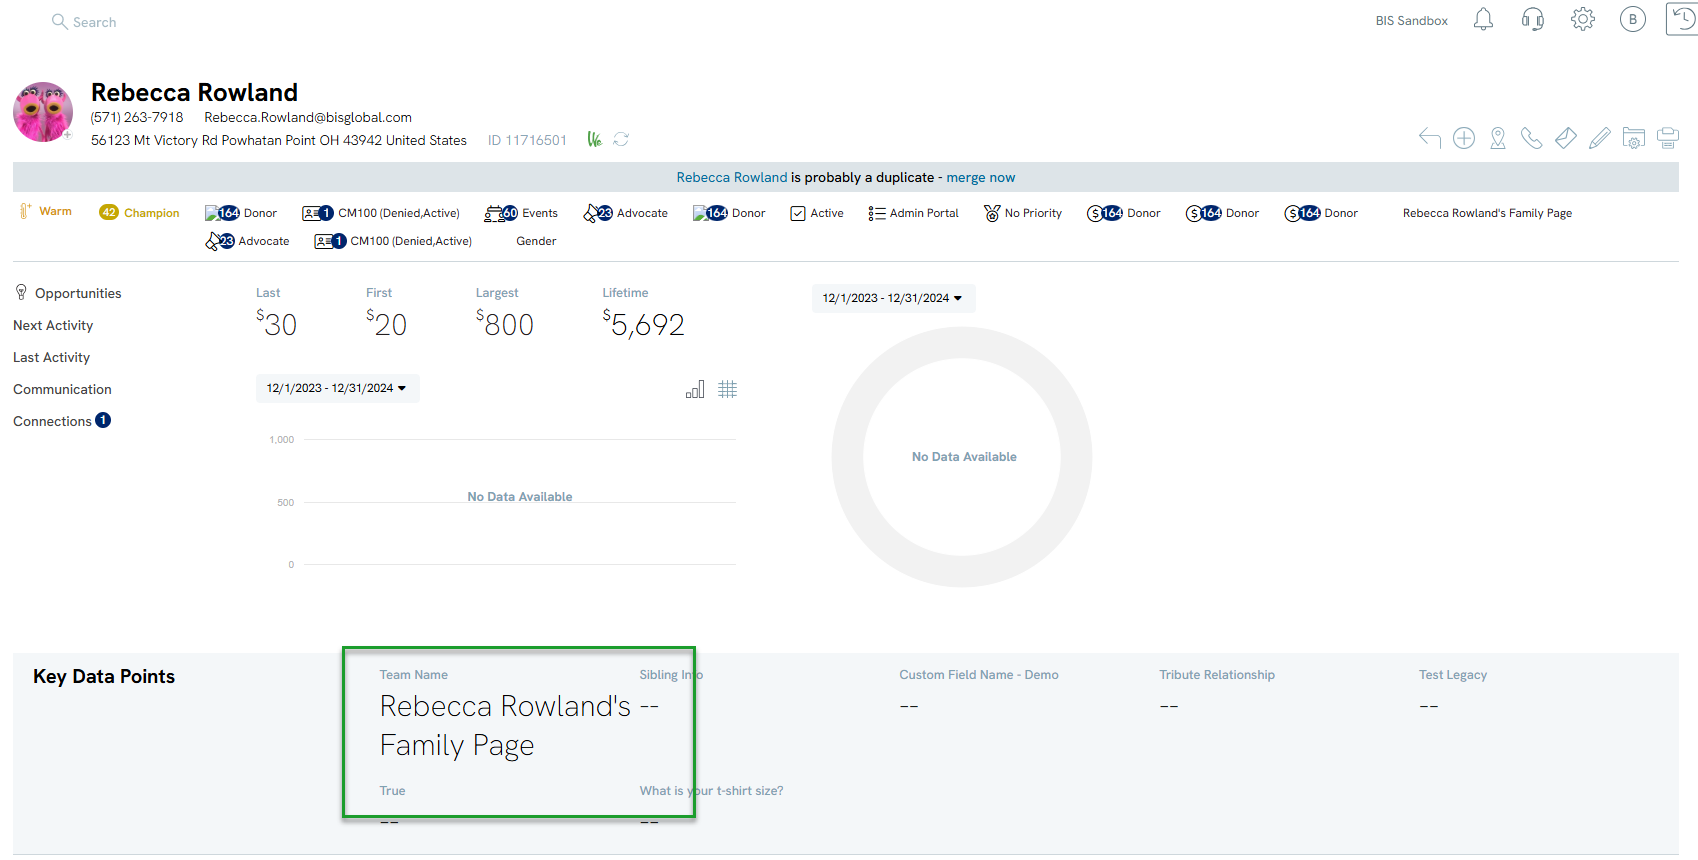
Example: Outcome in Custom Field Group
Example: Outcome based upon Show on Summary
Note: Custom fields are updated daily based upon the results of the query.
Other ways to use this computed field: set Chapters automatically based on contact location, calculate a type of giving like in-kind or towards a specific fund or campaign. These computed fields can then be used in queries to create a highly customized report for your users.
FAQs & Further Reading
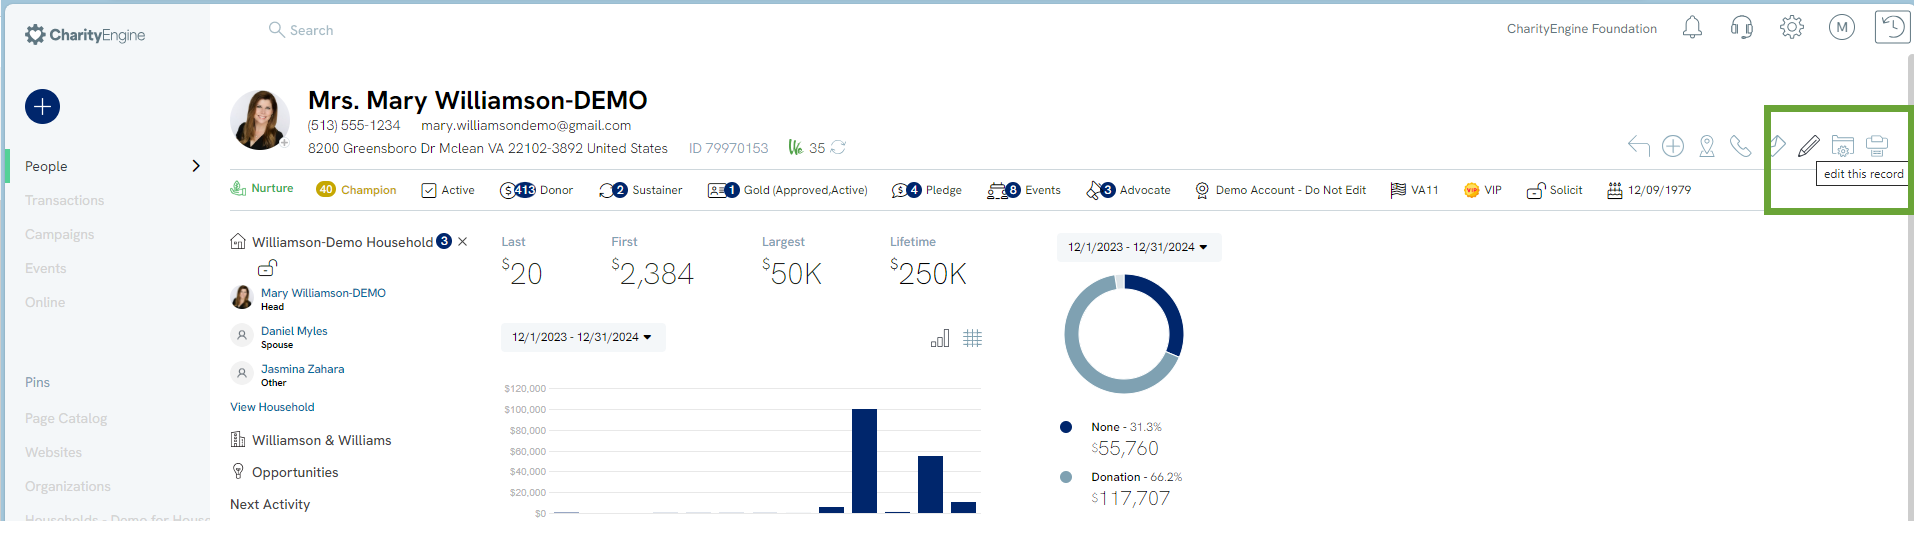
A. From the Contact App > Organization & People > locate your contact record > Edit
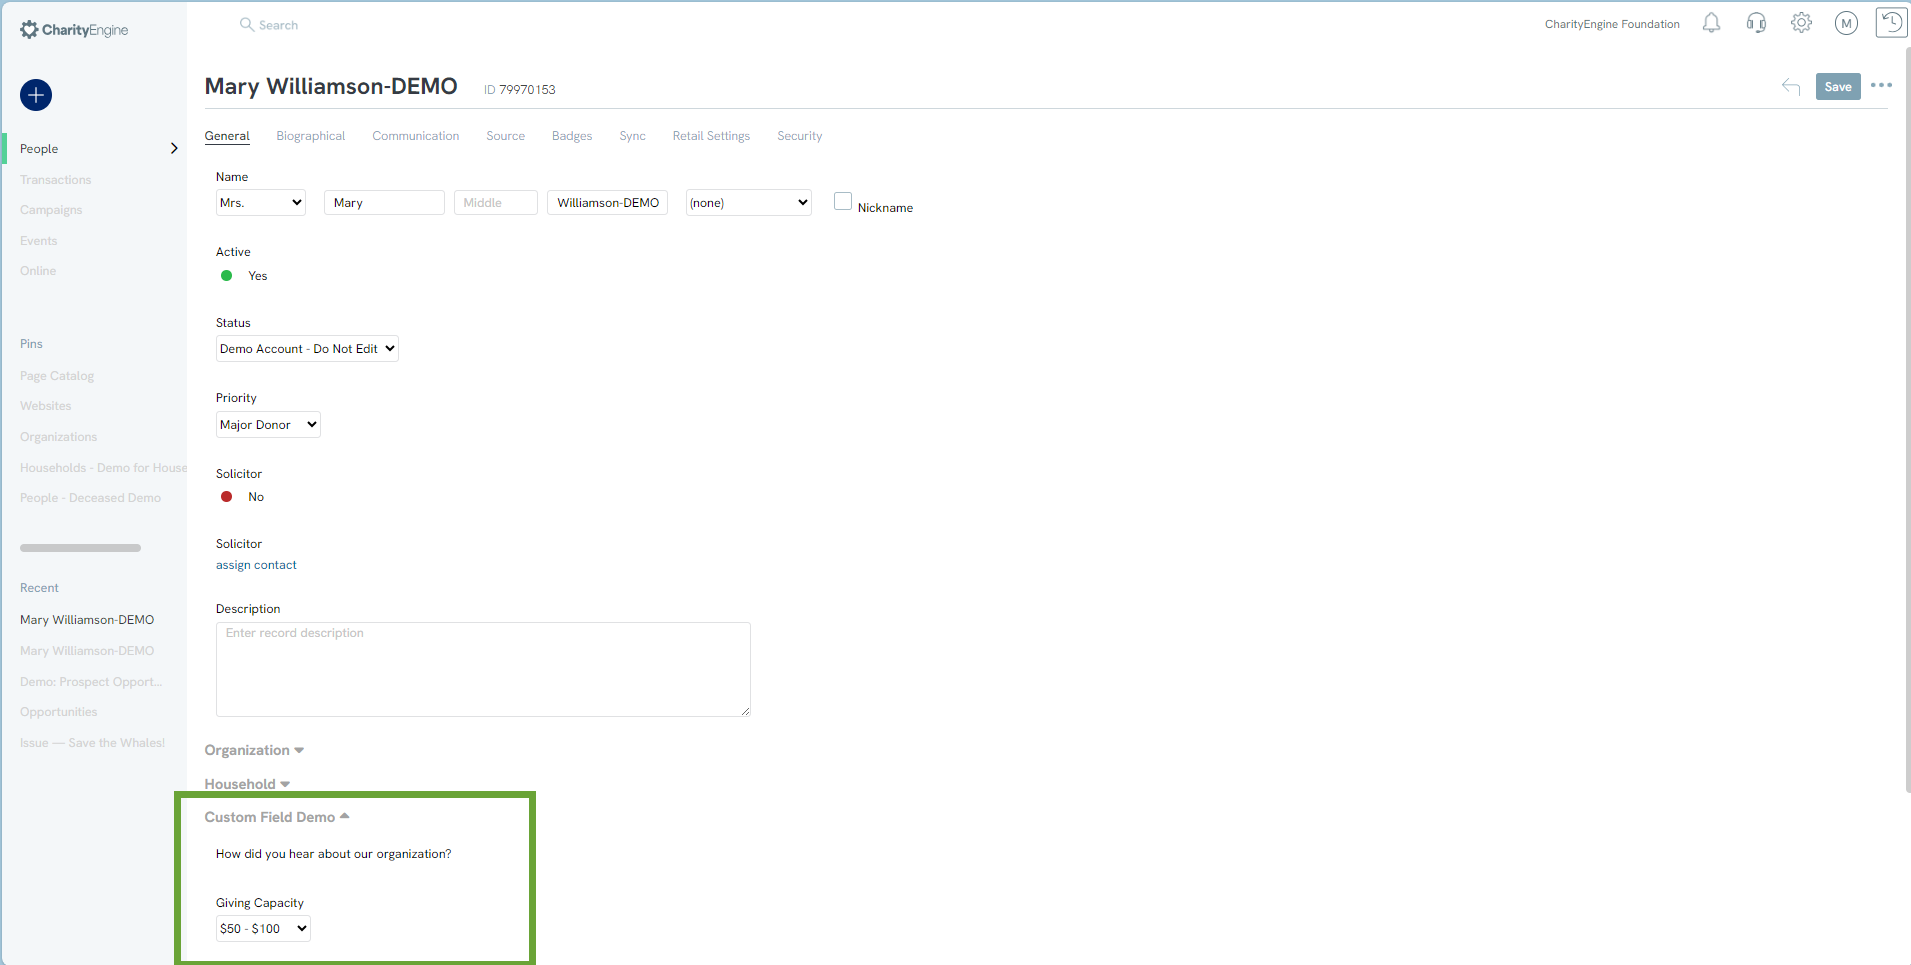
A. For ease of use for your end users, you can promote a custom field directly below the Summary panel of a contact record. Here, Custom Field Name - Demo is presented immediately below giving summary.
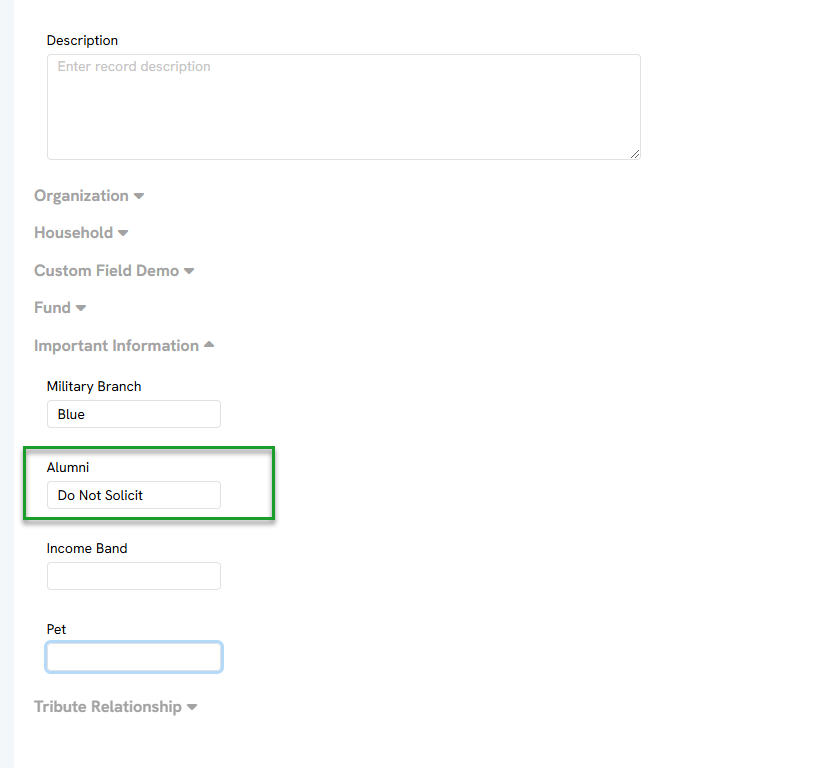
In addition, the custom field and it's custom field group name will also continue to present within the custom group section further on the contact record:

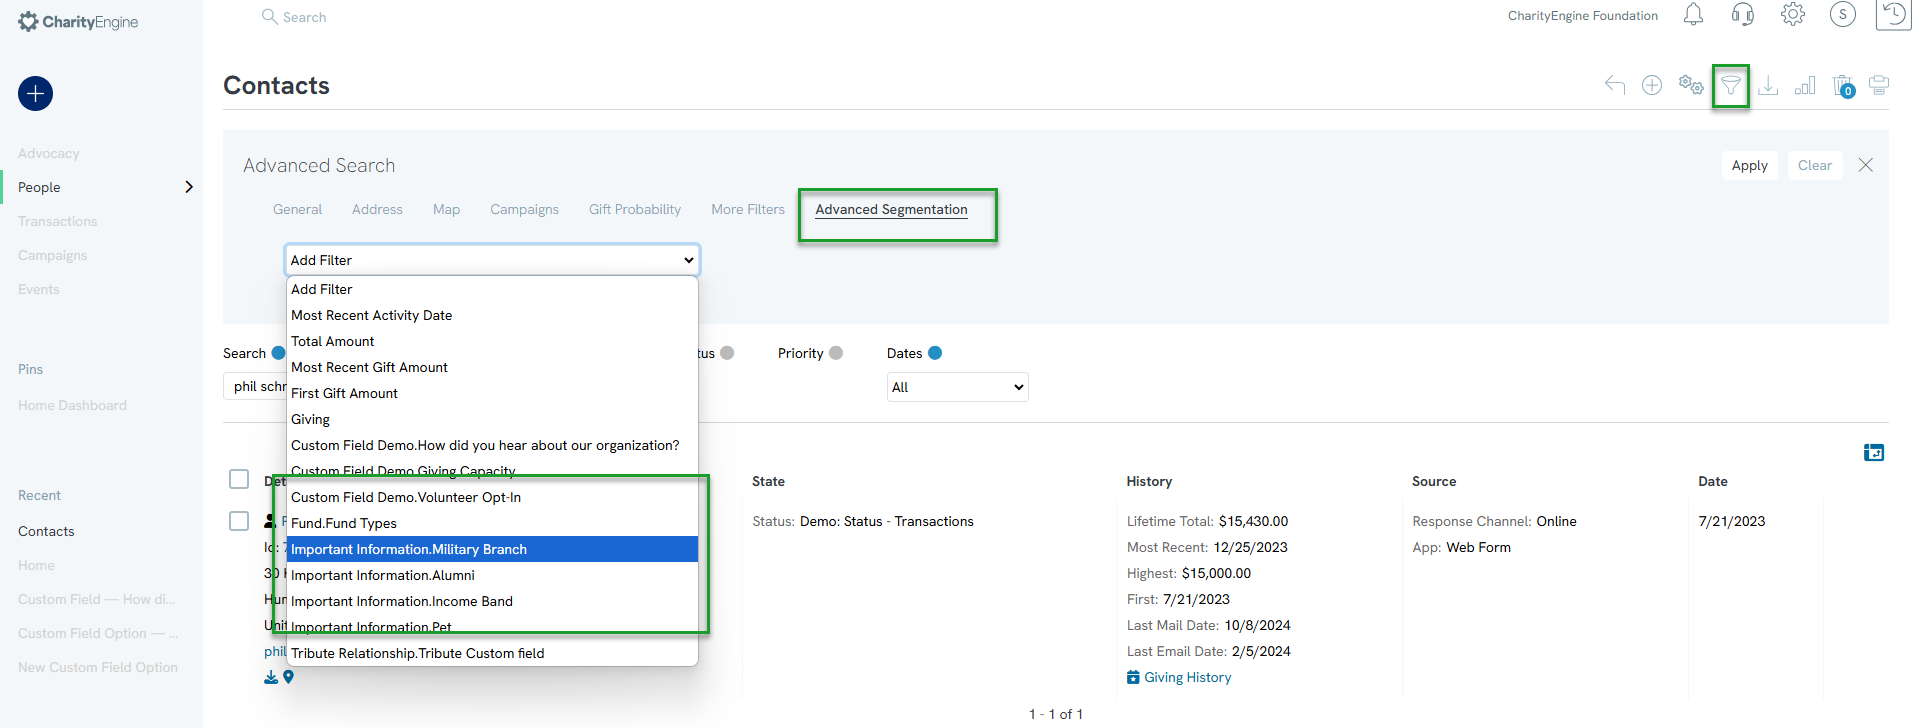
A. Yes, you can access Organization & People > Search & Manage> navigate to the Advanced Segmentation tab and use the drop down to locate your custom field.
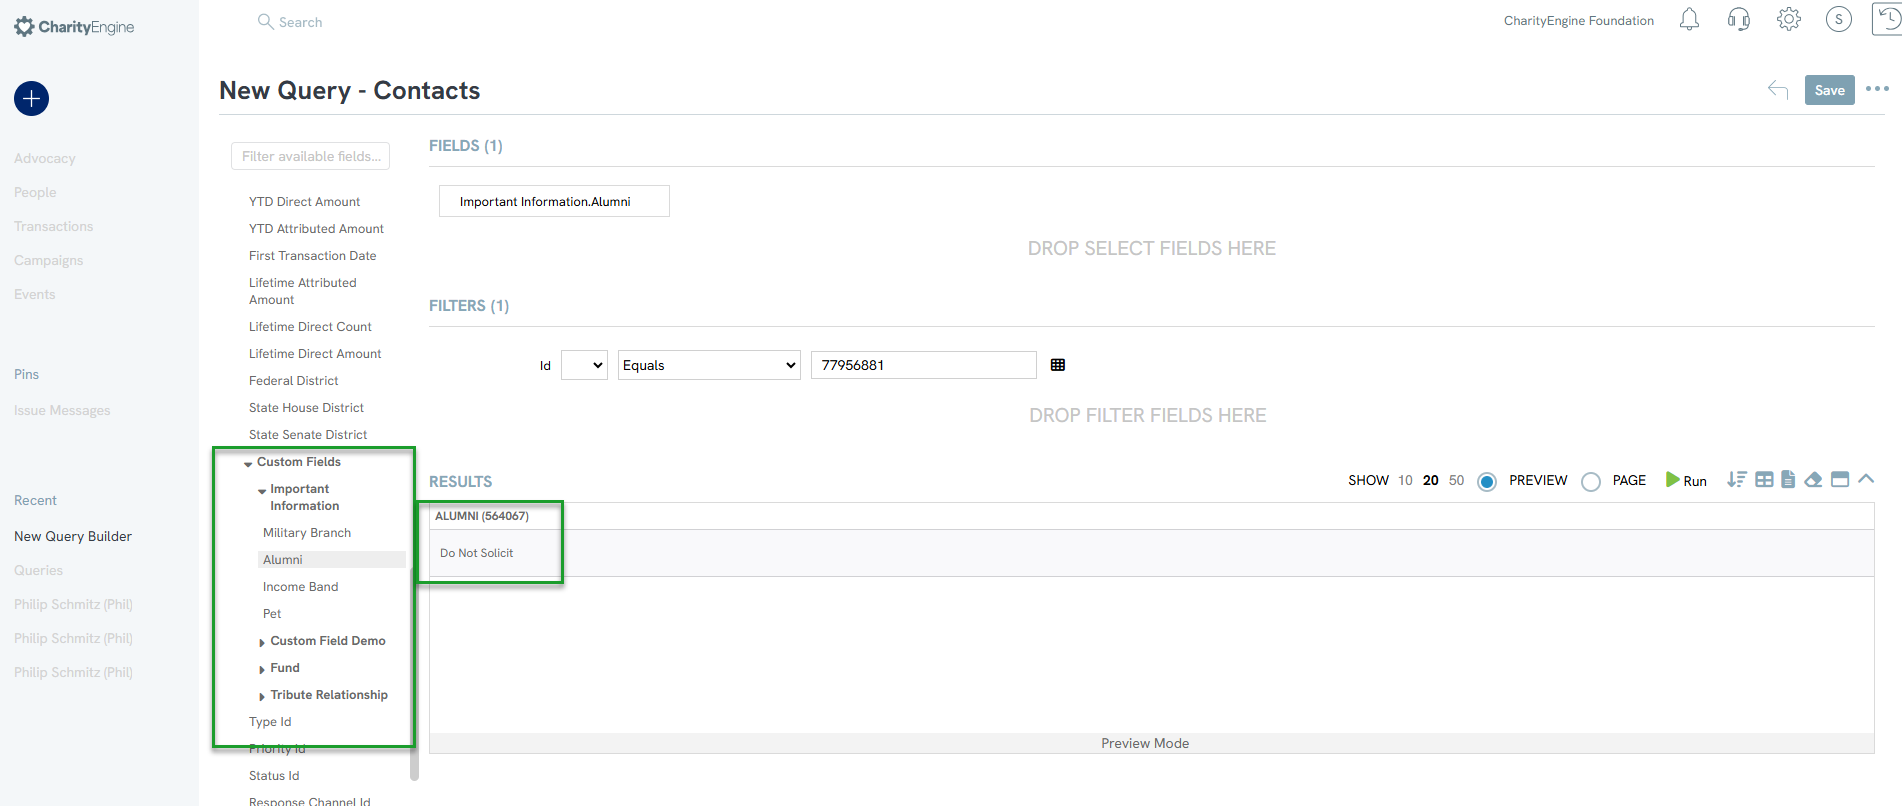
A. Yes - access Workflow & Automation > General > Query > Create New > Contact > Contact. Navigate under Contact to locate the Custom Fields option to see all custom groups and associated field names. Drag & drop into the SELECT and/or FILTER section to use within a query.
A. Check your custom fields to ensure that one or more has not been configured as a Required field. This will prohibit the user from creating or modifying a contact record.