Introduction
Maintaining good data hygiene is an important activity that should be considered for any CRM. Creating a cadence for quarterly, semi-annual, or annual data governance should be considered. This article will cover the various data governance including:
- Management and monitor of duplicate contact records
- Identification of inactive donors
- Managing opt in list for email sending practices
When contacts have dependencies, CharityEngine allows for individual and bulk deletion of contacts and dependent records such as transactions and activities though a data transformation.
Please Note:
-
- -Deleting transactions can be done easily when deleting contacts, however the decision to delete transactions should be review internally before doing so.
- -CharityEngine recommends avoiding the deletion of transactions processed through your payment gateway. Doing so may result in lost transactional record details.
Warning: Transforming data can cause irreversible changes to your database. Make sure you back up your data first.
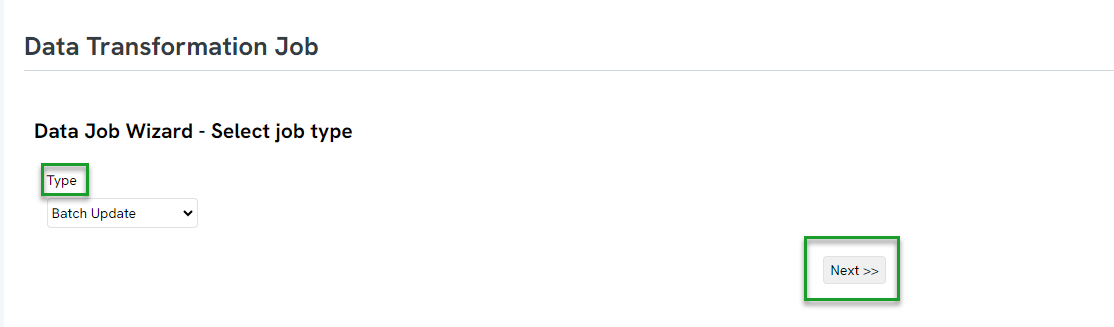
Table of Contents
- Introduction
- Prerequisites
- Instructions: Updating Contact Records via the Transaction Listing Screen
- Instructions: Updating/Merging Contact Records via the Contacts Listing Screen
- Instructions: Managing Duplicate Records (Singular Contacts)
- Data Governance: How to De-Dupe Using Automation & Workflow De-Dupe feature (People, Organizations, or Households) (Singular Contacts)
- Instructions - Bulk Merge through Import Feature (Multiple Contacts)
- Instructions - Scheduling a Recurring Duplicate Report
- Data Governance: Identification of Inactive Contact Records
- Data Governance: Deleting Contacts from the Contact Listing Screen
- Data Governance: Deleting Contacts in Bulk with a Query
- Data Governance: Deleting Contacts in Bulk with a File Upload
- FAQs & Further Reading
Help Center – Legacy User Interface
Click here to access the Help Center legacy user interface article.
Prerequisites
- Consider data governance practices and frequency of review
- Prior to any data transformations, be sure to back up your data first
- Warning: Transforming data can cause irreversible changes to your database. Make sure you back up your data first.
- If your contact records have custom fields, please note, when using the match/merge feature on the Contacts listing screen, your custom fields will only maintain the surviving record's data point (i.e. record 1 contains custom field: Favorite Color = Yellow and record 2 contains custom field: Favorite Color = Blue, if the surviving record will be record 2, the Favorite Color = Blue)
Instructions: Updating Contact Records via the Transaction Listing Screen
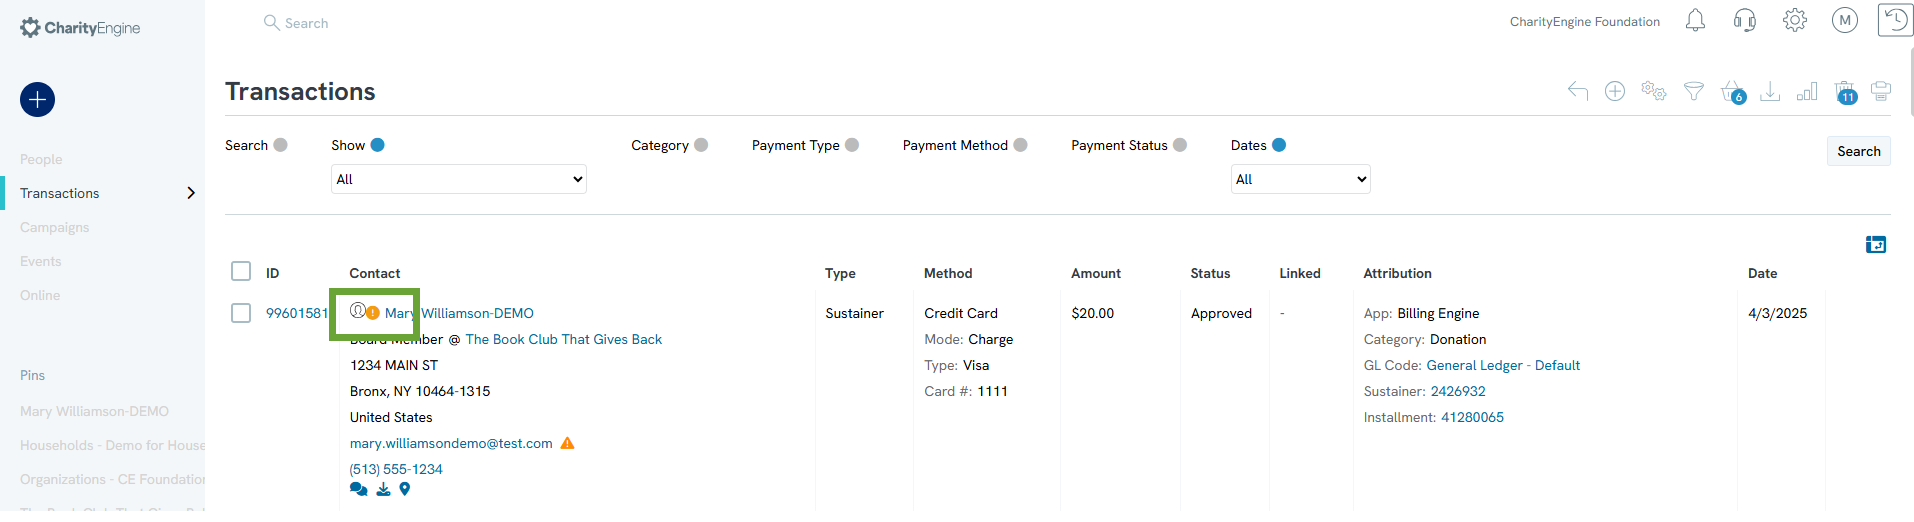
-
-
- UPDATE CONTACT: A pop-up box will then allow the user to update -
- Name - yes/no
- Birthday - yes/no
- Address - no changes, overwrite primary, add as primary (demote current), or add as secondary
- Phone - no changes, overwrite primary, add as primary (demote current), or add as secondary
- and/or Email - no changes, overwrite primary, add as primary (demote current), or add as secondary
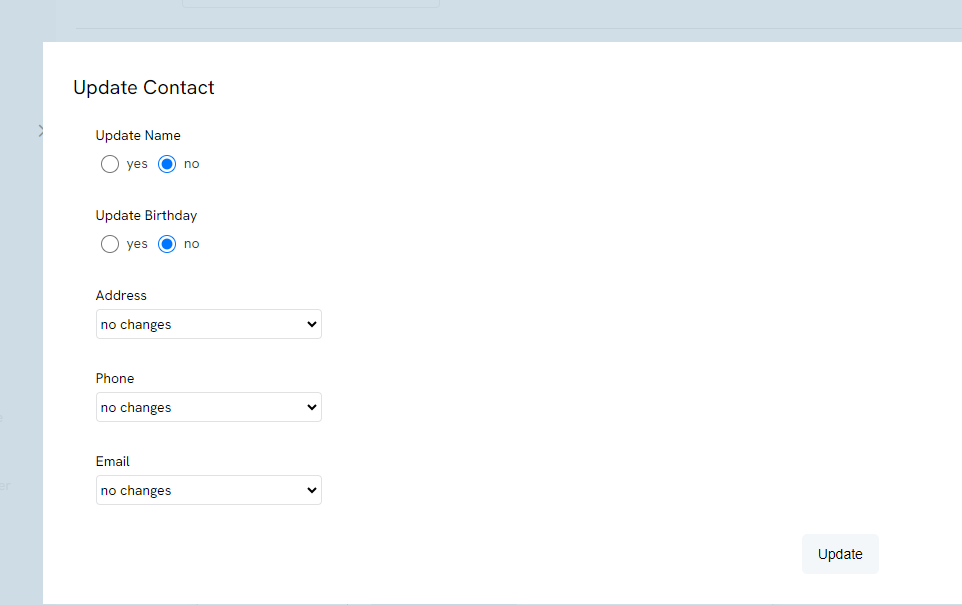
- Click UPDATE to secure changes.
-
REASSIGN CONTACT will a brand new contact ID within CharityEngine with the assigned contact information.
-
DISMISS will ignore the contact updates and remove from future assessments.
- UPDATE CONTACT: A pop-up box will then allow the user to update -
-
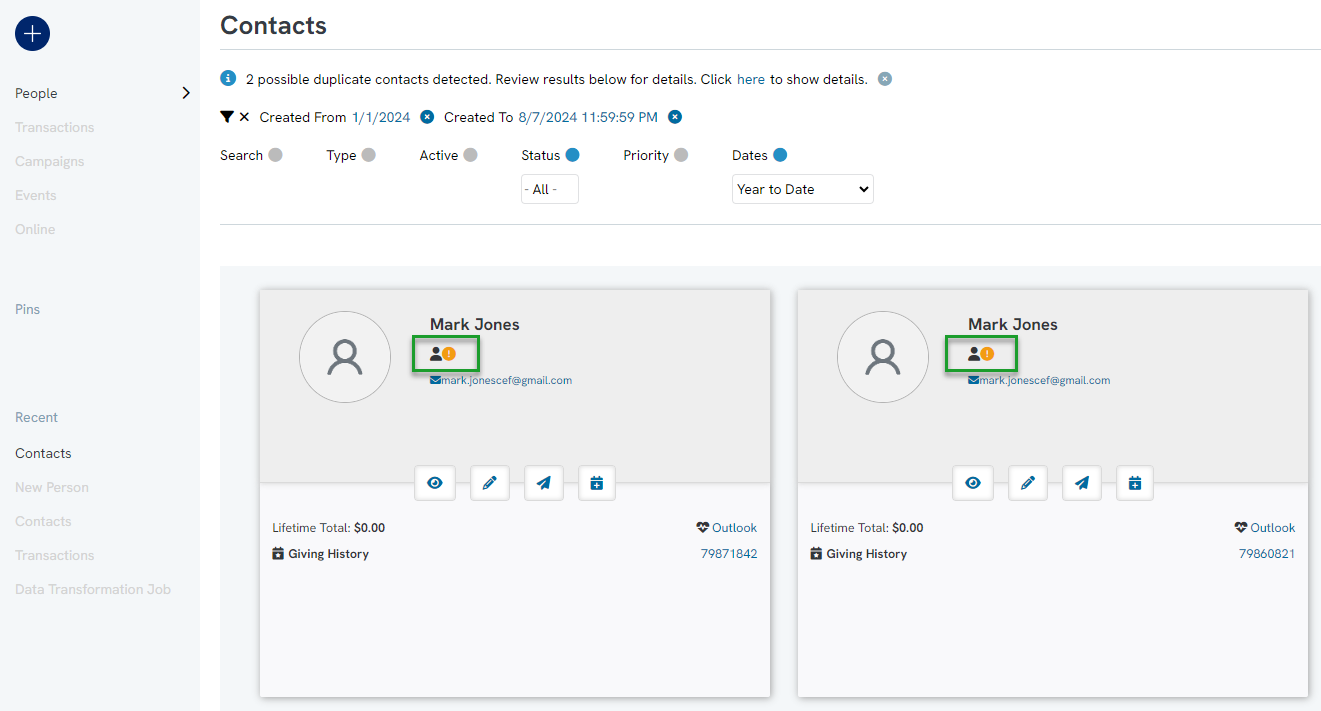
Instructions: Updating/Merging Contact Records via the Contacts Listing Screen

-
-
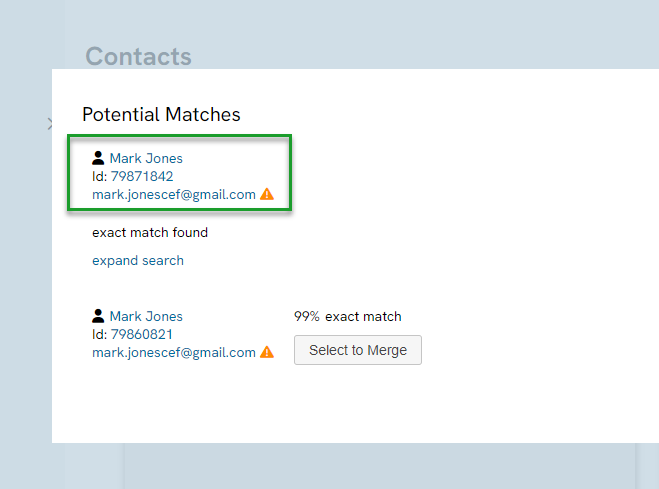
- Determine which record to Keep or Merge
- Toggle to select specific demographic elements to be maintained on the record. (i.e. contact type, name, address, email)
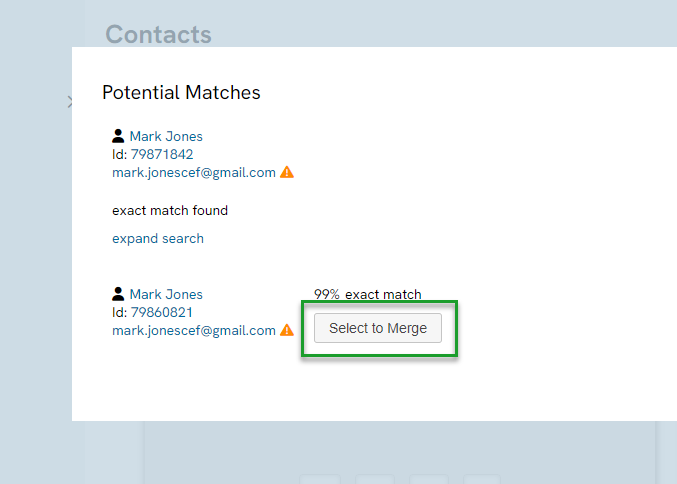
- Select MERGE NOW.
-

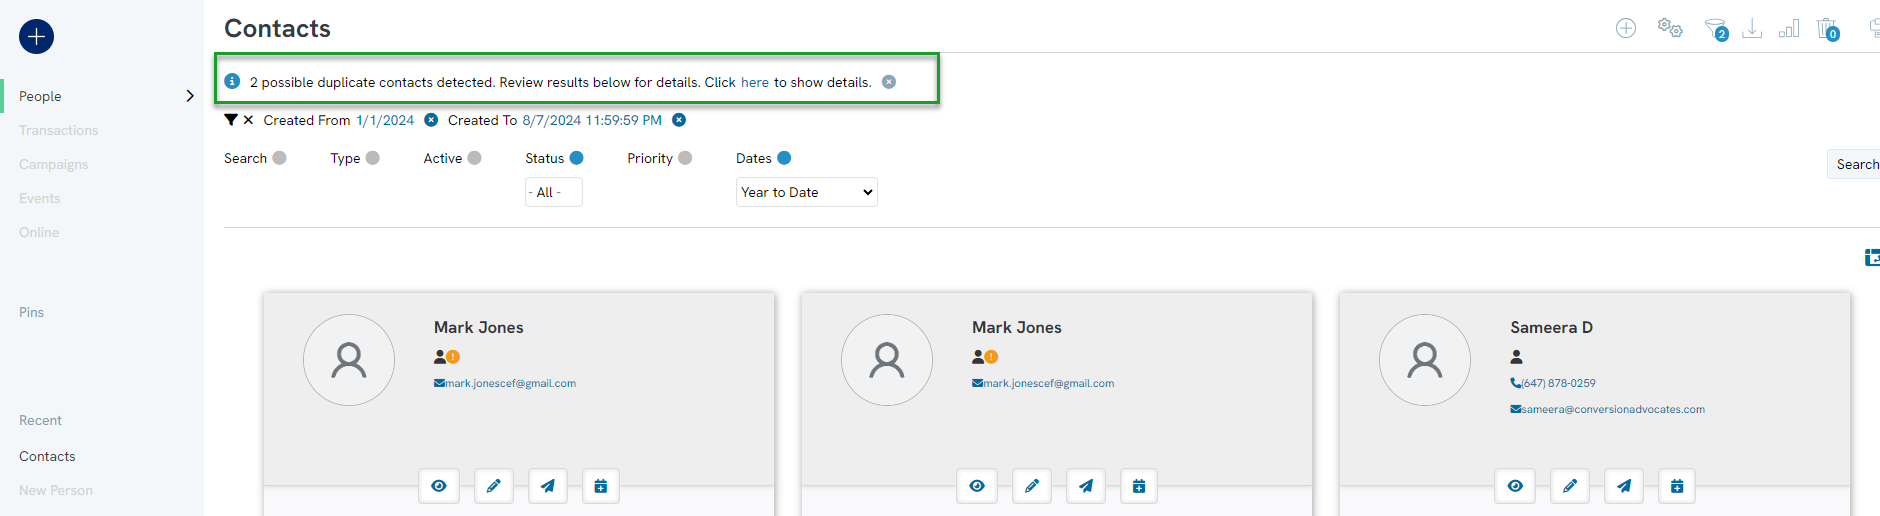
Instructions: Managing Duplicate Records (Singular Contacts)
As a first step in data governance, it is important to evaluate and cleanse any duplicative contact records at the Person, Organization, and Household level. CharityEngine offers a variety of tools to assist the end user with identification of duplicate records while also allowing for systemic merging of multiple contact records.
To merge contacts that may not appear in De-Dupe People, use the Merge Contacts page
NOTE: The contacts may not match through De-Dupe People due to differing information. For example, one contact could have a nickname, or the contact may have been entered under another alias if the contact goes by a different name.
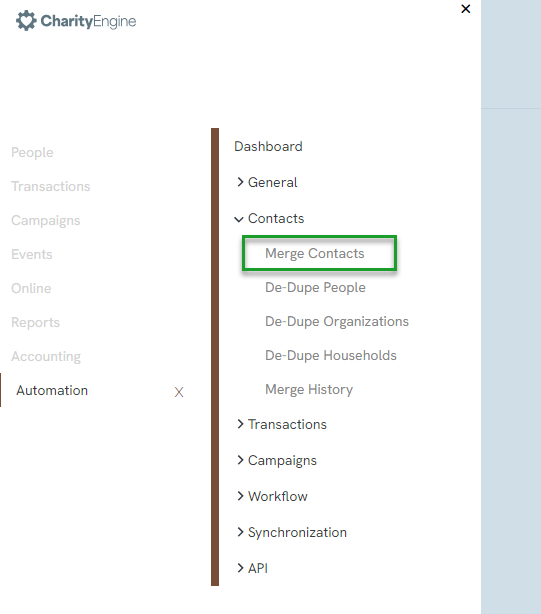
Step 1: Navigate to the Automation > Contacts > Merge Contacts
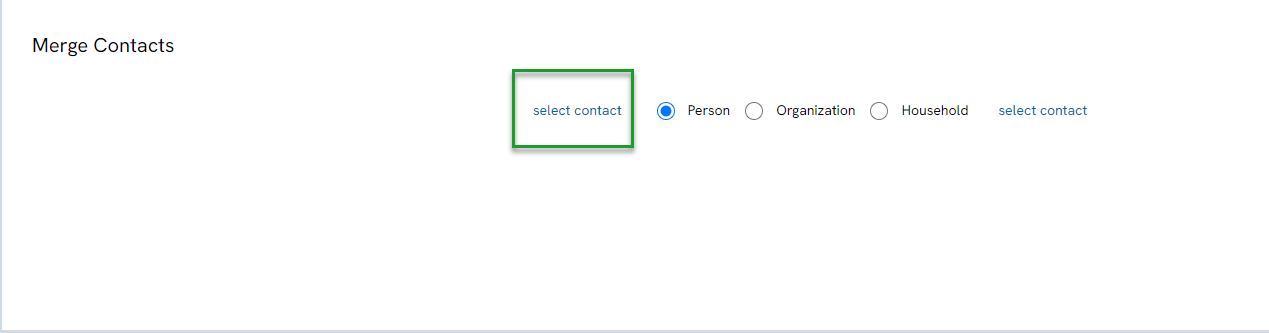
Step 2: Choose the contact type, then click on the Select Contact button to search for your contacts
Step 3: Enter the information for the contact and select search
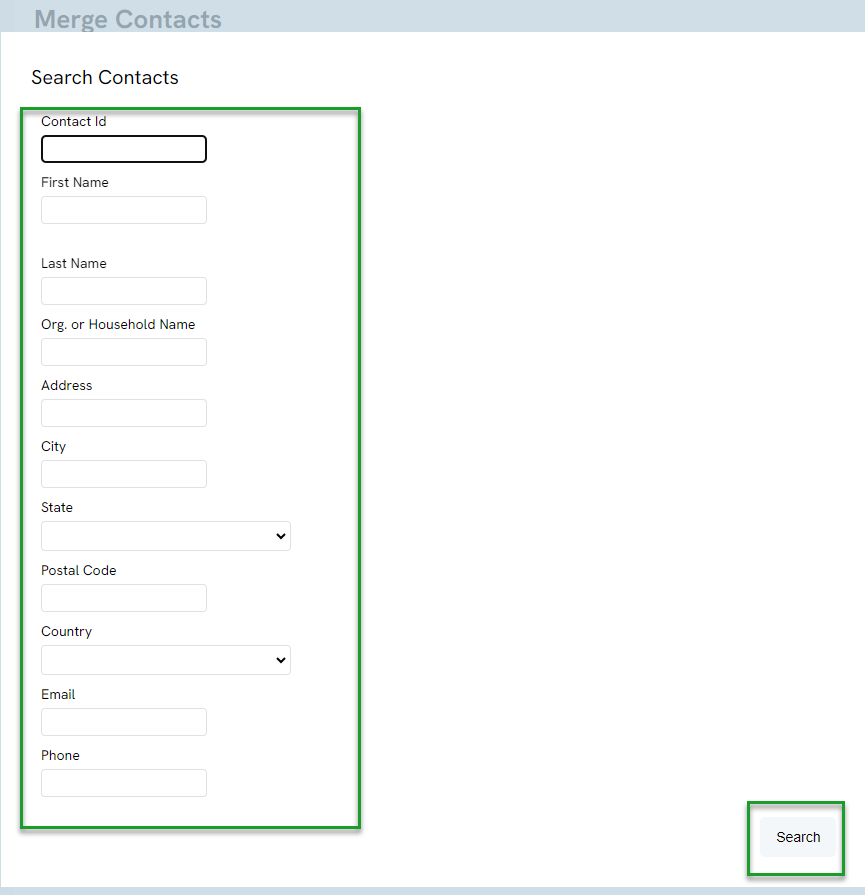
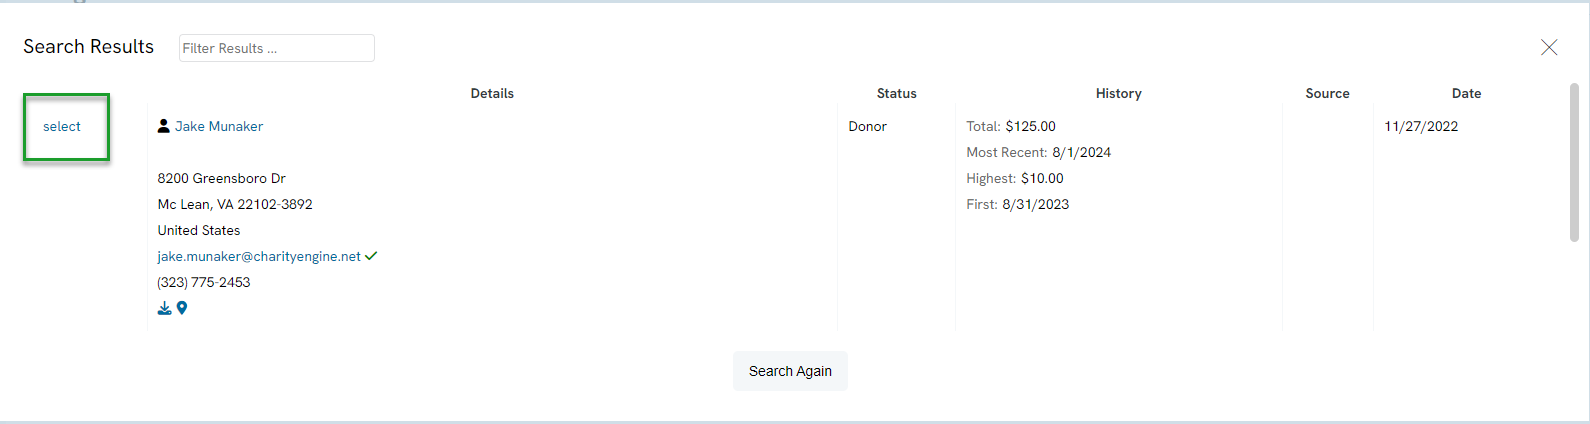
Step 4: Once the search is complete, click the select button to select the contact
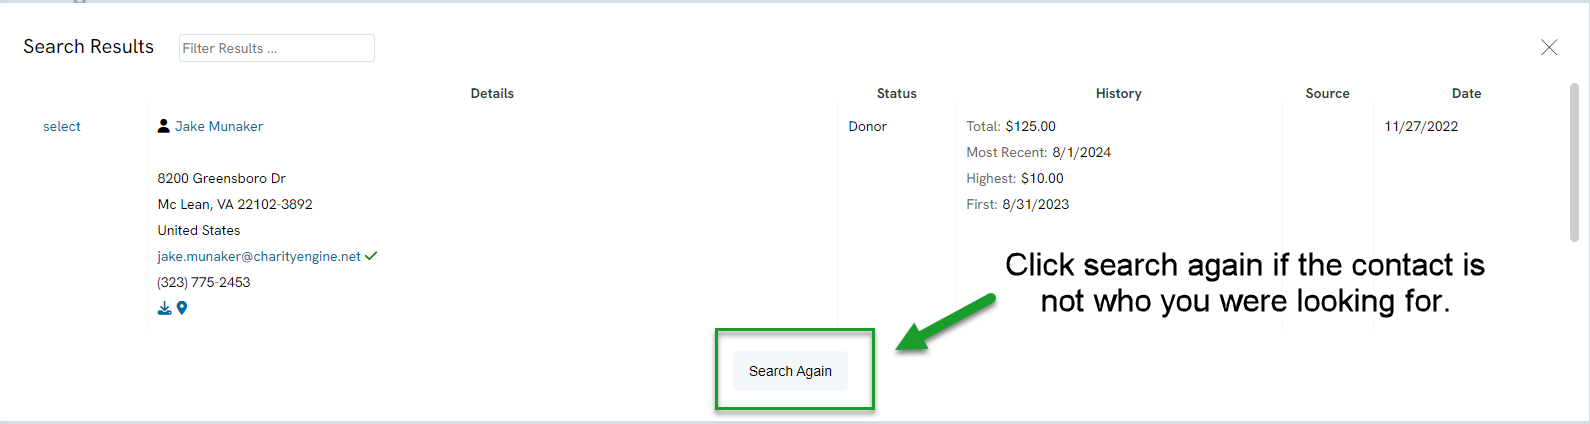
Step 5: If the contact that was found is not the correct contact, click search again to enter more information to find the correct contact.
Step 6: Once the contact has been selected, it will appear under Contact # 1. Now search for the second contact by clicking Search under Contact # 2.
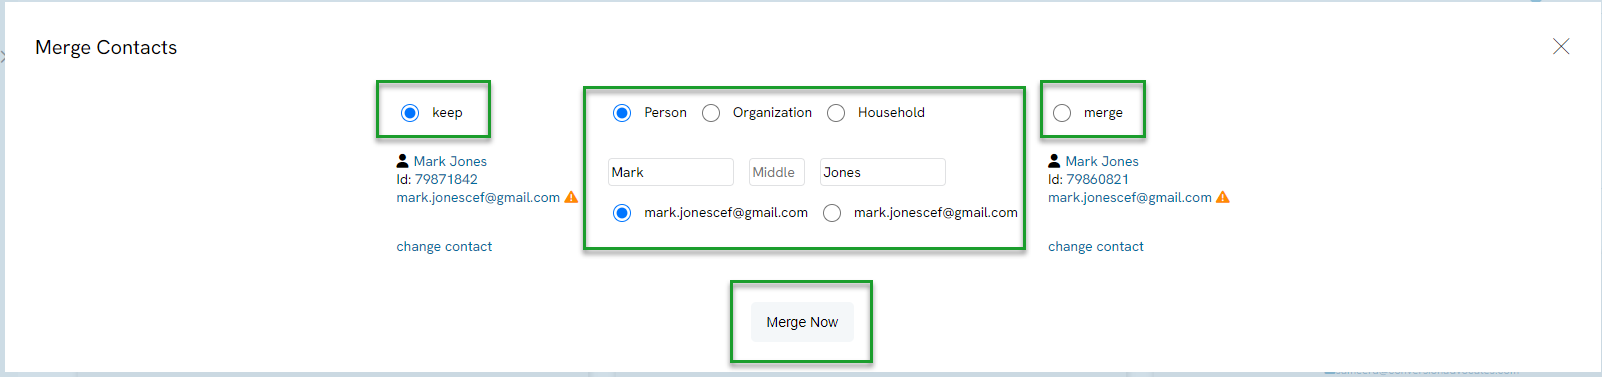
Step 7: Select which contact to Keep and which to Merge. To merge the contacts, click on Merge Now.
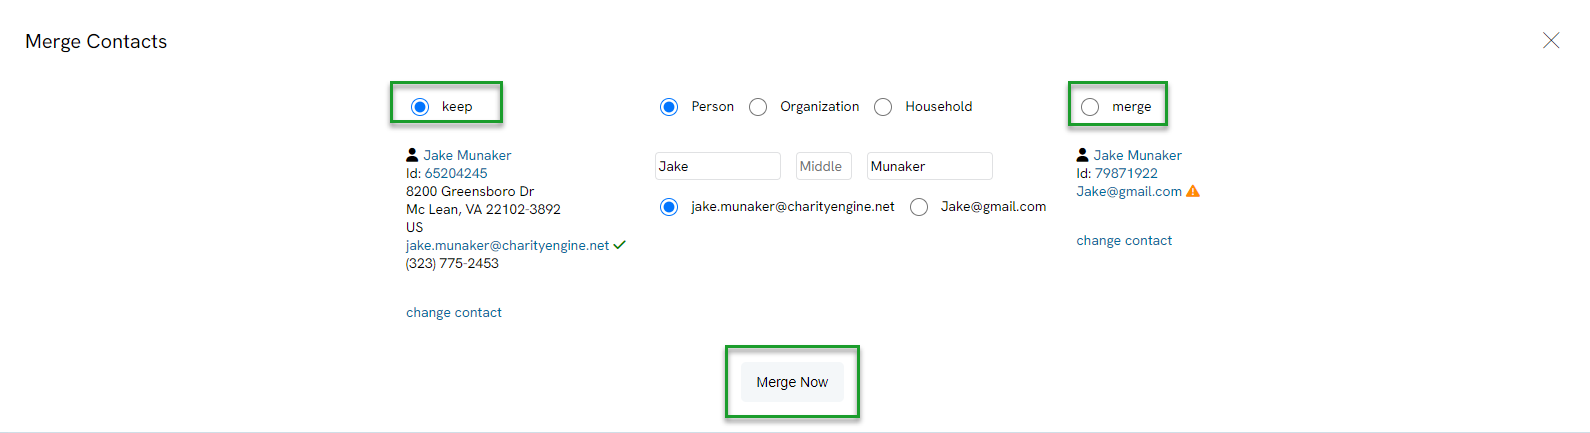
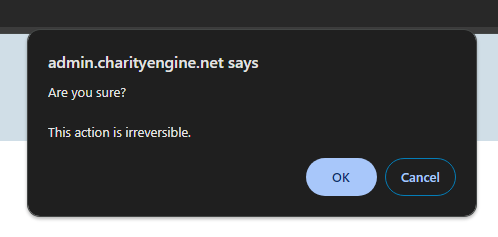
NOTE: Merging the contacts is irreversible. Prior to merging the contacts, please ensure the contacts selected are the correct contacts. If Contact # 1 is selected as the master, Contact # 2 will no longer exist and will not be able to be found unless a new contact is created. A reminder will appear to confirm that you are sure of this action.
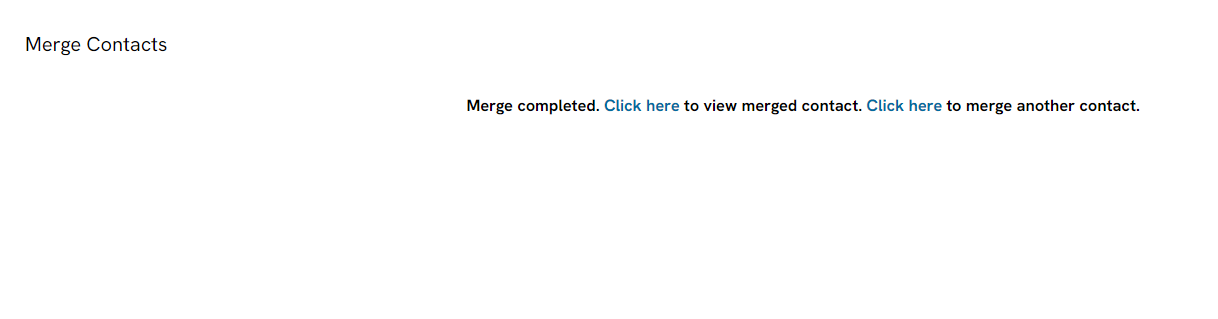
Step 8: When the contacts have been merged, a blue bar will appear at the top of the screen. There will be a link to view the new contact that contains the merged information.

Step 9: The link will lead you to the contact page. Any information that was on Contact # 2 will now appear under this contact. For example, the email address for Contact #1 and Contact #2 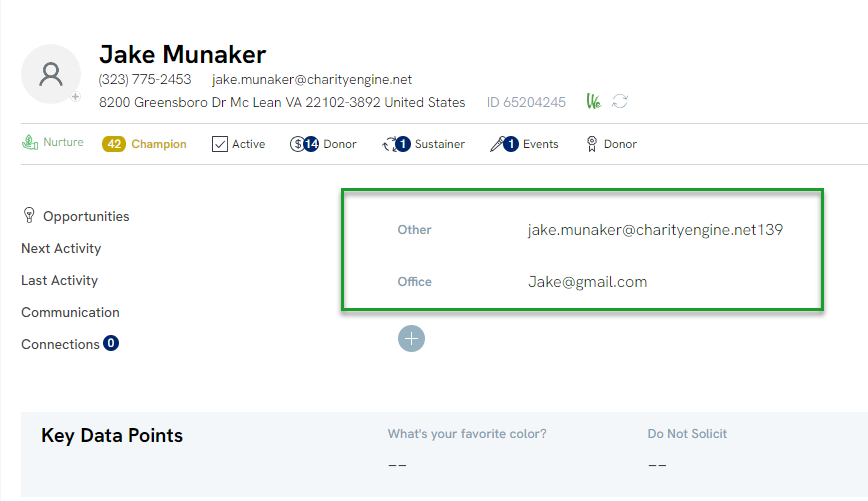
Step 10: To see your merge history, navigate to the Automation > Contacts > Merge History
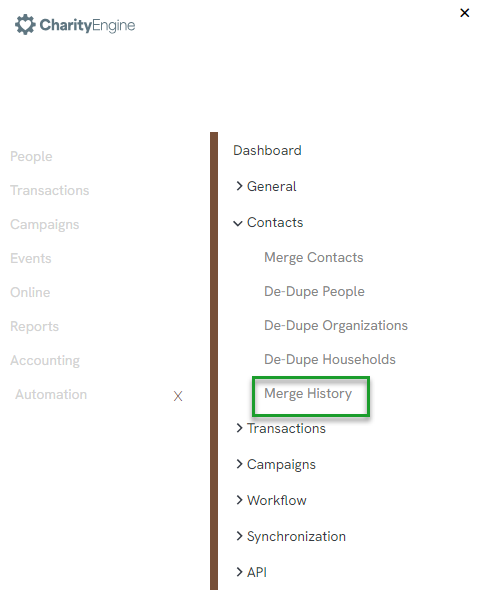
Step 11: You will be able to see what contacts were updated, who updated the contact, and when it was updated

Data Governance: How to De-Dupe Using Automation De-Dupe feature (People, Organizations, or Households) (Singular Contacts)
To utilize the De-Dupe People feature within CharityEngine, navigate to the Automation > Contacts > De-Dupe People. This should be used for smaller data sets as each record will be independently reviewed.
Note: Please follow the same flow for De-Dupe Organizations and De-Dupe Households

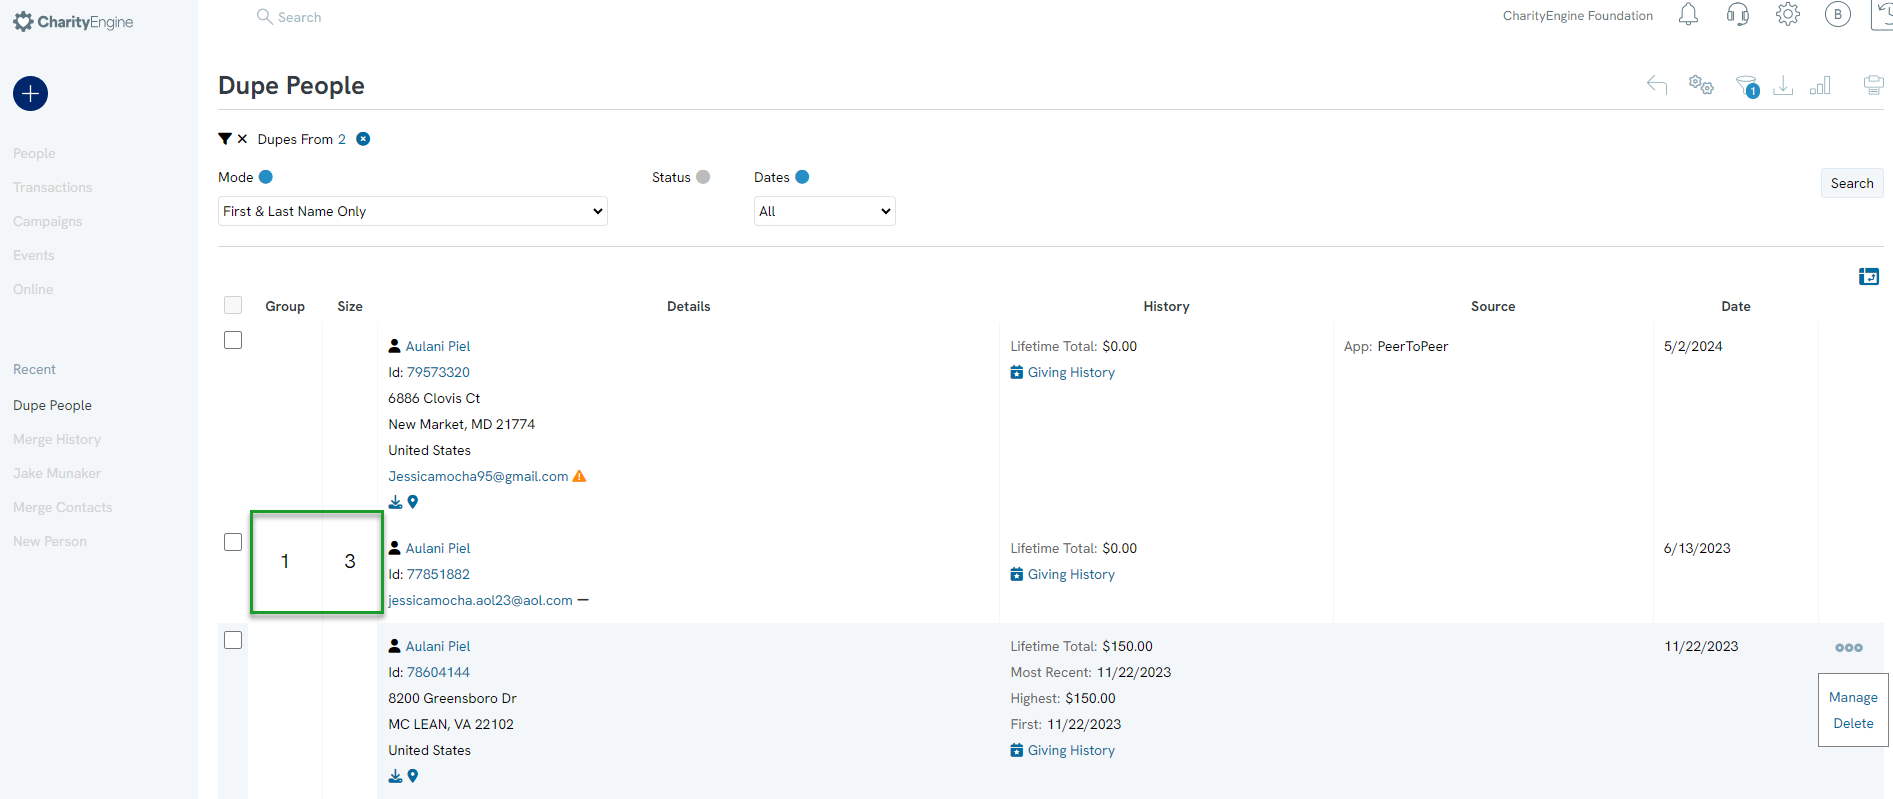
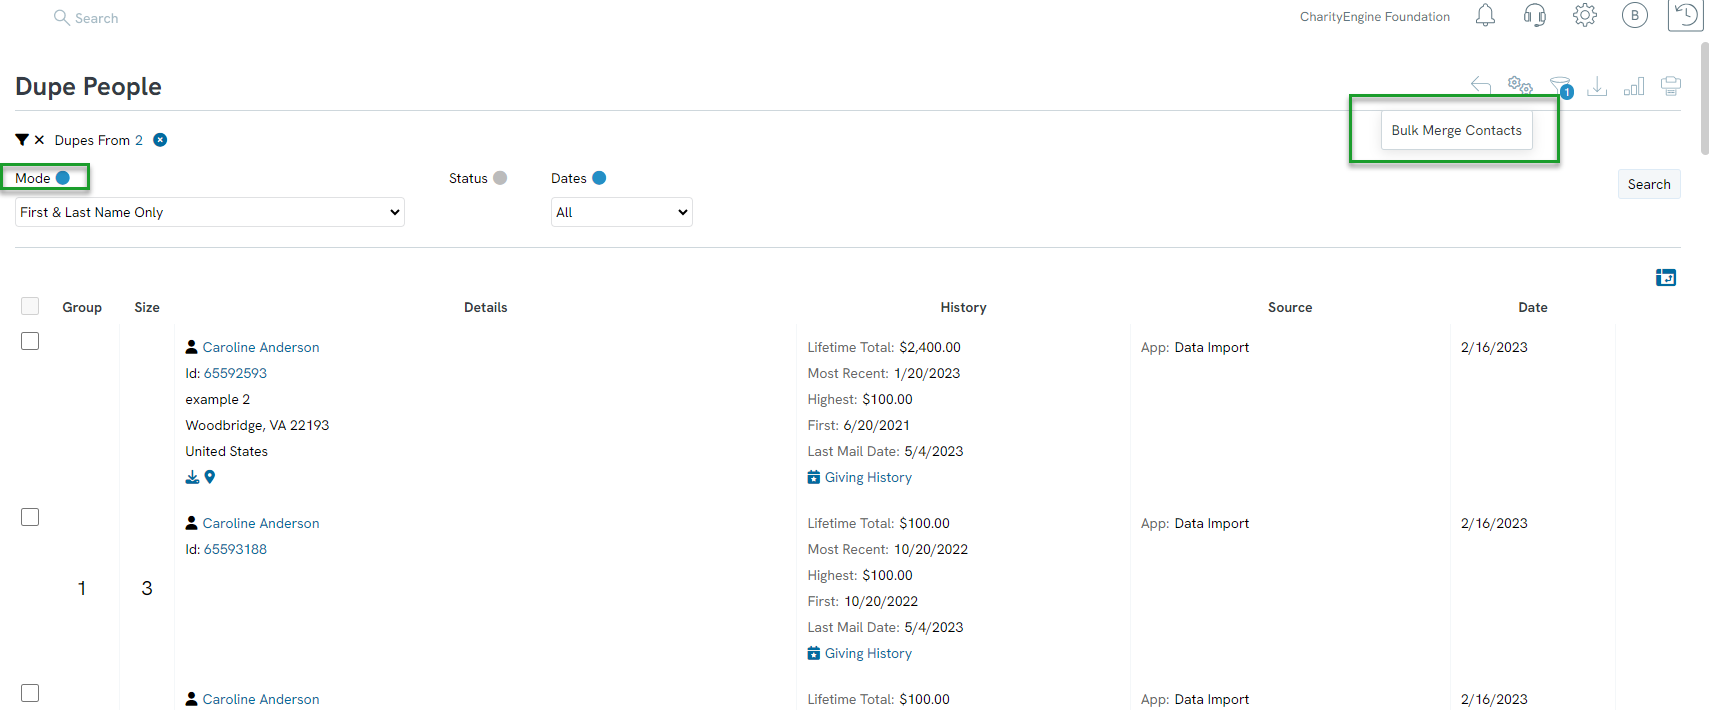
Step 1: On the De-Dupe People listing screen, modify the Mode, Status, and Date filter to locate your target populations. In this example we will leverage a match on First & Last Name Only with all status and all dates.
Note: Leverage the Advanced Filter option for additional filtering.
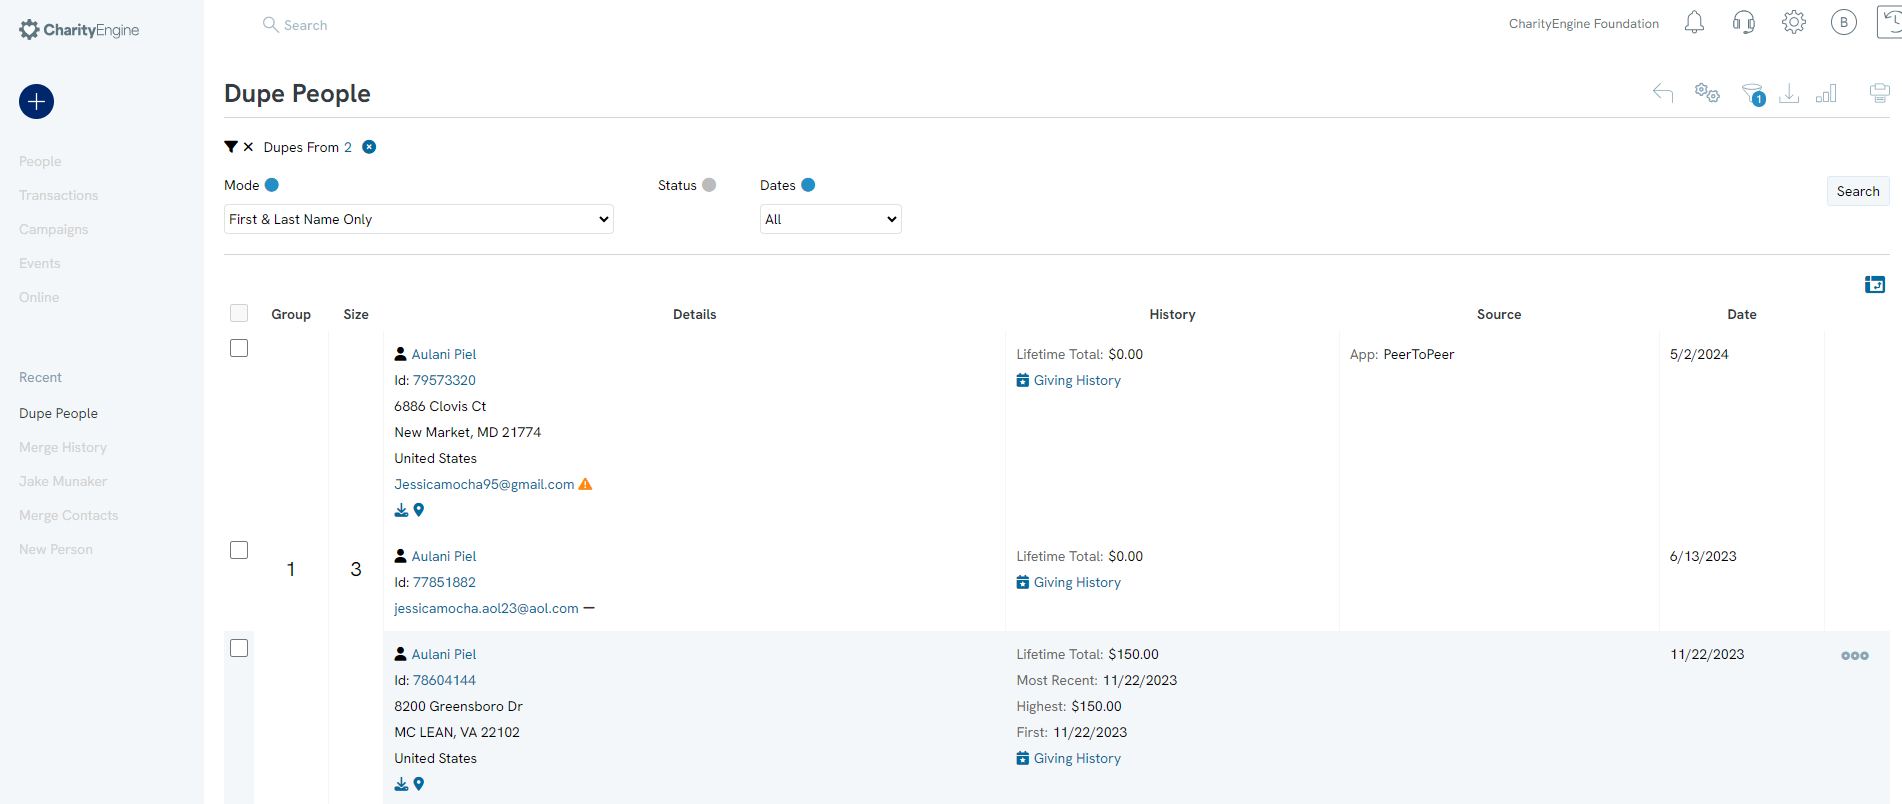
Step 2: Once the duplicate filter has been set, CharityEngine will compare all contacts that have the same name, regardless if they have other information that does not match such as email or address.
Example: In Group 1, there are 3 duplicates for Aulani Piel.
Note: Selecting a more specific filter will result in finding contacts that return a closer match, but still may have
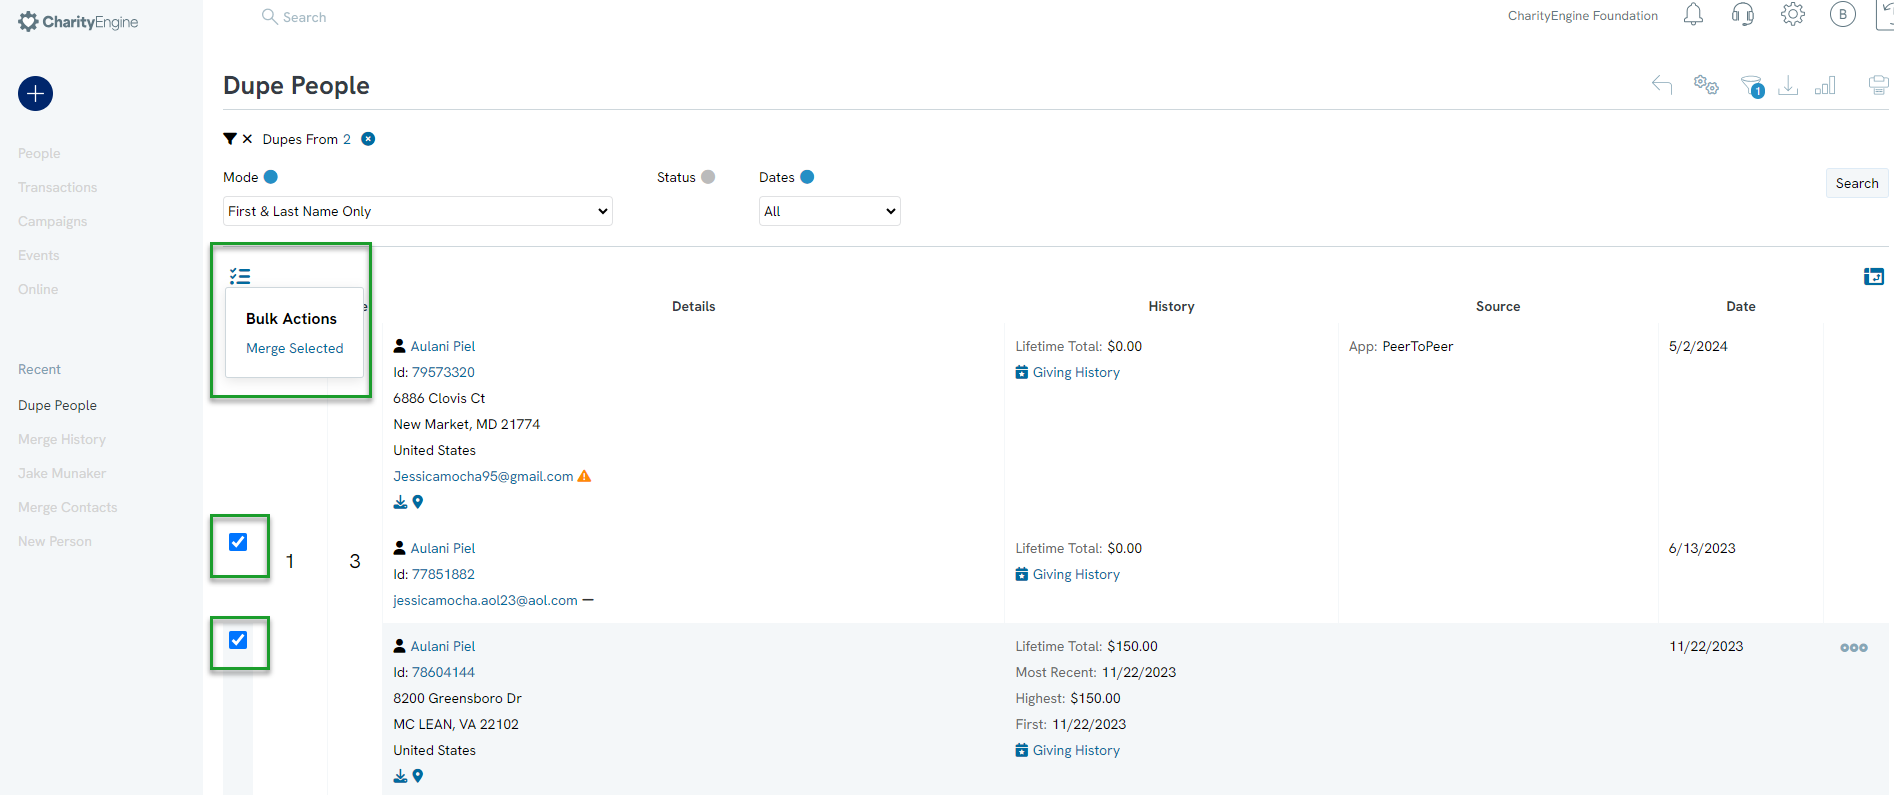
Step 3: Once duplicate contacts have been found, check the Merge boxs for the contacts you want to merge.
Note, through this feature, you can only merge two records at at time.
Step 4: Use the drop down to select Merge Selected
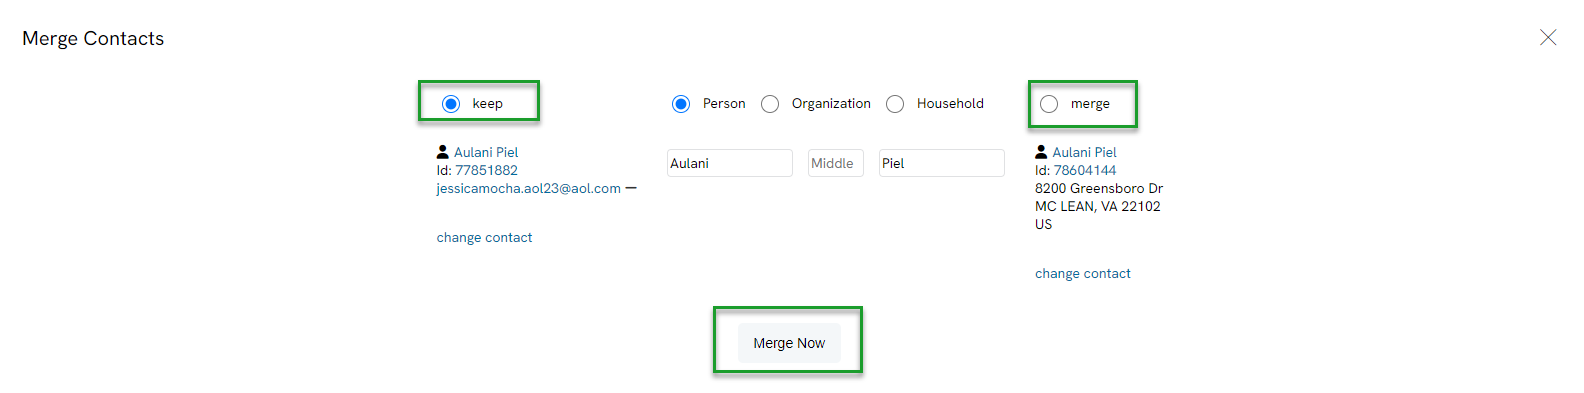
Step 5: From the pop-up, select the contact record you wish to keep, then select MERGE NOW.
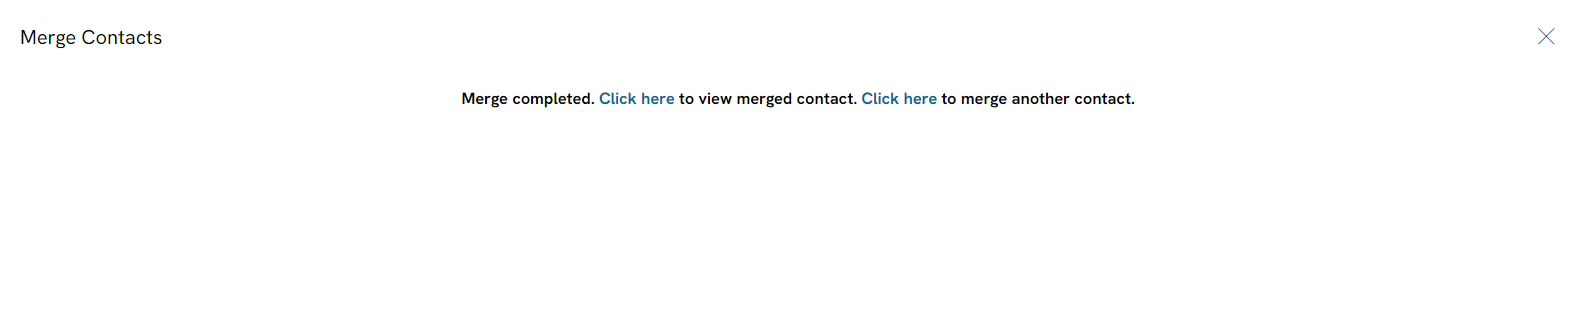
Step 6: Once merged, you can view the merged contact or click to merge another.
Instructions - Bulk Merge through Import Feature (Multiple Contacts)
Locating potential duplicate records can be easily achieved with the following steps.
Note: Leverage these steps for De-Dupe Organizations and De-Dupe Households
-
- Note: Other available contact reviews include Organizations and Households.
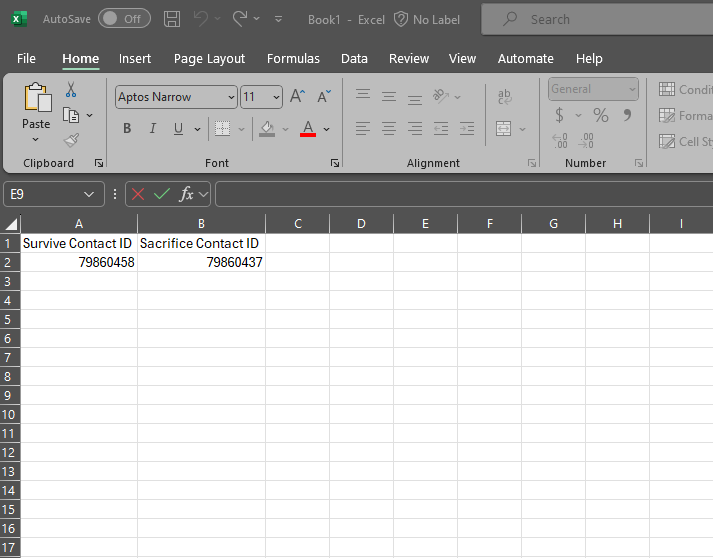
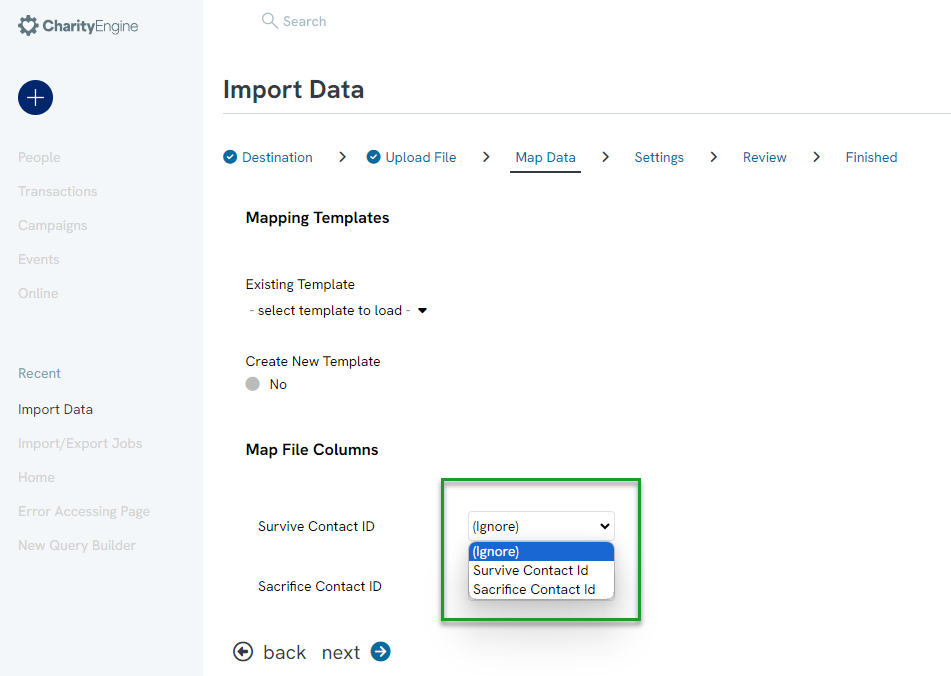
Once you have identified your "surviving" contact record ids and the record's reciprocal "sacrificed" contact record ids, you can begin the creation of your bulk merge file.

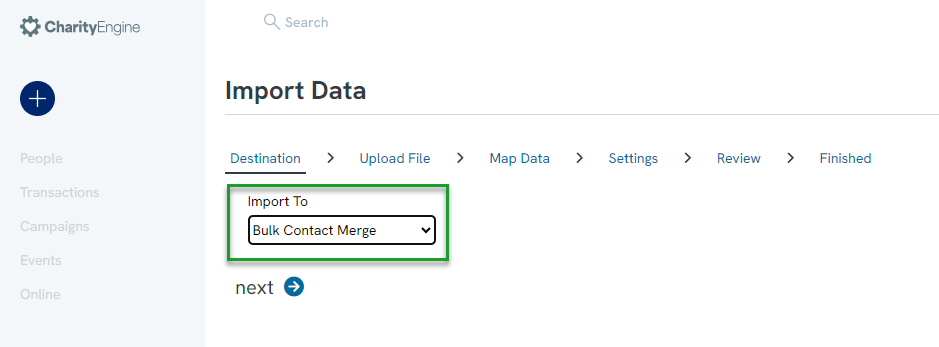
-
- Your Excel Workbook should like similar to the below with the two columns for the fields.
-
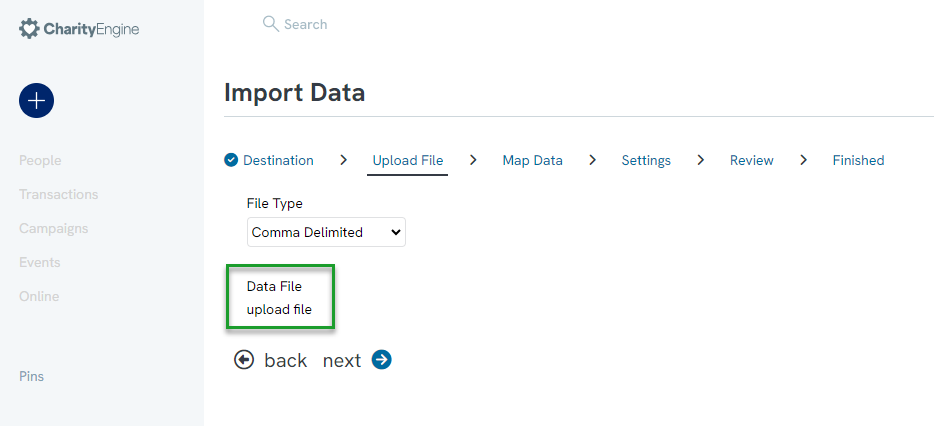
Critical Note: Data Importing cannot be reversed. Ensure your import file is managed with care and your data has been backed up as needed.
Instructions - Scheduling a Recurring Duplicate Report
Maintaining good data hygiene requires a continued review of duplicate contacts (people, households, organizations) and transactions. Leverage the reports scheduling feature within the de-dupe features to create recurring reports to monitor and address duplicate entries.
Note: These steps can be replicated for De-Dupe Household, De-Dupe Organization, Dupe Transactions, and Dupe Tributes.
Step 1: Access the Automation App > Contacts > De-Dupe People
Step 2: Set filters using Quick Filters and/or Advanced Filter
Pro Tip: If reviewing at a recurring frequency (i.e. once a month or once a quarter), set Dates quick filter to all in order to capture all duplicate records across the database.
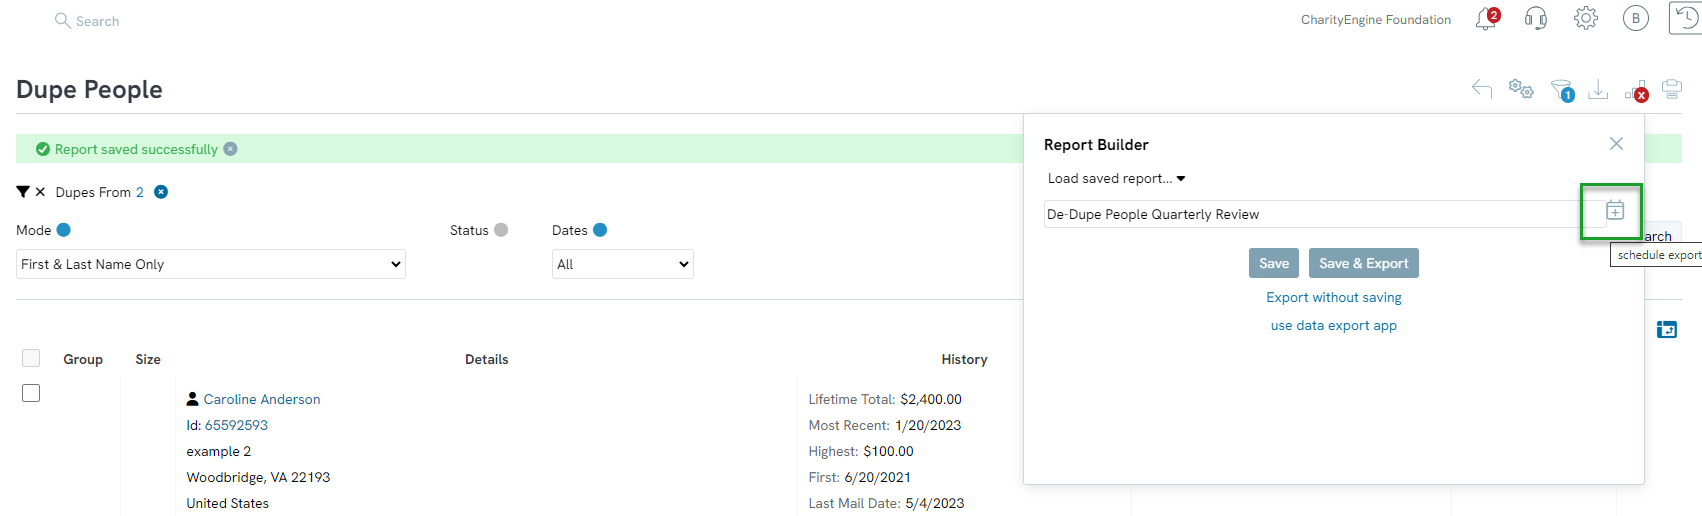
Step 3: Use the Report Builder from the top right hand corner to Name the report.
Step 4: Click SAVE to secure the report settings.
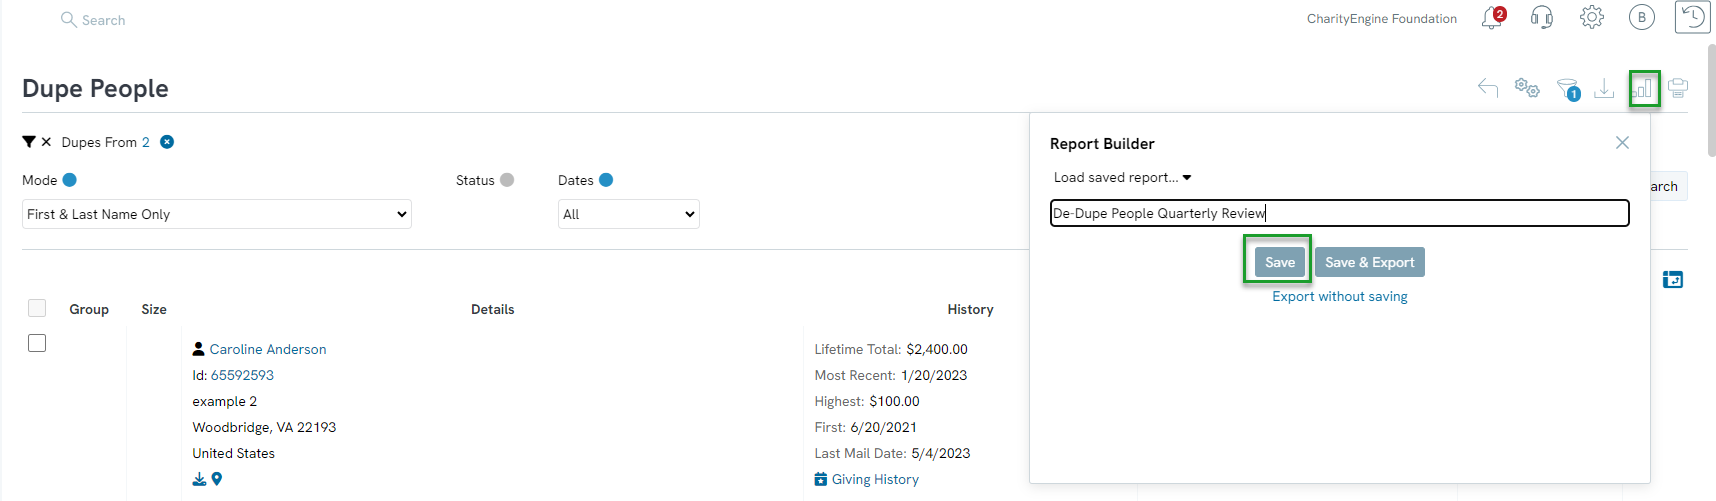
Step 5: Once saved, select Report Build and locate the saved report title.
Step 6: Click on the Calendar icon to launch the scheduler workflow.
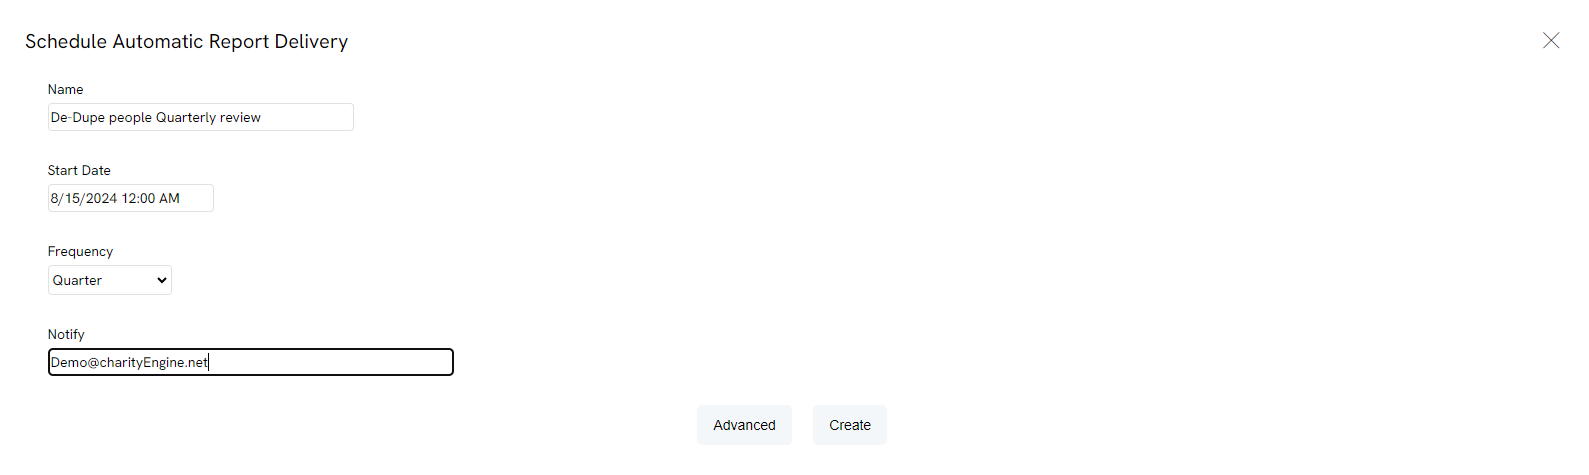
Step 7: From the Scheduler workflow, set:
Name: Name of report
Start Date: Select date/time for first report
Frequency: Elect frequency
Notify: add one or more emails for notification when report is complete
Step 8: Click CREATE to secure the schedule frequency
This report will be delivered based upon desired frequency and can be a great reminder and prompt to care for data cleansing activities.
Data Governance: Identification of Inactive Contact Records
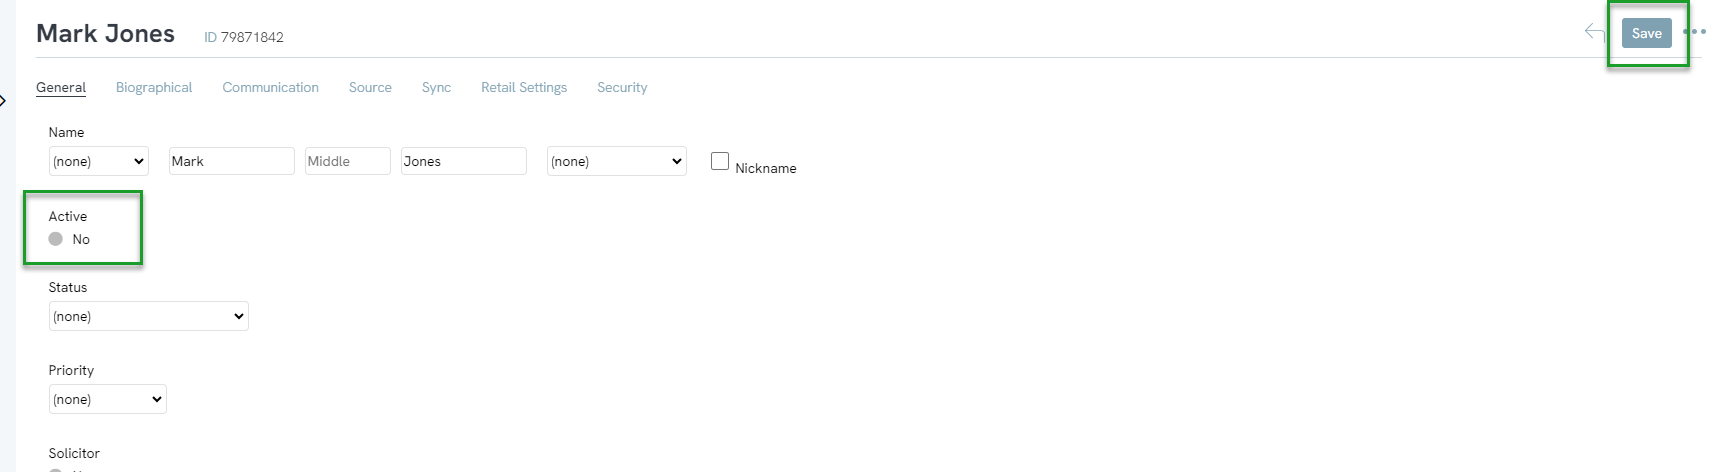
Once you have completed a review of duplicate and record merging, identification of inactive records can create downstream benefits including email deliverability. CharityEngine offers a flag to maintain contact records while flagging as Inactive. The presence of an Inactive flag will systemically suppress communication campaigns.
Note:
-
-
- Contact records identified as ‘Inactive’ will systemically be suppressed for email, mail, SMS campaign sends
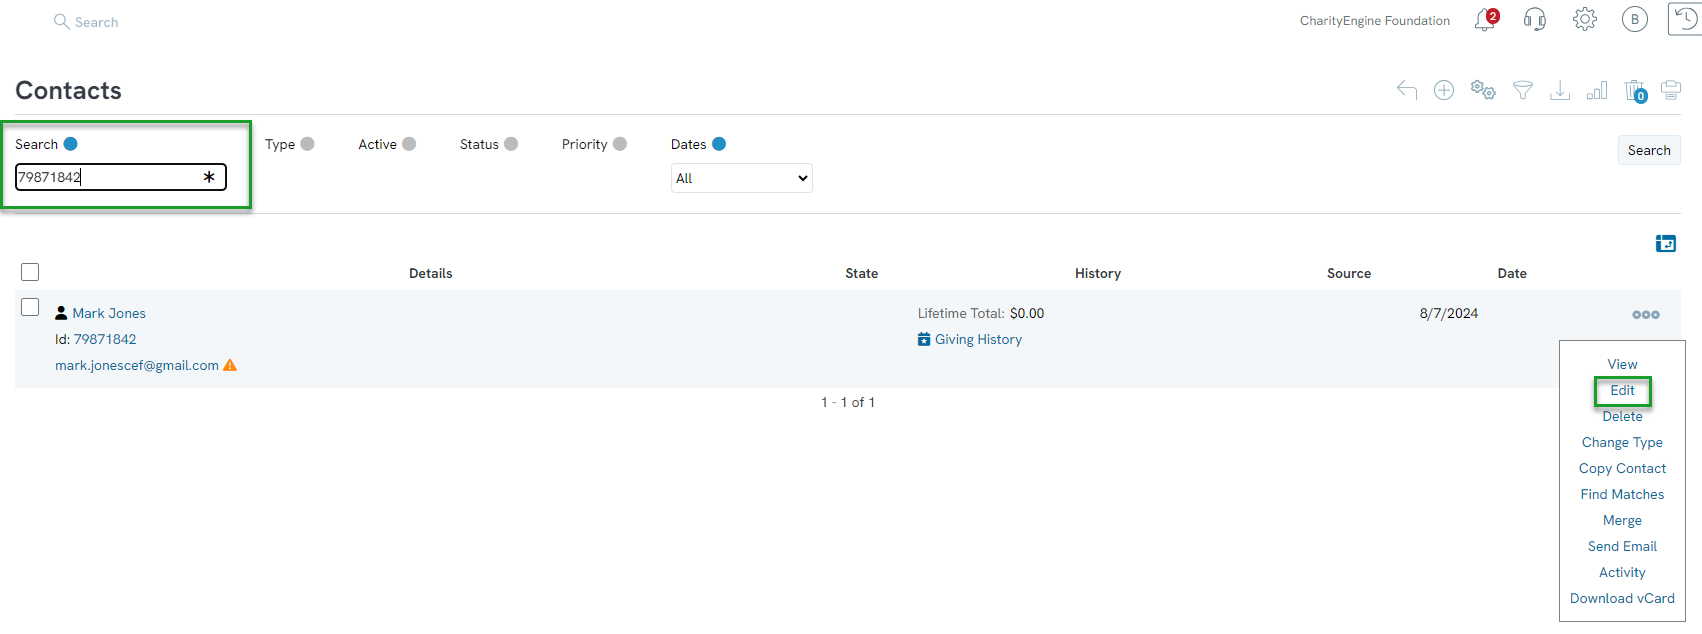
- Contact records identified as ‘Inactive’ can be easily identified in the Search feature – simply select Active = No to expose all inactive records
- Contacts assigned as Inactive will remain available to account and will be included total database contact counts
-
Data Governance: Deleting Contacts from the Contact Listing Screen
An organization may also find the necessity to delete inactive and significantly dated contact records. This can be achieved easily within CharityEngine through the Contact Listing Screen. In addition, CharityEngine will also identify any dependencies (i.e. transactions, opportunities, relationships) and guide the end user through the dependency and required action.
The following steps are suited for a small number of records requiring management. If you require a bulk deletion of several contacts, read the next section of this article for data transformation capabilities.
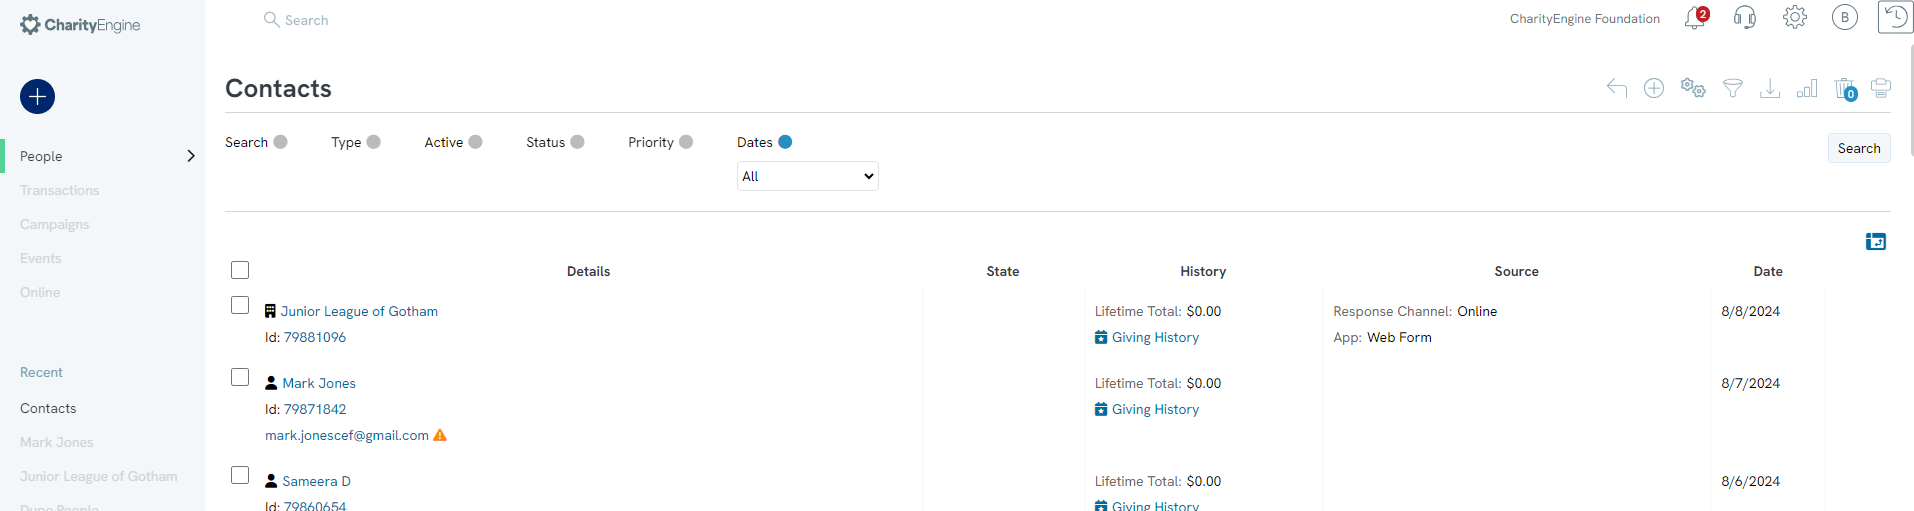
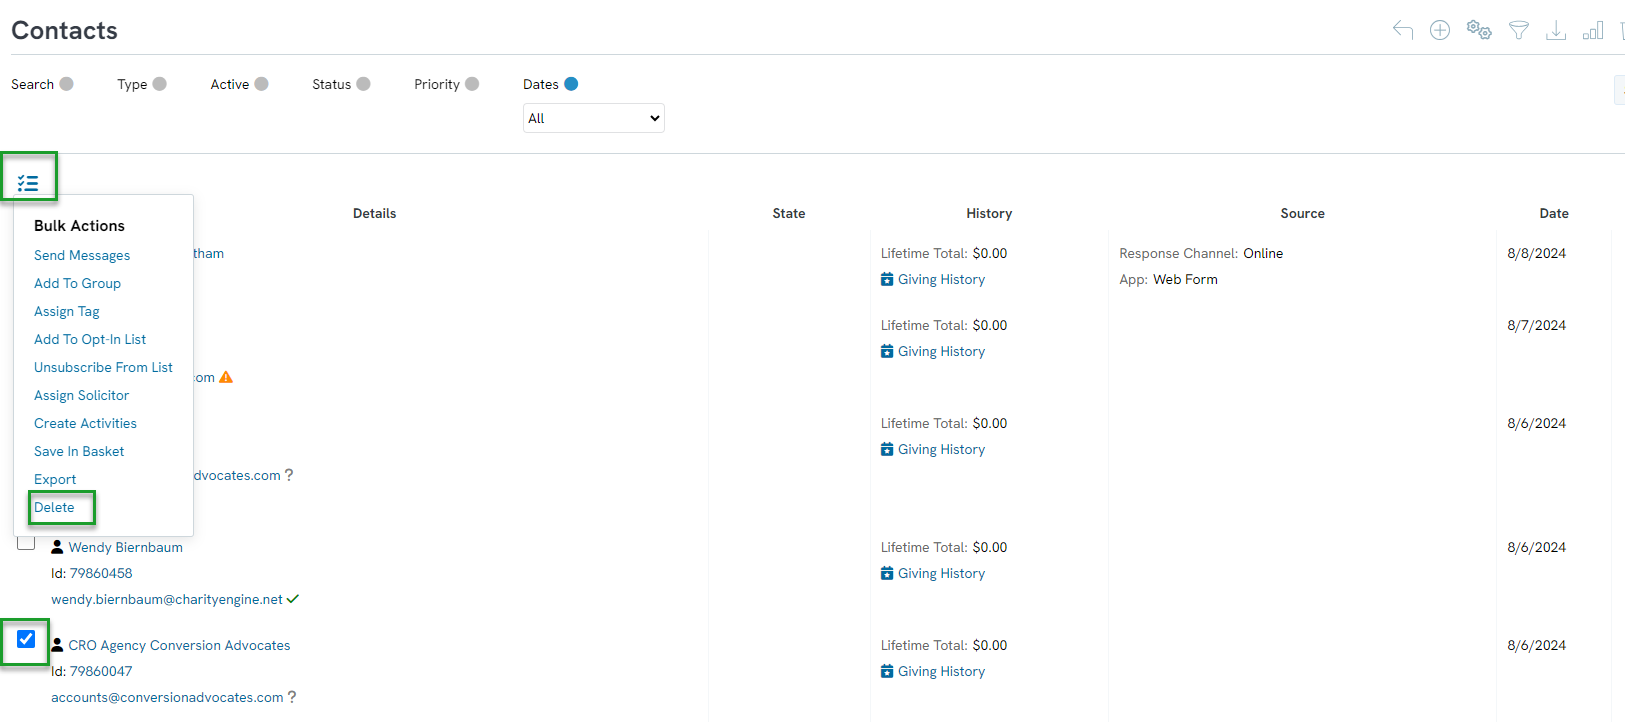
Note: You must be in the Default view to expose the check box and the drop-down arrow options.
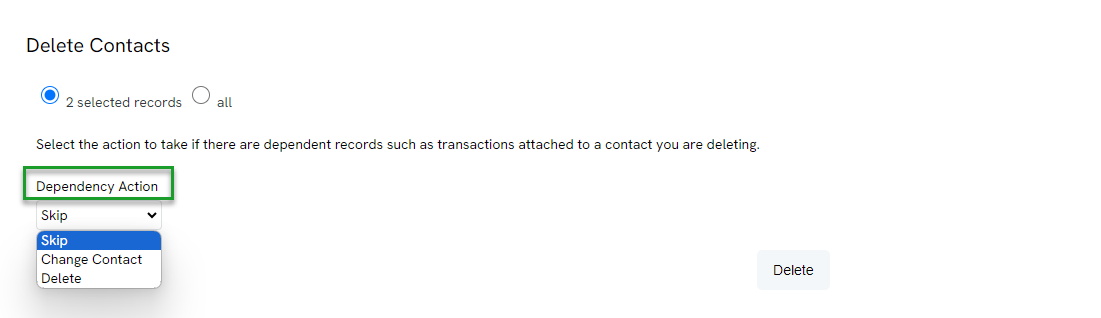
-
- Skip no action taken
- Change Contact merge the dependency actions to one record (select contact record once this option is selected)
- Delete contact records
- Note: Bulk deletion action is not available for contacts that contain dependencies; contact record will need to be managed individually (using Delete Selected)
-
-
- Bulk deletion action is not available for contacts that contain dependencies; contact record will need to be managed individually (using Delete Selected)
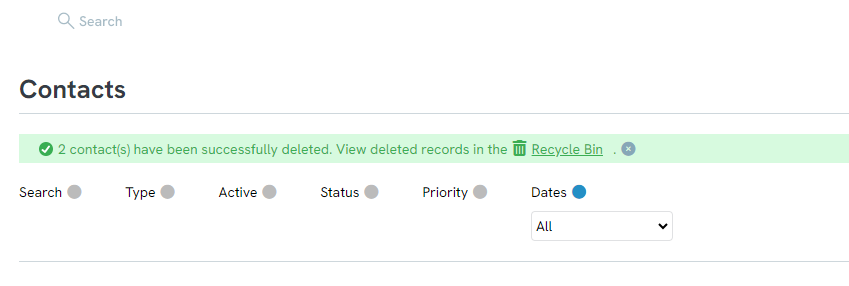
- Deleted records will be available to the user via the Recycle Bin if record needs to be restored
-
Data Governance: Deleting Contacts in Bulk with a Query
An organization may also find the necessity to delete a large volume of inactive and significantly dated contact records. This can be achieved in CharityEngine through the Automation & Workflow app through the Data Transformation Tool. To complete this data transformation, start with a query to identify all targeted Contact IDs and then proceed to the Bulk Delete feature.
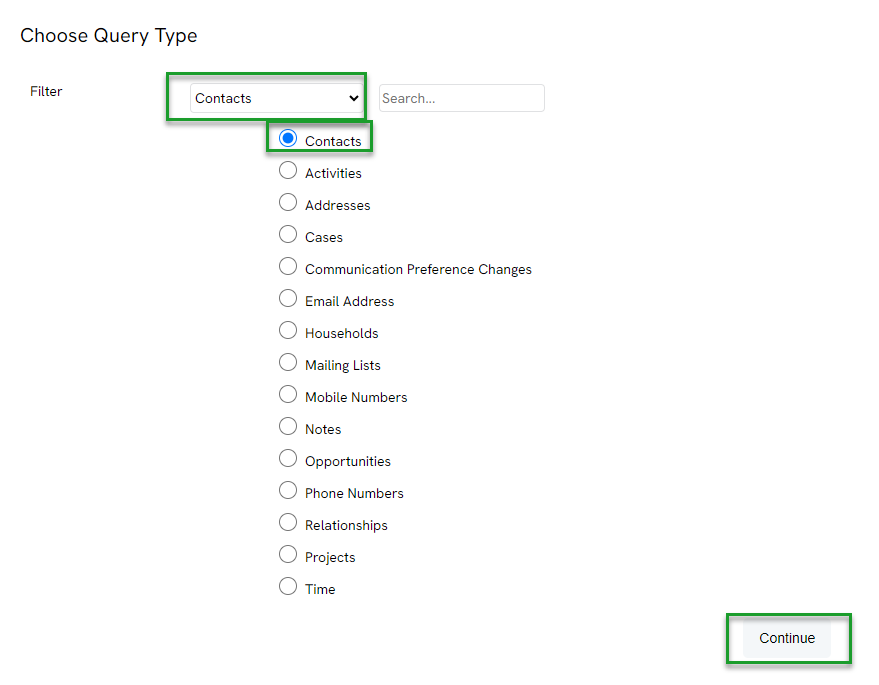
-
-
- Note: This is the minimum required field, users can add additional fields as needed for display.
-
-
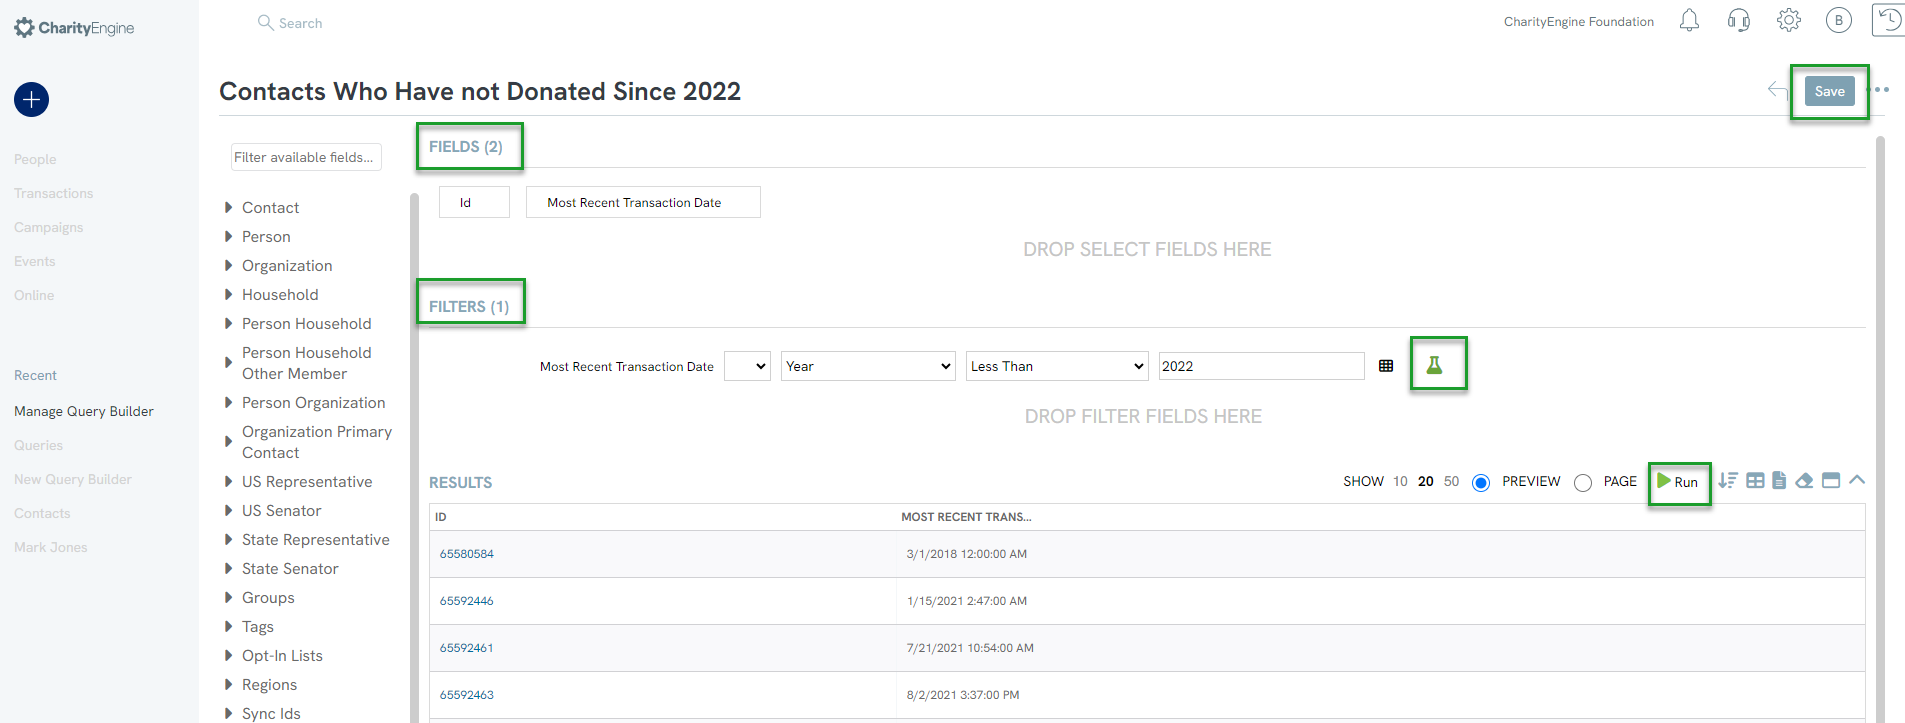
-
- Within Giving History, double click or drag and drop Most Recent Transaction Date into the Filters block.
- Within the Filter, leverage the Formula (beaker icon) select Year > Less Than > 2022
-
Step 6: Click SAVE > Enter Name > Click SAVE & CLOSE
-
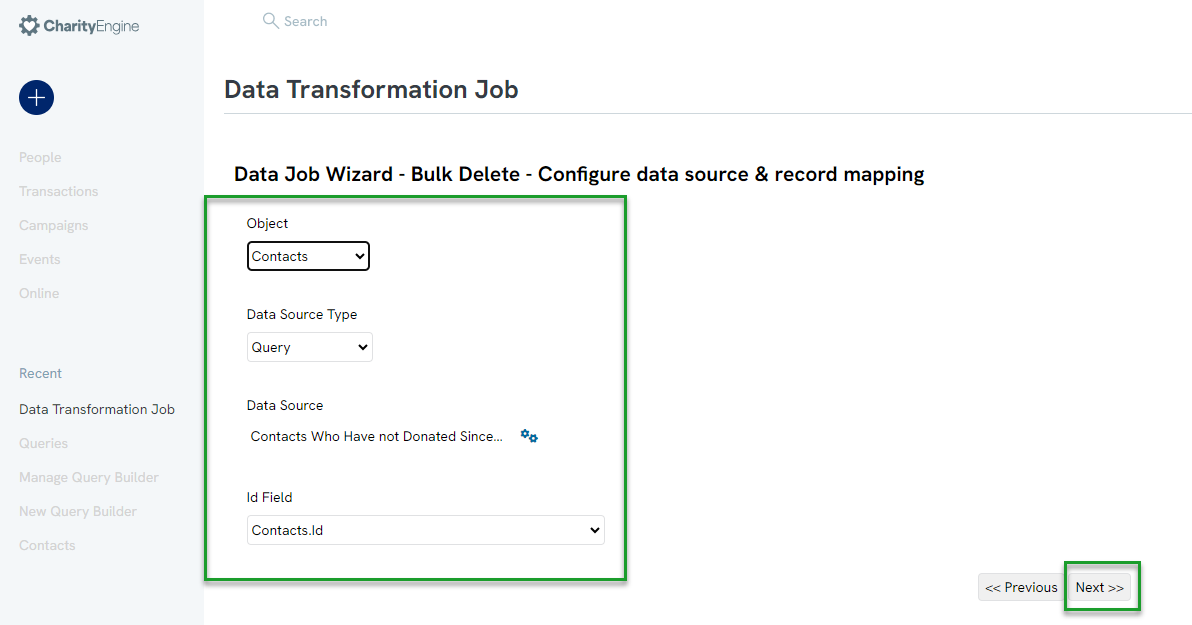
-
- Object: Contacts
- Data Source Type: Query
- Data Source: drop down to locate your query
- Id Field: Contact.Id (the field which will be used as the primary key for deletion identification)
- Select NEXT
-
-
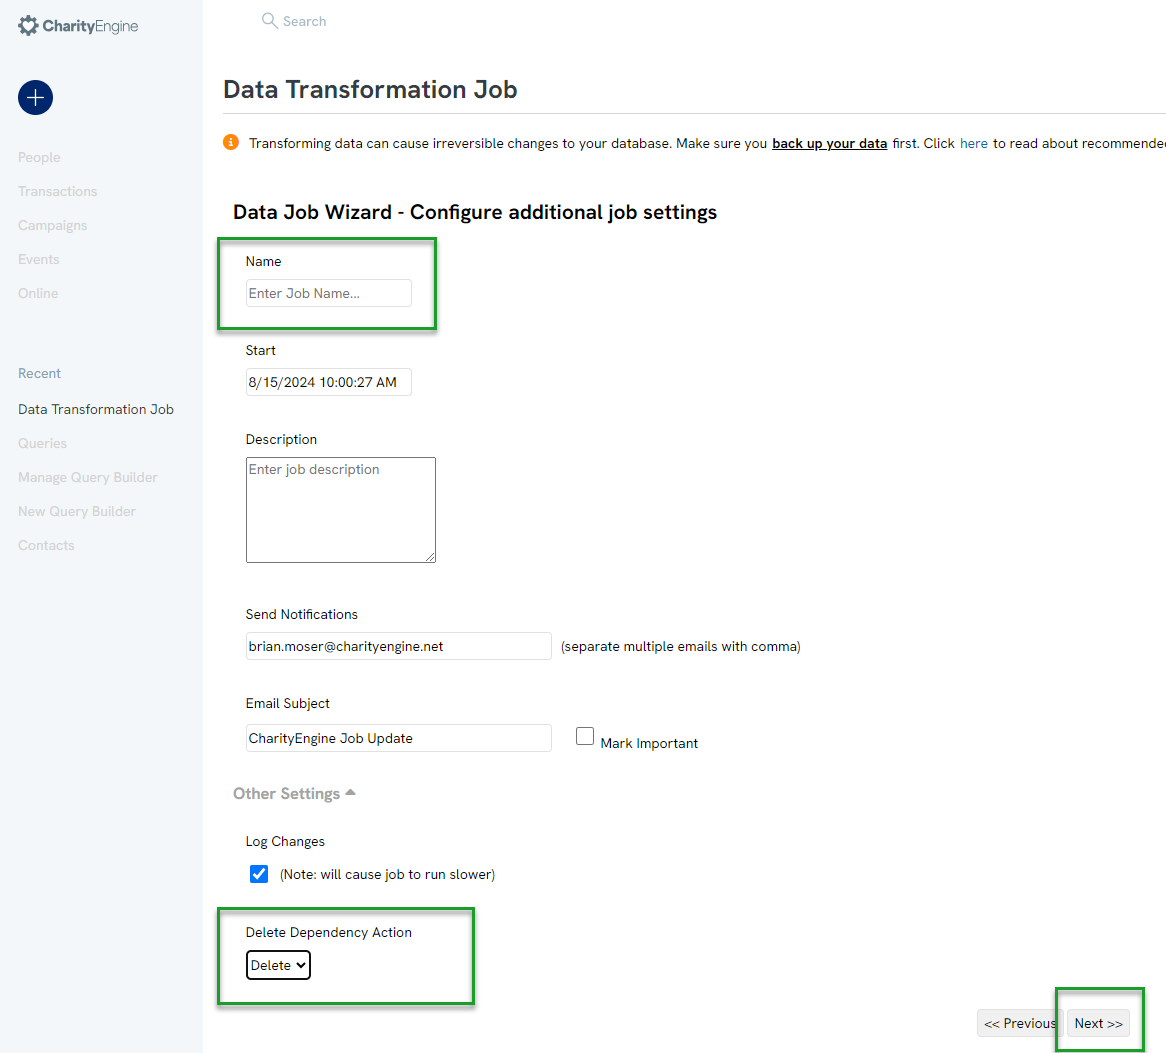
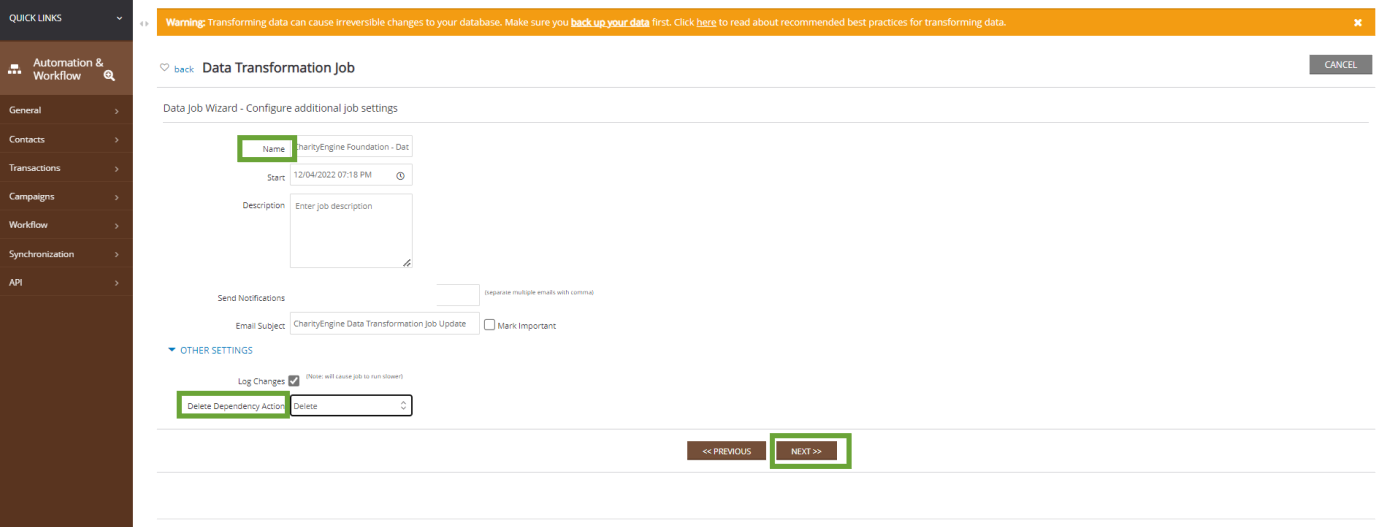
-
- Add Name for your data job
- OTHER SETTINGS > Delete Dependency Action: Delete
- Note: This will delete all dependencies (i.e. relationships, transactions, opportunities)
-
-
-
-
- Click NEXT
- Click NEXT
-
-
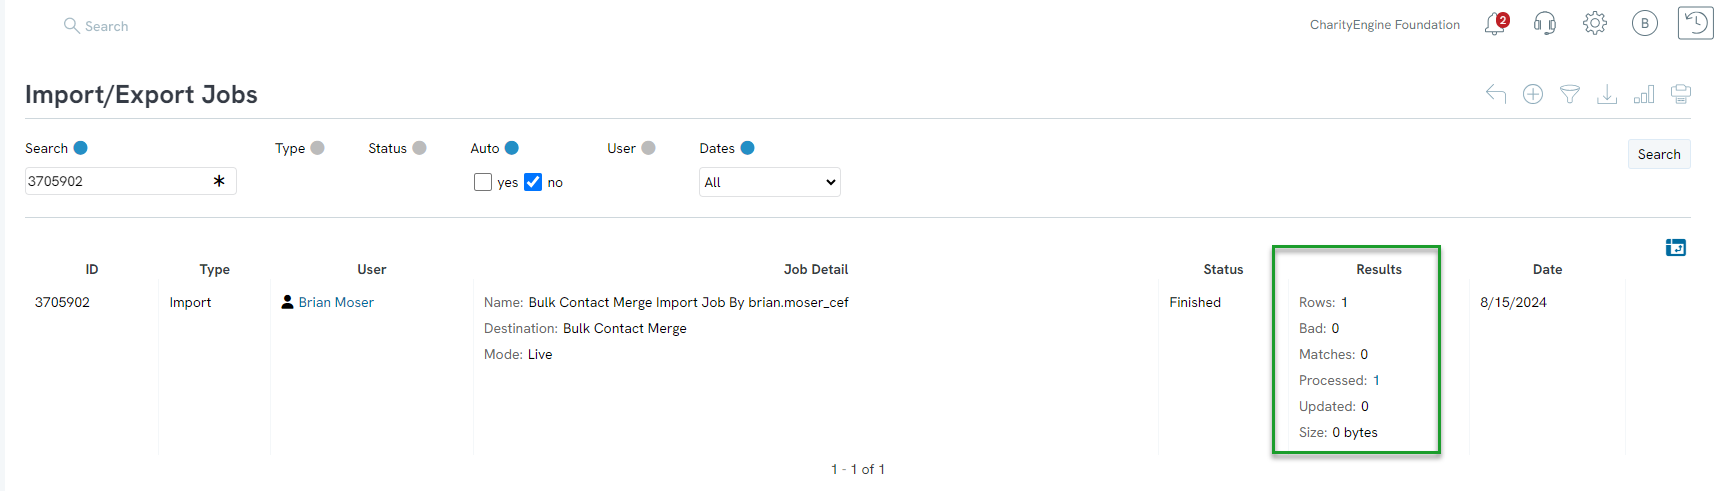
Step 11: Confirm the data job and click FINISH to initiate the bulk deletion
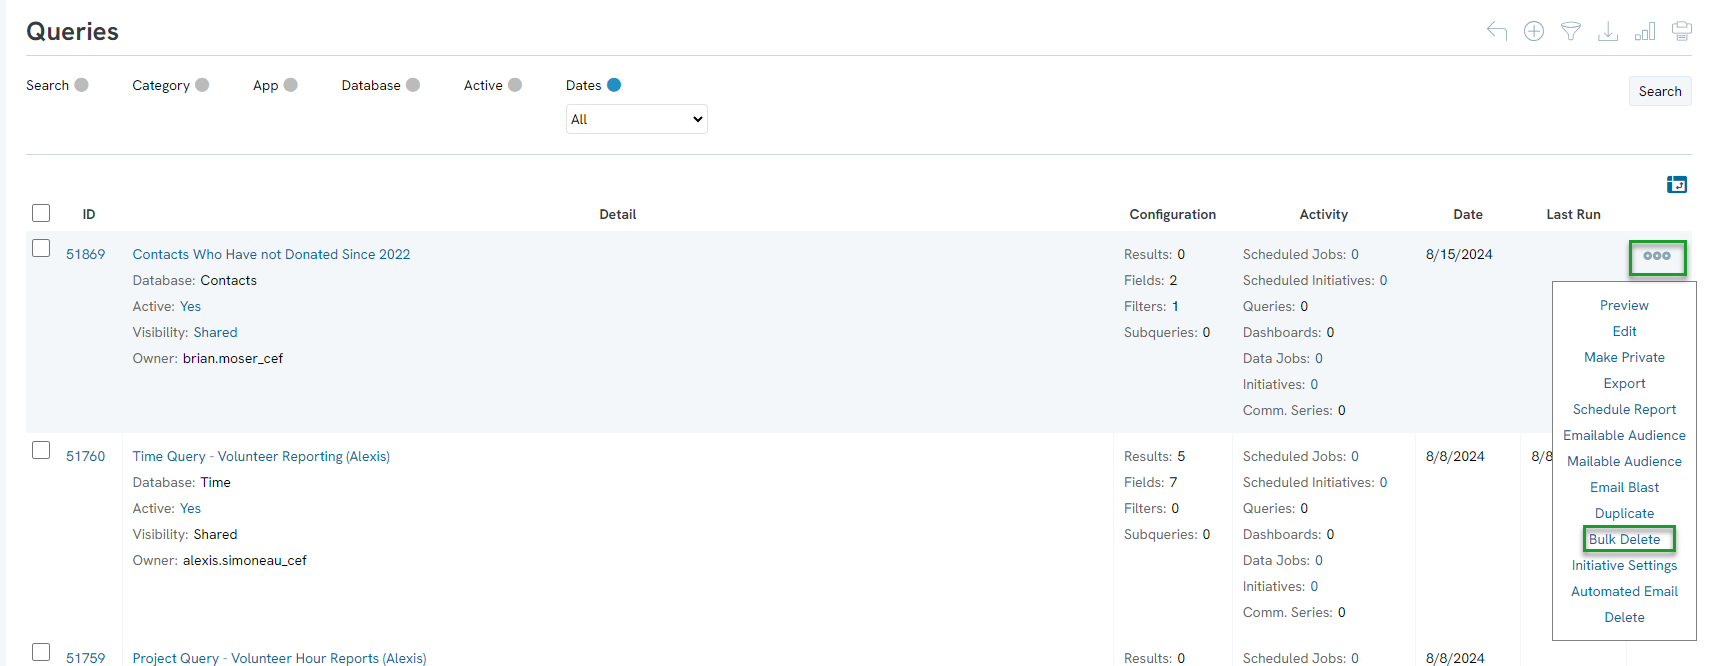
-
-
- -Once the job is complete, a notification will be sent to the Send Notifications identified; jobs can also be managed by accessing Automation > Workflow > Transformation
-
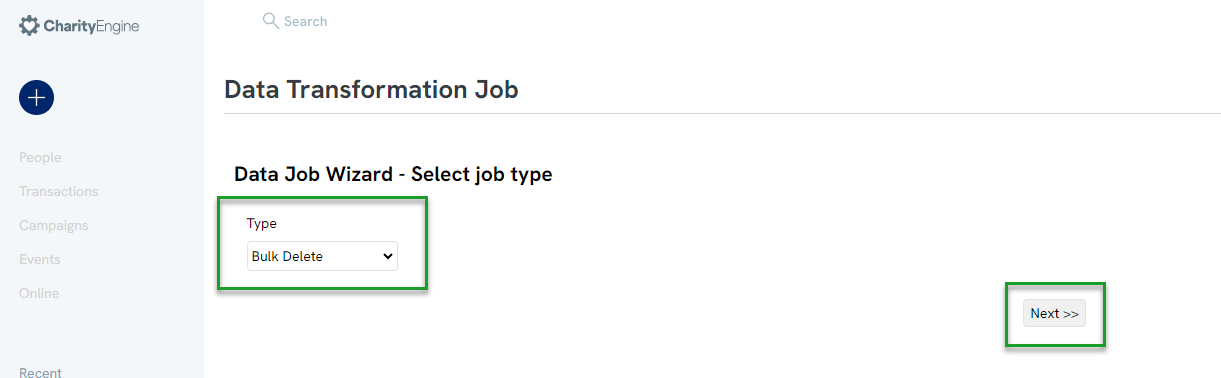
Data Governance: Deleting Contacts in Bulk with a File Upload
You can also create a data job transformation without creating a query, but instead uploading an independent file with the contacts you wish to delete.
Step 2: Select Type: Bulk Delete > NEXT

-
-
- Object: Contacts
- Data Source Type: File
- Select File
- Select NEXT
-

-
-
- -Add Name for your data job
- -OTHER SETTINGS > Delete Dependency Action: Delete
- -Note: This will delete all dependencies (i.e. relationships, transactions, opportunities)
-
-
-
-
-
-Once the job is complete, a notification will be sent to the Send Notifications identified; jobs can also be managed by accessing Automation & Workflow App > Workflow > Transformation
-
-
-
FAQs & Further Reading
A. Read our article here for managing inactive sustainer accounts.
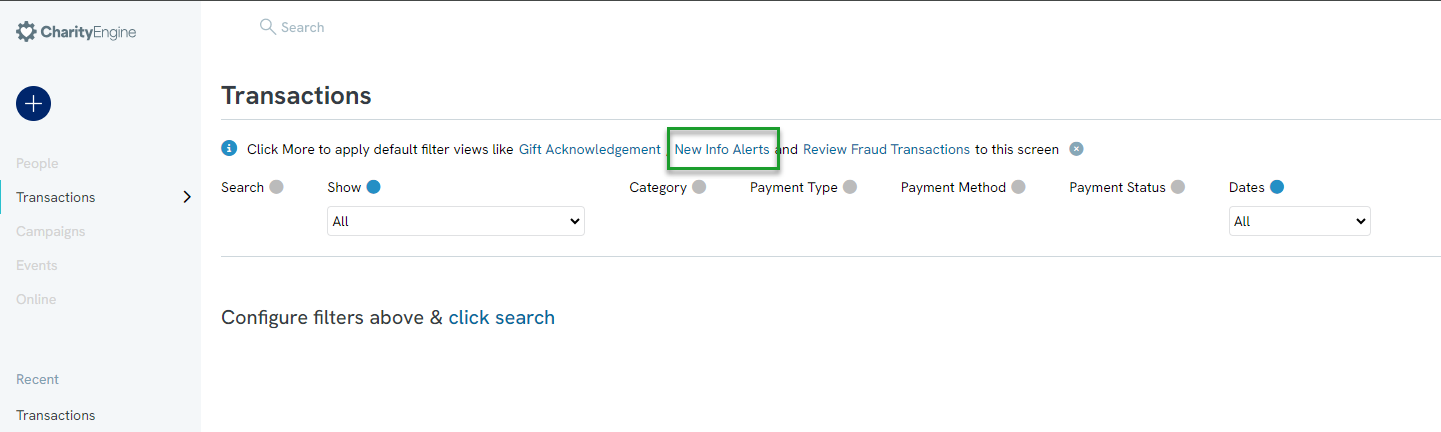
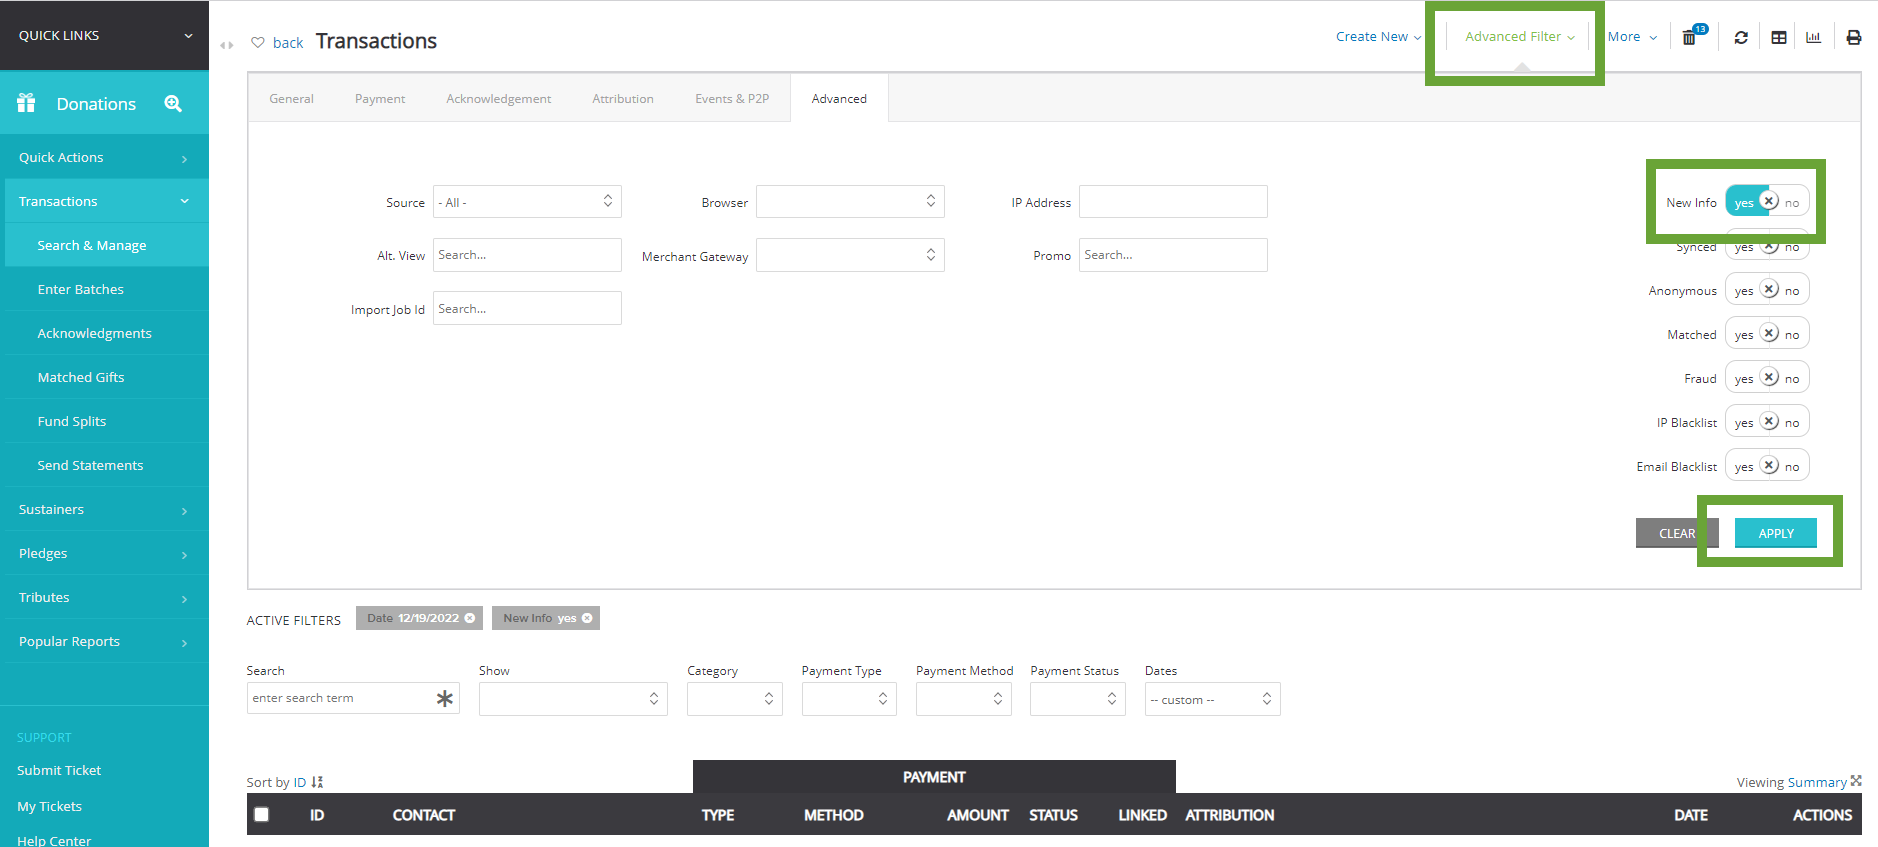
A. Yes - there are a few methods, including that outlined above. You can also access the New Info Alerts by accessing:
- the Donations App > Transactions > Search & Manage > More >

- alternatively, access the Donations App > Transactions > Search & Manage > Advanced Filter > Advanced tab > New Info = yes > APPLY
A. If you wish to maintain the custom field values, we recommend exporting your custom field details prior to merging. If you wish to override the surviving record with the prior custom field value, you can append the data point or choose to append as a note to the surviving record. Both can be accomplished through an Import action.
A. No. If a user excludes "The" as part of the organization's name, the result is that newly matched organization names that start with the term "The " will match against the name with our without the prefix as long as the record has been updated. Note: for accounts prior to April 2023, this will be reflected of updates or new organizations added after this date.
A. You may find that it is not necessary to delete the full contact record but elements associated with that record. Once you have identified your target population, access the Automation & Workflow App > Transformations > Type: Bulk Delete > NEXT > Object: (select from Addresses, Emails, Notes, Phone Numbers, Transactions, etc.). Select your Data Source and click NEXT > review and finish.
A. Yes but only if a contact being merged does not have a solicitor assigned. In these cases, the user will need to manually review for decisioning on appropriate solicitor assignment.
