Introduction
NOTE: This article assumes you know the events module ticketing and other event capabilities as well as basic transaction receipting.There are two ways to collect event guest names and additional guest information: directly on the registration form, and through a follow-up email that lets a registrant (the host) complete any missing guest names later through the Constituent Portal. These two methods work together to create a complete guest name collection workflow.
Table of Contents
Instruction - Collect Guest Names on the Registration Form
Step 1: From the event, open its Online section, manage the form, and click its link to open the live registration form.
Step 2: Select a ticket type that allows guests (for example, a single ticket). An Add Guest option will appear right away.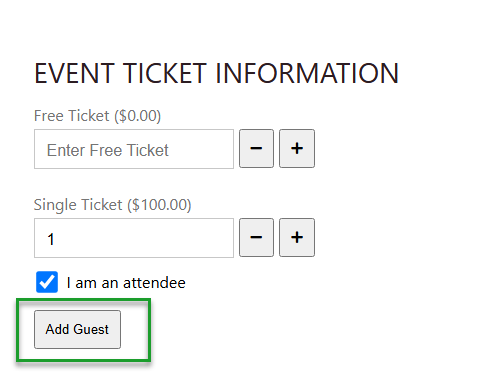
Step 3: Click Add Guest up to the number of guests the ticket allows (for example, 4). Once all guest slots are added, the Add Guest option disappears.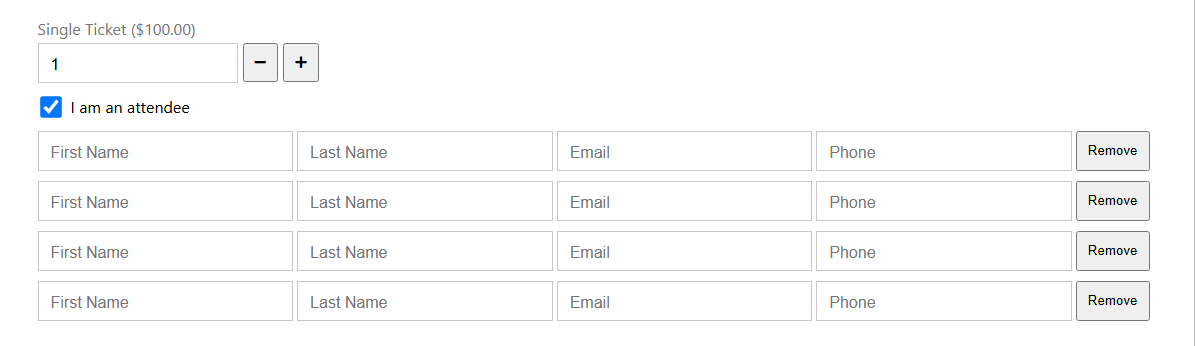
Step 4: Enter whatever guest names and information are known at the time of registration. It's fine if not all guest names are known yet – any incomplete slots can be finished later.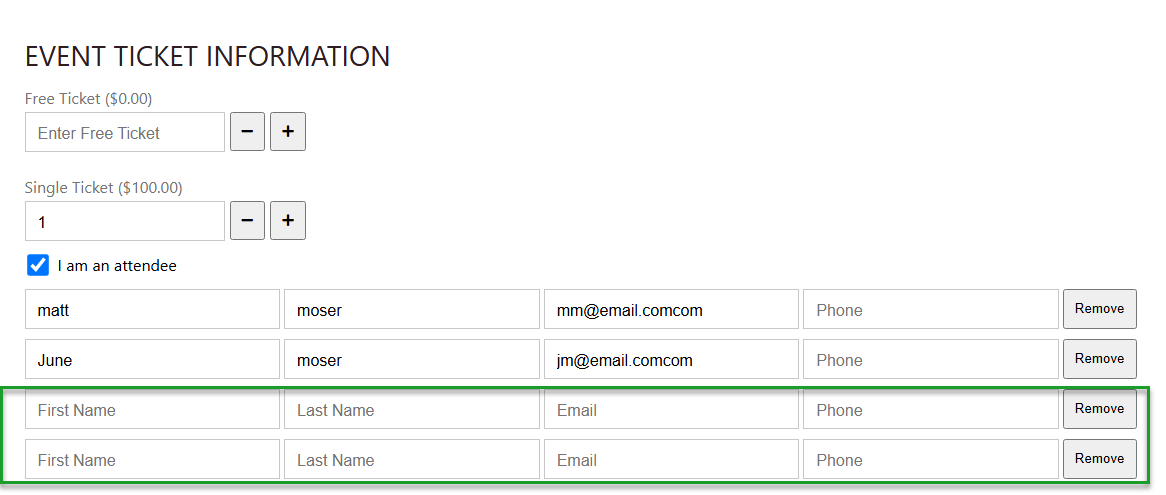
Step 5: Complete registration for the event.
Note: After registering, the registration will show the original ticket plus a guest ticket for each guest slot (for example, one single ticket allowing 4 guests results in 5 total registrations: the host, plus 4 guest tickets). Any guest slots that weren't completed at checkout will show as missing name information.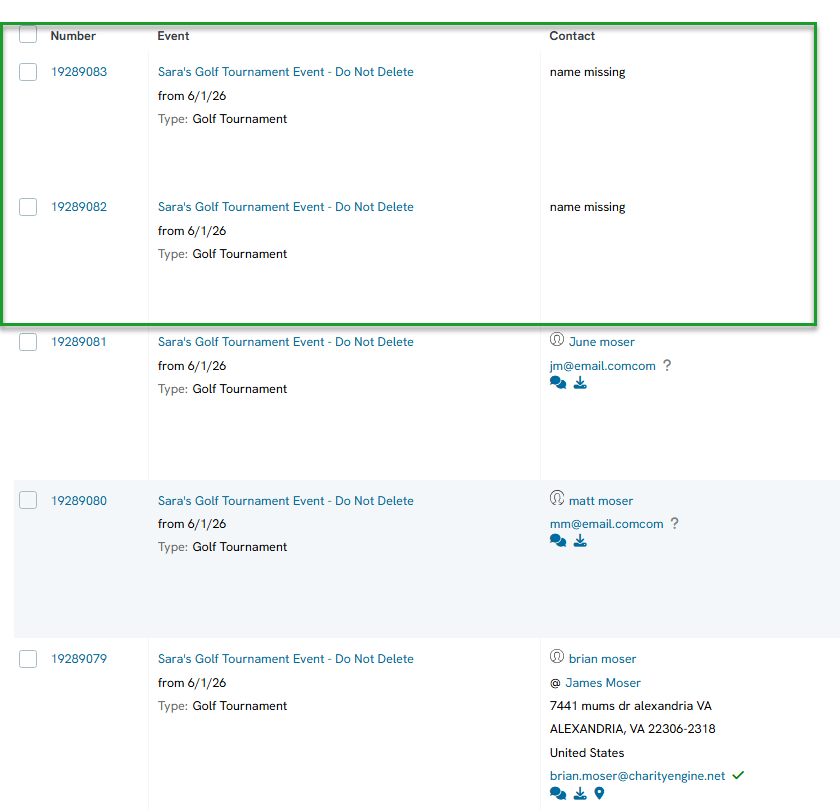
Instructions - Follow Up with Hosts to Complete Missing Guest Info
Step 1: Navigate to the event's registrations screen Events > Registrations > Search and Manage Then use the filtering to bring up the registration in question.
Step 2: Filter the registrations list to Guest = No, then click Search. This isolates the host registrations, since the goal is to communicate only with the host – not the individual guest registrations – about completing the remaining guest slots.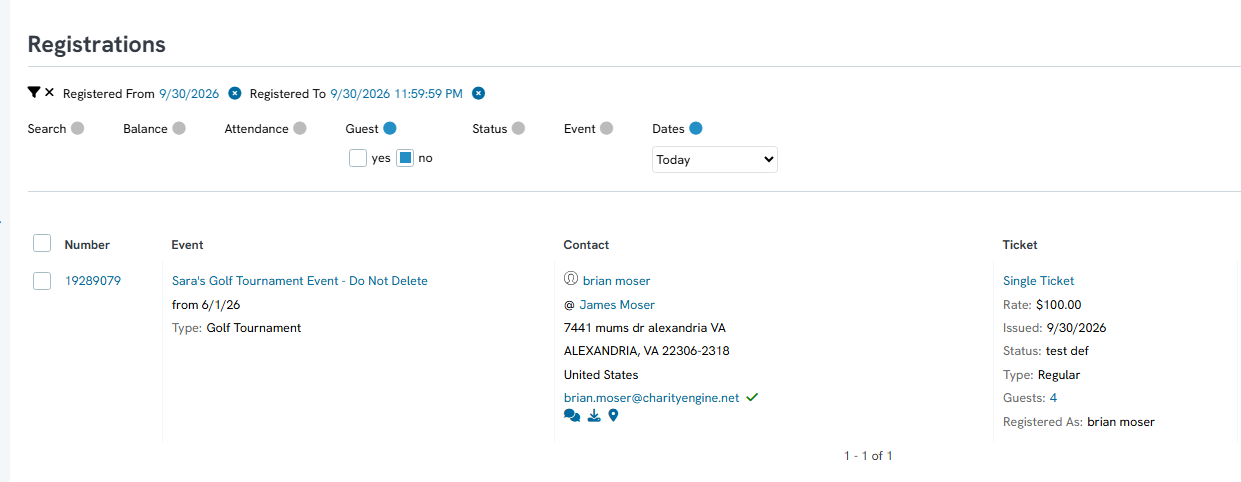
Step 3: Click the ellipsis (three dots) menu on the host's registration and select Send Email.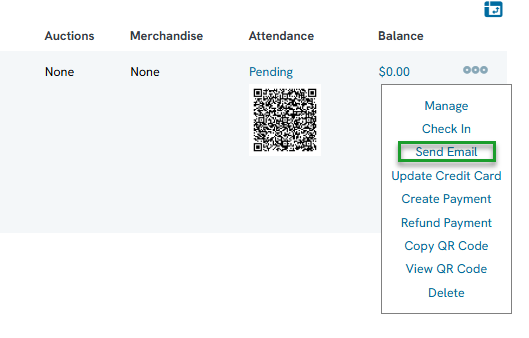
Step 4: Insert the token called Registration Ticket Management URL. This token generates a unique link to the Constituent Portal's guest management page for that specific registration.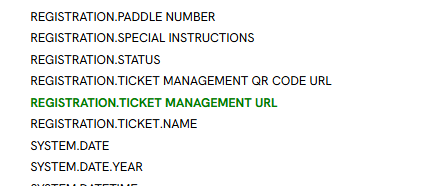
Step 5: Write the rest of the email (for example, asking the host to complete their outstanding guest information) with the token/link included, then send it.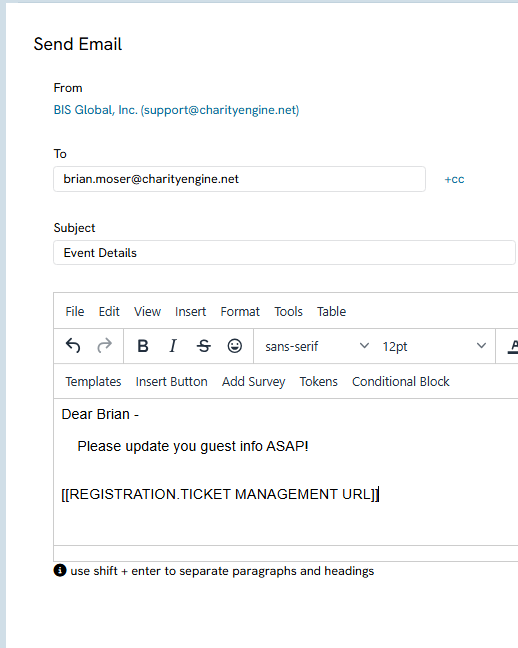
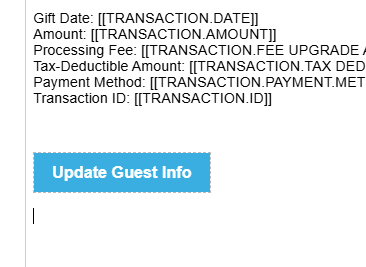
Note (Tip): The raw URL can be turned into a button for a cleaner look. Highlight and copy the inserted token/URL, click Insert Button, paste it as the Button URL, give the button a label (for example, "Update Guests"), and click Insert.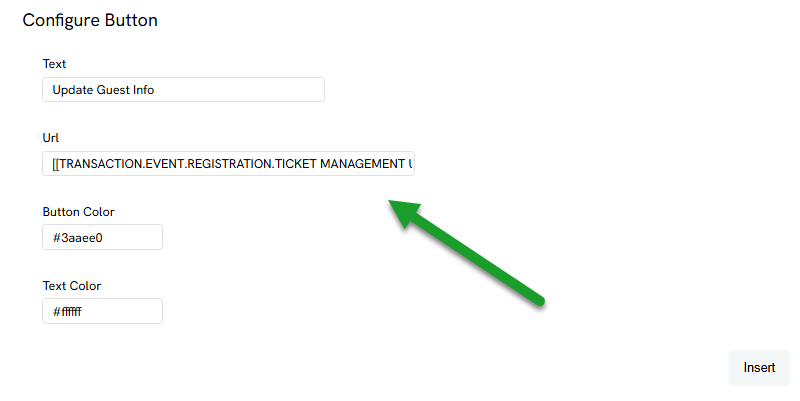
Instructions - Completing Guest Info via the Guest Management Portal
Step 1: The host receives the email and clicks the Registration Ticket Management URL link (or button).
Step 2: This opens the guest management portal, showing the registration's ticket(s) and total guest slots.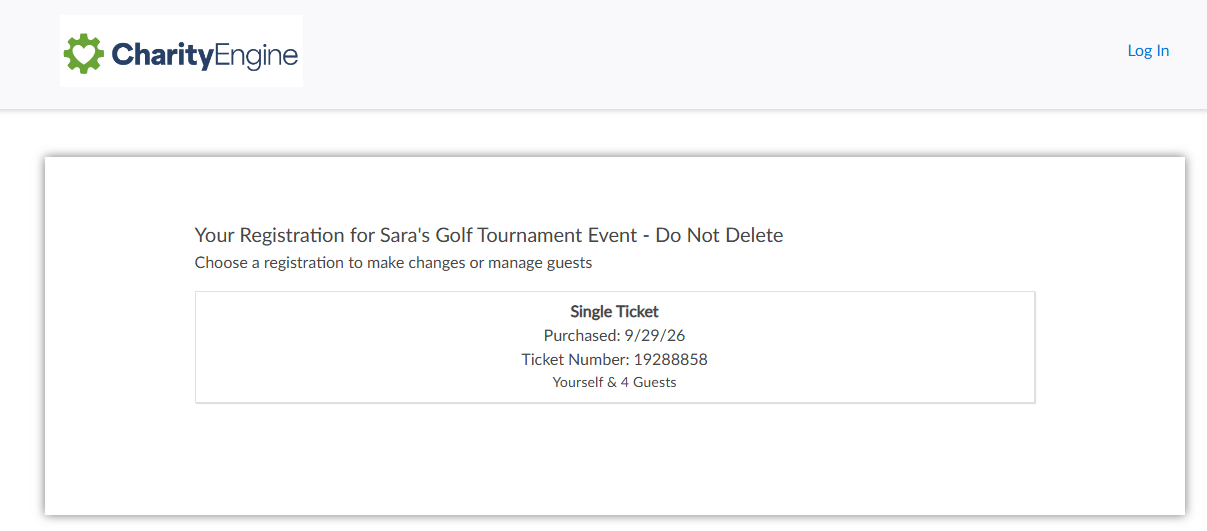
Step 3: Click on a ticket to view its guest list. Any guest slots still missing information will be visible here.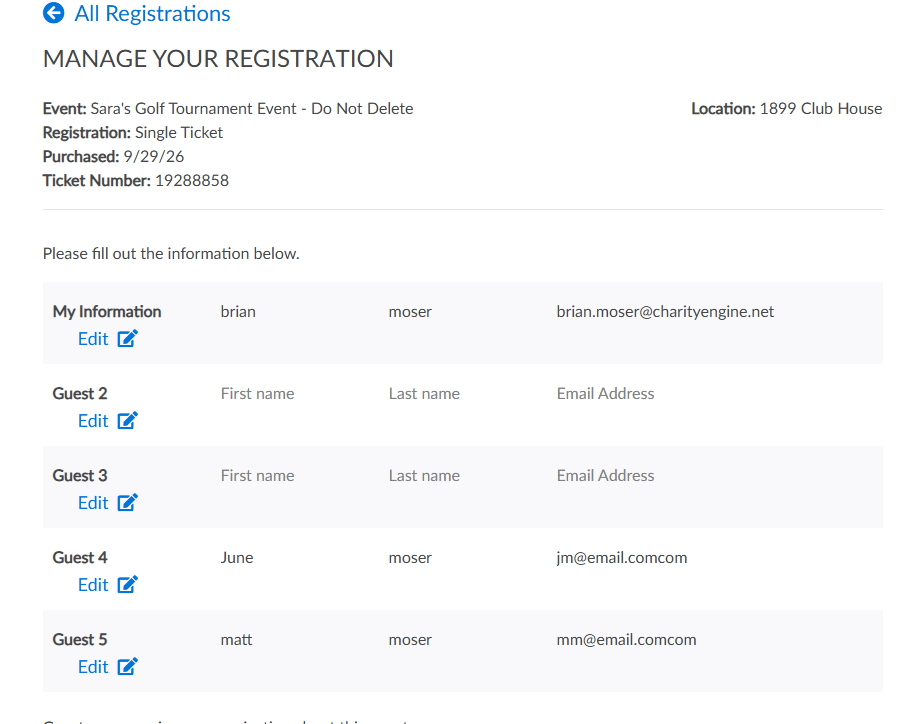
Step 4: Click Edit on a guest slot to complete that guest's name. Click Show More Info if additional fields need to be filled in.
Step 5: Click Save Changes. These changes are written back to the registration in real time.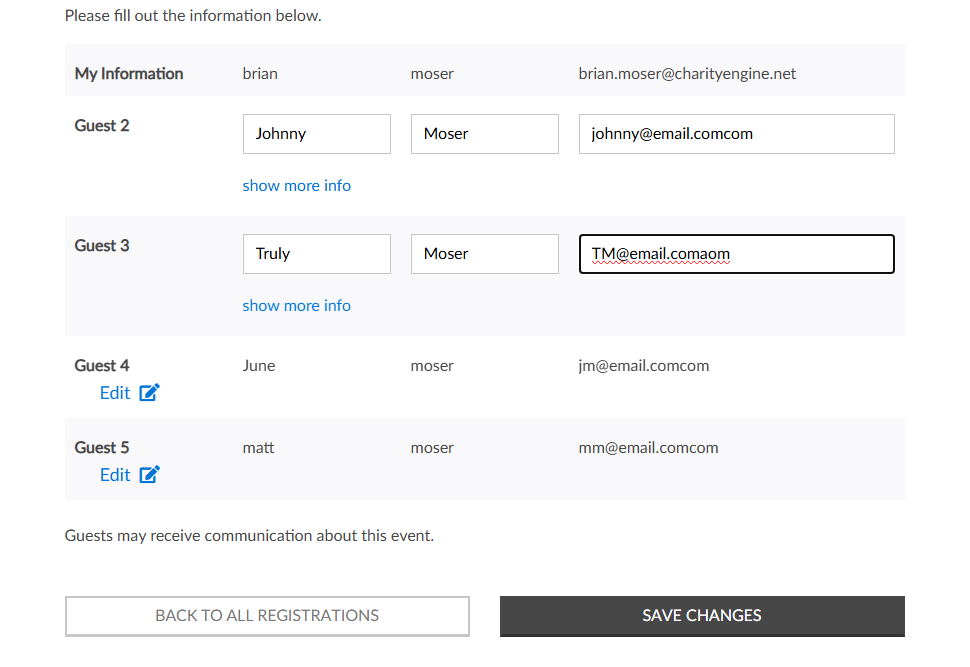
Note: Once the registration host updates the guest info, it is written to the Name Missing registration in real-time.
FAQs & Additional Reading
Q. Why filter to Guest = No before sending the follow-up email?
A. This isolates the host registrations so the email goes only to the host, not to the individual guest registrations created for each guest slot.
Q. What token generates the guest management link?
A. The Registration Ticket Management URL token, inserted into an email sent from the event registration.
Q. Does guest info entered through the portal update in real time?
A. Yes. Guest changes saved through the Constituent Portal's guest management page are written directly to the registration immediately.
Q. Can the raw link be styled as a button instead of a plain URL?
A. Yes. Copy the token/URL, click Insert Button in the email editor, paste it as the Button URL, give it a label, and click Insert.
