Introduction
Duplicating an event and its web form is a popular way to save time when setting up a recurring event, such as a returning gala or fundraiser. However, an event with heavy configuration – multiple tickets, ticket settings, sessions, or locations – along with a web form built around it can easily fall out of alignment if a few key areas aren't checked after duplication. This guide walks through the minimum set of places to check so the event, its registrations, and its web form all stay in alignment. It does not cover advanced features such as Surveys or Auctions, even though those may also be part of an event being duplicated.Table of Contents
Why Follow This Checklist When Duplicating an Event?
The value of duplicating an event and its form is the time and effort it saves. If the duplication isn't fully checked over, that value is lost – the time saved gets spent instead untangling the issue with Support, which negates the benefit of duplicating in the first place.
Always duplicate the event first and get its tickets and registrations fully set up before duplicating the form. Duplicating the form first, before the event is ready, is a common source of the confusion this guide is meant to help avoid.
Instruction - Duplicate an Event
Step 1: Navigate to Events > Events > Search and Manage.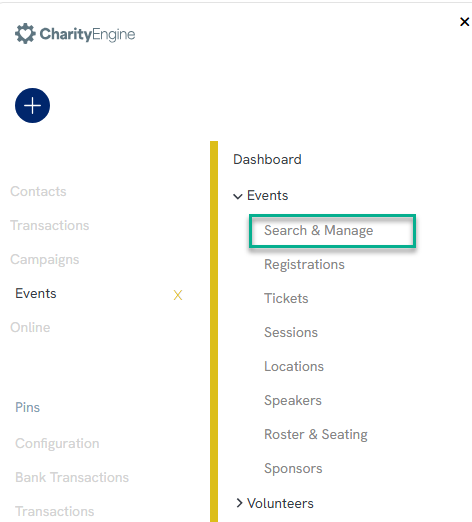
Step 2: Search for the existing event (searching by name works well).
Step 3: Click the ellipsis (three dots) menu on the event and select Duplicate. When prompted to create a copy, confirm and continue.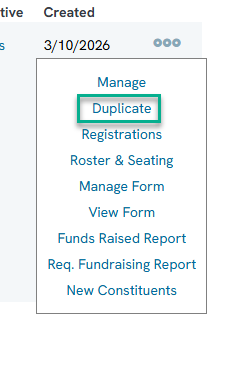
Step 4: To find the new copy, adjust the filter on the event listing screen to show events created today, then search. The duplicated event will appear in the results.
Step 5: Click the copied event name to manage it.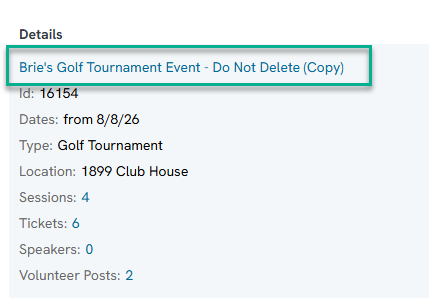
Step 6: On the General tab, update the Event Name, Event Location (if it has changed), and the Event Dates. Dates in particular must be updated, including the end date, so they reflect the new event rather than the original. Click Save.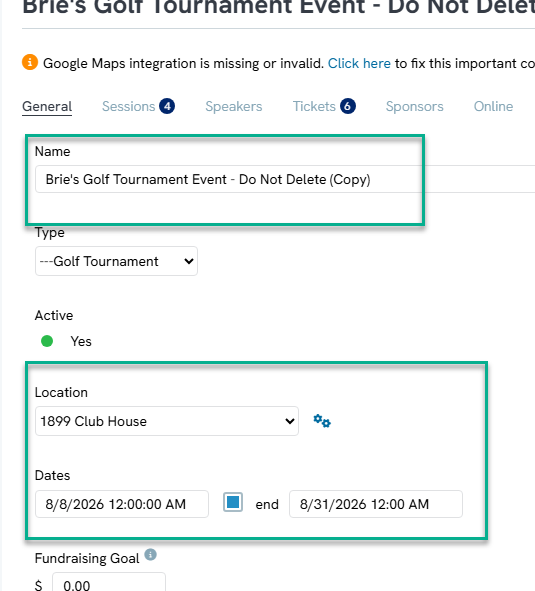
Step 7: If the event uses sessions, click the Sessions tab and review each one. Sessions carry over from the original event, so rename them only if needed (for example, breakfast, lunch, and dinner sessions can often stay as-is).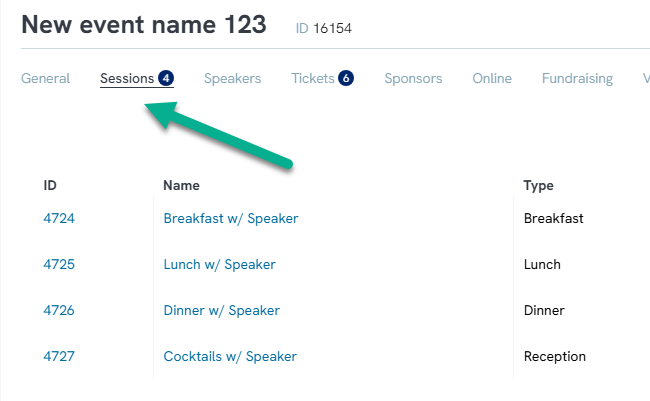
Step 8: Click the Tickets tab and review every ticket. Rename each ticket so it doesn't share an identical name with tickets from other duplicated events – ticket names appear throughout the CRM in dropdown lists, and duplicate names make it hard to tell which ticket belongs to which event.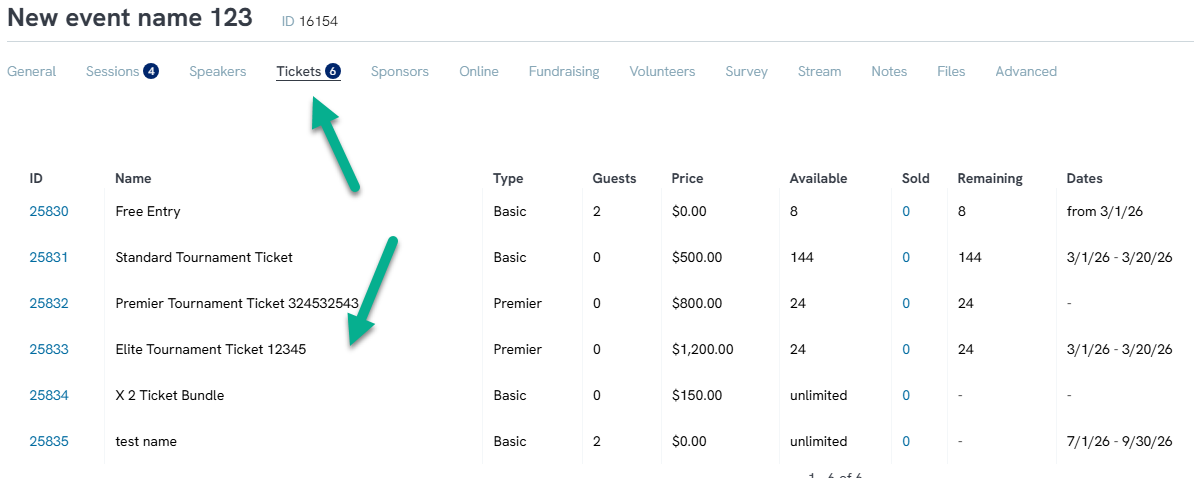
Step 9: For each ticket, also update the guest count (if the venue capacity changed), the ticket price (if it has increased), and the ticket availability (total quantity for sale).
Step 10: Open an individual ticket to manage it, and review the Online section for that ticket: the Sale Start Date, Sale End Date, Sold Out Message, and Max Purchase Quantity. Update these dates so the ticket displays correctly for the new event's timeline.
Note: The event's Online tab holds a link to its web form, but the form itself does not get duplicated along with the event. Duplicating the form is covered separately in the next section.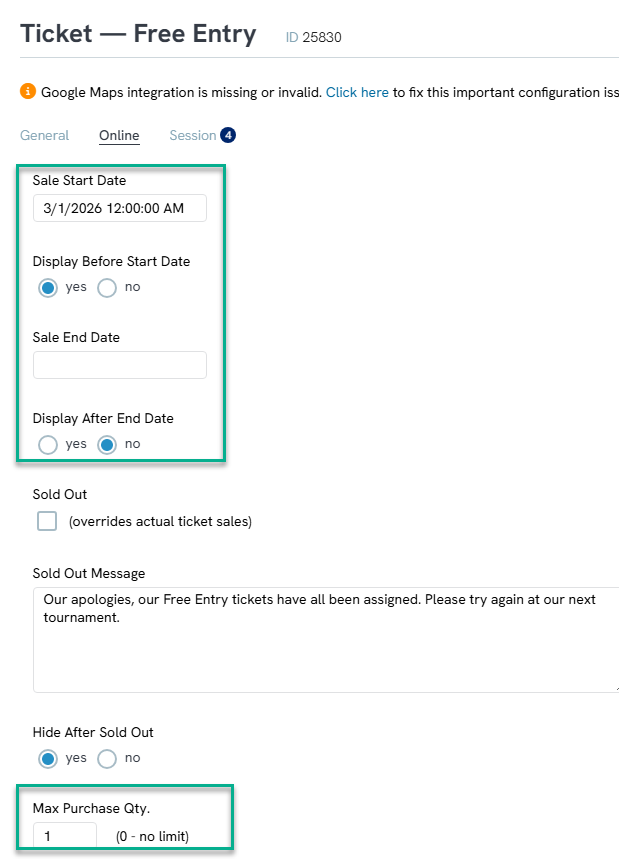
Step 11: If the event has any Volunteer posts, review those as well. The remaining tabs typically don't need changes unless the event uses more advanced features, such as surveys or auctions.
Step 12: Confirm the event manager listed on the event is correct, so attendees or staff know who to contact with questions about this specific event. This is back on the General Tab.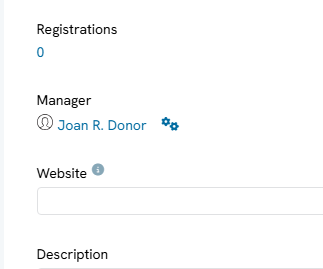
Instructions - Duplicate the Event's Web Form
Step 1: Navigate to Online > Web Forms > Search and Manage.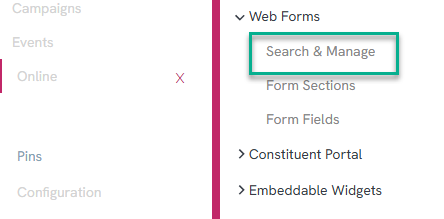
Step 2: Search for the existing form tied to the original event.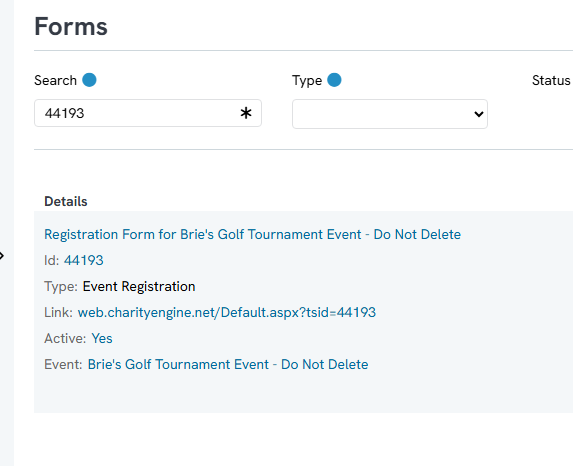
Step 3: Click the ellipsis (three dots) menu on the form and select Duplicate.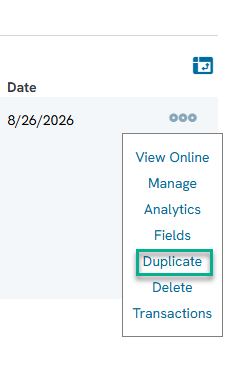
Step 4: Give the form a new name.
Step 5: When prompted to choose between using the existing event or creating a new event and tickets for a different event, leave this set to Existing, since the correct new event was already created in the previous section. Click Duplicate to create the new form.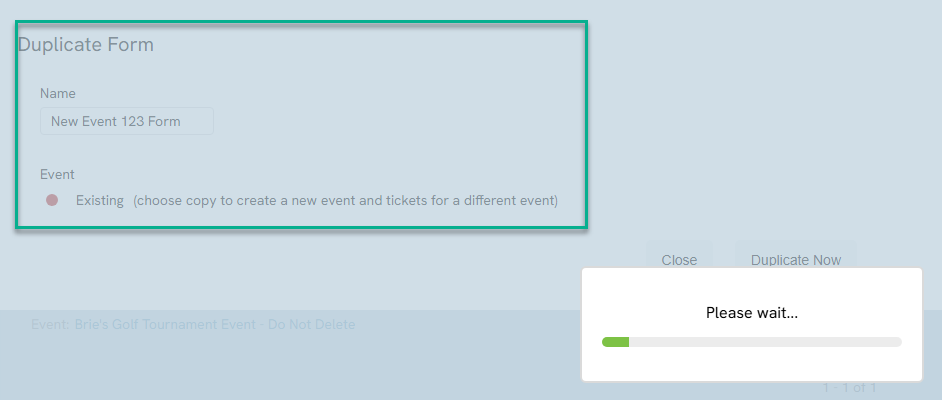
Step 6: Adjust the filter on the web forms listing screen to show forms created today, then search to locate the newly duplicated form.
Step 7: Click the form's name to manage it.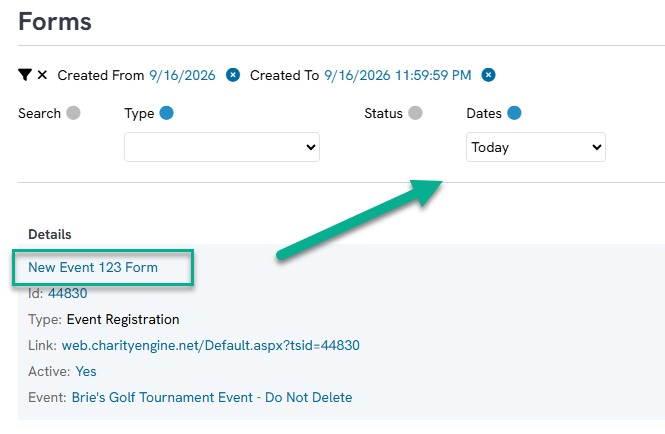
Step 8: Click the Event tab first. Since the form was duplicated using the original event, this tab will still be connected to the old event. Change this selection to the new duplicated event – this also loads the new event's tickets into the form. Click Save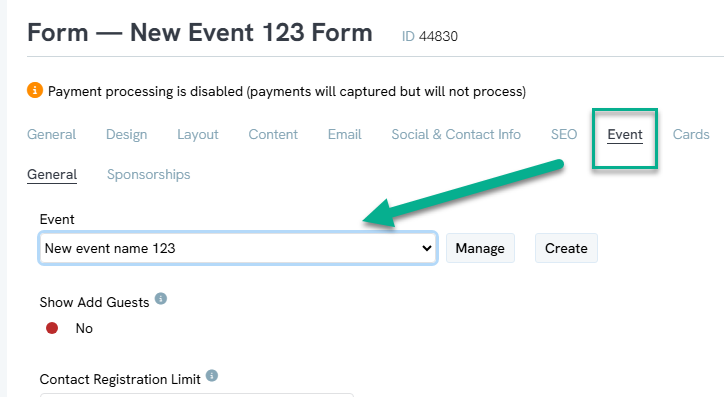
Step 9: This next step is very important as it will load the new ticket set form the duplicated event. Click the Layout Tab and Delete the existing Event Ticket Information section. 
Step 10: Once completed you will see the Event Section available on the left section menu. Click Add Event to add the new ticket set to the form. 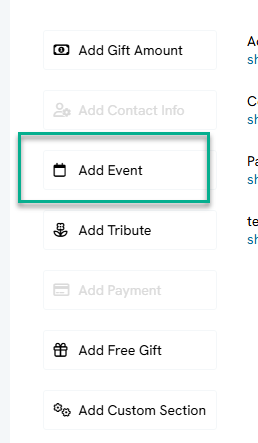
Step 11: Once the new ticket wizard appears, toggle Change Tickets, if not already selected. Select the tickets from the new event that you want to add. Click Save. 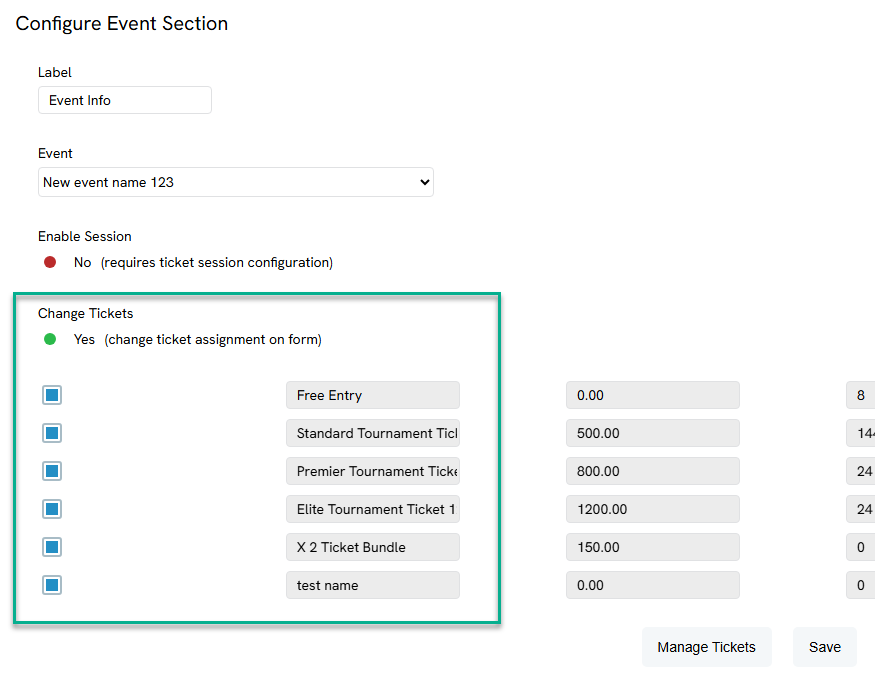
Step 9: Click the Content tab and review the landing page's top and bottom content, since it will likely reference details specific to the previous event (for example, the prior year).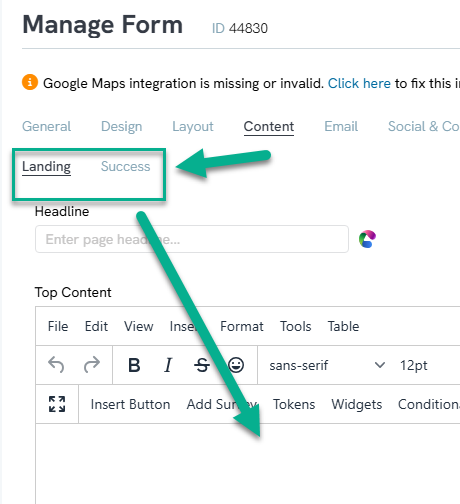
Step 10: Click the Email tab and review both the donor-facing receipt and the internal receipt email. Click the double gears icon to view and edit an email message.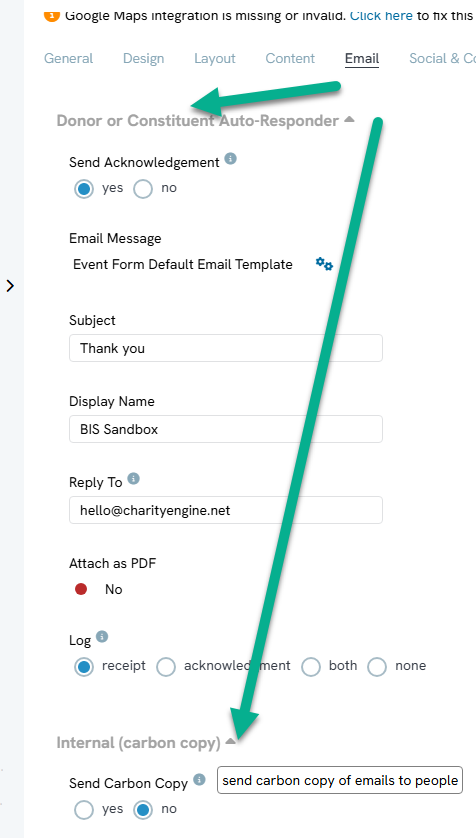
Step 11: Review the tab containing social and contact information. If this form gets shared on social media, update this information so it doesn't reference outdated details from the original event.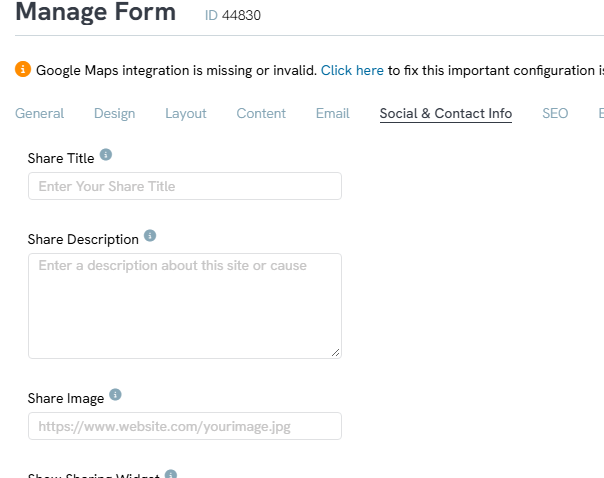
Step 12: Click the SEO tab and review it for anything that needs updating.
Step 13: Click the Advanced tab and review the Data section for any Lists, Tags, or Groups attached to the form. Update these as needed for the new event.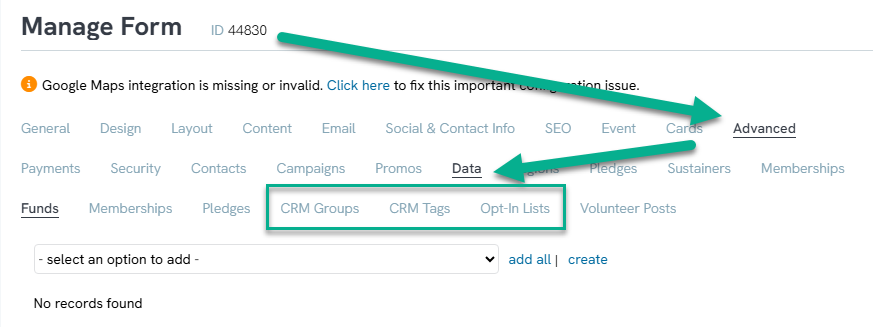
Note: This is not necessarily every tab that could need a change – it depends on how the original event and form were built. These are the points most likely to cause confusion if missed.
FAQs & Additional Reading
Q. Should I duplicate the event or the form first?
A. Always duplicate the event first and fully configure it (name, location, dates, sessions, and tickets) before duplicating the form. Duplicating the form first, while the event isn't ready yet, is a common source of confusion.
Q. When duplicating the form, should I choose "Existing" or create a new event and tickets from that dialog?
A. Choose Existing, since the correct new event should already have been created by duplicating the event directly. After duplicating the form, go to its Event tab and manually connect it to the new duplicated event.
Q. Why does it matter if ticket names are identical across duplicated events?
A. Ticket names appear in dropdown lists throughout the CRM. If multiple duplicated events share the same ticket name, it becomes difficult to tell which ticket belongs to which event when selecting one.
