Introduction
NOTE: This article covers managing tickets on an event that has already been created; it does not cover creating an event or its initial tickets from scratch. It also assumes you are familiar with the event type web form configuration. Users can create an early bird (or "flash sale") ticket to offer a discounted price on the first batch of tickets sold – for example, the first 50 to 100 – in order to drive early registration. After a set date (or once the limited quantity sells out), the ticket automatically transitions to a regular ticket, typically at a higher price.
Table of Contents
Why Combine Ticket Availability and Sale Dates?
There are a few ways to control how long an early bird ticket stays available: limit the Total Available quantity so the ticket sells out on its own, set a Sale Start Date and Sale End Date so it's only available for a set window of time, or combine an unlimited quantity with that date window. Which approach (or combination) to use is up to the organization.
On the ticket's Online tab, the Display Before Start Date and Display After End Date settings control what happens outside that window. Setting both to No means the ticket will automatically appear on the form exactly at its sale start date and disappear automatically after its sale end date – with no manual action needed to turn it on or off.
Instruction - Create the Early Bird Ticket
Step 1: Navigate to Events > Events > Search and Manage, search for the event, and click the event's name to manage it.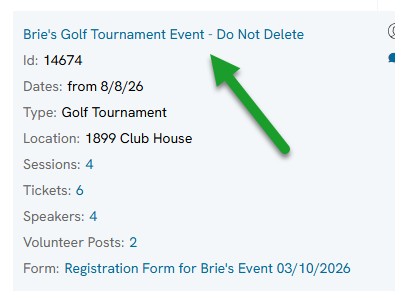
Step 2: Click the Tickets tab.
Step 3: Click Create New Record to add a new ticket.
Step 4: Name it (for example, "Early Bird") and set its Price (for example, $50).
Step 5: Set Total Available to the quantity this ticket should be limited to (for this example, 50).
Step 6: Leave Guest, Raffle, and GM options off if they don't apply to this ticket, then click Save.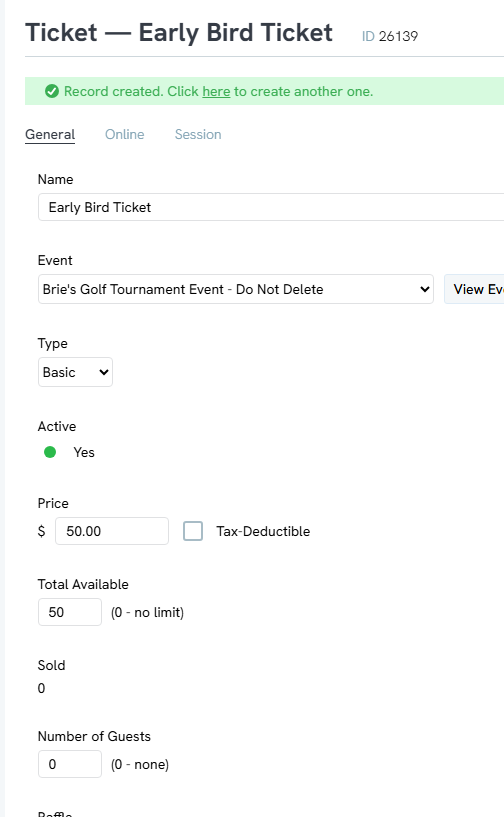
Step 7: Click the Online tab within this ticket.
Step 8: Set the Sale Start Date (when the ticket should become available) and Sale End Date (when it should stop being offered).
Step 9: Set Display Before Start Date to No and Display After End Date to No, so the ticket appears and disappears automatically on those dates.
Step 10: If purchases should be limited per buyer, set a Max Purchase Quantity (for example, 3).
Step 11: Click Save.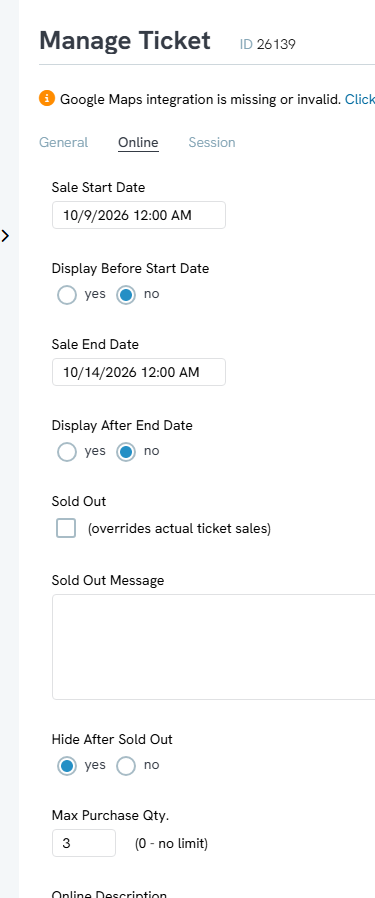
Instructions - Create the Regular Ticket to Follow It
Step 1: Return to the event's Tickets tab and click Add New again.
Step 2: Name it (for example, "Standard Ticket") and set its Price (for example, $100, typically higher than the early bird price).
Step 3: Leave Total Available unlimited (or set as needed) with no guest options, then click Save.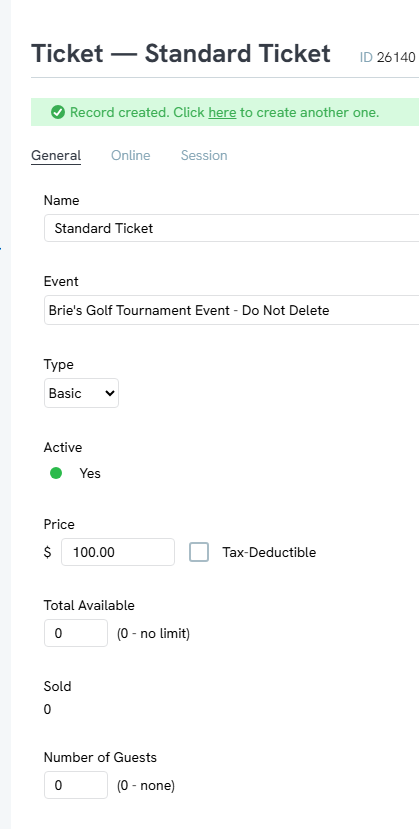
Step 4: Click the Online tab and set the Sale Start Date to match the early bird ticket's sale end date, so this ticket becomes available right as the early bird ticket disappears.
Step 5: Leave the Sale End Date blank if this ticket should remain available indefinitely.
Step 6: Set Display Before Start Date to No.
Note: Since there is no sale end date on this ticket, the Display After End Date setting doesn't apply, and there's no Max Purchase Quantity needed either.
Step 7: Click Save.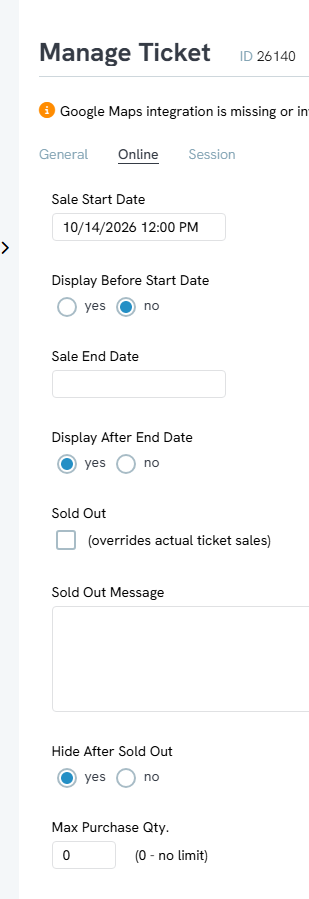
Instructions - Verify the Tickets on the Live Form
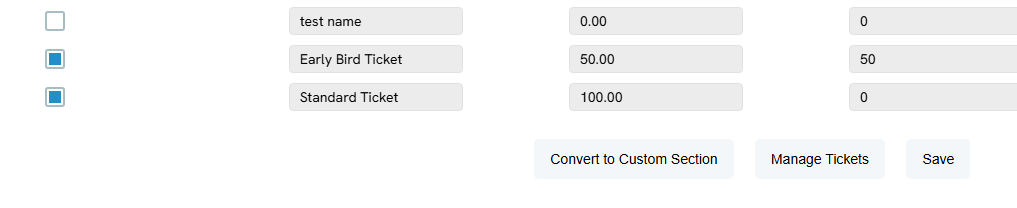
Step 1: From the event, click the Online tab and manage the form, confirming both tickets have been added to the form's layout.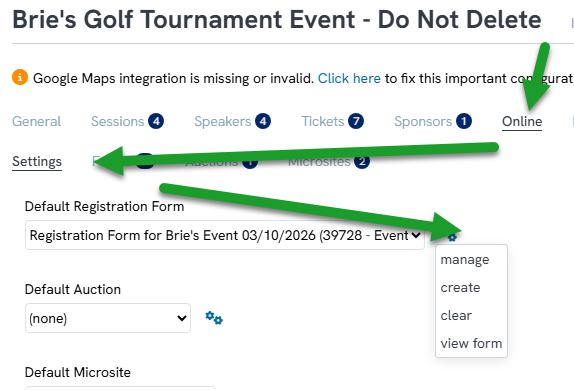
Step 2: Click the form's link to view it live. The early bird ticket should display at its price, with any purchase quantity restriction enforced at checkout.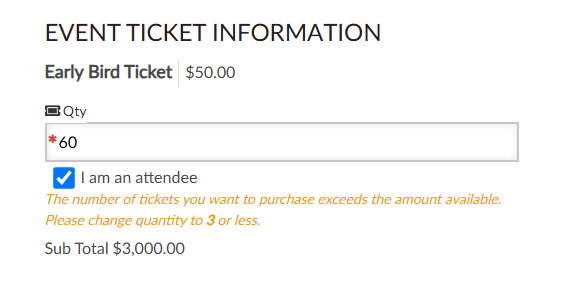
Step 3: To confirm the automatic handoff between tickets, this can be tested by temporarily adjusting the online dates – for example, setting the early bird ticket's sale end date to a past date, and the standard ticket's sale start date to today – then saving both.
Step 4: Refresh the live form. The early bird ticket should disappear and the standard ticket should now display automatically, without needing to manually hide or show either ticket.
Note (Tip): This can also be verified by putting the web form into test mode and checking out, to confirm the correct ticket is being collected at each stage.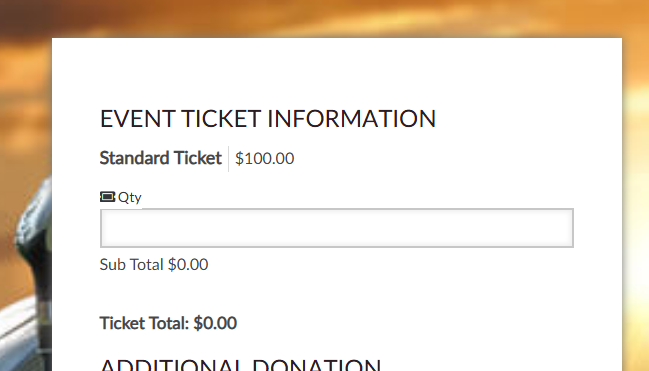
FAQs & Additional Reading
Q. What are the ways to control how long an early bird ticket is available?
A. Limiting its Total Available quantity so it sells out, setting a Sale Start and Sale End date so it's only available for a window of time, or combining an unlimited quantity with that date window.
Q. What do the Display Before Start Date and Display After End Date settings do?
A. Setting both to No makes a ticket automatically appear on the form at its sale start date and disappear automatically after its sale end date, with no manual action required.
Q. How do I make sure a regular ticket picks up right where an early bird ticket leaves off?
A. Set the regular ticket's Sale Start Date to match the early bird ticket's Sale End Date, so one ticket disappears right as the other becomes available.
Q. Can I limit how many early bird tickets a single person can buy?
A. Yes, using the Max Purchase Quantity field on that ticket.
