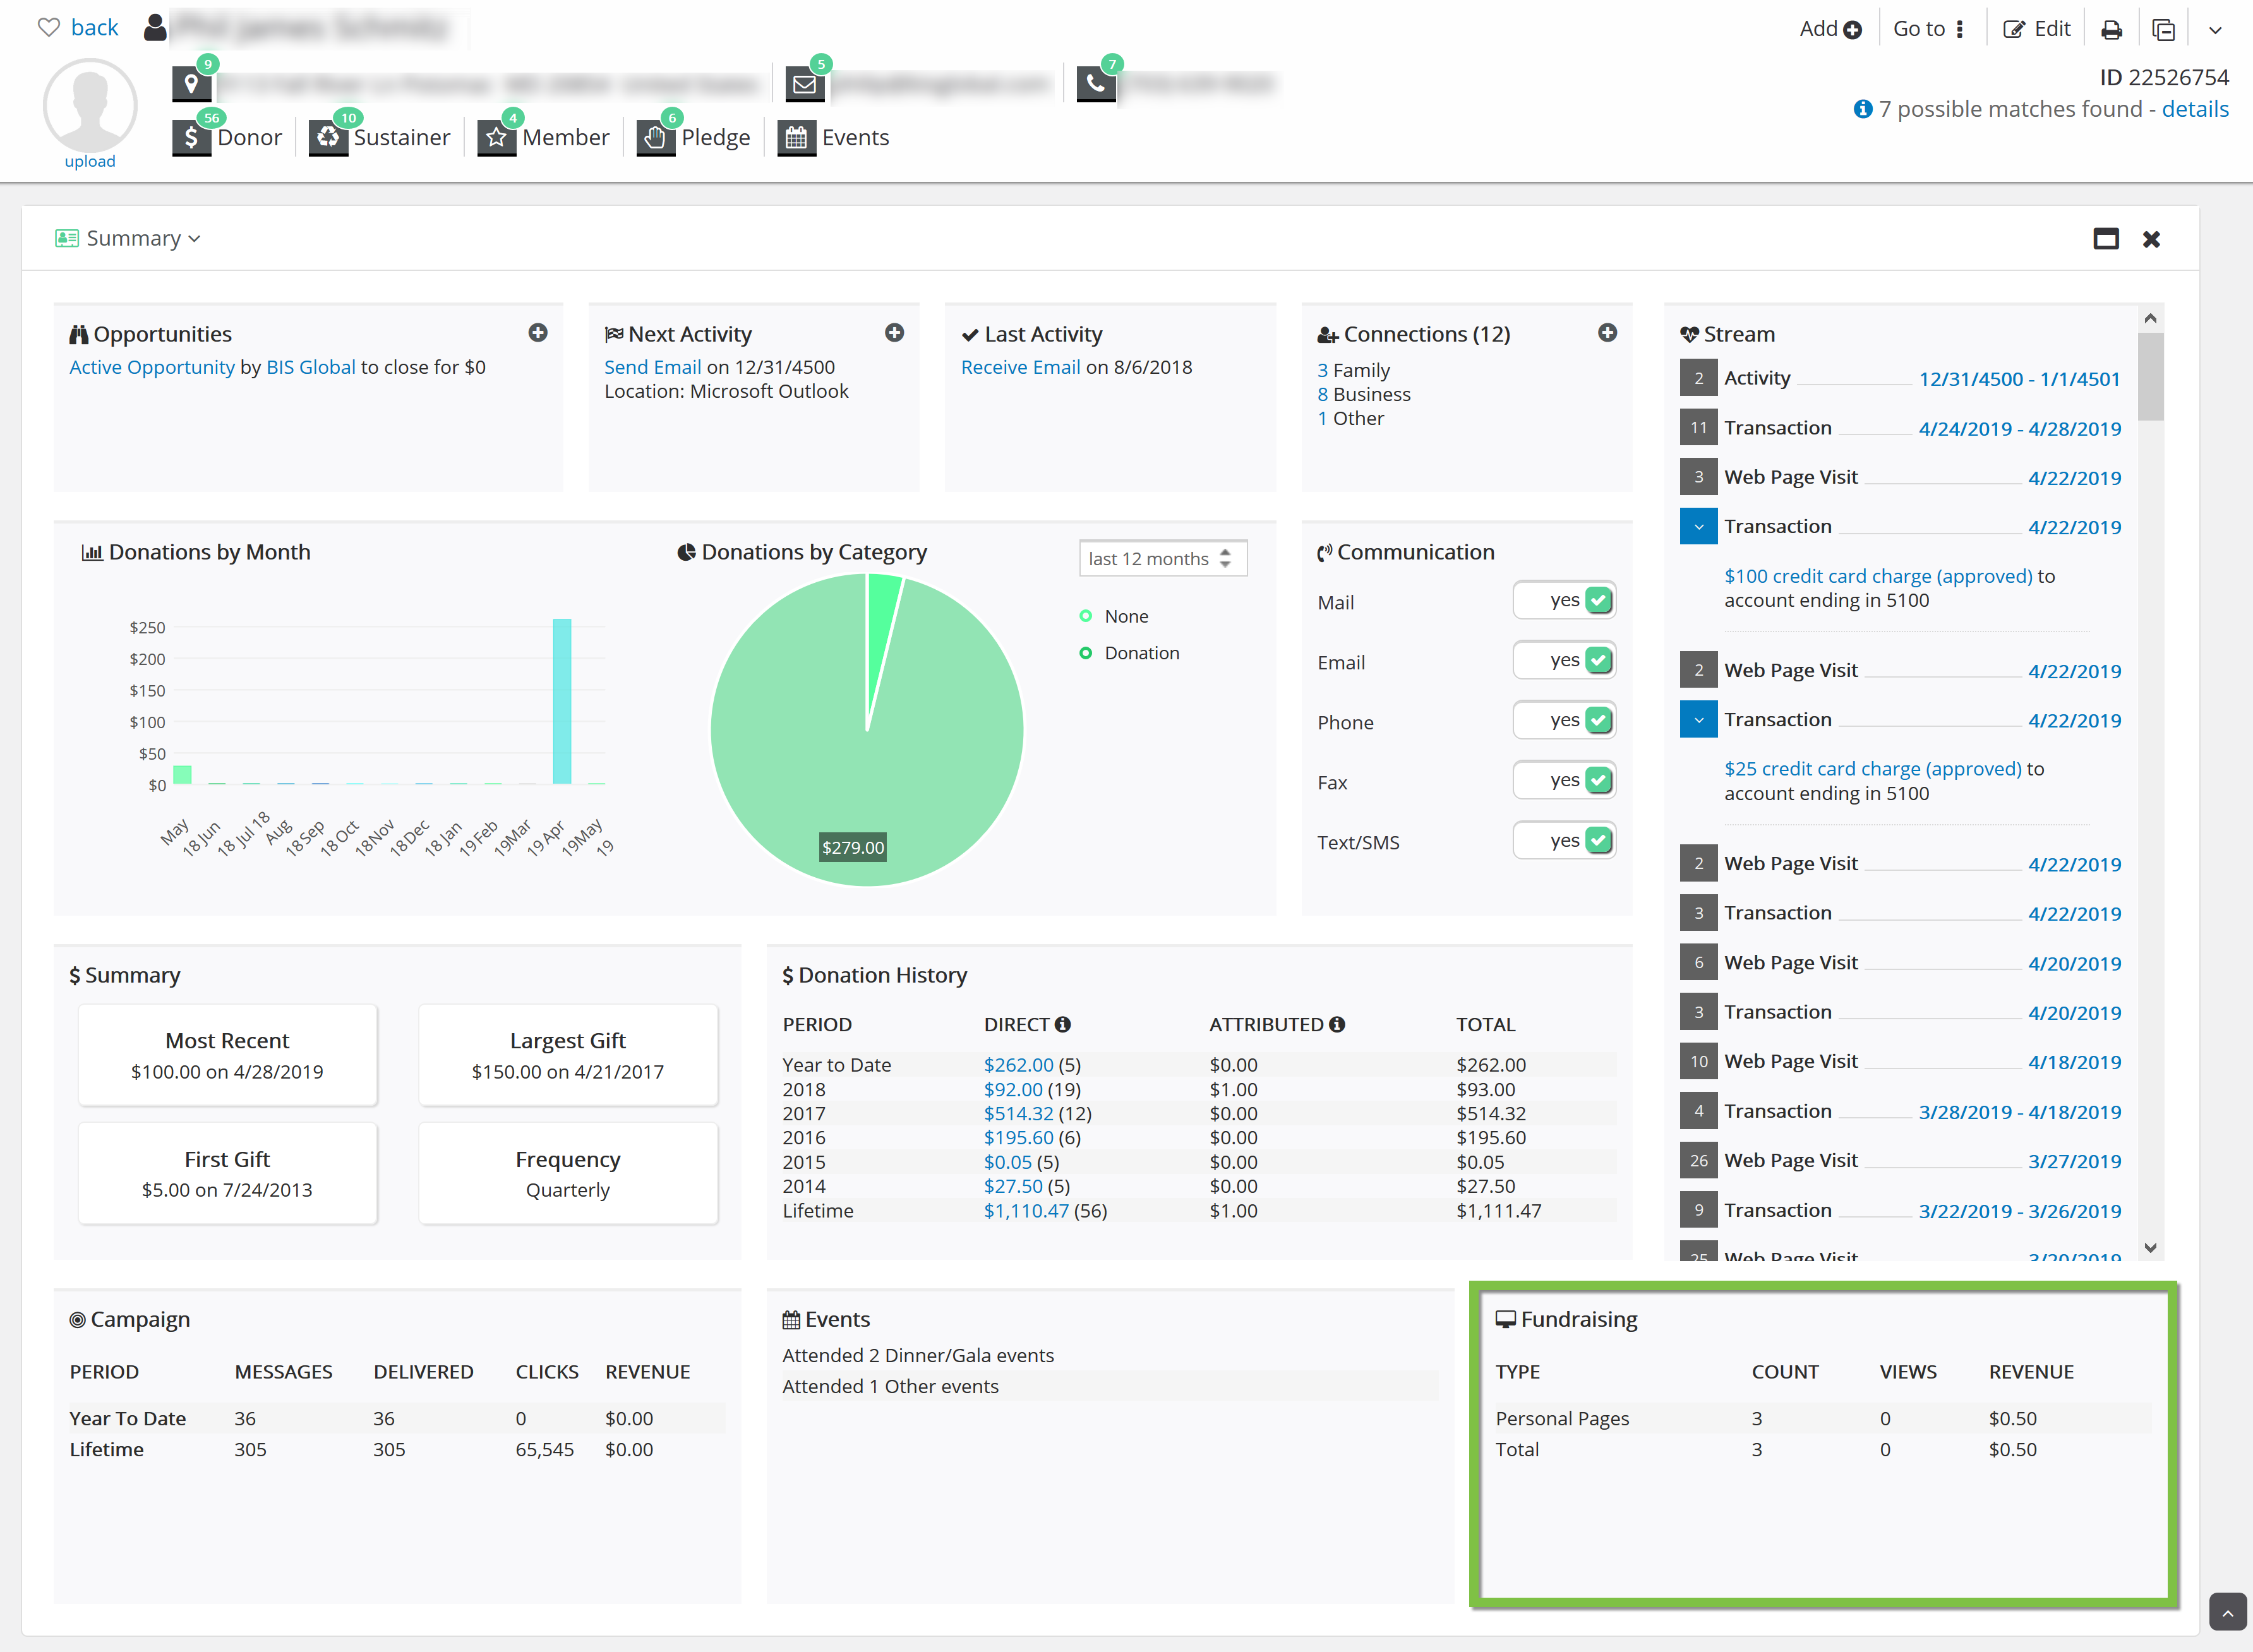
The Contact Record Summary page is a compilation of all of the ways the contact has interacted with your organization. Access all of their transactional history, relationships, opportunities, activities, etc. on one organized page.
Table of Contents
Top Icons
At the top of the contact record is the name of the contact and blurbs of basic information about the contact. Clicking on these icons will trigger different responses.
Note: Icons will only appear if the contact has participated in the activities of the icon type. For example, if the contact has made a donation, they will receive the Donor icon badge; if they have attended an event, they will receive the Events icon badge, etc. The icons that appear under a contact name are directly related to what the contact has done within the organization.
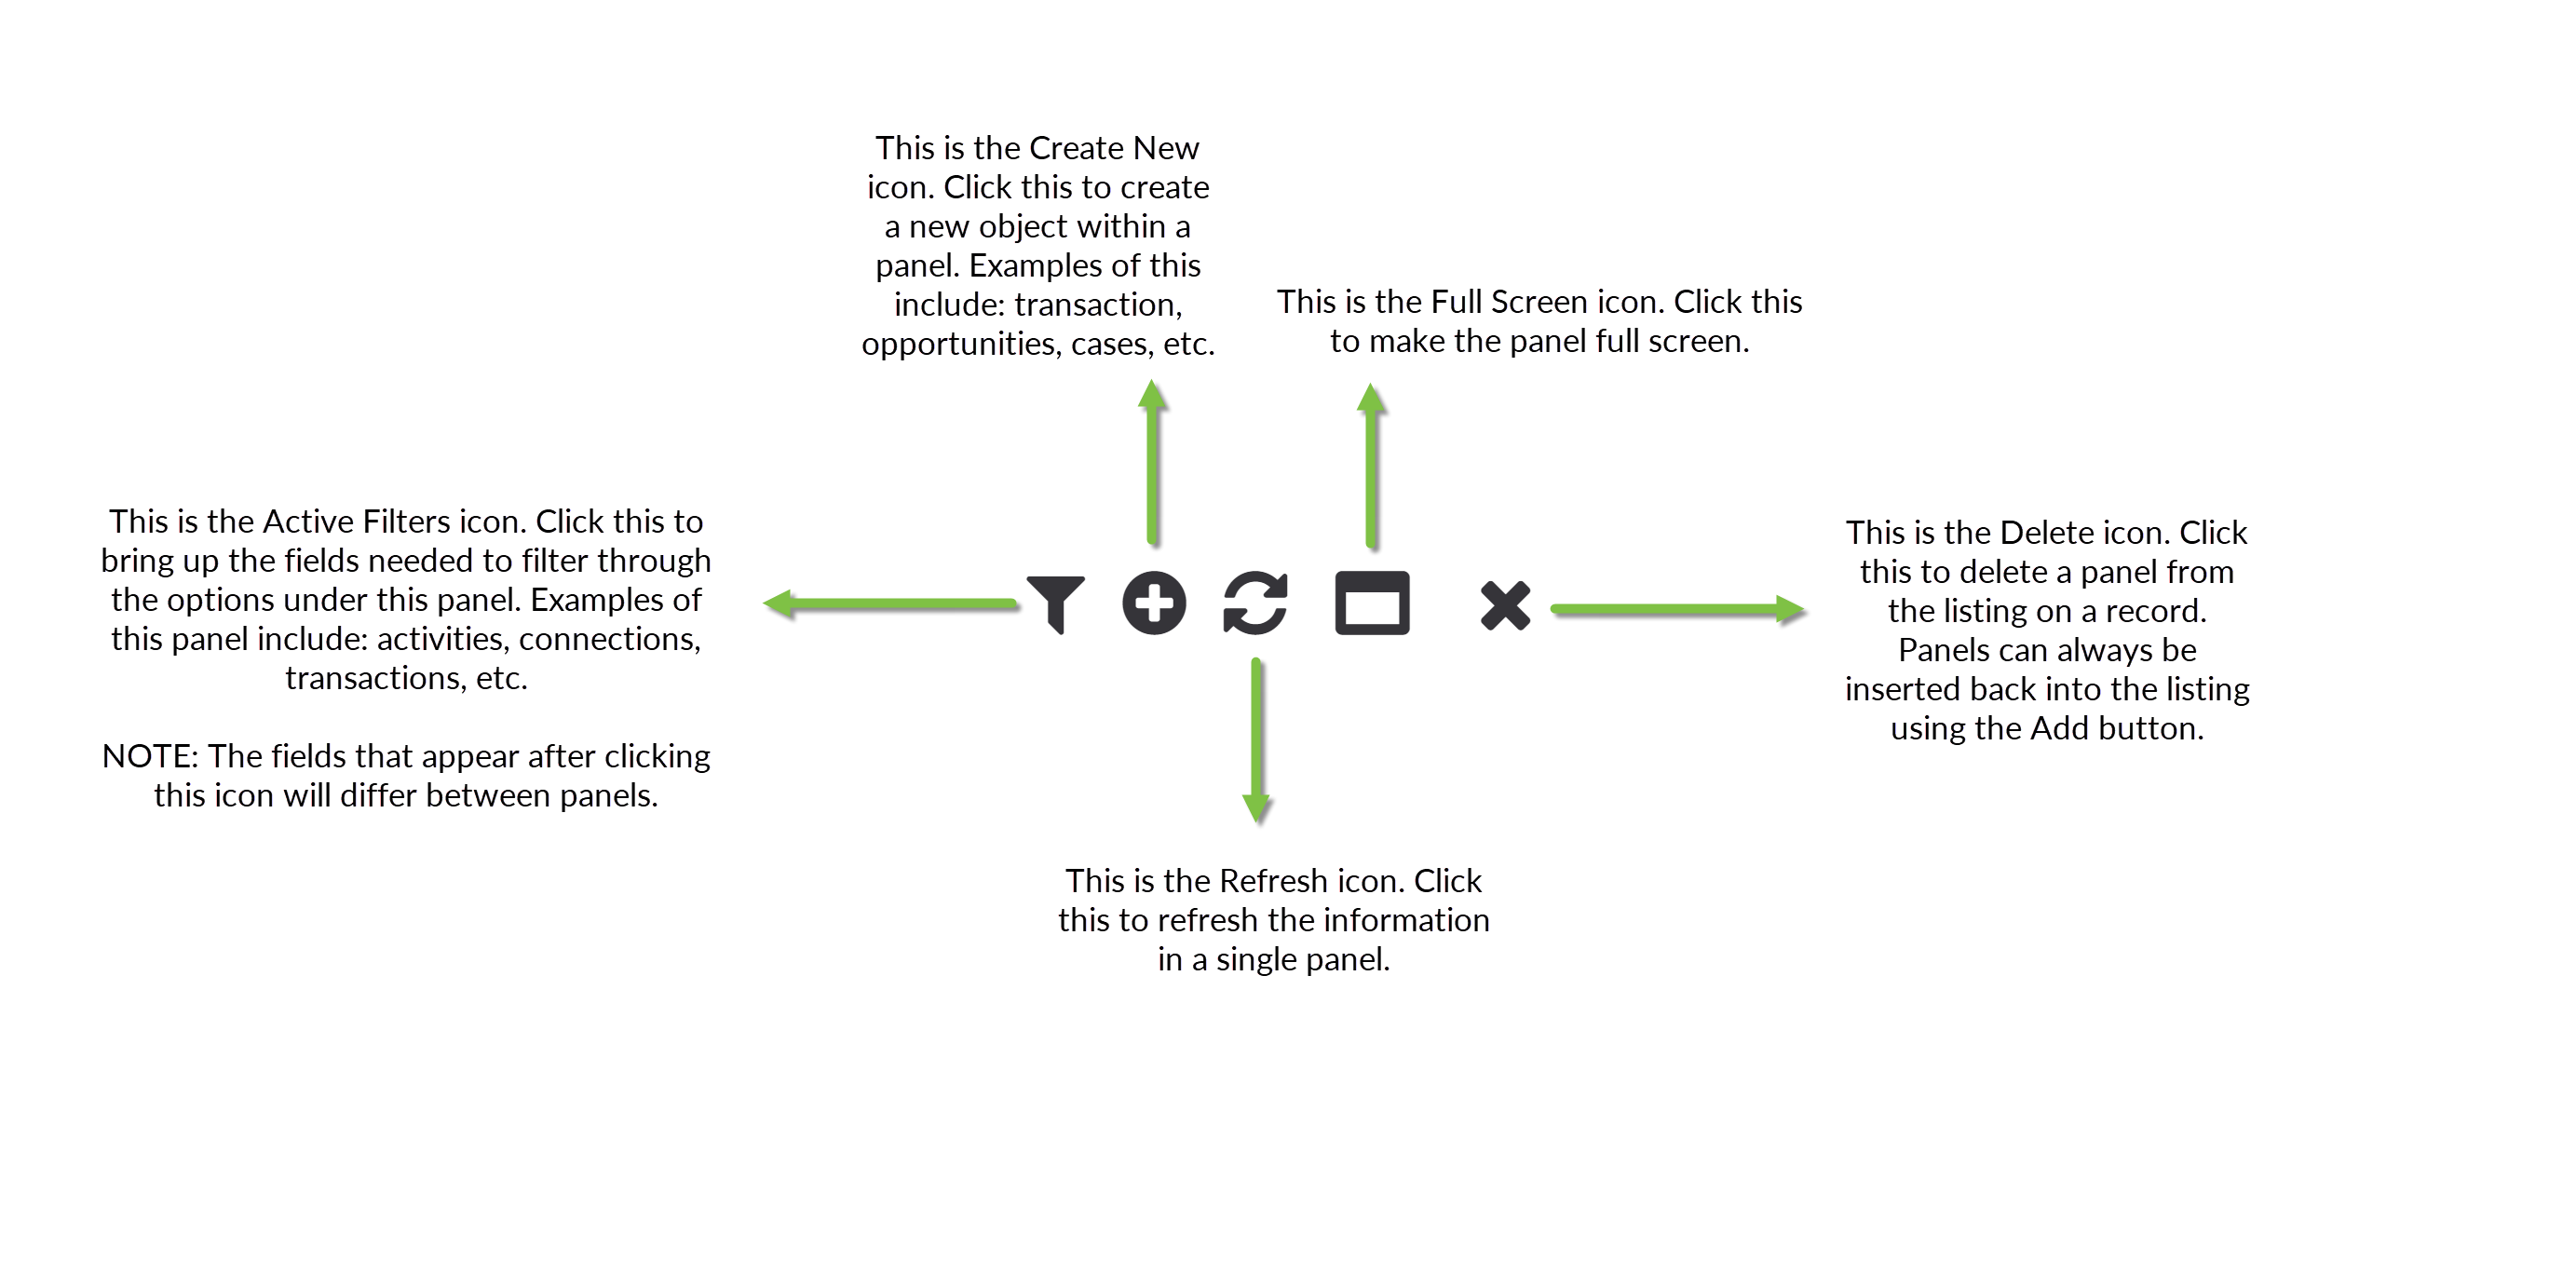
Icons for Panels
A listing of panels appears below the general information summary section of a contact record page. Scroll down to find the panels. Each panel has a varying choice of icons used to interact with it. It will be two or more of the following:
Stream
The Stream section of the contact record is the space that shows all of a contact’s activity. Whether they click on a page, make a donation, create a peer to peer page, etc., their activity will be recorded in this section of the contact’s record page.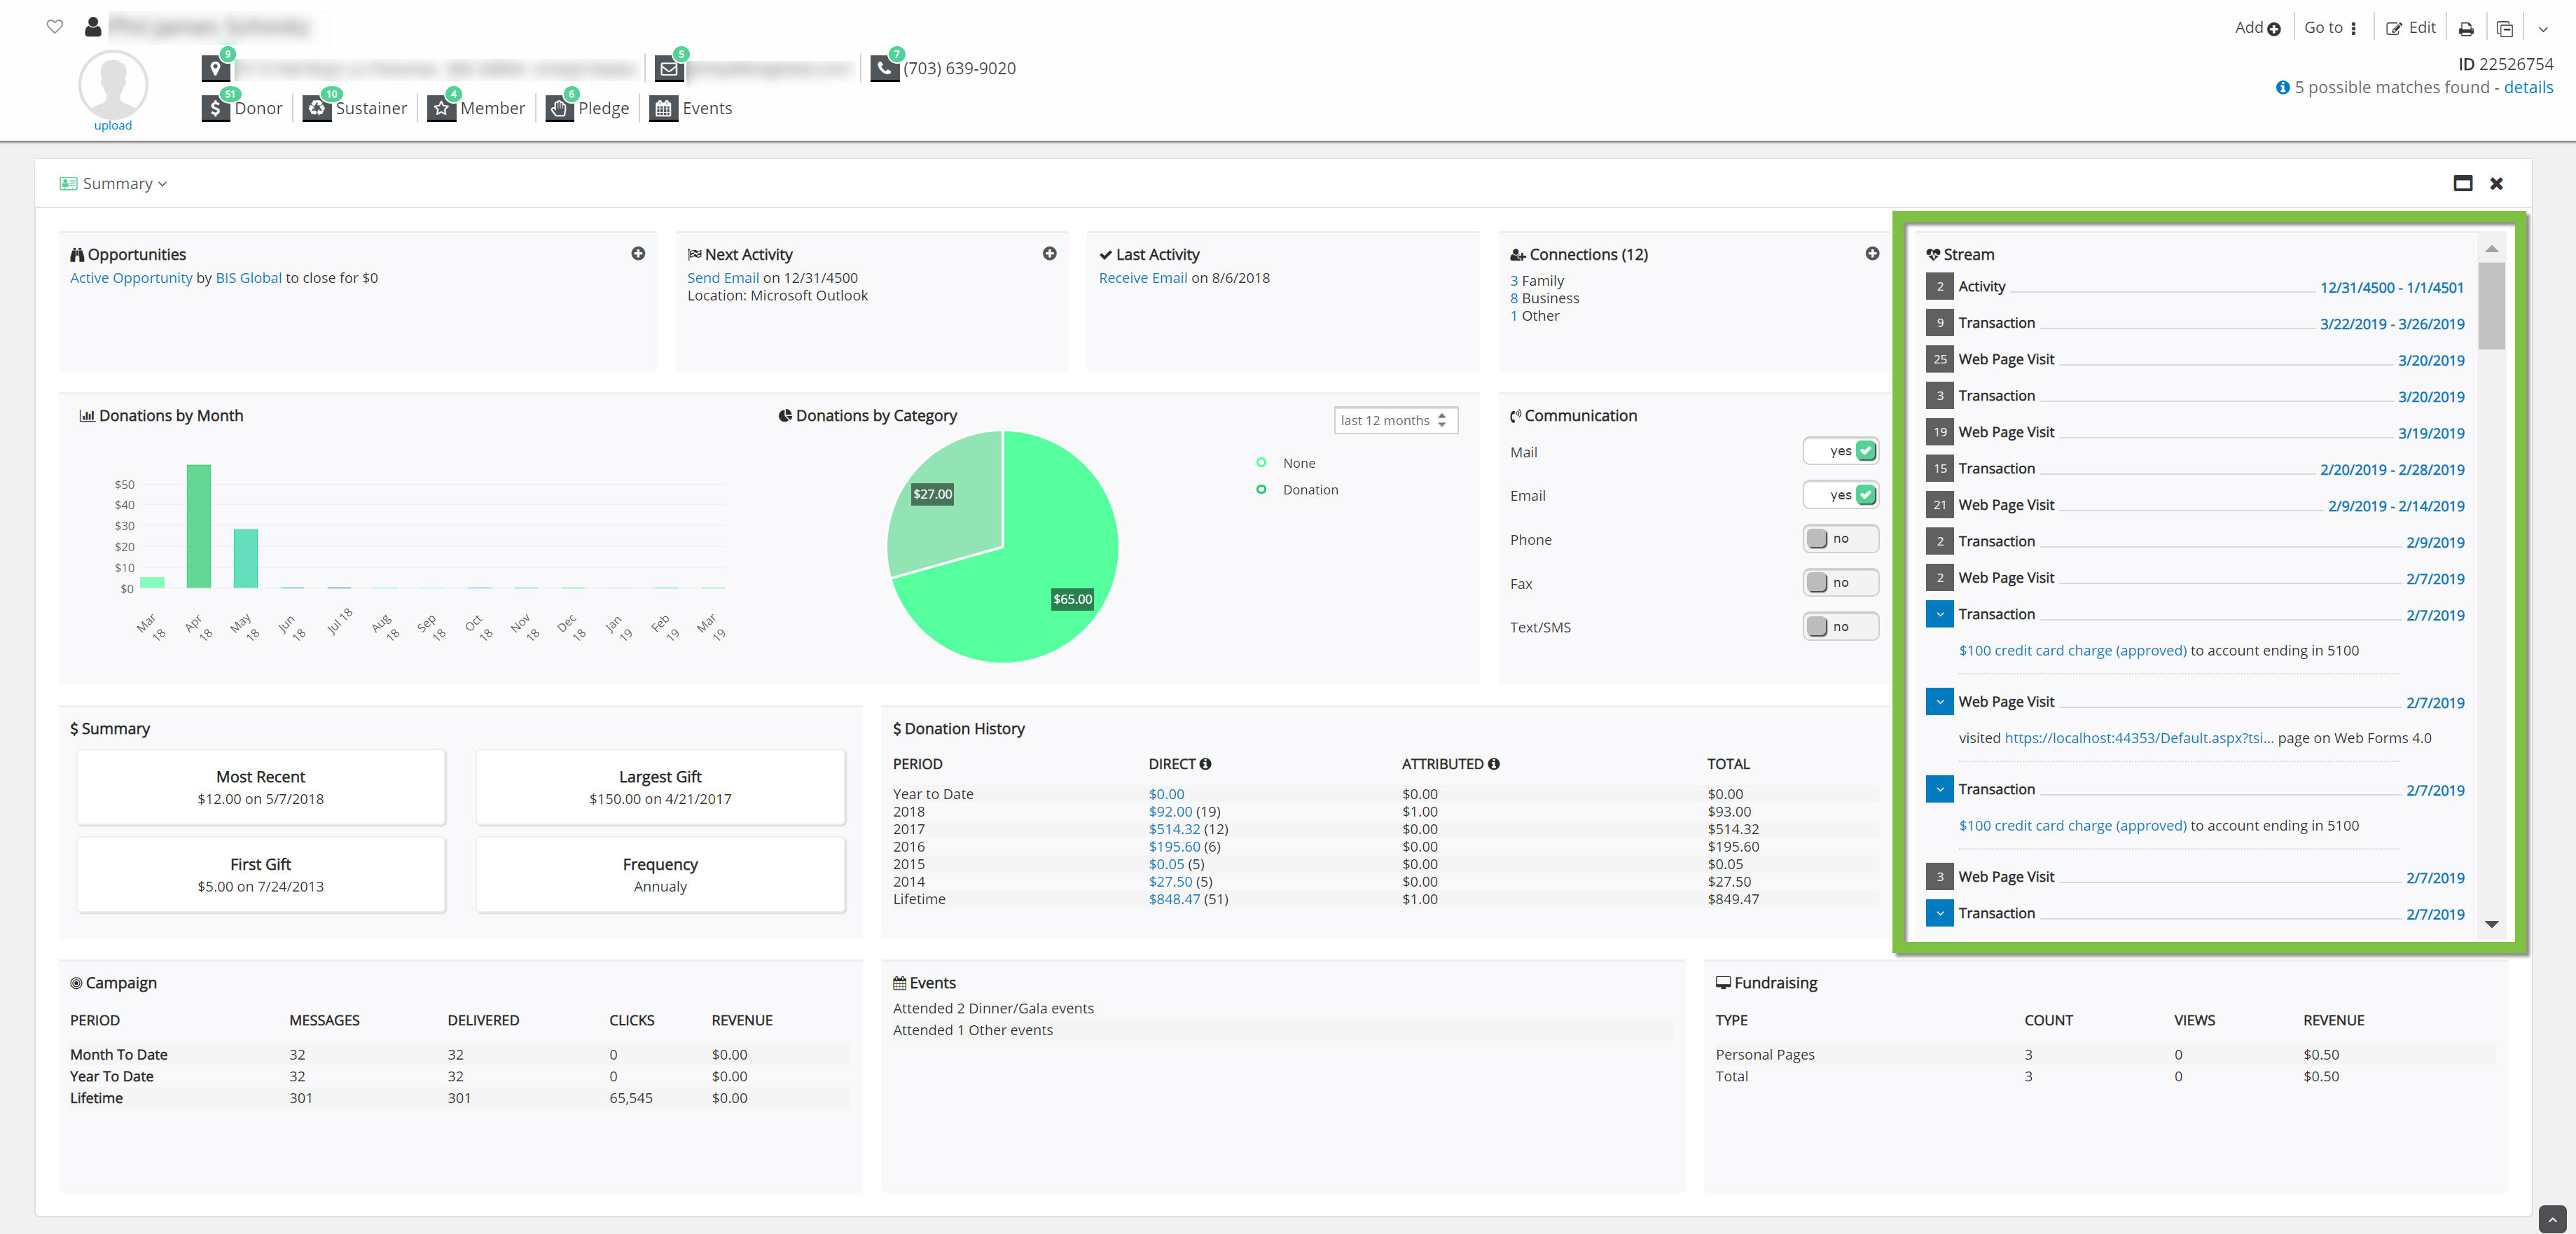
Connections
The connections to other contacts will be displayed in this section. Create new relationships by clicking the + symbol, and navigate to the connections section by clicking on the linked numbers next to the connection type.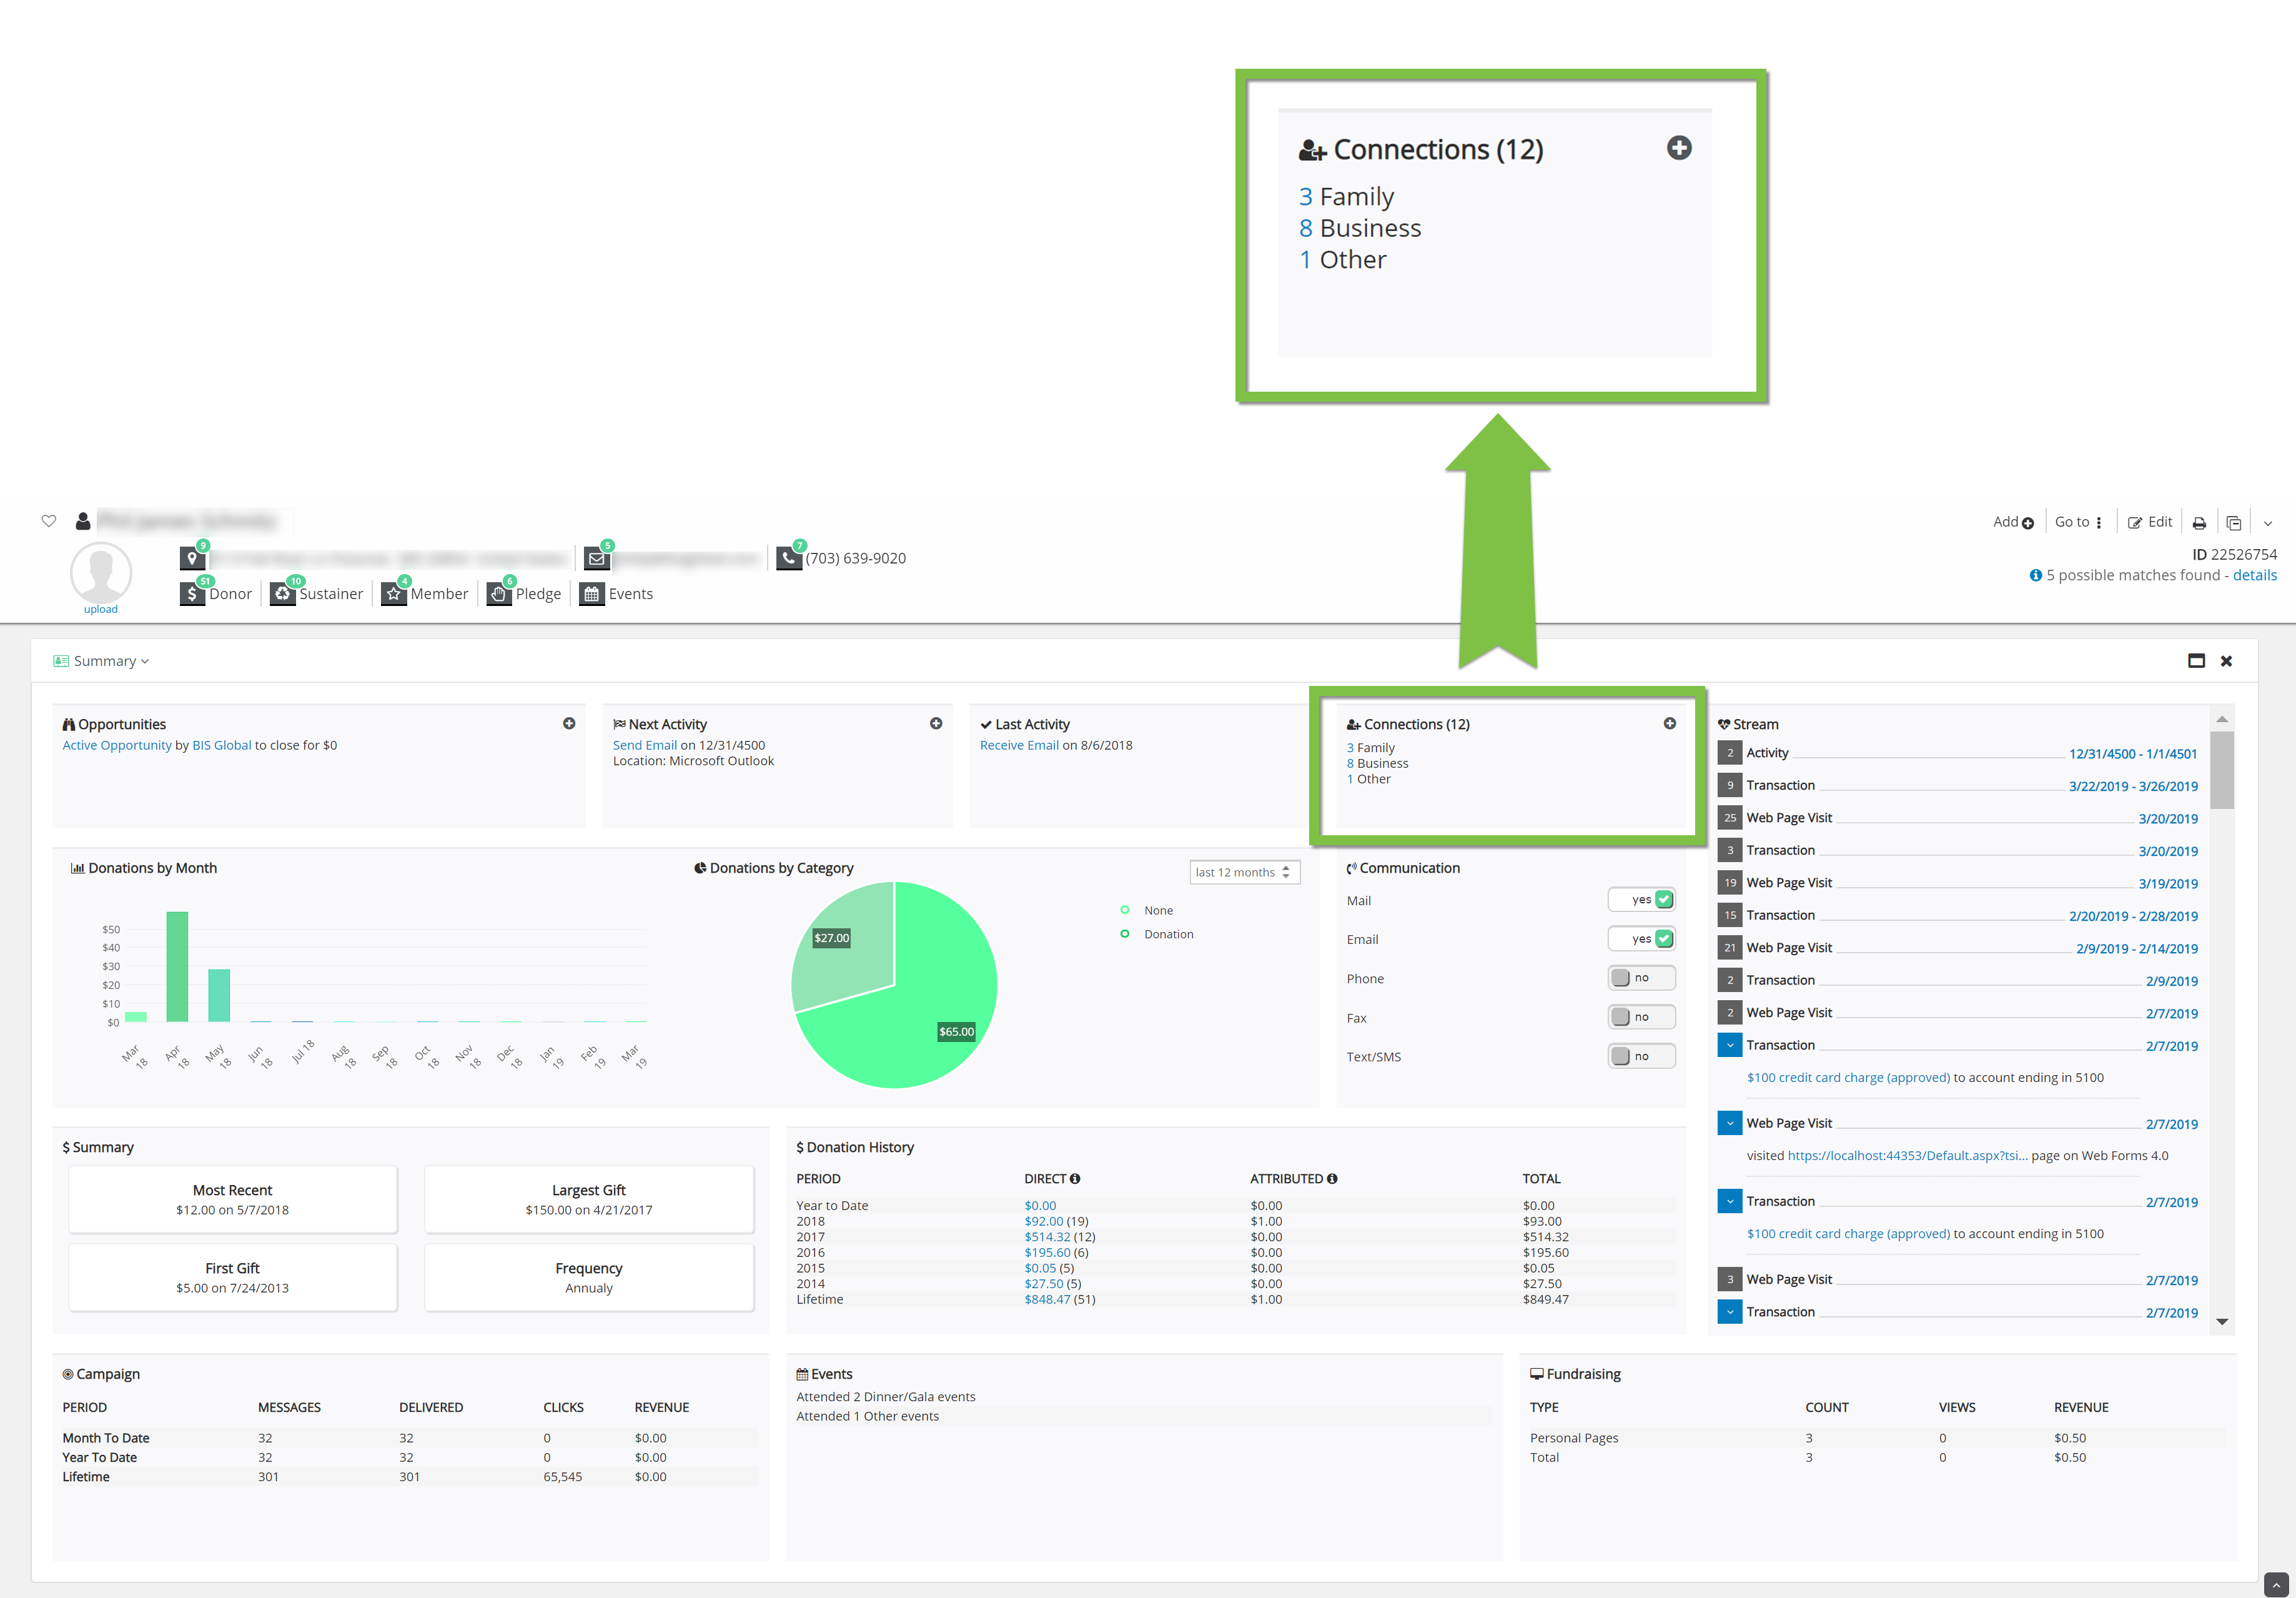
Last Activity
The Last Activity section displays the most recent activity the contact has participated in.
Next Activity
The Next Activity section displays the next activity scheduled for the contact. You can create new activities for the contact by clicking the + sign.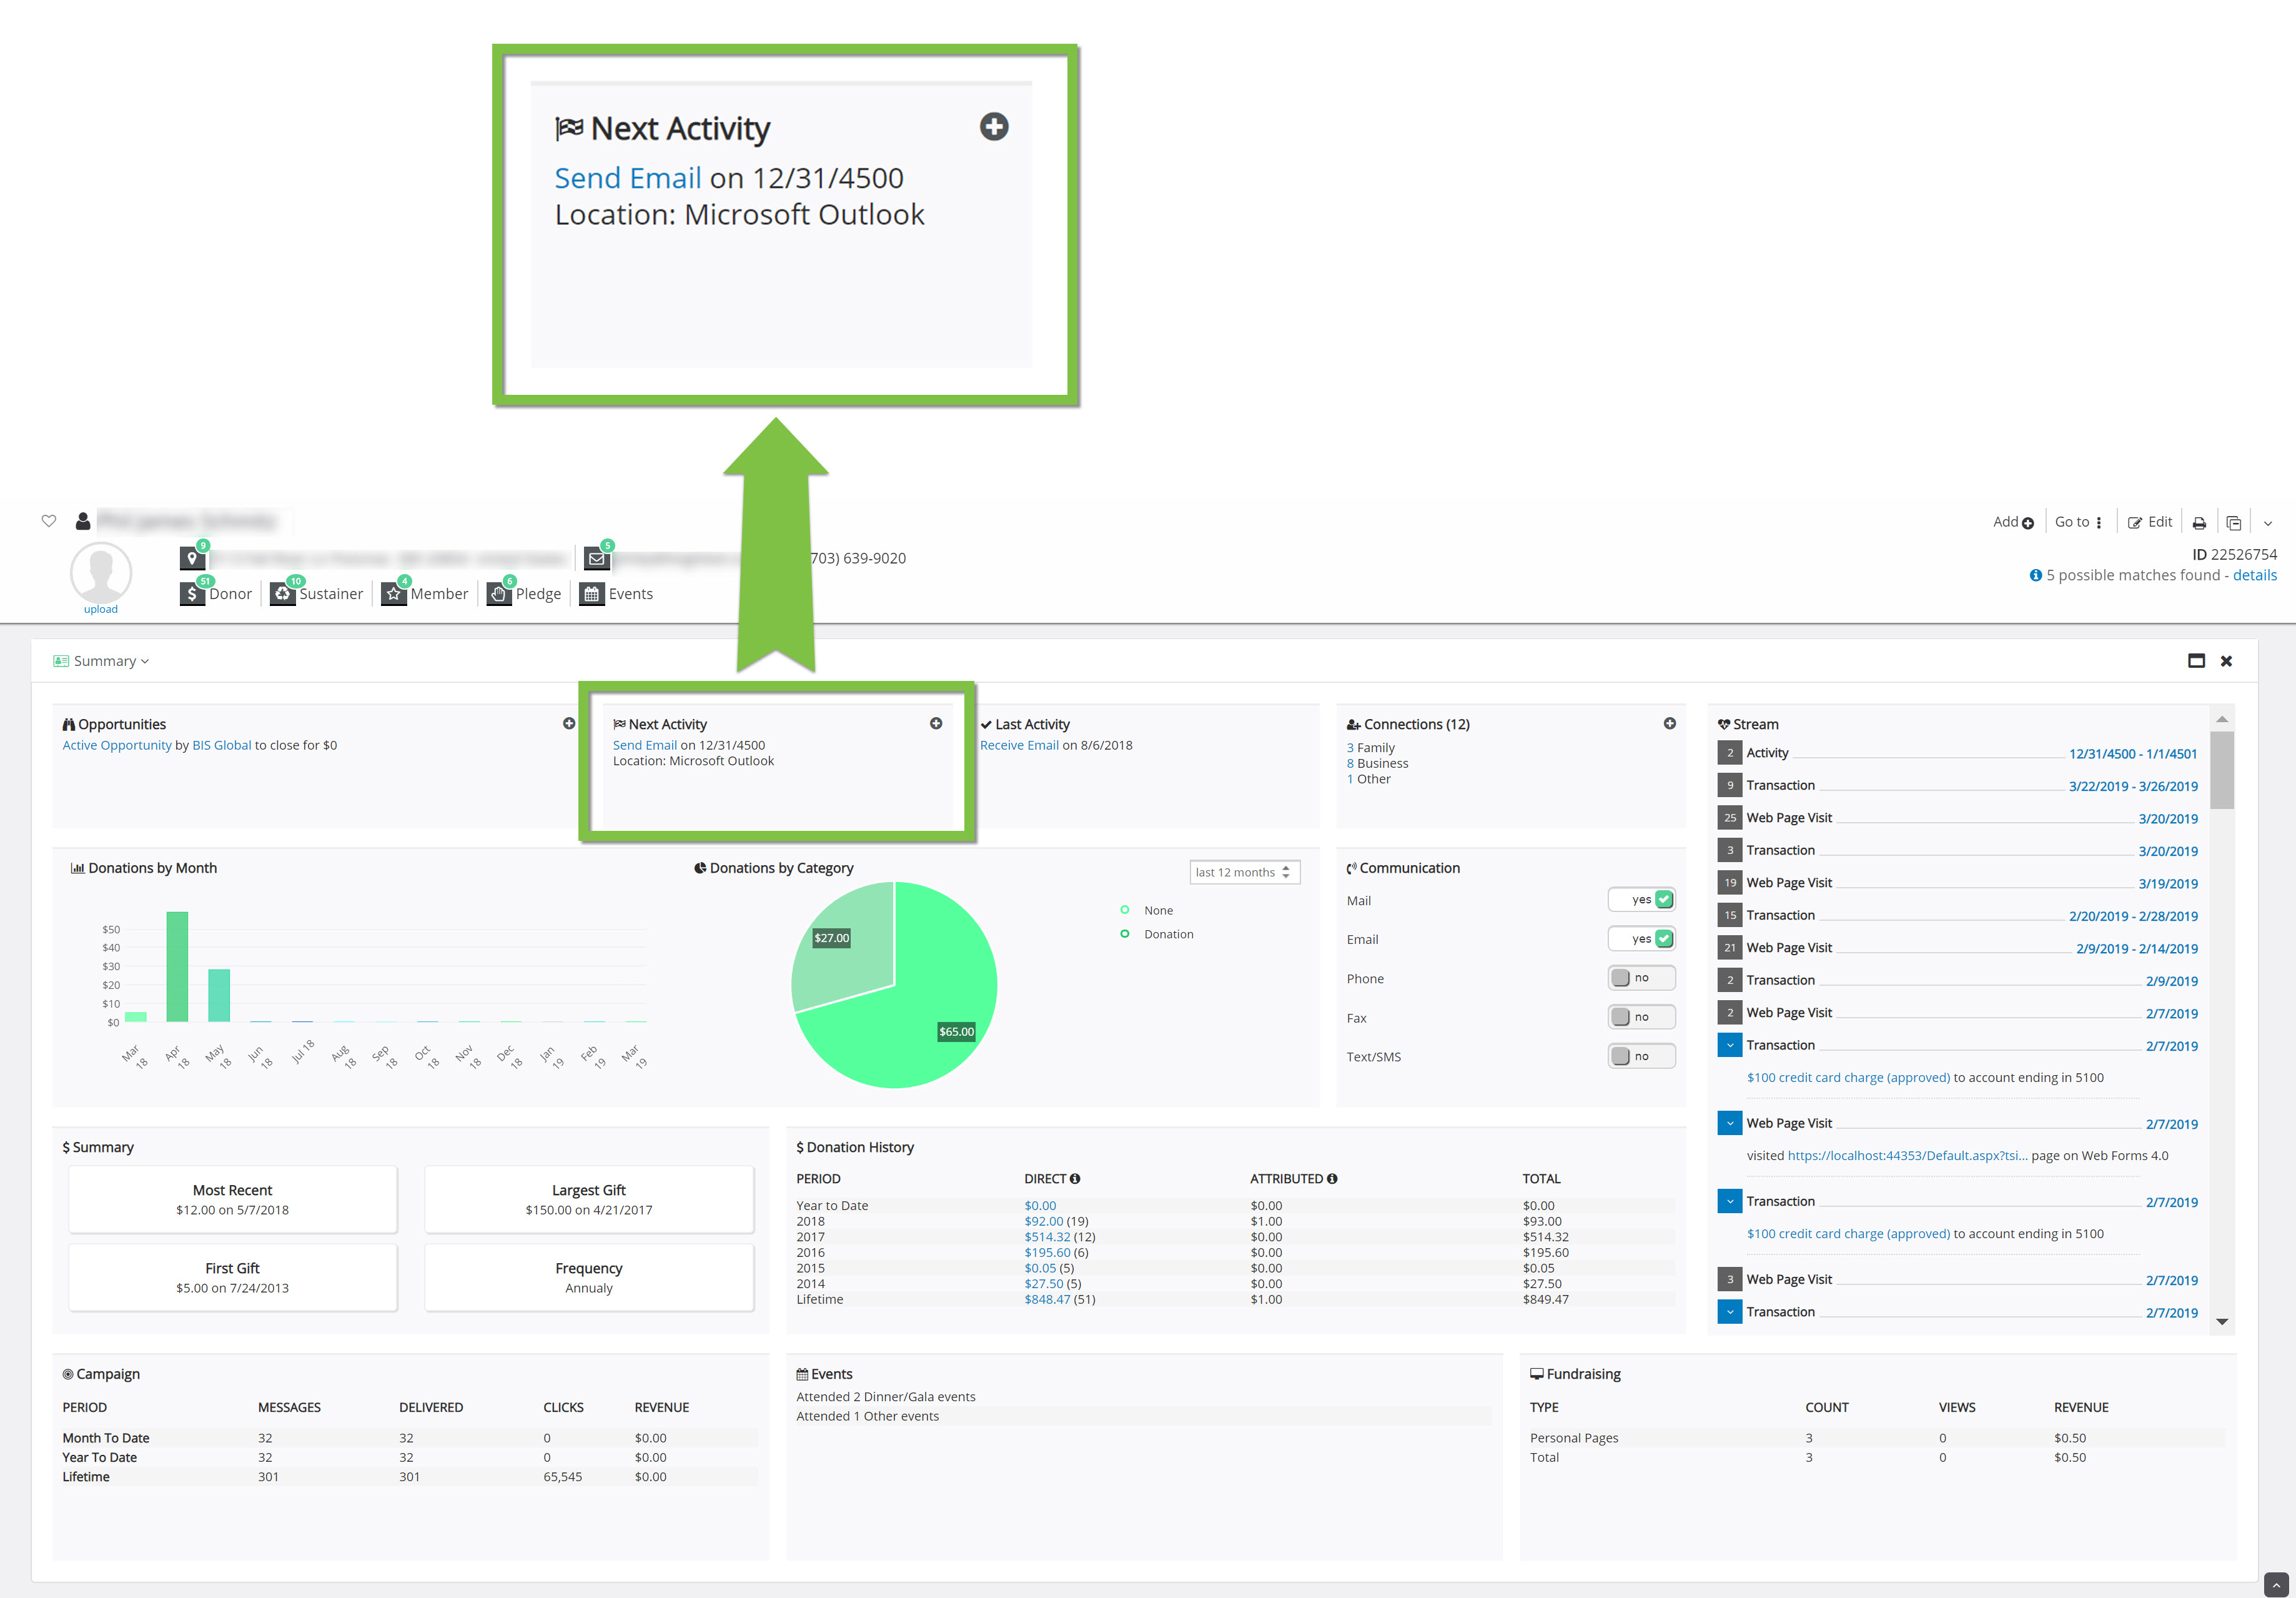
Opportunities
The Opportunities section displays active opportunities related to this contact.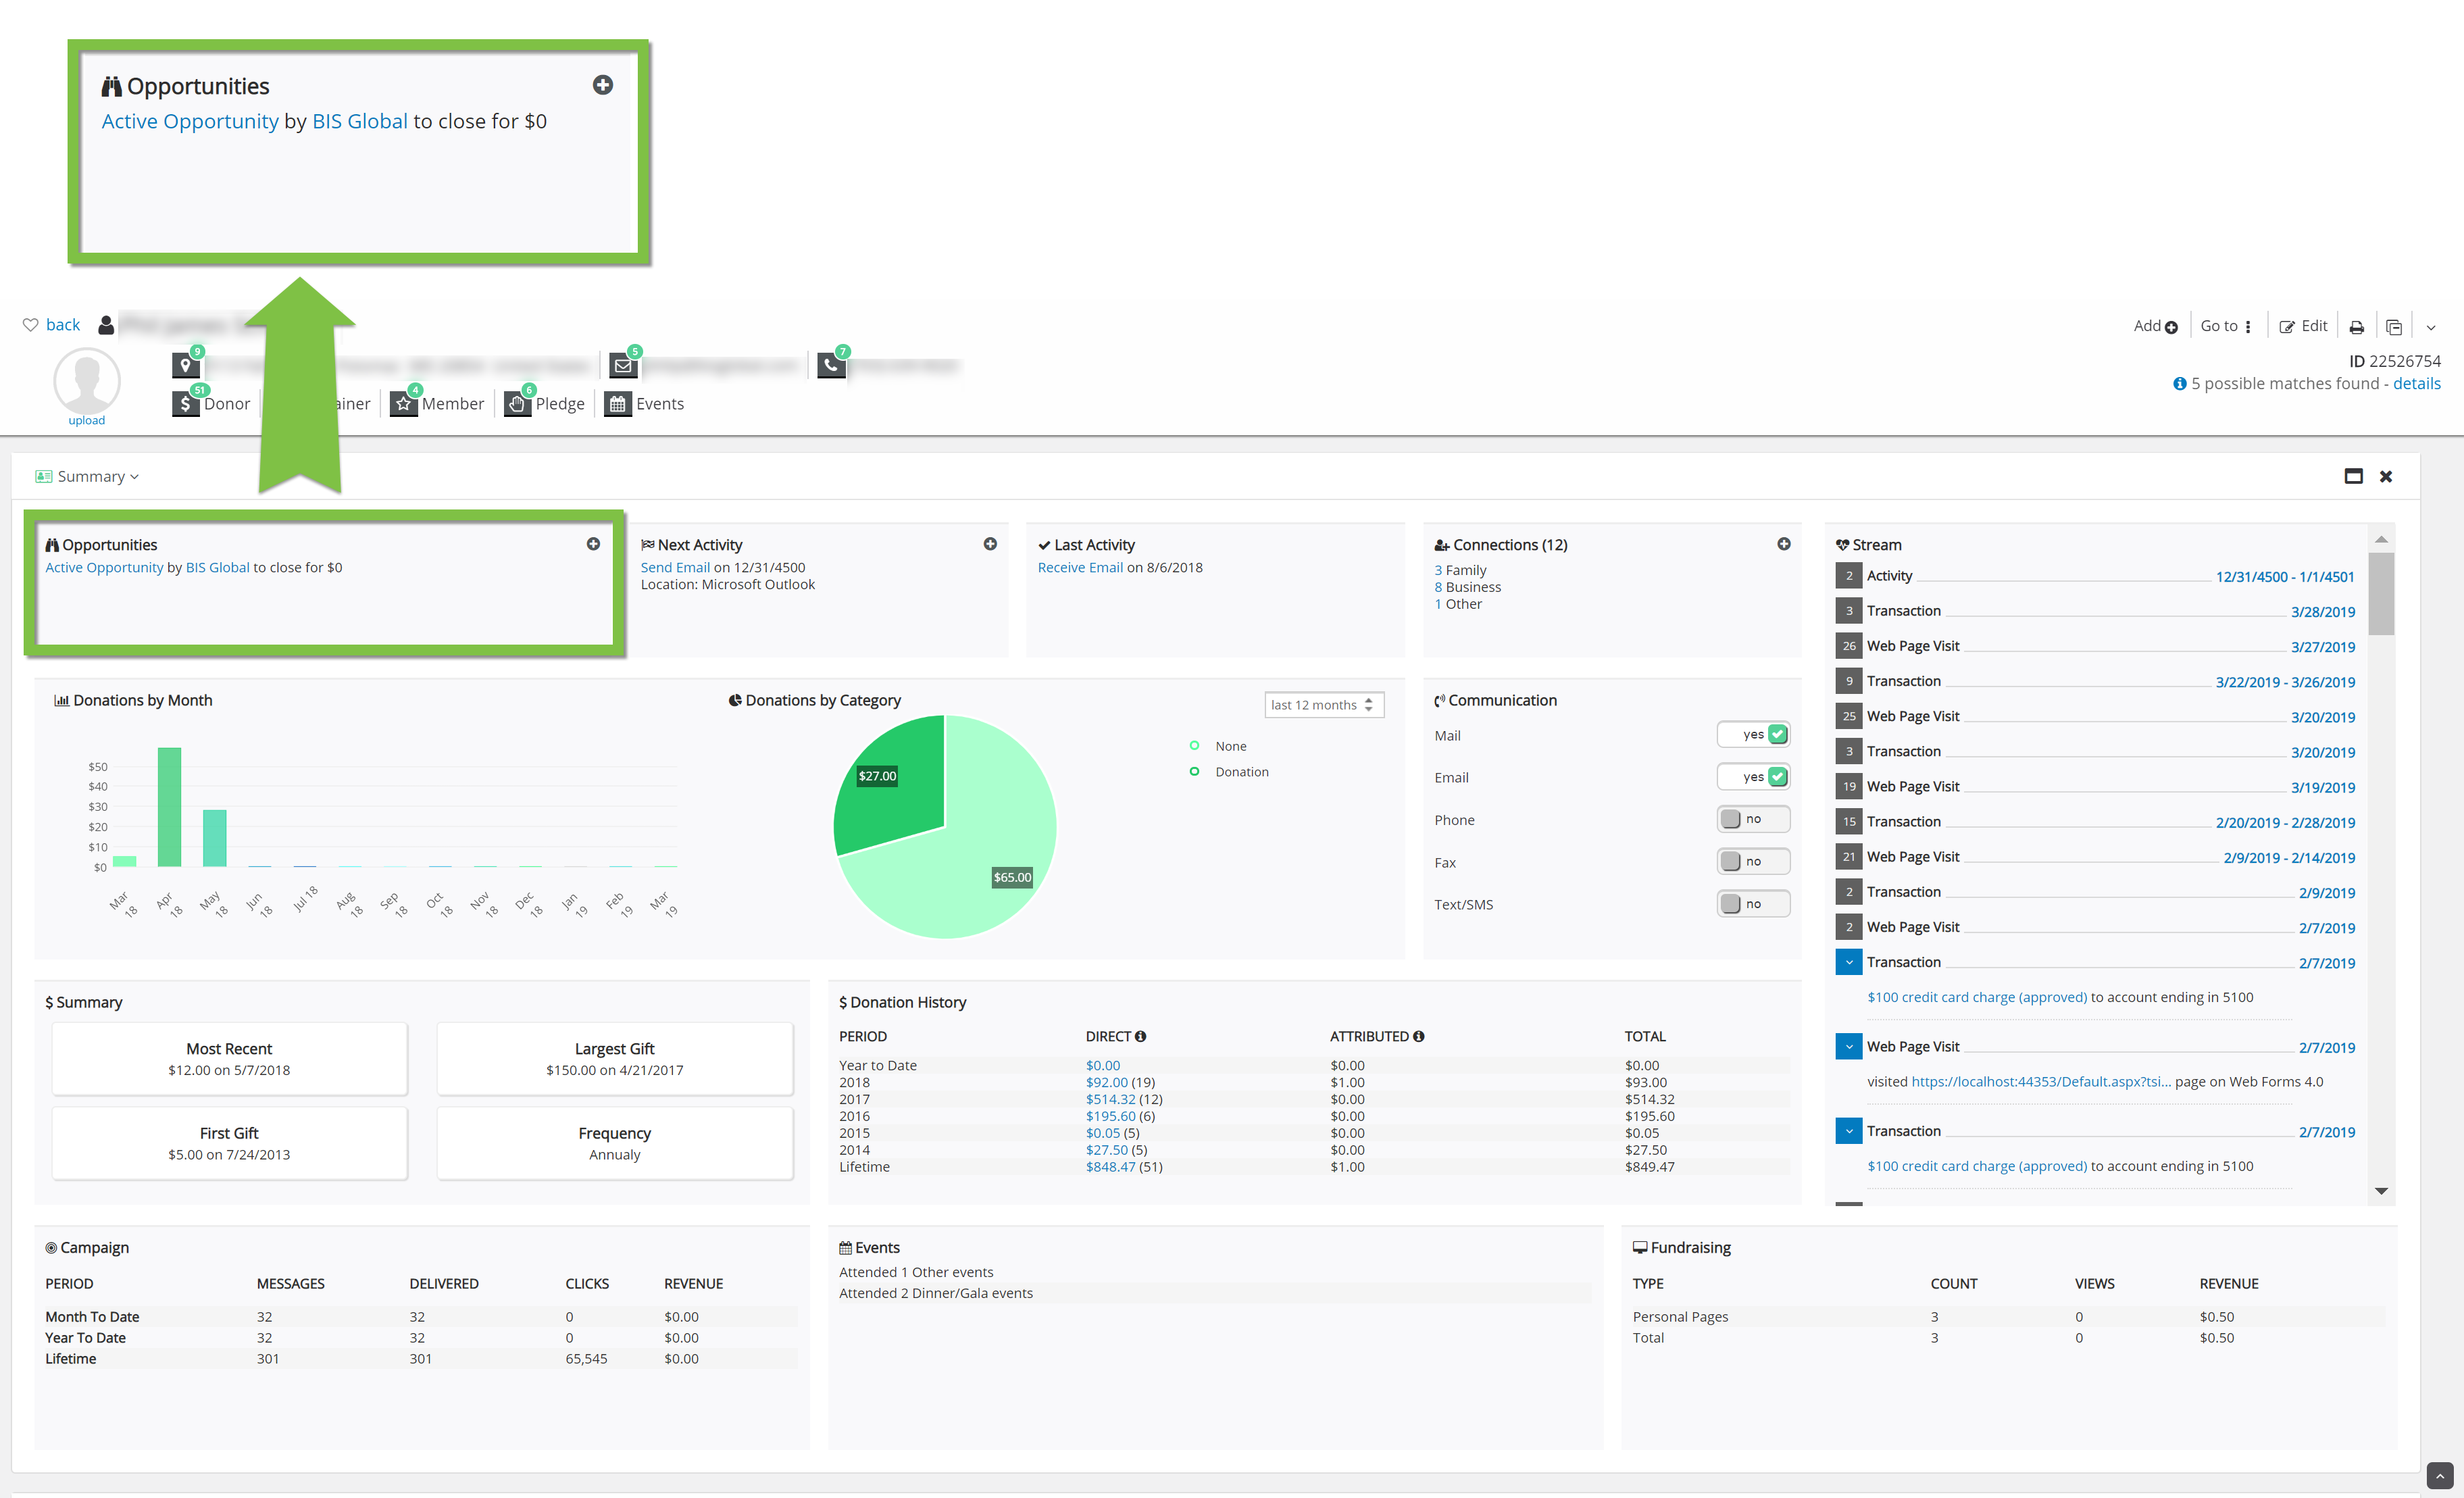
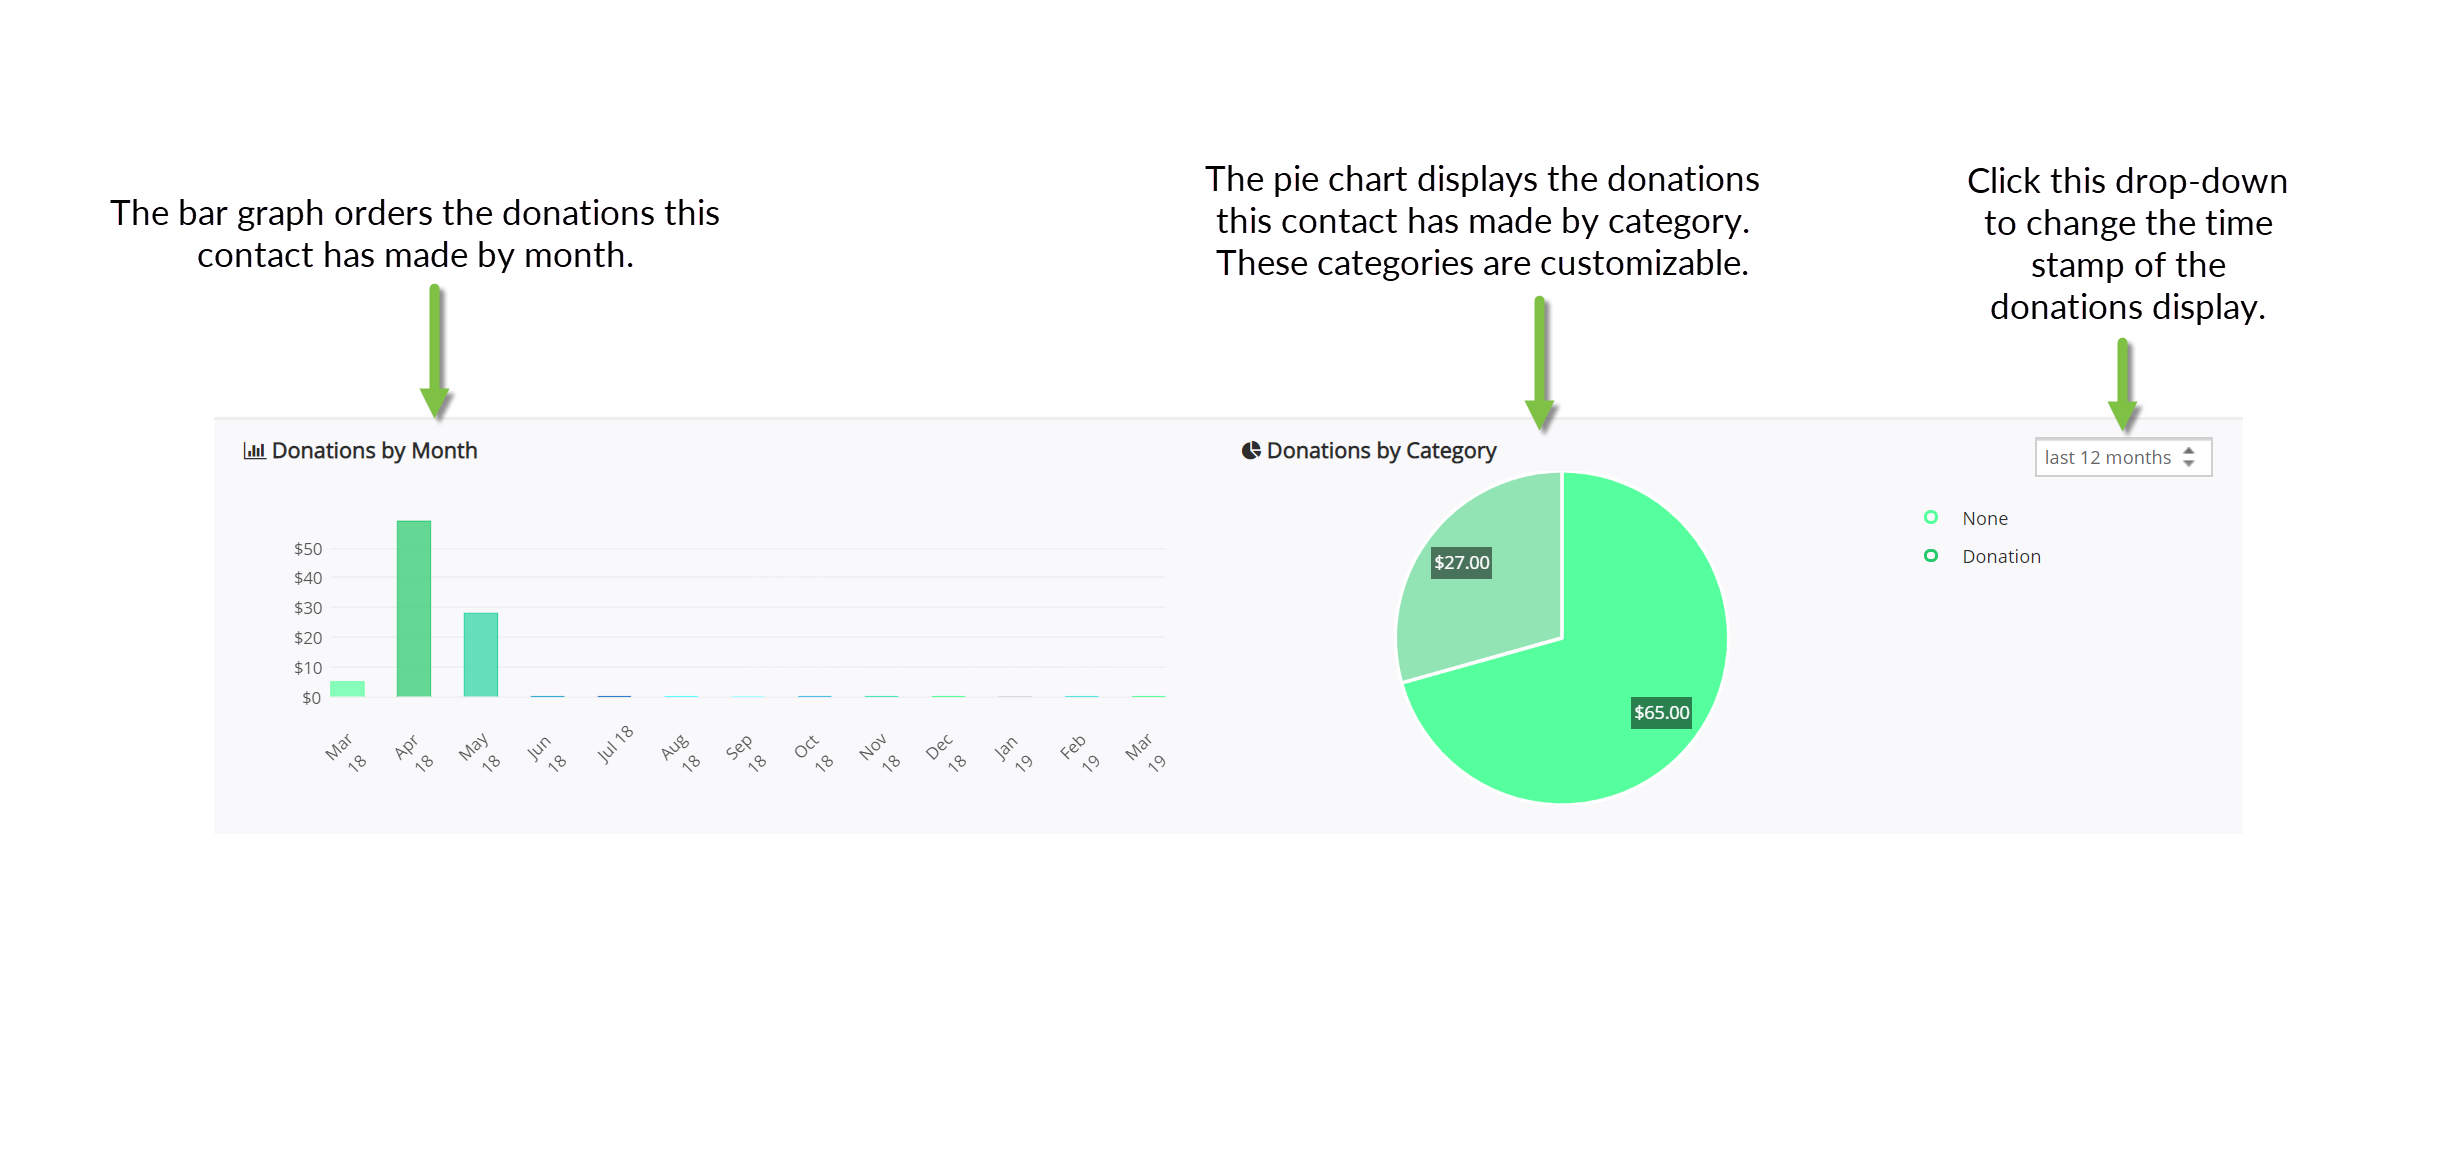
Donations
The donations section tracks the donations that this contact has made.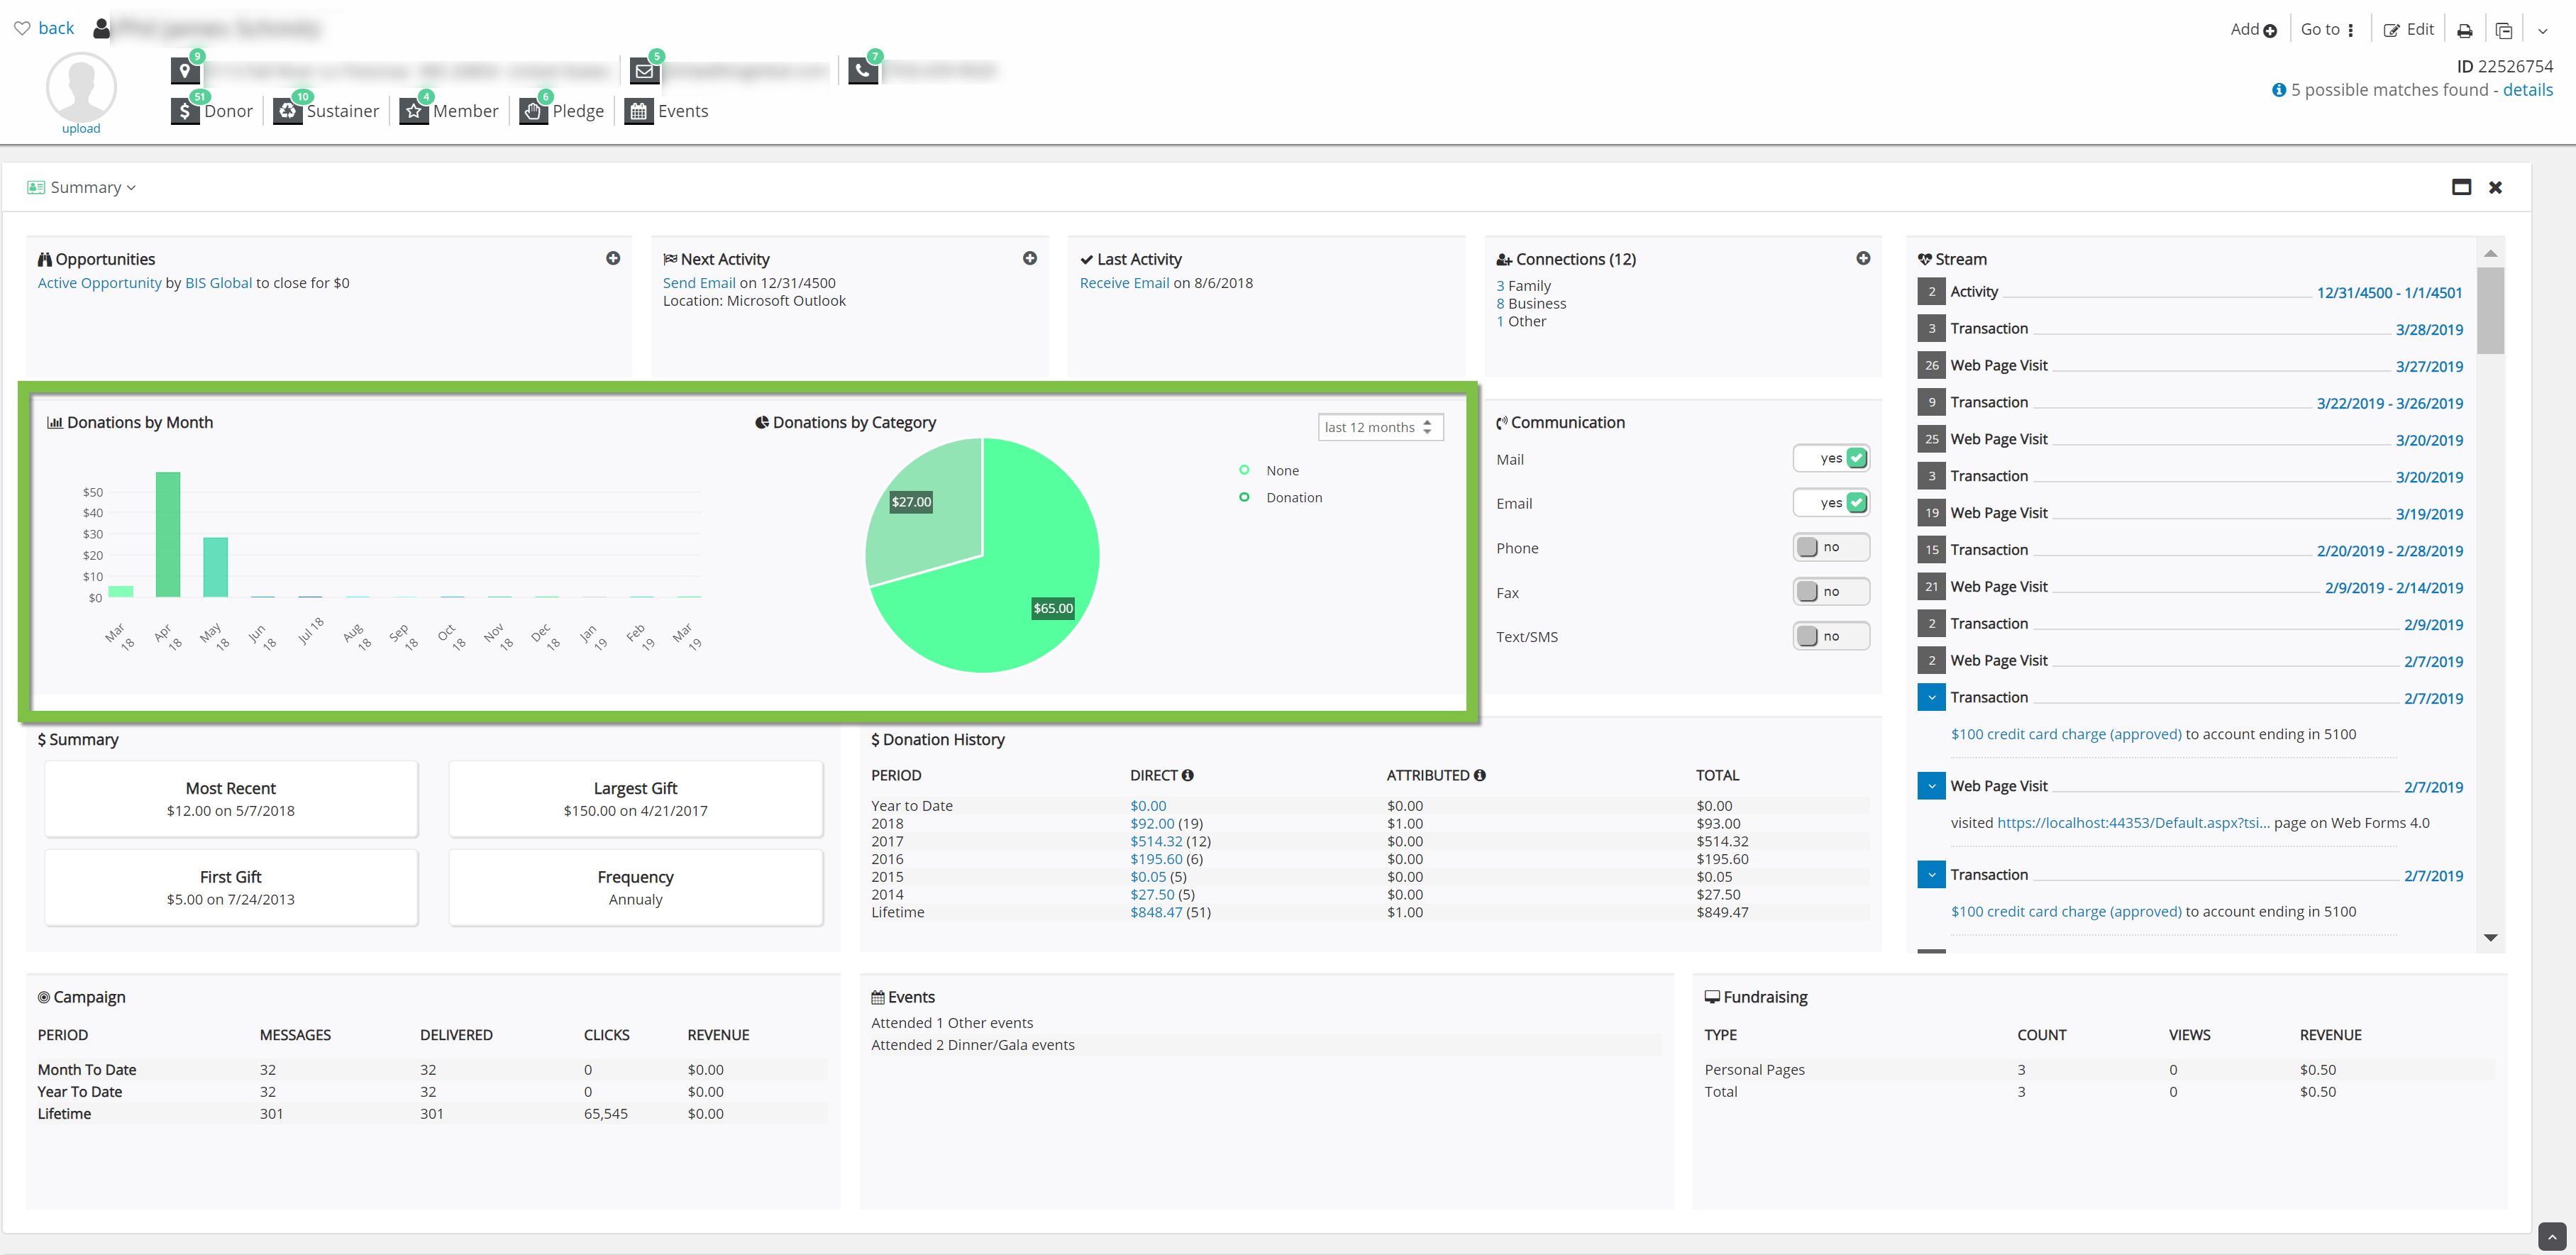
Communication
The communications section allows an administrator to change the communication preferences easily from the main page. The Communication preference is the global preference for the donor (i.e. if the user has more than 2 emails, all emails will be suppressed if the the communication flag is set to No)
Summary
The summary section is a small section of the contact record that displays a brief summary of the contact’s donation history.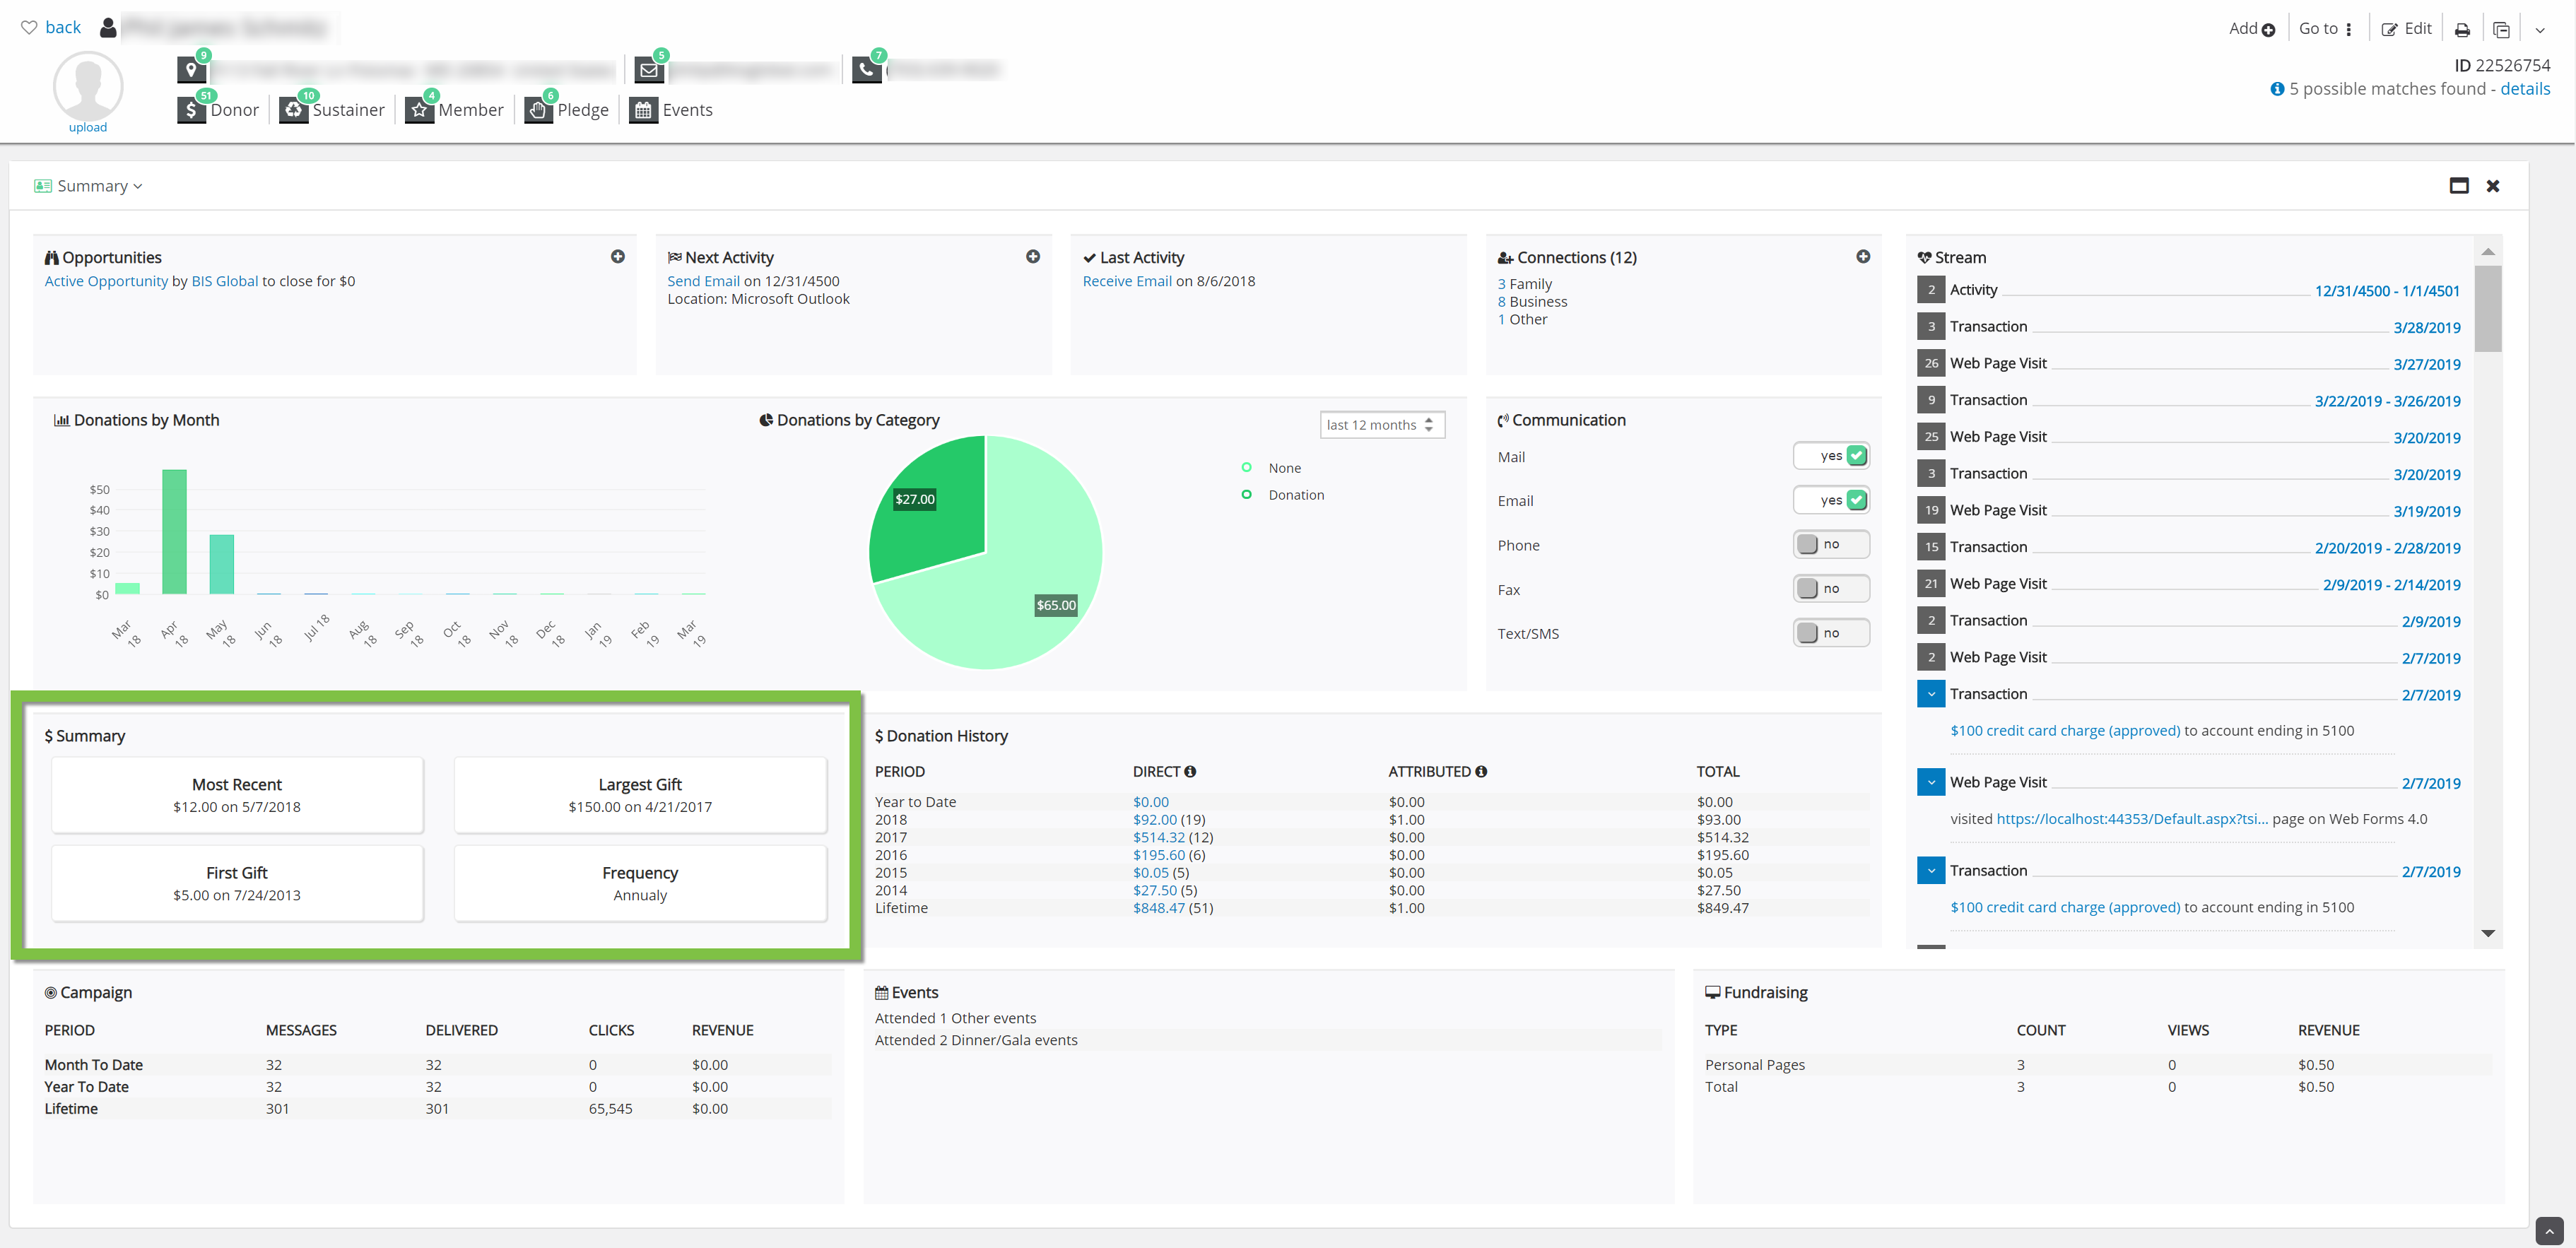
Donation History
The donation history section displays the history of the contact’s donations by year. It will track the direct donations, what parts of it were attributed, and the total. It will also track the total lifetime amount the contact has donated.
Attributed donations include donations to a Peer to Peer page where the contact is the owner.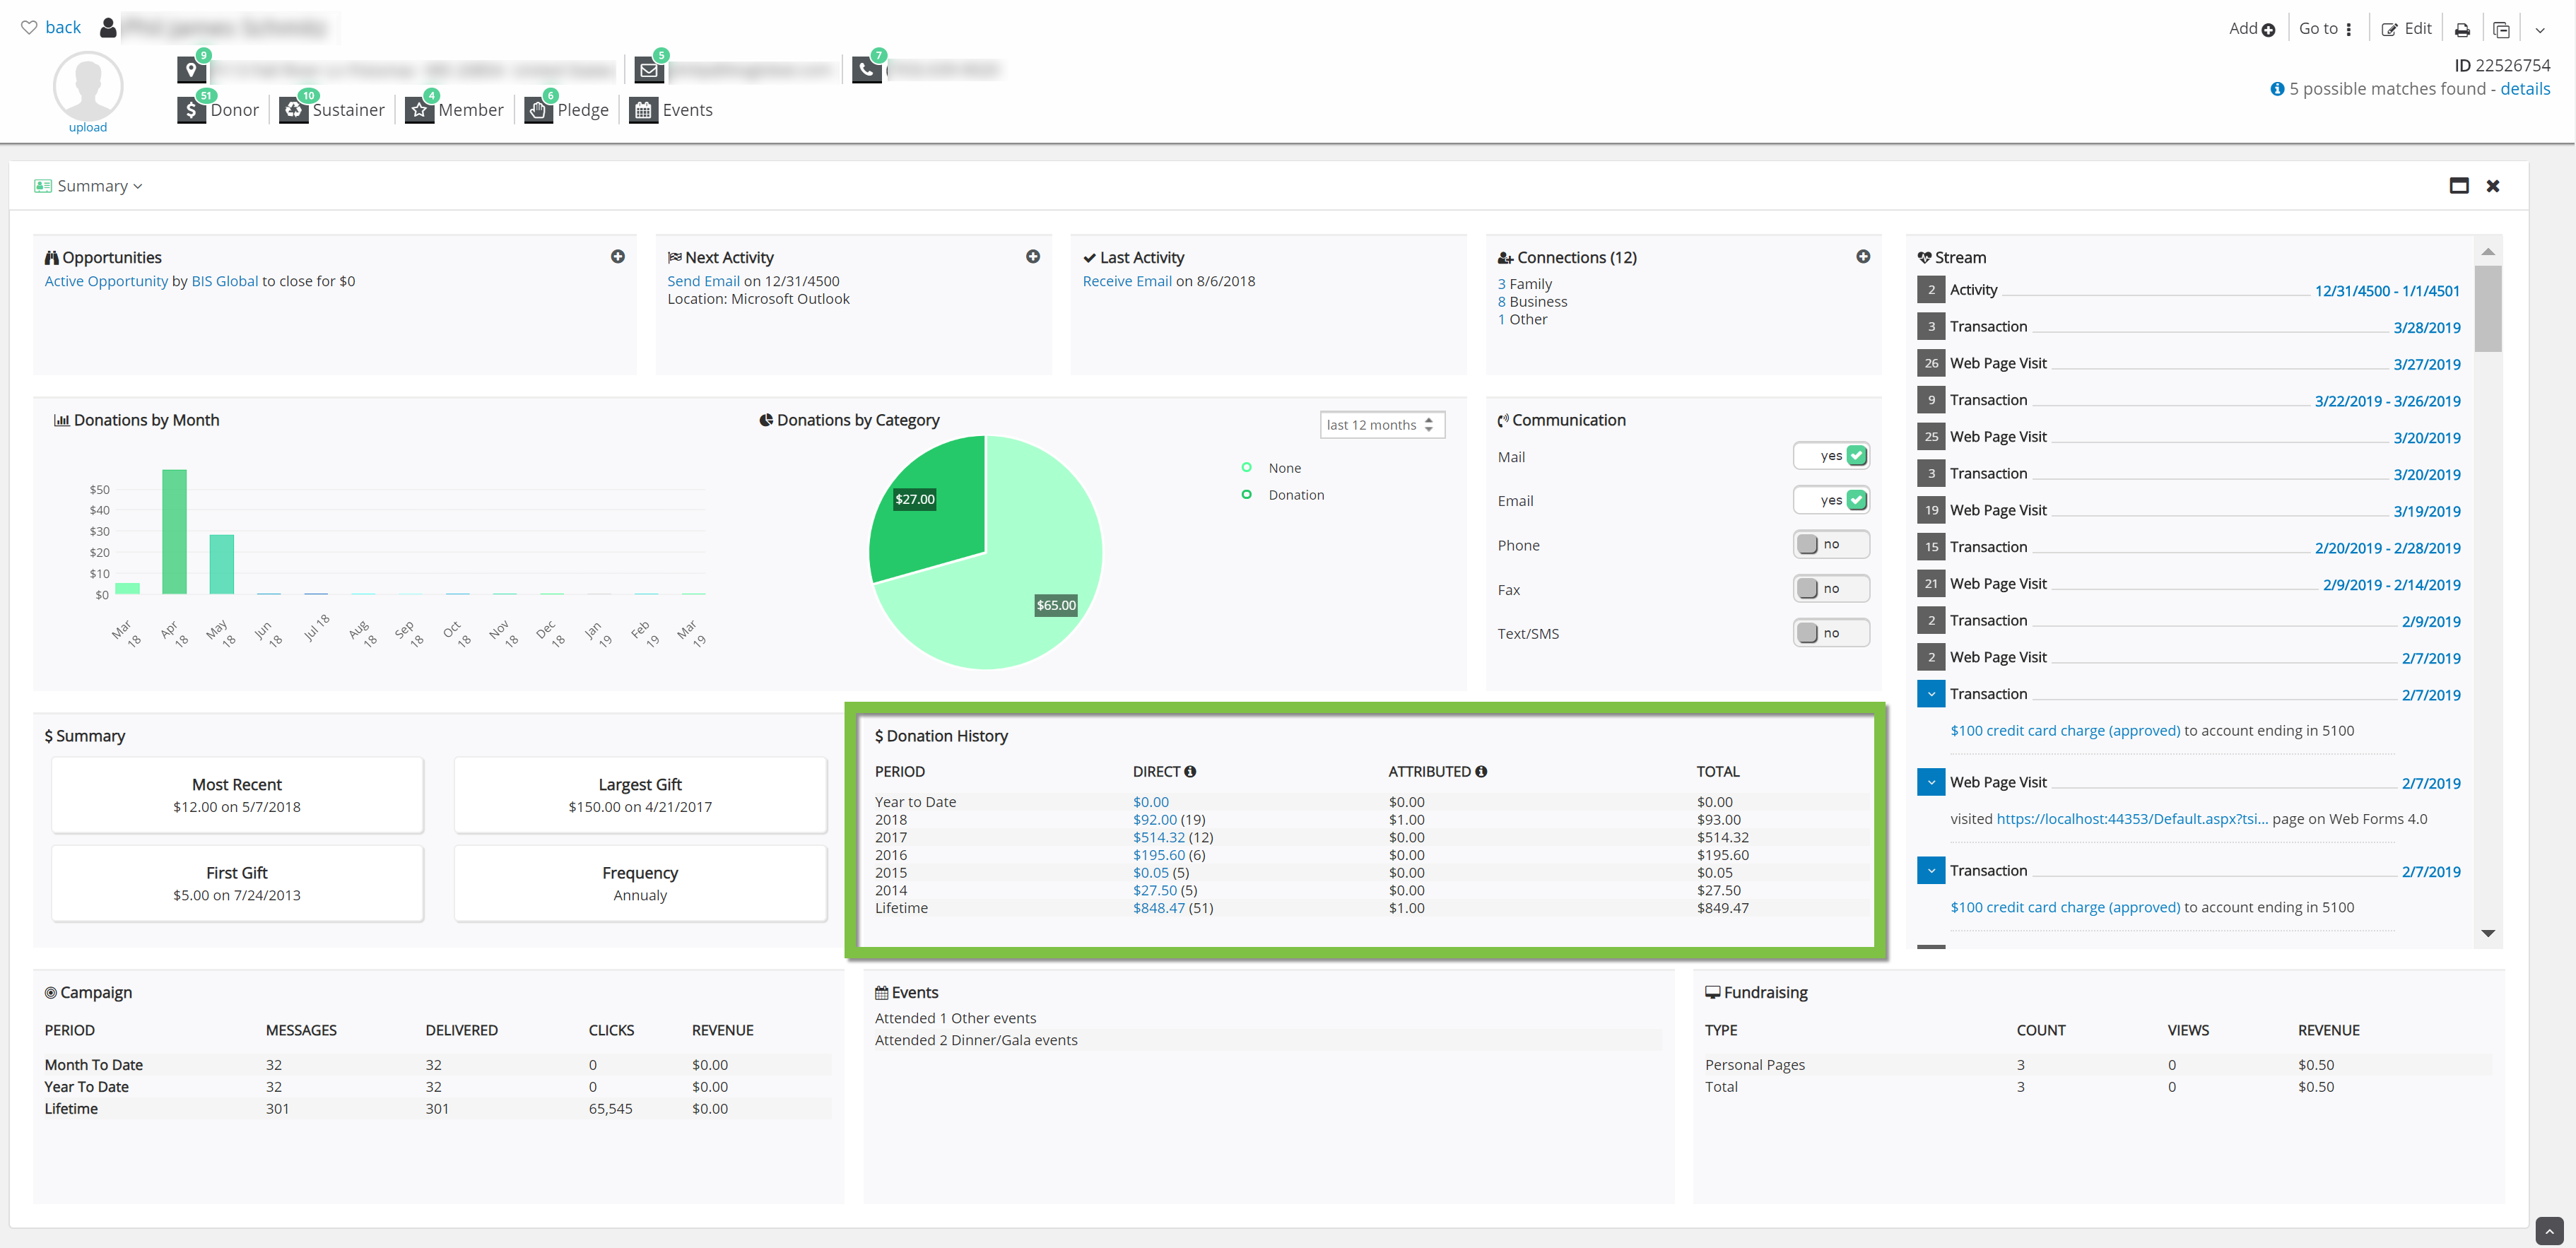
Campaign
The campaign section displays the total messages, delivered messages, clicks, and revenue through different periods of a contact’s email campaign.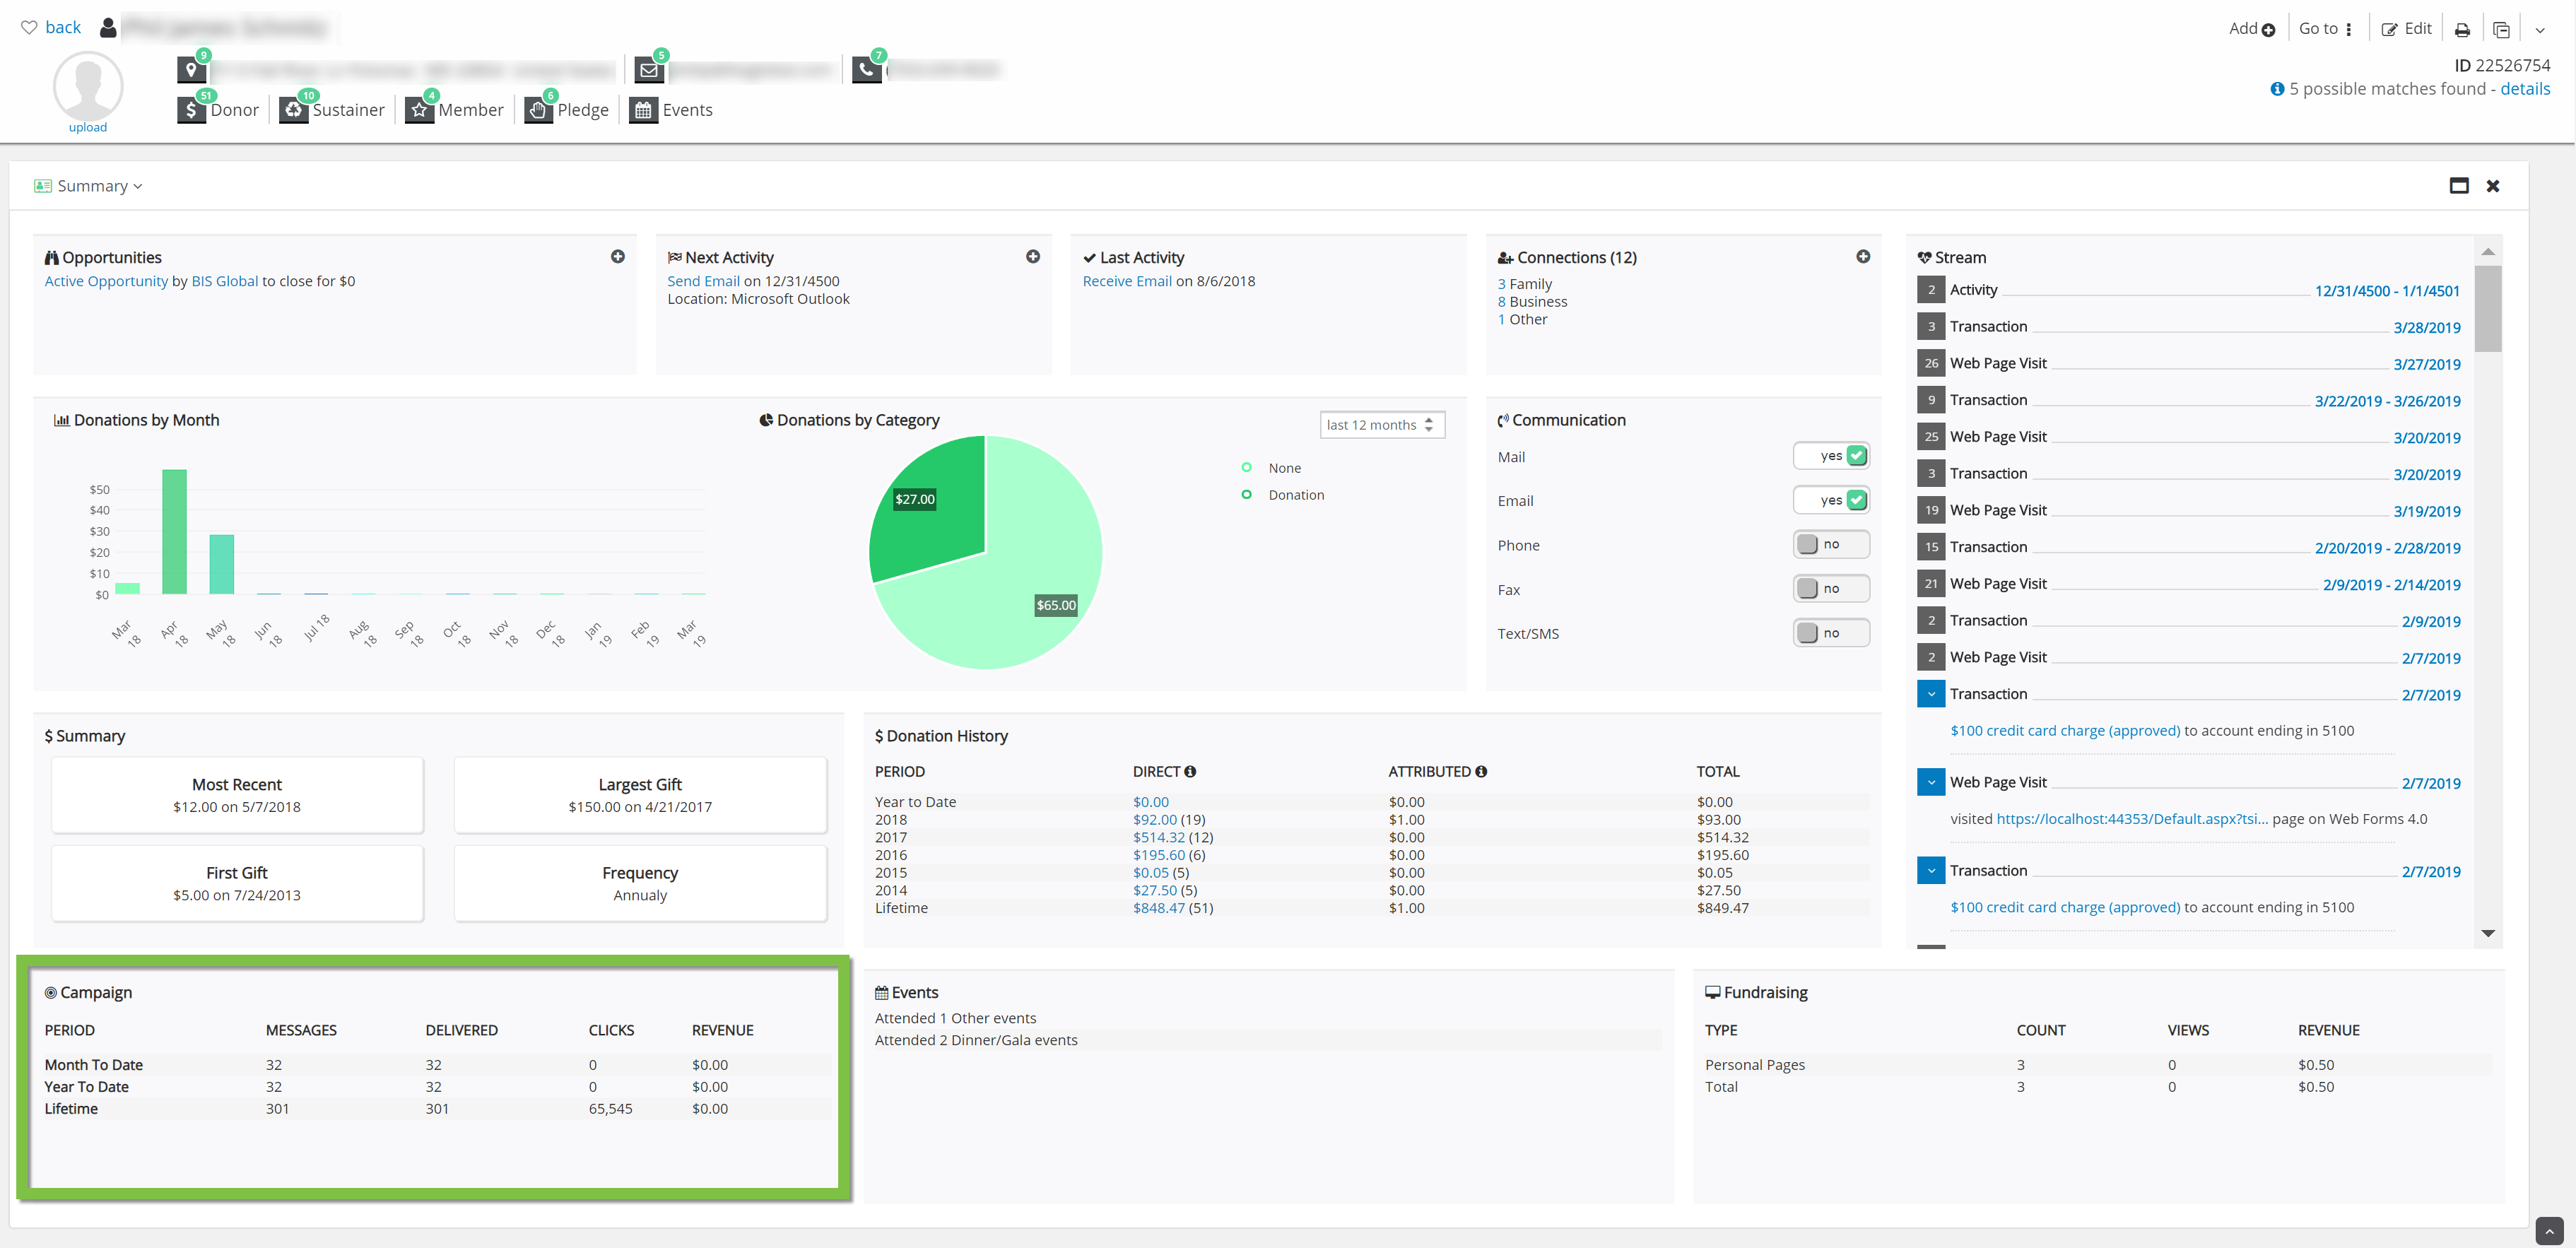
Events
The events section of a contact record lists the events that the contact has participated in.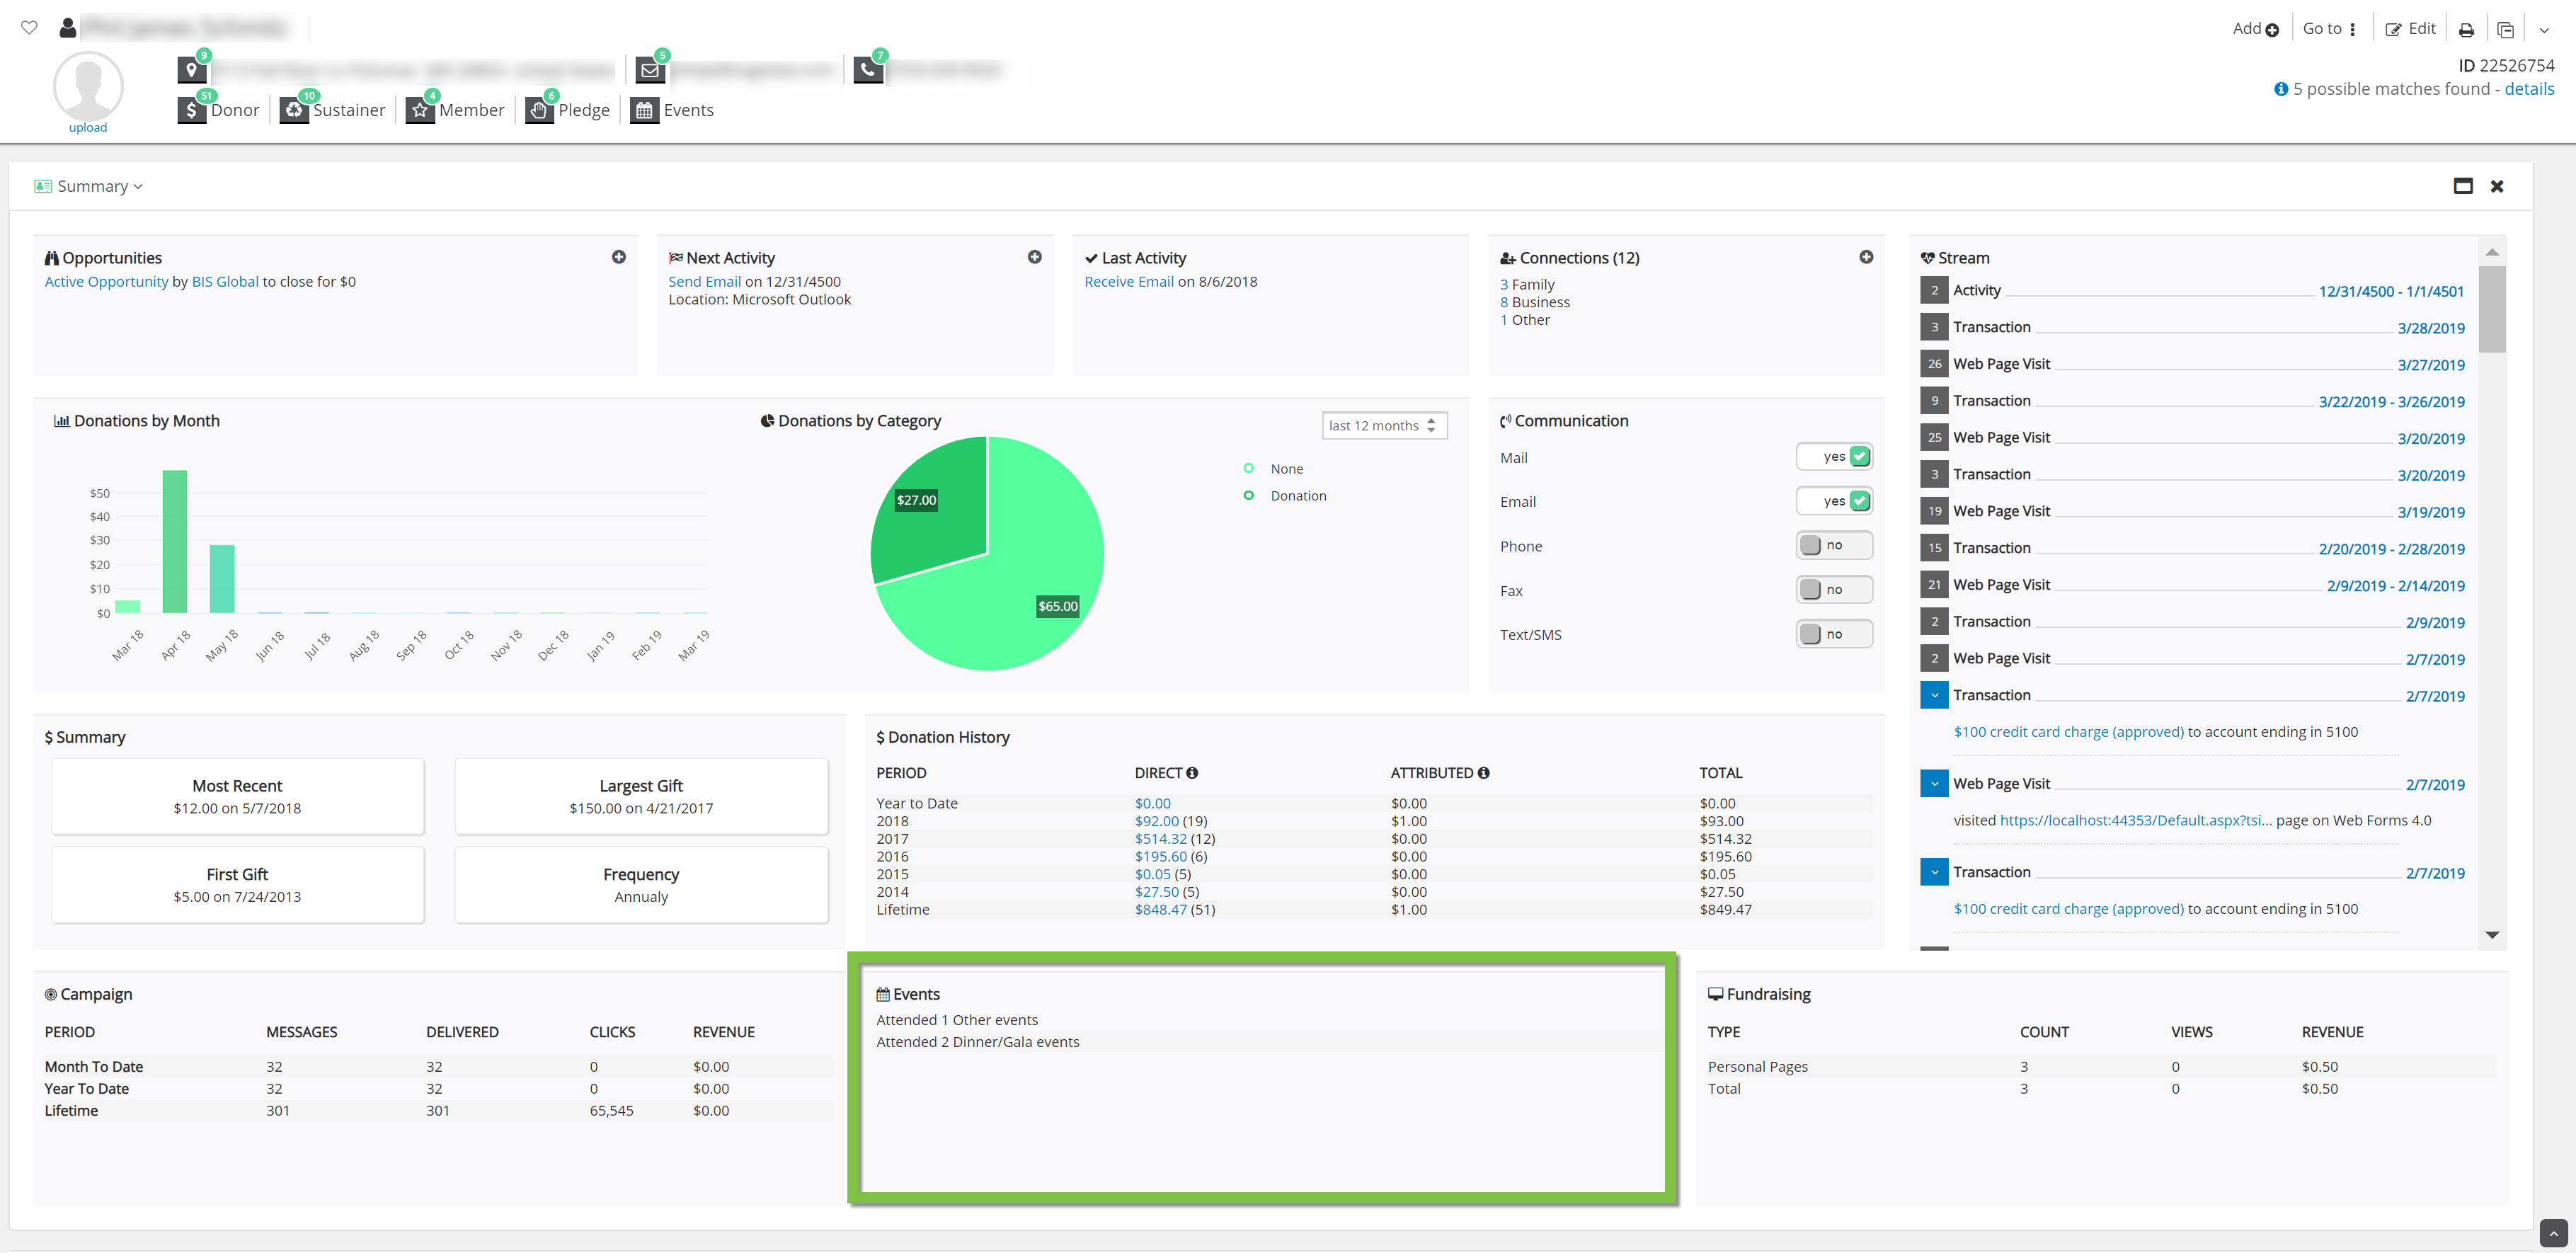
Fundraising
The fundraising section shows the fundraising that this contact has done, and the revenue that has been raised through their pages. This information comes from the contact’s Peer to Peer work.
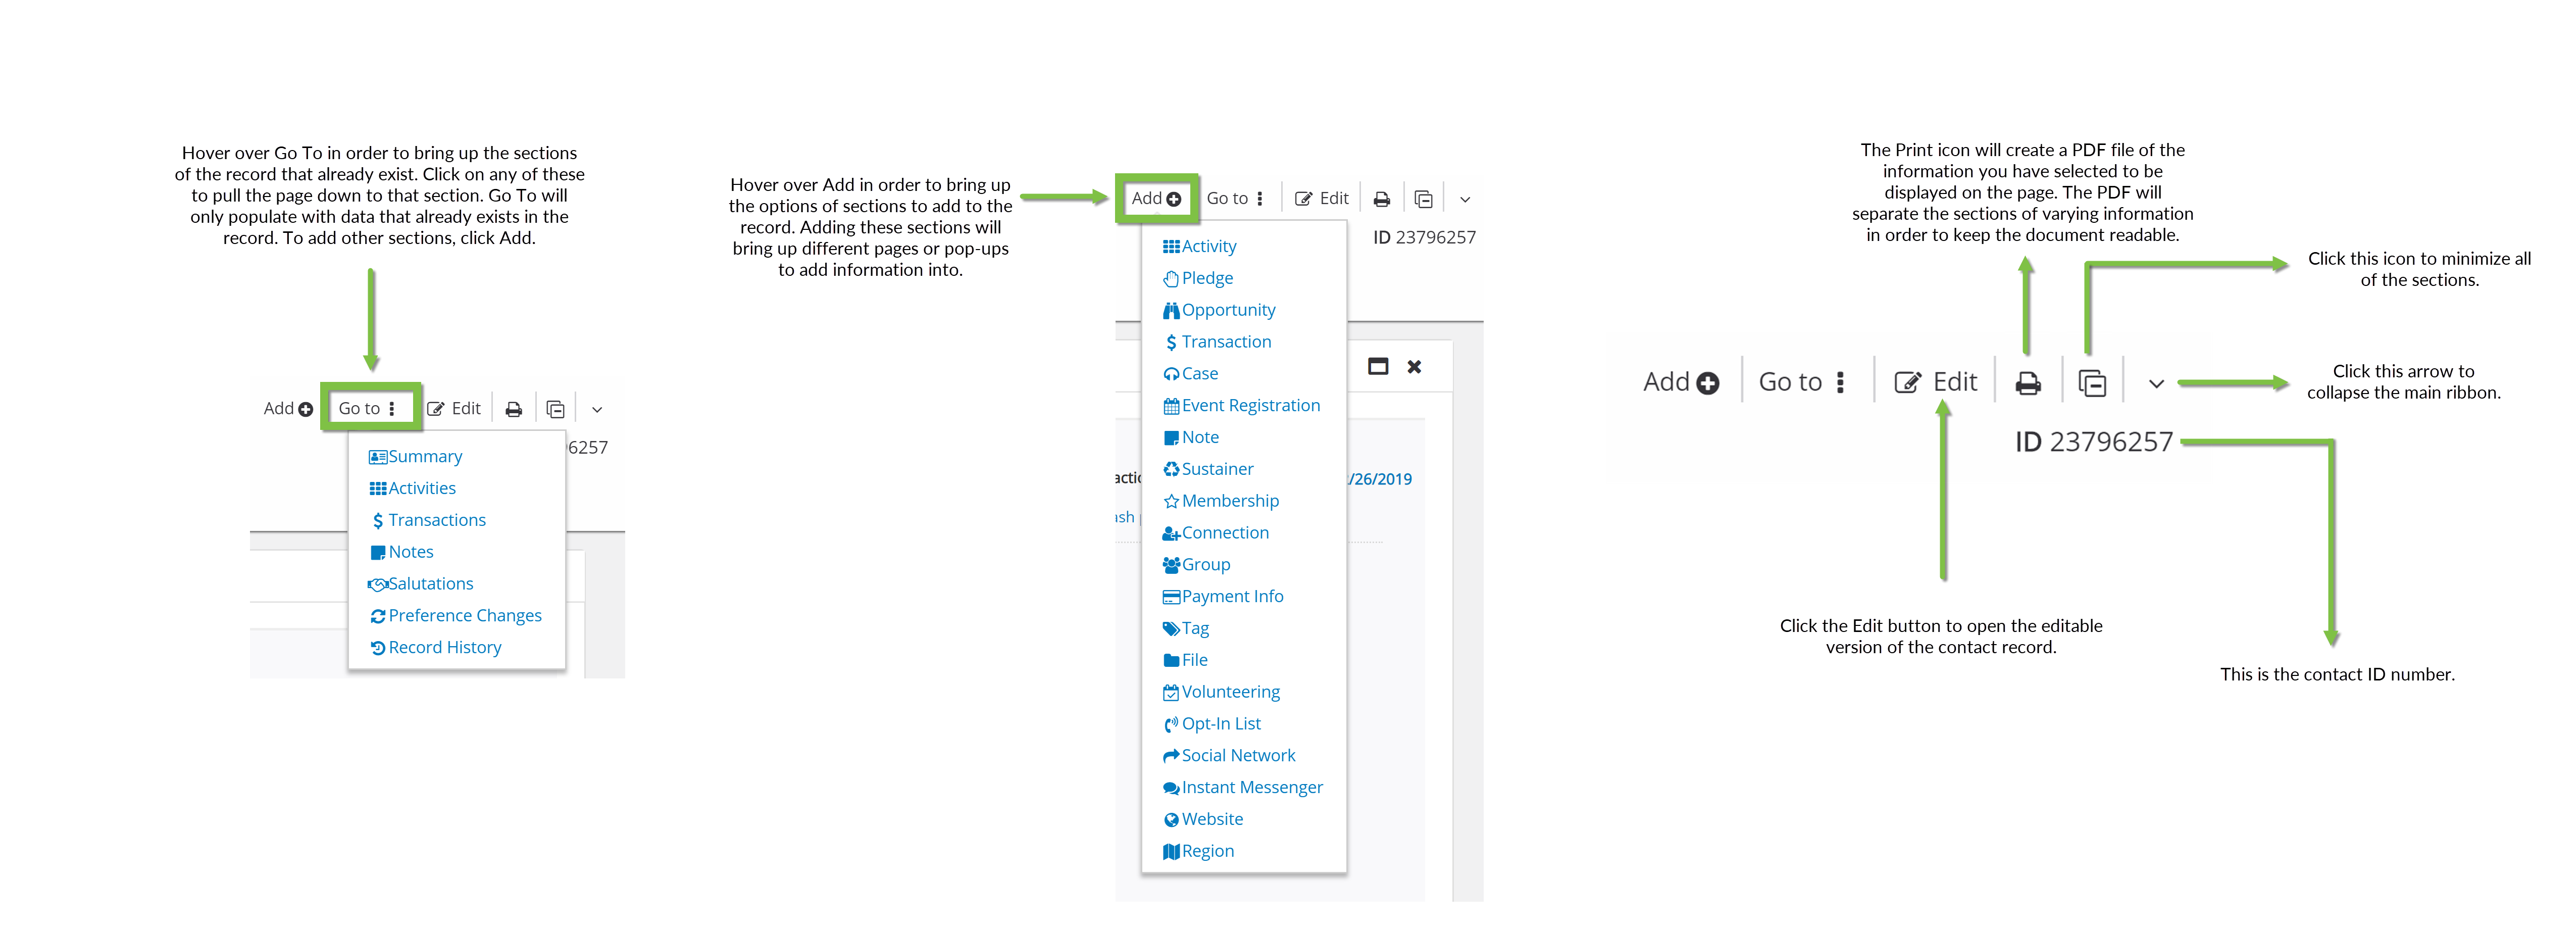
Add and Go-To Buttons
There is a short list of icons at the top of the contact record page, including Add, Go To, Edit, Print, and Minimize.
Add: Hover over Add in order to bring up the options of sections to add to the record. Adding these section will bring up different pages or pop-ups to add information into.
Go To: Hover over Go To in order to bring up the sections of the record in which there is already data. Click on any of these to navigate to that section of the Contact Summary.
NOTE: Clicking the X on a single panel will make the panel disappear. This is useful for creating easy-to-read PDFs with only the relevant information about the contact on them (See the Printing the Contact Summary Page documentation for more information). Once the panel is gone, you can always bring it back. Under Go To, the panel title will be grayed out. Simply click on the grayed-out title to make the panel reappear on the page.
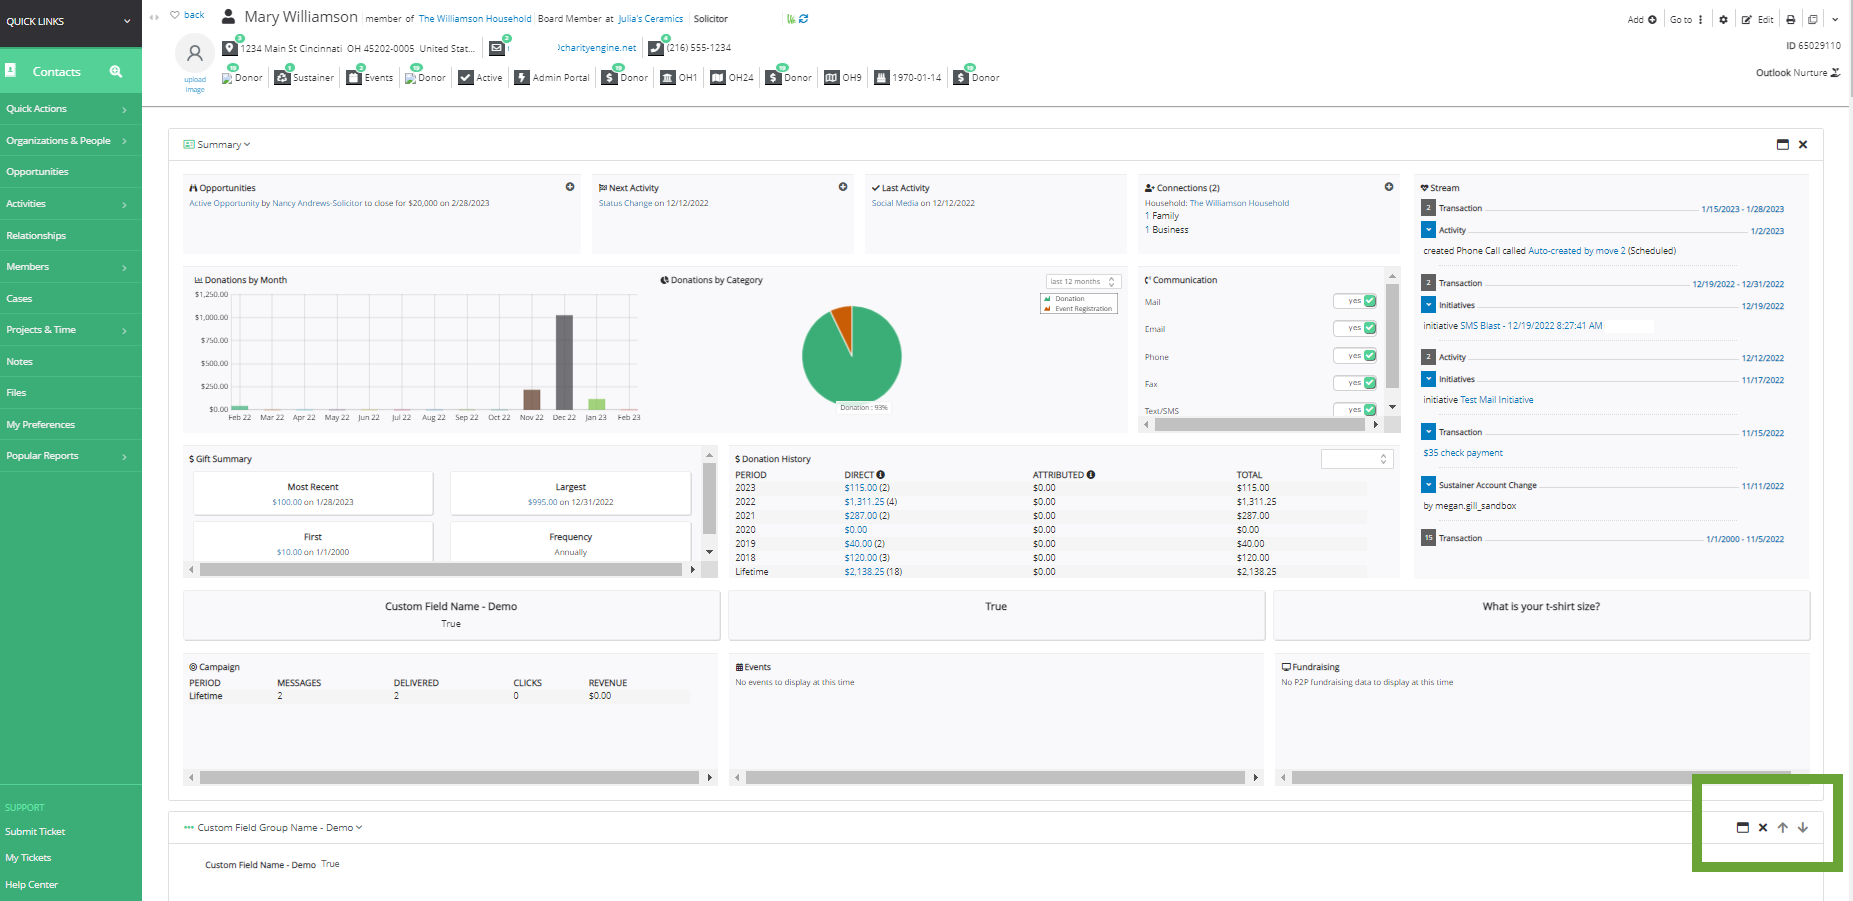
Customizing Panel Views
Each section, or panel, can be moved, deleted, or viewed in full screen. Use the Up and Down arrows to customized your preferred and most frequently used panels. Click on the Box icon to view the panel in a full screen. Or click on the X icon to remove the panel from your view.
Panels that are removed or closed can be reopened using the Go To menu in the upper right hand corner of the record.
Note: Adjustments to panel views and order are applied to the individual user and are applied to all contact records. Making adjustments to the panel views will not impact other CharityEngine users.