Introduction
Badges provide a quick way to identify important information on contact records. Badges appear at the top of the Contact Record page, allowing users to view key details without searching through the full record.
CharityEngine includes preconfigured system badges that are applied automatically when a record meets specific criteria. Users can also create and assign custom badges to contact, household, and organization records.
Custom badges can be configured in three ways:
- Manual: Assigned directly by a user.
- Mapped Field: Displayed when a selected system or custom field contains data.
- Computed: Applied based on the results of a query or report.
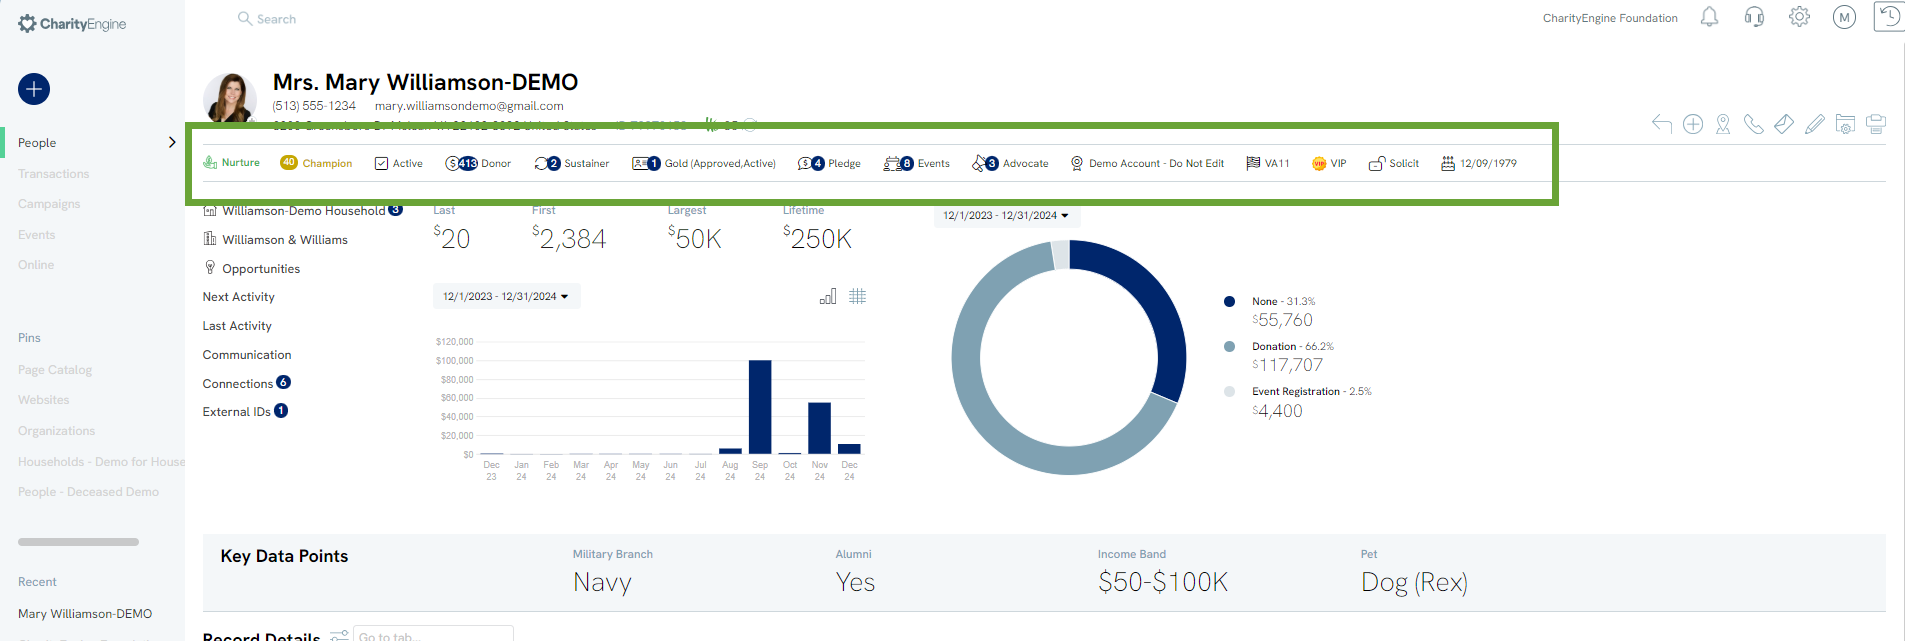
Table of Contents
Instructions - System Badges
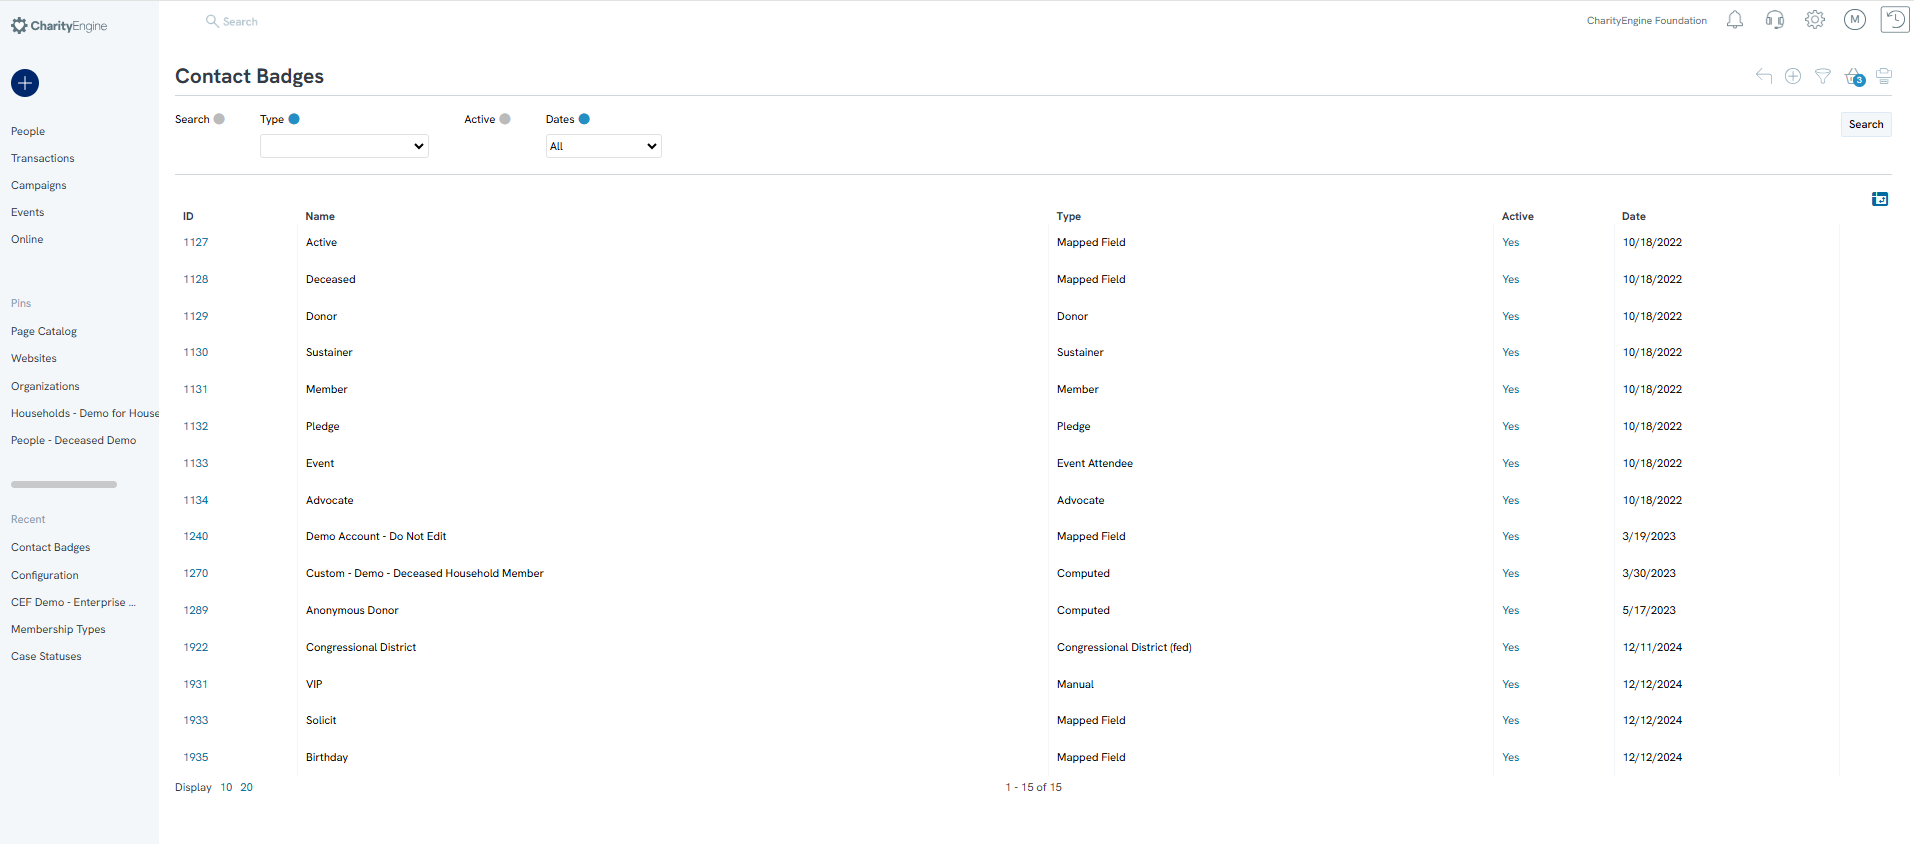
CharityEngine includes default System Badges, such as Donor, Sustainer, Member, and Pledge. These badges are displayed at the top of the contact record.
To view system badges, navigate to Configuration > Contacts > Badges. A list of existing system badges will be displayed.
Instructions - Custom Badges: Manual Entry
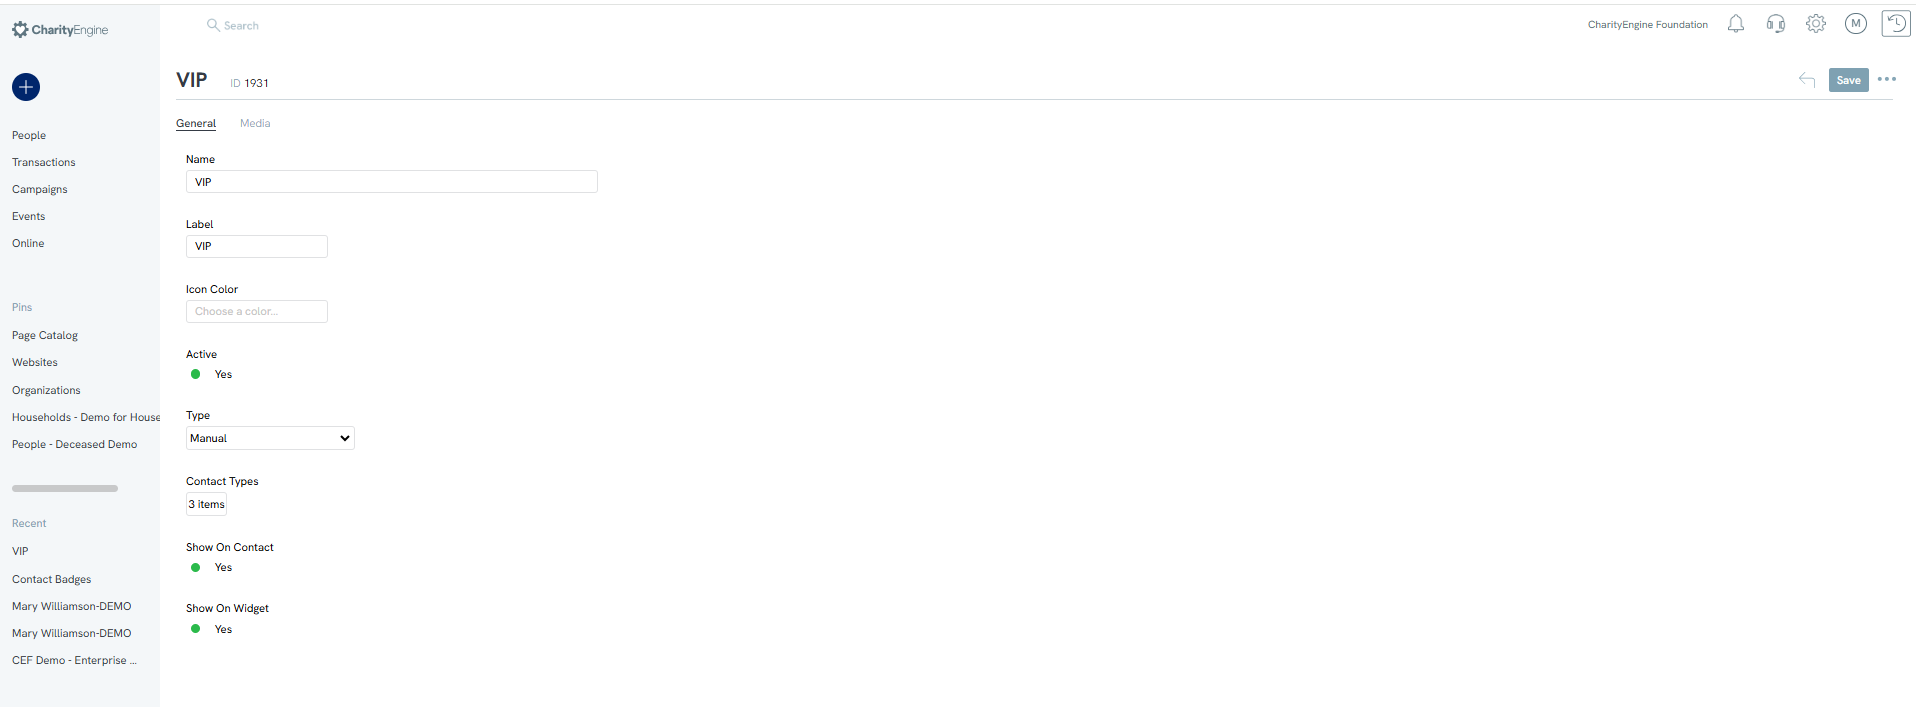
To create a manual badge, navigate to Configuration > Contacts > Badges.
Click Create New.

Complete the following fields:
- Name: Enter an internal name for the badge.
- Label: Enter the user-facing label that will appear on the contact record and in the user interface.
- Icon Color: Select an icon color, if desired.
- Active: Select Yes.
- Type: Select the appropriate badge type.
- Contact Types: Select Manual from the drop-down menu.
- Show on Contact: Select Yes to display the badge at the top of the contact record.
- Show on Widget: Select Yes to display the badge on the Search or Listing screen when using Card View.
Navigate to the Media tab to add a custom image.
Click Save to save the badge.
To manually assign the badge:
- Open the contact record.
- Click the Edit pencil icon.
- Open the Badges tab.
- Select the badge.
- Click Save.


Instructions - Custom Badges: Mapped Fields
Mapped Field badges are displayed when a selected CharityEngine system field or custom field contains data. This is useful when you want to highlight specific information directly on a record.
Navigate to Configuration > Contacts > Badges, and then click Create New.
Complete the following fields:
- Name: Enter an internal name for the badge.
- Label: Enter the user-facing label that will appear on the contact record and in the user interface.
- Icon Color: Select an icon color, if desired.
- Active: Select Yes.
- Type: Select Mapped Field from the drop-down menu.
- Contact Types: Select the contact types on which the badge should appear.
- Show on Contact: Select Yes to display the badge at the top of the contact record.
- Show on Widget: Select Yes to display the badge on the Search or Listing screen when using Card View.
- Map Type: Select whether the badge will use a CharityEngine system attribute or a custom field.
- Attribute: Select the system attribute or custom field that will control the badge.
Navigate to the Media tab to add a custom image.
Click Save to save the badge.
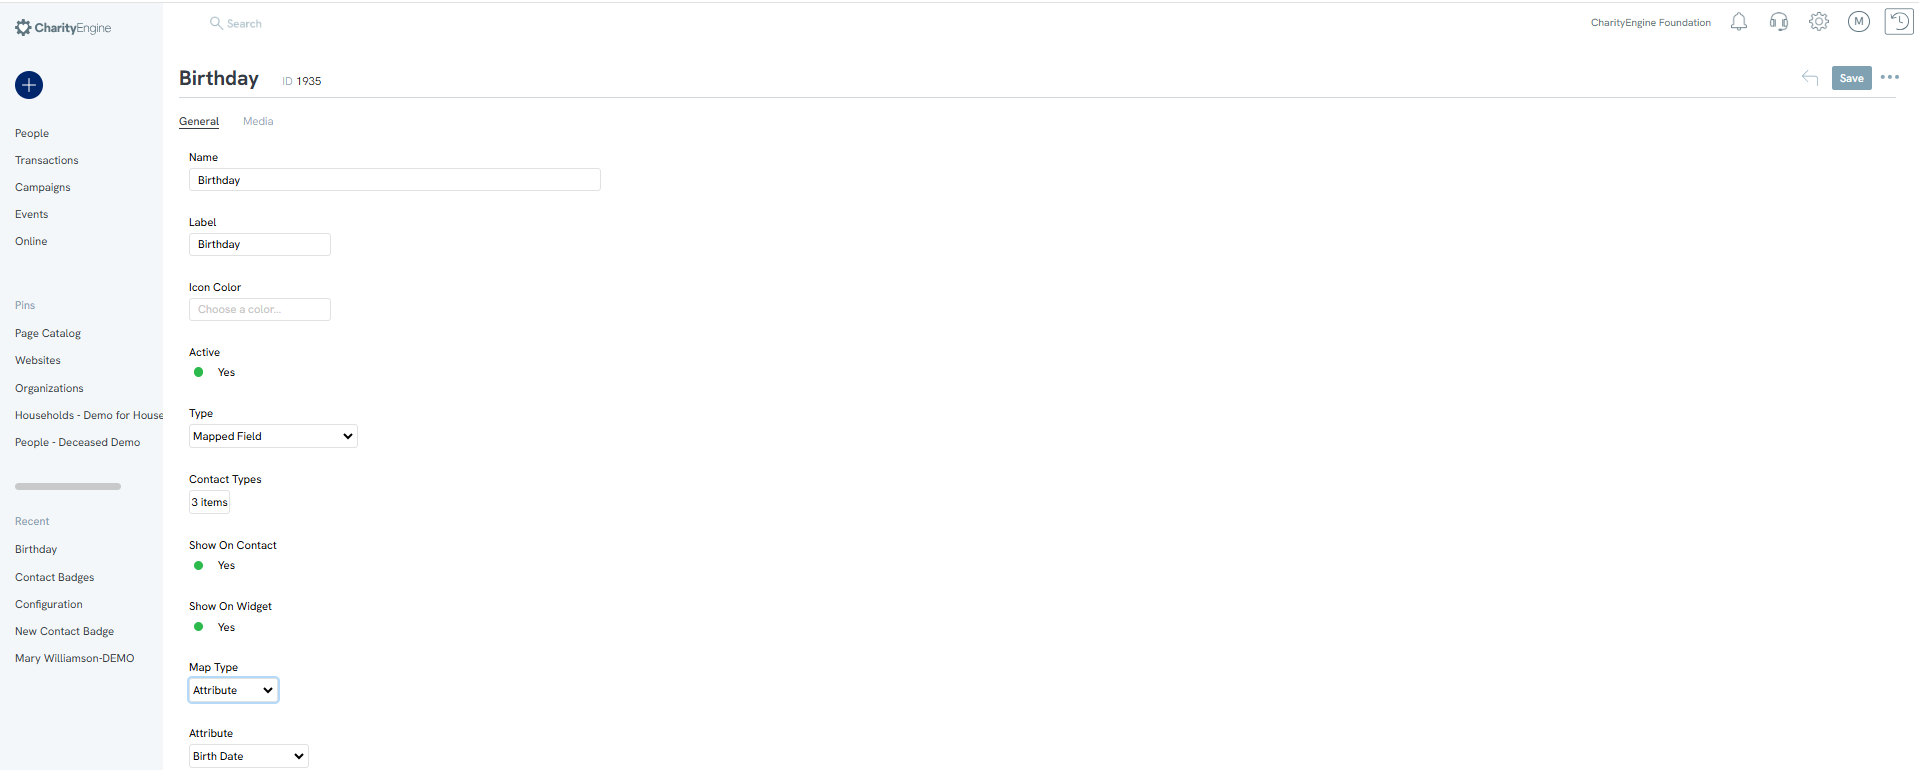
The badge will appear based on data in the selected system or custom field. It may take up to 24 hours for the badge to display.

Instructions - Custom Badges: Computed Fields
Computed badges are applied based on qualifying data returned by a query or report.
Prerequisite: Create a query or report that includes the Contact ID field. CharityEngine uses the Contact ID to determine which records should receive the badge.
Navigate to Configuration > Contacts > Badges, and then click Create New.
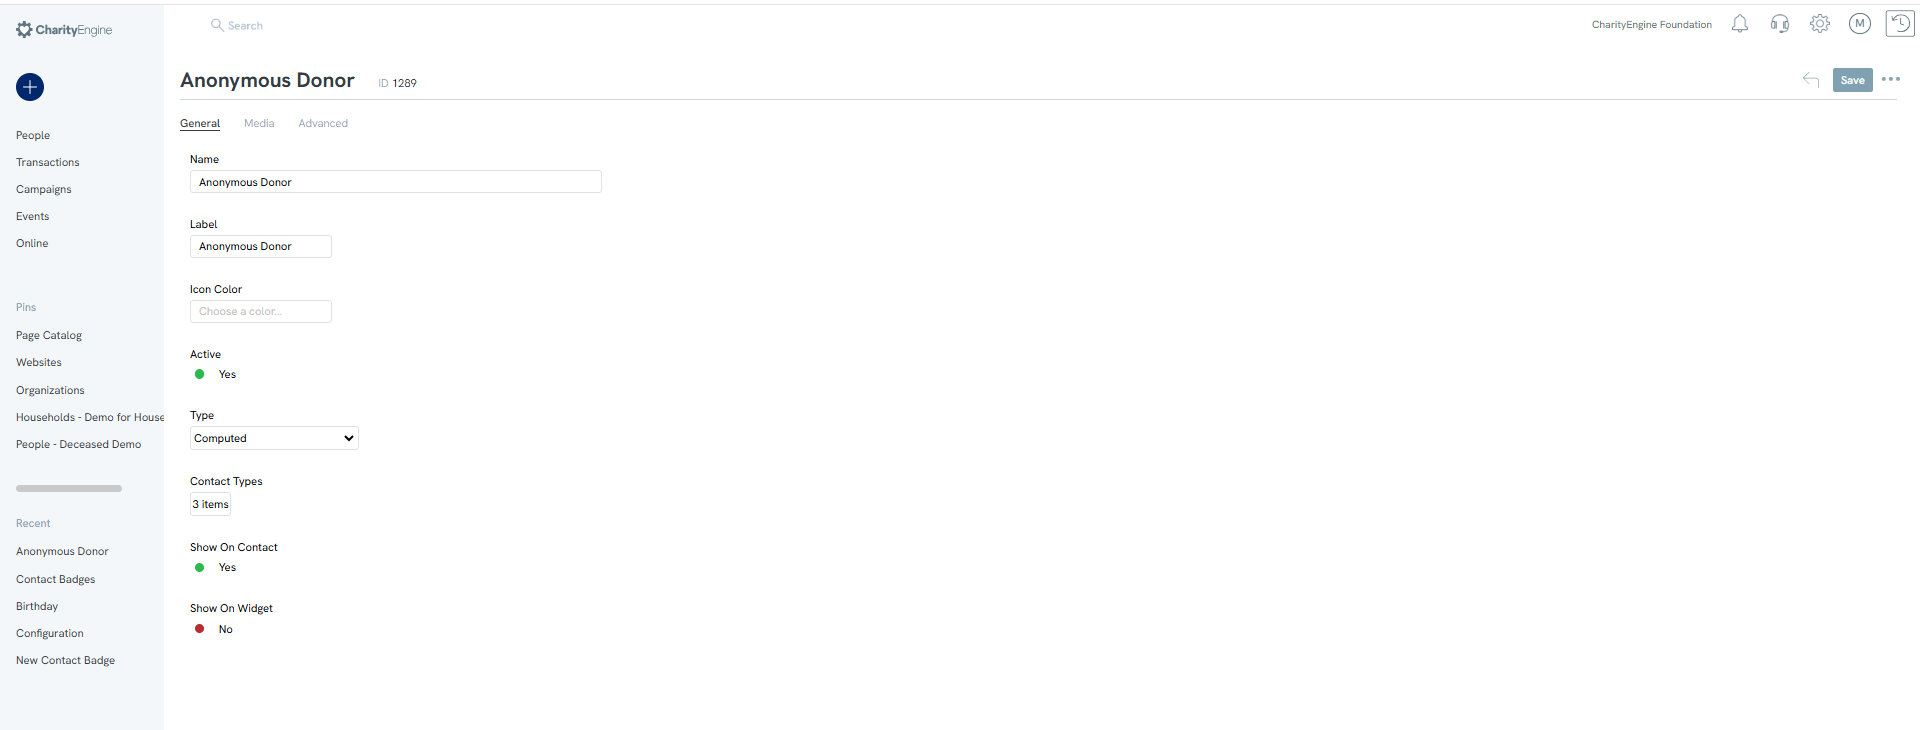
Complete the following fields:
- Name: Enter an internal name for the badge.
- Label: Enter the user-facing label that will appear on the contact record and in the user interface.
- Icon Color: Select an icon color, if desired.
- Active: Select Yes.
- Type: Select Computed from the drop-down menu.
- Contact Types: Select the contact types to which the badge should apply.
- Show on Contact: Select Yes to display the badge at the top of the contact record.
- Show on Widget: Select Yes to display the badge on the Search or Listing screen when using Card View.
Navigate to the Media tab to add a custom image.
Next, open the Advanced tab and complete the following steps:
- Select an existing query from the Data Source drop-down menu, or click the + icon to create a new query.
- In the Contact ID Column field, select the query or report column that contains the CharityEngine Contact ID.
- Click Save.

Note: Computed badges are updated by a daily system process. New badges will generally appear the following day. Badges may also be added or removed each day as query results change.
FAQs & Additional Information
Q: How quickly will a badge appear?
A: Manual badges appear after they are assigned and saved. Mapped Field badges may take up to 24 hours to appear. Computed badges are updated through a daily system process and will generally appear the following day.
Q: Can badges appear outside the contact record?
A: Yes. Select Show on Widget to display the badge on the Search or Listing screen when using Card View.
Q: Why did a computed badge disappear?
A: Computed badges are added and removed based on the current results of the selected query or report. If a contact no longer meets the query criteria, the badge may be removed during the next daily update.
