Introduction
Membership programs serve as an excellent fundraising tool, enabling organizations to generate revenue while offering donors exclusive benefits or incentives. While memberships function similarly to sustainers, they typically involve annual dues, which can be paid in full or in installments on a scheduled billing date. If your organization utilizes memberships as a fundraising strategy, follow the guidelines below to learn how to create and manage memberships within CharityEngine.
Table of Contents
Prerequisites
NoneStep 1: Create a Membership Type
Before creating member records, you must first create a membership type.
Navigate to:
People > Members > Membership Types
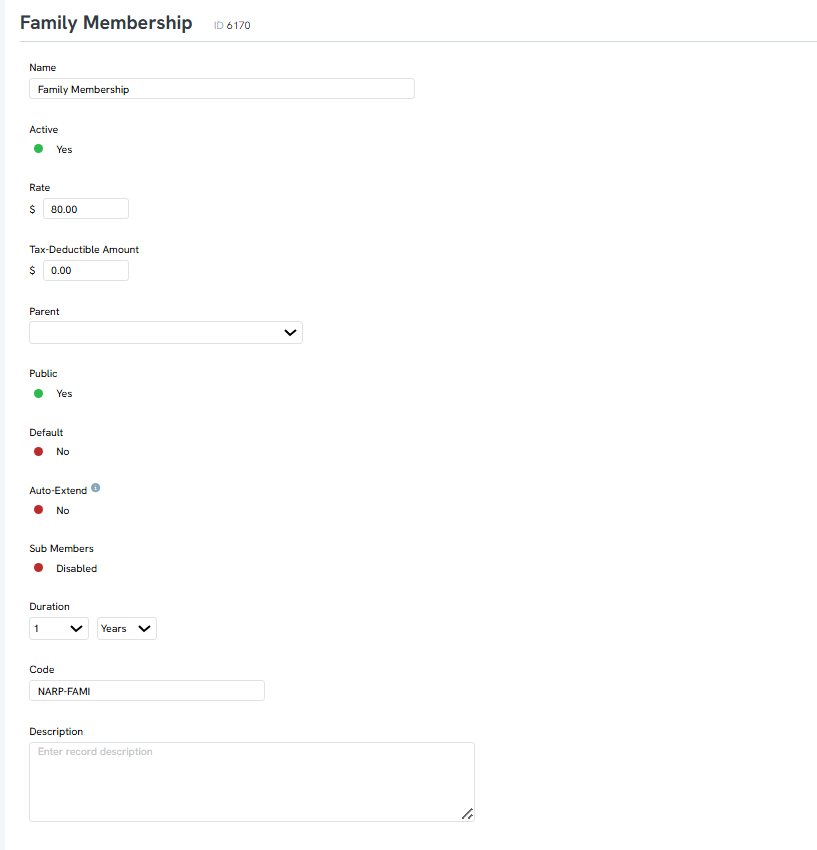
Select Create New and complete the following fields:
| Field | Description |
|---|---|
| Name | Internal name for the membership type. Required. |
| Active | Determines whether the membership type is available for use. |
| Rate | Membership cost. Required. |
| Tax-Deductible Amount | Portion of the membership fee that is tax deductible. |
| Parent | Associate with a parent membership type if needed. |
| Public | Controls whether the membership is available publicly. |
| Default Membership | Sets this membership as the default membership option. |
| Auto-Extend | Automatically renews the membership for a new term when it expires. |
| Sub Members | Allows household members or other related contacts to be linked under the same membership. Configure the maximum number of sub-members and, if needed, specify a different sub-member type. |
| Duration | Length of the membership term. Can be configured in months or years. |
| Code | External-facing membership code or identifier. Required. |
| Description | Internal notes regarding the membership type. |
After completing the required fields, select Save.
Step 2: Create a New Member
Navigate to:
People > Members > Search & Manage > Create New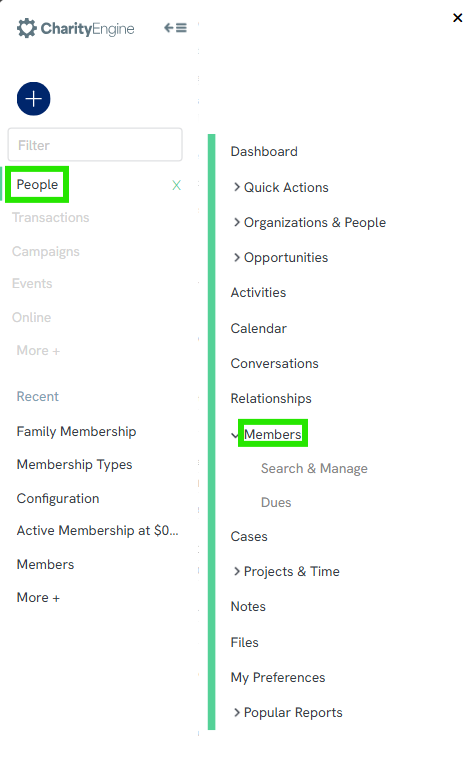
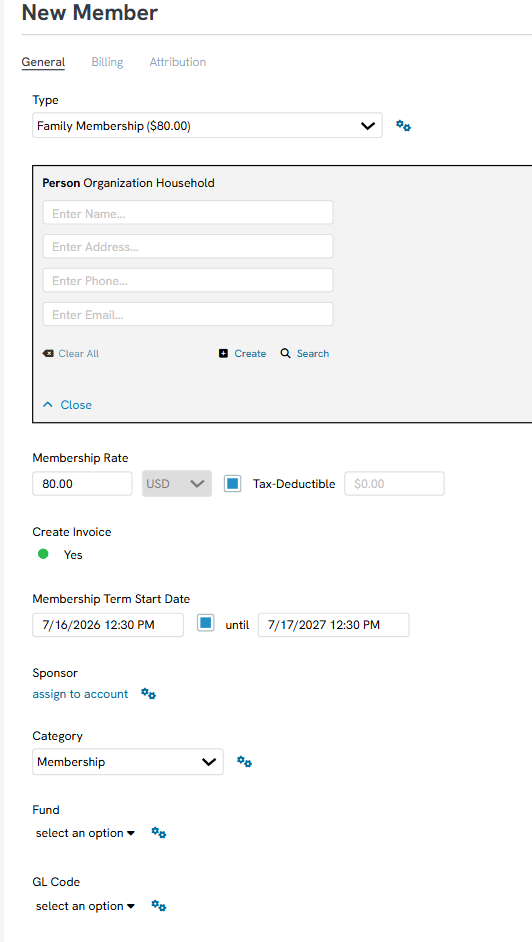
Choose the membership type created in the previous step.
Select Member Record
A membership can be assigned to:
- Person
- Organization
- Household
You can either:
- Search for an existing record, or
- Create a new constituent record
Membership Details
Complete the membership information:
| Field | Description |
|---|---|
| Membership Rate | Select the applicable membership rate. |
| Create Invoice | Choose whether an invoice should be generated immediately. |
| Term Start Date | Beginning date of the membership term. |
| Term End Date | Expiration date of the membership term. |
| Sponsor | Optional sponsor associated with the membership. |
| Category | Membership category. |
| Fund | Fund designation for associated revenue. |
| GL Code | General Ledger code if required for accounting purposes. |
Membership Tabs
Once the membership is created, additional configuration and management options are available through the membership tabs.
Billing Tab
The Billing tab controls how membership payments are collected.
Manual Billing
Use Manual Billing when you want to create a custom payment schedule.
When Manual Billing is selected:
- Payments are managed manually.
- Payment schedules can be configured through the Invoices tab.
- This option is useful when payments are not collected automatically or when special billing arrangements are required.
Auto Billing
Use Auto Billing when you want CharityEngine to automatically process membership renewals and recurring membership payments using a stored payment method.
This option is typically used for recurring memberships that renew automatically.
Attribution Tab
Use the Attribution tab to associate the membership with fundraising and reporting data.
Memberships can be attributed to:
- Initiative
- Response Channel
- Region
- Opportunity
- Tribute
- Event
These associations help improve reporting and campaign tracking.
Invoice Tab
The Invoice tab allows you to:
- Generate new membership invoices
- View all invoices associated with the membership
- Review invoice history
Payments Tab
The Payments tab is used to manage membership payments.
From this tab, you can:
- View all payments applied to the membership
- Add new payments
- Review payment history
- Verify outstanding balances
Managing Memberships
After a membership has been created, staff can return to the membership record to:
- Update membership information
- Modify billing settings
- Generate invoices
- Note: If you adjust any elements of the billing component, be sure to create a selection for Copy to Invoices including copy (or apply) to open invoices, collectable invoices only, or do not apply to any invoices.
- Note: Manual creation of invoices can be leveraged for manual billing or if an out of cycle payment is requested/received.
- Record payments
- Note: Note, invoices are simply the notification to attempt to collect payment. An invoice does not secure a payment - as such invoices can remain open and uncollected if payment is missed. The Payment tab will provide you the insights on payments associated with an invoice.
- Manage sub-members
- Review membership history
- Renew memberships as needed
Membership management tools are available directly from the member's membership record.
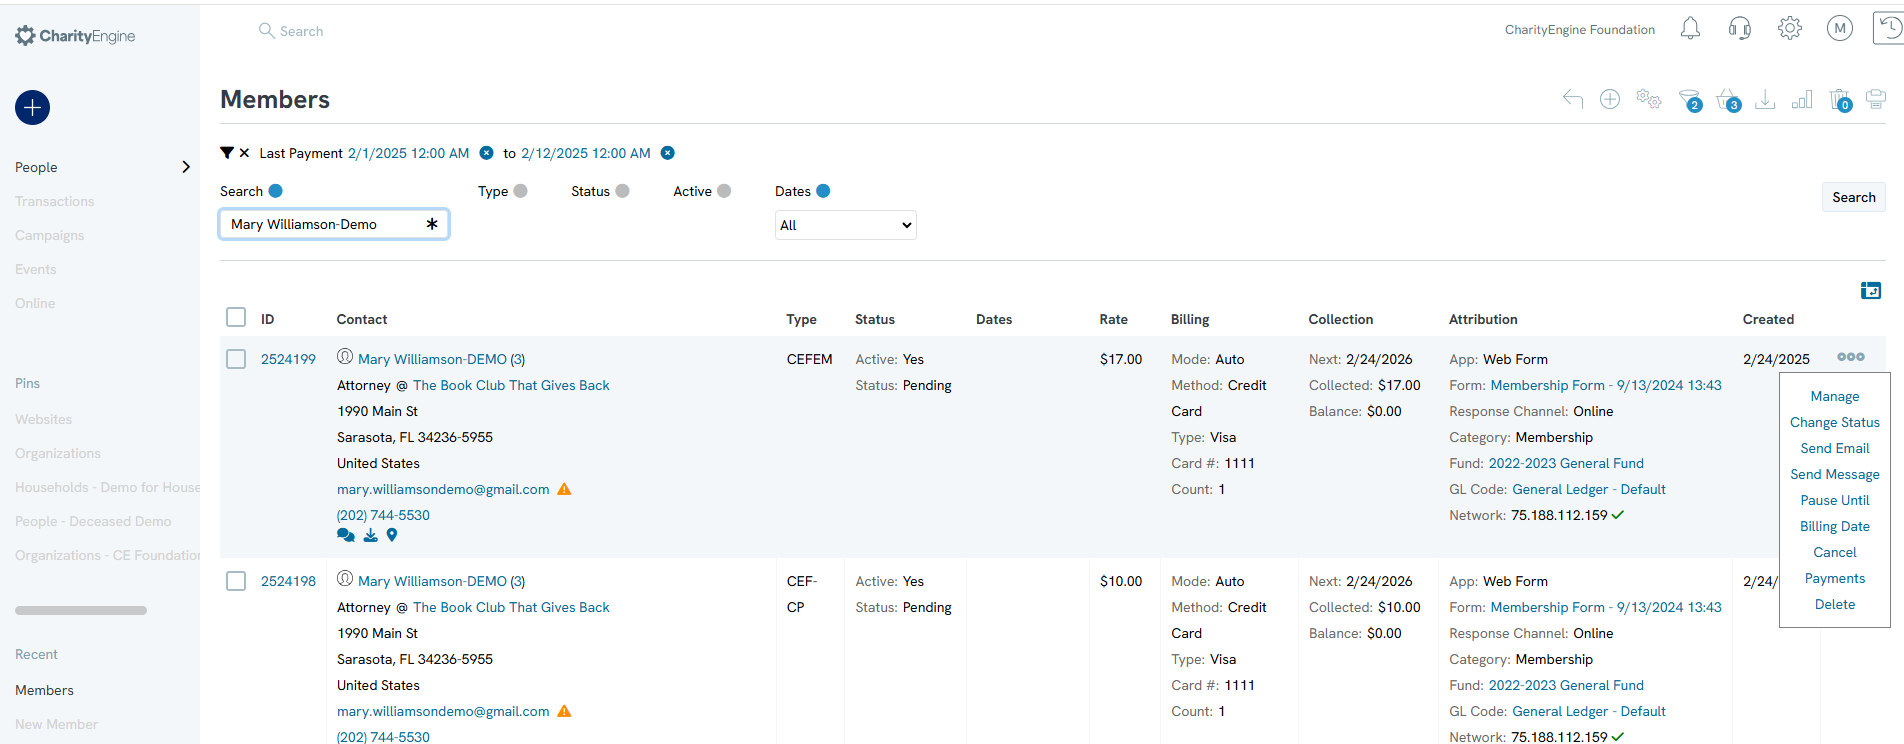
Instructions - Creating Membership Web Forms
-
Navigate to: Online App > Web Forms > Search & Manage > Create New > Select Membership Form.
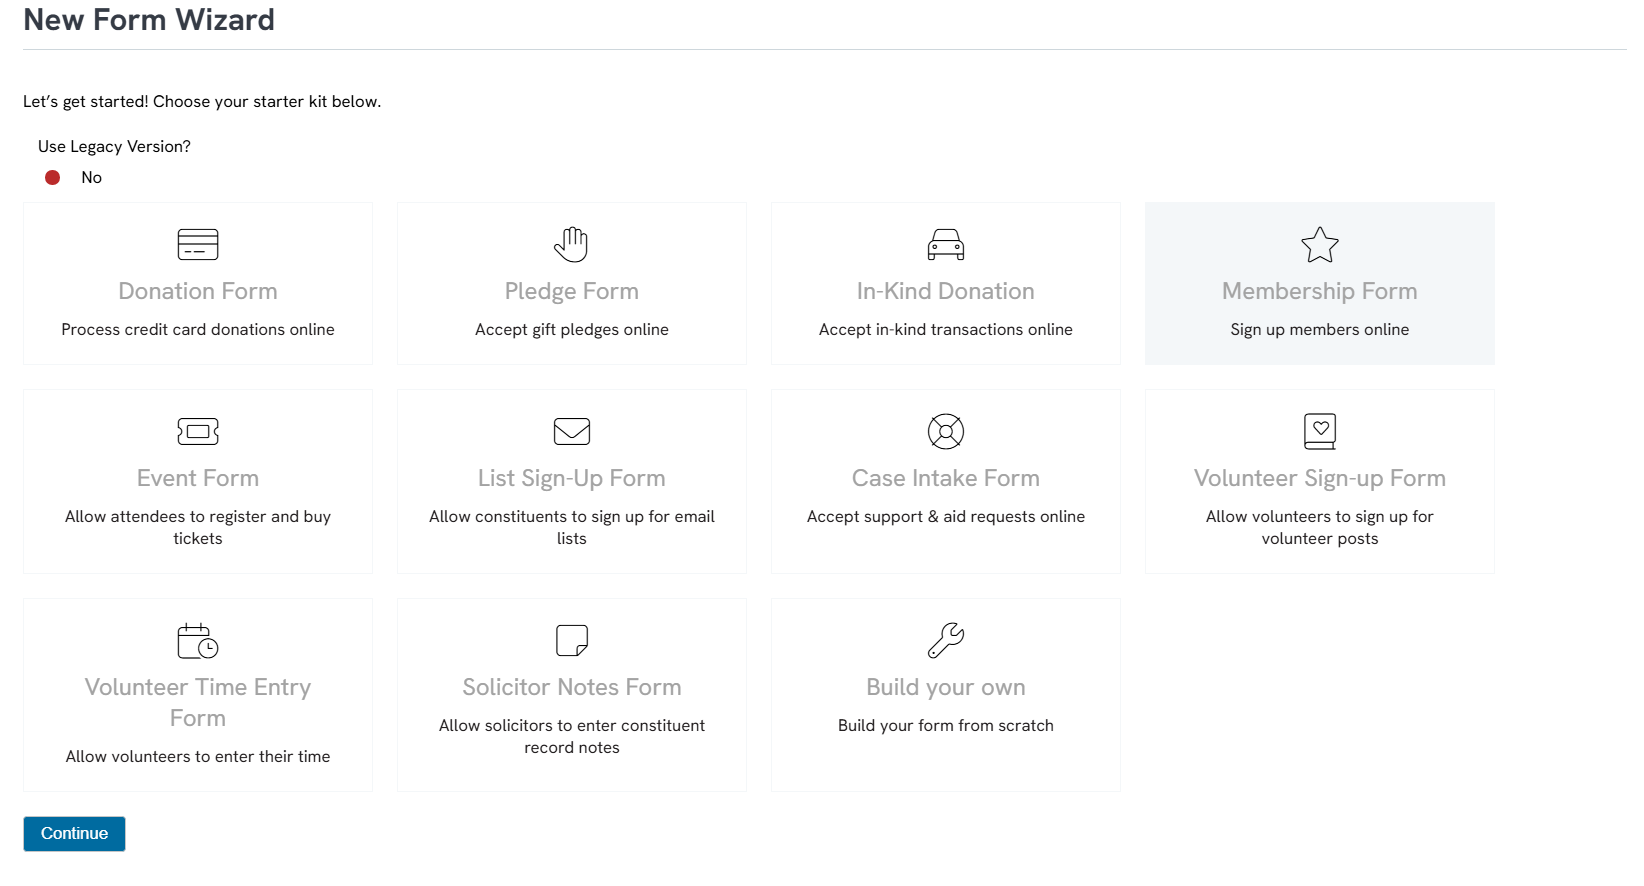
-
Choose Membership Types to display in the form.
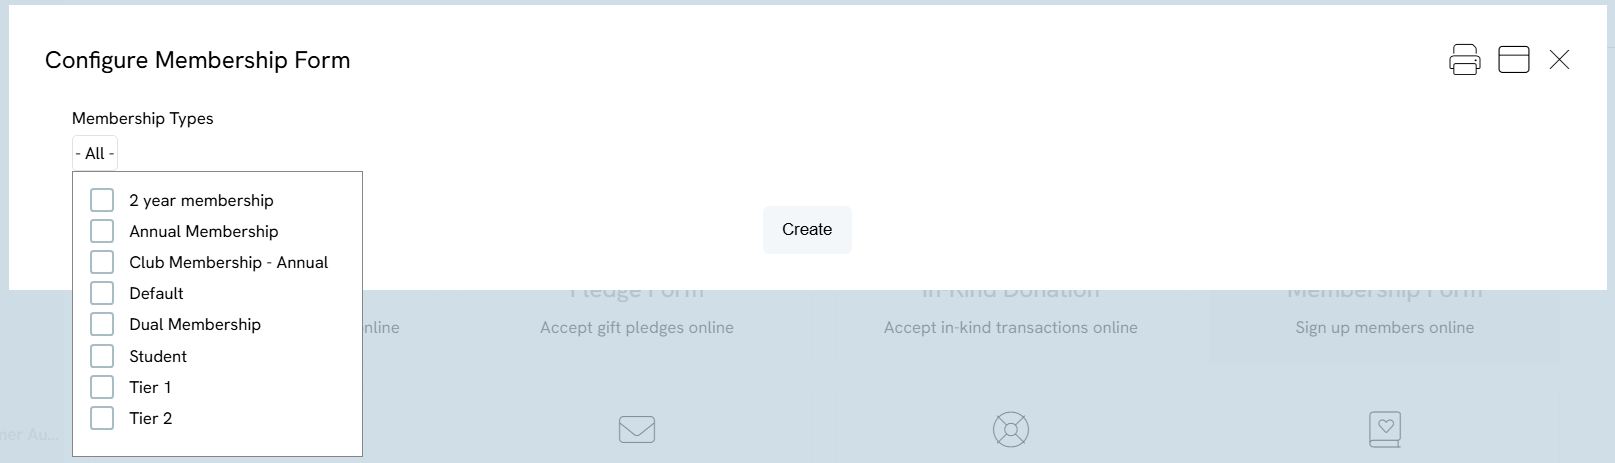
-
Configure settings and include tokens for automated responses.
When a donor completes their membership form, the first payment will be captured and associated with the new membership record.
Note, similar to other web form features, users have the ability to leverage available tokens for receipt acknowledgement. Leverage the Email tab > Donor or Constituent Auto-Responder (and/or Internal (carbon copy)) to create or modify an existing Email Message.
Important Note: Membership web forms default to an "Annual" frequency and are best suited for memberships without a payment schedule.
Use Case - Communication for Membership Renewal
Leveraging CharityEngine's automation and workflows can assist organizations with automated membership renewal and support upgrade opportunities.
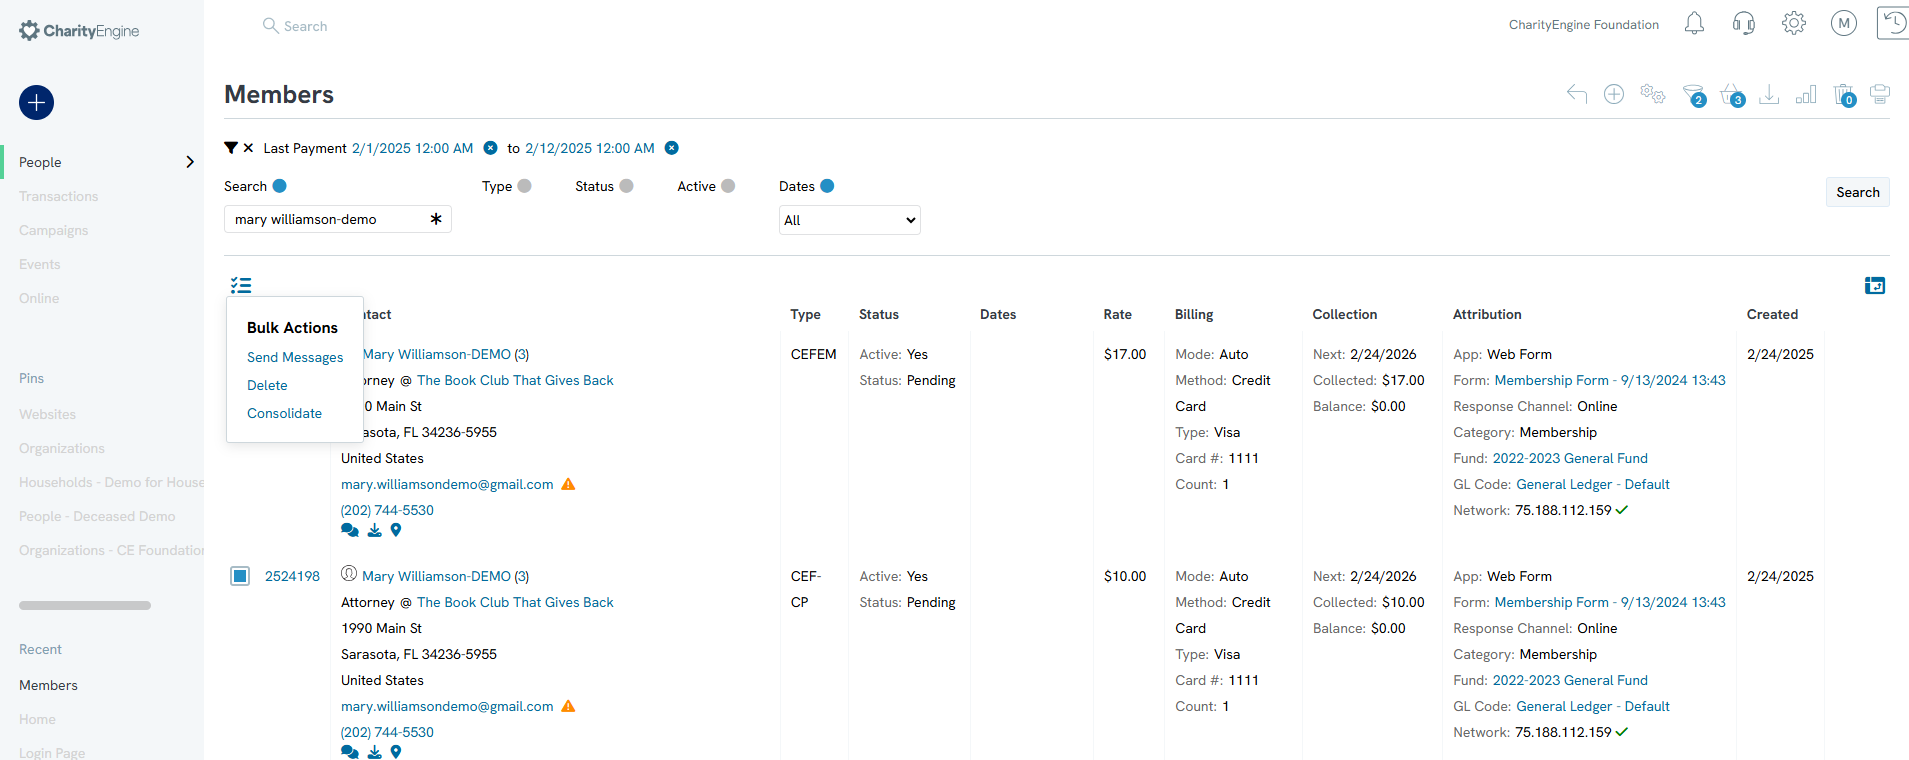
Integrated Send Message Feature (Individual Management)
-
Navigate to: Contacts App > Members.
-
Select one or more records.
-
Click More > Send Message.
-
Choose a sending preference (Letter/Email) and enter sender details.
-
Create a new message or use a template.
-
Click PROCESS to send.
Automated Send Message Feature (Pre-Scheduled Bulk Management)
This use case could be applied for notification to members who are about to end their membership cycle and are ready for renewal. In this use case, the construct is to identify members who are expiring in 90 days in order to deliver an automated email with a link to select/pay for their next annual membership. In this use case, targeting expiring membership in January 2024.
-
Navigate to: Automation & Workflow App > General > Queries > Create New.
-
Set filters to identify members whose memberships expire in 90 days.
-
Save the query.
-
Navigate to: Campaigns App > Quick Actions > Email Blast.
-
Select the query audience and design email content.
- Schedule and automate renewal notifications.
To schedule and automate renewal notifications, navigate to the Automation & Workflow App and follow these steps:
- Enter the Schedule Name (required).
- Set the Start and End Dates.
- Select Audience Type: Smart List and choose the query created above.
- Complete any additional attribution selections.
- Click Save to finalize.
- From the Triggers tab, select the desired frequency and click SAVE.
In this example, the organization is filtering for records where the "Payment End Date" is both "In Future" and "Before the next 90 Days."
Hint: To access additional filter options, hover over the right side of the filter field and click the Beaker icon. This will reveal options such as "In Future" and "Before the next 90 Days."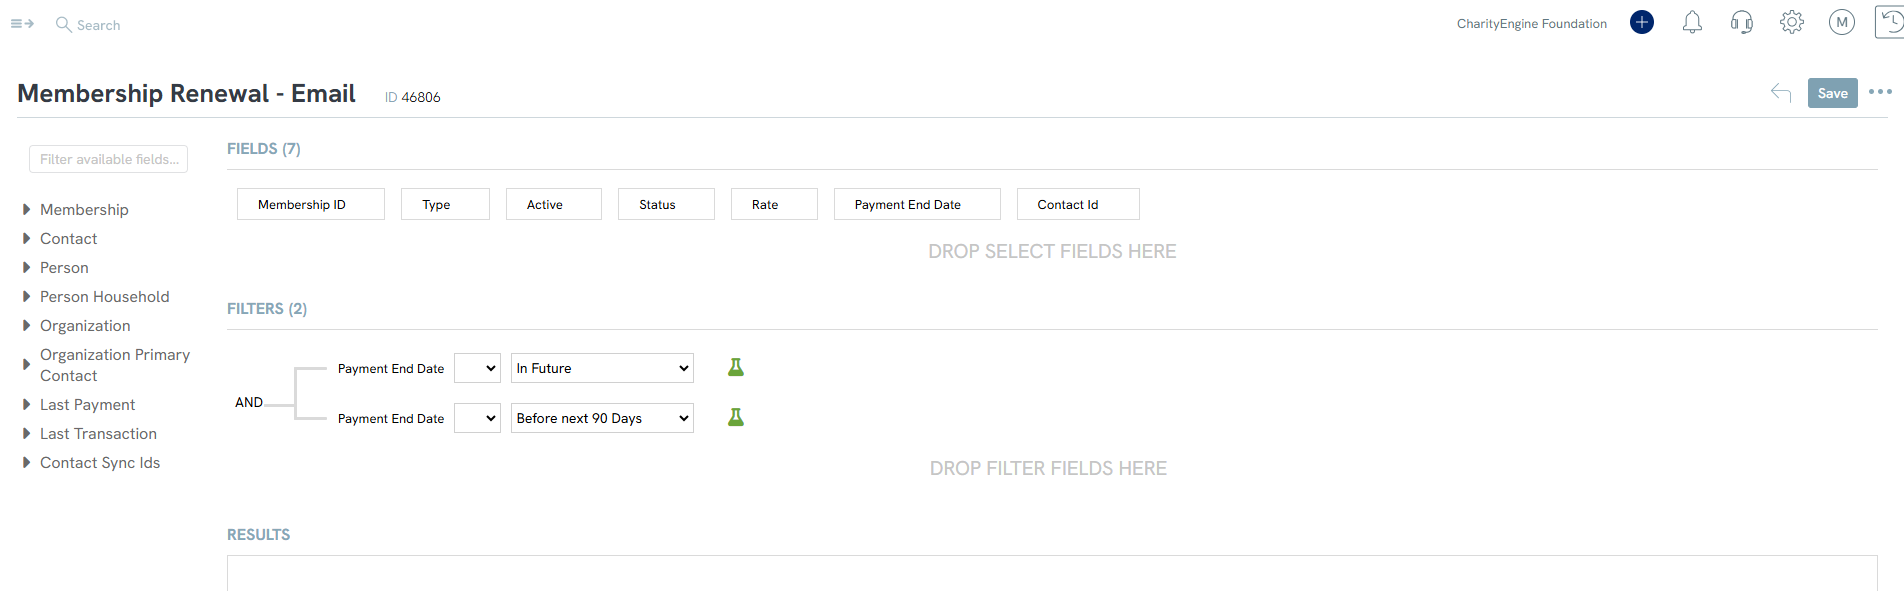
Note: In this example, a button listed as "Renew Today" will route the donor/member to a membership type web forms
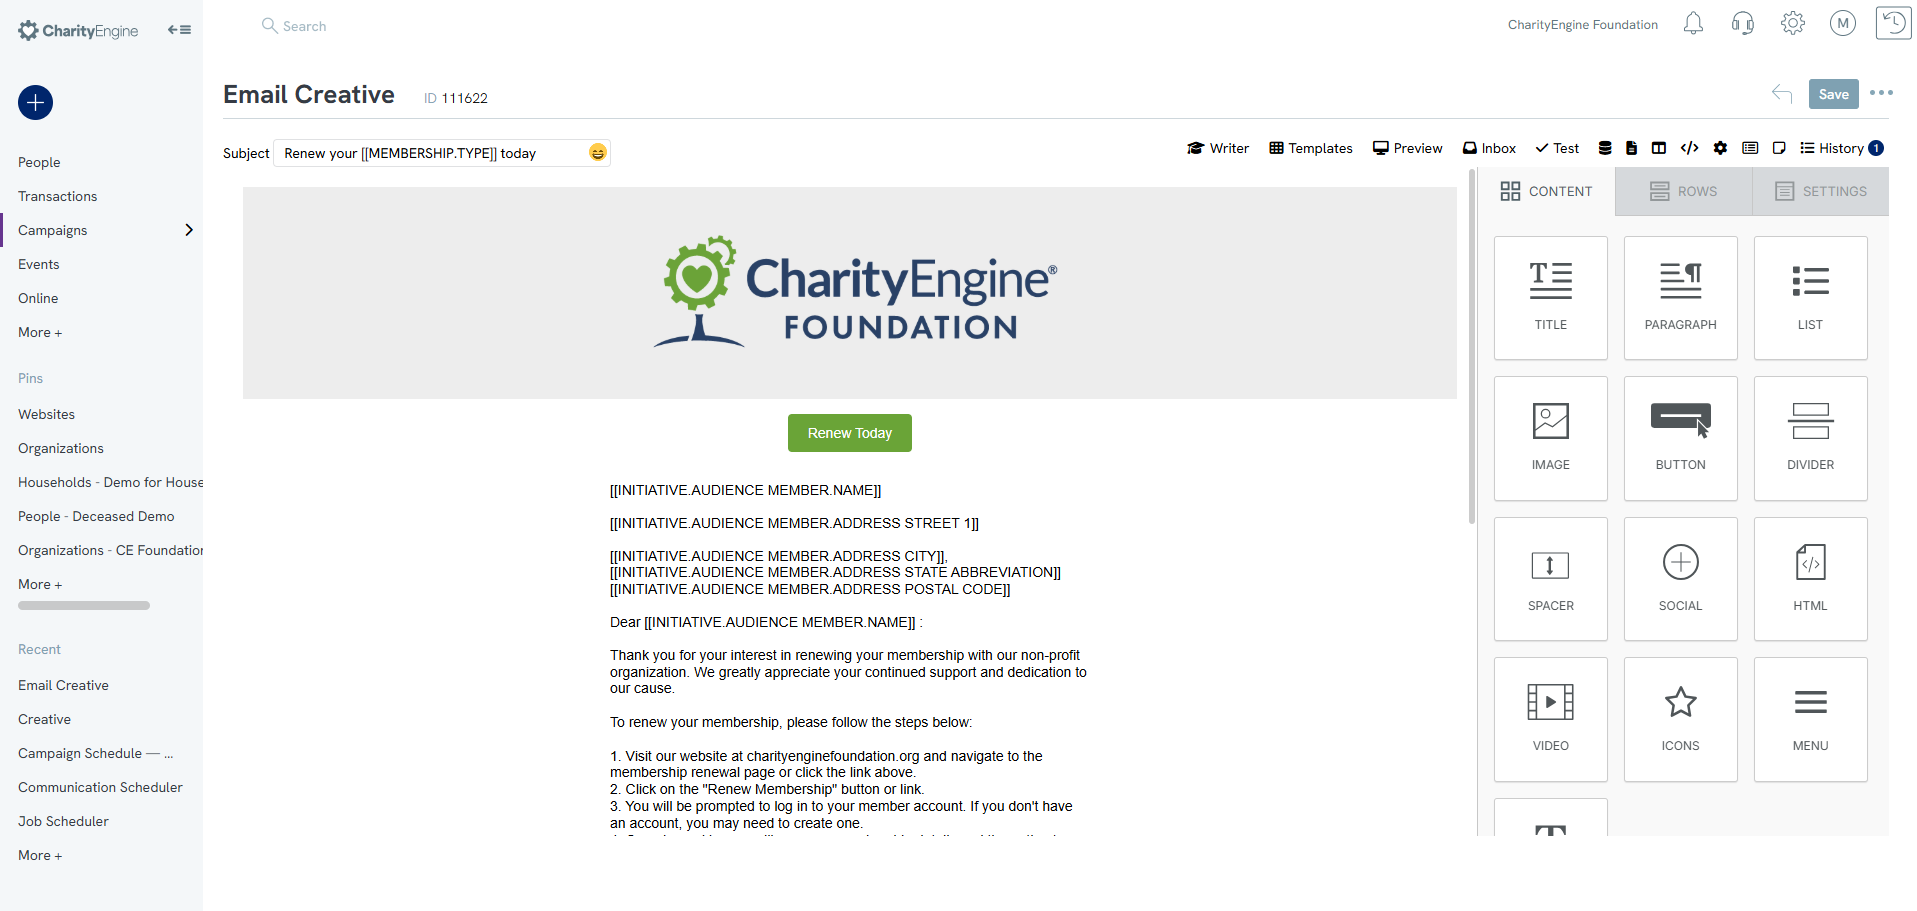
Trigger/Schedule Example: In this example, the email will be sent on the 5th of each month at 10:00 AM EST to members whose expiration date is within the next 90 days.

FAQs & Additional Reading
Q: How do I enable donors to update their payment details?
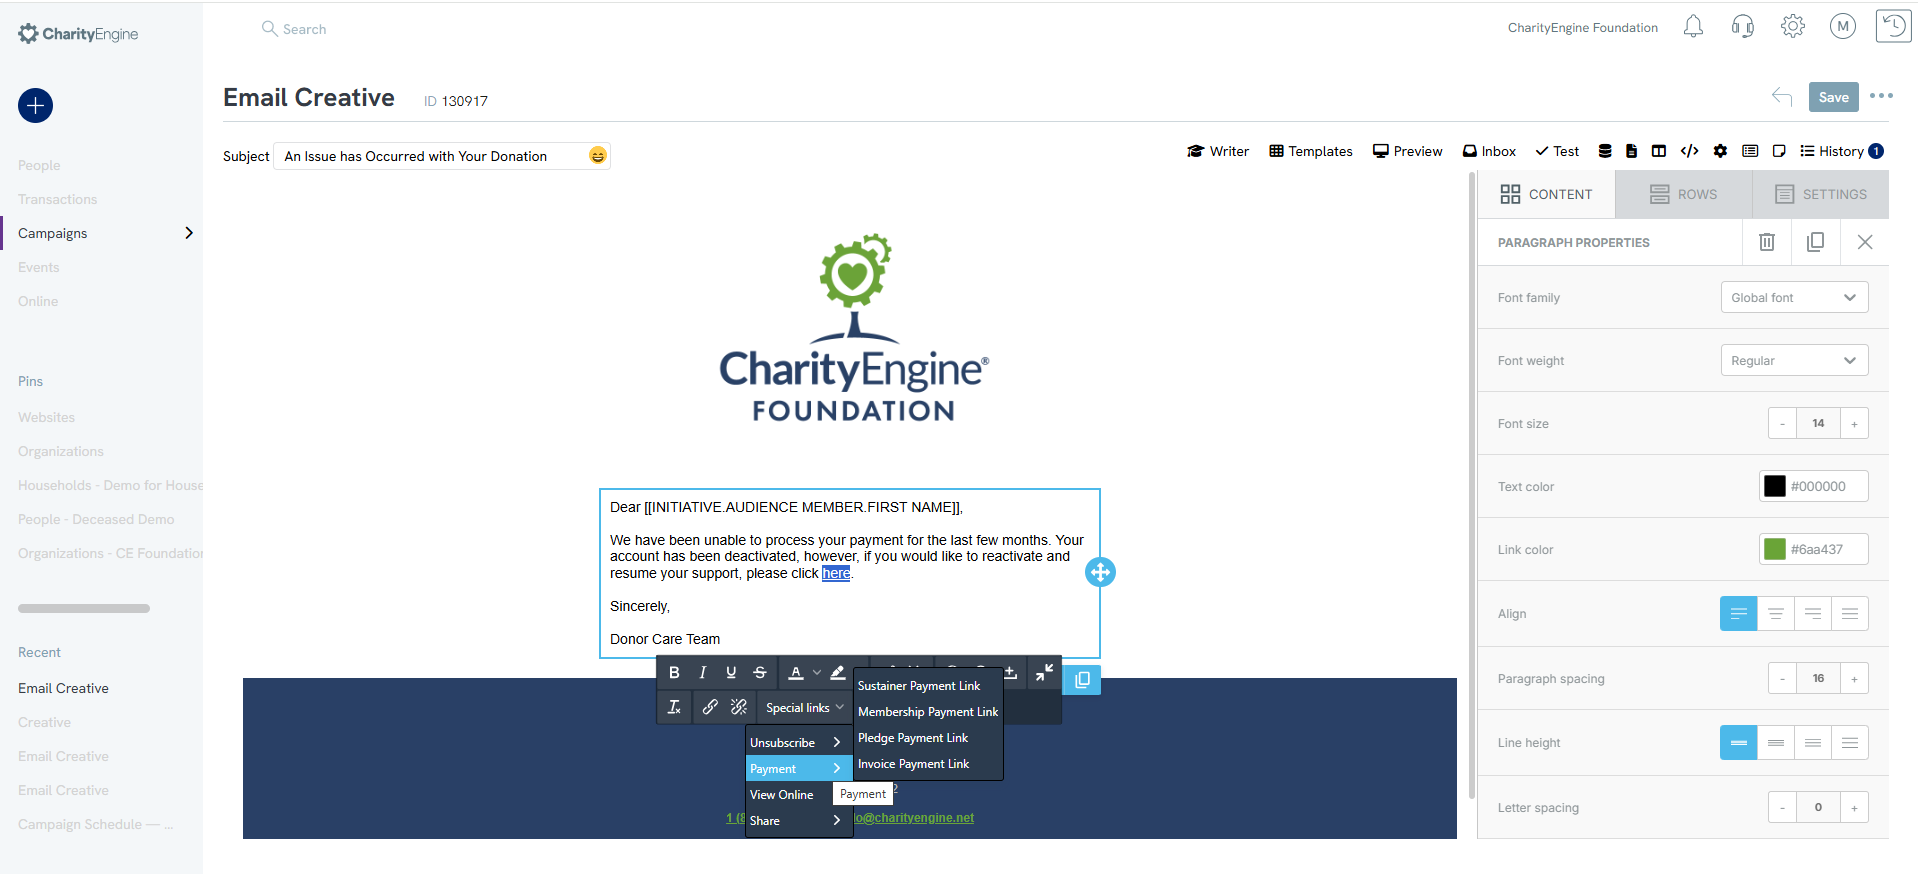
A: Use the appropriate Special Link feature based on audience type:
| Special Link | Use Case | Audience Source |
|---|---|---|
| Sustainer Payment Link | Updating sustainer payment details | Query: Sustainers |
| Membership Payment Link | Updating membership payment details | Query: Memberships |
| Pledge Payment Link | Updating pledge payment details | Query: Pledges |
| Invoice Payment Link | Paying an invoice or updating future payments | Query: Invoices |
Q: Where can I access the membership change log?
A: Open the membership record and scroll to the bottom to view the change log.
Q: How do I update a web form to support monthly frequency types?
A: Following these steps
-
Navigate to: Online App > Web Forms > Search & Manage.
-
Locate the desired web form and select Manage.
-
Go to the Layout section and ensure that Membership displays four fields.
-
Click Manage Frequency > Display.
-
Under Default Value, change the value from 7 (Annual) to 4 (Monthly).
Note: The membership web form can only manage one frequency type. If your organization needs a combination of monthly, quarterly, and annual options on one form, additional JavaScript and customization are required. A professional web developer can assist with implementing this functionality.
Q: Why is the rate on my recurring payment membership reflective of the installment rate and not the total membership payment?
A:The membership structure is intended to reflect the installment rate. If the membership is a one-time payment, the value will represent the full membership rate as presented in the Configuration Membership Type Rate value. If the rate needs to be split across multiple payments, the Rate should reflect the invoice amount and should be reflected in the Configuration Membership Type Rate value.
