Introduction
Users can create a custom, single pass token from any custom field on a web form so that whatever a donor or registrant enters into that field at checkout is displayed back to them on the receipt. A single pass token is for display only – the data is not stored anywhere in CharityEngine, so it cannot be acknowledged or reported on later. This article also covers the alternative: mapping a custom field to one of a transaction's custom code fields, so the data can be acknowledged and reported on after the fact.Table of Contents
Single Pass Token vs. Transaction Custom Code Mapping
A single pass token is useful when a custom field's entered text just needs to be displayed back to the donor or registrant right away, often so some real-time action can be taken – it doesn't need to be mapped anywhere in the CRM. However, since the web form only populates this data at the moment of submission, CharityEngine has no record of what should go in that field afterward. It cannot be acknowledged later, and it cannot be pulled into reporting.
For data that does need to be acknowledged later or reported on, it can instead be mapped to one of a transaction's 8 custom code fields. Once mapped, that data lives on the transaction permanently and can be surfaced in tools like Report Builder.
NOTE: Mapping to the transaction custom codes is a simple alternative. There should always be thought about what type of data are we collecting and where should it live in the CRM. Custom contact fields is an example of contact type data mapping.
Instruction - Create a Single Pass Token for a Custom Field
Step 1: Navigate to Online > Web Forms > Search and Manage, find the form, and manage it.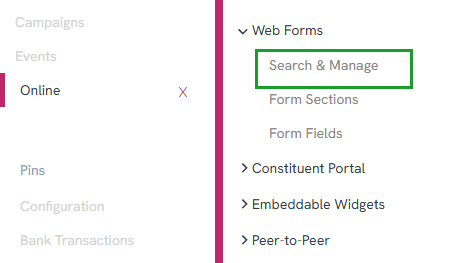
Step 2: Click the Layout tab and find the custom field (My example, "Tell Me More").
Step 3: Click the pencil icon to edit the custom field.
Step 4: Click the Developer tab (General sub-tab) and note the field's Element ID.
Step 5: NOTE: If you wrap the Element ID in the system's token brackets – this creates the single pass token for this field. We will see this in a moment. 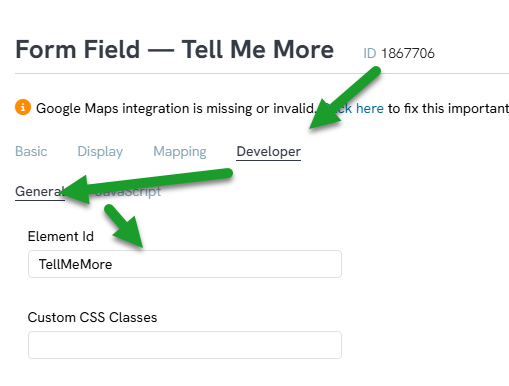
Step 6: Go back to the form and click the Email tab.
Step 7: Expand the Donor/Constituent Autoresponder section, and under Email Message, click Manage to open the receipt.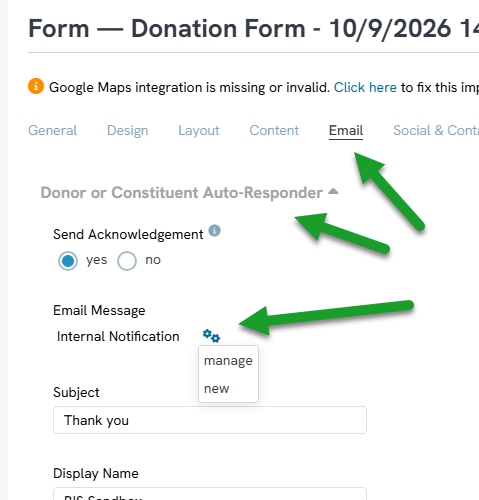
Step 8: Add the Element ID, wrapped in token brackets, into the receipt content, then save the message.
Step 9: Save the template.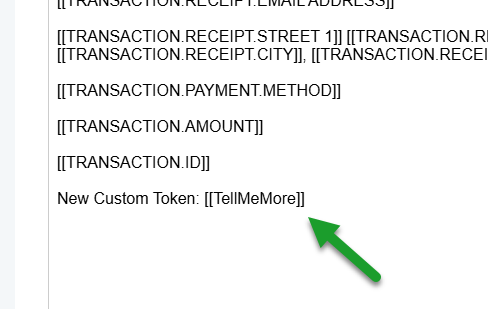
Step 10: Click the General tab, click the link to open the live form, and check out, entering text into the custom field.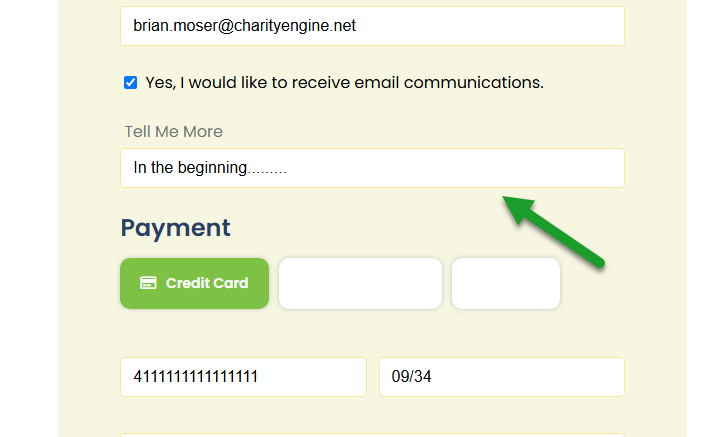
Step 11: Check the resulting email receipt to confirm the entered text now displays through the token.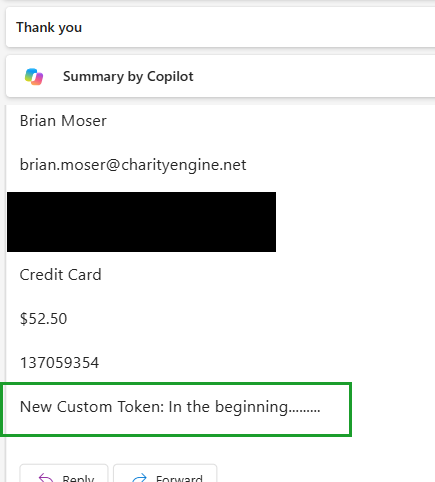
Instructions - Map a Custom Field to a Transaction Custom Code Instead
Step 1: Navigate back to the form, click the Layout tab, and find the custom field.
Step 2: Click to edit the field, then click the Mapping tab > Transaction tab .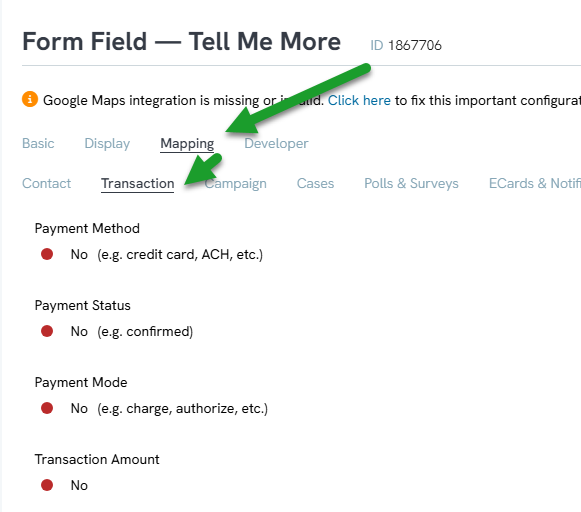
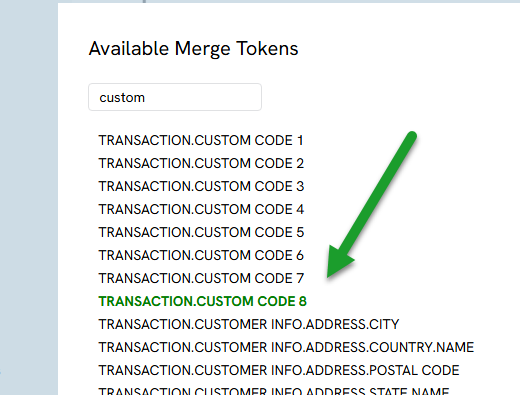
Step 3: Scroll down and turn on mapping to a Custom Code field (for example, Custom Code 8 – a higher number is often used since lower-numbered codes may already be in use for tracking elsewhere). Every transaction has 8 of these custom code fields available.
Step 4: Save the field, then save the form.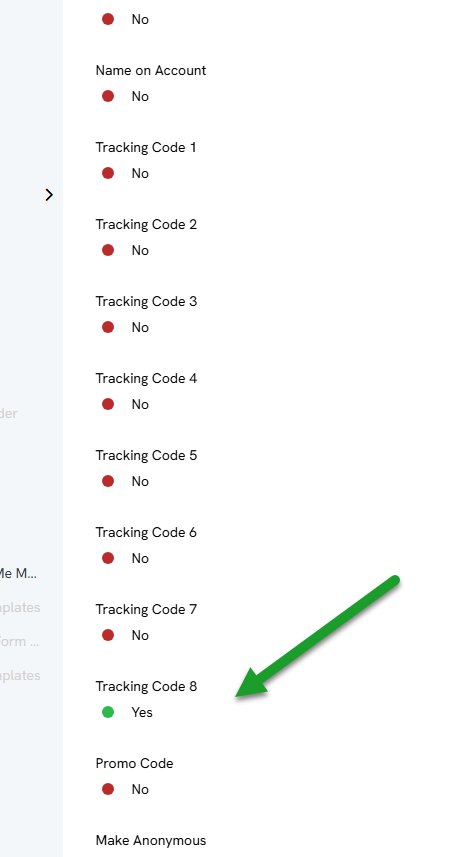
Step 5: Click the General tab, click the link, and check out again, entering custom text into the field.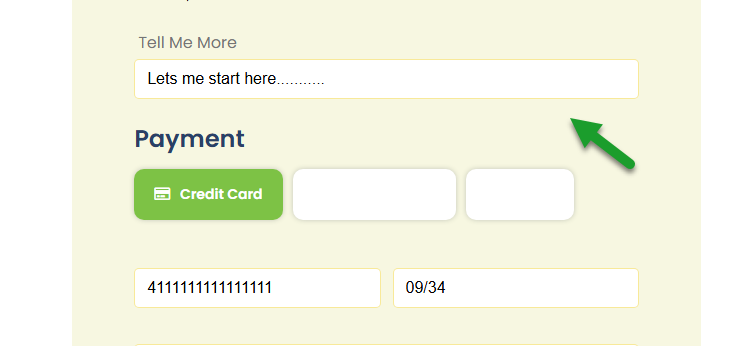
Step 6: Navigate to Transactions > Transactions > Search and Manage and manage the resulting transaction.
Step 7: Click the Detail tab > Attribution tab, then Custom tab, to confirm the entered text was mapped to the selected custom code.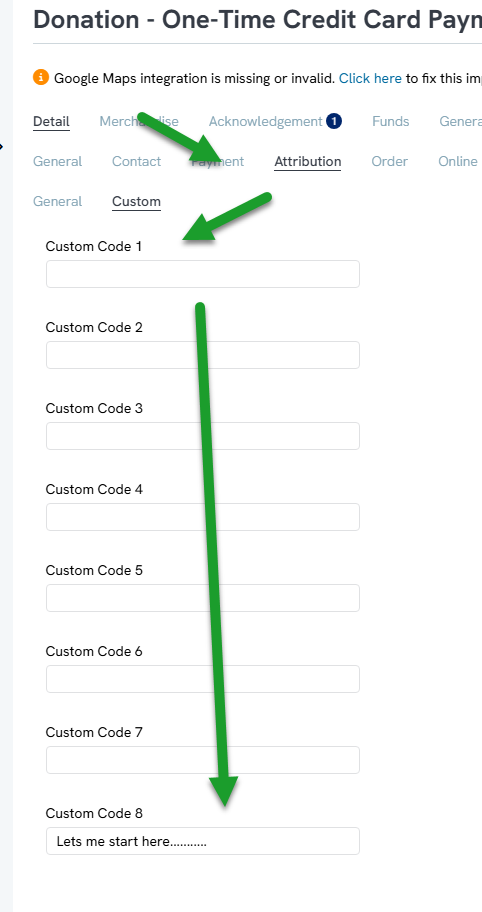
Step 8: Return to the form's Email tab, expand the Donor/Constituent Autoresponder, and click the double gears (Manage) to open the receipt.
Step 9: Using the Token Picker, insert the transaction's custom code token into the receipt (instead of, or alongside, the single pass token).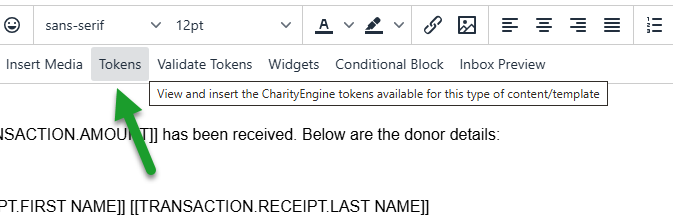
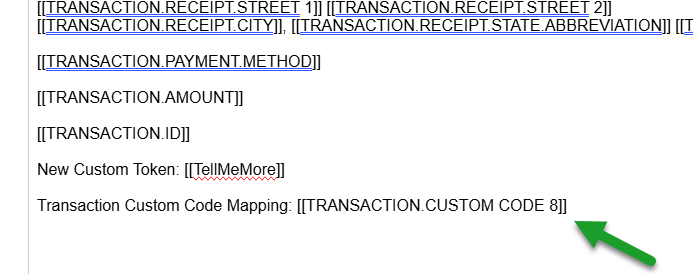
Step 10: Save, then check out on the form once more to confirm the token displays correctly in the resulting receipt email.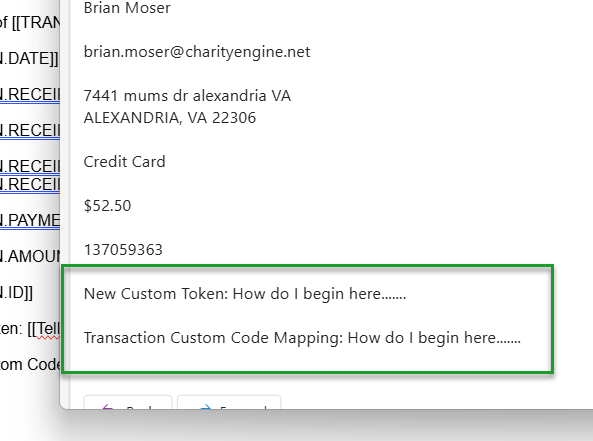
Note: Data mapped to a transaction custom code can later be pulled into Report Builder – for example, selecting that custom code in Report Builder will display everyone who filled out that field, letting the data be reported on or acknowledged after the fact. This is the key difference from a single pass token, which is receipt display only and can't be queried or reported on later.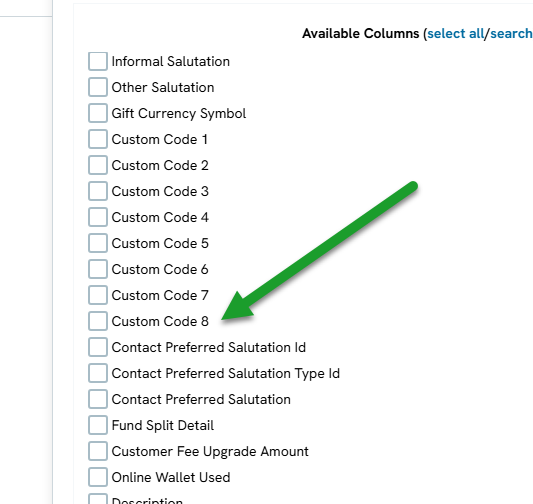
FAQs & Additional Reading
Q. What's the difference between a single pass token and mapping to a transaction custom code?
A. A single pass token only displays the custom field's entered text on the receipt at the moment of checkout – it isn't stored anywhere in CharityEngine and can't be acknowledged or reported on later. Mapping to one of a transaction's 8 custom code fields stores the data permanently on the transaction, so it can be pulled into reporting or acknowledged after the fact.
Q. Why use Custom Code 8 specifically?
A. It's just an example. Any of the 8 available transaction custom code fields can be used; starting from a higher number can help avoid conflicts if lower-numbered codes are already used for tracking elsewhere.
Q. Can a single pass token's data be recovered later if it isn't mapped?
A. No. Since it's only used to populate the receipt at the time of submission, CharityEngine has no record of what should go in that field once the transaction is complete.
Q. How do I report on data submitted through a custom field?
A. Map the custom field to one of the transaction's custom code fields, then use Report Builder to select that custom code – everyone who filled out that field will appear in the report.
