Learn about our newest features and enhancements!
Online: Online Constituent Portal Configuration
Authored by: Jessica Mocha-Piel
on 7/23/2024 11:44:00 AM

Introduction

CharityEngine’s Constituent Portal is the self-service center for an Organization’s constituents. Leveraging the Constituent Portal will allow your donors to execute a variety of activities including obtaining end of year tax statements, updating credit card information for sustaining transactions, opting in to organization's newsletters, or learning more about upcoming events. Any contact that exists in CharityEngine also has credentials to manage their Contact in the Constituent Portal . The Constituent Portal is a great opportunity to include in your organizational website footers and creates deeper engagement with your donors. 


Help Center - Legacy User Interface


Click here to access the Help Center legacy user interface article


Prerequisites

    •  Note: If you plan to use an out of the box template, please select Standard Center Theme (see step 2 below for details).

Instructions: How to activate your Constituent Portal
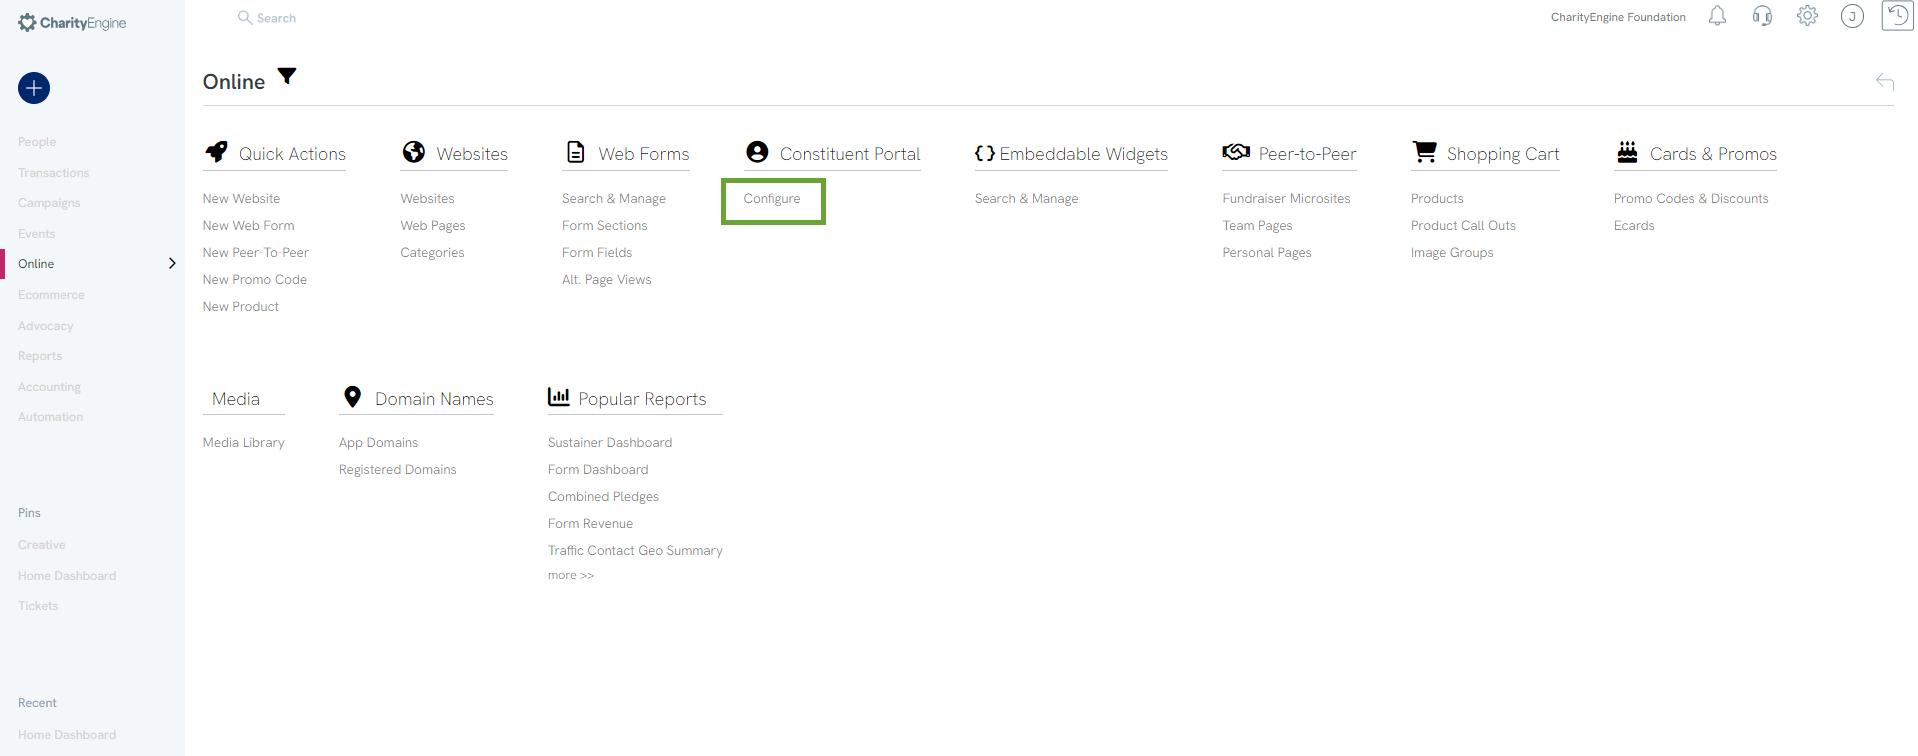
Step 1: Navigate to the User Center by navigating to the Online App > Constituent Portal > Configure
Step 2: Mark the User Center as Active if it not is already active and select Standard Center Theme as the template.
Note: The Starter Template includes Global Tokens configured about your Organization like External Name, Logo, and Address. To update or this data, go to your Account Settings).
Note: The Url for your user center can be leveraged to embed within your organization's website or in email communications.
Instructions: How to configure options with your organization's user center

Out of the Box Navigation Features

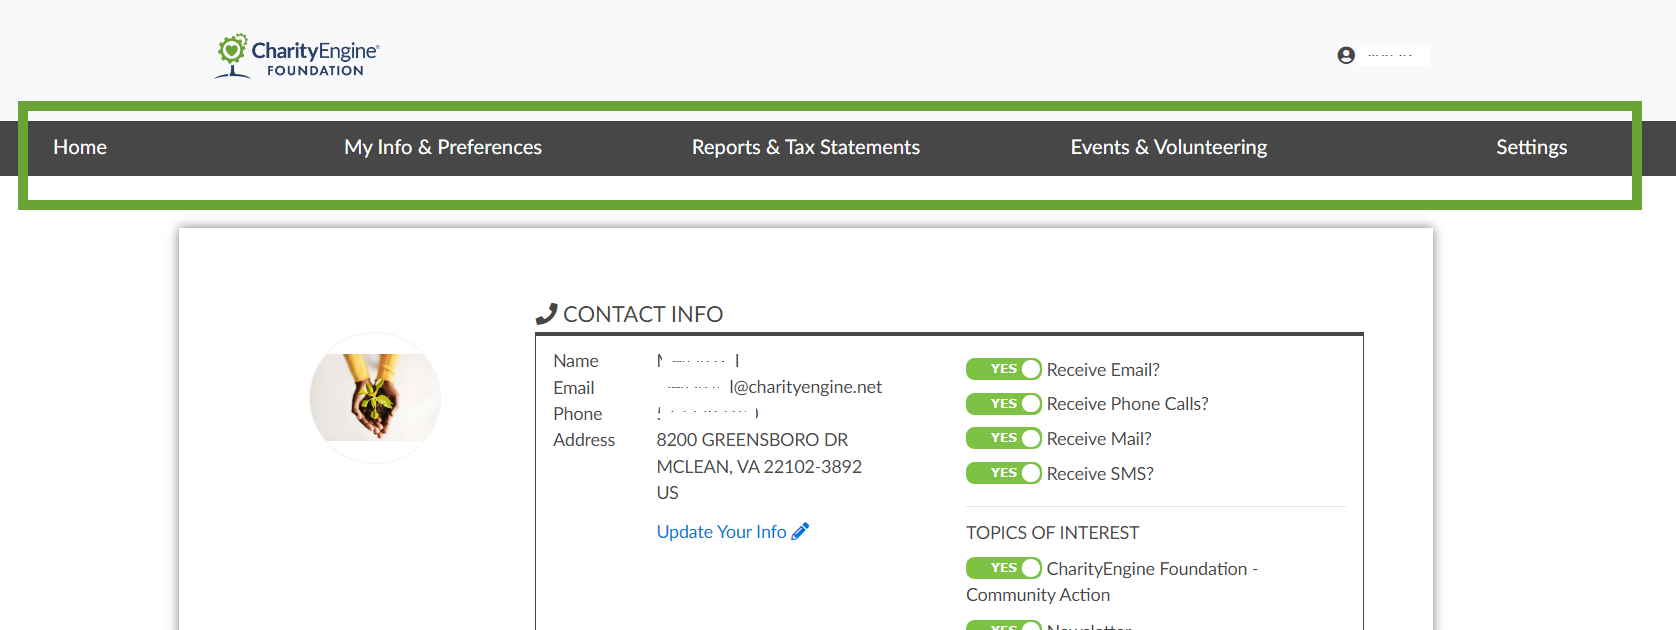
Using the Standard Center Theme, administrators will be able to access the following basic navigation for users:

  1. Home: Returns user to login/landing page and personal dashboard
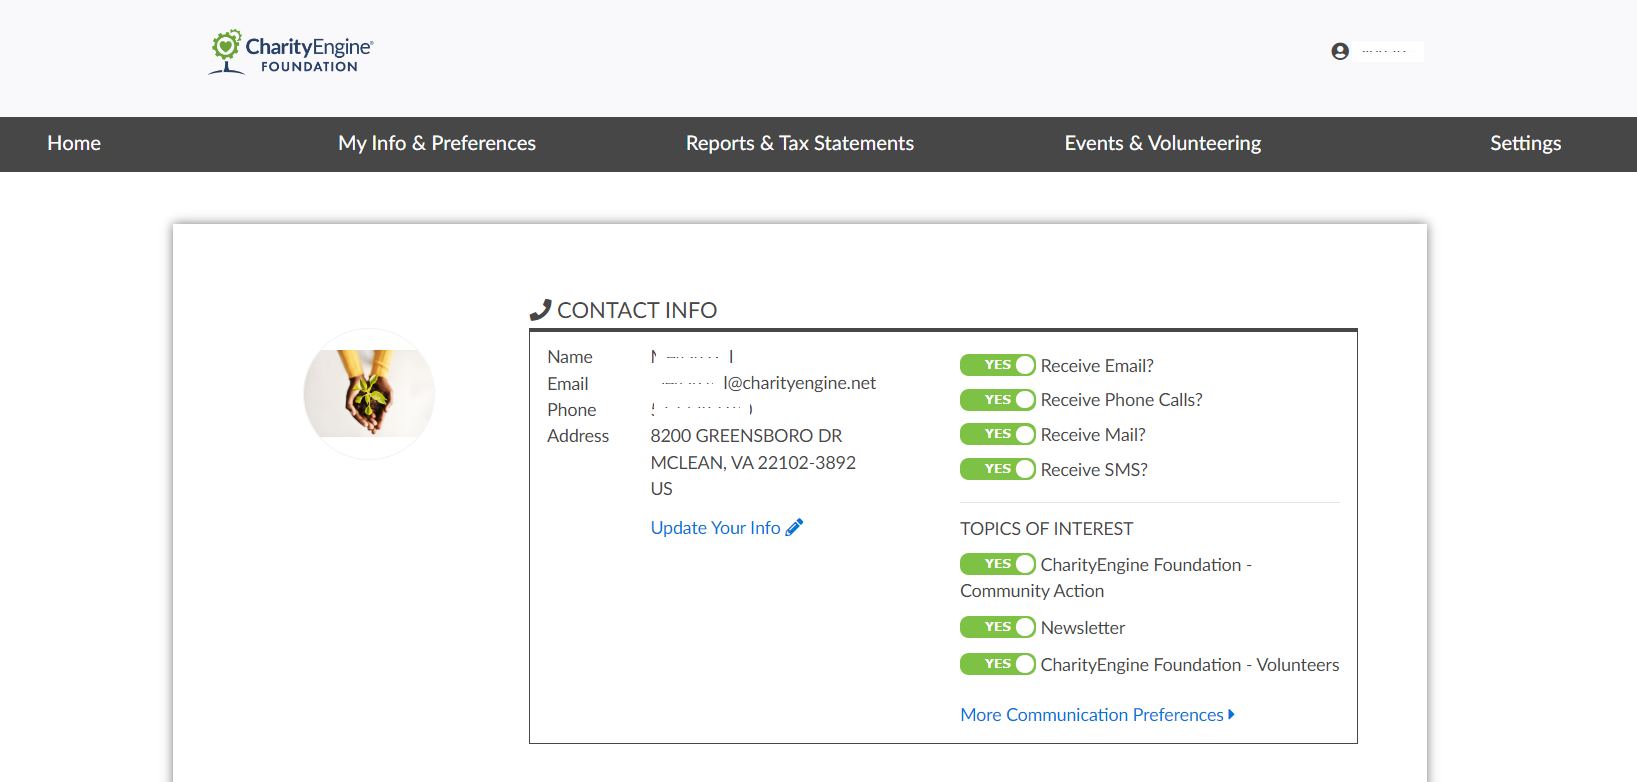
  2. My Info & Preferences: User can update contact information, communication preferences, opt in/out of communication opt in lists
  3. Reports & Tax Statements: User can review giving history, view/manage accounts (sustainer, pledge, and/or memberships), review reports & statements such as end of year tax statements
  4. Events & Volunteering: User can view and manage event tickets including assigning purchased tickets to guests and/or view raffle ticket numbers
  5. Settings: User can change their password for login to the organization's user center

Customization of Feature/Functions

Dashboard Tab

Step 1: Leverage the dashboard as a communication tool to your organization including announcements, news, and coming events.

Note: leverage the tool bar for more customization including inserting source code customization, adding buttons, icons, etc.

Signup Tab

To allow users to create new accounts for the User Center, turn on Enable Signup.

Donations Tab

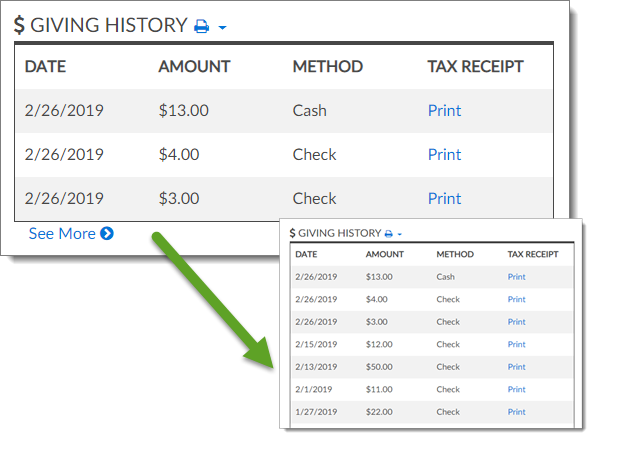
Step 1: To show the donation history of the logged-in user in the User Center, click on Show Donations.

Step 2: Donors can download their tax receipts for each of their donations if the Tax Acknowledgements is enabled.
    • Note: If the Tax Acknowledgement is enabled, you can also provide a year end giving summary by creating a statement template within the Statement Template. Learn more here on how to create a statement template.

Step 3: Tax Ack. Template can be used for all receipts generated in the User Center.

Note: By default, the three most recent gifts will appear. To see the full history, users should select See More. Please note, if the organization supports multi-currencies, the donor's currency will display appropriately.
The tax receipt for any single gift can be generated in PDF form by clicking on Print under Tax Receipt.
The Print icon gives users the option to download receipts for all transactions from the current tax year and the last tax year.

Accounts

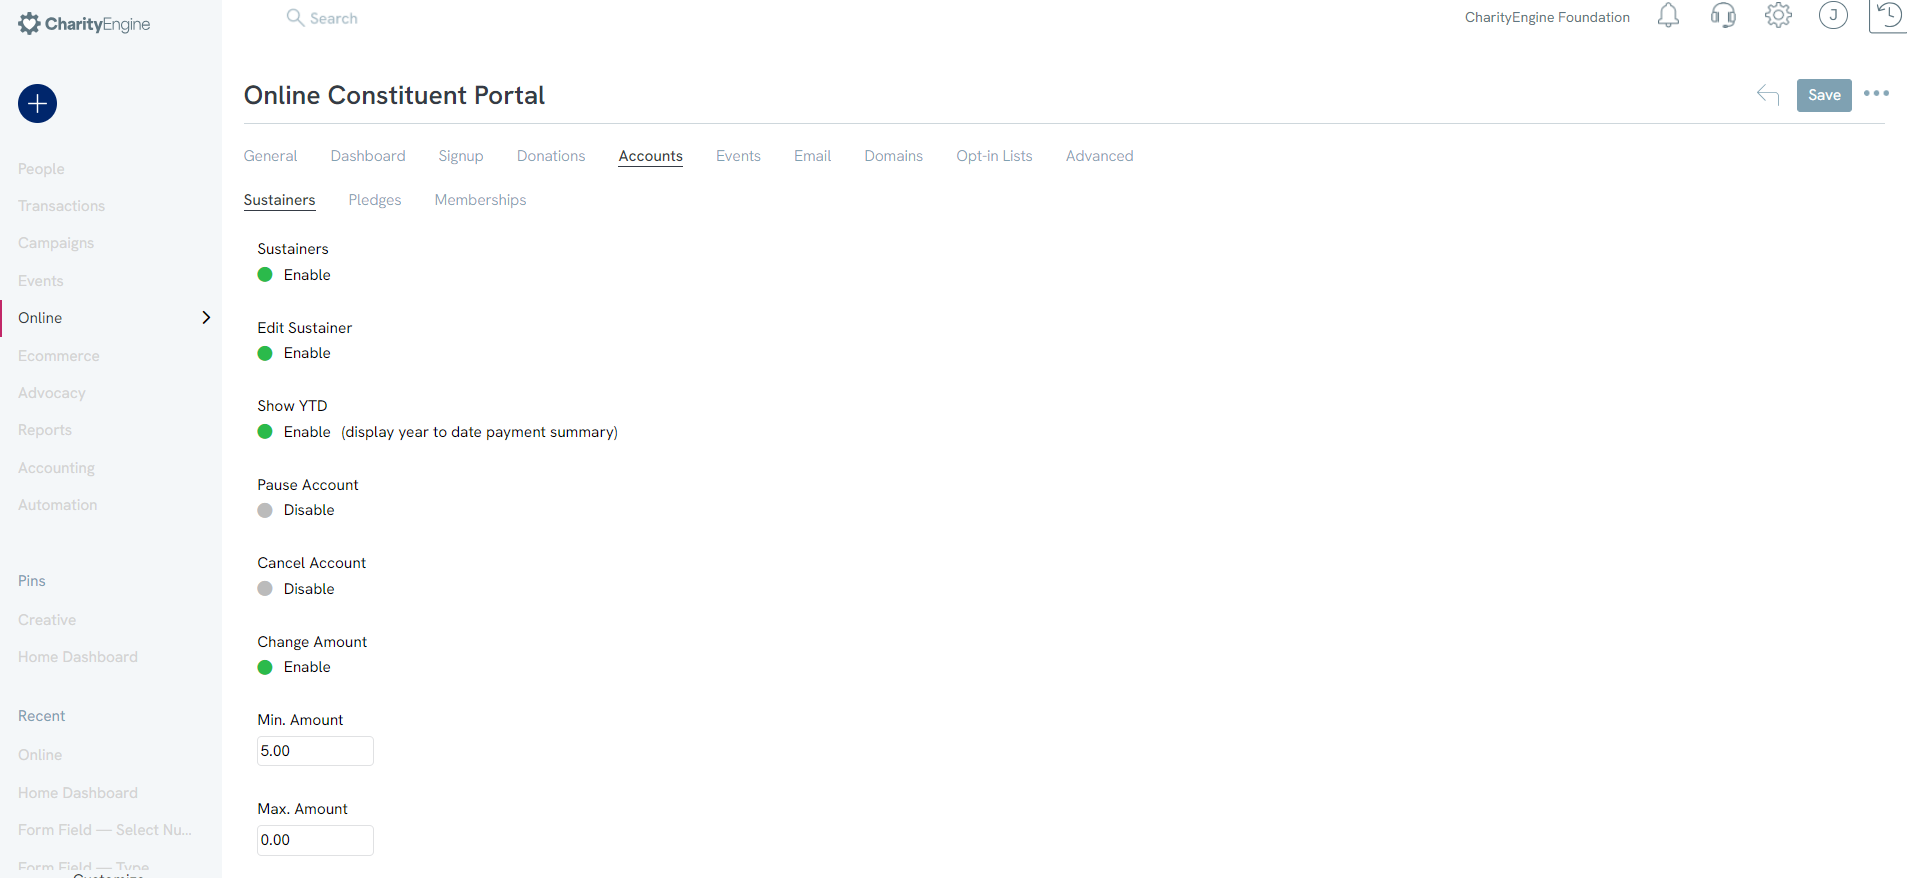
In this tab administrators can configure the options they want available for users to view and/or update their sustainers, pledges, and/or membership accounts as established within CharityEngine. To show the section, enable one or more of the account options aligned with your organization's account support. By enabling these options, you will allow your donors to view, edit, and manage their financial contributions. 

Events Tab

To show the upcoming event registrations of the user, Enable Events in this tab.

Email Tab

In this tab, administrators can configure the auto-responder templates for Welcome Emails (upon sign up). Configure the the Email Subject, Email Reply To, and Email Display Name while also leveraging an out of the box email template or configuring a custom template for your organization.

Domains Tab

The web address of the User Center is determined on the Domains tab. From the Domains drop down select usercenter.charityengine.net (which is the default URL location) or a custom domain already configured for the User Center and enter what you would like the domain suffix to be and Click Add.


Note: If no custom domain is configured, a good suffix is your organization’s name.

After configuring the User Center’s domain and selecting charityenginefoundation as the Suffix, the User Center in this example, can be found at: https://usercenter.charityengine.net/charityenginefoundation

Note: If you would like to use a vanity domain, contact support or your account representative.

NOTE: Make sure you update your domain before saving!

Opt-in Lists Tab

General Tab

To show Opt-in Lists for that users can subscribe to, mark Enable-Opt In List as Yes. To allow users to unsubscribe from Opt-in lists, mark Enable Unsubscribe as Yes.

Note: If the opt-in list is enabled in the user center, you must also enable the Unsubscribe or donor will not be able to unsubscribe.

Lists Tab
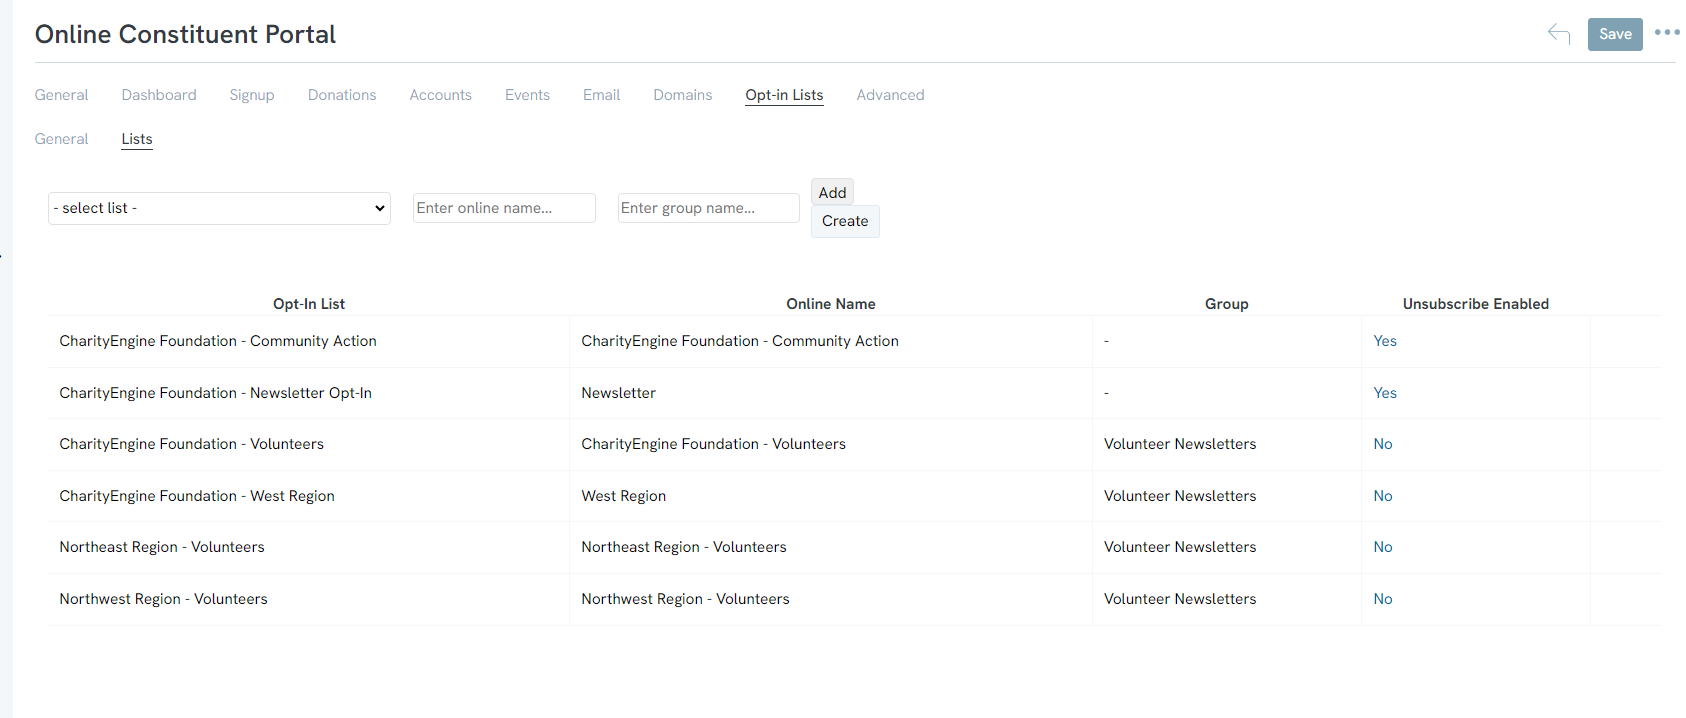
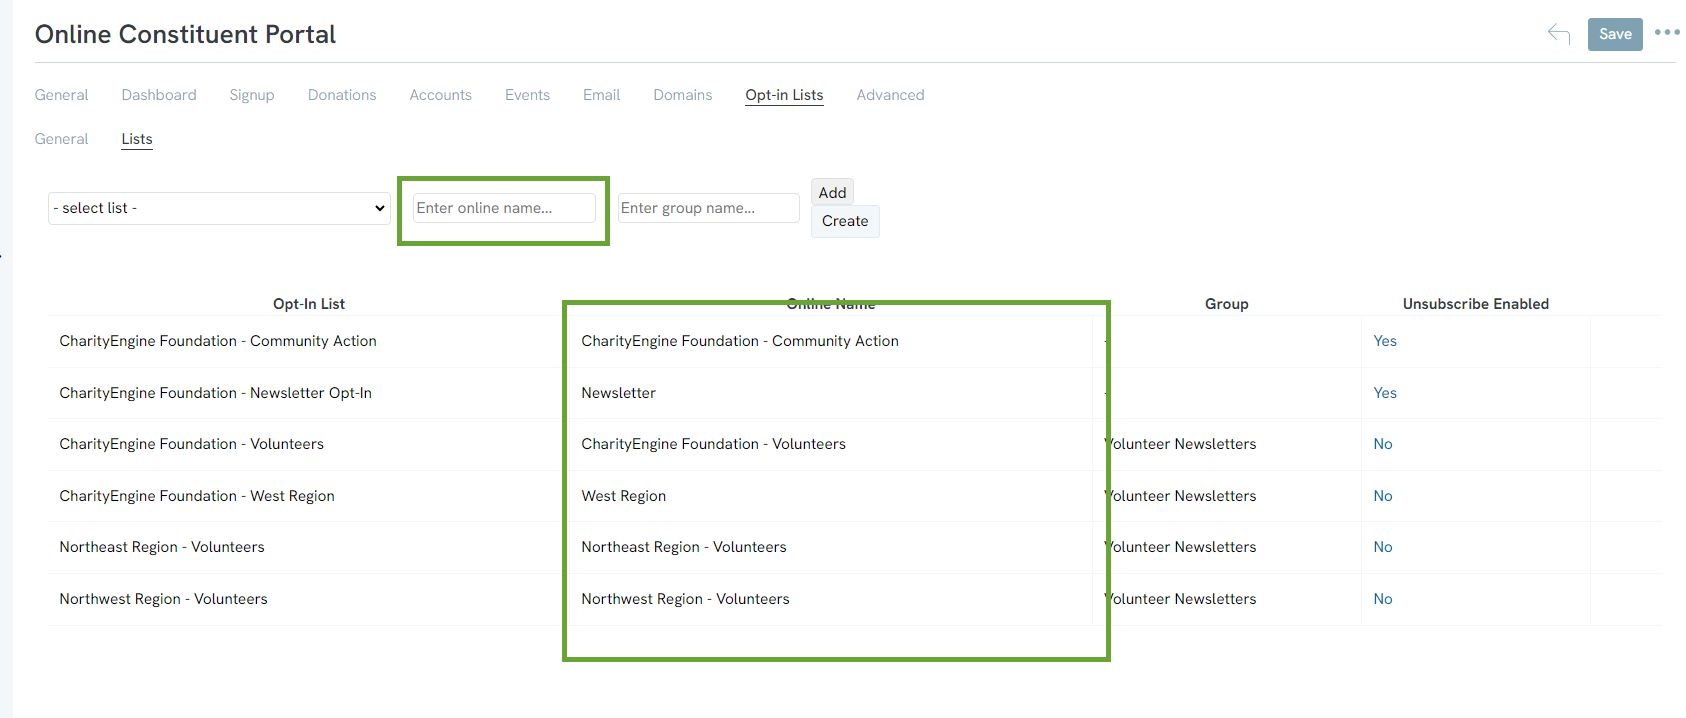
On the lists tab, administrators can configure which lists they want users to be able to subscribe to or unsubscribe from. To add a list, select an already configured list in the Campaigns > List Management > Opt-In Lists section of CharityEngine and enter the external/friendly name that should appear in the Online Constituent Portal and Click Add.
The order that lists are added is reflected in the Online Constituent Portal, so add the lists you want to appear at the top first.
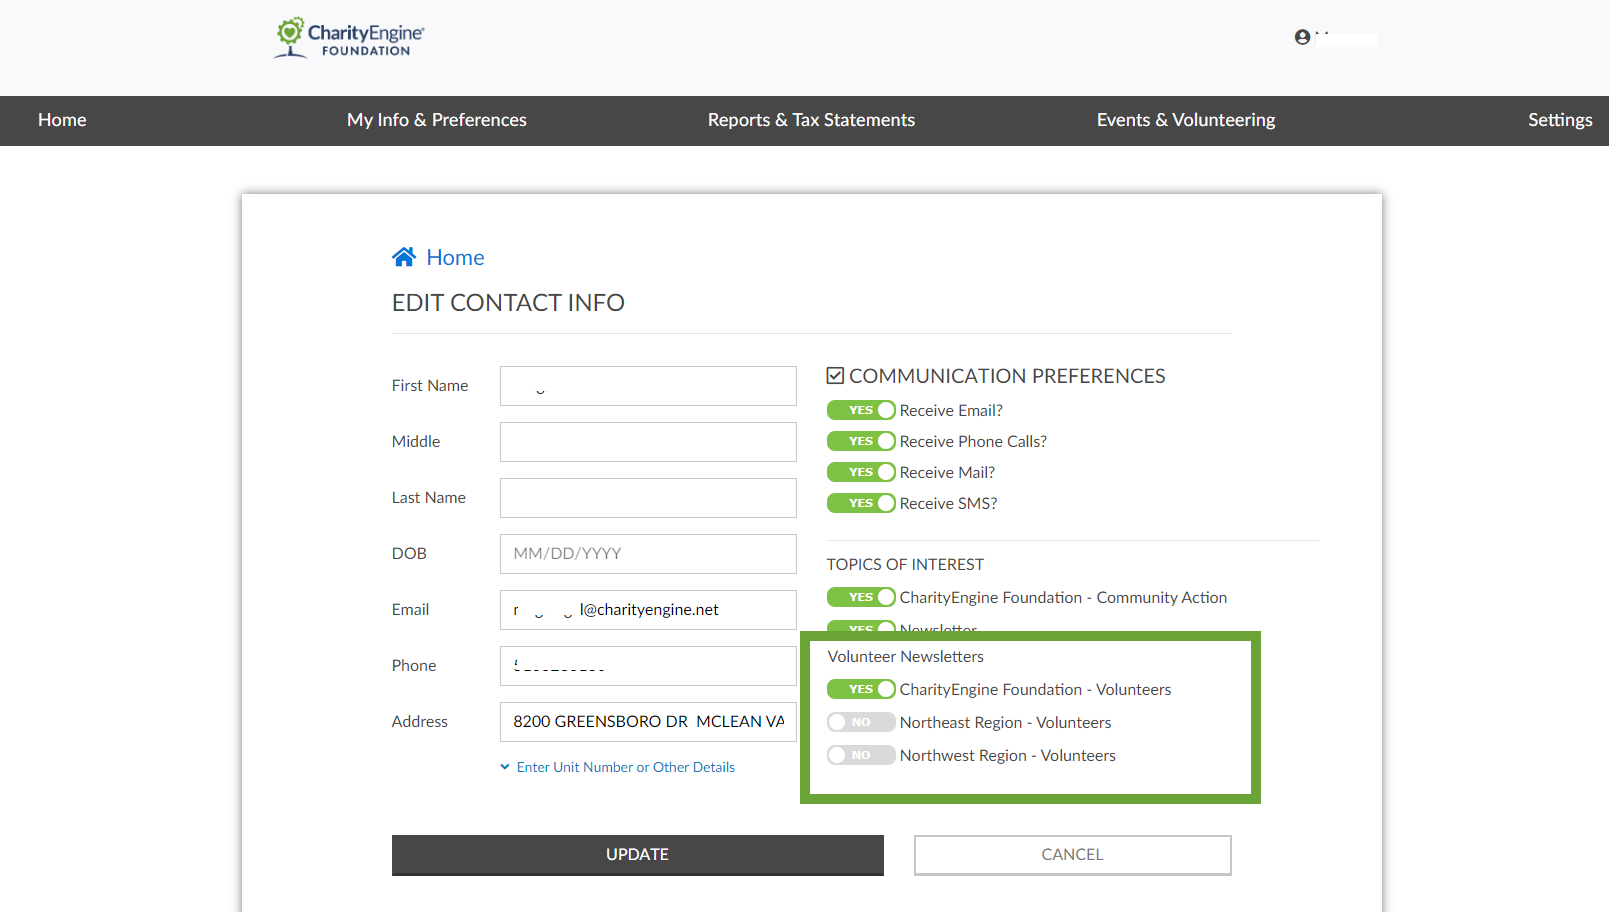
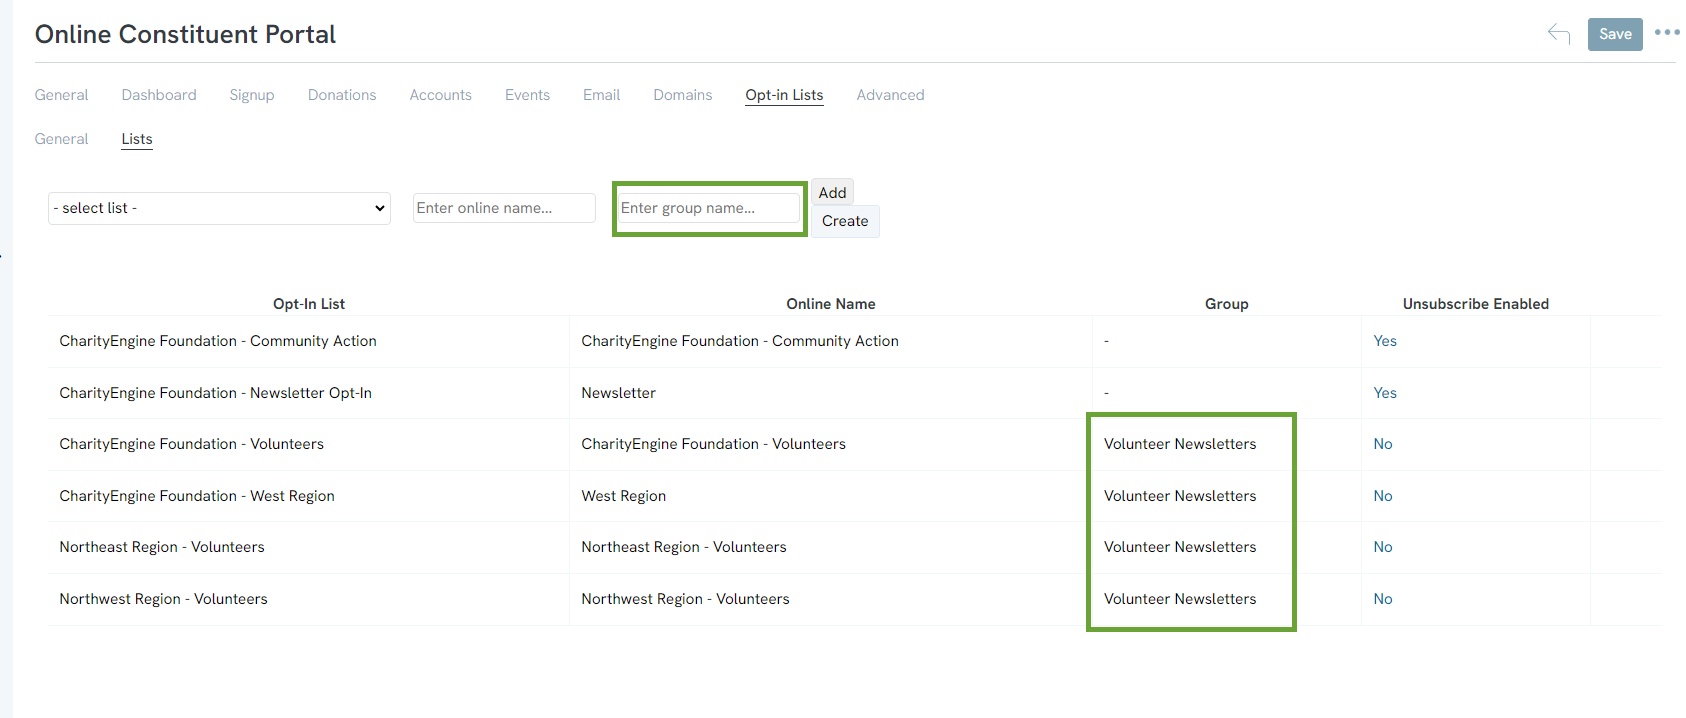
In addition, you can group Opt In Lists for your end user. In this example, the user can opt in/out of three various newsletters related to volunteer information.
Note: If you wish to group opt in list name (such as Volunteer Newsletter), select the list, update the online name and enter the group name then click ADD. Lists included within the group will be displayed under the headline of the Group Name and presented collectively for your end user's management.
Add the opt in list and the group name in Enter Group Name field and click ADD.
Note: For directions on how to create new Opt-in lists click here.
You can change the name the constituents see in the User Center by changing the Friendly Name. You can edit the Friendly Name by managing the List.


FAQs & Further Reading

Q. I'd like to set up end of year tax statements for my donors. How can I set these up for my donors?
A. Follow our steps here for information on how to create an annual tax statement for donors to easily access and print. 
Q. What views will be presented to the end user?
A. See our article here for more demonstrations of available options for your donors when using the user center


Related Articles

Powered by Powered By CharityEngine