Introduction
This is an advanced workflow that crosses multiple modules. If you are not familiar with the query builder or sending emails with custom tokens to your donors, please review those articles first. Organizations can launch the Constituent Portal to their existing contacts in two phases: first, configuring contact logins on the back end so every login is predictable, and second, announcing the launch to contacts on the front end with an email that tells them how to log in. This article is not about configuring the portal itself – it's strictly about this launch workflow, and it addresses a common source of support cases organizations receive once a portal goes live.
Table of Contents
Why This Two-Phase Launch Approach?
Any interaction with CharityEngine – signing up for an opt-in list, making a donation, entering a peer-to-peer competition, or registering for an event – can create a login for that contact, even though they've never actually used it. So when a newly launched Constituent Portal tells contacts to log in, they often don't realize a login already exists for them, or they don't know what their username is.
A simple fix is to make every contact's login the same and predictable before announcing the launch: set each contact's username to their primary email address, and make sure Online Access is turned on. From there, a launch email can direct contacts to log in using their email address and use Forgot Password to set a password. This two-phase approach – configure on the back end, then announce on the front end – significantly reduces the number of calls organizations receive once the portal launches.
Instruction - Phase 1: Configure Contact Logins for the Portal Launch
Step 1: Navigate to Automation > General > Queries and create a new Contacts query.
Step 2: Add the Contact ID, Username, and Primary Email Address fields to the query's select list. The Primary Email Address is needed later to populate the corrected username.
Step 3: Add a filter on the Username field so it does not contain the @ symbol. This isolates contacts whose username isn't already formatted like an email address – in other words, contacts who still need to be normalized.
Step 4: Click Run to review the results, and spot check a few records to confirm which usernames need correcting.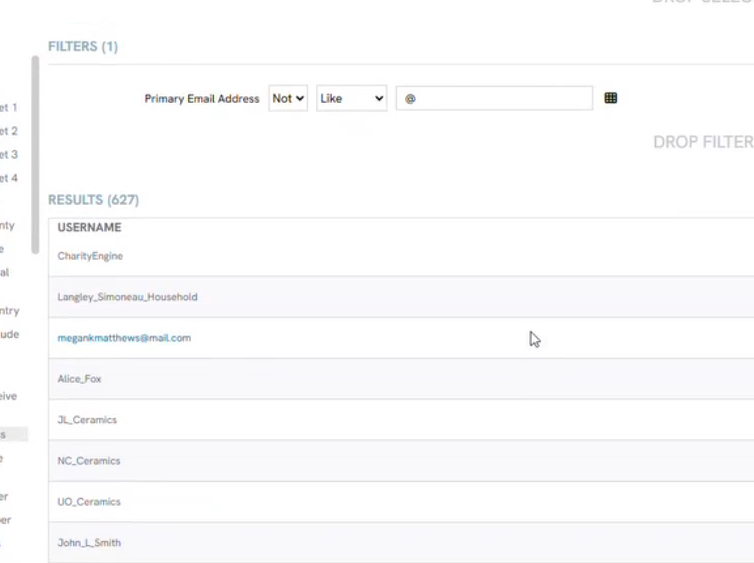
Note: If the contact list is very large, this update doesn't need to be done all at once. Consider running and importing it in smaller batches – for example, by tag or group.
Step 5: Save the query, then export the results to a spreadsheet.
Step 6: In the exported spreadsheet, prepare an import file with three columns: Contact ID, Email Address, and Active (set to 1, to turn on Online Access for each contact).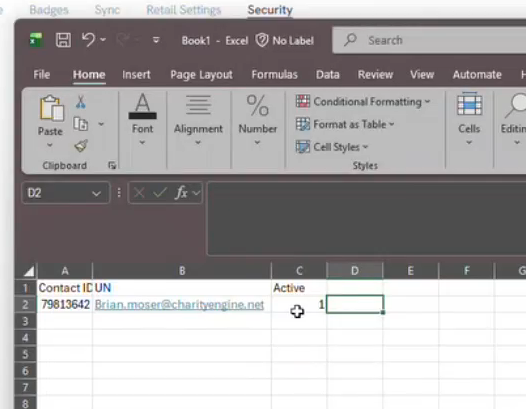
Step 7: Navigate to the Importer and start a new import. Choose Contact Credentials as the import type – this is a separate database from importing to People, used specifically for login records.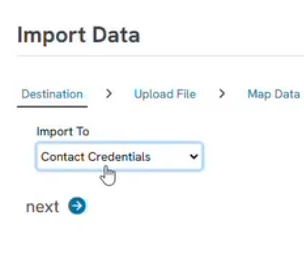
Step 8: Upload the prepared file and click Next.
Step 9: On the field mapping screen, confirm the three columns are mapped correctly: Contact, Username, and Is Active. Click Next.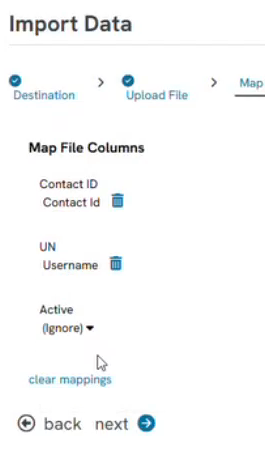
Step 10:: Check the job status to confirm the import completed successfully.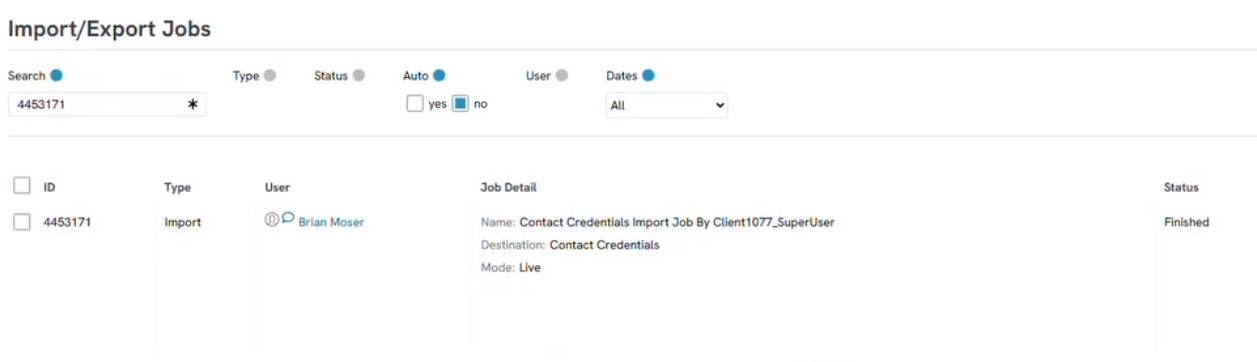
Step 11: Spot check the results by opening a person record. Confirm that Online Access is now on and the Username matches the contact's email address.
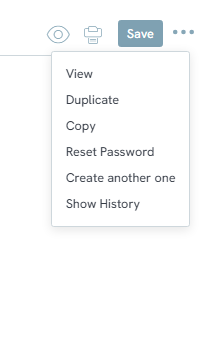
Note: If a contact calls in for help, their password can be set directly from their record by clicking Change next to the password field, so they can log in right away on the call – instead of directing them through the password reset flow. A temporary password can also be sent this way through a secure email.
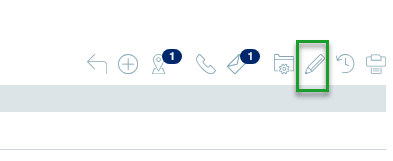
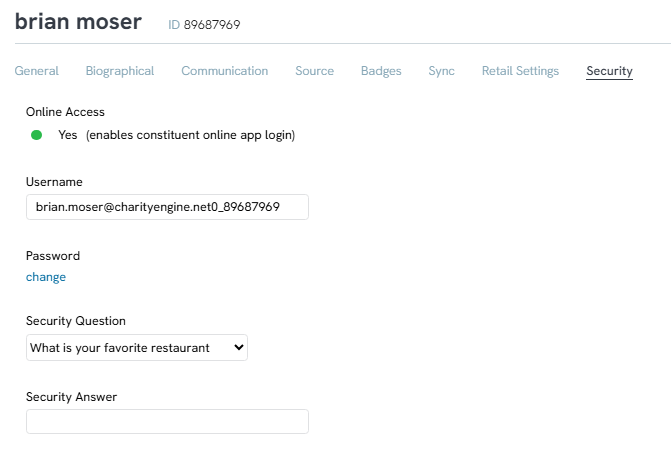
Contact Record > Pencil to Edit > Security Tab > 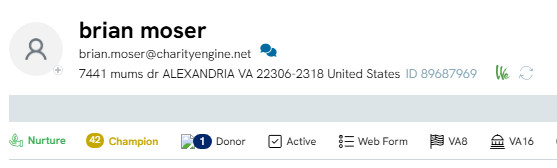
Instructions - Phase 2: Announce the Portal Launch by Email
Step 1: Build a Contacts query for the audience who should be told to log in (for example, filtered to a specific segment such as members or sustainers). Include the Contact ID and Username fields.
Step 2: Click Run to confirm the results, then save the query as the audience.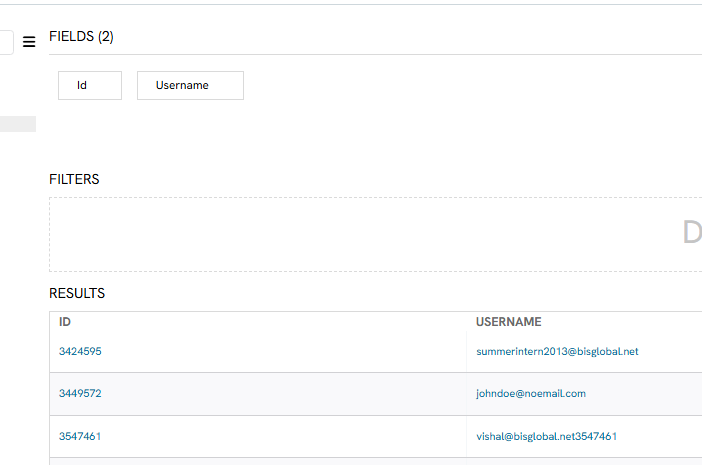
Step 3: On the email creative, use the ellipsis (three dots) menu and select Save and Send Email Blast to begin attaching this audience – the email does not need to be sent at this stage, only configured.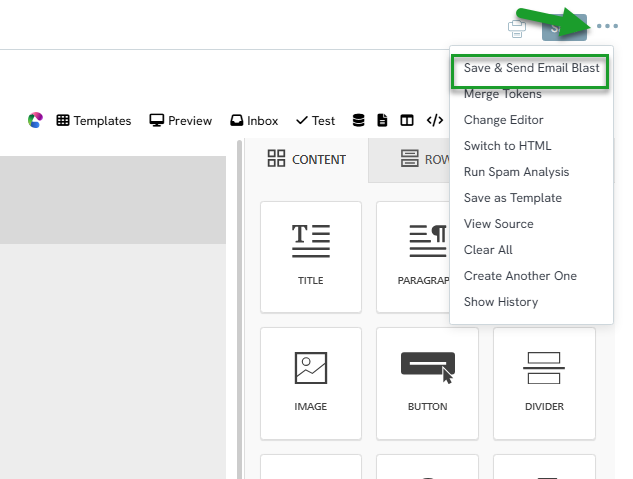
Step 4: On the Audience Source step, select the saved query. If prompted to overwrite the email creative with the changes, confirm Yes so the list connects to the creative.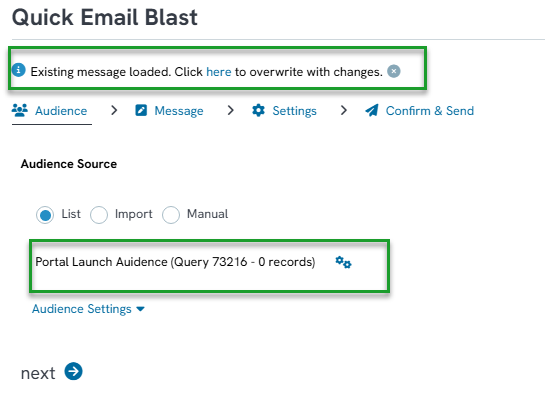
Step 5: Click Next through the Settings step without making changes.
Step 6: On the Message step, write the email content – for example, welcoming contacts to the new portal, describing what they can do there, and explaining that their login is their email address and they can click Forgot Password to set one.
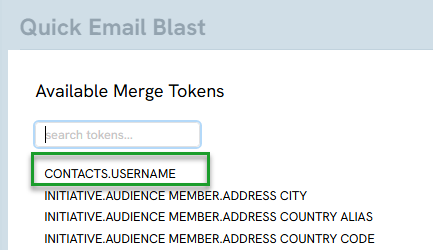
Step 7: Click the Token button and select the Contact Username token (listed among the tokens pulled from the query, alongside fields like Contact Full Name) to insert it where the recipient's username should display.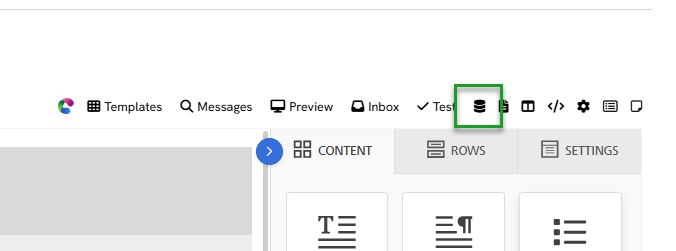
Step 8: Click Next to proceed to the Settings step and allow the tokens to save.
Step 9: The Email Blast workflow can now be abandoned (Simply "X" out of the browser tab) to send later, or completed to send right away.
Step 10: To confirm, return to the creative and refresh it. The Username token should now display in the email content, ready to be sent using this query as the audience.
FAQs & Additional Reading
Q. Why don't contacts realize they already have a portal login?
A. Nearly any interaction with CharityEngine – a donation, event registration, peer-to-peer signup, or opt-in – can create a login behind the scenes, even though the contact has never used it. When told to log in, they often don't realize one already exists.
Q. How can I find contacts whose username isn't already their email address?
A. Build a Contacts query and filter the Username field to exclude values containing "@". This isolates the contacts that still need to be normalized.
Q. What if I have too many contacts to update at once?
A. The update doesn't have to happen all at once. It can be run and imported in smaller batches, for example by tag or group.
Q. Can I help a contact log in directly over the phone?
A. Yes. From their record, click Change next to the password field to set one directly, or send a temporary password via secure email, instead of directing them through the password reset flow.
