Introduction
CharityEngine supports multilingual configurations to enhance the user experience for diverse audiences. This article outlines how to set global and form-specific language preferences, apply custom translations, and enable automatic translation features using tools like Google Translate.

Table of Contents
Prerequisites
Setting a Global Language Preference
To set a default language for all online applications (e.g., web forms, the constituent portal, peer-to-peer integrations):
-
Navigate to the Configuration app.
-
Select General & Account Settings.
-
Click on the Online tab.
-
Select your preferred language under Language Preferences.
-
Click Save.
📝 Once saved, all online applications will automatically reflect the selected language by default.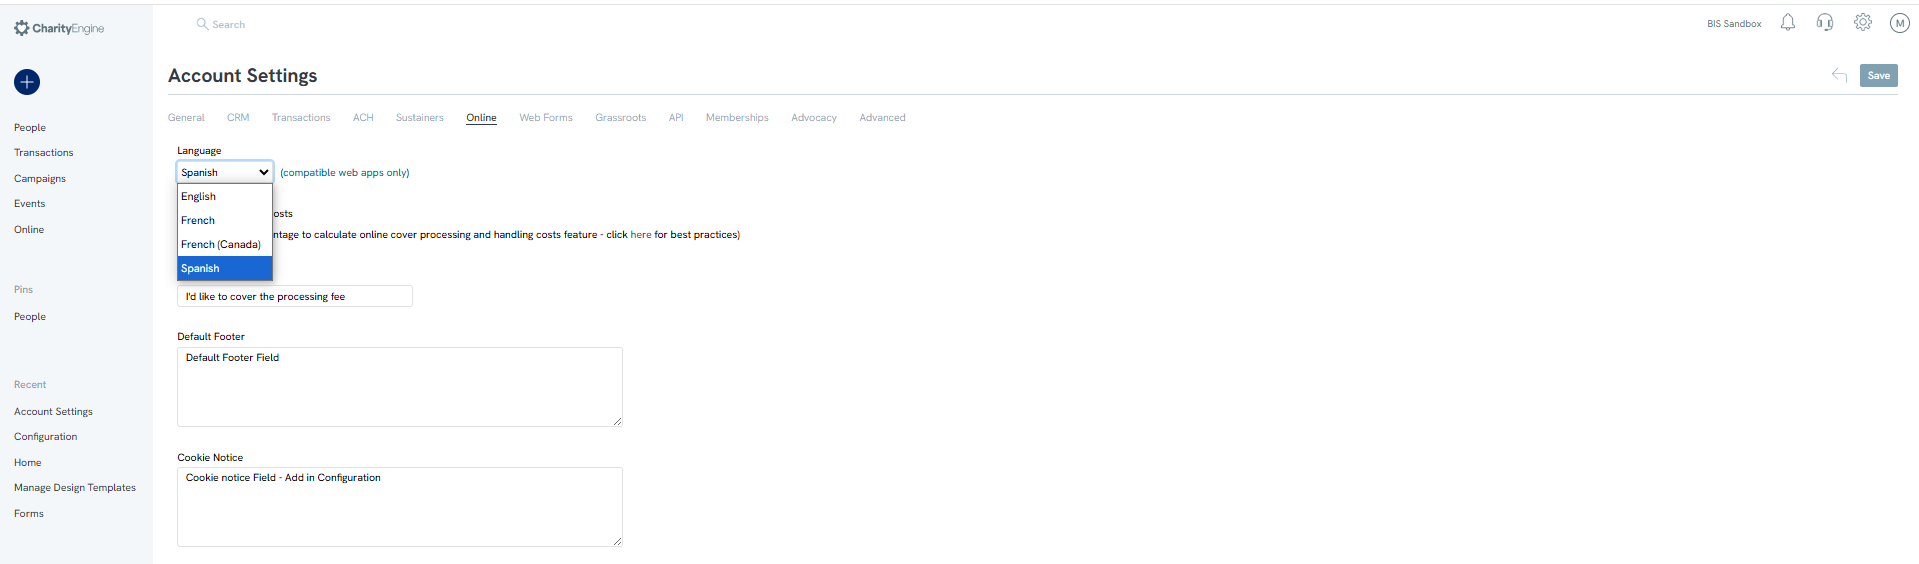
Setting Language Preferences for Individual Web Forms
If you prefer to translate only specific web forms:
-
Navigate to the Online app > Web Forms > Search & Manage.
-
Locate the form you'd like to update and click Manage.
-
Navigate to the Advanced tab.
-
Under Payments: General, you'll find the Language setting.
-
By default, this mirrors the global language setting. To override:
-
Select a different language for the form.
-
Click Save.
-
The selected web form will now display in the specified language.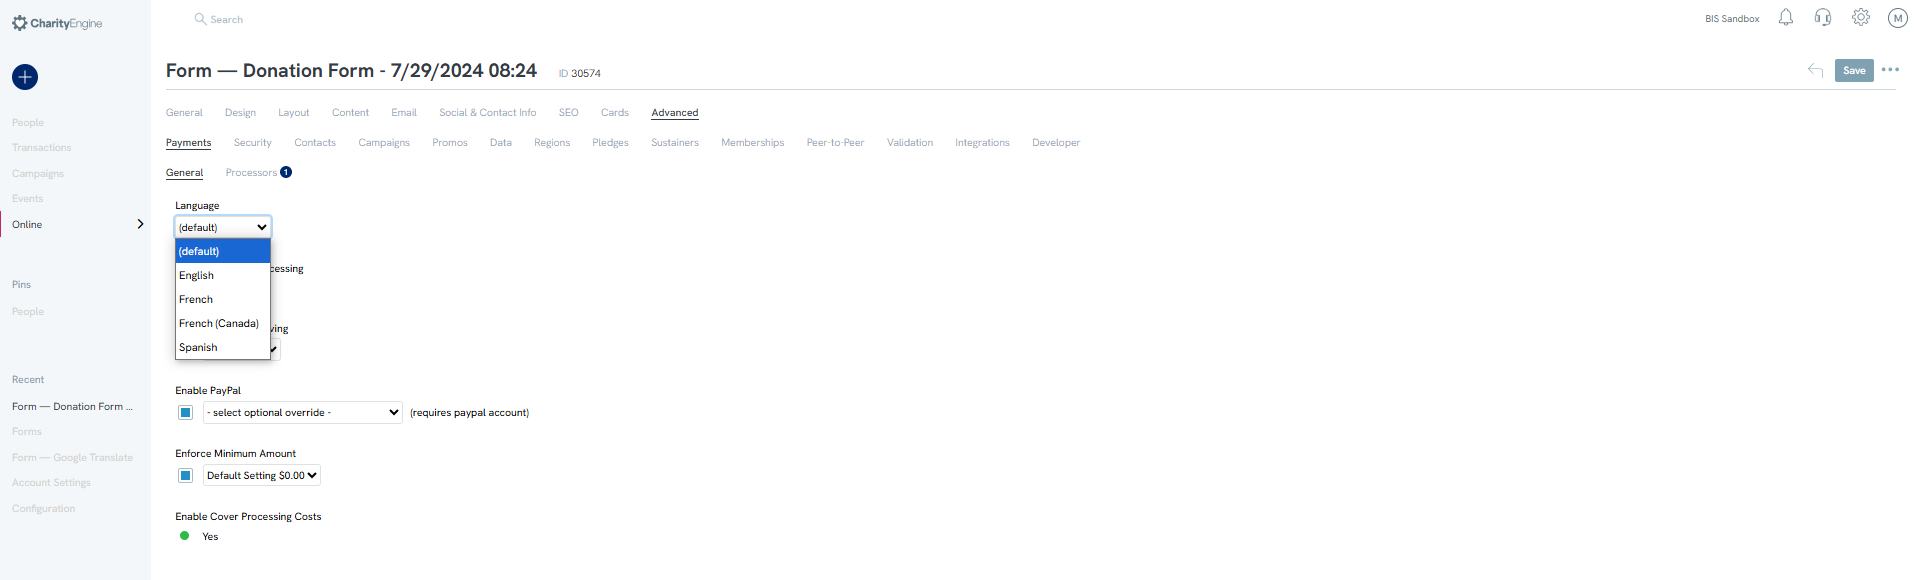
Adding Google Translate to Online Applications
Organizations seeking to support multiple languages or offer real-time translation can implement Google Translate via a custom script.
Step 1: Add the Template
-
Navigate to the Configuration app.
-
Select Design & Message Templates.
-
Choose Website Design as the template type.
-
Add or edit a template, embedding the Google Translate script of your choice.
🔁 The script can also be enablabled for automatic page translation and a dropdown for users to select their preferred language.
Suggested Google Translate Scripting Option (1 language, no drop down)
<script src=https://translate.google.com/translate_a/element.js?cb=googleTranslateElementInit></script>
<script>
setCookie('googtrans', '/en/fr-CA', 365, 'None');
function googleTranslateElementInit() {
document.body.addClassName('googleTranslateOn');
new google.translate.TranslateElement({
pageLanguage: 'en',
includedLanguages: 'fr-CA',
autoDisplay: true
});
}
</script>
Step 2: Apply the Template to Web Forms or the Constituent Portal
-
For Web Forms:
-
Navigate to Online > Web Forms > Search & Manage.
-
Manage your web form.
-
Click the Design tab.
-
Select your custom template with the translation script.
-
Click Save.
-
-
For the Constituent Portal:
-
Go to Online > Constituent Portal.
-
Access General Settings.
-
Apply your translated template under Template.
-
Click Save.
-
⏳ Note: When using Google Translate, there may be a slight delay in the language rendering.
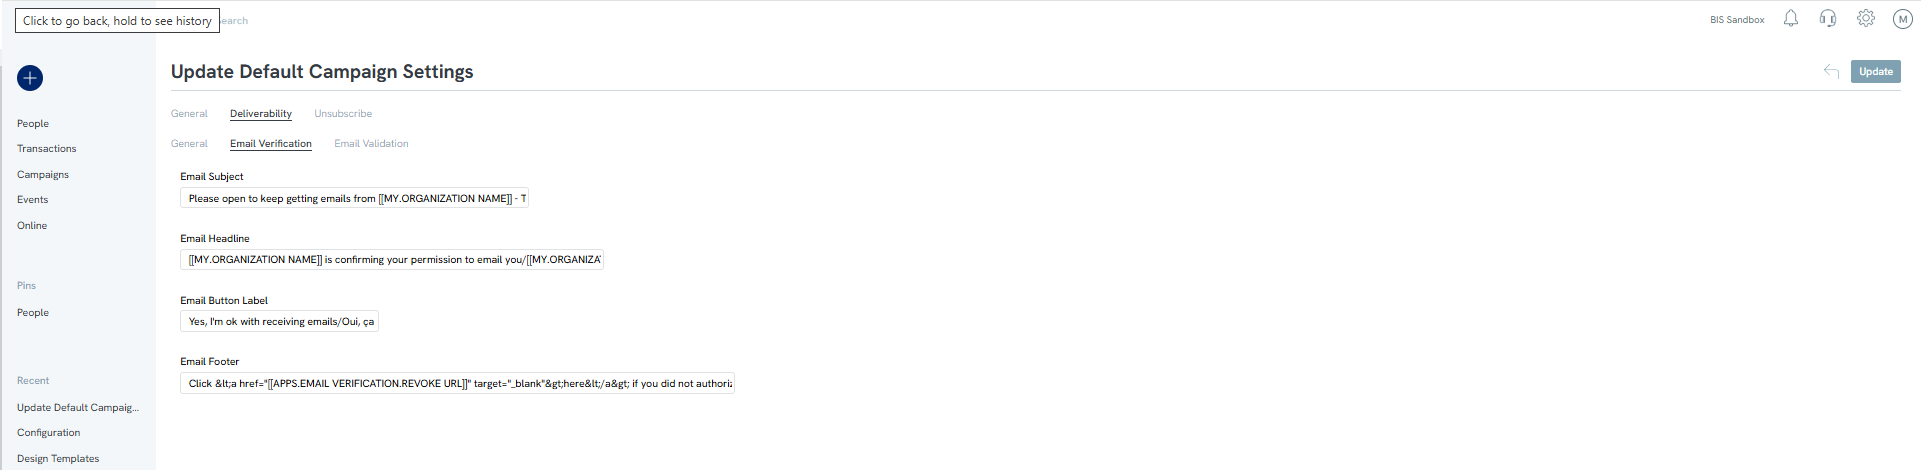
Translating Email Verification Content
To customize and translate your email verification messages:
-
Navigate to the Configuration app > Campaigns > Default Settings.
-
Select the Deliverability tab.
-
Scroll to Email Verification and update the following fields:
-
Email Subject
-
Headline
-
Button Label
-
Footer Text
-
✅ Best Practice: If supporting two languages, consider displaying both within the same field using a separator (e.g., English - Español).
-
Click Update to save changes.