Introduction
Users can combine Products and Web Forms to sell items independently on a form, or to let donors direct additional dollars to specific funds beyond their main gift. This article walks through setting up a fund as a product so donors can give a discretionary amount to a cause, and setting up a real, sellable product (such as a book bag) complete with inventory and variants. It does not cover general web form building, the full product catalog and fulfillment center, or the Orders module.NOTE: You will need to reach out to the Client Experience department at: CX@CharityEngine.net if you do not see the Products module in your menu items.
Table of Contents
- Introduction
- Why Add Products to a Web Form?
- Instruction - Create a Fund as a Product
- Instructions - Add Fund Products to a Web Form
- Instructions - Set a Separate Fund and GL Code per Product
- Instructions - Allow a Free-Form Amount for a Fund
- Instructions - Create a Sellable Product with Inventory and Variants
- Instructions - Add the Product to the Web Form
- FAQs & Additional Reading
Why Add Products to a Web Form?
A fund set up as a product lets donors give as much money as they see fit to a specific cause, in addition to their main gift on the form. For example, a donor giving to a form's primary cause may also want to direct extra dollars toward a related, more specific interest that the organization supports – a fund product makes that possible on the same checkout. A real product, like a book bag, lets an organization actually sell physical merchandise directly from a web form, complete with inventory tracking and variants such as color or size.
Instruction - Create a Fund as a Product
Step 1: Navigate to Online > Shopping Cart > Products.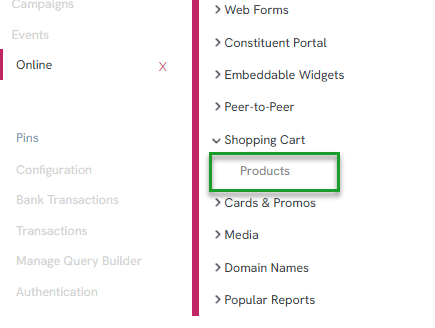
Step 2: Click the plus icon in the top right to create a new record.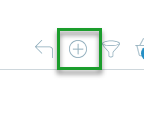
Step 3: Enter a Name for the fund (for example, "Fund One").
Step 4: Set the Price (for example, $10) and a Price Label (for example, "each"). This creates preset dollar increments that a donor can select as quantities (10, 20, 30, and so on).
Note: Fields such as Show on Page, Subtitle, SKU, and Availability don't need to be completed for a fund product – they're primarily used for the full shopping cart e-commerce experience.
Step 5: Click Save.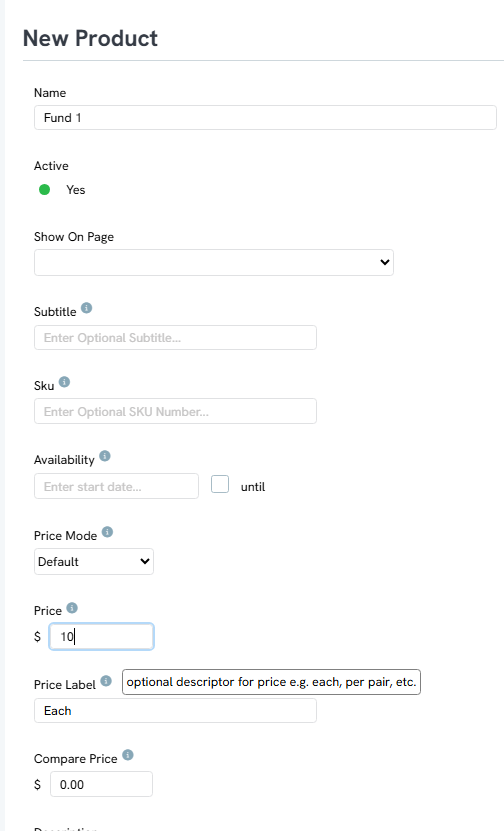
Note: The Inventory tab isn't needed for a fund product, since a discretionary fund shouldn't have a sellout limit. Inventory (and Variants) come into play for real, sellable products, covered later in this article.
Step 6: Repeat Steps 1–5 to create a second fund product (for example, "Fund Two").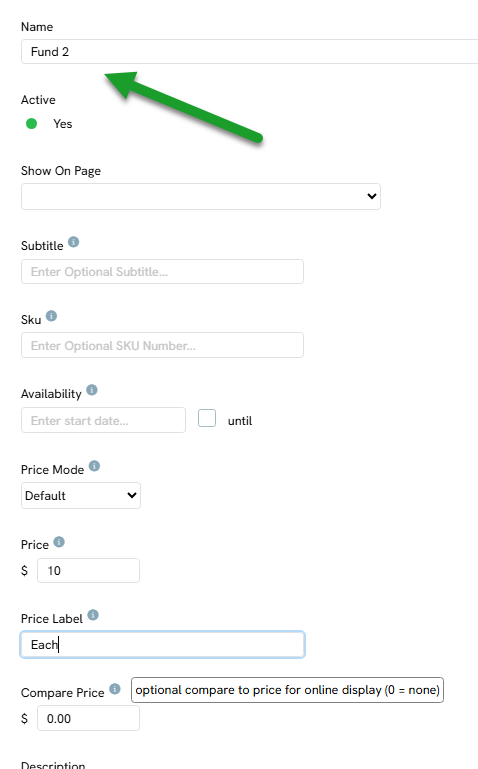
Instructions - Add Fund Products to a Web Form
Step 1: Navigate to Online > Web Forms > Search and Manage and open your donation form to manage it.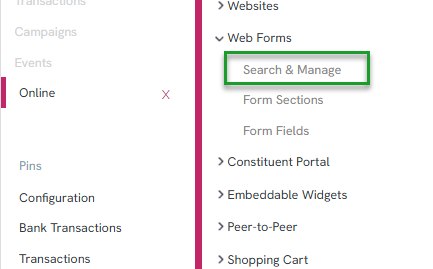
Step 2: Click the Layout tab and add a custom section (for example, "Additional Donations"), then click Save.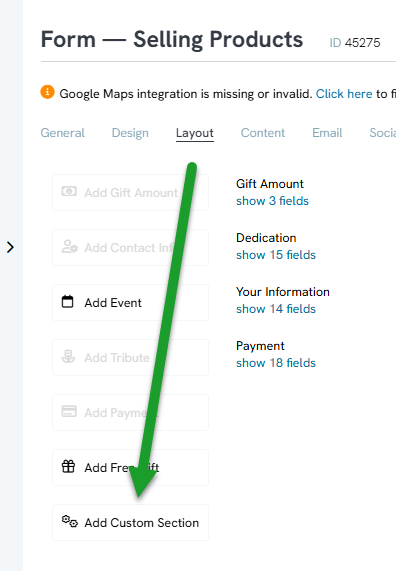
Step 3: Within this new section, click the plus button to add a field. Name it to match the fund product (for example, "Fund One"), then click Create Field.
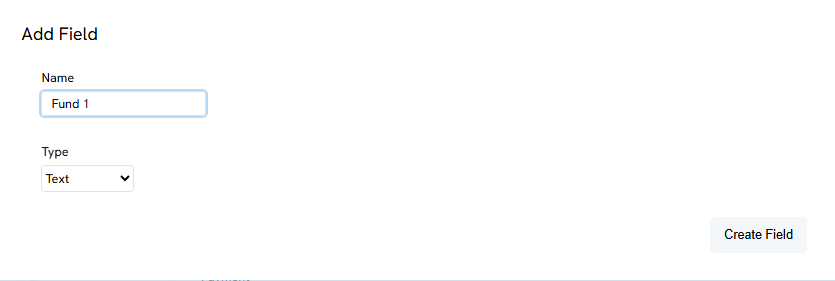
Step 4: Repeat Step 3 to add a second field for the other fund product (for example, "Fund Two").
Step 5: Click the pencil icon to edit the Fund 1 field. On the General tab, change the field's Type to the Product system field type.
Step 6: This displays a product dropdown – select the matching product (for example, Fund One), then click Save.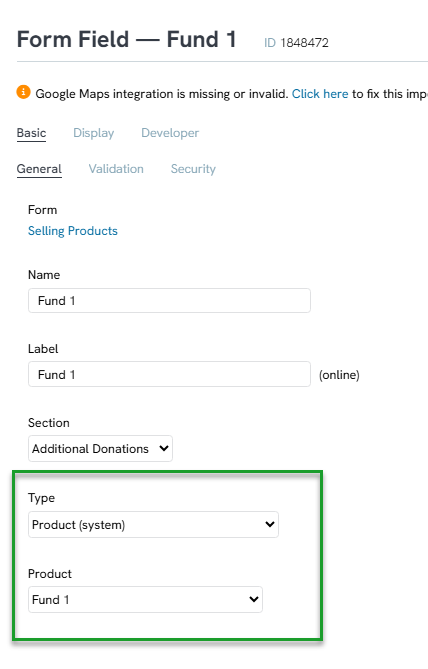
Step 7: Repeat Steps 5–6 for the second Fund field, selecting its matching fund product.
Step 8: Click the form's link to view it live and confirm the new section shows both fund selections.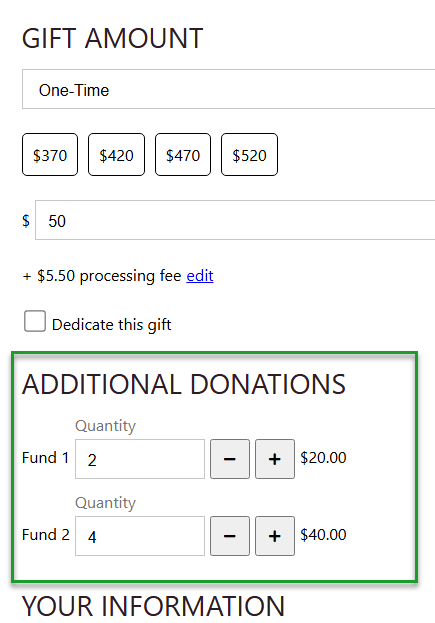
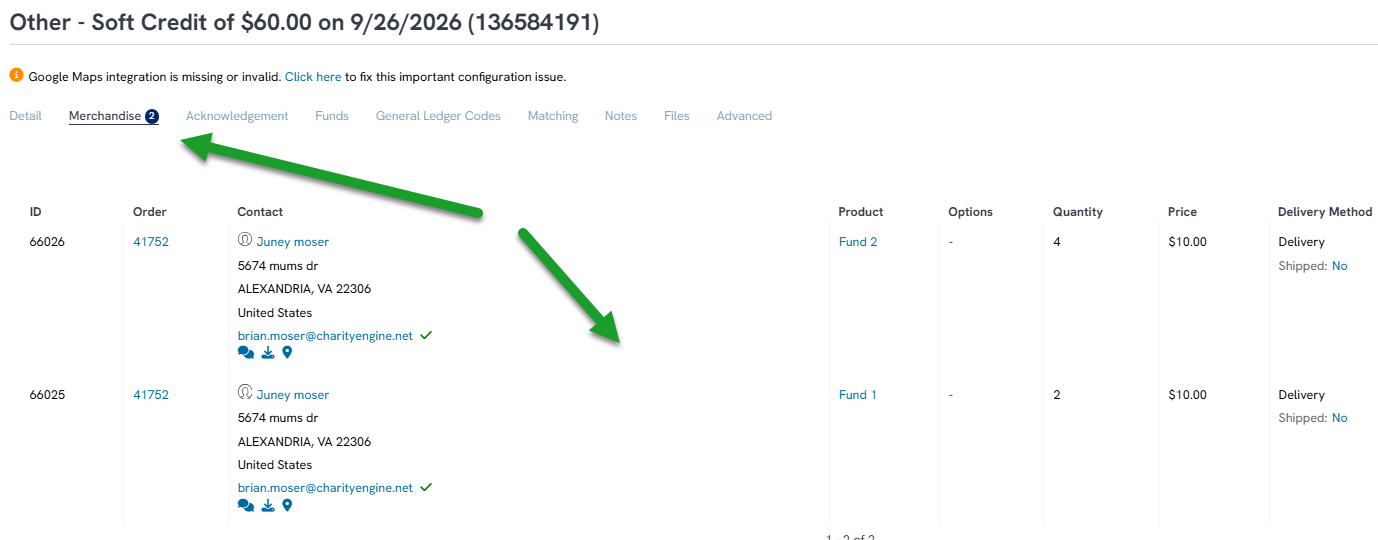
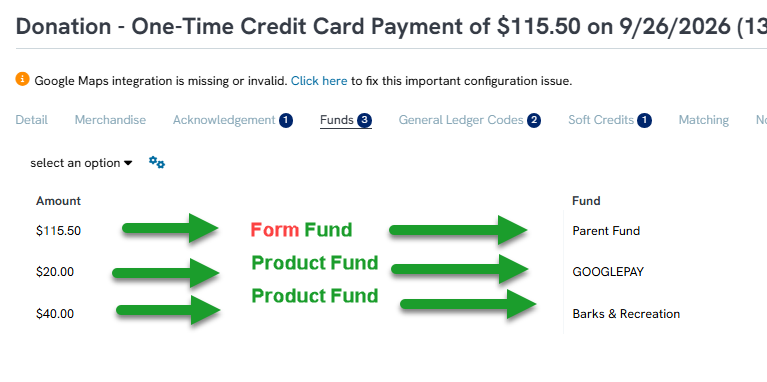
Note: When a donor checks out with an amount for the main form gift and quantities selected for one or more fund products, the fund amounts are broken out as a separate, linked product transaction. This can be reviewed in Transactions by managing that linked transaction and viewing its Merchandise tab, which lists each fund and the quantity given.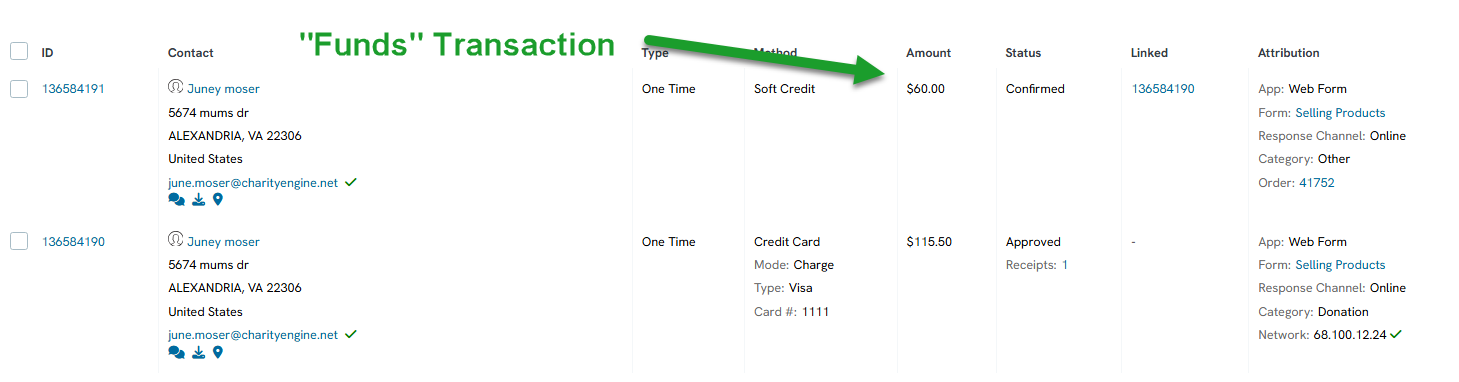
Instructions - Set a Separate Fund and GL Code per Product
Step 1: Navigate to Online > Shopping Cart > Products and manage a fund product created earlier in this article.
Step 2: Click the Advanced tab and select a Fund and a GL code specific to that product.
Step 3: Click Save.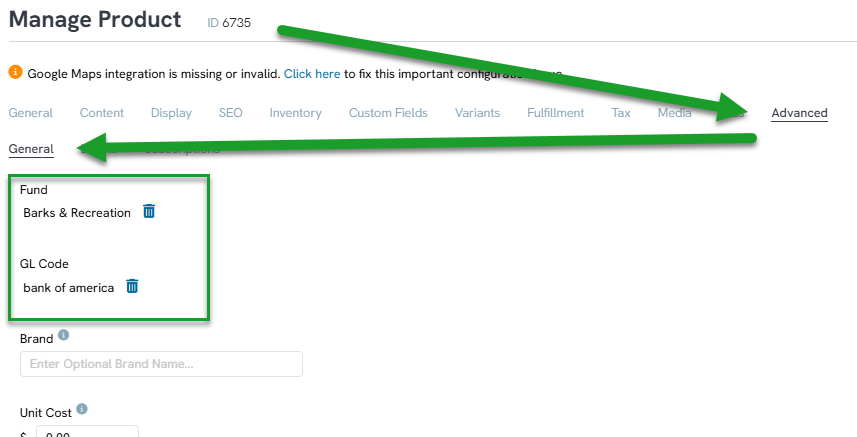
Step 4: Repeat Steps 1–3 for the other fund product, assigning its own fund and GL code as needed.
Note: A default fund and GL code can also be set at the form level for the form's main gift amount. When a transaction includes both a form-level gift and product-based fund amounts, each portion keeps its own fund and GL allocation and appears broken out separately on the resulting transaction.
Instructions - Allow a Free-Form Amount for a Fund
Step 1: Navigate to Online > Shopping Cart > Products and manage the fund product.
Step 2: Under the Price Mode drop down, click on Customer Selects
Step 3: Click Save.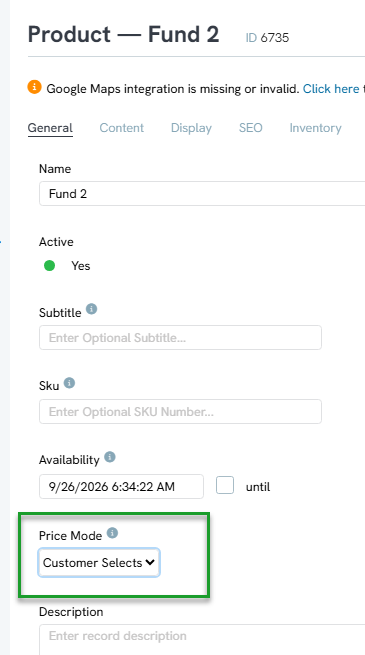
Note: With this Price Mode, the field on the form becomes a free-form amount entry instead of a fixed-increment quantity selector, letting donors type in the exact dollar amount they'd like to give to that fund.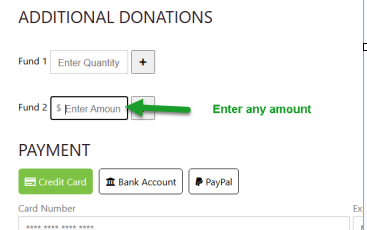
Instructions - Create a Sellable Product with Inventory and Variants
Step 1: Navigate to Online > Shopping Cart > Products and click the plus icon to create a new record.
Step 2: Enter a Name (for example, "Book Bag") and a Price (for example, $65), then click Save.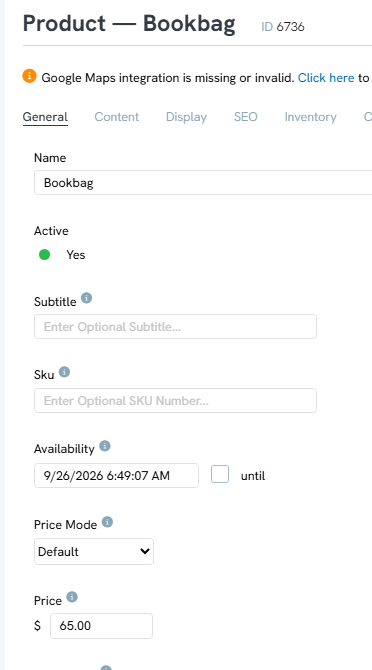
Step 3: Click the Inventory tab and toggle on Use Inventory.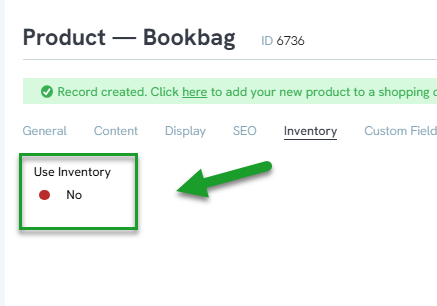
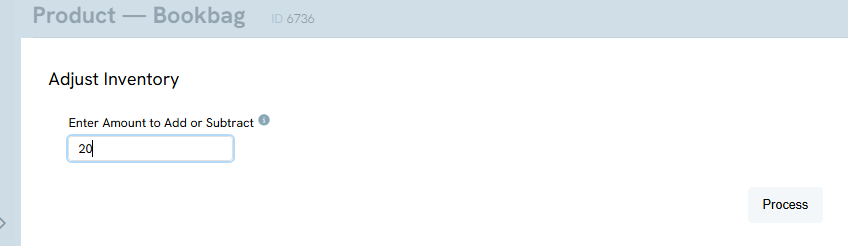
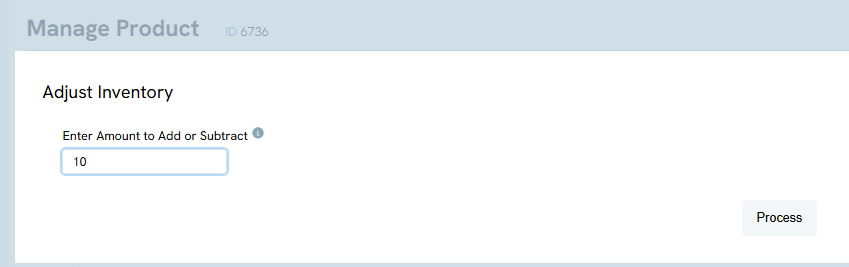
Step 4: Click Adjust Inventory to set the total quantity available, then click Process.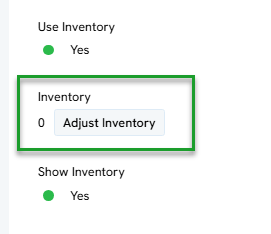
Step 5: Click the Variants tab to create a variant type (for example, "Color") along with its attributions, or options (for example, Blue, Pink, and Black).
NOTE: Please see THIS article if you are not familiar with setting up variants and variant attributions.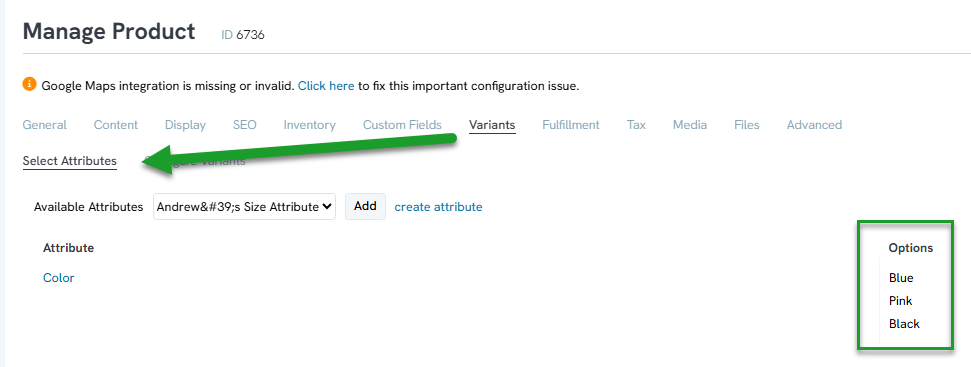
Step 6: Click Configure Variants. Under the Variants tab, expand each variant and assign inventory to it, spreading the total evenly across each option.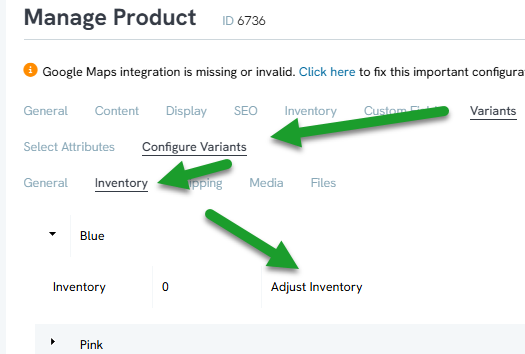
Step 7: On the General tab of Configure Variants, check the Active box and click Save for each variant. Every variant needs to be made active individually.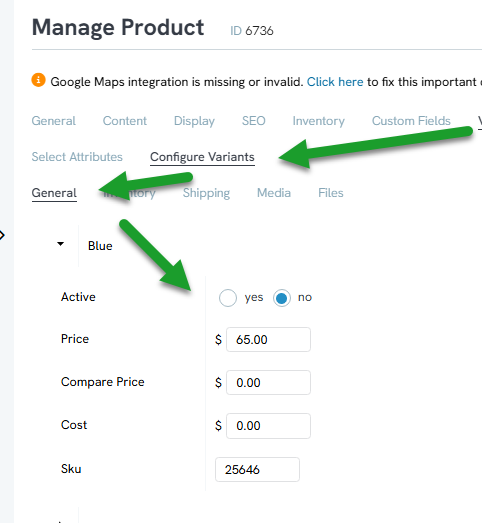
Instructions - Add the Product to the Web Form
Step 1: Navigate to Online > Web Forms > Search and Manage and manage the form.
Step 2: Click the Layout tab and add a new custom section (for example, "Buy a Bag Today"), then click Save.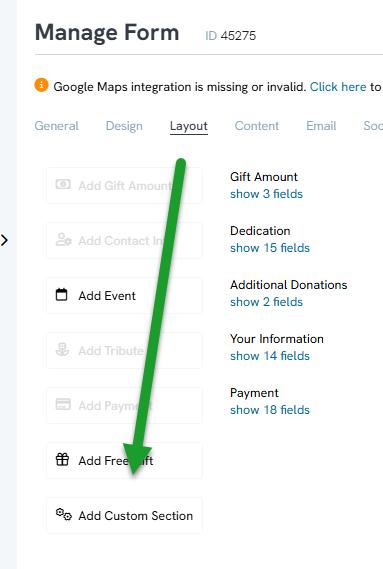
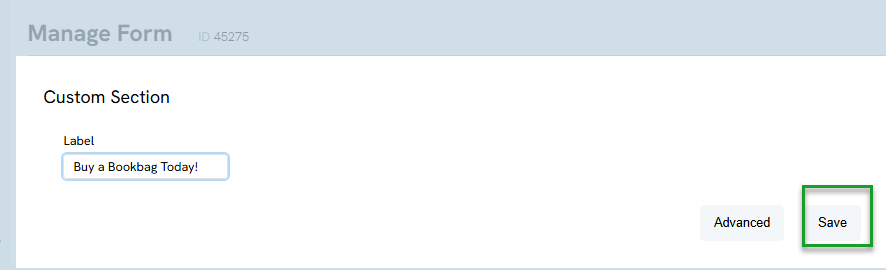
Step 3: Within this section, click the plus button to add a field (for example, "Book Bag"), then click Create Field.
Step 4: Click the pencil icon to edit this field. On the General tab, change the field's Type to the Product system field type.
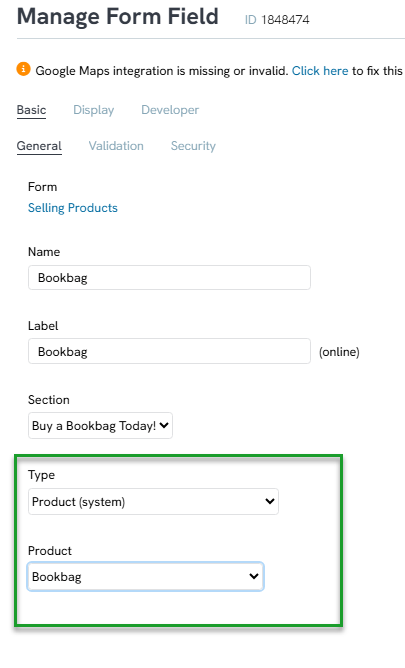
Step 5: Select the matching product (for example, Book Bag) from the dropdown, then click Save.
Note: Newly added sections appear in the order they were created. Use the form's section ordering to move a product section wherever it should appear – at the top, at the bottom, or grouped alongside existing fields such as the payment method.
Step 6: Click the form's link to view it live and confirm the new product section appears alongside the existing fund selections. When purchasing, a variant (for example, a color) can be selected along with the product.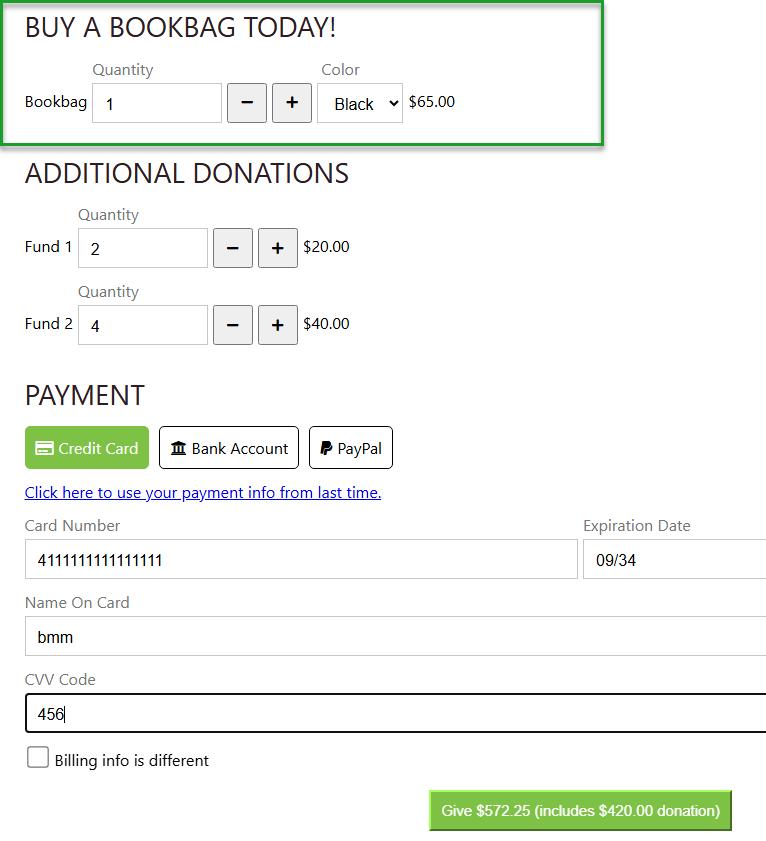
FAQs & Additional Reading
Q. Where can I see fund and product purchases after checkout?
A. In Transactions, search for the day's transactions. The main gift will show a linked product transaction for any fund or product amounts. Managing that linked transaction and viewing its Merchandise tab shows each fund or product and its quantity.
Q. How does fund and GL code allocation work between the form and its products?
A. A fund and GL code set at the form level apply as the default for the form's main gift amount. Each product can have its own fund and GL code set on its Advanced tab, which apply specifically to that product's amount and appear as separate splits on the resulting transaction.
Q. Since we are configuring products, is an official product order created in CharityEngine?
A. Yes, each product and fund product purchase will create an order in the Ecommerce section of CharityEngine.
Q. Can a donor give a variable amount to a fund instead of choosing from preset increments?
A. Yes. Removing the Price from the fund product turns its field on the form into a free-form amount entry instead of a quantity-based selector.
