Introduction
In the digital age, where connectivity and communication thrive, digital marketing remains a potent tool for non-profits to engage with their audience effectively. Central to a successful marketing strategy is the creation of a well-curated and engaged audience. Here's a comprehensive guide to help you build and nurture an audience for your marketing campaigns. These strategies can be utilized for email, Text to Give (SMS), or mail campaigns.
The following materials will guide CharityEngine users on tactics to build marketing audiences designed to fit the organization's strategies and objectives.
Table of Contents
- Introduction
- Building an Audience: The Foundation for Successful Marketing Campaigns
- Building an Audience List in CharityEngine
- Automated Audience Selection: CharityEngine Queries
- Maintain a Clean Audience List: CharityEngine Data Enrichment Job
- Creating Seed Lists
- Creating a Global Suppression List
- FAQs & Additional Resources
Building an Audience: The Foundation for Successful Marketing Campaigns
In the digital age, where connectivity and communication thrive, digital marketing remains a potent tool for non-profits to engage with their audience effectively. Central to a successful marketing strategy is the creation of a well-curated and engaged audience. Here's a comprehensive guide to help you build and nurture an audience for your marketing campaigns. These strategies can be utilized for email, Text to Give (SMS), or mail campaigns.
Understanding Your Target Audience
Before diving into creating an email list, it's crucial to understand who your audience is. Conduct market research to identify your target demographic, their preferences, behaviors, and pain points. Understanding your audience enables you to tailor your email content to resonate with their interests and needs.
Setting Goals for Your Email Audience
Clarify your objectives. What do you aim to achieve with your email campaigns? Whether it's increasing sales, brand awareness, customer engagement, or driving website traffic, defining your goals will guide your email marketing strategy.
Building an Email List
There are various ethical ways to build an email list:
- Website Sign-up Forms: Implement visible and user-friendly forms on your website to encourage visitors to subscribe. See our article Web Forms: How to Create a List Sign Up Form (Contact Type Web Forms)
- Social Media Campaigns: Leverage social platforms to promote your email list and attract subscribers.
- Events and Webinars: Collect emails during events or webinars by offering registration opportunities.
Always prioritize obtaining explicit consent for email communication to comply with data privacy regulations.
Organizing and Segmenting Your Email Audience
Segmentation is key to sending targeted and personalized content. Categorize your audience based on demographics, interests, past donations, or engagement levels.
Engaging Your Email Audience
Once you've built your list, focus on engaging your subscribers:
- Personalized Content: Craft emails that resonate with specific segments of your audience.
- Exclusive Offers and Promotions: Reward subscribers with exclusive event insights, promotions, or exclusive content.
- Consistent Communication: Regularly send newsletters, updates, or curated content to keep subscribers engaged.
- Automation: Use automated workflows to deliver timely and relevant content based on subscriber actions or preferences.
Analyzing and Optimizing Your Email Campaigns
Monitor and analyze campaign performance metrics such as open rates, click-through rates, conversions, and unsubscribe rates. Leverage this data to refine your strategies, optimize content, and improve engagement in future campaigns. See our Article Email Campaigns: How to Leverage Email Analytics
Conclusion
Building an engaged email audience is an ongoing process that requires attention, strategy, and consistent effort. By understanding your audience, setting clear goals, collecting emails ethically, segmenting effectively, engaging meaningfully, and analyzing data, you can create a robust foundation for successful marketing campaigns through email.
Remember, email marketing is not just about promotion; it's about building relationships and providing value to your audience.
Ready to harness the power of email marketing? Start by building and nurturing your email audience today!
Building an Audience List in CharityEngine
There are multiple ways in which an audience list can be built within CharityEngine. The following examples provide ways in which users can identify and target various audience lists to meet the organization's needs. Use one or more that best suite the organization's operating procedures and workflows.
Opt-In Lists
With the CharityEngine Opt-In List feature, users can consolidate contacts within one or more opt-in lists for email, mail, or SMS marketing campaigns. These opt-in lists can be leveraged within web forms and online user center for donors to select topics of interest.
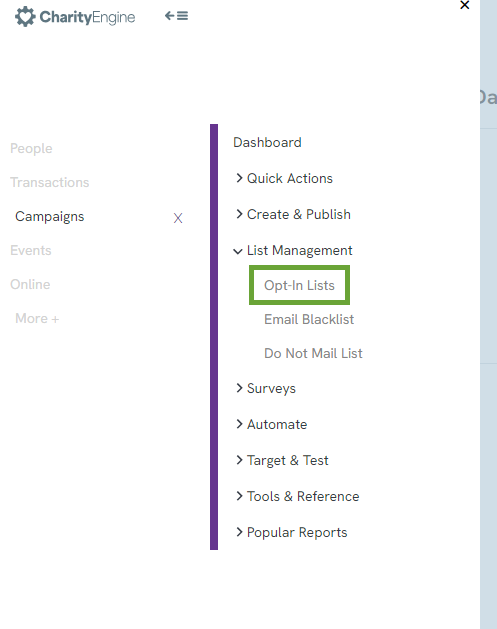
Step 1: Under the Campaigns App > List Management, there is an option to create easy opt-in lists that constituents can subscribe to and can be used as the target audience for email blasts or SMS campaigns.
Step 2: To create a new opt-in list, click the + icon in the right corner to create a new opt in list.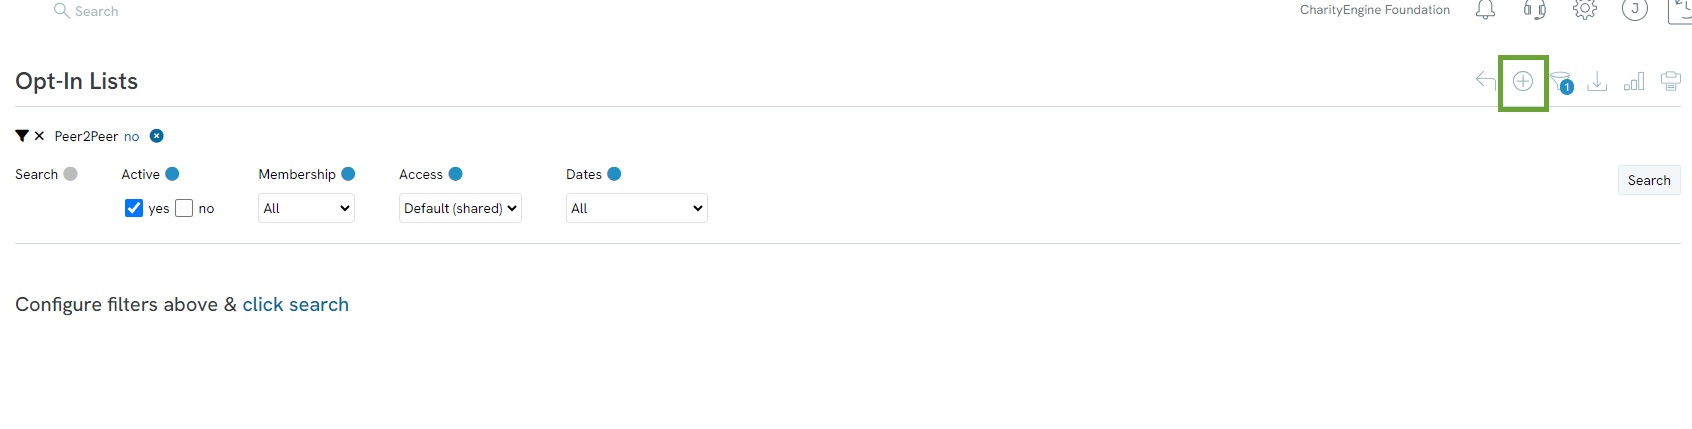
Step 3: On the General Tab, the user will be able to enter in a Name for the opt in list, enter the Online Name if to be exposed on User Center, Web Forms, etc. In addition the user can select Type: to allow for sharing with the full organization or a private list designed just for the user. Finally, enter in a description of the list if necessary. 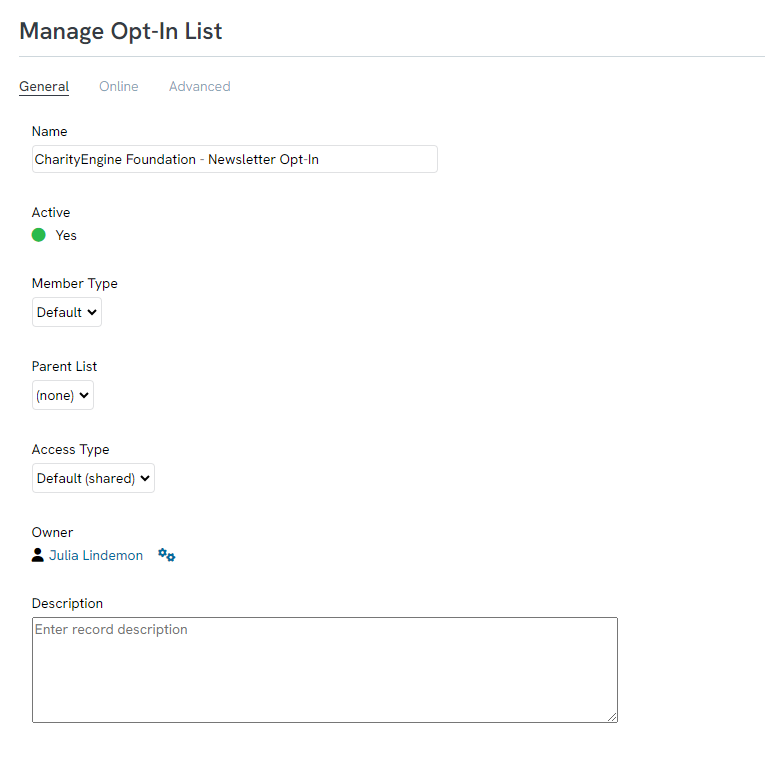
Optional: On the advanced tab, you will be able to configure some advanced options, such as toggling on/off sending emails to contacts marked as deceased, the sender and reply to email overrides, and the default recipient name. If the user does not enter anything in the sender name or rely email, the default global settings will be used. For SMS lists, these settings will not apply.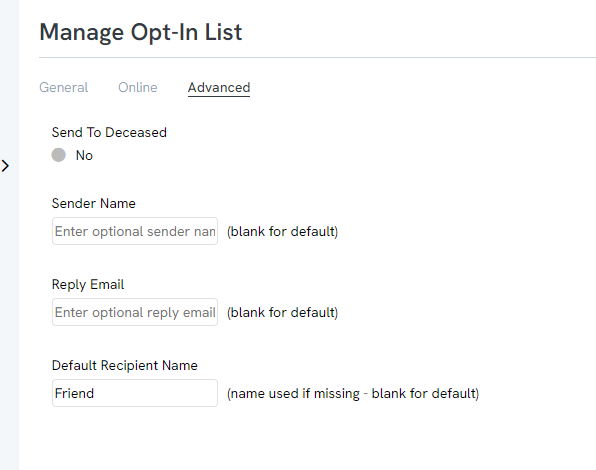
Opt-In Filters (Listing Screen)
Like on many pages throughout CharityEngine, the Opt-In Lists page has filters to help easily narrow down your search for any specific lists, including the Advanced Filter.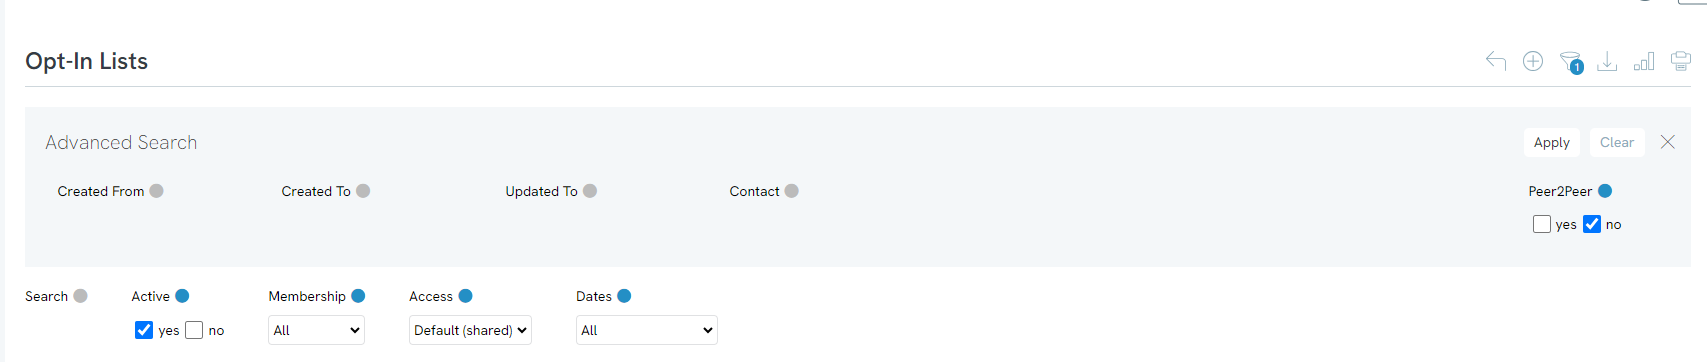
Adding Contacts to Opt-In Lists
Adding Contacts to Opt-In Lists (Bulk)
You can add people to your opt-in lists through the People App.
Step 1: To add people to an opt-in list you have already created, navigate to People> Organizations & People> Contacts > Advanced Filter.
- You can use both the Quick Filters and Advanced Filters to filter and pull a list of people that you would like to add to your opt-In list. Select your filters and then select Apply. A list of all contacts with the applied filter will then be displayed.
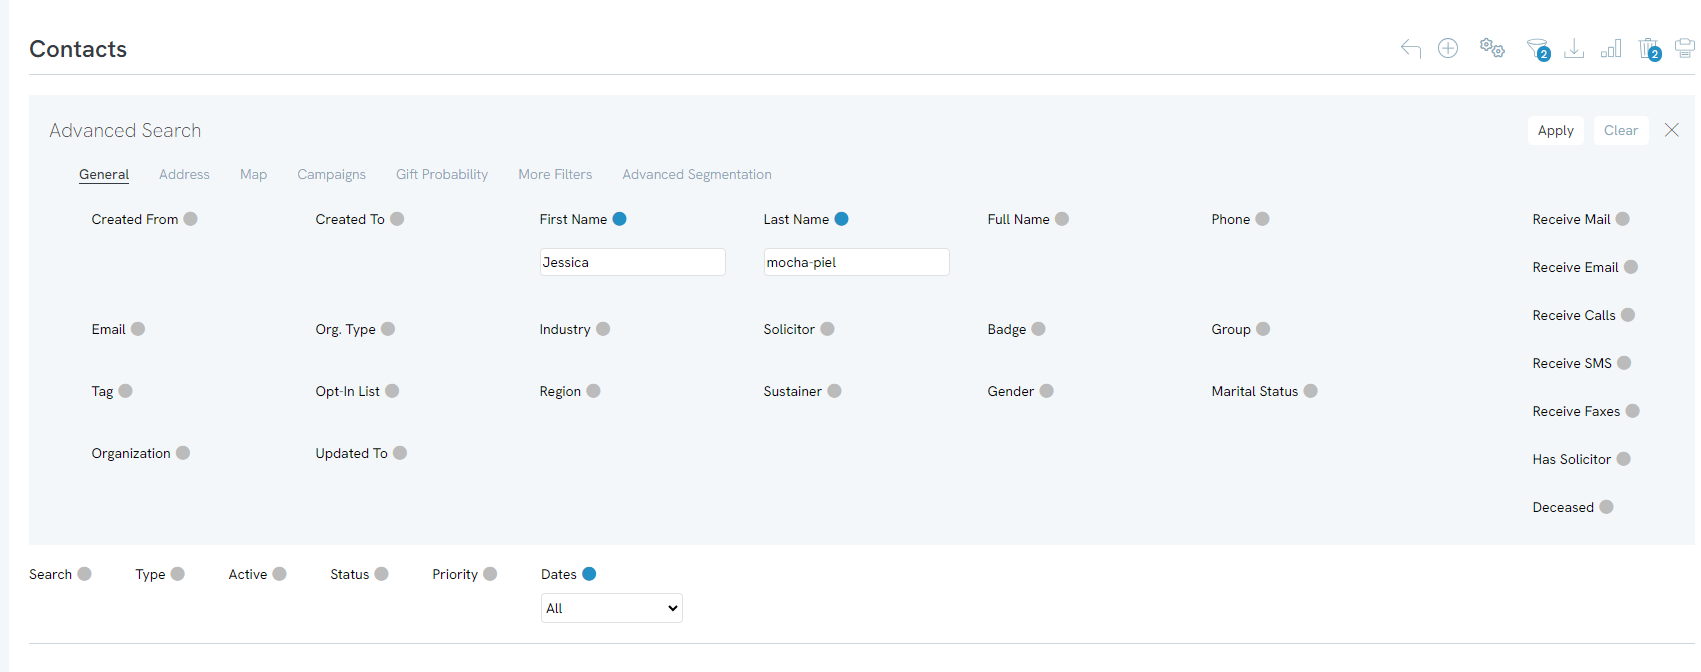
Tip: For SMS opt-in lists, pay close attention to the Receive SMS filter on the right. Deselect the no option, to ensure everyone on your SMS list is opted-in to receive SMS messages.
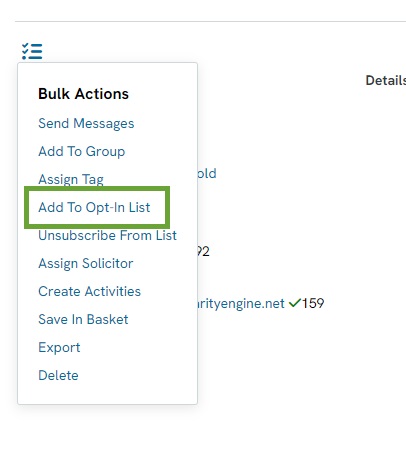
Step 2: You can then individually select contacts by selecting the check box to the left of their name or bulk select contacts by selecting the top left check box in the header. After you have selected the contacts you want to add to your list, select the drop dox arrow from the top left check box and select Add to Opt-In List.
- NOTE: To access these options, you may need to change your Viewing preference to Summary vs. Panel. Navigate above the ACTIONS column to click on the hyperlink to change to Viewing Summary. This will expose the Bulk Actions options.
- Critical Note: This will only assign to those on the listing screen. If you several contacts to add, please use the Automation & Workflow > General > Import/Export > Contact to bulk add your contacts to an opt in list or groups/tags.
Step 3: In the pop up window, you have the option to add the select contacts to an existing list or create a new list. We do not recommend creating a new list this way. Next, you can select the drop-down arrow in the Opt-In List box and search for the existing Opt-In list. Then, select Process.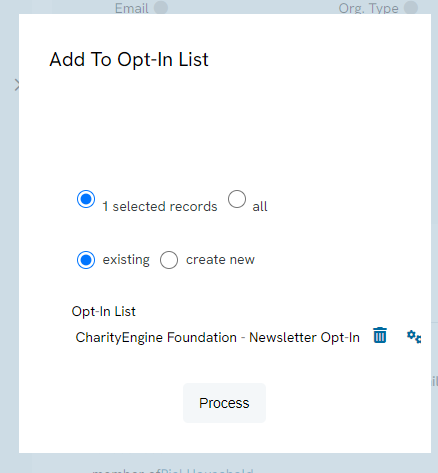
Note: You also have the same option to add contacts to an Opt-In list on the Transactions listing screen and the Event Registration listing screen by following the same method above within the Donations App and the Events & Volunteers App.
Step 4: Once you have created your opt-in lists and added people to your lists, you will be able to select your lists when sending an email. This will make sending emails much easier as your lists will already be created and you will not have to select individual people each time you want to send a mass email.
Adding Contacts to Opt-In Lists (Individual)
You can manually add contacts to an email listing through their page on the Contacts tab.
Step 1: Go to the Contacts App > Organizations & People > Search & Manage.
Step 2: Find the contact using the Advanced Filter or quick filters.
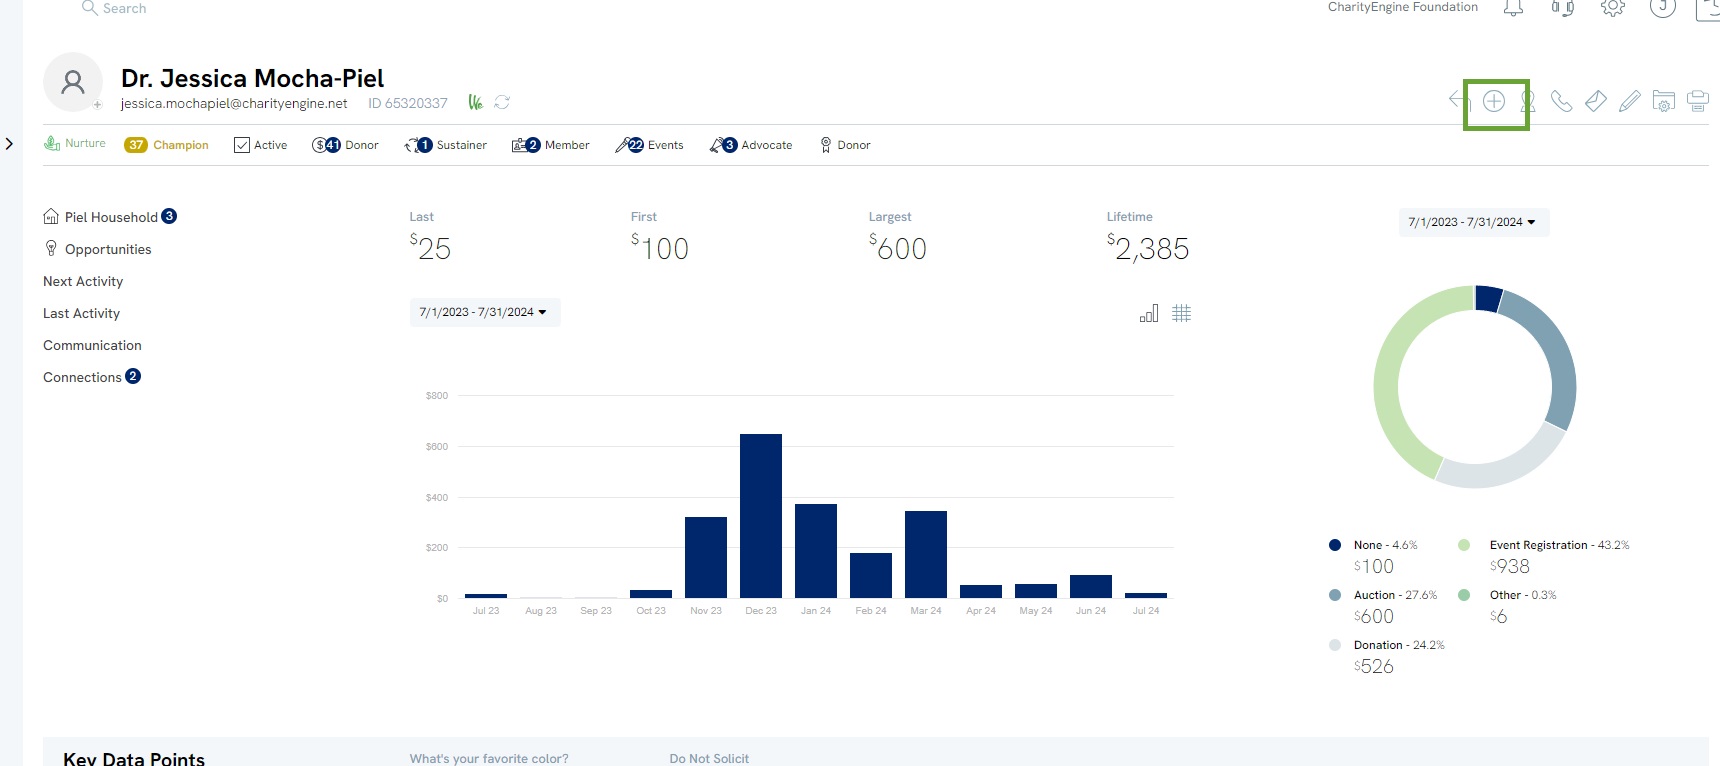
Step 3: Click the contact name to access the contact’s page.
Step 4: Click the Add button in the top right corner to bring up a list of options.
Step 5: From the list that appears, select Opt-In List. It will pull you down the screen to the section of the contact profile for opt-in lists that this contact is a part of.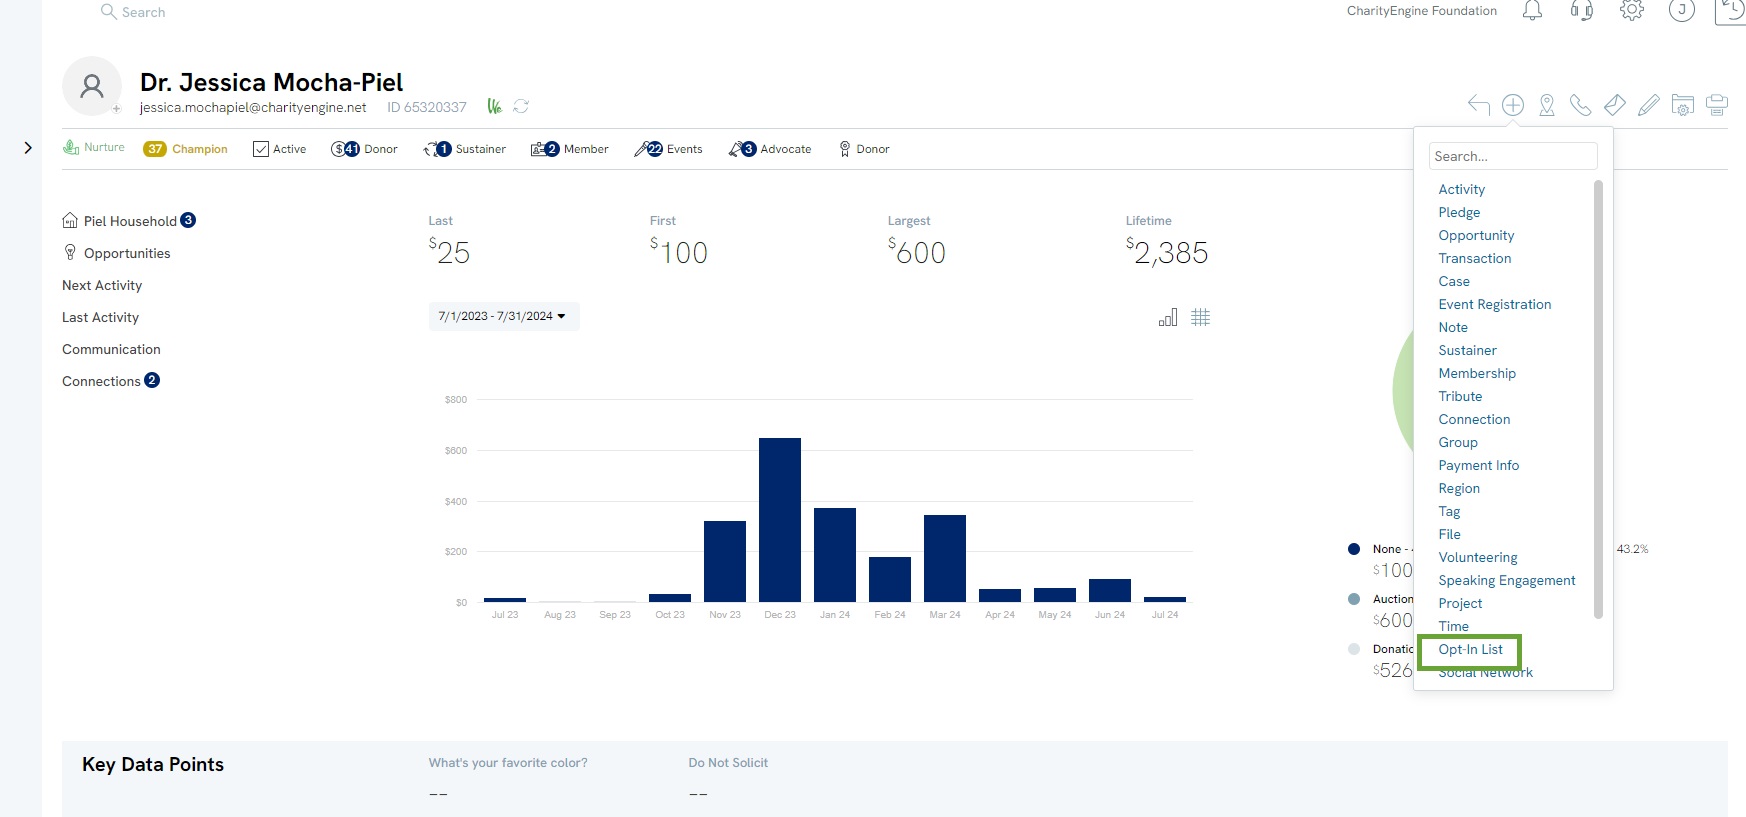
Step 6: Click the circular plus icon and a selection of pre-created opt-in lists will appear. Choose a list to add the contact to. If you are adding a contact to more than one list, click Add List after each one and then continue adding until complete.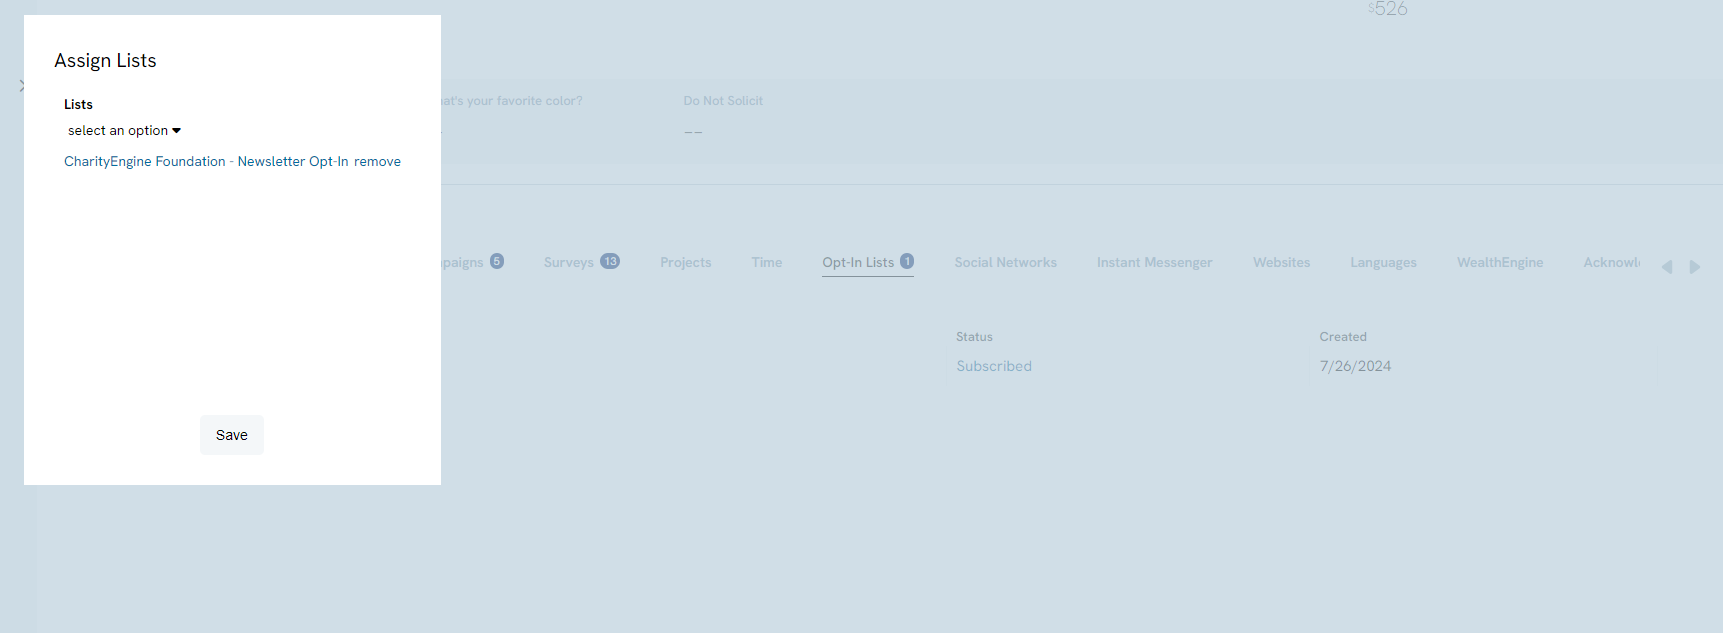
Adding Contact to Opt-In Lists (Automation & Workflow Importer Tool)
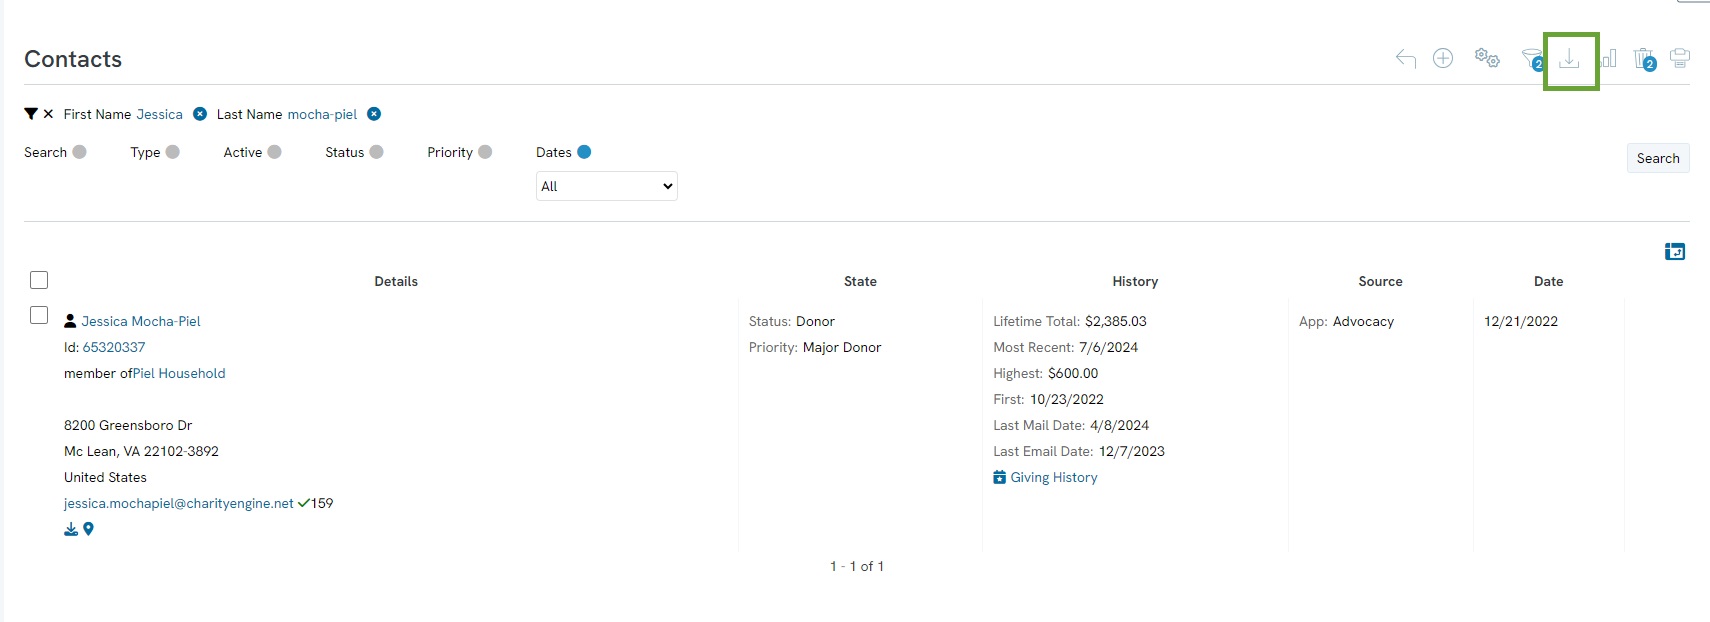
Step 1: Locate your target audience by navigating to the People App > Organizations & People >Contacts > Advanced Filters
Step 2: Use the Advanced Filters to target your audience > Make your selection and click APPLY
In this example, we will locate contacts added between a specific date range
Step 3: Once you have the results, click on the Export icon in the top right hand corner to export your list and click on Download File once available
Step 4: Once you have your export file, you can delete all other fields and maintain your CharityEngine contact IDs
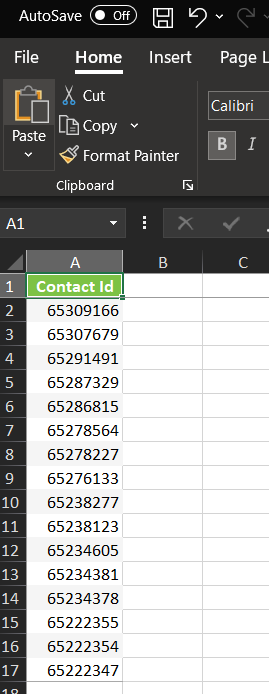
Step 5: Save your file to your local network
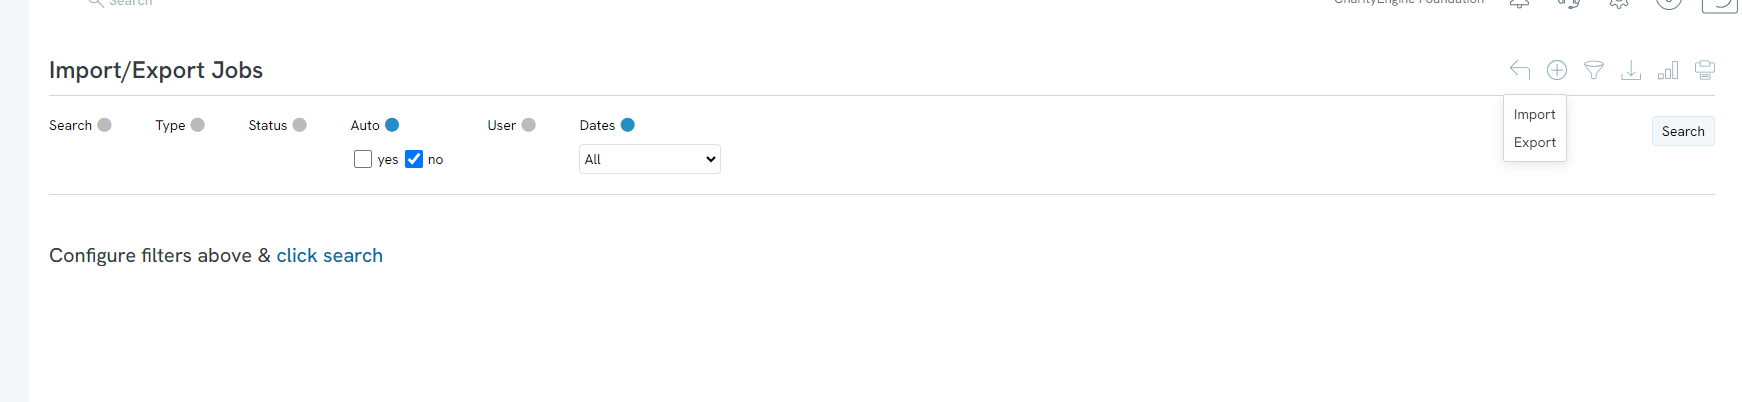
Step 6: Navigate to the Automation App > General > Import & Export > Create New > Import
Step 7: Select Import To: People and click NEXT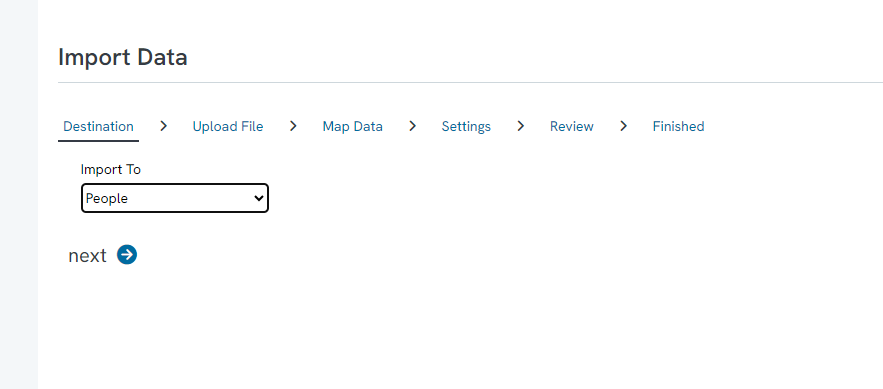
Step 8: select your file type and upload your file
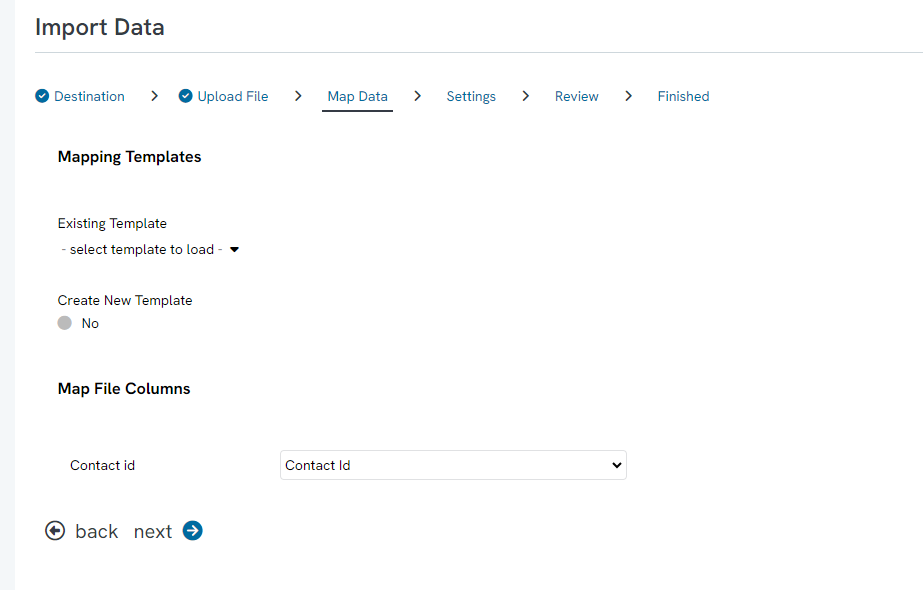
Step 9: Map the fields in your file to CharityEngine fields using the dropdown and click next
Step 11: As a final review, you will see your import is assigned to your selected Opt-In List. Click Process to initiate the data appending.
Step 12: You can monitor the job or you will be alerted by email once the append job has been completed.
Step 13: You can now review your contact records and use the Go to: to navigate to the Opt-In Lists and verify the assignment
Monitoring & Reporting Subscribe/Unsubscribe Status

Donors have the ability to "Unsubscribe" (opt out) of specific Opt In Lists. This can be achieved by manually clicking on the Status Subscribed to update to Unsubscribed. User may also unsubscribe from opt in list via User Center or Web Forms as leveraged by the organization. As demonstrated above, the List panel on a contact record will store the date/time and status of each opt in list.
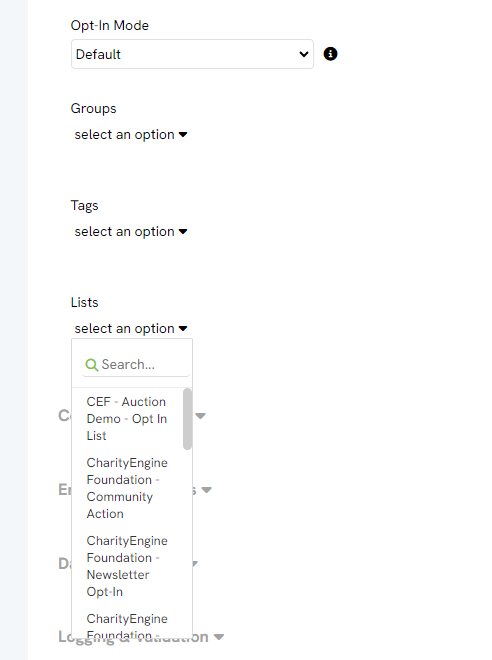
Adding Opt In Lists for Online Exposure
For Web Forms, see our example here for Web Forms: How to Create a List Sign Up Form (Contact Type Web Forms)
For Embedded Widgets, see our guide here at Online: Widgets - Embedding Donation, Sign-Up, and Legislature Look-up Forms
Removing Contacts from Opt-In Lists
Self-Service: Donor Elected Removal from Opt-In Lists
For a contact to remove themselves from a opt-in list, instruct them to navigate to their user center dashboard and use the toggles to opt-out of the list.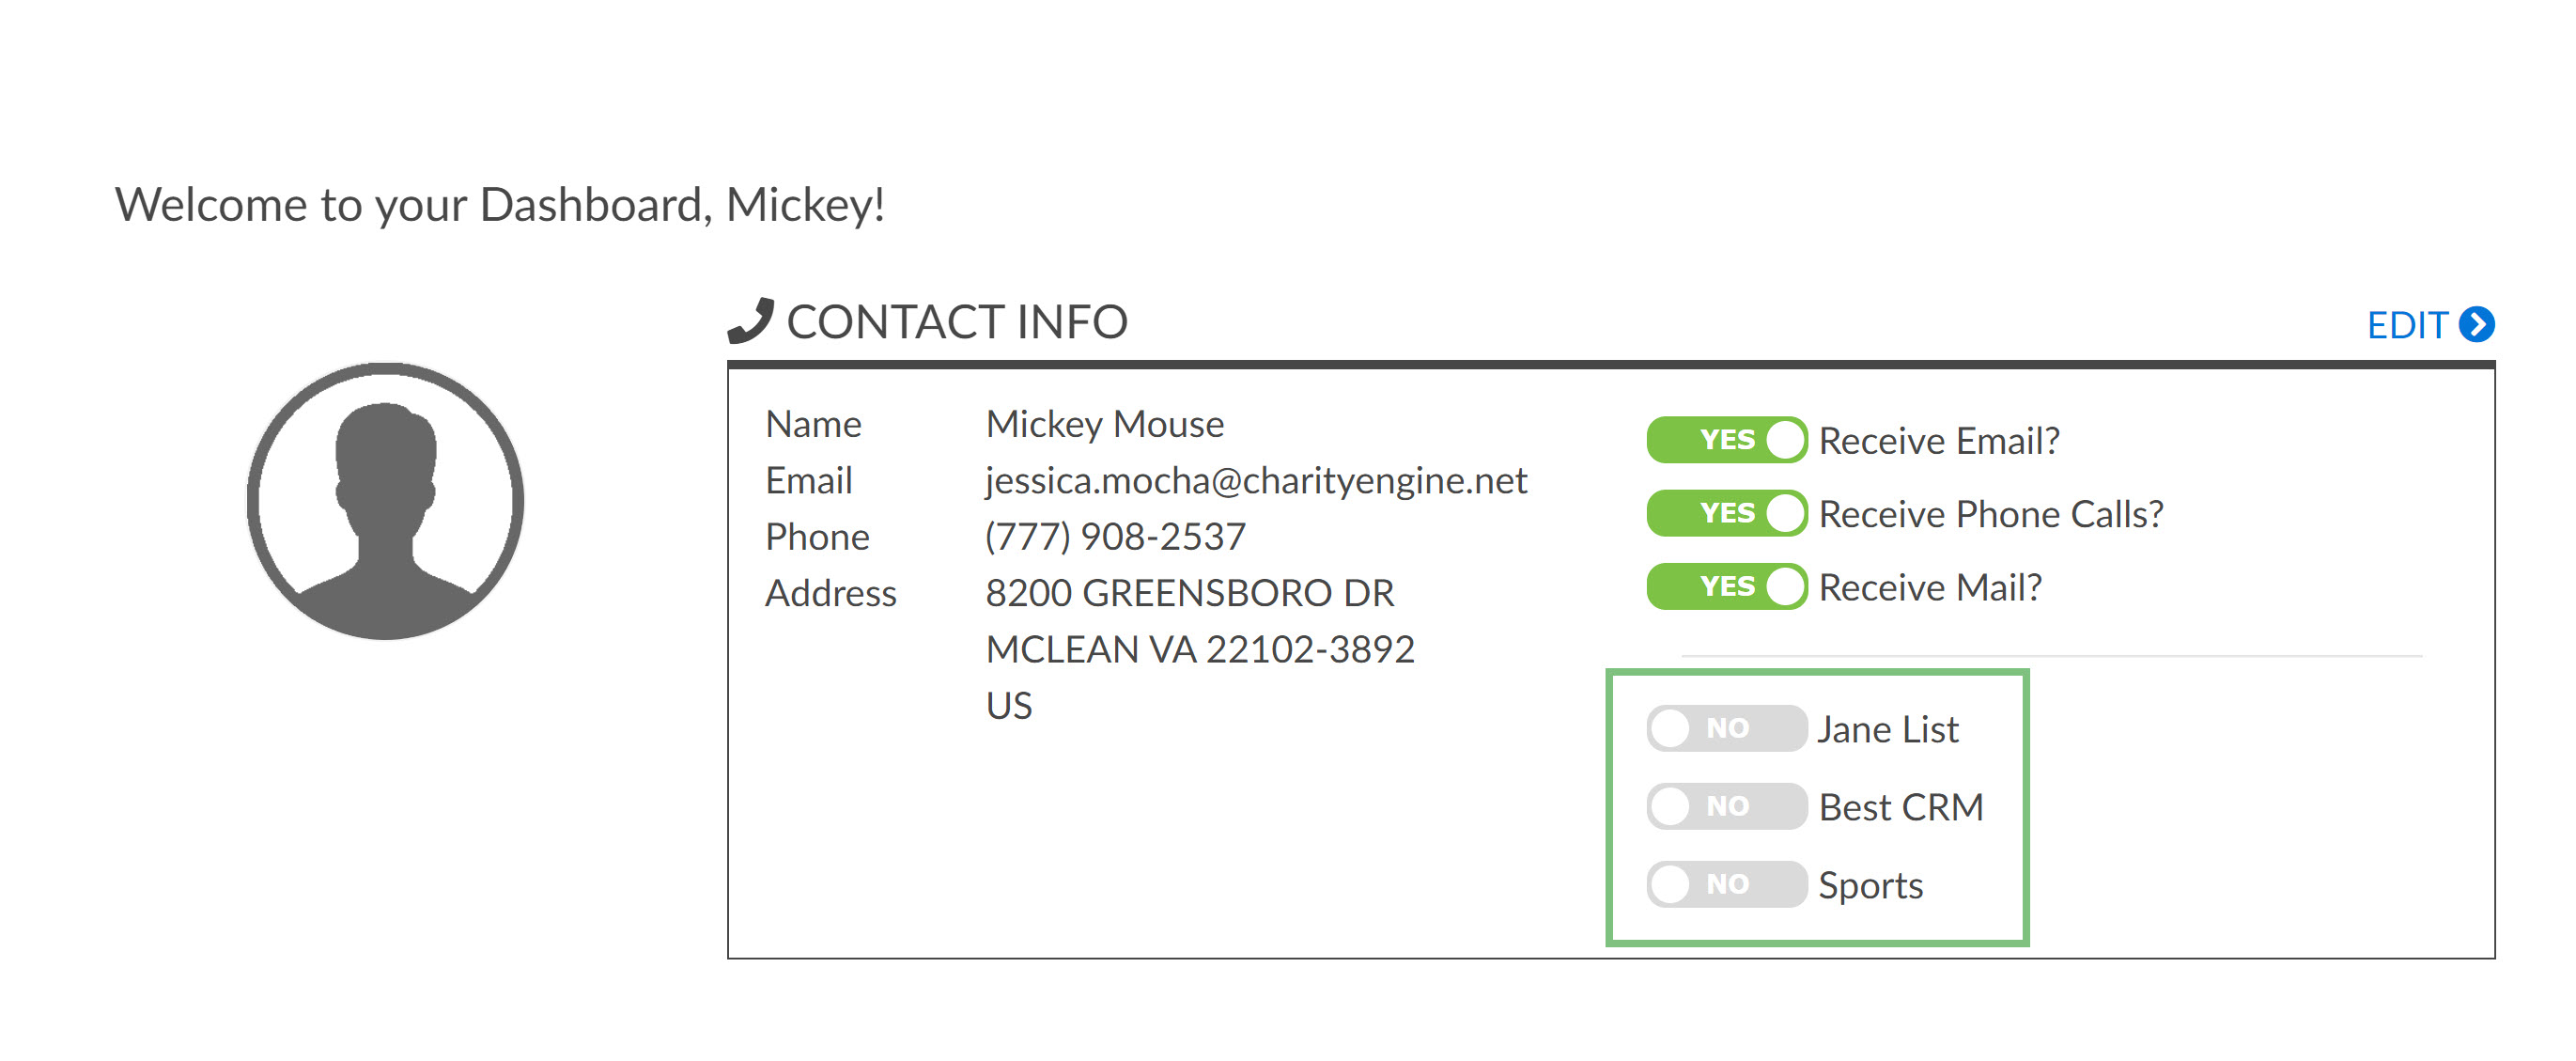
Manual Removal: User Steps for Removal from Opt-In Lists
One way for users to remove audience members is to manage the list.
Step 1: Navigate to the Campaigns App > List Management > Opt-In Lists and search for the list you wish to manage.
Step 2: Click on the size number to view all contacts in the list.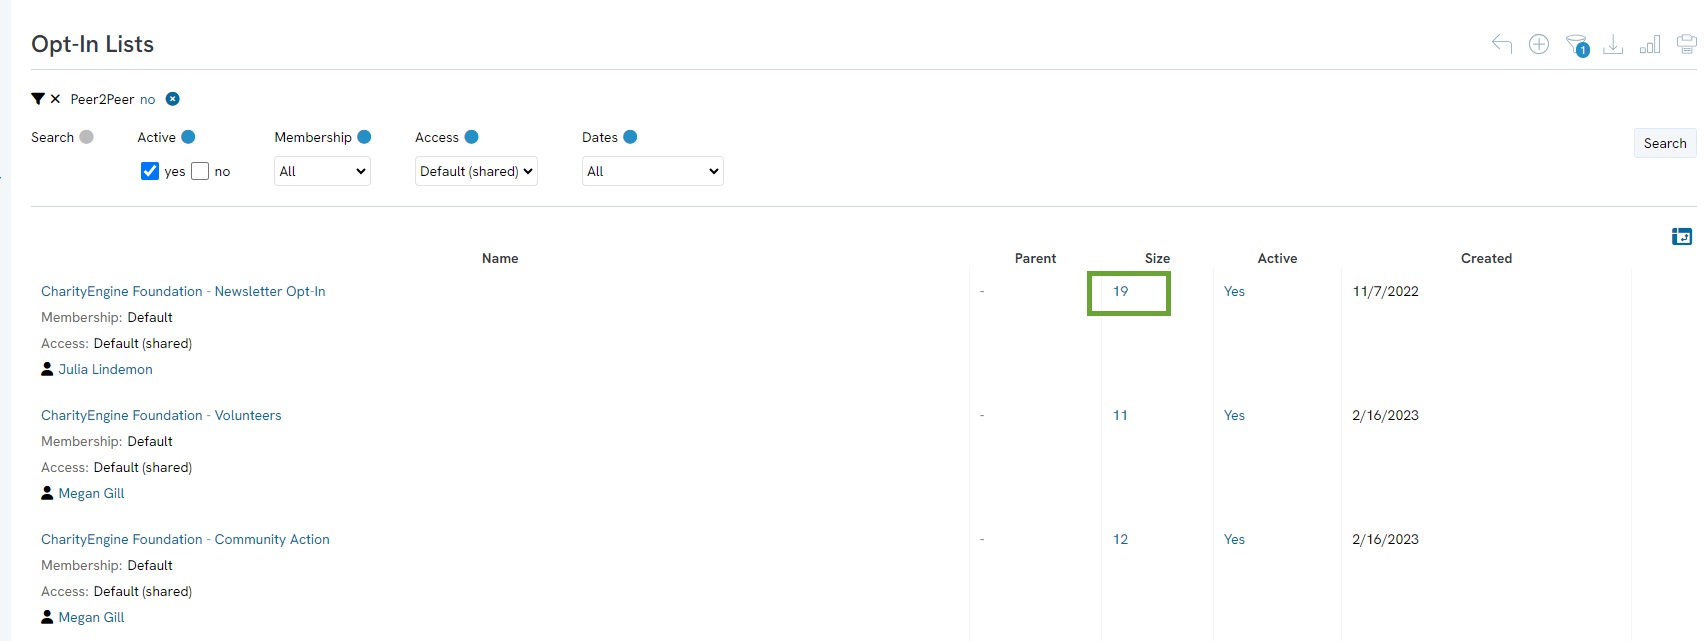
Step 3: You will be navigated to the contact listing screen and a filtered list of contacts will be displayed.
Step 4: Click view under actions to view the contact record of the contact you are removing from the list.
Step 5: Use the Go To drop-down to quickly navigate to the Opt-In lists.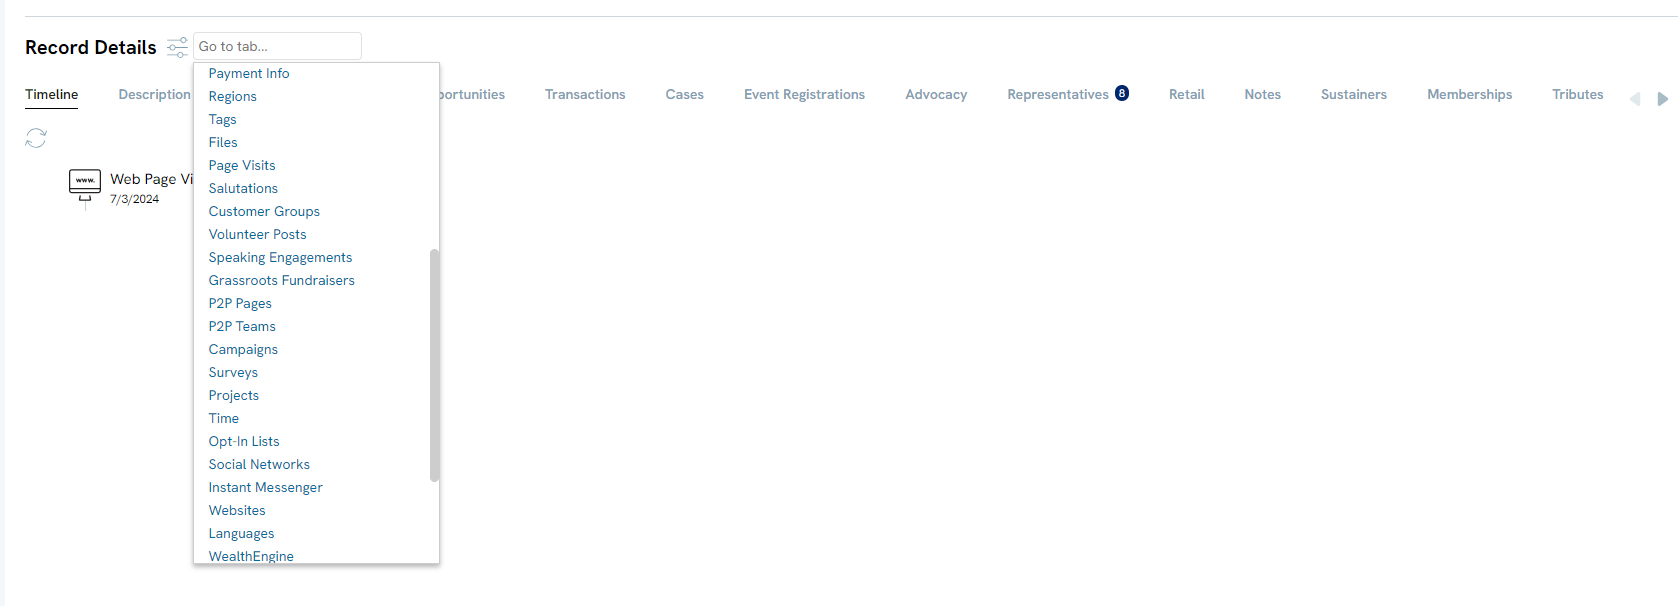
Step 6: Click delete to remove the contact from the list.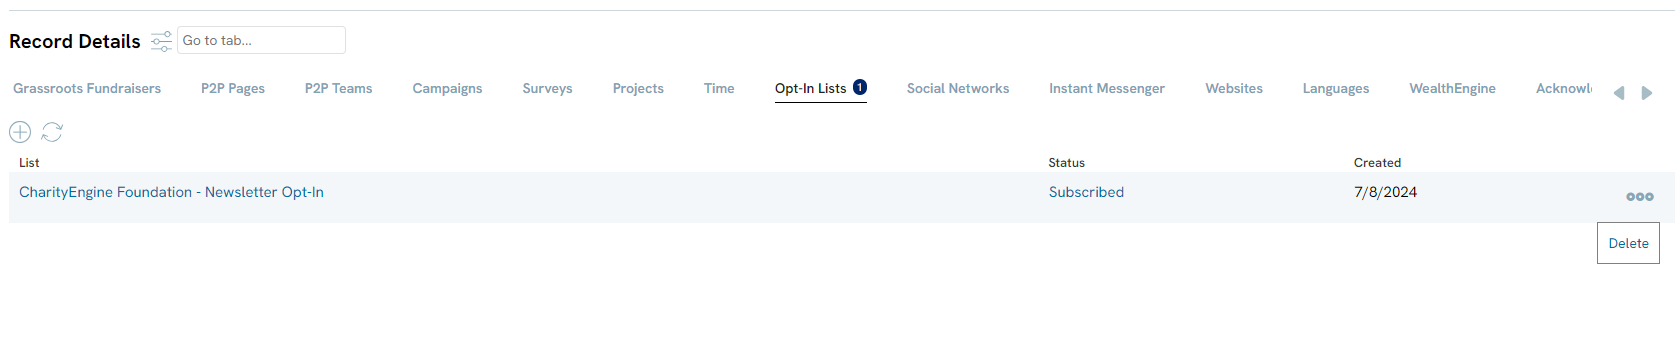
Removing audience members can also be done in bulk using queries and the importer tool.
Automated Audience Selection: CharityEngine Queries
This may sound simple and obvious, but it makes a difference! Being a good email sender is the number one most important contributor to your domain reputation and IP reputation which, in turn, is the largest contributor to whether your email lands in the inbox or is considered spam. Email providers notice if their users never open emails coming from your domain, so if someone has not opened a message from your organization for a long time, then it is recommended you remove them from your email list (even if they subscribed at one point).
Why does this matter? Because other recipients’ lack of engagement on your messages can tell the email provider that your domain sends unwanted email and they could start sorting your messages as spam rather than desired inbox content, even to recipients who do like to open your mail.
Note: Never purchase email lists. Purchasing of an email list can result in the introduction of SPAM traps and harm your email reputation making it difficult to successfully get your emails into inboxes.
Using the following guidance, users can customize and segment audience needs while also maintaining automated and healthy sending lists.
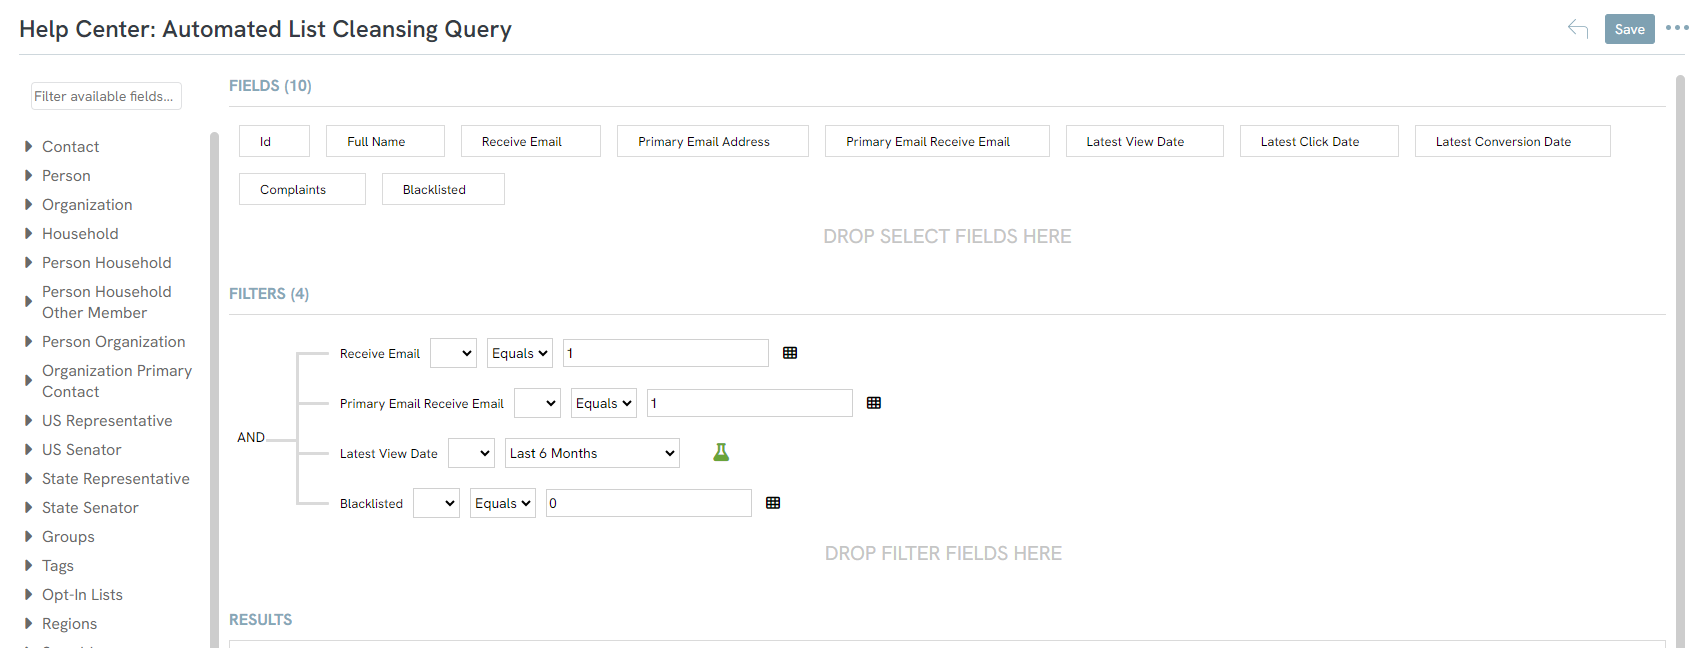
The following instructions can be utilized to create a sending list that considers constituent engagement defined as Viewed Email in last 6 months
-
- Received Email = True - includes Global Email Opt In
- Primary Email Receive Email = True - includes Primary Emails set as Opt In
- (Primary Email Meta Data Sub Table) Latest View Date = Last 6 Months (use the formula icon to locate filter) - this will limit all email address in which the constituent has viewed an email in 6 months or sooner demonstrating engagement
- (Primary Email Meta Data Sub Table) Is Blacklisted = False - this will eliminate any blacklisted email address
- Where can I monitor and investigate my failed emails? See more at Campaigns & Marketing: Unveiling Success: The Art of Monitoring Results in Non-Profit Email Campaign
- Have you hit Spam traps? We have a list of providers and actions you can take to remove and correct your reputation Spam Removal: Provider Recommended Actions
Maintain a Clean Audience List: CharityEngine Data Enrichment Job
Email list hygiene is recommended from time to time to make sure you are not emailing bad email addresses. Bad email addresses can range from a common domain misspelling (yaho, gamil, hotmal) (Typo Spam Traps) to known spammy email addresses that end up in lists because of inaccurate data appends or bad list purchases (Pristine Spam Traps). So how can you make sure you are reaching donors who want to hear from you?
- CharityEngine uses an email verification tool on forms (Online Donation Forms, Advocacy Forms, Shopping Cart checkout, etc...) that is used as an opt-in verification, asking your donors if they would want to receive emails from your organization.
-
Another valuable tool is the email validation process that on a regular cadence, completes list cleansing leveraging a third-party vendors. Fees may apply. This validation of emails will ensure that there are no bad emails in your sending population and will help maintain a good list. If you are interested in learning more, please reach out to your account manager.
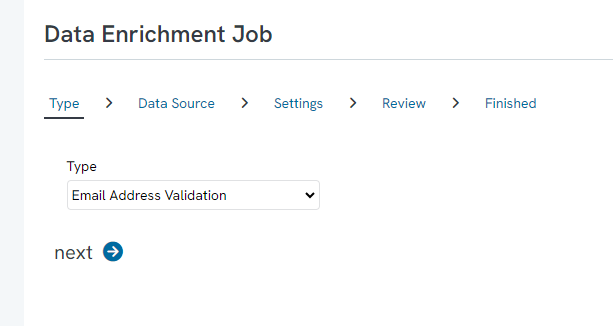
CharityEngine Data Enrichment Job (Bulk Job)
Completing an Email Address Validation Data Enrichment Job (fees may apply)
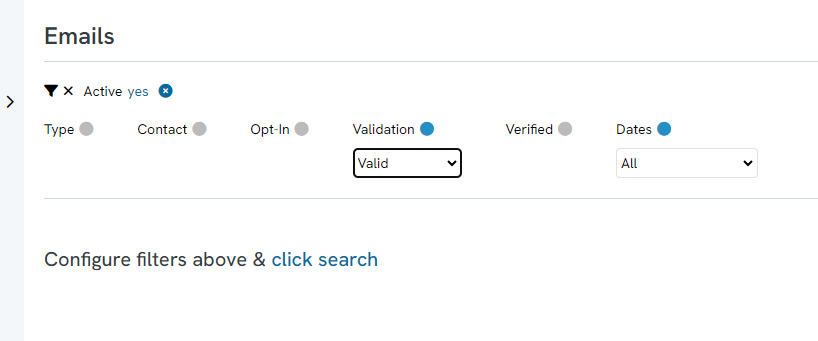
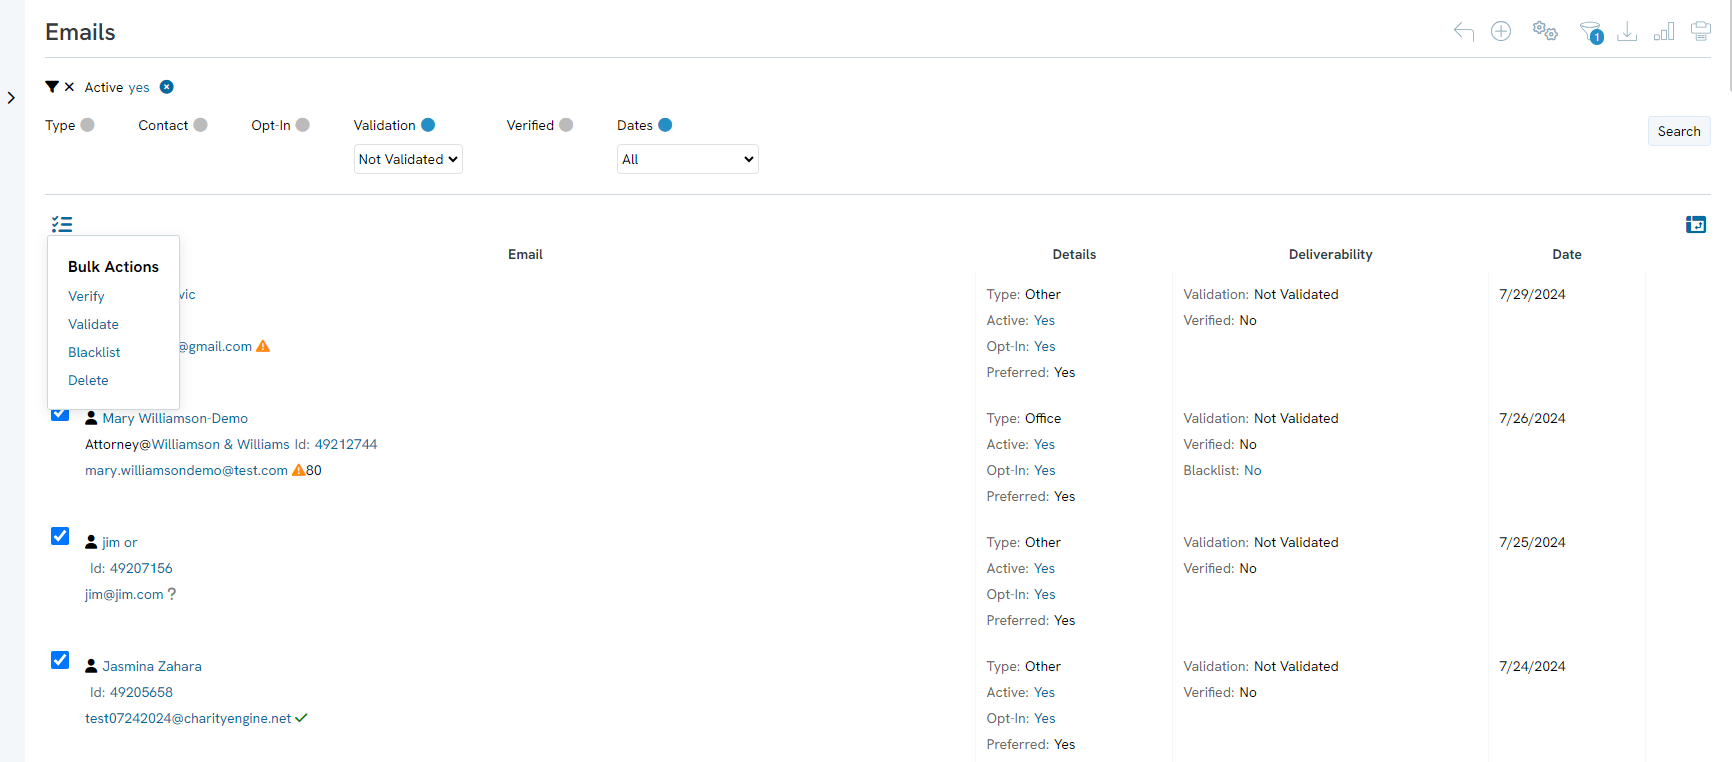
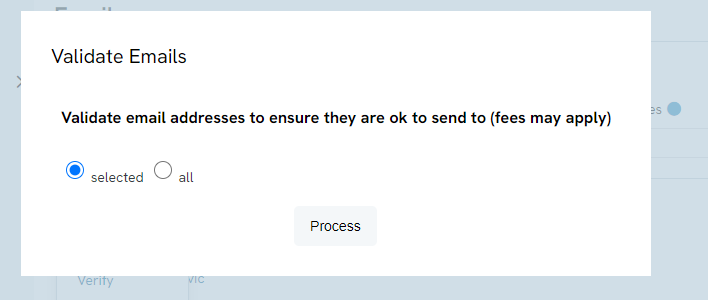
CharityEngine Data Enrichment Job (Select Records)
Completing an Email Address Validation Data Enrichment Job (fees may apply). This use case will allow users to select specific emails for email validation.
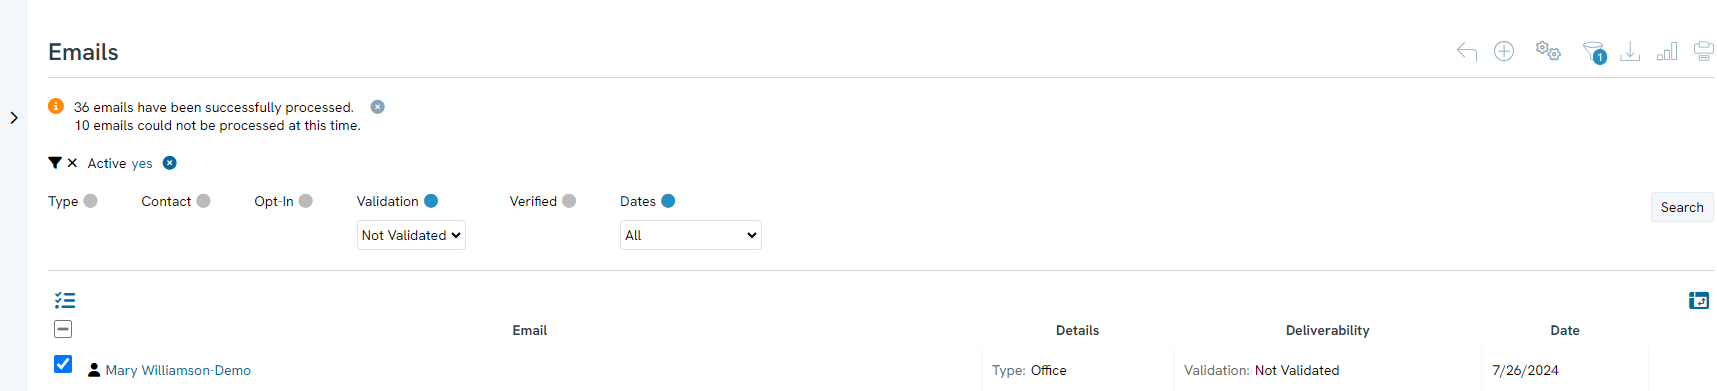
Step 7: Validation status will be updated as Valid or Invalid
CharityEngine Data Enrichment Job (Integrated Ongoing)
Users can set automated email address verification via the Configuration App > Campaigns > Campaign Default Settings > Deliverability. Set Email Address Validation = on for automated activation of email cleansing for any new email address. 
Creating Seed Lists
Seed lists are very useful and will add a group of contacts without having them listed within a opt-in list or query. Contacts within a seed list will receive the email just as the contacts within your audience does even if they do not fit the criteria for the email. For example, if you are sending an email regarding Event Registration to a list of people who have donated, and you want to include your management team, instead of adding an additional filter or subquery, you can create a seed list for them and they will receive the email, even though they are not in the list of donors.
Step 1: To add a seed list to an email blast, you must first create the seed list. To create a seed list, navigate to the Automation & Workflow application.
Step 2: Click on Queries under the General section.
Step 3: Select the Contacts database in the filter dropdown and then select the Contacts table.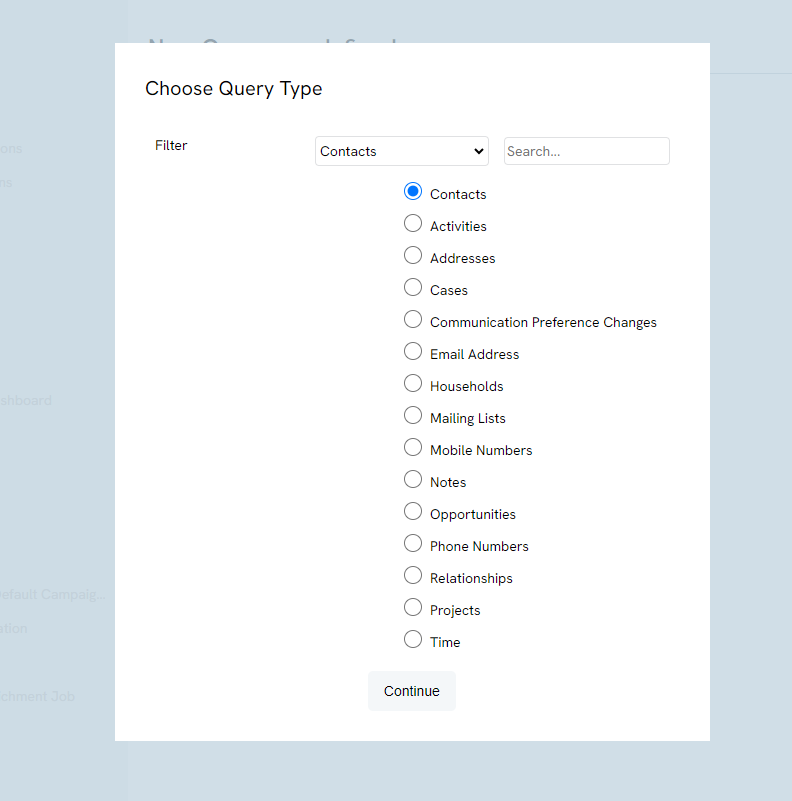
Step 4: Add Contact Id to the Selected field section and to the Filter section.
Step 5: If you are adding multiple contacts to the seed list, change Equals to Is One Of and then enter the contact Ids of the contacts you want to add to the seed list.
Alternatively, you can select other attributions that identify your seed list, such as a specific group or tag. 
Step 6: Save your query and name it in a manner that will be recognizable as a seed list, for example you could name it Internal Seed list for Managers.
Creating a Global Suppression List
You may find that you need to resend an email campaign to only certain emails on your email list. For instance, if you have an email list to which you have already sent an email campaign to, and have since added more emails to that list. Or you may have a business case in which specific emails should be suppressed. Users can create a suppression list and only send the email campaign within the identified audience list.
Step 1: In this step, navigate to the Automation & Workflow App > General > Queries > Click New
Step 2: Select Filter: Contacts Select: Contacts (or appropriate database to target)
Step 3: Use the Select to include Contact Id (minimum requirement for use within Global Suppression via Email Blast)
Step 4: Include Filter elements to target those within the Global Suppression List (i.e. those with a specific Tag, Group, Status, etc.)
FAQs & Additional Resources
Q. Can this be used to create opt in list for SMS?
A. Yes. This can be used for all initiatives including email, mail, and SMS.
Q. Can I automatically add contacts to an opt in list?
A. Yes. Learn how to use the trigger tool to automatically add contacts to an opt-in list: Trigger Tool – Creating an Opt-In List
Q. Can I create audience lists specifically for Advocacy communications?
A. Yes. See our article Advocacy: How to create an audience for a communication initiative for details on how to segment donors based upon Advocacy needs.
