Table of Contents
Individual Acknowledgments
There are many ways to thank a donor. In CharityEngine®, send custom acknowledgments to individual donors from the Transactions screen.
To get to the Transactions Search & Manage page, click Donations > Transactions > Search & Manage.
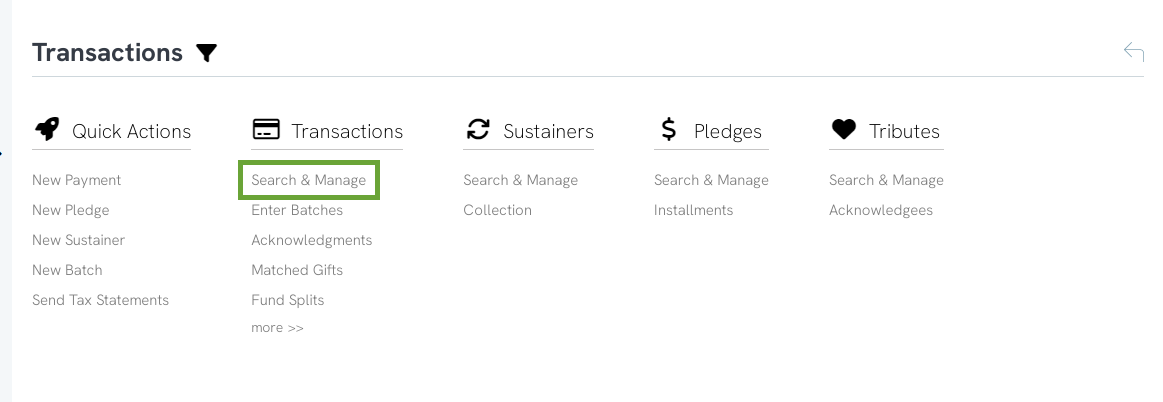
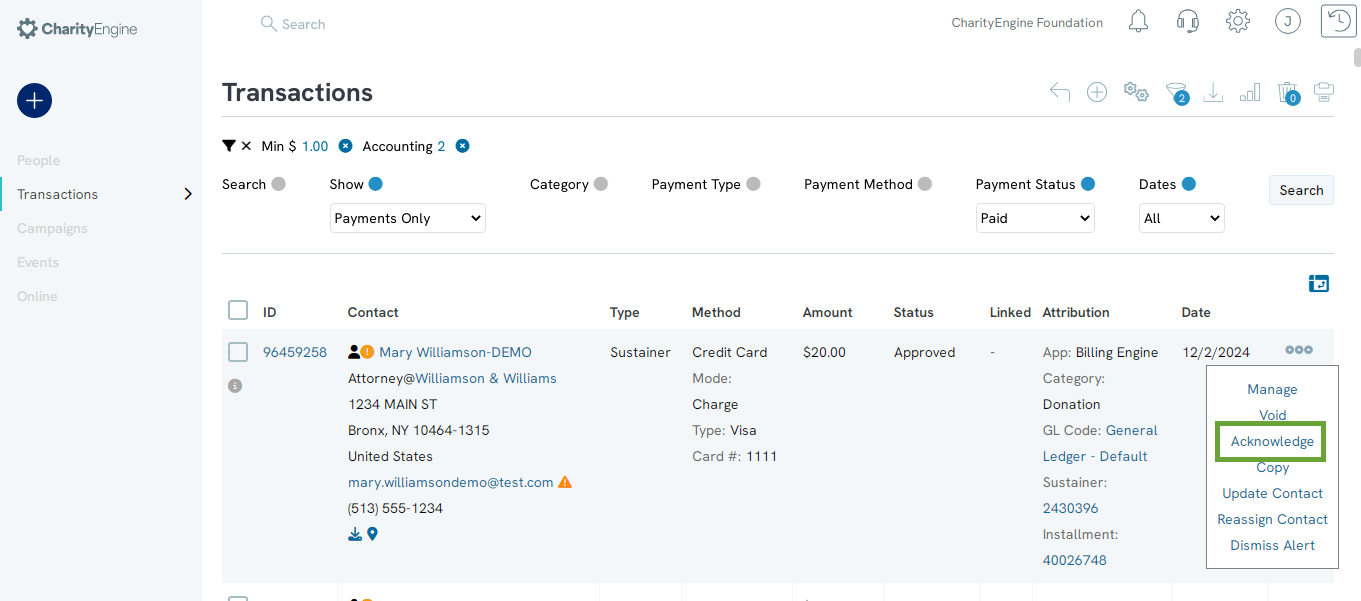
For an individual acknowledgment, find the transaction receiving the acknowledgment using the Quick Filters and the Advanced Filters.
To bring up the acknowledgment wizard, hover over the three dots to the right of the listing and click Acknowledge.
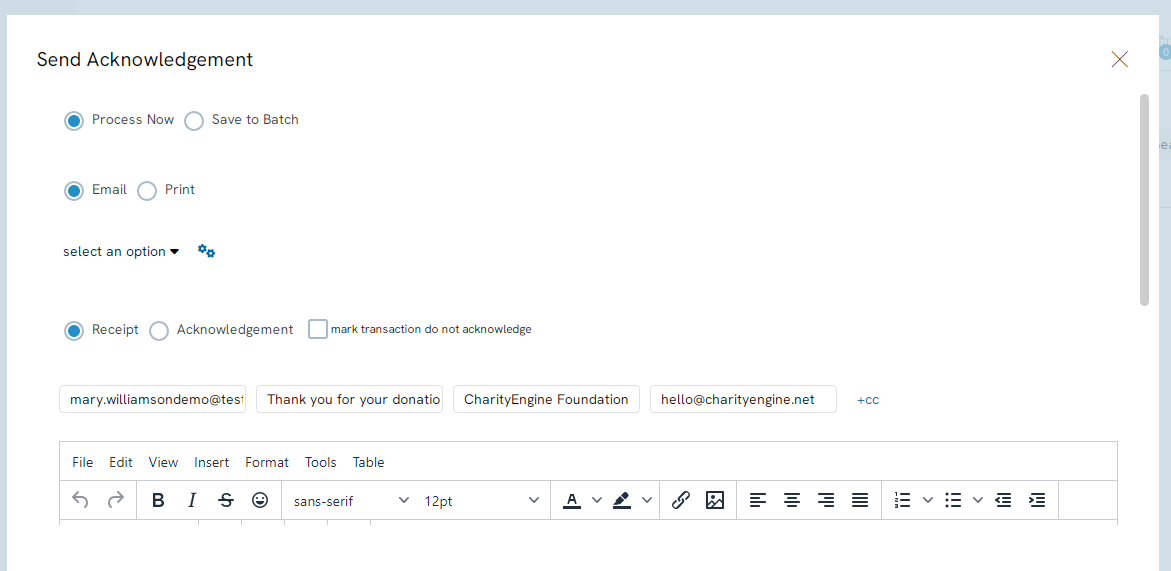
The acknowledgment wizard will appear in a popup box.
1. Choose either to process the acknowledgment not, or to save the acknowledgement to a batch. Clicking Save to Batch will prompt more options.
2. Choose whether to email or print acknowledgement
3. choose a pre-existing message
4. choose whether this is a receipt or an acknowledgement.
5. Use the design editor to create your own message if you do not want to use an existing message.
Multiple Acknowledgments
To acknowledge multiple donor transactions at once, first find the transactions listing screen under Donations > Transactions > Search & Manage.

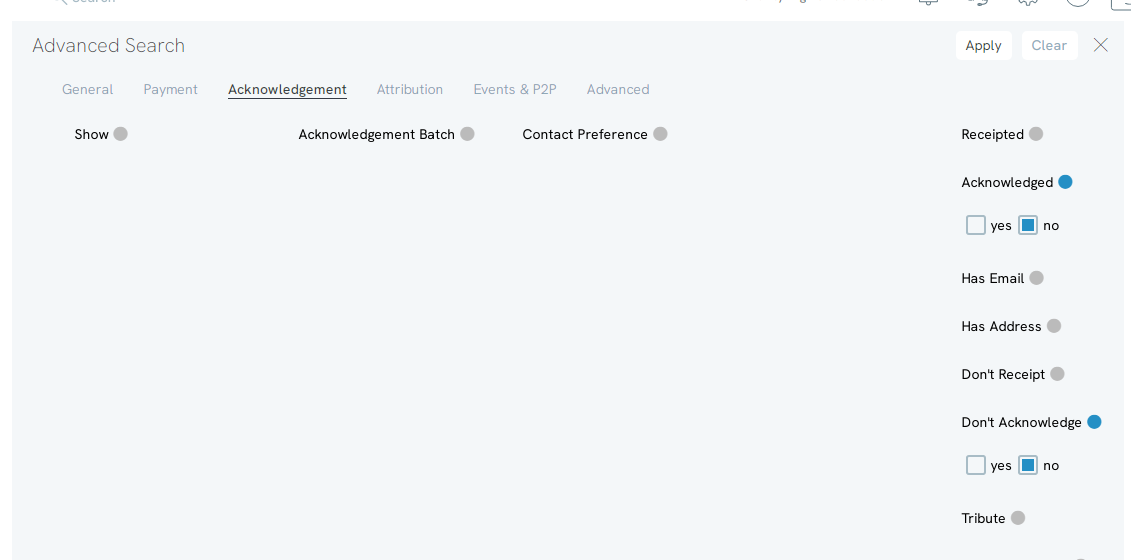
CharityEngine® simplifies finding donors to acknowledge by filtering for donors who have not been acknowledged or not marked as do not acknowledge. Use the advanced filters > Acknowledgement and click on the Acknowledged radio button, then select no. Do the same thing or Do not acknowledge.
Choose the donors you would like to acknowledge using the check boxes to the left of the listings. Click the top check box in the black bar to select all of the donors on the page. Choose Acknowledge to create a group acknowledgment.
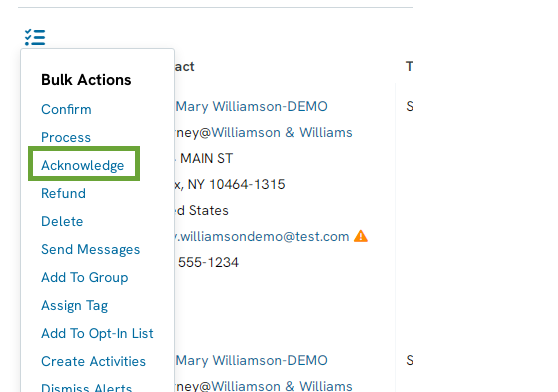
NOTE: Checking the top box will ONLY select the transactions displayed on the page. This may not include transactions beyond the number selected to display. To select a larger number of listings, change the number of listings displayed. Find this in the bottom left corner of the page.

Clicking Acknowledge will prompt the batch acknowledgment wizard to pop up. It will default to create a new acknowledgment batch. To use a pre-existing acknowledgment batch, select it from the drop-down menu.
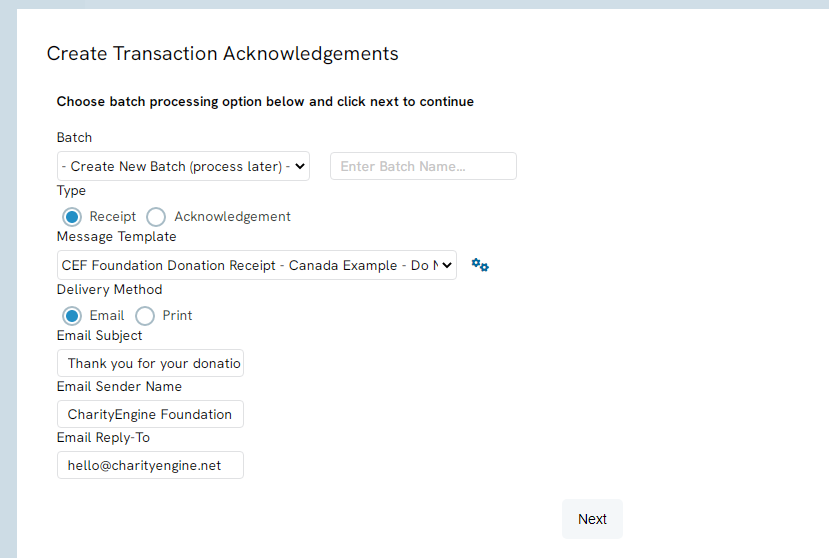
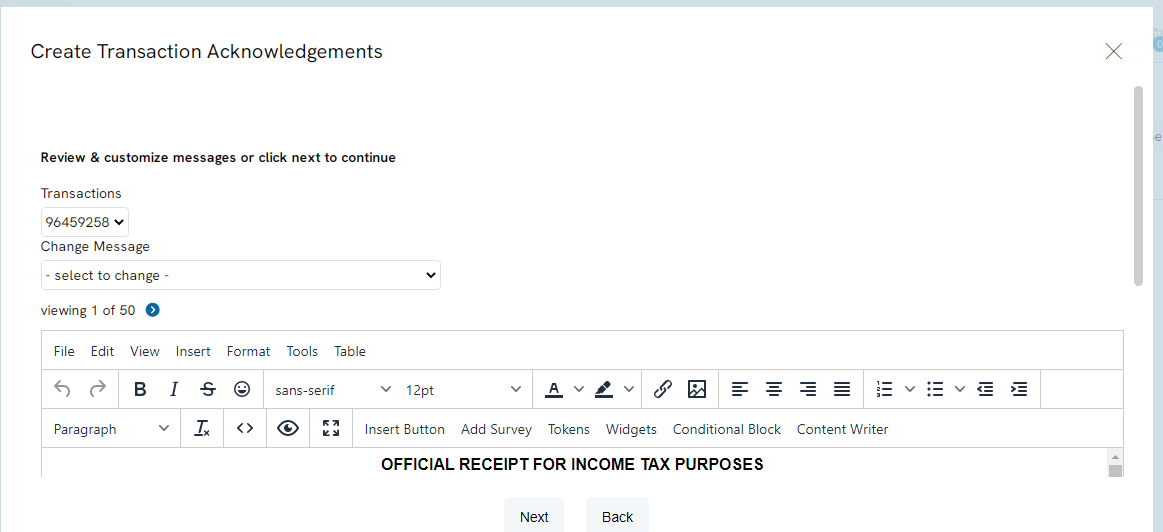
Click Next to access the editor. In CharityEngine®, you can edit single specific transactions if there are any specific ones you would like to personalize before sending them out. Personalization of single transactions occurs within the wizard, so it can be a smooth, singular process.
1. Transactions: This dropdown is useful if many transactions have been selected to acknowledge. Use the dropdown to choose a specific transaction you want to edit
2. Change Message: Quickly change the design of the message in the editor by choosing a pre-existig message.
3. Viewing: Edit each individual acknowledgement using the arrows
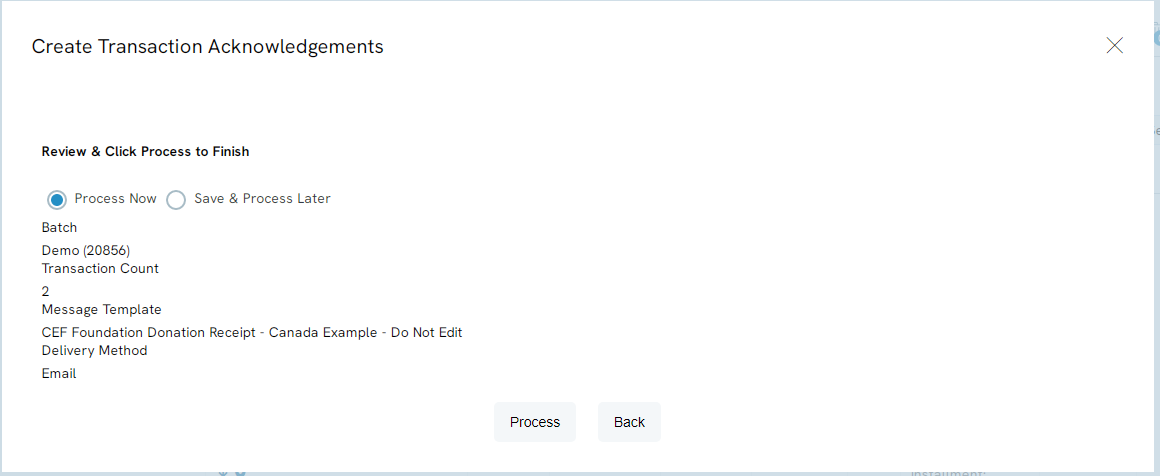
The final screen of the wizard is a confirmation screen. On this screen, you can choose to process the batch you have created immediately, or save it and process it at a later time.
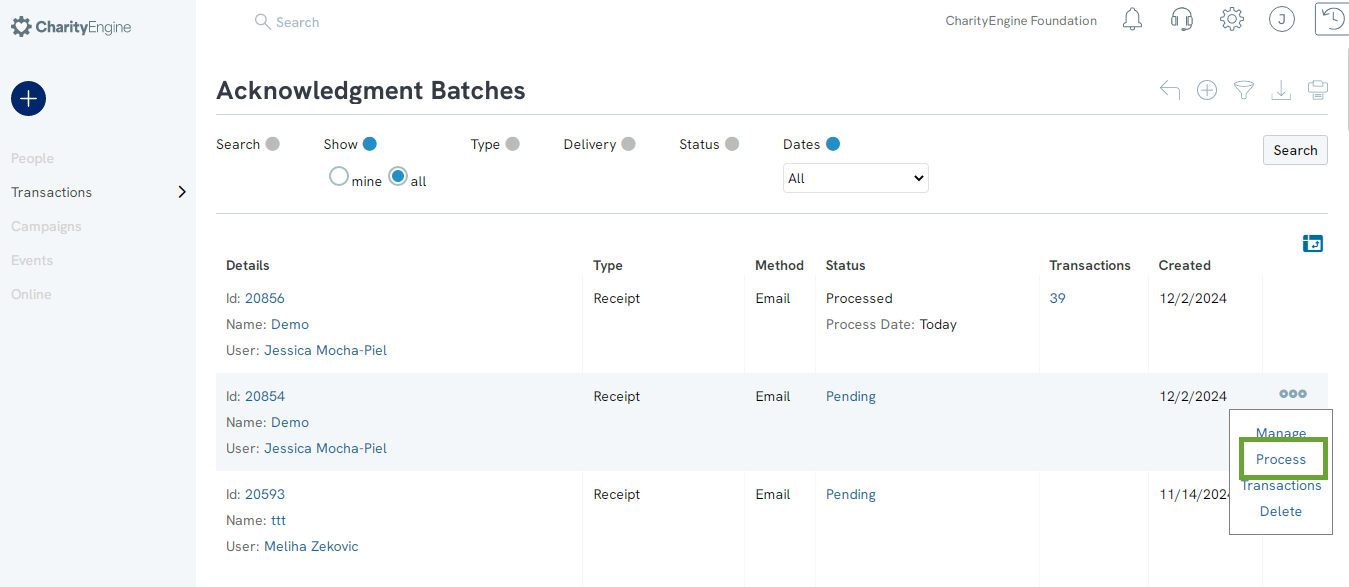
When you click Process, another window will appear with the option to click on the link to manage the batches you have created. Click it to manage batches. You can also reach that page by clicking Donations > Transactions > Acknowledgments.

If you choose to save the batch and process it later, you can click the link that appears, or you can head to Donations > Transactions > Acknowledgments. Hover over the three dots to the right of a listing and click Process to manually process a batch. The same wizard will walk you through the process.
NOTE: Before the batch processes, a review and confirmation box will appear to double-check that the messages are correct.
Importing/Creating Letter Templates
Create templates for acknowledgments using our Design & Message section. Click Configuration > Design & Messages > Templates.
Click Create New under the Design Templates listing screen to design a new template for your acknowledgment.

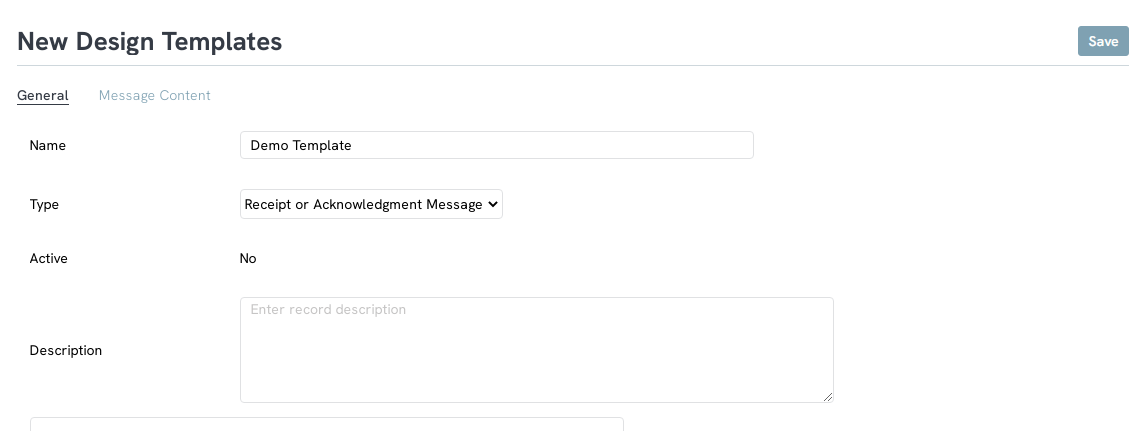
Design a new template by navigating to the General Tab and enter:
- Name: Enter unique name for the template
- Type: Select Receipt or Acknowledgment
- Active: Defaults to Yes
- Description: add option description
Design a message content by navigating to the Message Content Tab and enter design.
Design your template message content here. Add images, change fonts, insert merge tokens, include hyperlinks, etc. within the editor.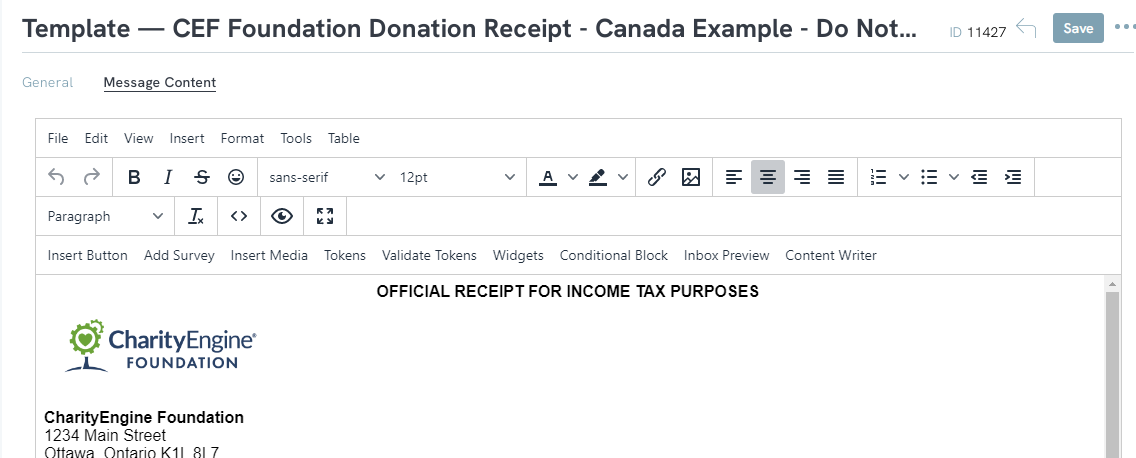
Click the Validate Token (labeled above) to validate the merge tokens you insert. Green merge tokens are working merge tokens! Red merge tokens are broken merge tokens.

Import Templates from Word
NOTE: Importing templates from Word is only possible AFTER the template has already been created.
Name and create your new template by clicking the Create button. This will not take you away from the page—it will refresh and bring you to the Manage page now that the template has been created.
Once the template has been created, the Create button will turn to an Save button an ellipse will appear next to it . Click on the ellipse for more options. Click Import Word Doc.

A pop-up box will appear prompting you to choose a file from your computer. Click Choose File, and click Open after selecting a file. It will import your Word file into the template.

Managing Microsoft Word Margins
In Microsoft Word, you cannot directly view or access the HTML code that represents the document's content and formatting. Microsoft Word uses its own proprietary file format (.docx) to store documents, which is not HTML-based. As a result, the user will need to add coding to care for margin adjustments. The following is one example of coding that can be used to create and adjust margins for printing or delivery.
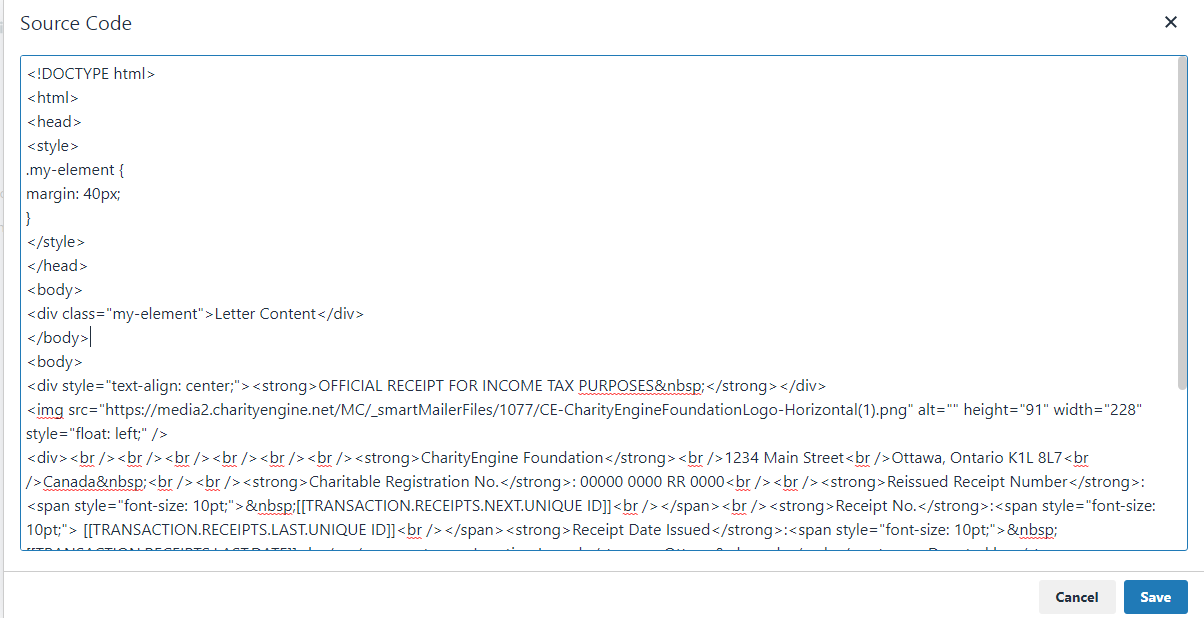
To access the source code, from the Message Content tab, click on the Source Code icon (< >).
Enter the style code to create a margin. In this example, the following code has been applied for a 40 pixel margin.
<head>
<style>
.my-element {
margin: 40px;
}
</style>
</head>
<body>
<div class="my-element">Letter Content</div>
</body>
FAQs & Additional Reading
Q. I have Canadian Donors that require specified receipting elements. Does CharityEngine have field that will help me remain compliant?
A. Yes! CharityEngine has specific tokens that you can use to help ensure compliance with Canadian tax receipting needs.

