Introduction
There are two ways to use the event form wizard in CharityEngine. This documentation will cover both approaches.
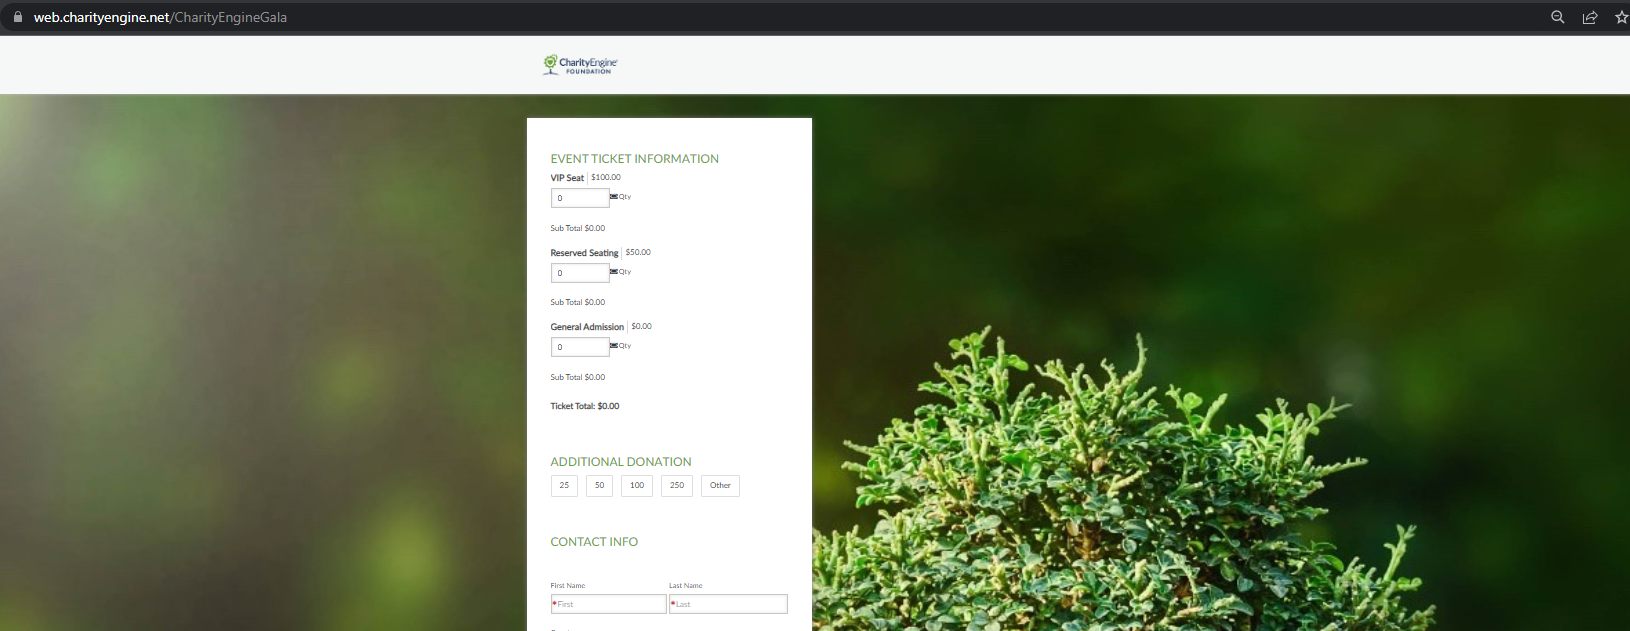
Table of Contents
Help Center - New User Interface
Click here to access the Help Center new user interface article
Prerequisites
- Create an event within the Events Application > Events > Search & Manage > Create New
Instructions: Creating a Web Form from the Event Wizard
Step 1: Navigate to the Online App > Quick Actions > New Web Form to select the Web Form Wizard > Select Event Form

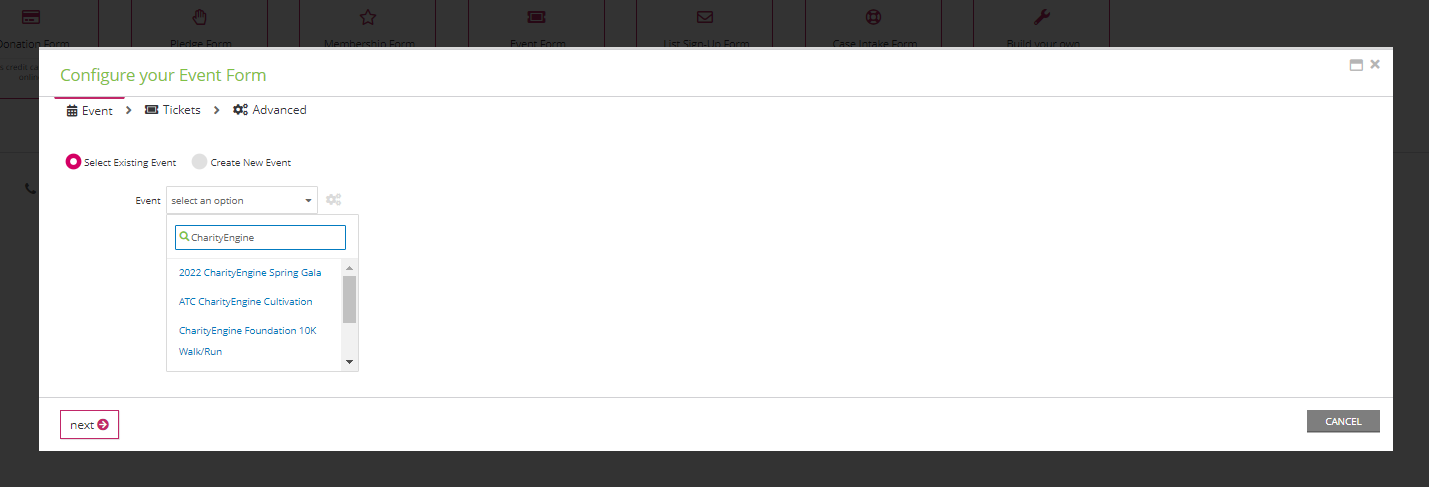
Step 2: From the wizard and Select Existing Event, select your pre-set event from the drop down and click next
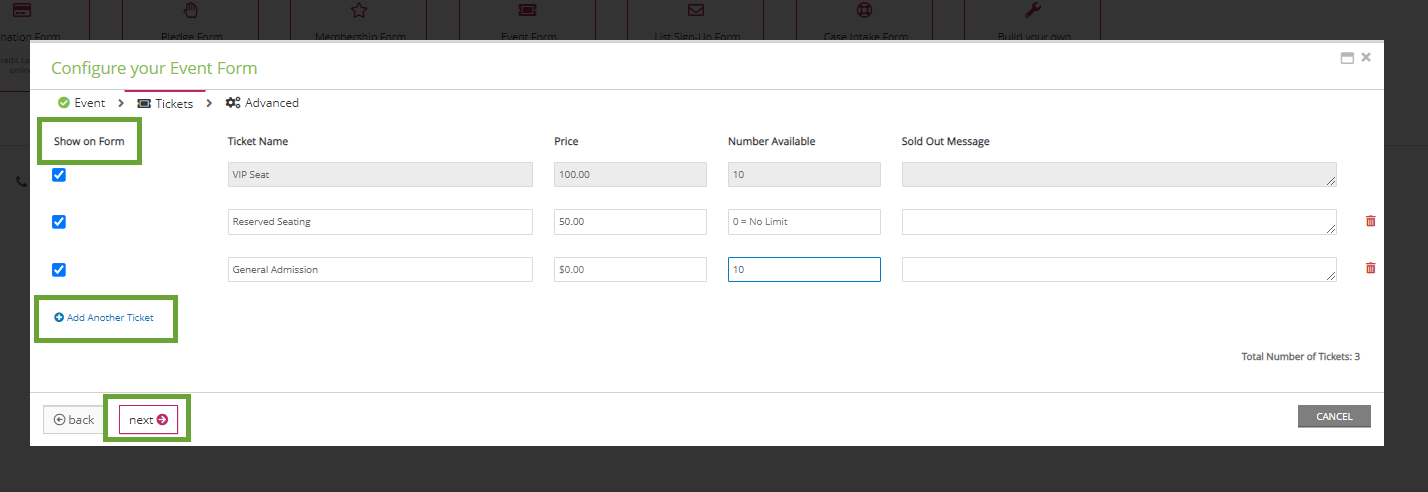
Step 3: From the Wizard, add new tickets and/or determine which tickets may be presented on the web form. Click next to proceed.
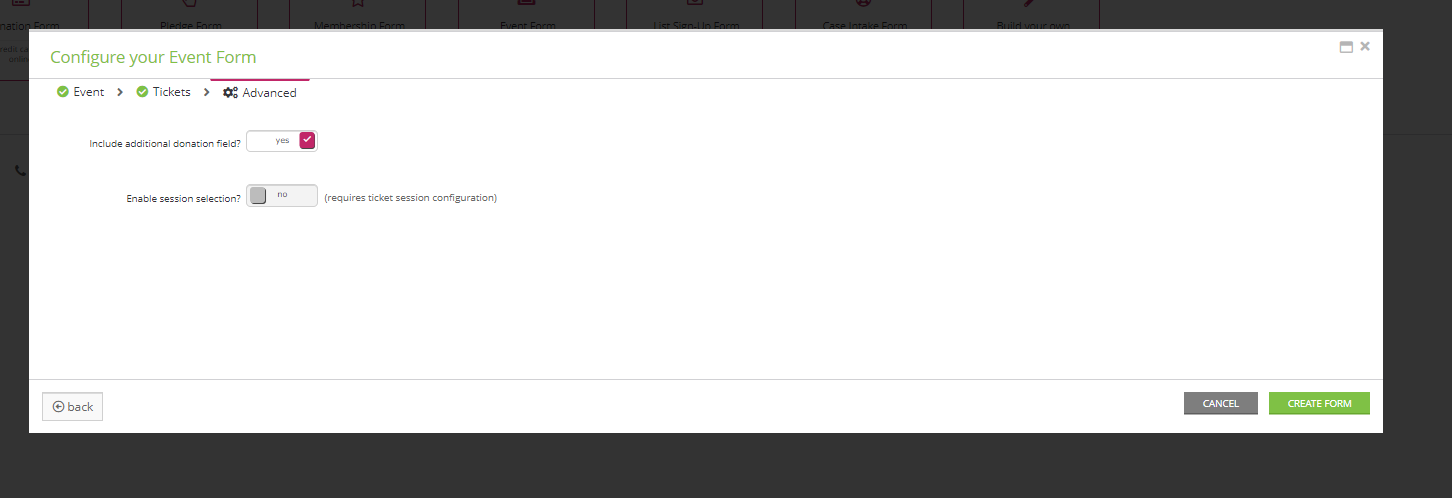
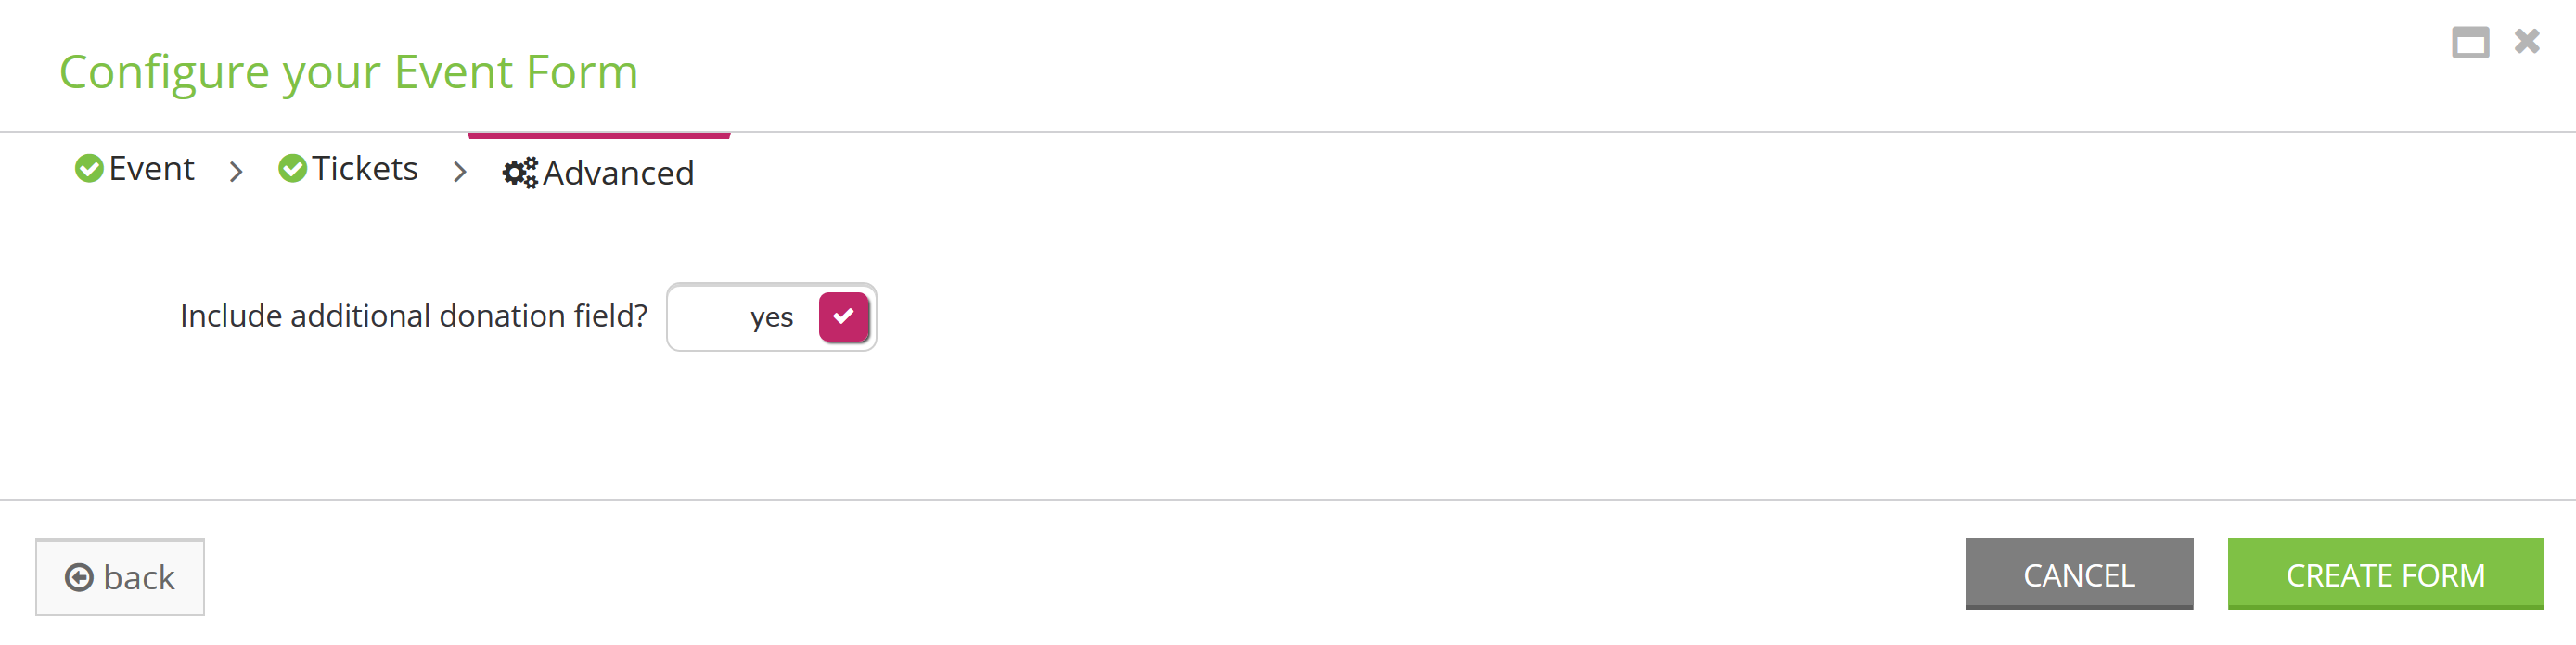
Step 4: Select if the web form should not include additional donation options and/or if your event should enable session selection. (Note: additional configuration of sessions required) Select CREATE FORM to proceed.
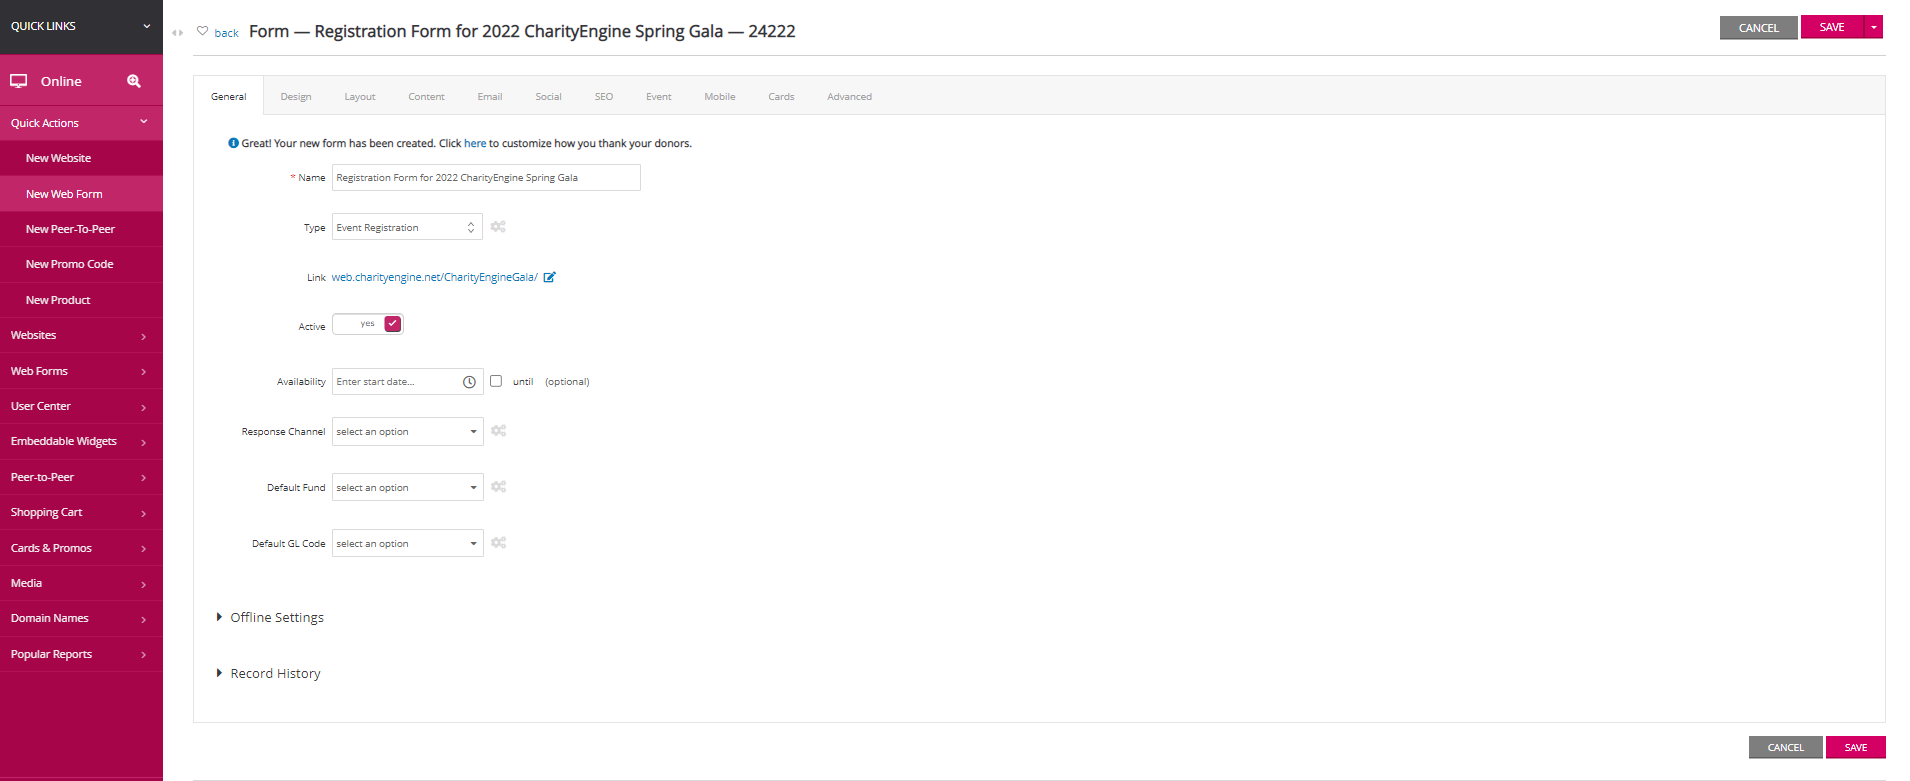
Step 5: From the General tab, modify the Name of the web form (internal presentment only). From here you can also modify the suffix of the link, set availability (please note - if set in a future date, web form will not be visable for review/testing).
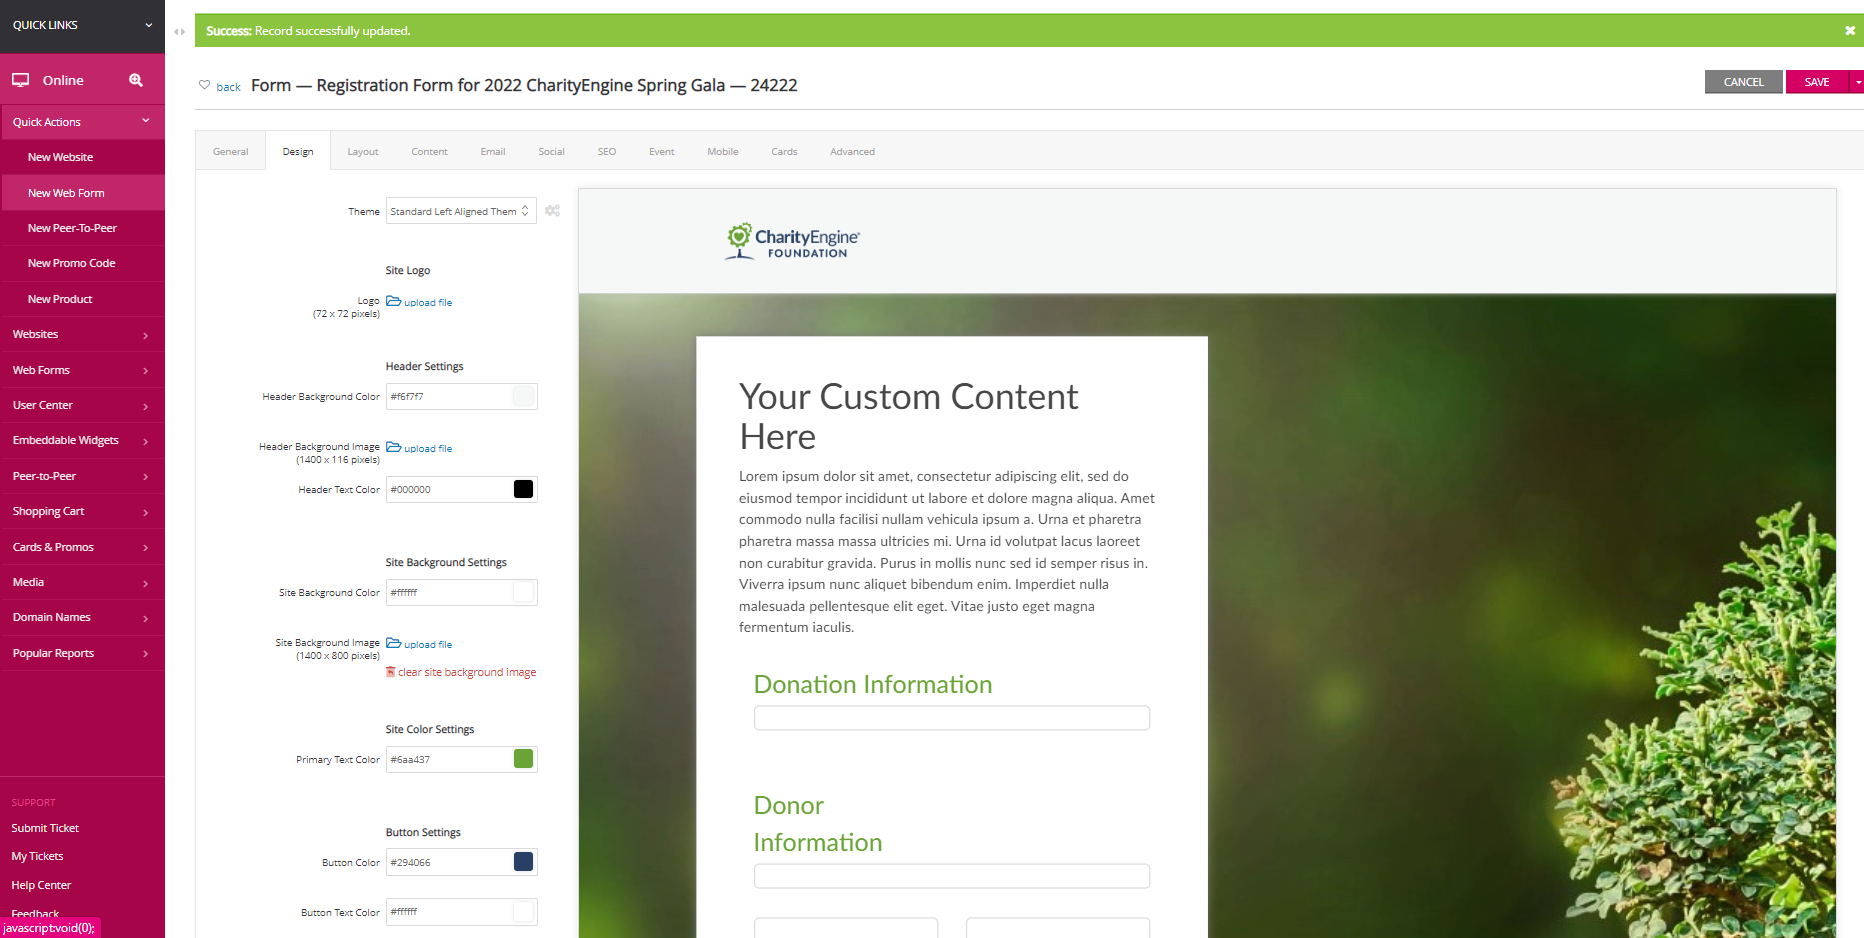
Step 6: From the Design tab, determine your theme, color settings, apply images, etc. Click SAVE to secure your changes.
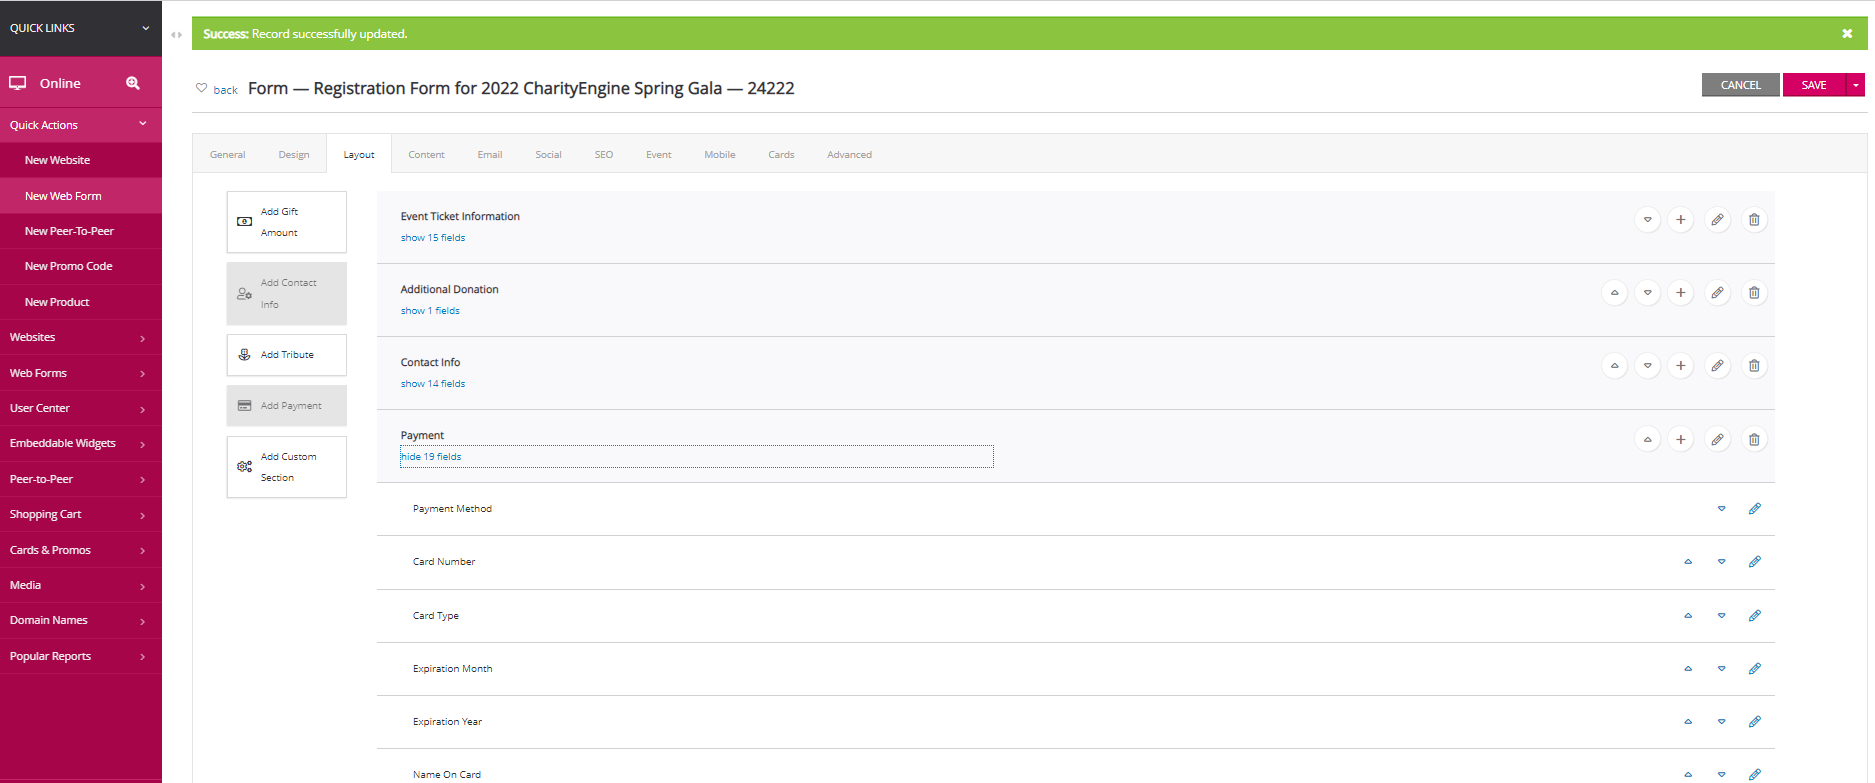
Step 7: Navigate to the Layout tab to add/edit/delete the pre-created form options
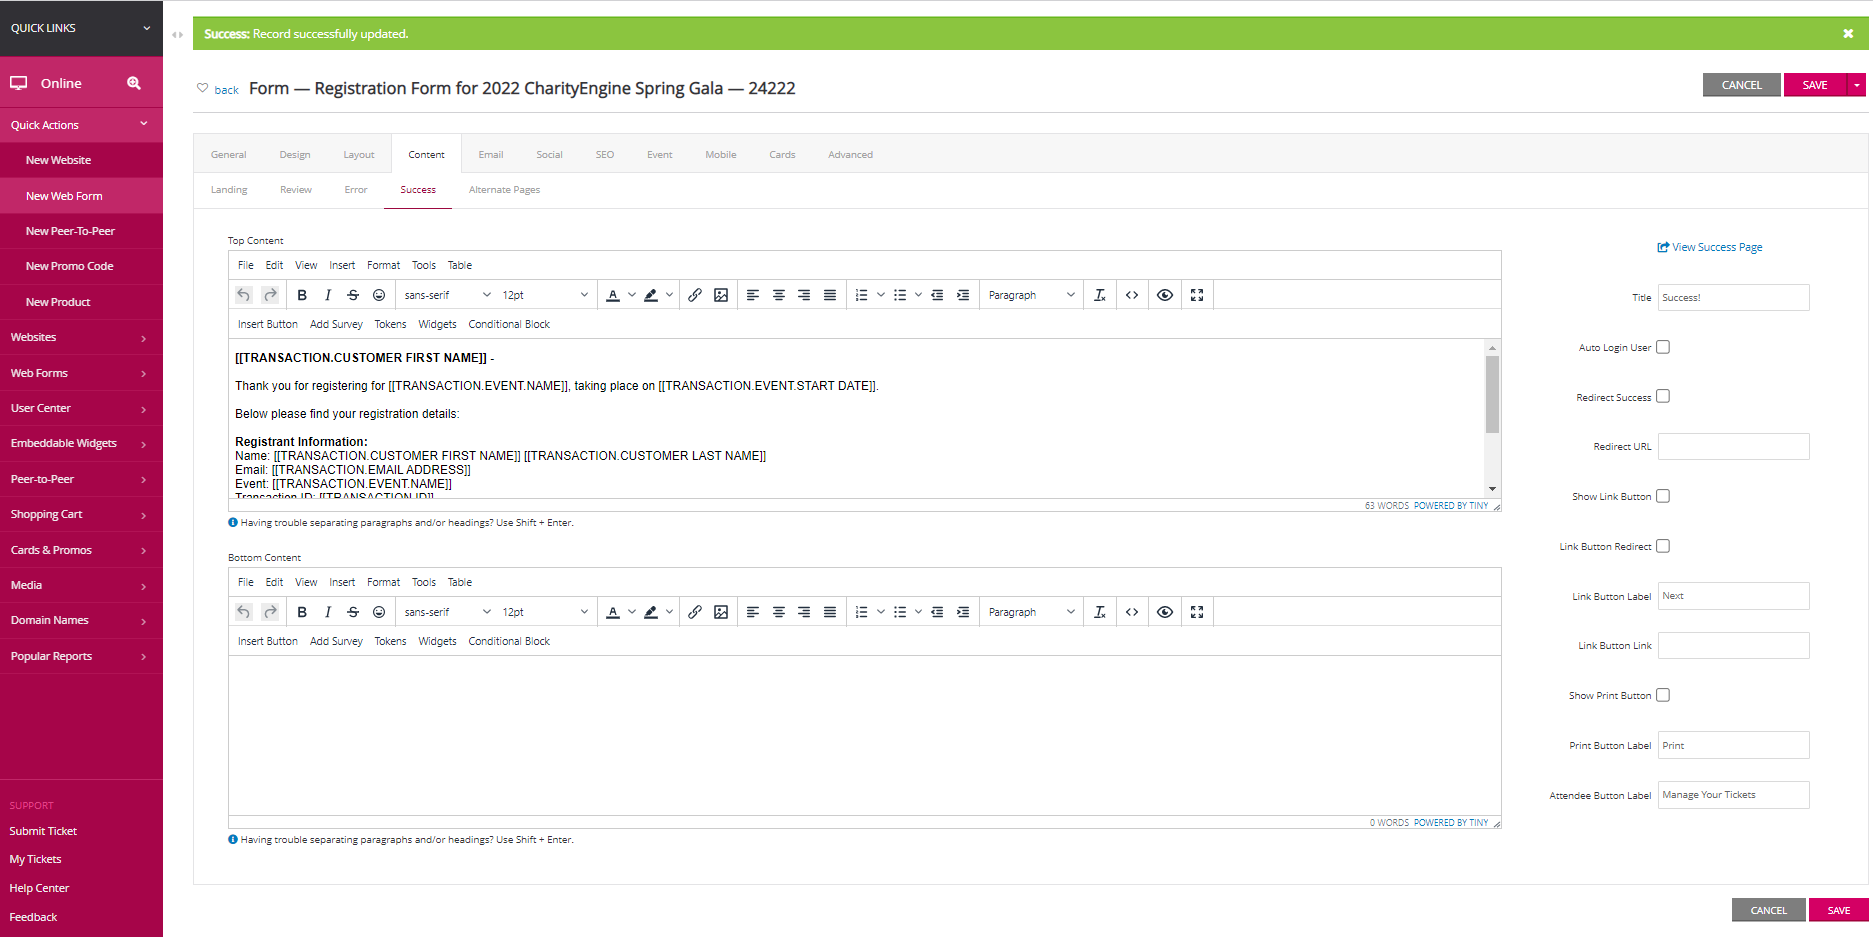
Step 8: Navigate to the Content tab to adjust and create updates for:
- Landing subtab - add additional content/images/videos for your donors when they access your web form
- Success subtab - modify pre-set content for online confirmation of the event registration for your donor
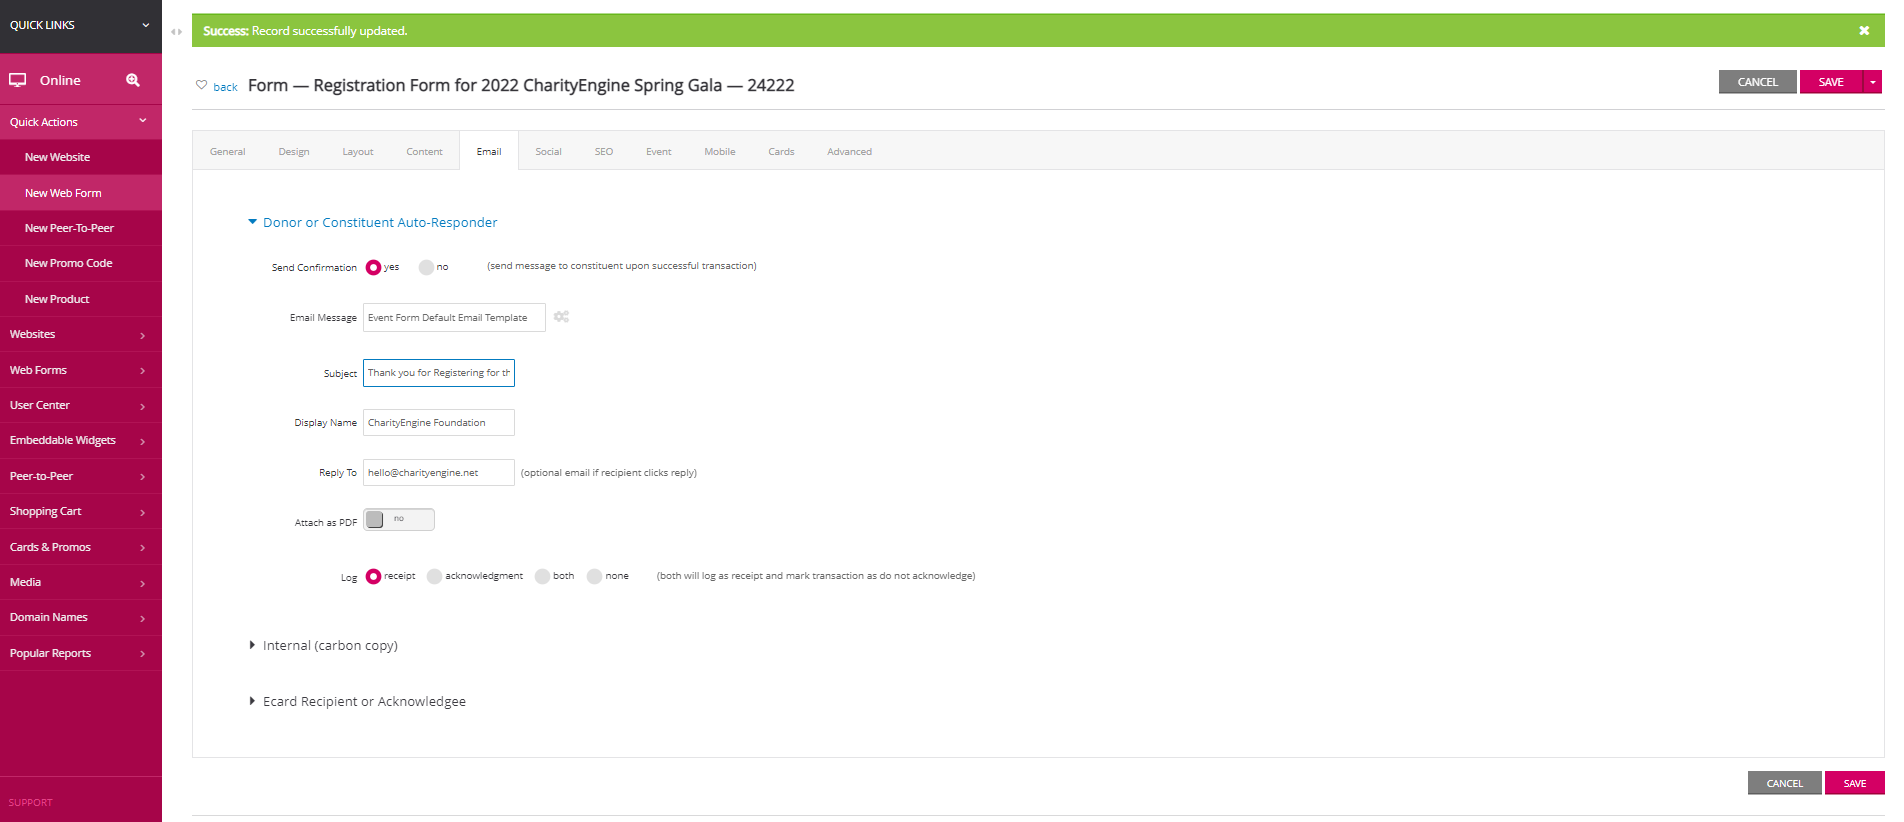
Step 9: Navigate to the Email tab to customize and configure email receipt and/or acknowledgements including Email Message template, Subject, Display Name, and Reply To. In addition, expose the Internal (Carbon Copy) option if you wish for members of your organization to also receive a carbon copy of all successful registrations.
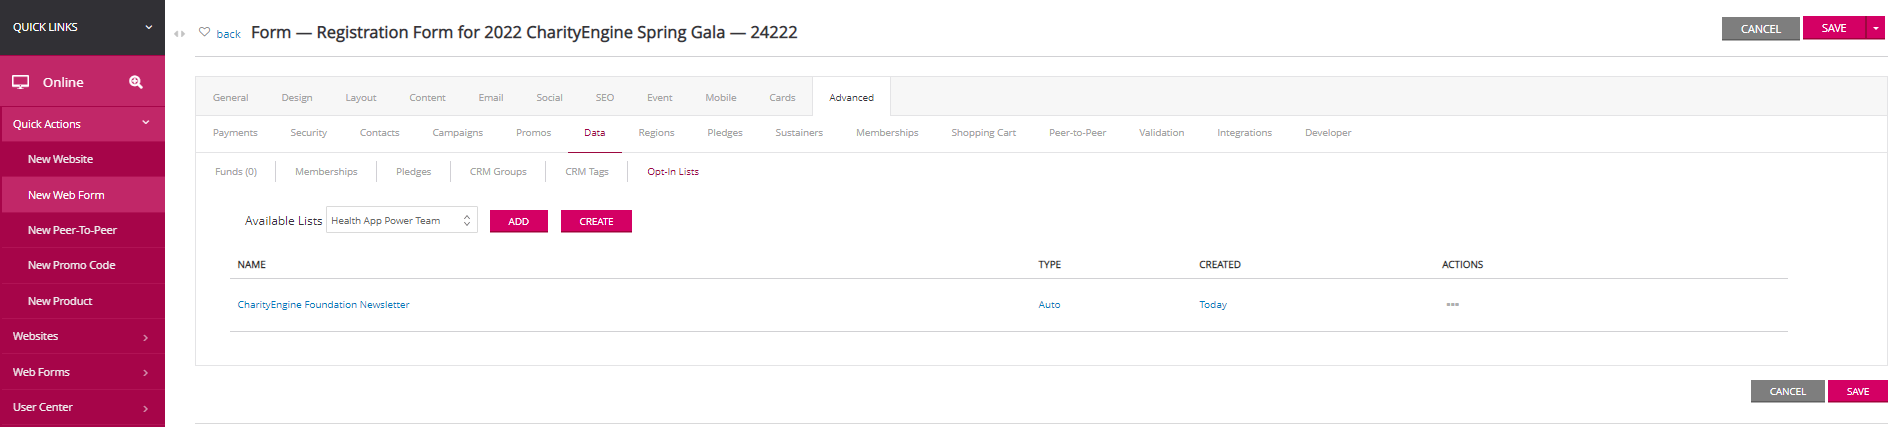
Step 10: Navigate to the Advanced tab for additional attribution options
Creating Forms from the Events Application
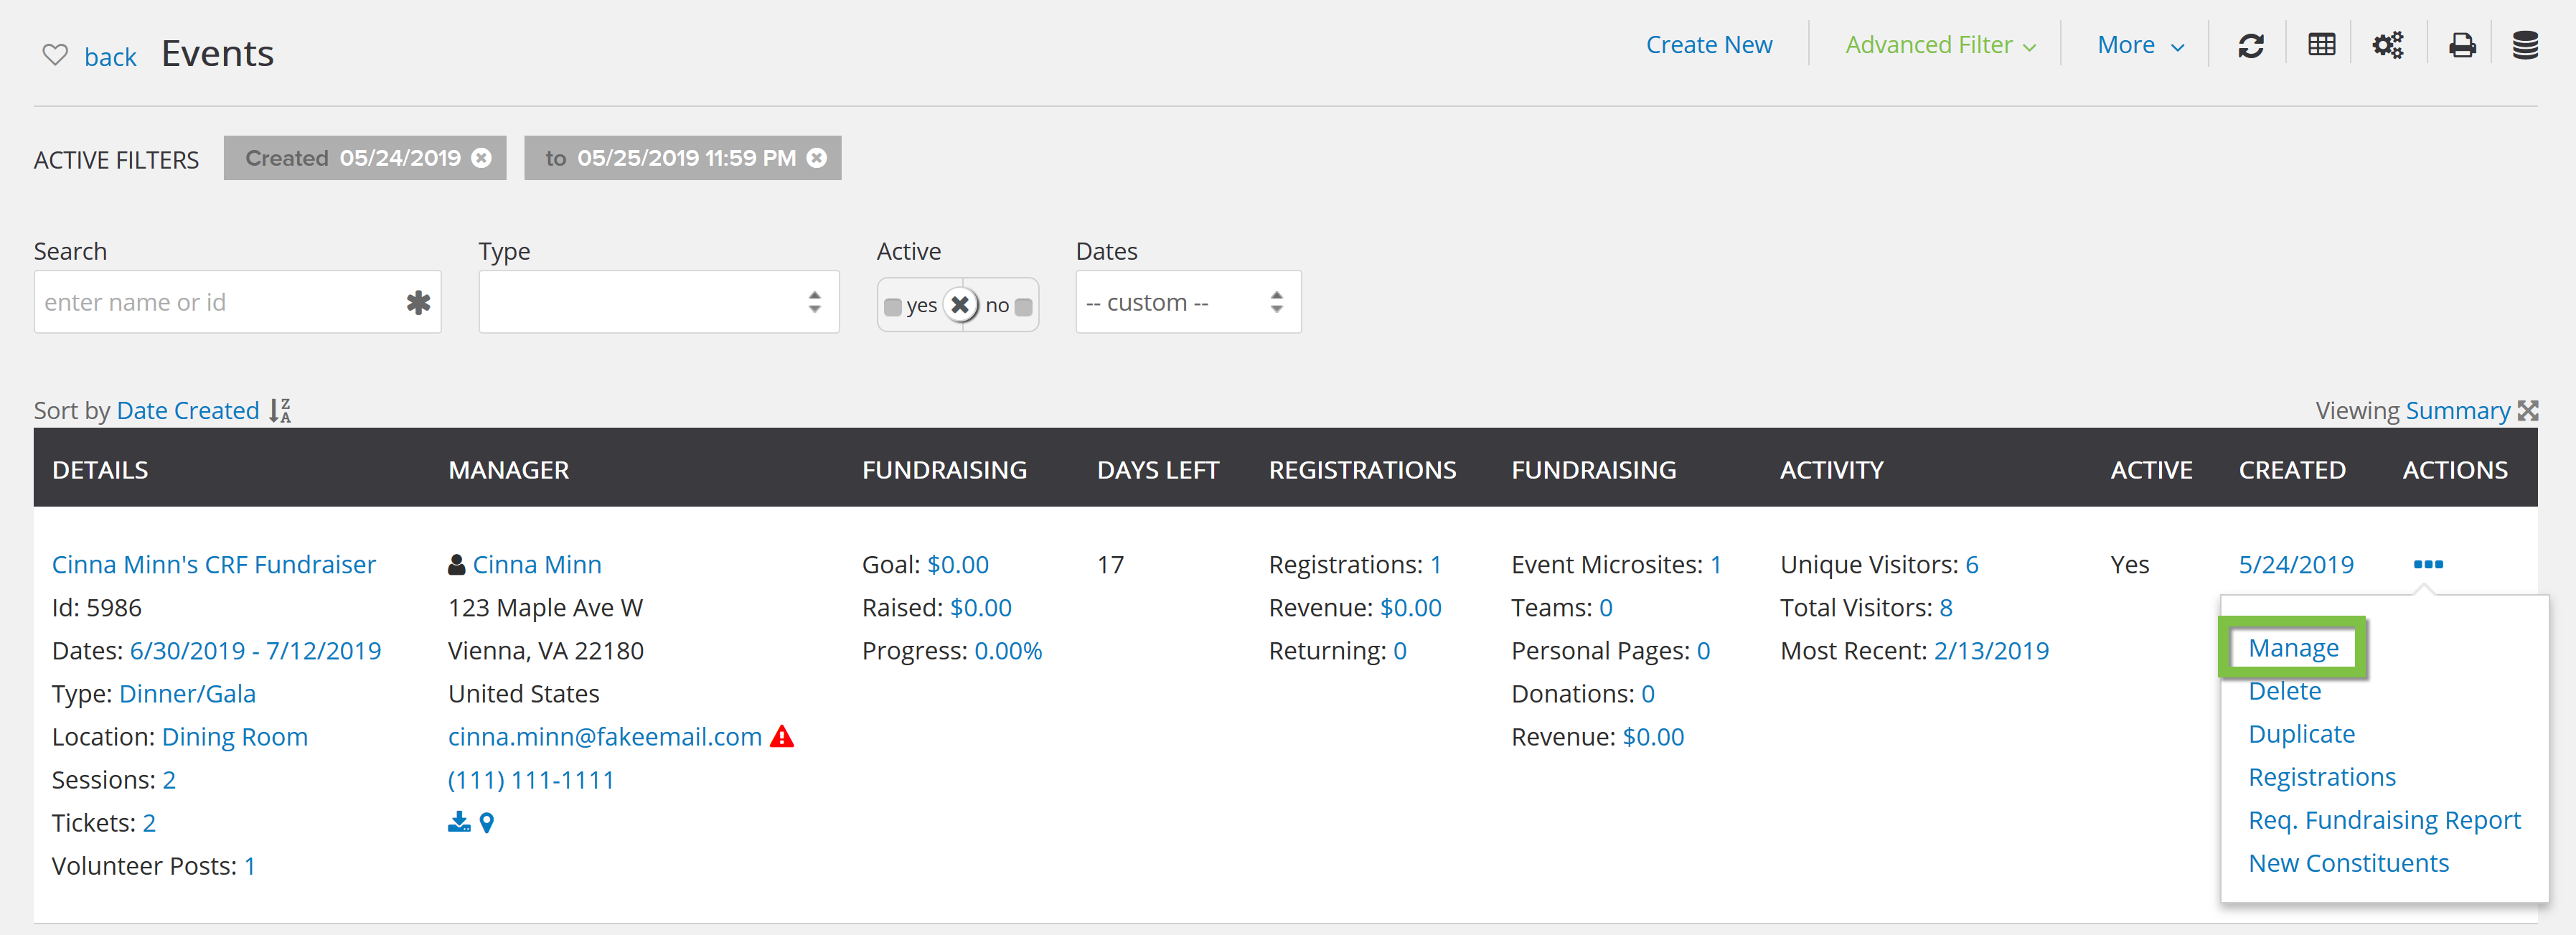
If you created your event first, you can create the form directly from the Events application. Navigate to the Events section of CharityEngine® , find your event, and click Manage.
To create your event form, navigate to the Registration tab.
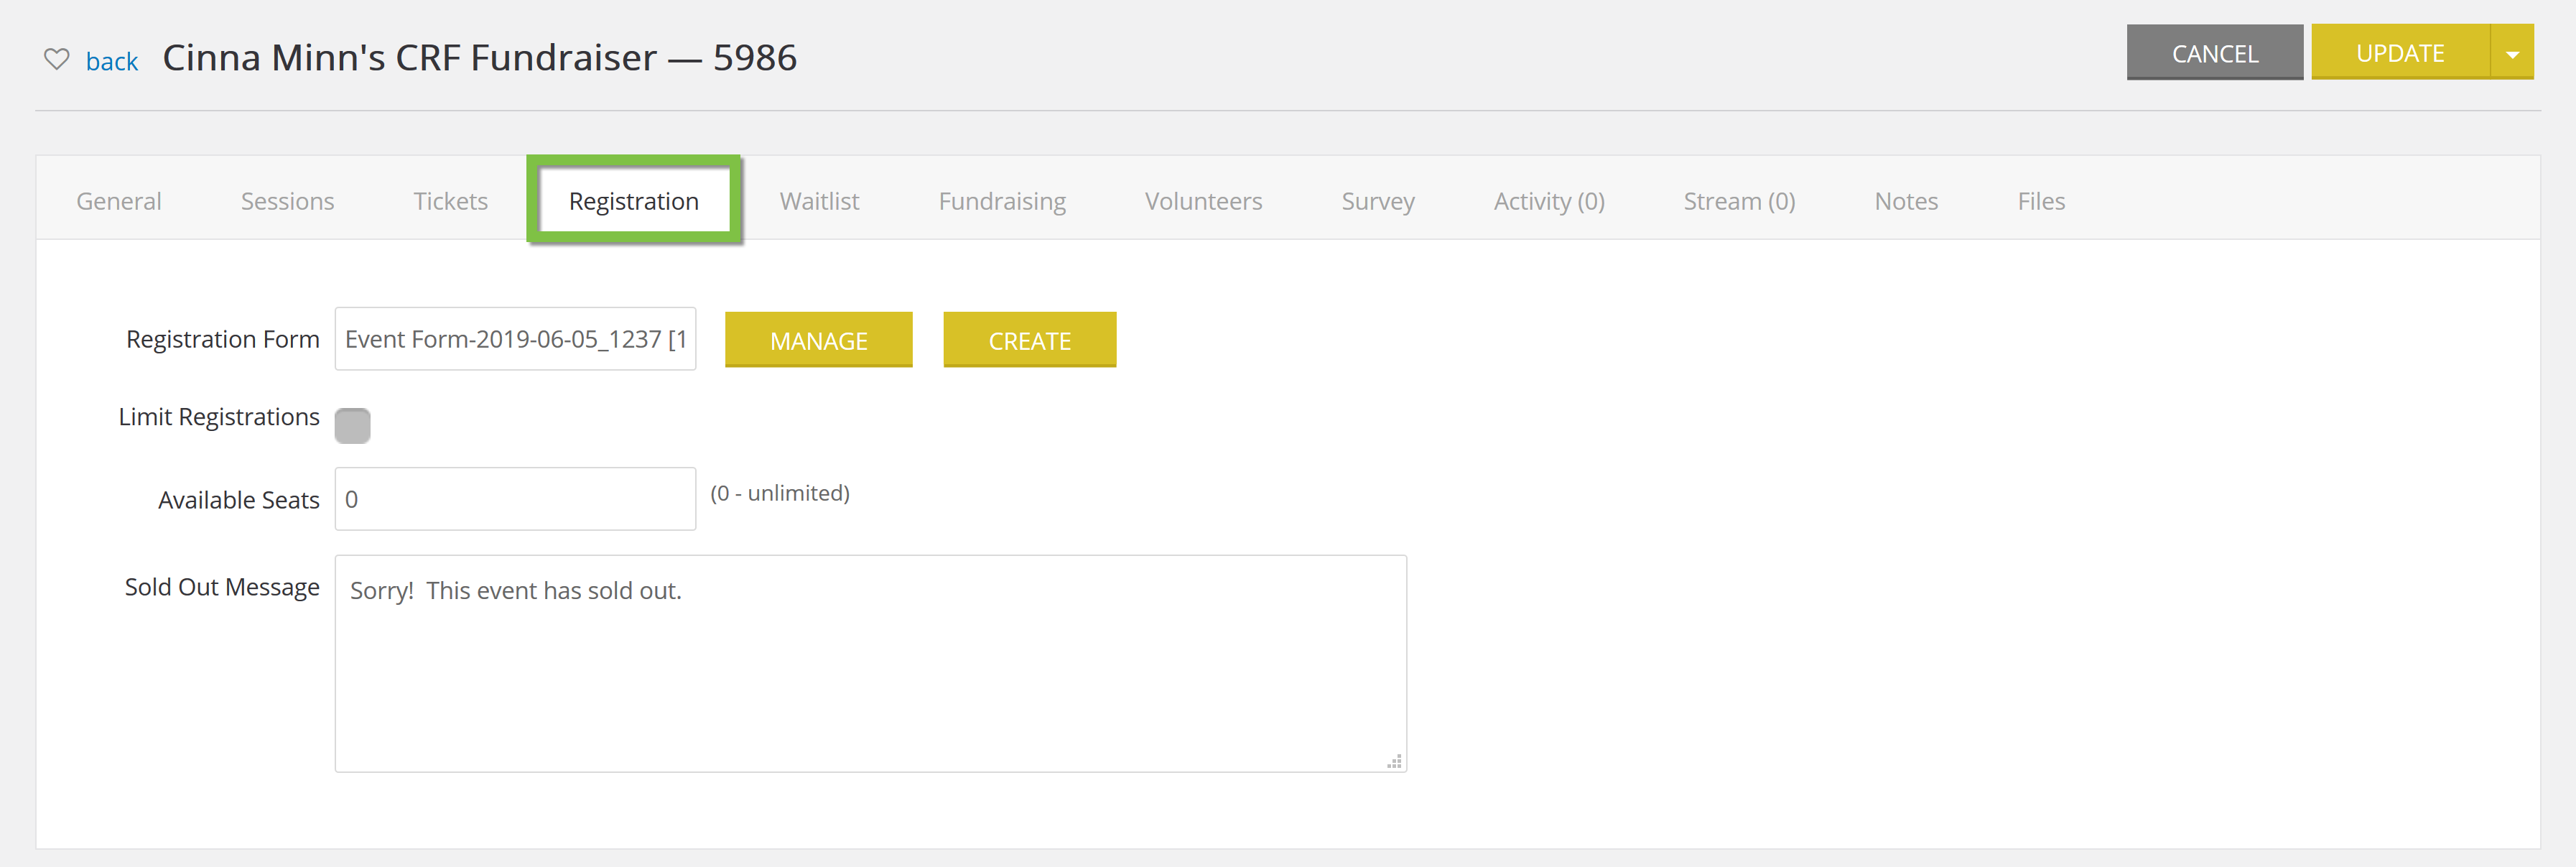
To create a new form, click on the Create button.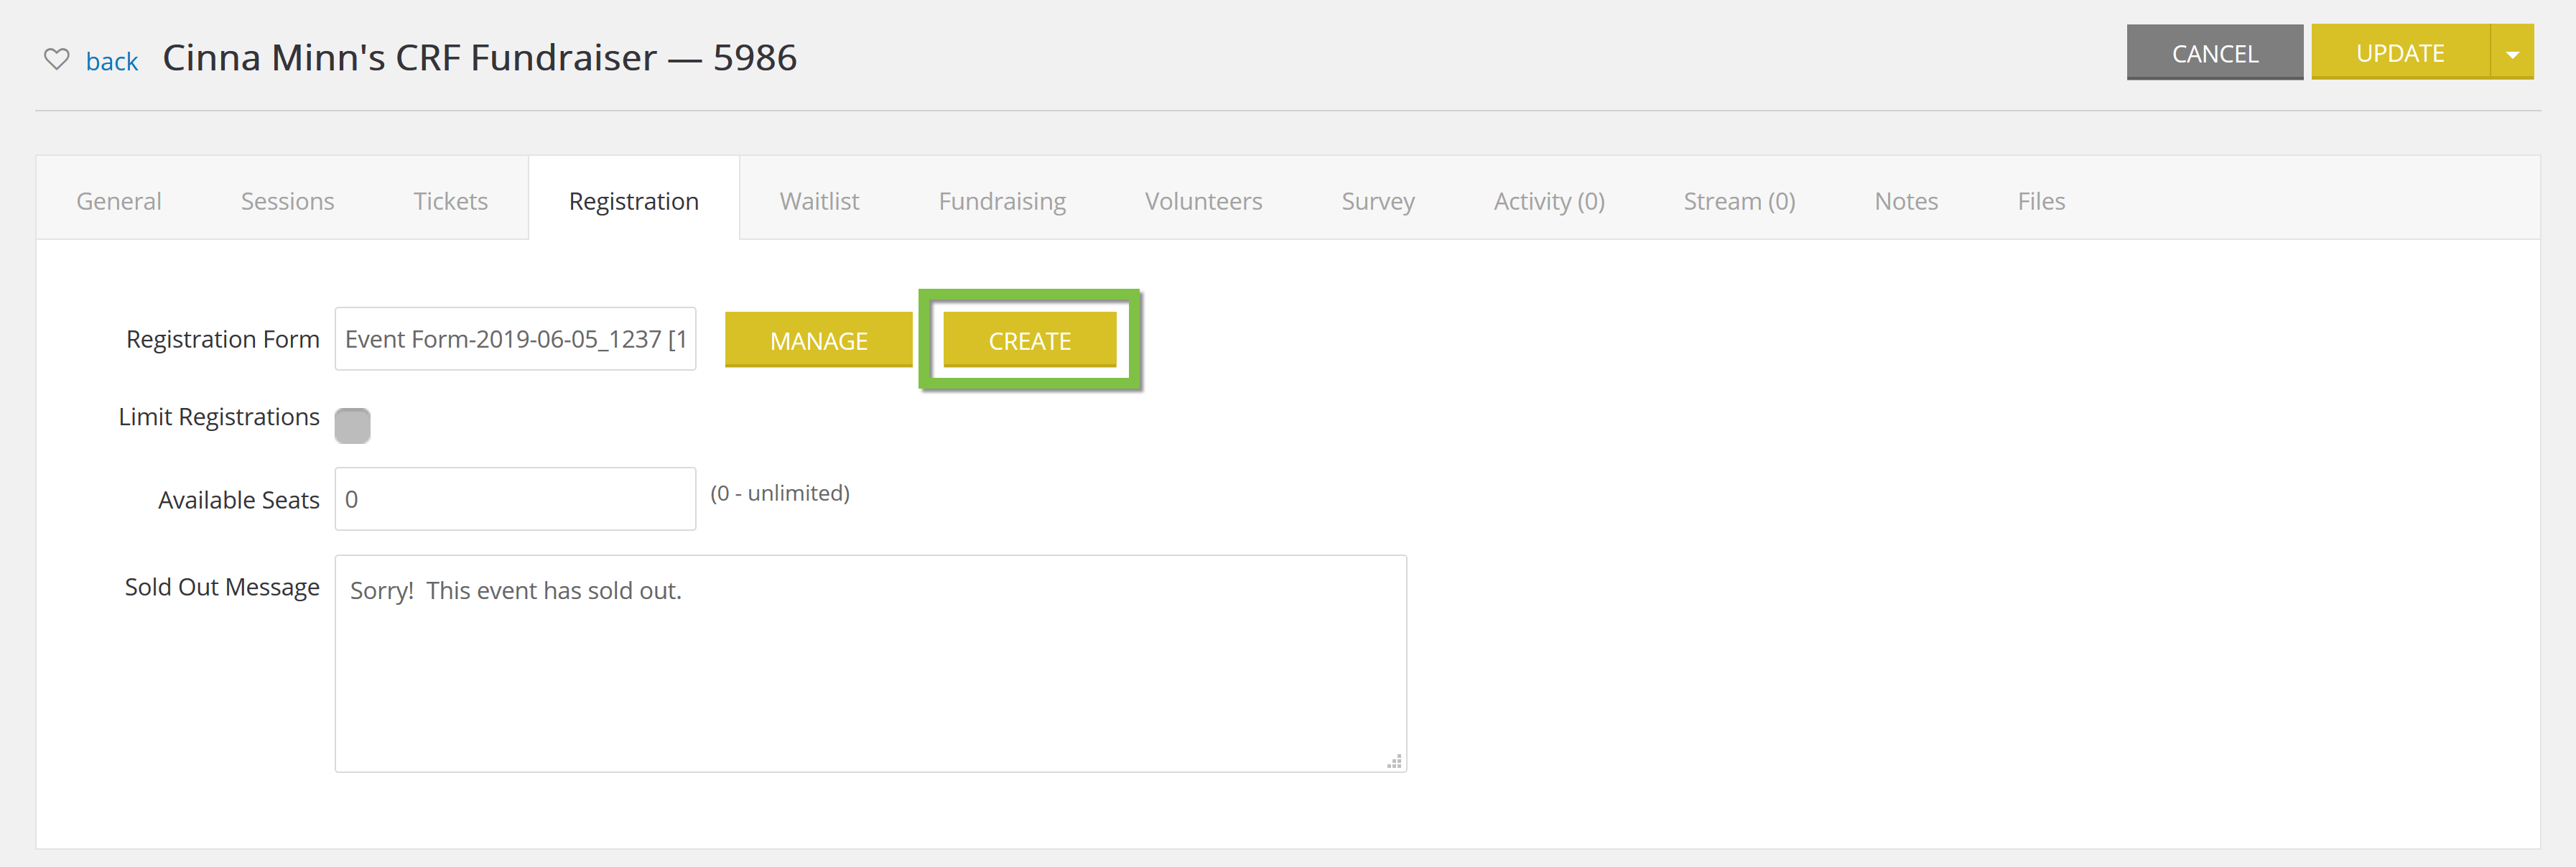
After clicking Create, the Tickets step of the form builder will appear.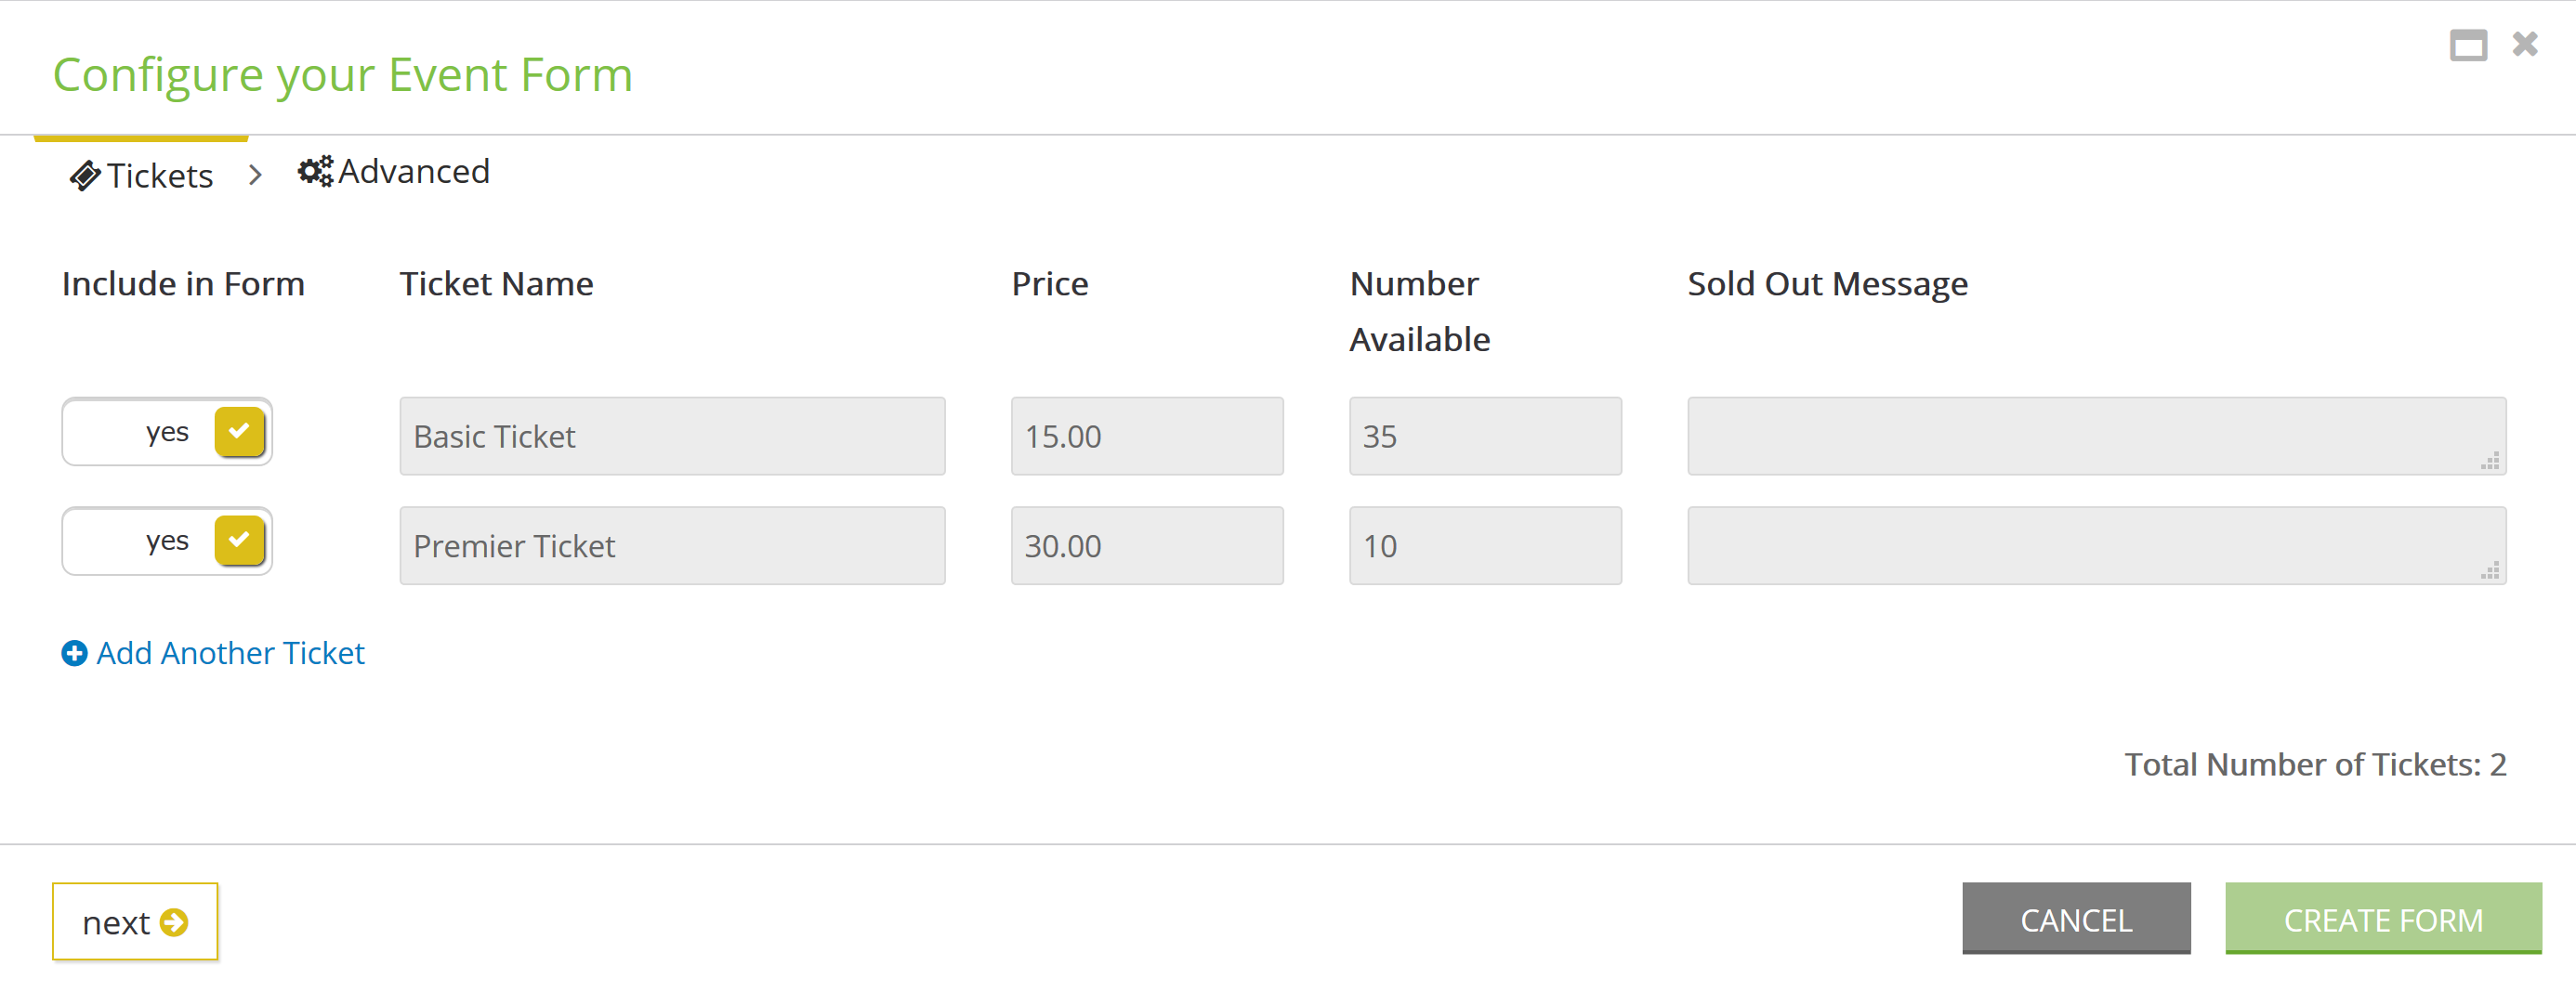
Note: New tickets can be created for the event from the ticket step. Previously created tickets cannot be edited from this wizard.
Tickets
If you selected an existing event, the tickets already configured for the event will appear on the Tickets step.
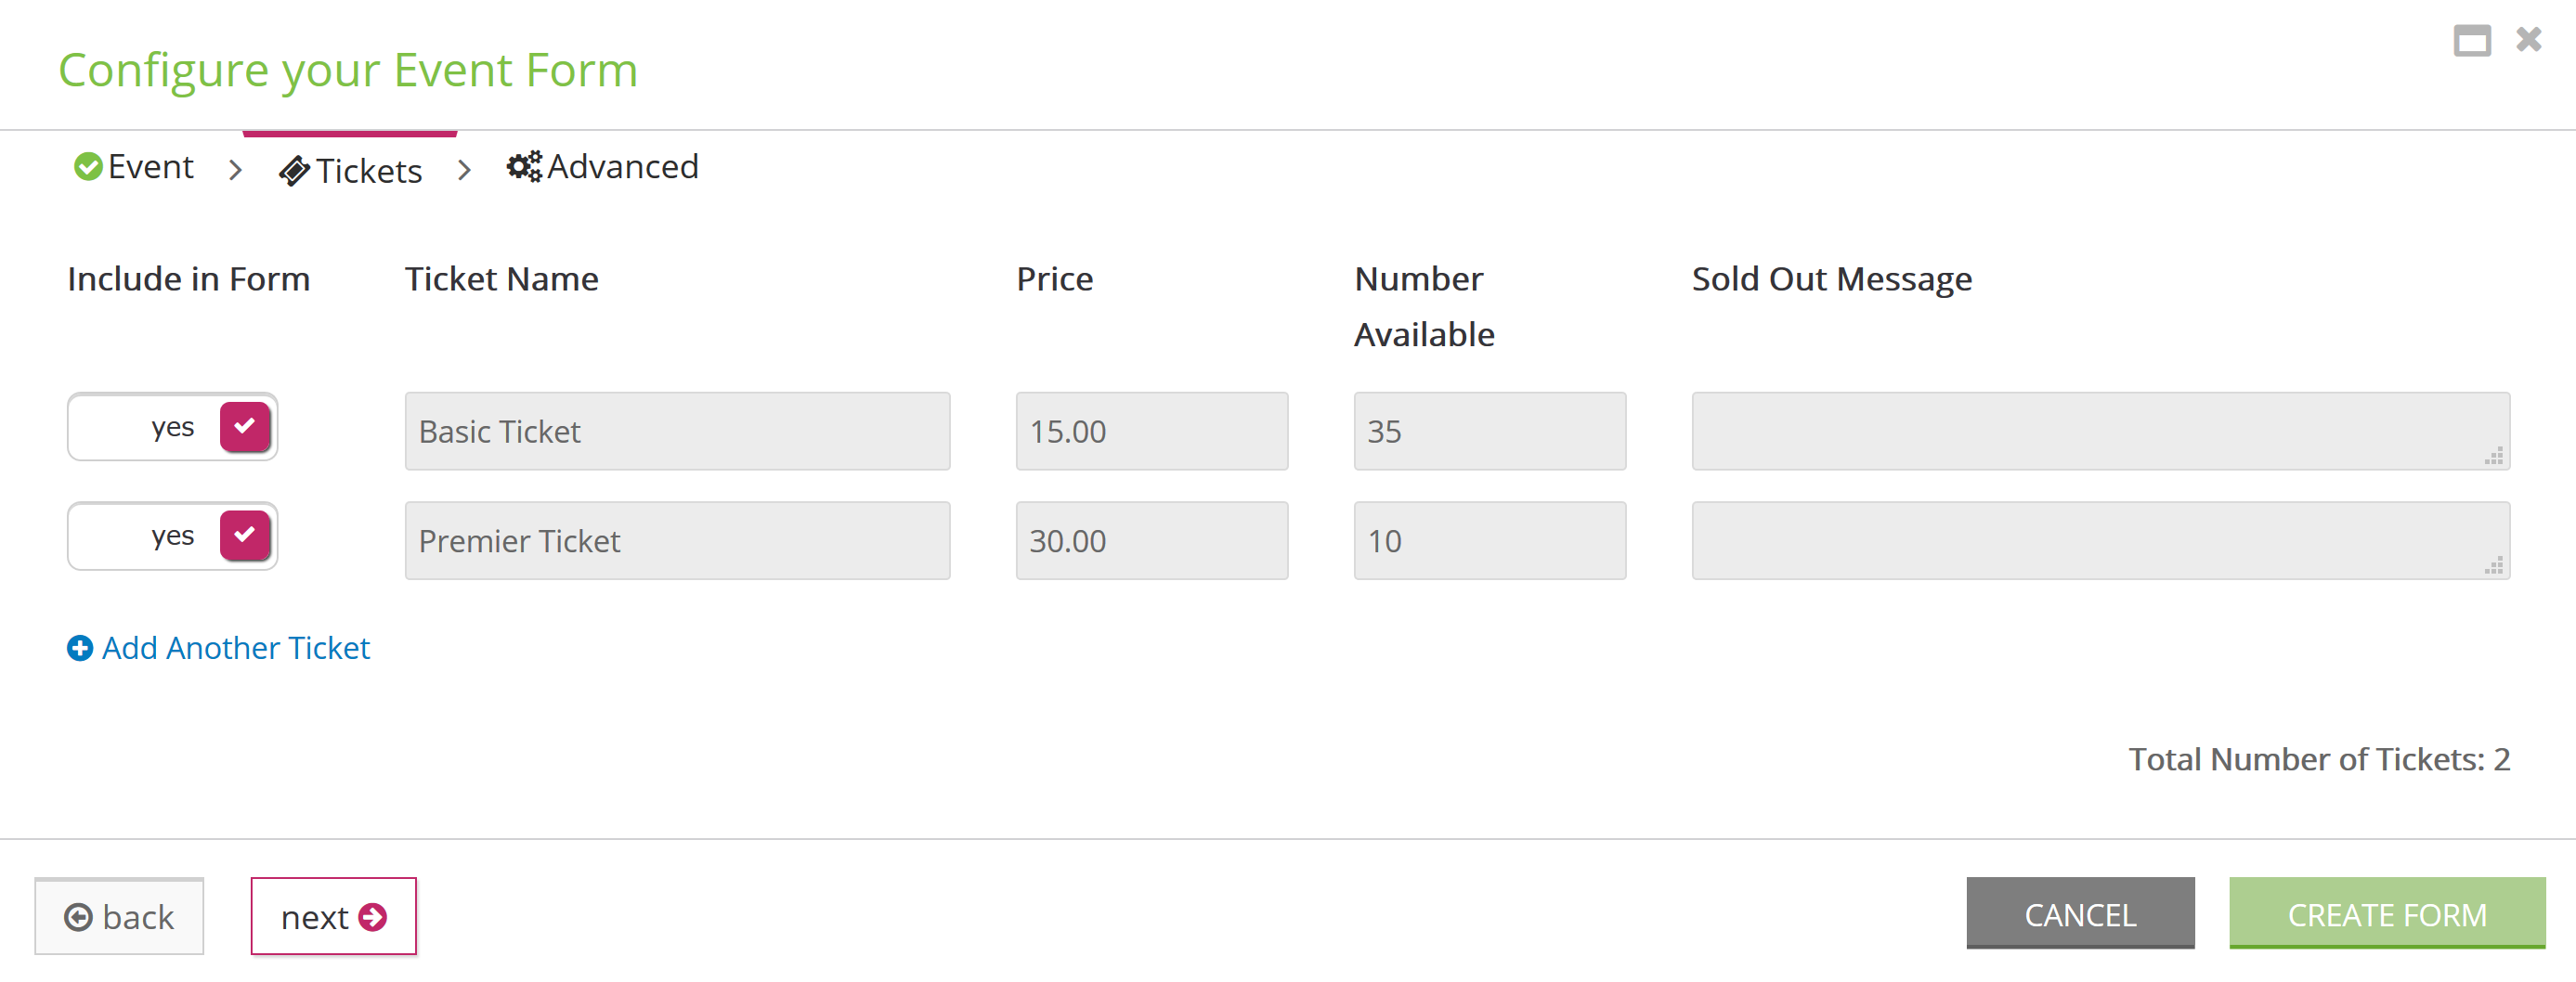
On the ticket step, you can decide whether or not you want to include the ticket on the form by selecting toggling the Include in Form switch from yes to no.
You can add new tickets to the event by clicking on Add Another Ticket.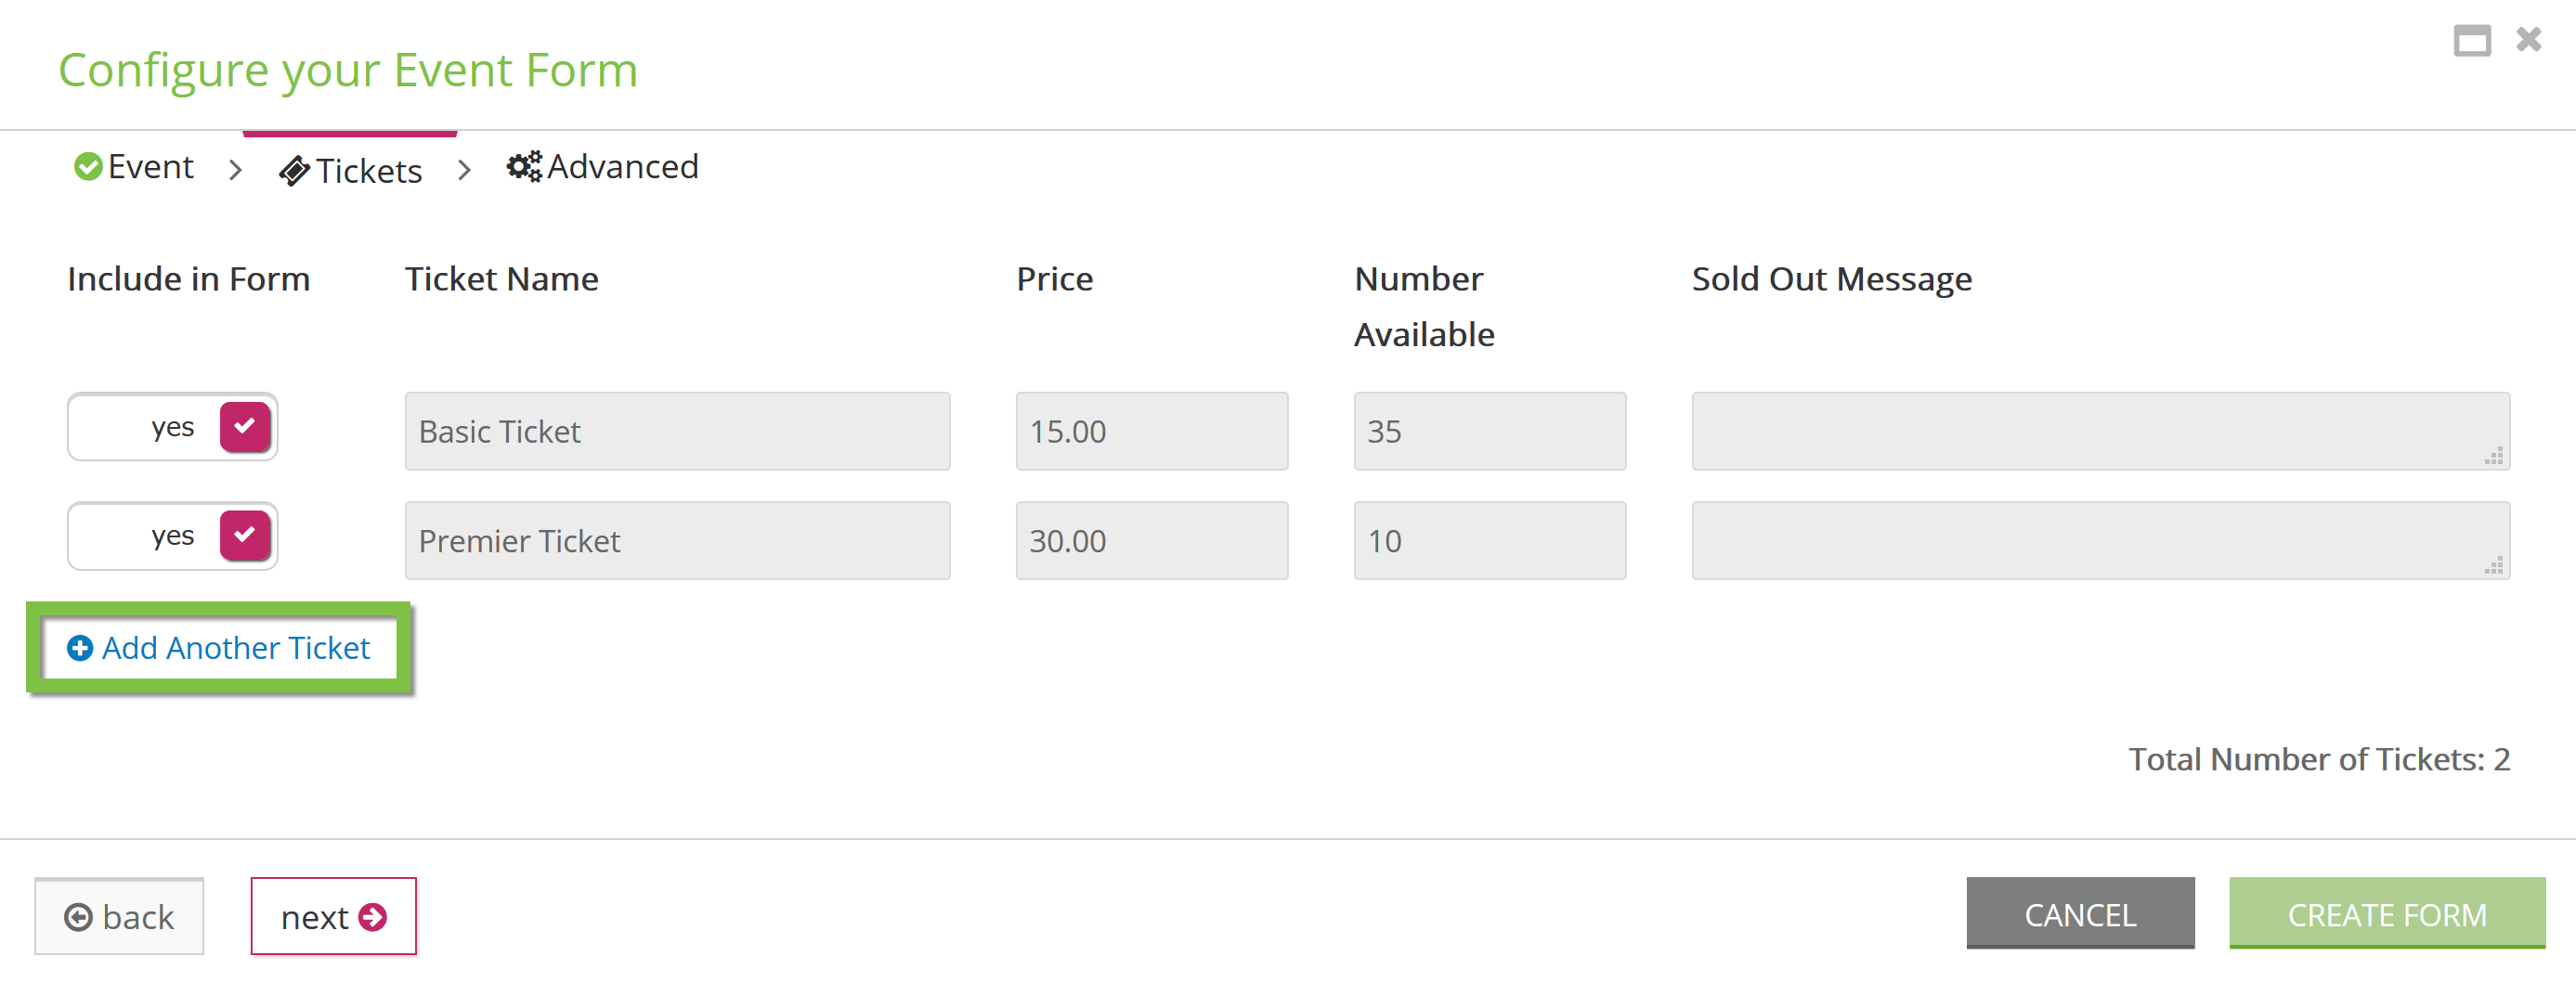
If you created a new event, you will be able to create tickets for the event on the tickets step.
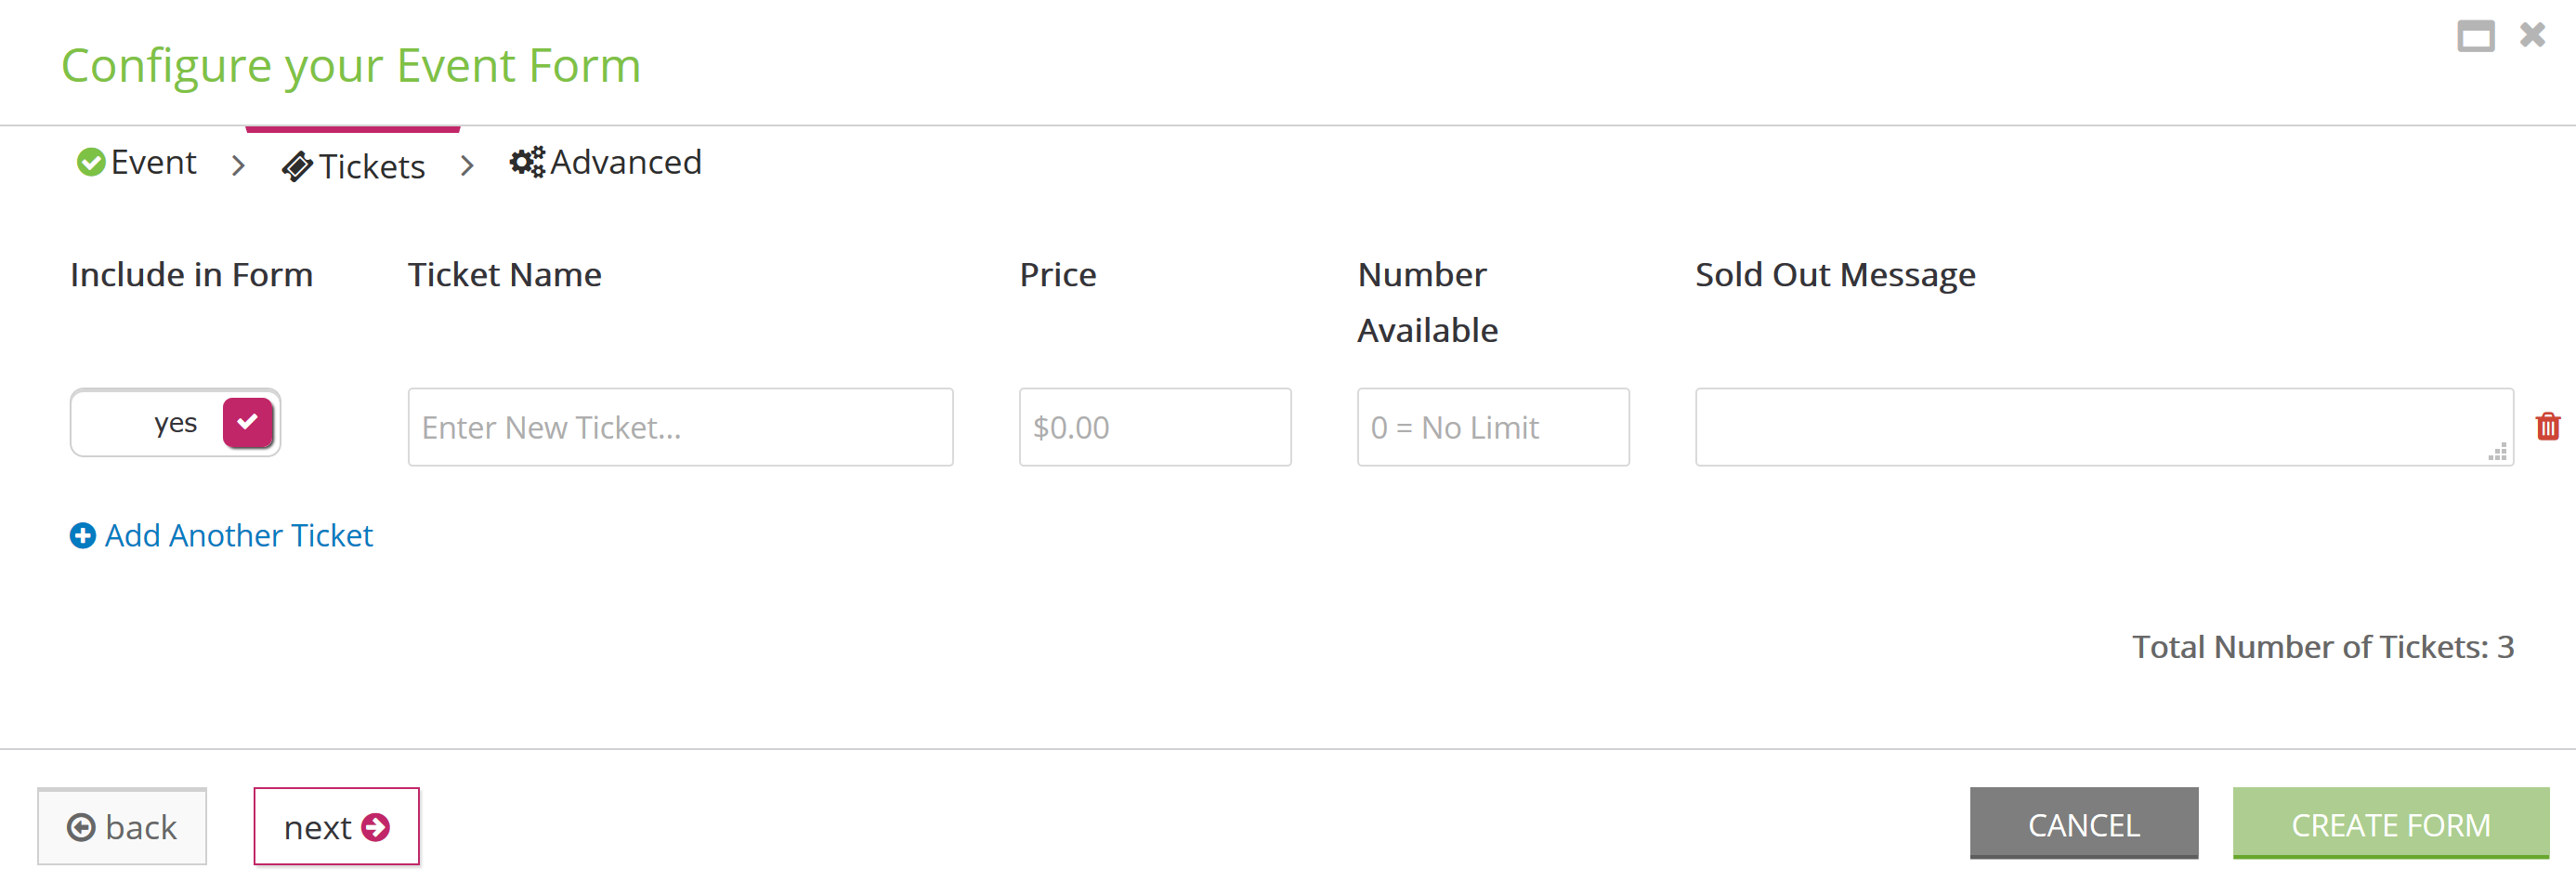
Note about event tickets: if you create a ticket in error through this form wizard you can delete it by clicking on the trashcan icon. If you need to delete a ticket previously created, you will need to navigate to the event configuration in the Events application of CharityEngine.
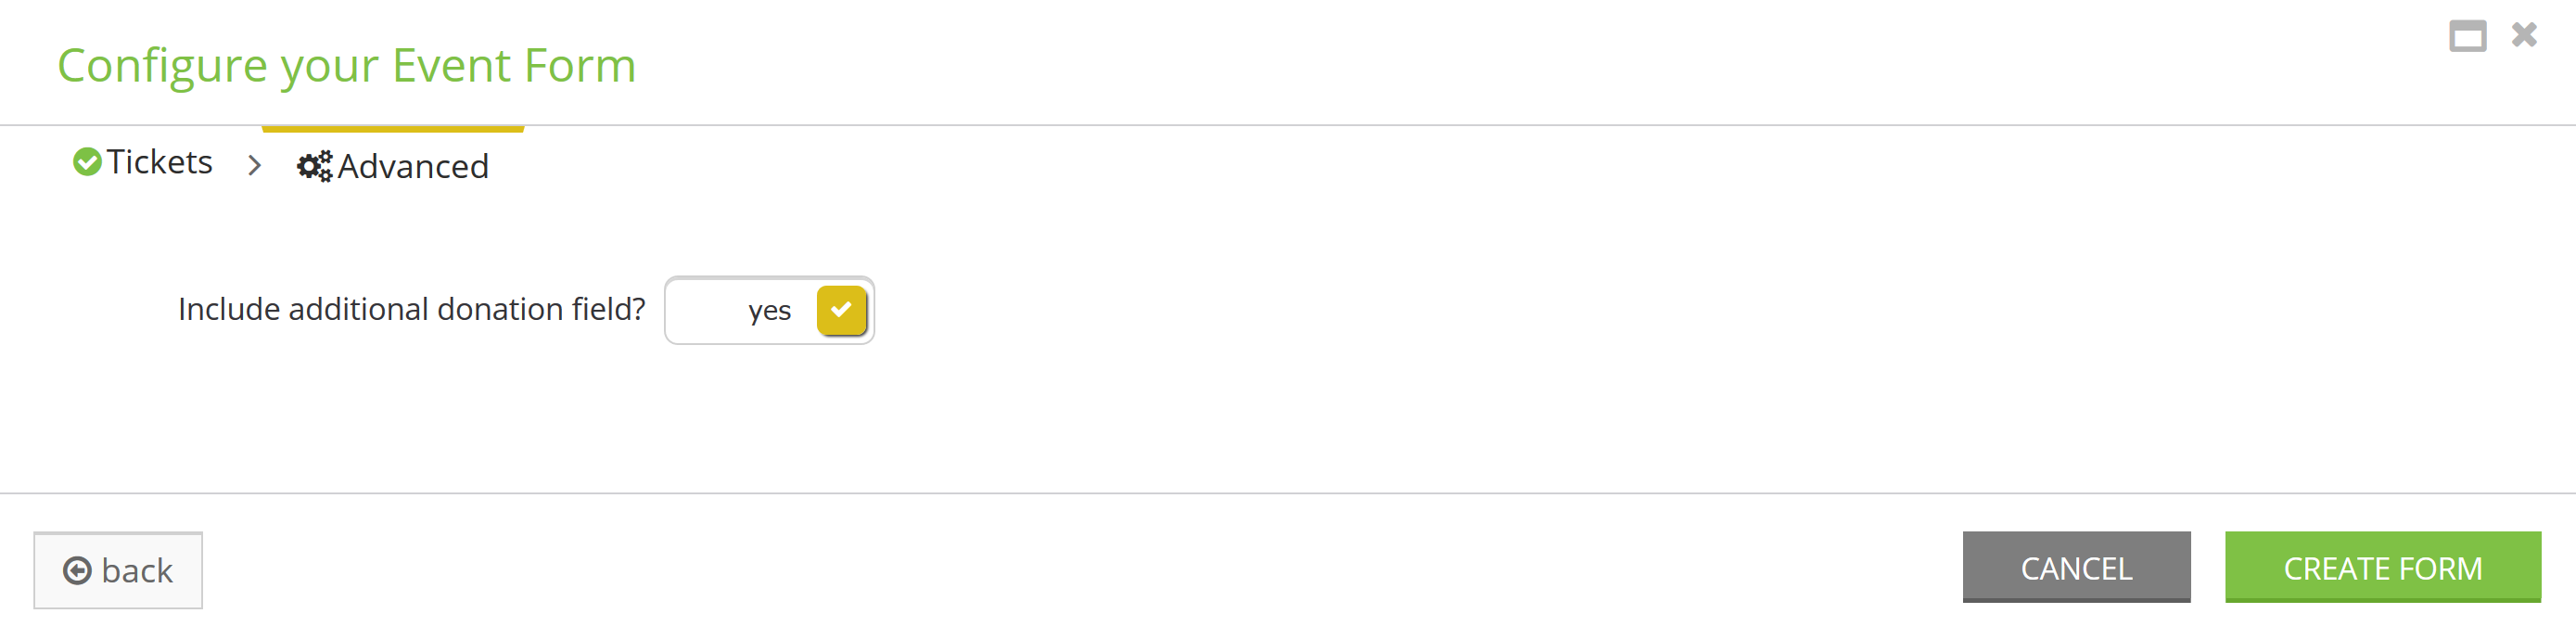
Advanced Step
On the advanced step are other fields you may want to include in your event form, like an additional donation or promo codes.
Advanced: Default Ticket Quantity Value
When creating an event form, it is important to think about how many tickets you want your participants to be able to purchase. If there is a limited amount to tickets and you only want your participants to purchase one ticket per participant, you will want to limit the tickets by setting a default value and hiding the quantity entry to ensure users cannot purchase more than one. The other benefit of setting up your form this way is that it makes for a quick check out for your registrants!
Once the user has created the Event Web Form, access the following steps.
Step 1: To set the default value of the tickets to 1, navigate to the Layout tab and manage the Qty field.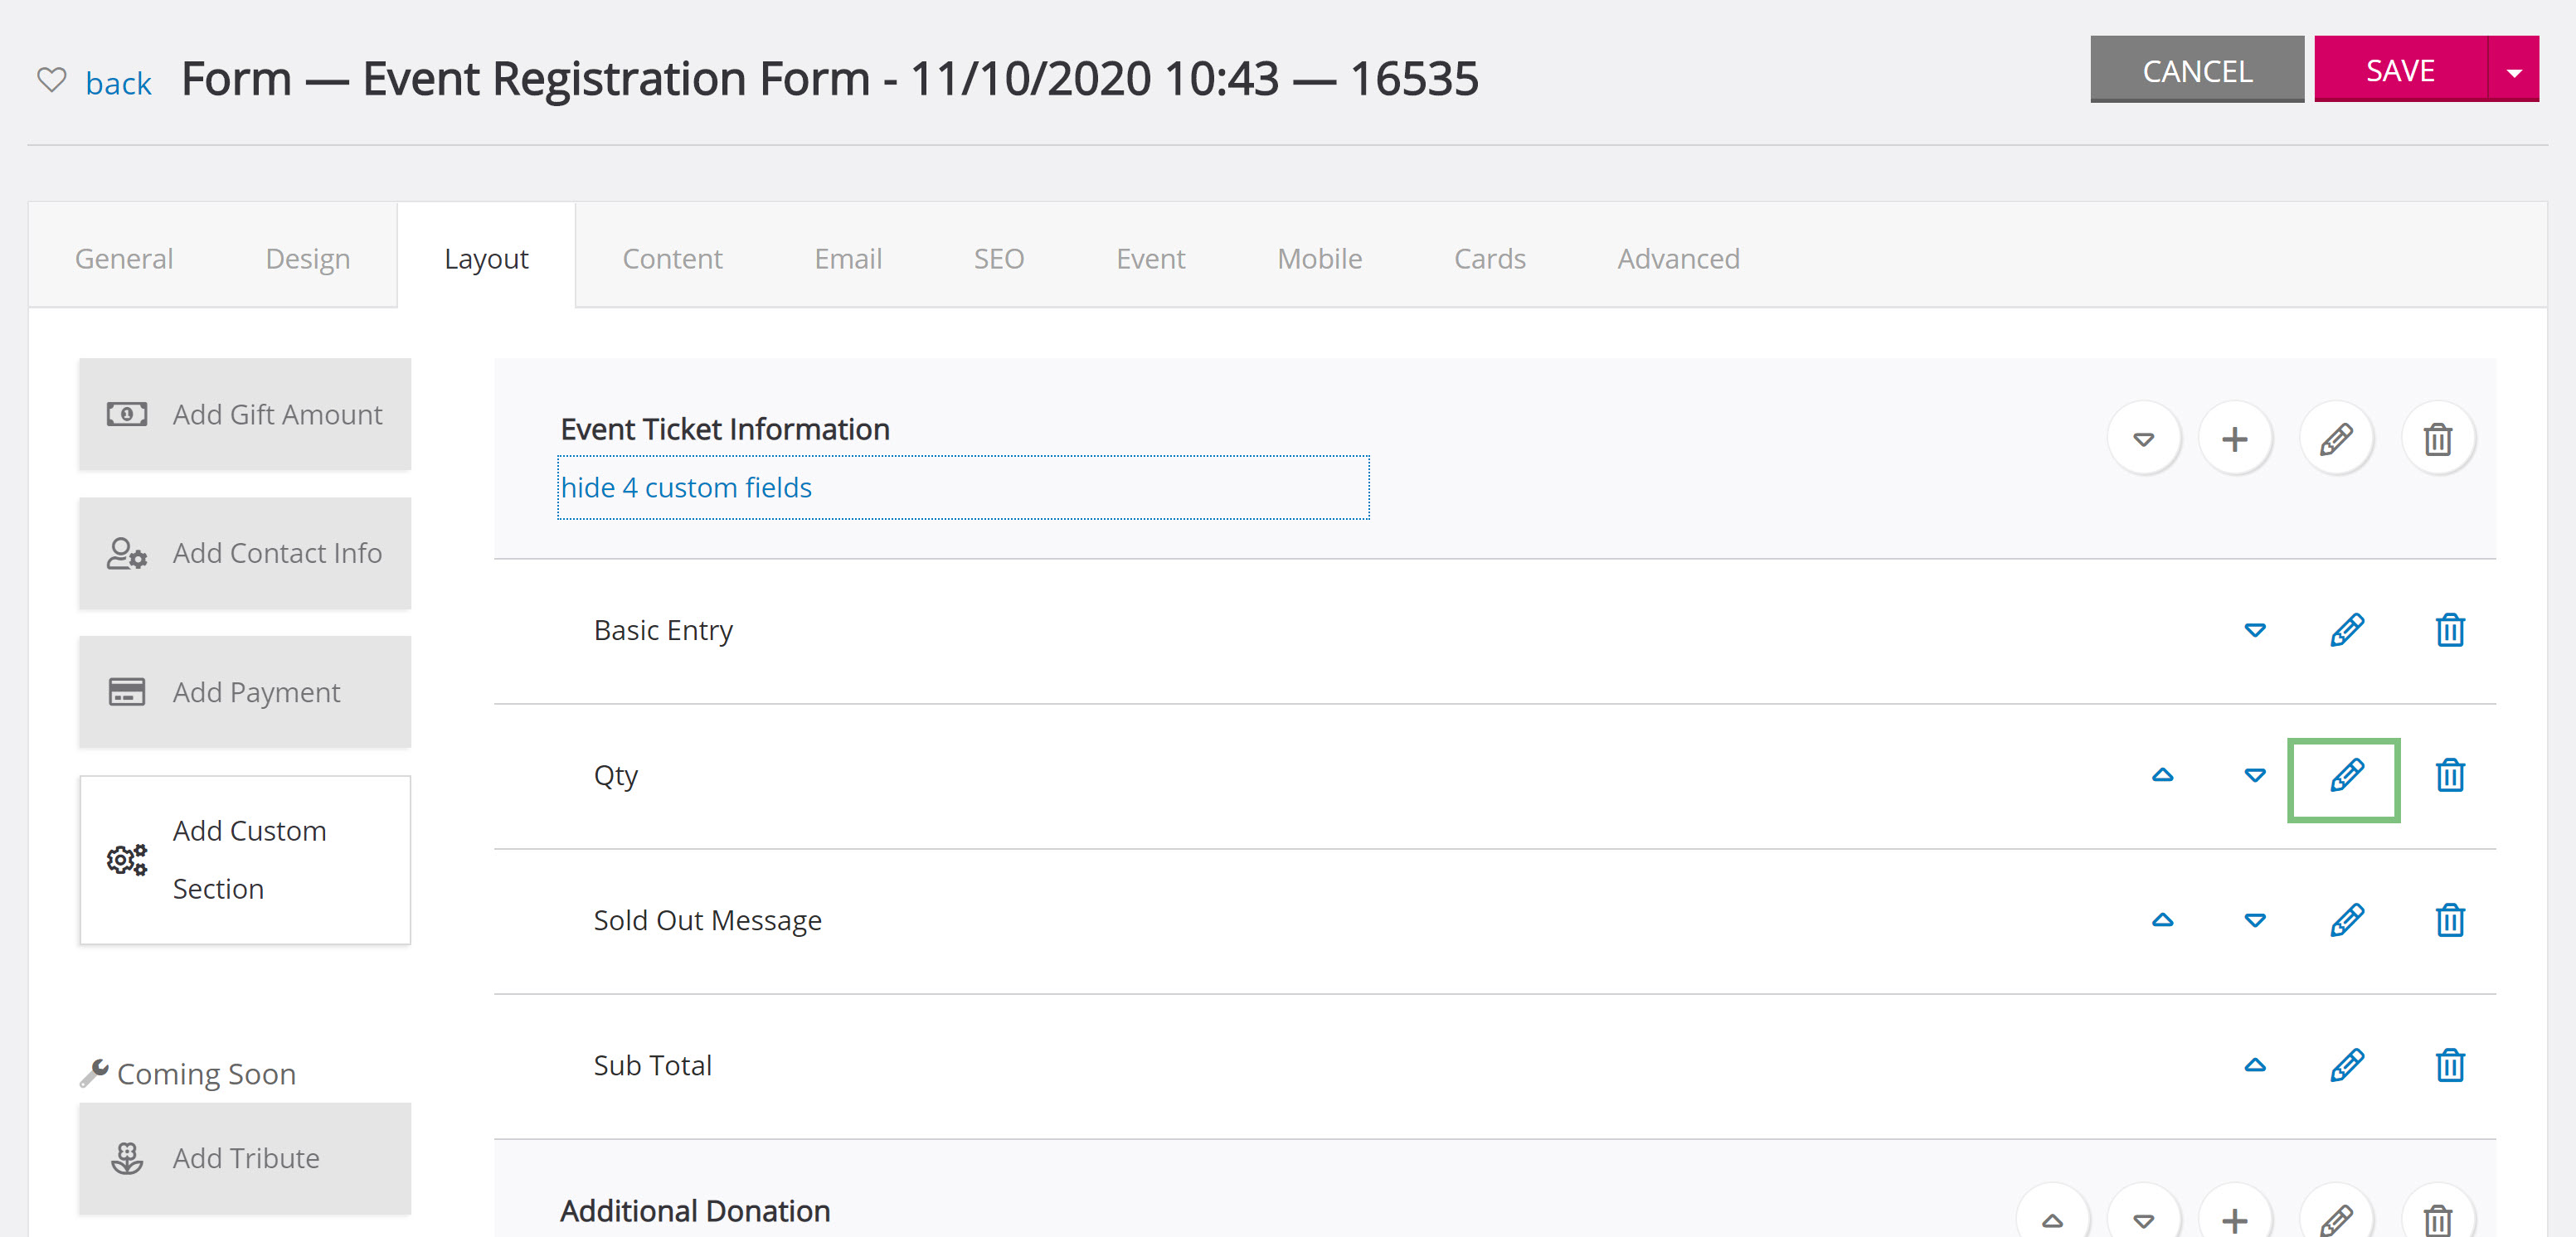
Step 2: On the display tab, enter 1 in the Default Value text box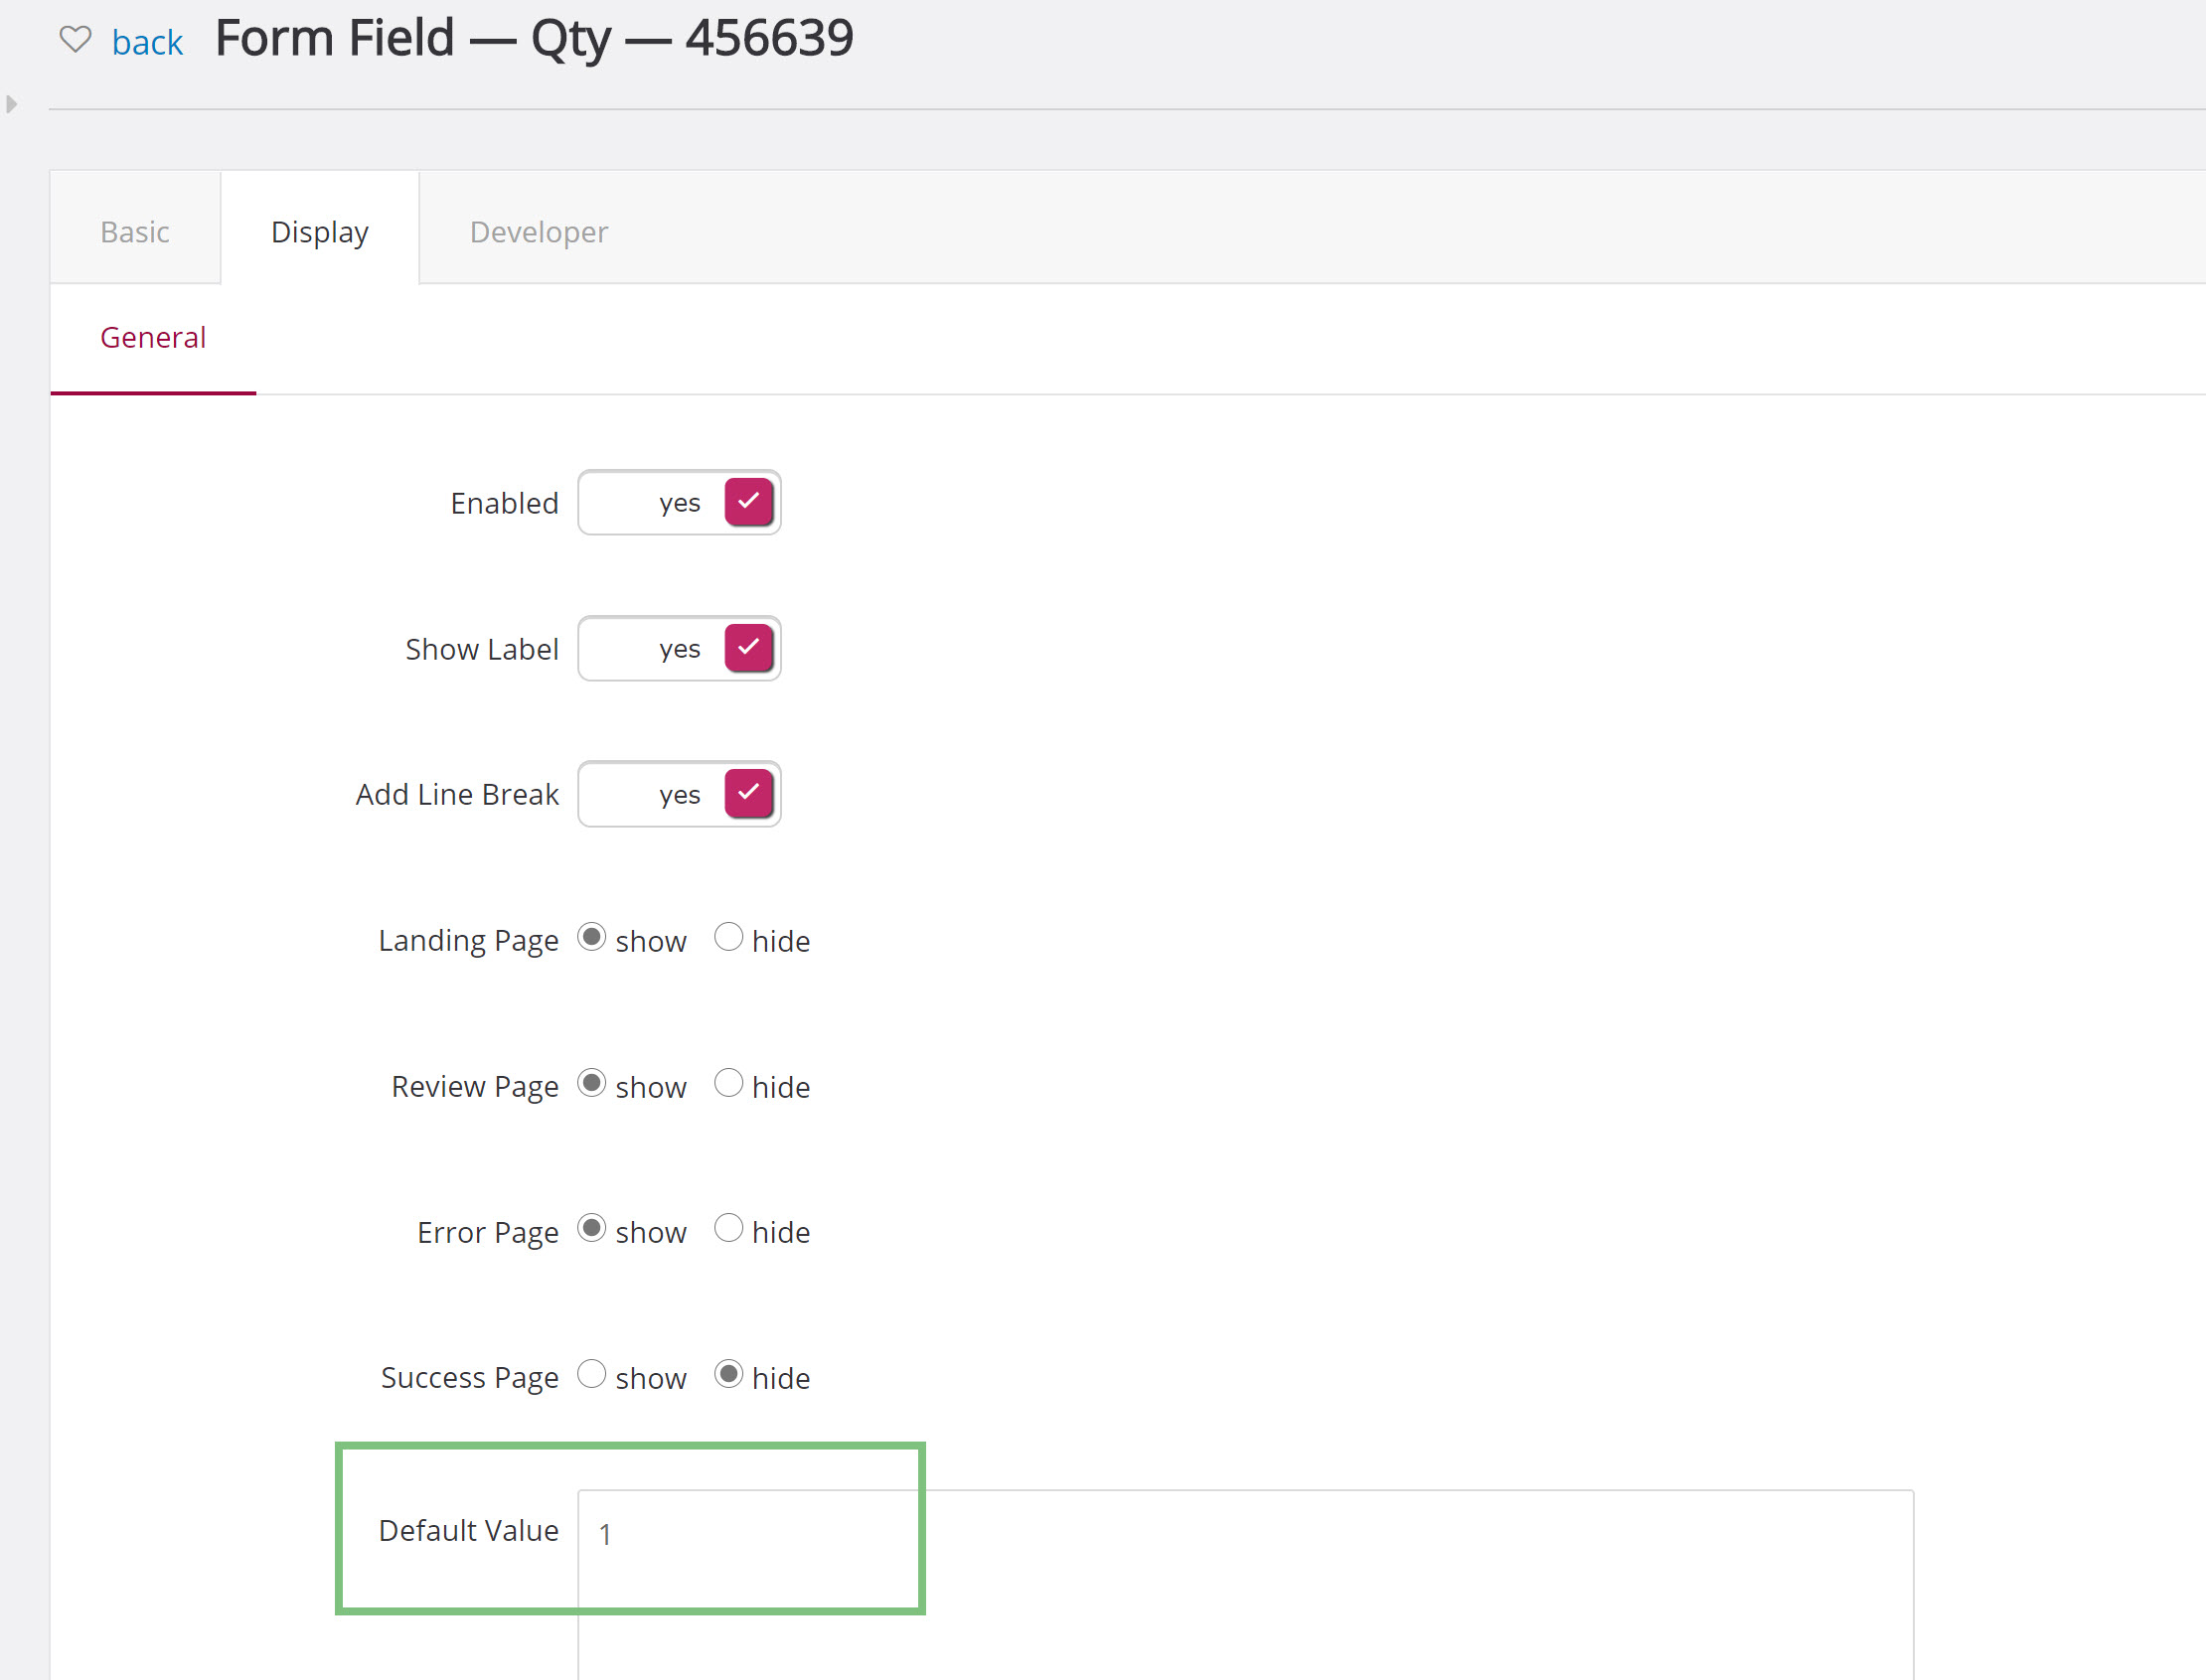
Step 3: The default ticket value will now be set to 1.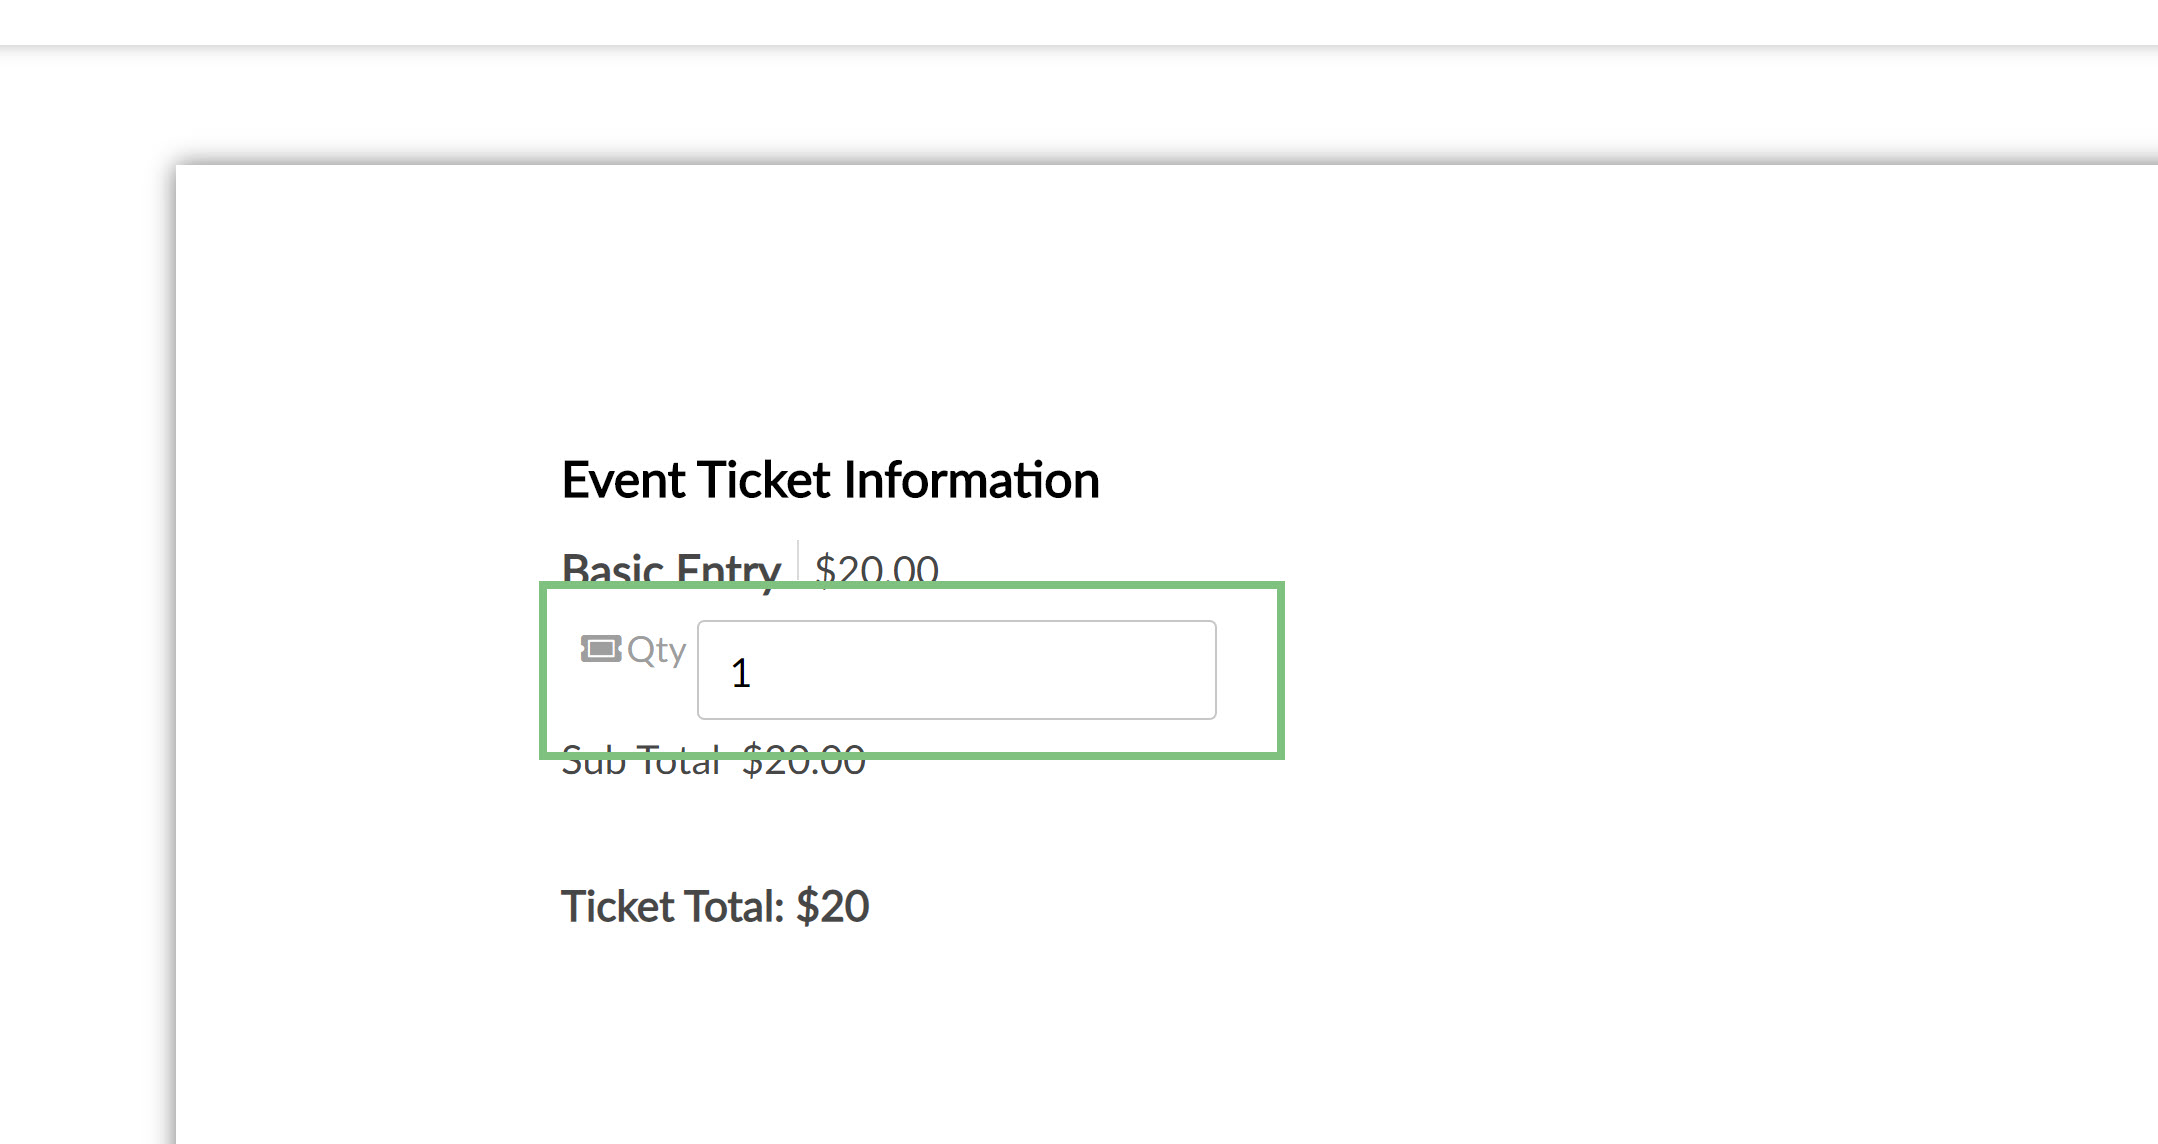
Step 4: Setting the default value to one will not limit the amount of tickets the participant will be able to purchase. To limit the ticket purchase, you will need to hide the text box on the form. To do this, navigate to the Qty form field, then the developer tab.
The Registrant also has the ability to not only contribute funds to the ticket for the event they are signing up for, but also if they would like to make any other donations they can do so on the same form.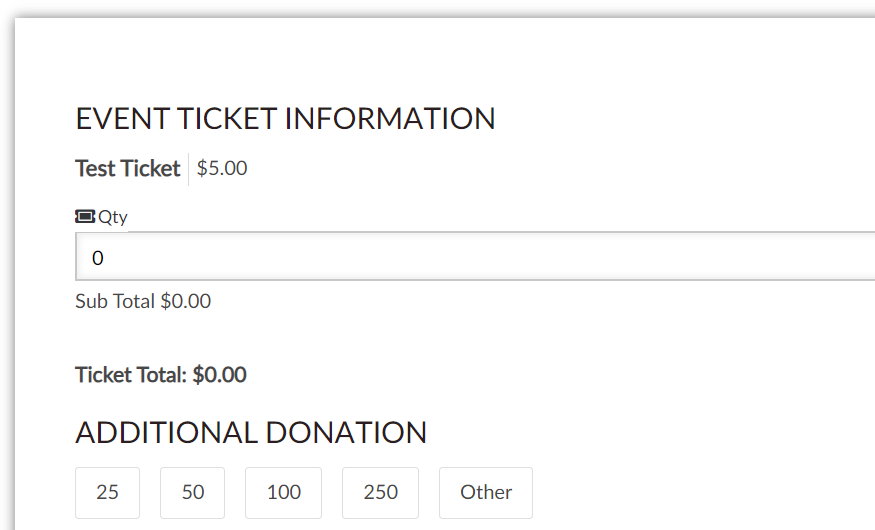
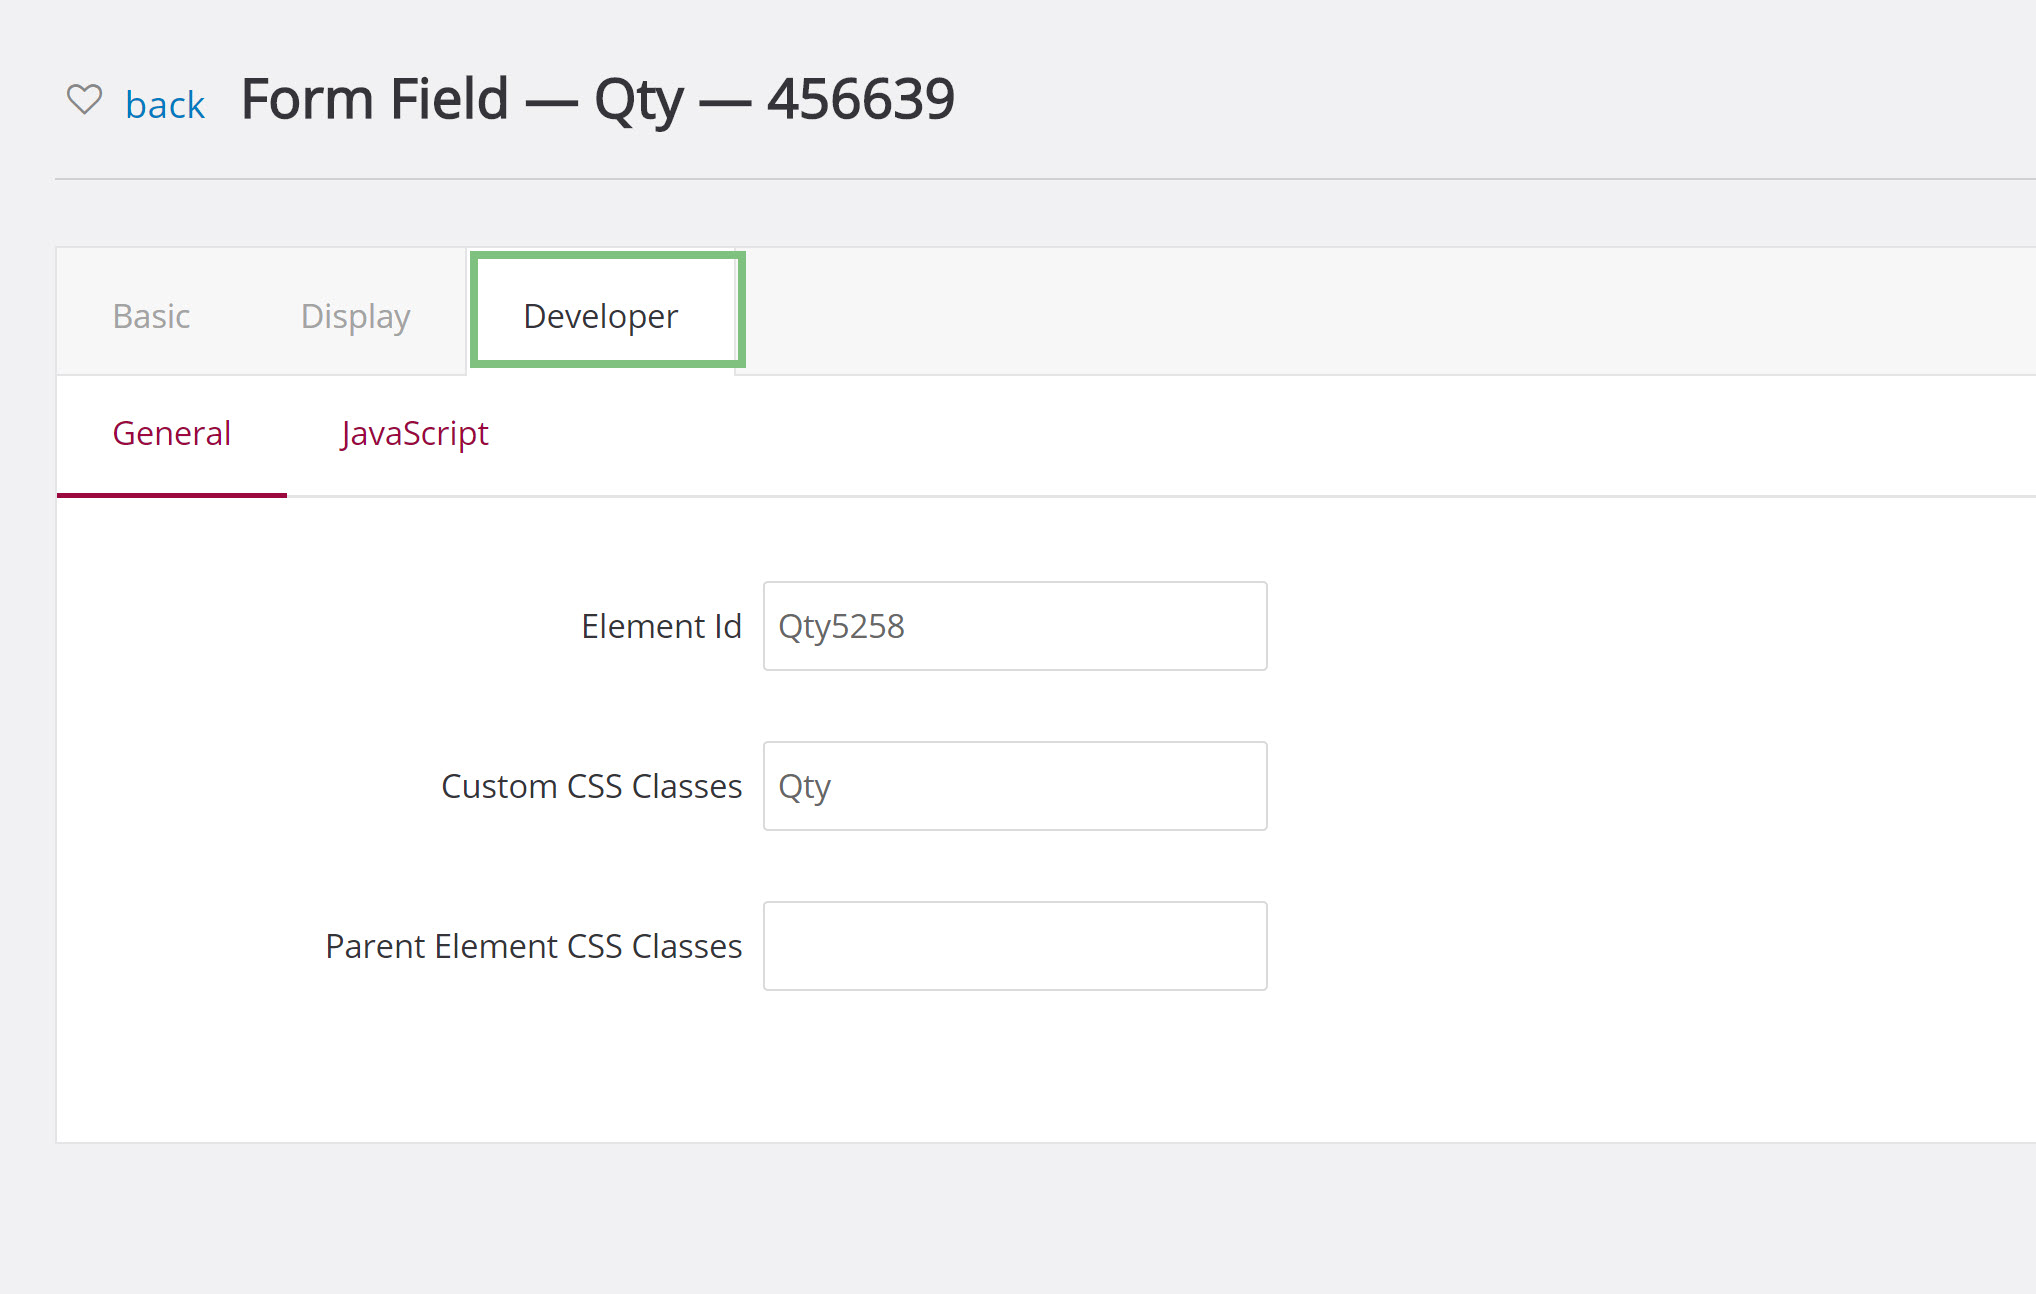
Step 5: In the Custom CSS Classes text box, enter Hidden and click save.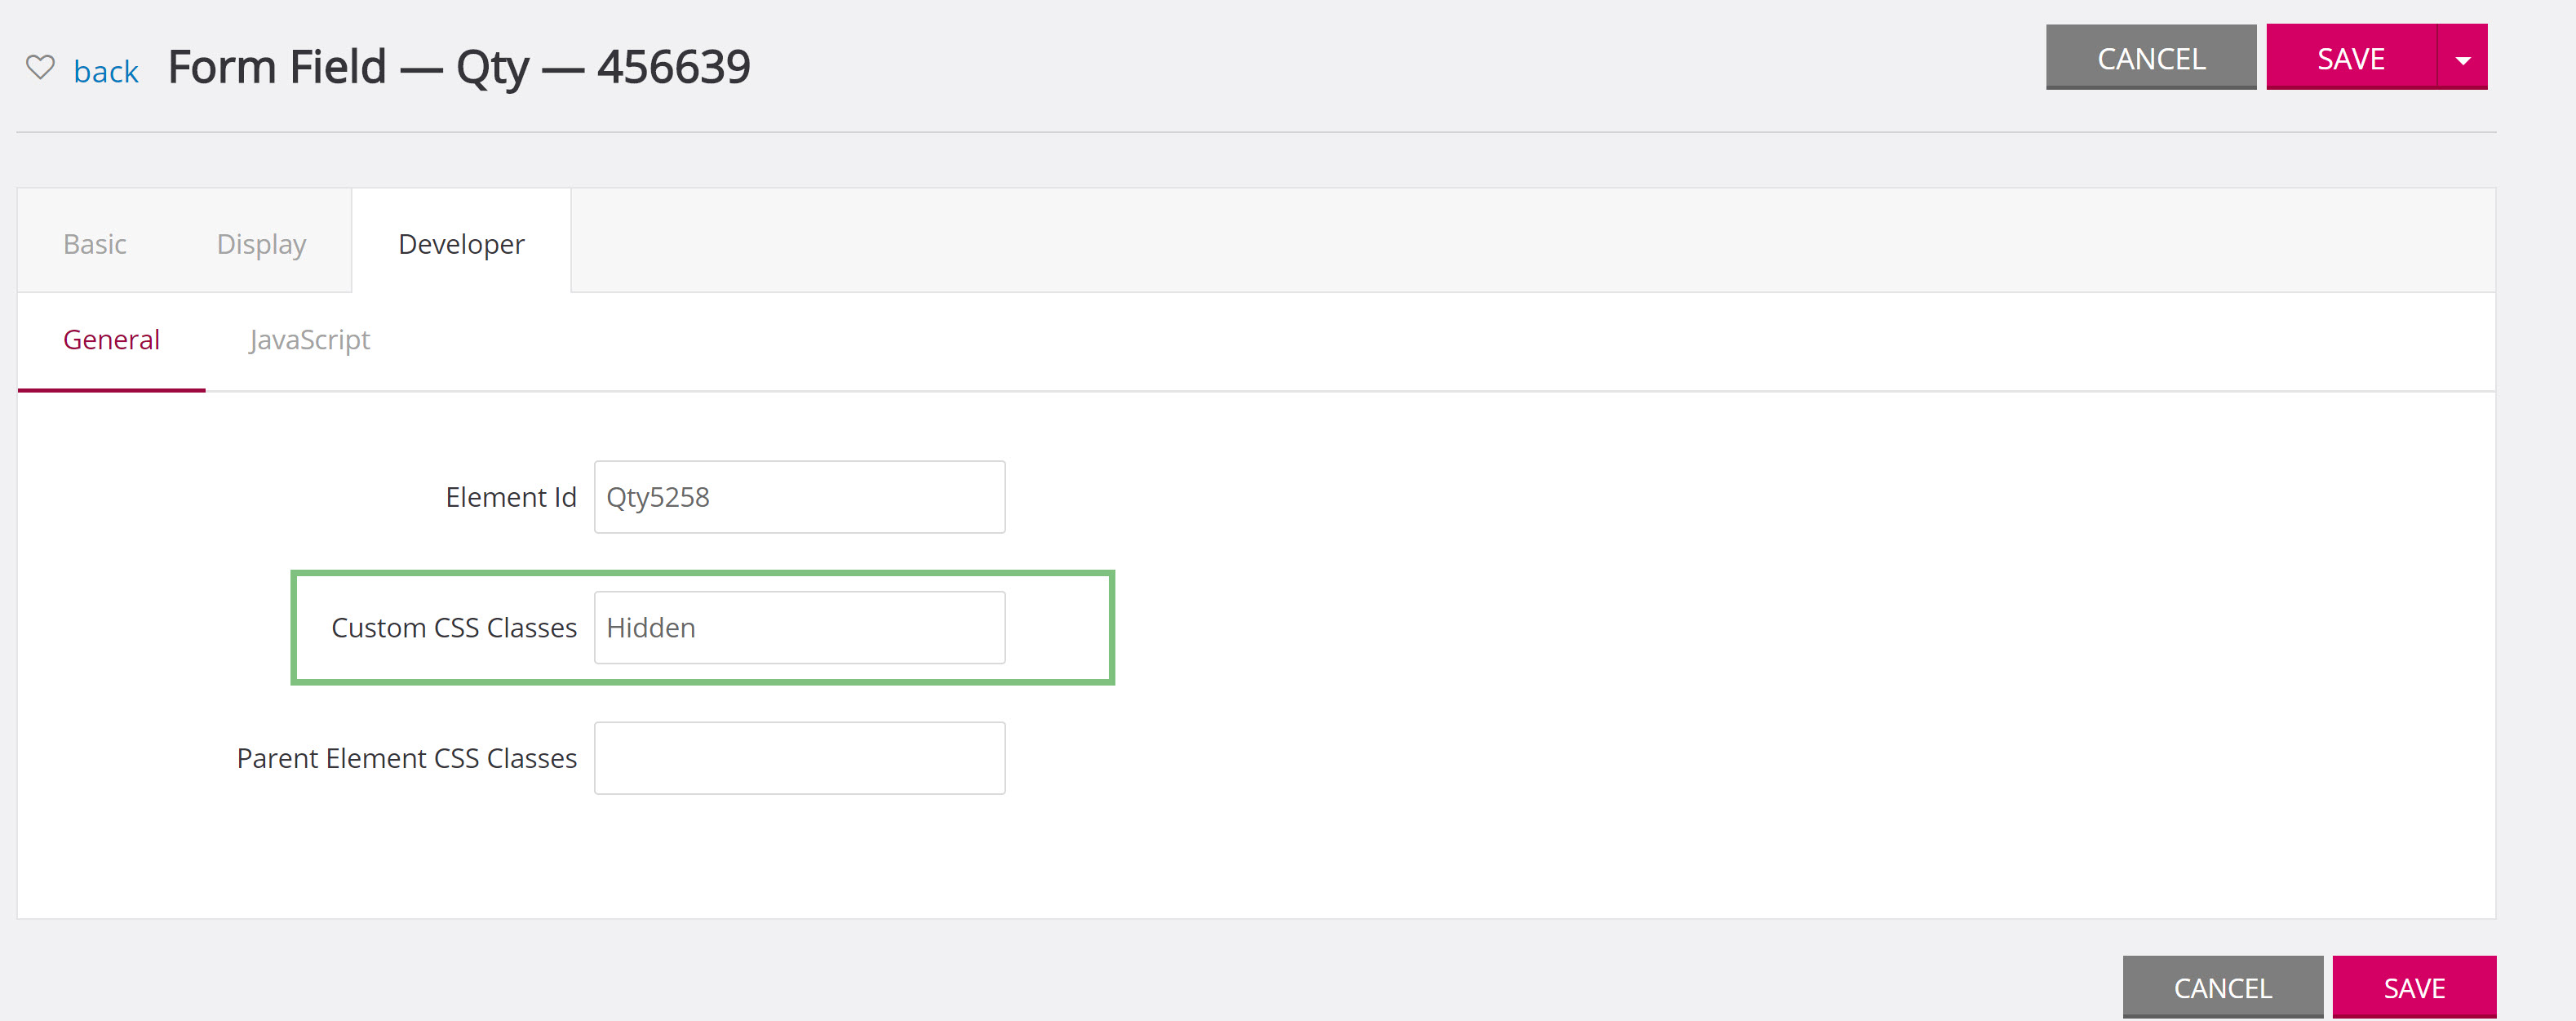
Step 6: Now the quantity text box will no longer appear on the form and participants will only be able to purchase one ticket.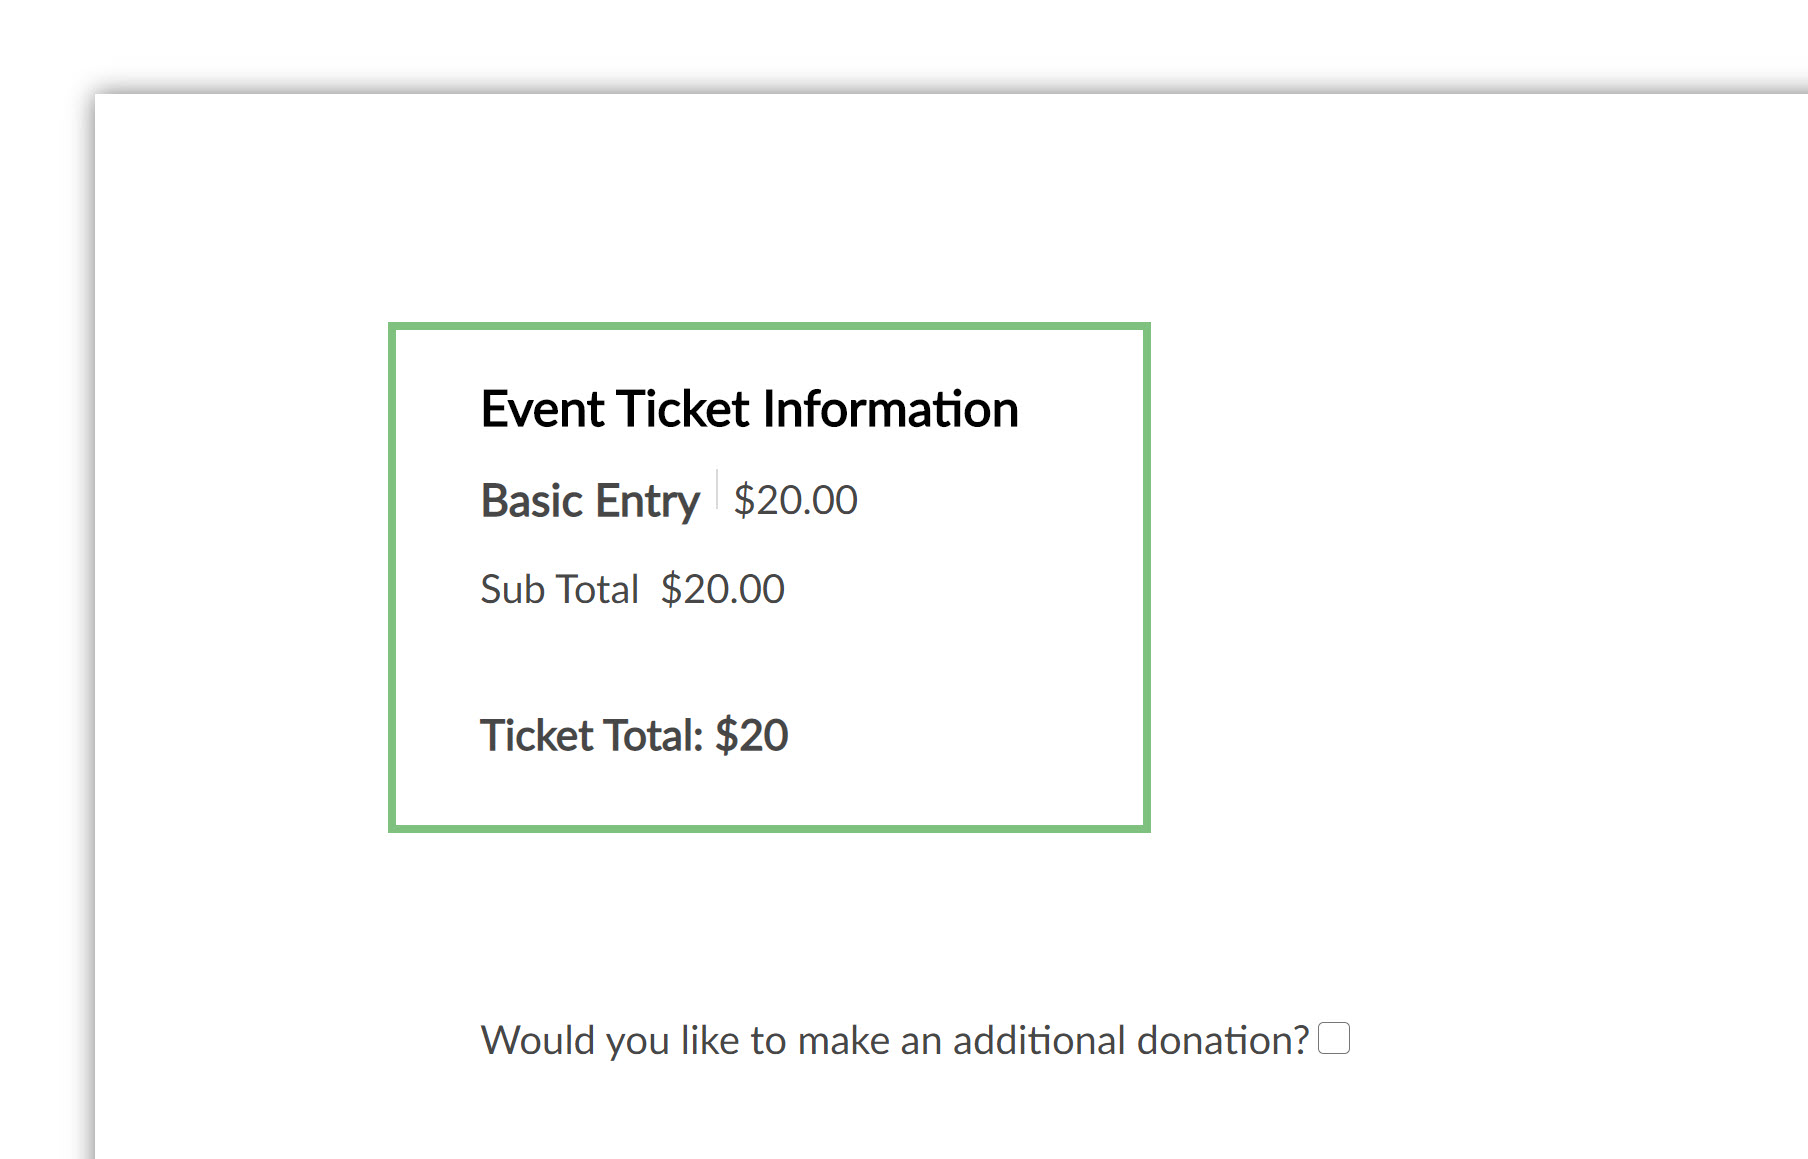
Note that this documentation is specifically for our out of the box forms and templates.
