Events: How to Create a Survey for Your Event
Introduction
Survey questions are a great way to gain extra knowledge from donors and event participants. The knowledge obtained through these survey questions will help the organization better understand individual donors and could even help the event run smoothly.
Table of Contents
Prerequisites
Creation of a new event should be completed prior to initiating a survey.
If you are interested in learning more about CharityEngine's survey feature, please contact your account manager for details and pricing.
Instructions - How to Create a Survey Within an Event
Step 1: To add a survey to an event, navigate to the Events & Volunteers App > Events > Search & Manage and locate the event the survey will be linked to.

Step 2: Manage the event and navigate to the Survey tab.

Step 3: To add a survey question, click Add New.
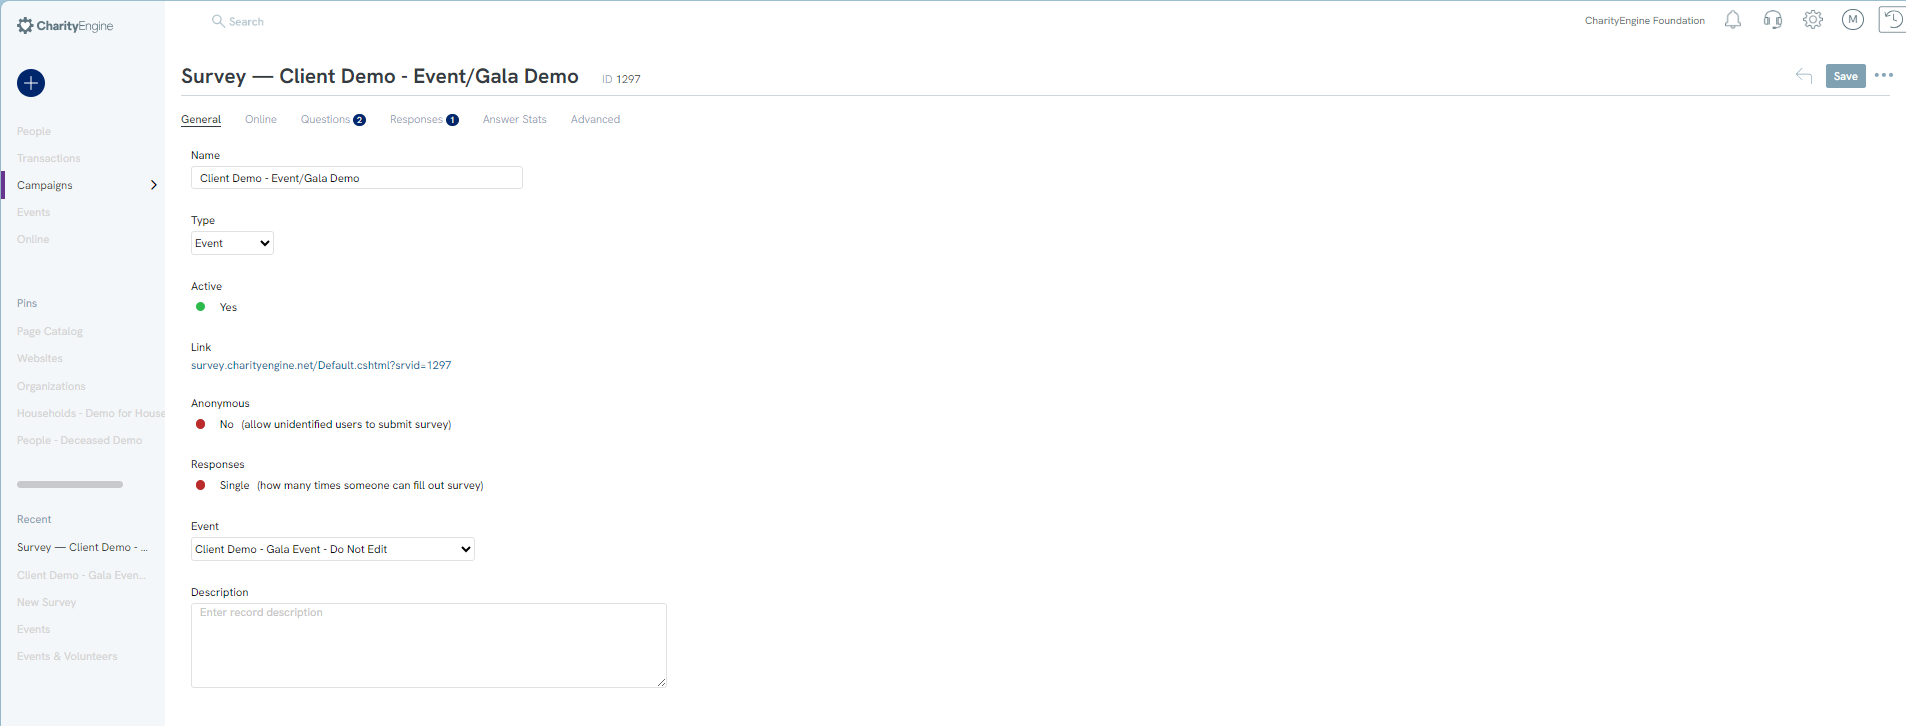
Step 4: Add a title, select the type of survey, and ensure that the correct event is selected.
Note: the title is an internal reference and will be used for reporting purposes
Step 5: Click save and the questions tab will appear.

Step 6: Click ADD to create the question for the survey.

Step 7: Select the response method from the Render Mode dropdown and enter the question in the text box and click save.

Step 8: If the render mode is anything other than text, once you click save you will be able to enter the answer choices on the Answer Choices Tab.
Step 9: Enter the answer choice into the text box and click ADD. The response will then be displayed below.

Step 10: Once you have your answers configured, you can navigate back to add more questions if needed. Otherwise the next step is adding the survey question to the even registration form.
Instructions - How to Add a Survey to an Event Registration Form
Step 1: To add the survey to the form, navigate to the Online App > Web Forms > Search & Manage. If the event form already exists, search for the form and click to manage.
Step 2: Otherwise, click Create New and use the form wizard to create an event registration form. For assistance in creating an event registration form, read this article .
Step 3: To add the survey question to the form you will need to add a custom section on the layout tab.

Step 4: A popup will appear to create the Label for the section. Enter the name and click SAVE. Note, the label will be internal for reporting purposes.

Step 5: Next, add a field for the question by clicking the + icon on the section.
Step 6: Name the field with the question you want displayed externally and click Create Field.

Step 7: After the field has been created, you will need to map the field to capture the data correctly on the event. To do this, click the pencil icon on the custom field to manage the field.

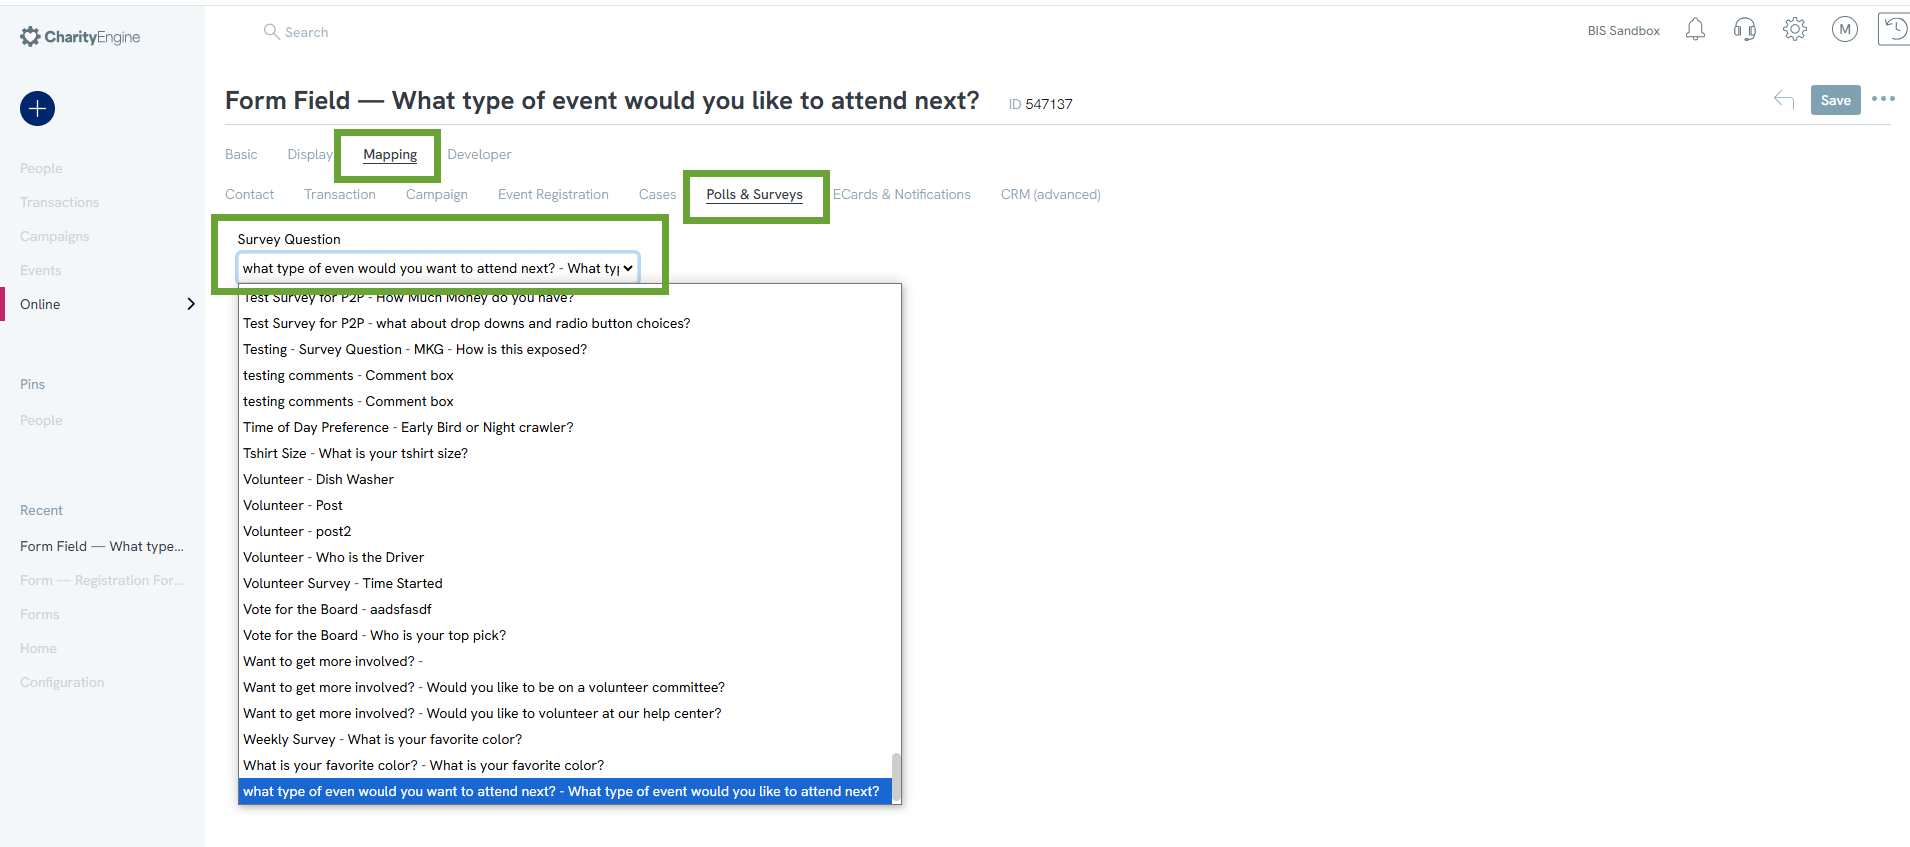
Step 8: Navigate to the Mapping tab > Polls & Surveys and use the dropdown to select the survey question you created.

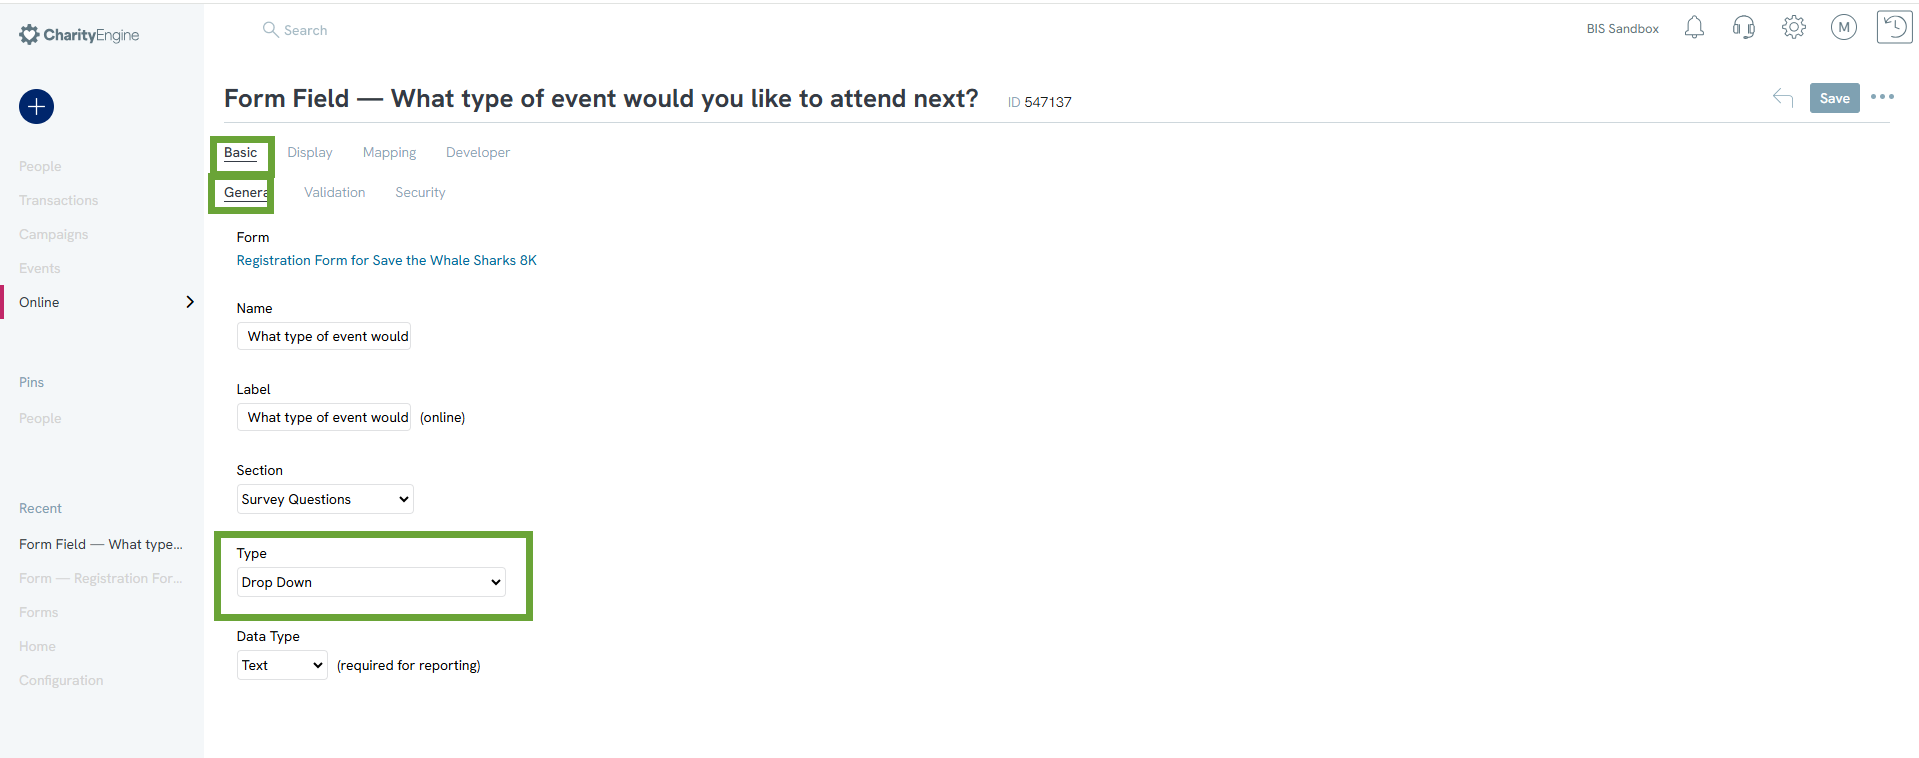
Step 9: Additionally, you will want to ensure that the correct response type is selected by navigating to the Basic tab > General tab and locate the Type field.

Step 10: If the question response is anything but text, you will also need to enter in the options on the display tab by navigating to the Display tab > Advanced subtab.

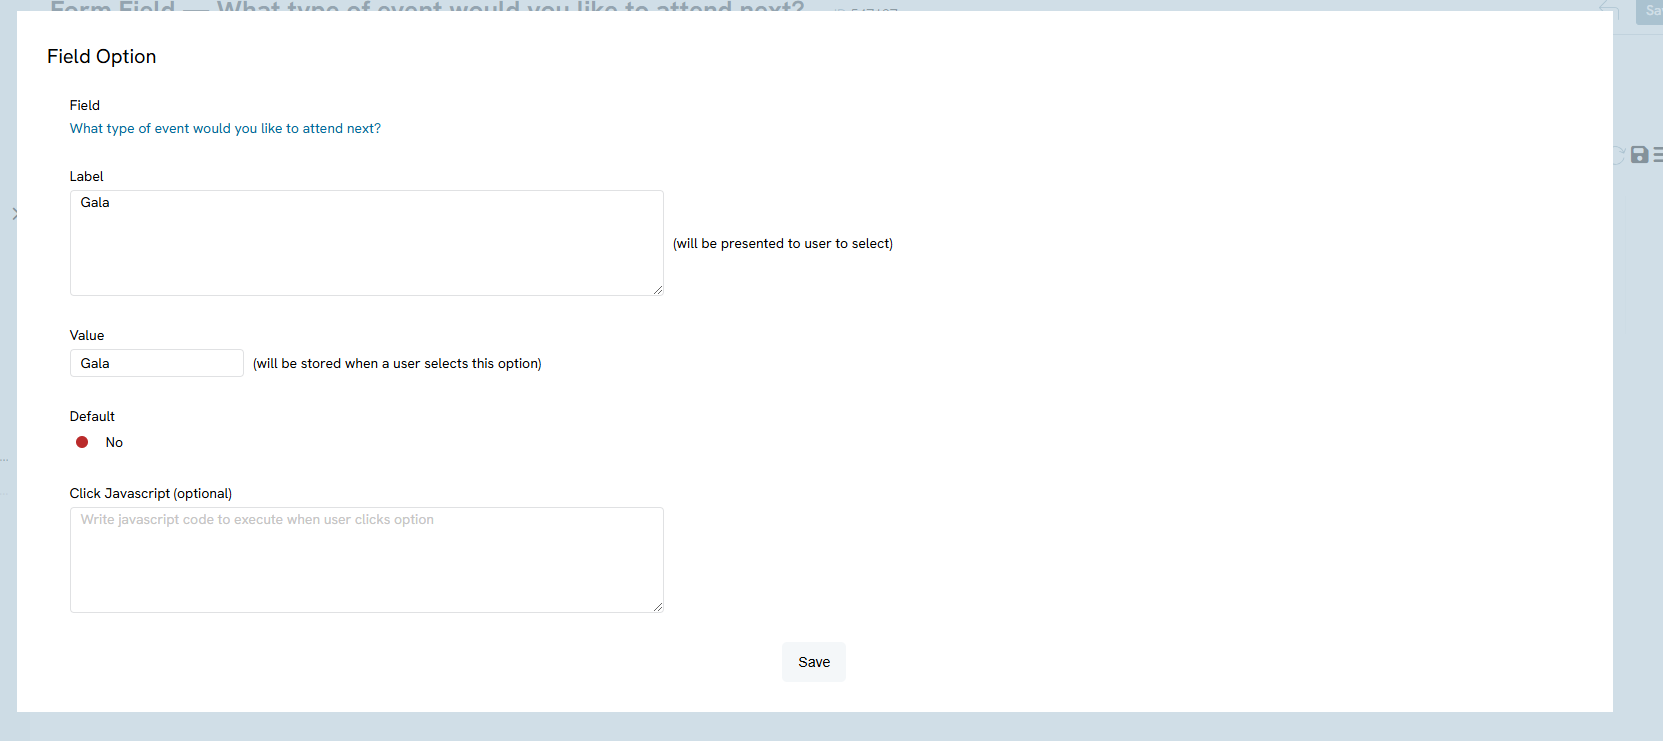
Step 11: Click Add New to add your responses.
Step 12: Match your answers to the answers you created under the survey to ensure correct mapping. Click Save to secure your changes.

Step 13: Click on Save on your web form to secure all changes.
Step 14: Once the configurations have been made, the survey question will appear on your web form.


Instructions - How to Track Survey Results
Step 1: The responses to the survey question can be seen by navigating to the Campaign App > Survey > Answers > Select the Survey Questions to view the answer tab.

FAQs & Additional Reading
Q. I need assistance to set up my Event Registration Web Form. Where can I read more?
A. Check out our article on Events: Creating an Out of the Box Web Form
A. Check out our article on Events: Creating an Out of the Box Web Form
