Introduction
This article aims to guide non-profit organizations through the process of testing and sending effective emails, highlighting the importance of strategy, personalization, testing, and ongoing optimization to maximize engagement and support for their cause. Use CharityEngine functionality to test and optimize your non-profit marketing campaigns.
Table of Contents
- Introduction
- Mastering the Art of Testing and Sending Effective Emails for Non-Profit Campaigns
- A Basic Email Checklist
- How to Test an Email
- How to Select an Audience for Marketing Campaigns
- How to Schedule a Marketing Campaign
- Other Methods for Sending Campaigns/Personalized Messages
- How to Leverage A/B Testing
- Printing Marketing Campaign Content (Mail)
- FAQ & Further Readings
Mastering the Art of Testing and Sending Effective Emails for Non-Profit Campaigns
Email marketing stands as a powerful tool for non-profit organizations to engage with supporters, raise awareness, and drive action for their causes. Crafting compelling email content is crucial, but equally important is the process of testing and sending these emails effectively. Here's a comprehensive guide to ensure your non-profit's email campaigns reach their full potential.
Define Your Email Campaign Objectives
Before diving into testing and sending emails, establish clear objectives for your campaign. Whether it's soliciting donations, promoting an event, sharing success stories, or calling for volunteers, a well-defined goal will guide your email content and testing strategies.
Segment Your Audience
Segmentation is key to sending targeted and relevant content. Divide your email list into segments based on factors such as donation history, engagement level, demographics, or interests. This allows for personalized messaging that resonates with specific groups within your audience.
Craft Compelling Email Content
Create engaging and relevant content that aligns with your campaign objectives. Incorporate impactful storytelling, compelling visuals, and a clear call-to-action (CTA) that encourages recipients to take the desired action. Ensure your email content is concise, visually appealing, and mobile-responsive.
A/B Testing for Optimization
Utilize A/B testing to optimize your email content and increase engagement. Test variations of subject lines, email copy, visuals, CTAs, or send times to determine what resonates best with your audience. Use these insights to refine and improve future email campaigns.
Test Email Elements
Before sending emails to your entire list, conduct thorough testing. Check for proper rendering across various devices and email clients. Test links, images, and CTAs to ensure they work correctly. Also, review the email for spelling, grammar, and formatting errors.
Choose the Right Sending Time
Timing is crucial for email success. Analyze past data and consider your audience's behavior to determine the best time to send emails. Experiment with different send times and days to identify when your audience is most responsive.
Personalize and Customize Emails
Personalization enhances engagement. Address recipients by their names and tailor content based on their preferences or past interactions with your organization. Customized emails create a sense of connection and increase the likelihood of action.
Monitor and Analyze Performance
Track key metrics such as open rates, click-through rates, conversions, and unsubscribes. Analyze these metrics to understand what elements are resonating with your audience and what needs improvement. Use this data to optimize future campaigns.
Engage and Follow Up
Engage with your audience beyond the initial email. Follow up with personalized thank-you emails, updates on campaign progress, or targeted content based on their interaction with previous emails. Building and nurturing relationships is key to long-term engagement.
Conclusion
Email marketing for non-profits is a dynamic process that requires strategy, testing, and continuous optimization. By defining objectives, segmenting audiences, crafting compelling content, conducting A/B tests, testing thoroughly, choosing optimal send times, personalizing messages, analyzing performance, and nurturing relationships, non-profits can maximize the impact of their email campaigns.
Remember, effective email communication can significantly contribute to advancing your non-profit's mission and rallying support for the causes you champion.
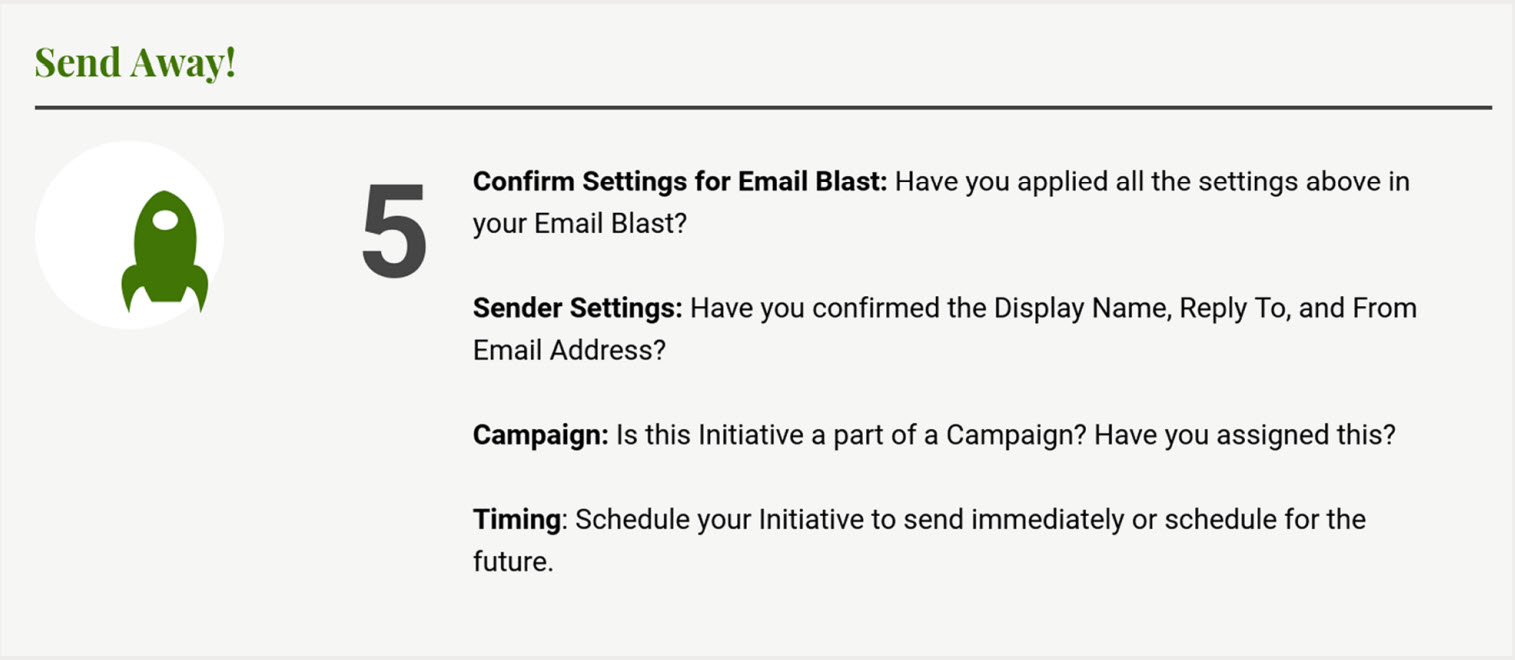
A Basic Email Checklist
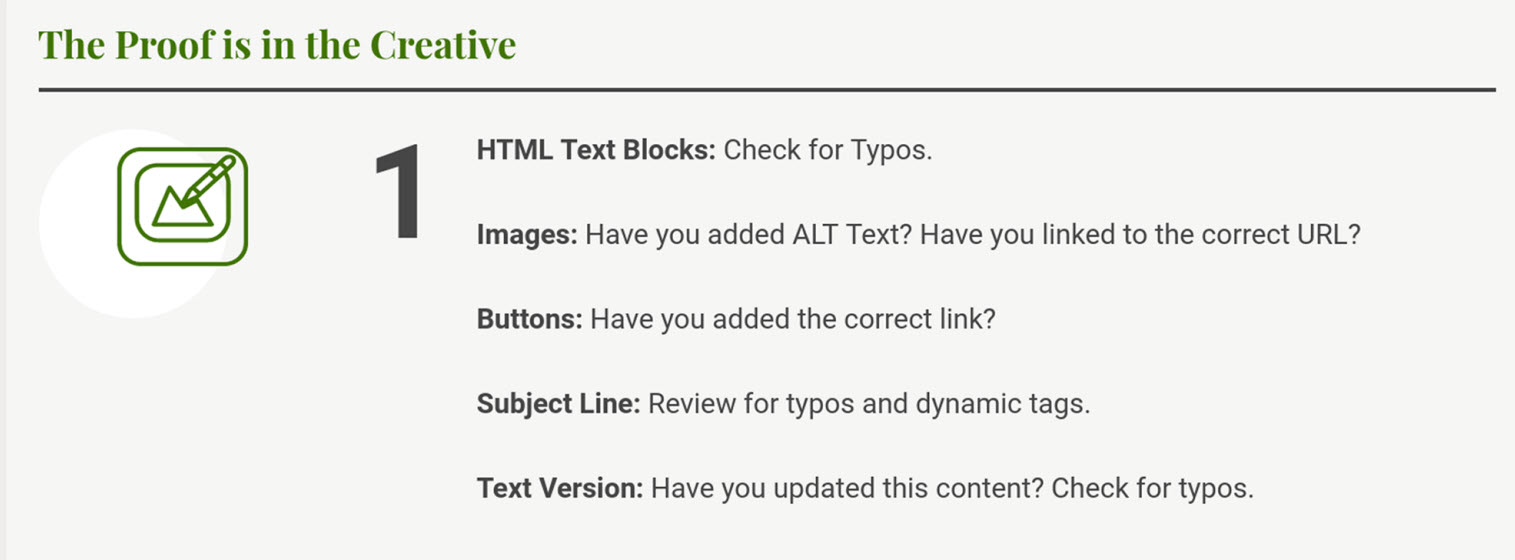
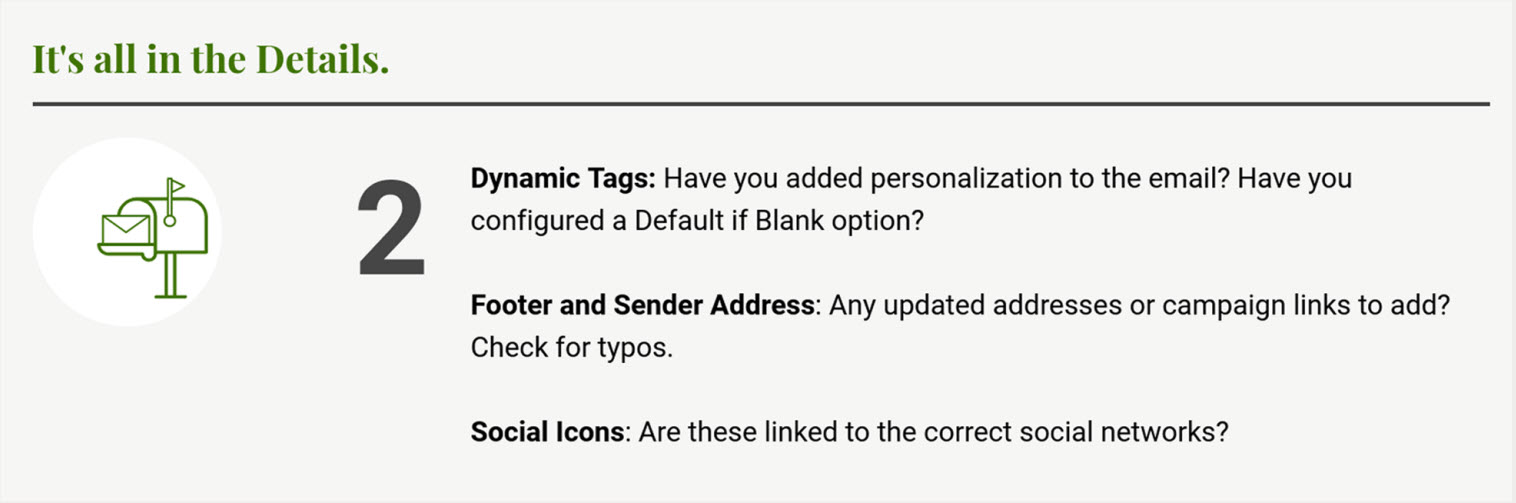
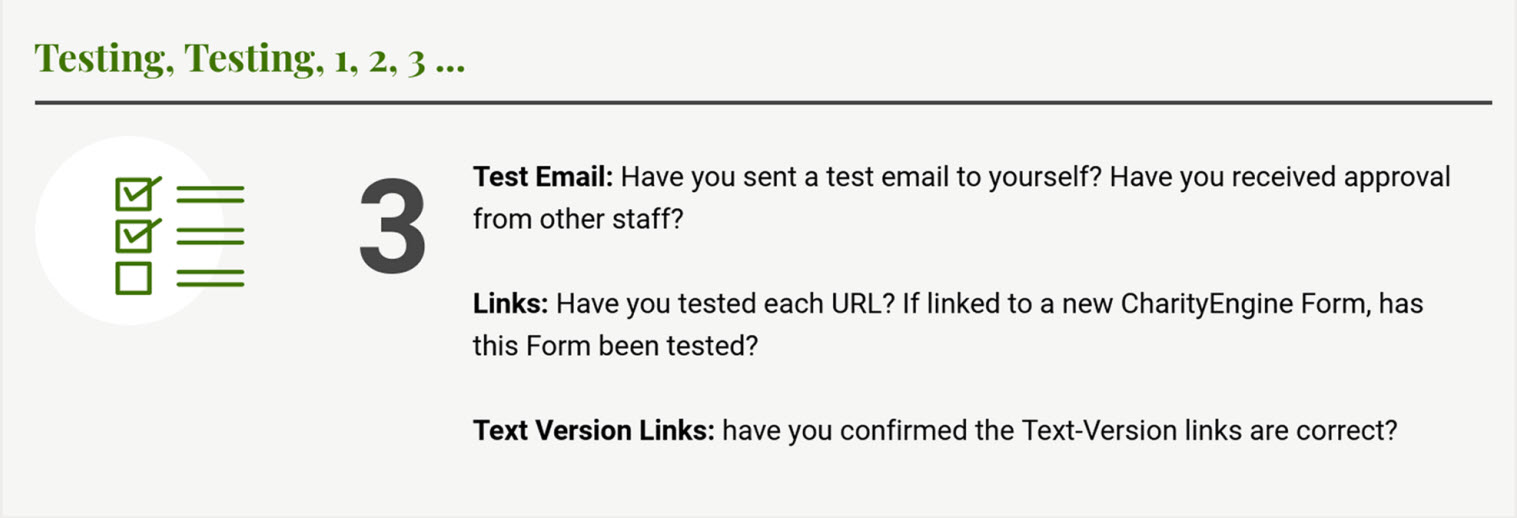
The final preparation of an email campaign can be the most nerve wracking, it can be hard to know when you’re really ready to send your initiative. That’s why we have creating a checklist that contains the elements you need to think about before you send an email to your list. Think of it as a quality-assurance check of your CharityEngine Campaigns.
Note: There should be at least one person who receives the text version. You can adjust these settings in the primary email record in a contact record. Set email preference to Text.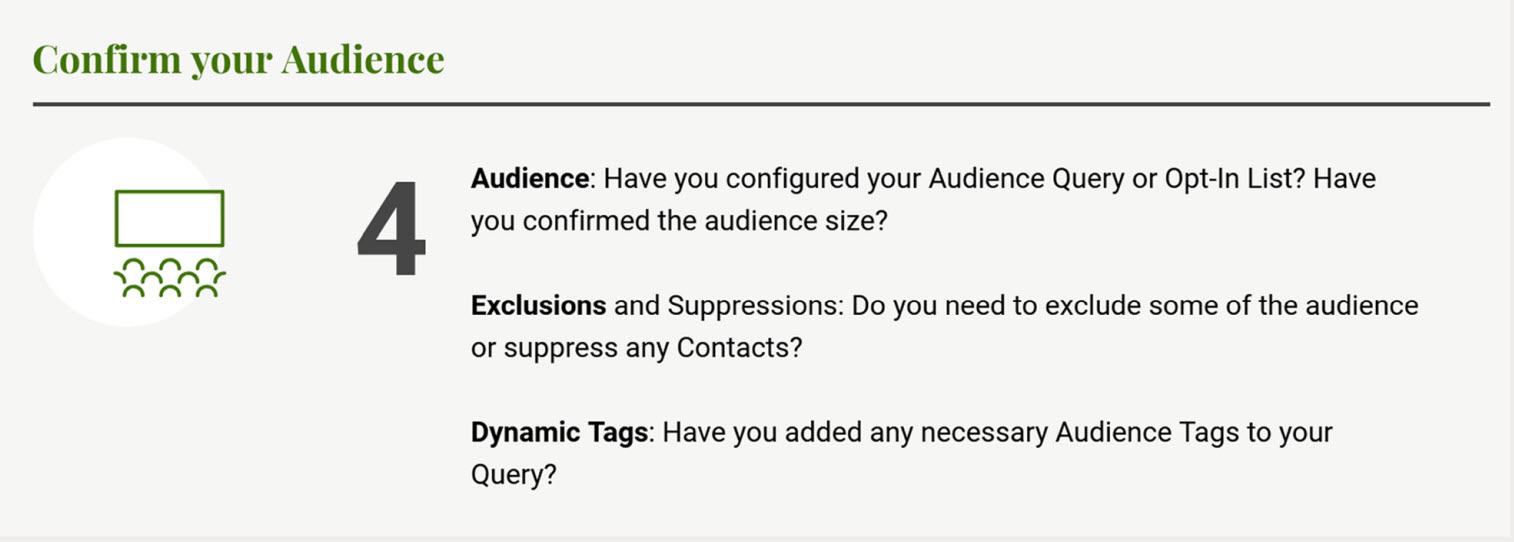
How to Test an Email
As a best practice, CharityEngine recommends complete a test send prior to your email delivery. With CharityEngine's built in test functionality, you can quickly and easily test your email to ensure view, links, content are presented in 3 different formats: default value, text value, and HTML value. The test email will only be sent to contacts that have been selected by either a list or by manually entering the contact email. The email should be sent to the user who is sending the email as well as at least one other organization contact to ensure that the email is perfect prior to sending it live.
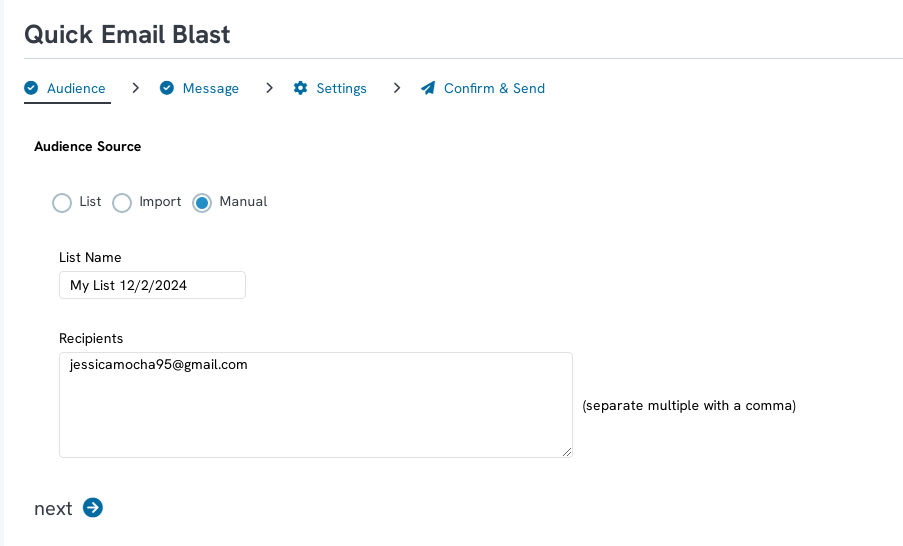
Step 2: click on the Manual radio button and enter the email address(es) of your test recipients. Click NEXT to proceed.
Note: To enter multiple emails, use a comma to delineate
Note: You can also leverage List if you have a predefined Opt In List or Query (if you have a recurring list of testing participants, creating a list or query will improve efficiency in testing going forward.)
Note: Leveraging Test will create 3 copes of the message to each audience member. Three emails will be delivered to the audience member(s) including: default view, text only view, HTML view.
Step 6: Once the email has been sent and delivered, review the content for final adjustments (i.e. grammar, image placement, presentment by browser and/or mobile modes, test links, test videos, etc.)
How to Select an Audience for Marketing Campaigns
For many organizations, creating one or many mailing lists can be beneficial for efficient and consistent sending practices. By proactively identifying and managing your sending lists, you can easily leverage CharityEngine functionality to efficiently and effectively send to segmented constituents. In addition, by leveraging Opt-In lists within CharityEngine, you can easily allow your contacts to easily opt in to lists leveraging web forms or through the Online User Center. These lists can be very broad in topics or can be customized to more limited topics and content. CharityEngine allows you to easily manage your lists for most effective communication to your donors.
There are three sources for email messages in CharityEngine: Opt-In Lists, Queries, and Imports.

- Important: If you are using a "Query" as your list source, your query MUST contain the CharityEngine Contact ID in order to use the email blast feature.
- If you have not already created am Opt-In List and need assistance, please read this article.
How to leverage Opt-In Lists or Queries for Marketing Sends
Note: The list may also contain query and opt-in lists. Each will be identified with the name followed by Query or List respectively.
Importing an Audience
To import a list of people you want to send a Campaign Email to, select Import as the Source.
After selecting import, two new fields will appear. Import file where you can upload your file, as well as the download import template, which is a file that shows users which fields are required and available for this email send import.

Import files are required to be in a CSV format and need to be in the following order: First Name, Last Name, Email.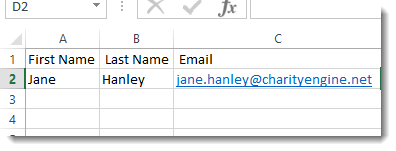
After preparing your file for import, click on import file and the file upload dialogue will appear. Select your import file and click next.
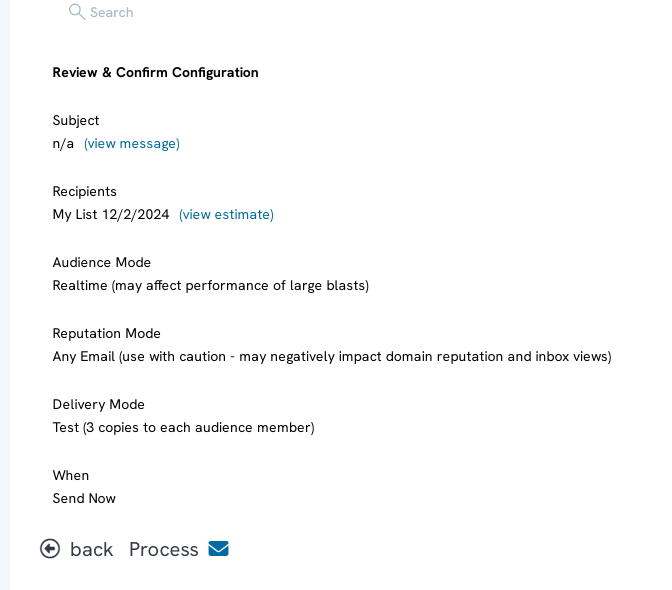
After selecting your Creative on the Message step and managing the send settings on the Advanced step, you can review the status of your import on the final Confirm & Send step.
You will not be able to send your message until the import is complete. Upon completion you will be able to estimate your audience size, and the Send button will be available again.
You can also review the results of your Import by navigating to Automation & Workflow > General > Import & Export.
*Calculating audience size will give you an approximate estimate of how many contacts will receive your message. This calculation removes duplicates, deceased contacts, people who have opted out, contacts who are part of your global email suppression, or whose email addresses have been blacklisted.

Manually Entering Contacts
Finally, the last way to select an email audience is to manually enter the email addresses. Click the Manual radio button and enter the email address into the text box. If you have more than one email address, use a comma to separate them.
Note: If the email address belongs to a contact that does not already exist in your database, a new contact will be created. To ensure that the contact is not created with the contacts name missing add the name of the contact like shown below.
After selecting your list, the Actions drop down will appear next to it. From this menu you can review your list members, manage the list settings, or create a new list.
After selecting your Creative on the Message step and managing the send settings on the Advanced step, you can review your audience again on the final Confirm & Send step.
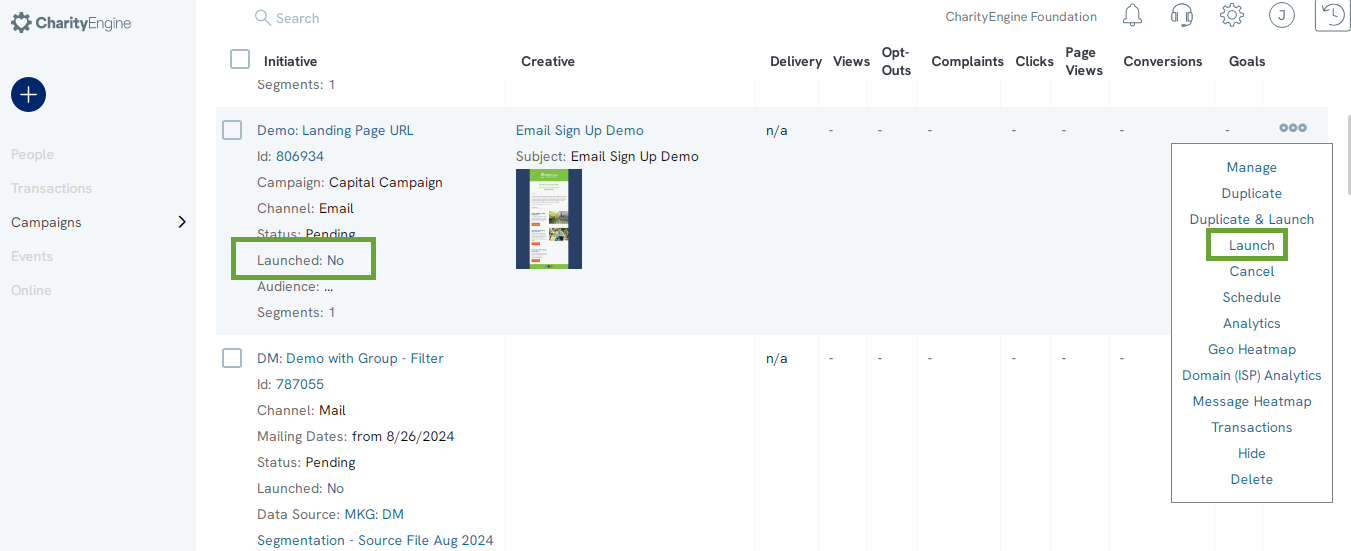
How to Schedule a Marketing Campaign
When creating a marketing campaign, scheduling it to be sent is an important step. Scheduling the email or SMS to be sent at a certain time allows you to create the email ahead of time and send it later. This feature will save users time when it comes to sending emails. Scheduling can be done when you are creating the email or after the email has already been created.
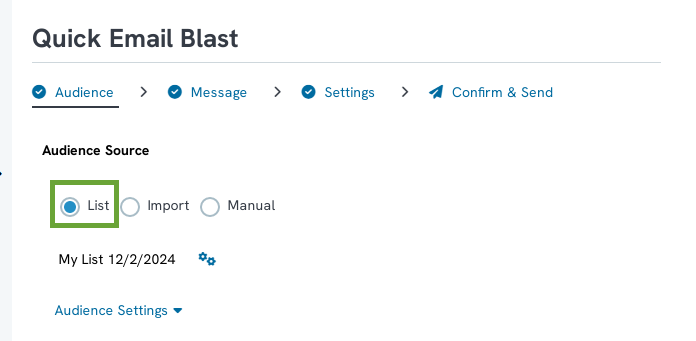
-
- -List: Refers to an existing Opt-In List or other Query (as created from Automation & Workflow)
- -Import: Refers to the ability to create an email list from an external source (CharityEngine ID minimum requirement)
- -Manual: Refers to the ability to physically type email address(es) directly into the entry field
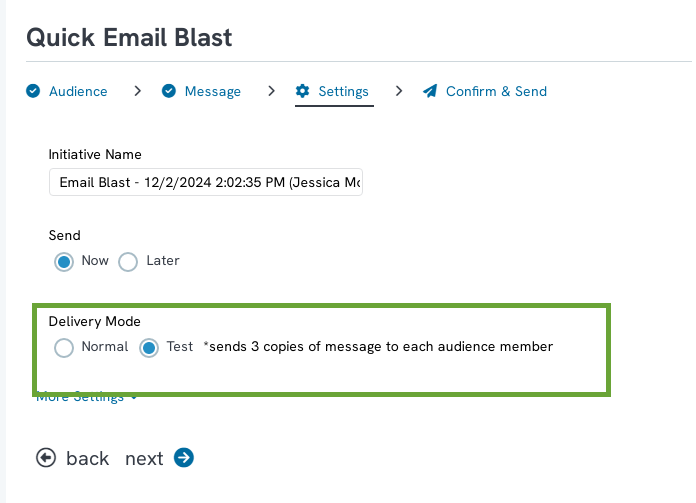
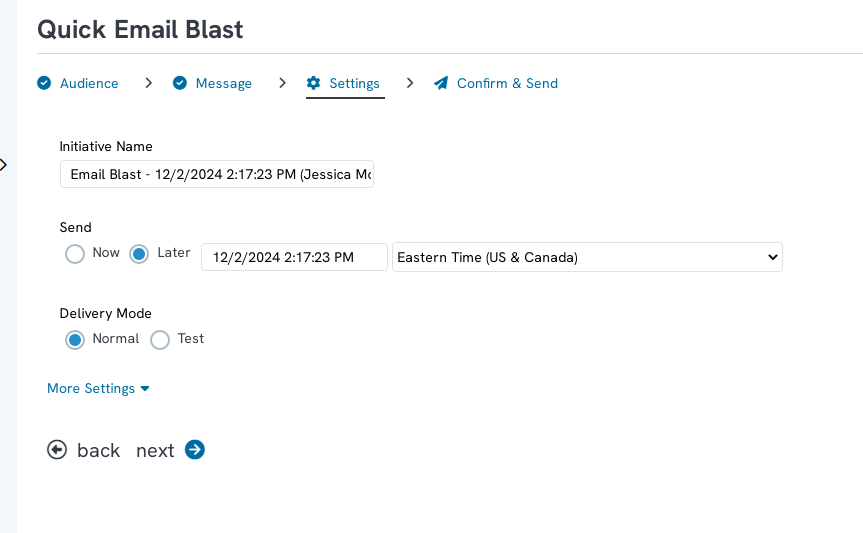
Step 4: Finalize all Settings - and now schedule for later
-
- Decide to Send Now or Schedule for Later
- Note: When selecting Schedule for Later, enter in the date and time for your email to be sent
- You may modify the Initiative Name or leverage the system generated value
- Delivery Mode allows you to send to your audience or perform a test send (to receive three versions of your email in Standard, HTML and Text Format for review)
- Leverage ADDITIONAL SETTINGS to modify additional attributions such as campaign, funds, display name, reply to address, etc.)
- Complete all change and proceed to next
- Decide to Send Now or Schedule for Later
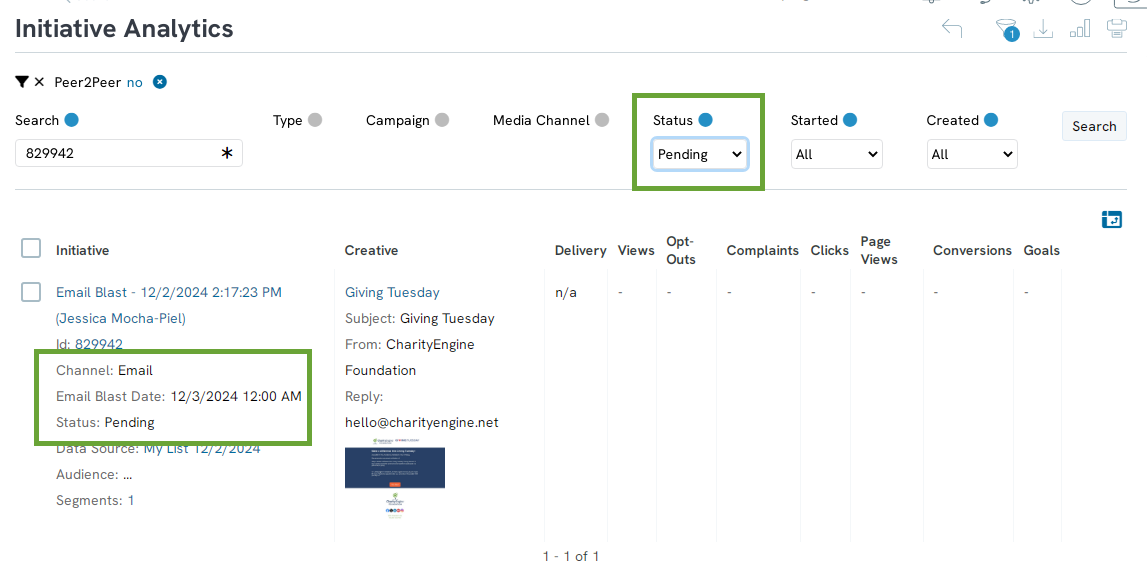
How to review and monitor future dated campaigns
This will provide you with a listing of all scheduled emails in queue. Within Details column, reference the Email Blast Dates to see the scheduled date/time.
Other Methods for Sending Campaigns/Personalized Messages
We know how important it is to communicate with your donors. While our Campaign Email Blast feature is great for bulk sending needs, on our CharityEngine transactions, contacts, and registration listing screens, users can easily send an email or generate a letter to a select group of contacts. This will save users time and can be used to generate invoices for pledges, send thank you letters to event attendees, and send emails to contacts on your LYBUNT report.
Note: If you have a predetermined message/content, you can leverage below (as created in the Configuration App > Design & Message > Templates). If you do not have a readily available template, this flow will allow you to create custom content.
To send an email or generate a letter from a listing screen use the filters to create a list. In this example we will leverage the Donations App but this can also be applied to the Contacts App, Events App, and other areas within CharityEngine.
Step 1: Navigate to the Donations App > Transactions > Search & Manage > locate your selected population (i.e. transactions from 02/06/2021) > click on More > Send Message
Step 2: A pop up will appear to select your delivery method and if you want to create an activity. Complete your selections and click NEXT.
Note: the options on the contact listing screen will be different because you can do more from that screen. On the contact listing screen, you will be able to send an email or letter, send an email blast, a mail initiative, or SMS blast.
Note: If you select to create an activity, use the drop-down to select the type of activity
Step 3: Under Load Message, you can select an existing template or simply begin creating your message.
Pro Tip: Leverage the Tokens option to insert related tokens. Note, tokens available will be specific to the listing screen you are leveraging. For example, the tokens on the transaction listing screen will include transaction data and tokens on the event listing screen will contain event details.
Step 4: Click Process and the communication will be sent.
How to Leverage A/B Testing
As you begin to advance your email sending practices, you may find the necessity to test the performance of email content. This is helpful when determine content changes that help produce increased engagement and strong conversion rates. A/B testing is a feature in CharityEngine to use when you want to test email content and subject lines performance and determine which email drives better response from recipients. The differences in the email could be a simple image change or a subject line, or it could have multiple variants. A/B testing allows you to send multiple emails with these variations to a portion of your email list for testing purposes.
In advance:
-Prepare email content for your A & B email testing
-Identify test audience source to be used for your A & B email testing
Instructions: Setting Up Your Audience
Step 1: Navigate to the Campaigns App > Target & Test > Build Audience
You will be routed to the Query feature within CharityEngine
Step 2: Navigate to Create New
Step 3: Select your Filter and Select your data set
Step 4: Add your data elements by dragging and dropping fields into SELECT
Note: The CharityEngine Contact ID will be the minimum required field for this activity
Step 5: Drag and drop your data elements to FILTER to segment your list
Step 6: Click SAVE and name your query
Instructions: Setting Up Your Test
Step 1: To use CharityEngine A/B testing application, navigate to the Campaigns App > Target & Test > Set Up Tests > Create New
Step 2: You will need to name the test, select the type of test, the campaign the test is targeting, the media channel the test will be sent through, and if the target will be an email blast or a web form.
Note: the type selection is only for reporting purposes and will not reflect the overall outcome of the test. You will be able to select A/B testing if there is only one variation in the emails, or you will select multi-variant test if there are multiple variants in the emails.
Once you have configured the basic options for the test, click Save and the Outbound Audience Segments tab will appear. On this tab you will be able to create the two or more emails that will be used in the test

Click the Create button to create the first email.
You will be navigated to a new page to name the first email, select the target query, and configure the percentage of contacts within the query that will receive the email.
When naming the first email, it is important to notate within the name the difference between the emails. For example, if one email has a hero image and one does not, the names could easily be email with hero image and email with no image.
The distribution split will determine the percentage of contacts that will receive the test email. For best practices and to determine the winner of the emails, you will want to select a small percentage of contacts and ensure both emails have the same percentage.
You can use this A/B testing to do a random segmentation of your list and send to the entire list at launch. To email this way, make sure your distribution split across your segments adds up to 100%.

You will also need to either search for an existing email or create a new email to be used for the test. Click Search to search for the previously existing email or Create to create a new email.

When searching for an existing email, you will be able to search by ID, Name, Subject line, when it was created, and the recipients of the email. For best practices, CharityEngine suggests searching by ID or Name of the email.
Once you have found the email creative you are looking for, click Select.
Click Save and navigate back to the Outbound Audience Segments Tab. You will now see the test email and be able to add the second email the same way you added the first.
Note: you will need to select the query again as well as all other settings.
Once both emails have been created, click the drop down next to the save button and click Launch. The two emails will be sent to the split percentages you configured.

Printing Marketing Campaign Content (Mail)
If your organization sends direct mail as well as email content to your donors, CharityEngine provides an option to print out your newsletters for mailing initiatives using the same creative used for your emails.
Step 2: You have the option to create a new newsletter by clicking on Create new at the top right of the screen.
Otherwise, locate the newsletter you would like to print and navigate to the action ellipses.

Step 3: Under ACTION > Download PDF
Step 4: Open the PDF downloaded file and Print.
Step 5: To print out your list of donor addresses, navigate to the Contacts App > Organization and People > Addresses
You may use the search filters or the advance filters if needed.
Step 6: When your address report populates, you may then export.
To export, click on the report tab to export the addresses.
Step 7: Click on the address information you would like to capture in the report.
Step 8: Lastly, you may either save, save and export or export without saving the report.
Any saved reports can be located under the Load saved report drop-down.
FAQ & Further Readings
A. Please review our article on how to create an opt-in list
A. Our quick actions feature will allow you to quickly create an email blast. Read more here to send a simple email.
Q. I've already created my creative and I would like to make this email a recurring notification. How can I achieve this?
A. If you have a recurring email that you want to schedule, navigate to the Campaigns App > Create & Publish > Creative and find the creative you want to schedule. Under ACTIONS, click Schedule.

You will be navigated to create the data job and configure the send date, the campaign, the opt-in list, and the de-dupe method.

Click save and then you will be able to configure the trigger to send the email. Use dropdowns to select when the email will be sent.


Click SAVE and your email will be sent when it is scheduled.
Q. Where can I review the sending results of my email campaign?
A. Initiative Analytics are easily located in the Popular Reports section within the Campaign App. Read more here on email analytics to monitor your sending results.
Q. How can I ensure my emails are delivered?
A. Email Service Providers (ESPs) have rules in place to prevent unwanted messages from appearing in their users’ inboxes. Due to these rules, wanted and subscribed-to messages may end up in spam and could be blocked from delivery altogether. As an email sender, there are things you can do to improve your inbox deliverability. Read more here.
Q. What other best practices does CharityEngine recommend when sending emails?
A. Managing your email list is crucial for not only reaching your constituents but for also managing your reputation as a sender. CharityEngine provides a variety of features and tools to ensure you can manage your email lists and increase the success of your emails reaching your constituent's inbox. Read more here.
Q. Can I schedule an email based upon time zone?
A. Yes - Clients can schedule email sends in different international time zones. When you’ve done the research and understand the best time to have emails hit donors on the West Coast, for example, it’s nice to be able to schedule that send when you know it’s going to be most effective. Simply navigate to Campaigns > Quick Actions > Email Blast > complete the Audience > insert Message > Settings > Schedule for Later > select date/time and time zone
