Introduction
Employee matching gifts are a valuable aspect of corporate philanthropy, allowing employees to amplify their charitable impact with the support of their employers. Properly tracking and recording these matching gifts in your CharityEngine (CRM) system ensures accurate donor records and facilitates effective donor stewardship. This guide outlines the steps to enter employee matching gifts into your CRM system efficiently.
Table of Contents
Instructions to Record a Matching Gift Transaction
Step 1: Gather Necessary Information
Before entering employee matching gifts, gather all relevant information, including:
- Donor's name: The name of the employee who made the original donation.
- Employer information: The name of the employer providing the matching gift and any relevant details about their matching gift program.
- Donation details: The amount of the original donation made by the employee.
- Matching gift details: The amount being matched by the employer and any additional requirements or restrictions.
Step 2: Access CharityEngine
Log in to your CharityEngine account with the appropriate credentials to access donor records and donation entry functionalities.
Step 3: Create New Donation Entry
Navigate to the Transactions App > Quick Action > New Payment
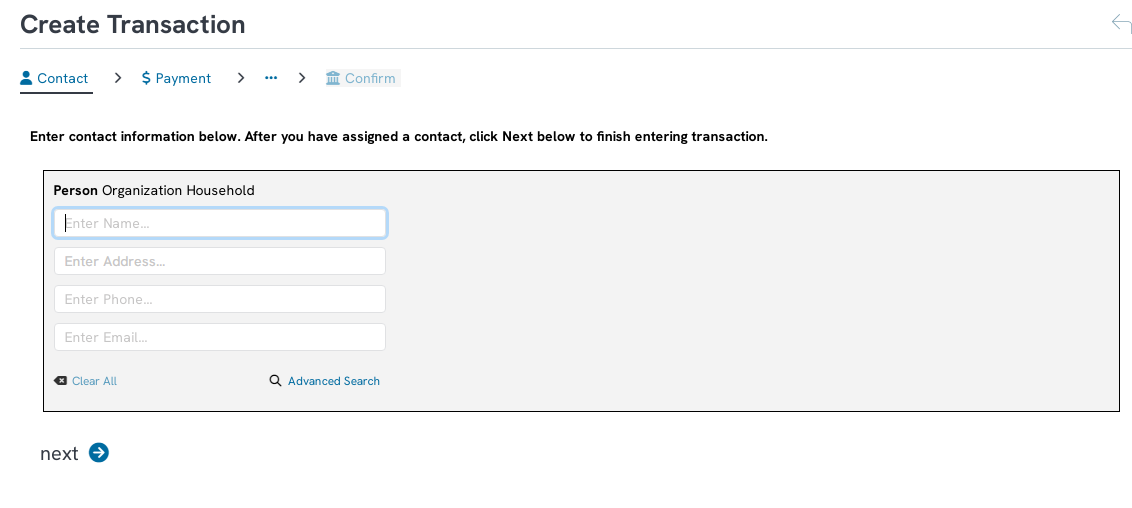
Step 4: Enter Donor Information
Fill in the donor's information, including their name and contact details, ensuring accuracy and consistency with existing donor records. Click Next to proceed.
Step 5: Record Original Donation
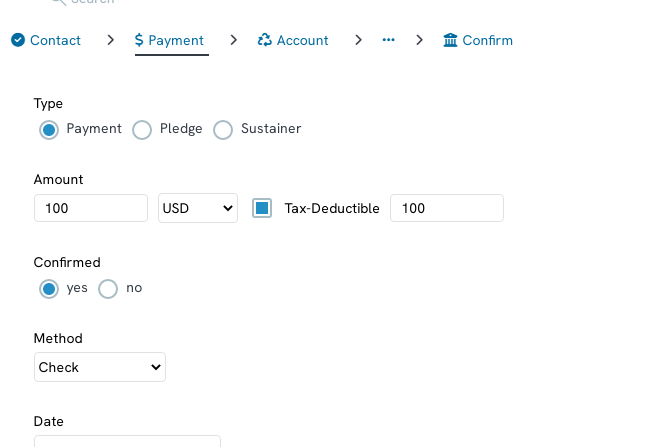
Enter the details of the original donation made by the employee, including the donation amount, date, and check dates if applicable. Click Next to proceed.
Step 6: Record the initiative/campaign
Select the initiative if applicable and click Next to proceed.
Step 7: Select Event (if applicable)
Step 8: Select associated Opportunity (if applicable)
Step 9: Select Category type, Fund, GL Code, and/or Response Channel (if applicable). Use Additional Settings to record Region or other tracking codes. Click Next to proceed.
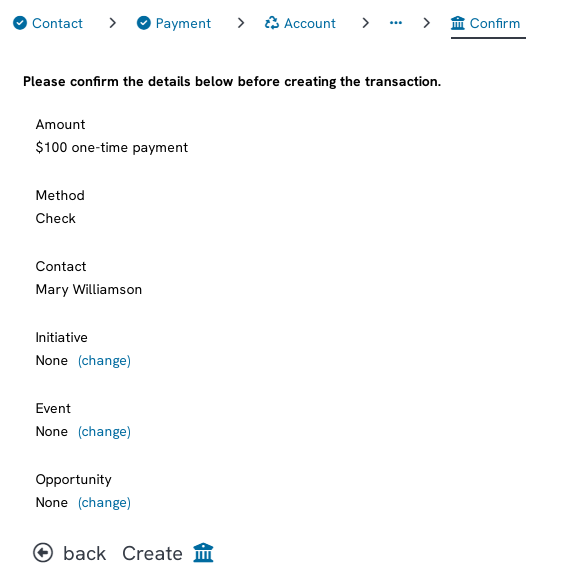
Step 10: Review and Confirm. Click CREATE to submit the transaction.
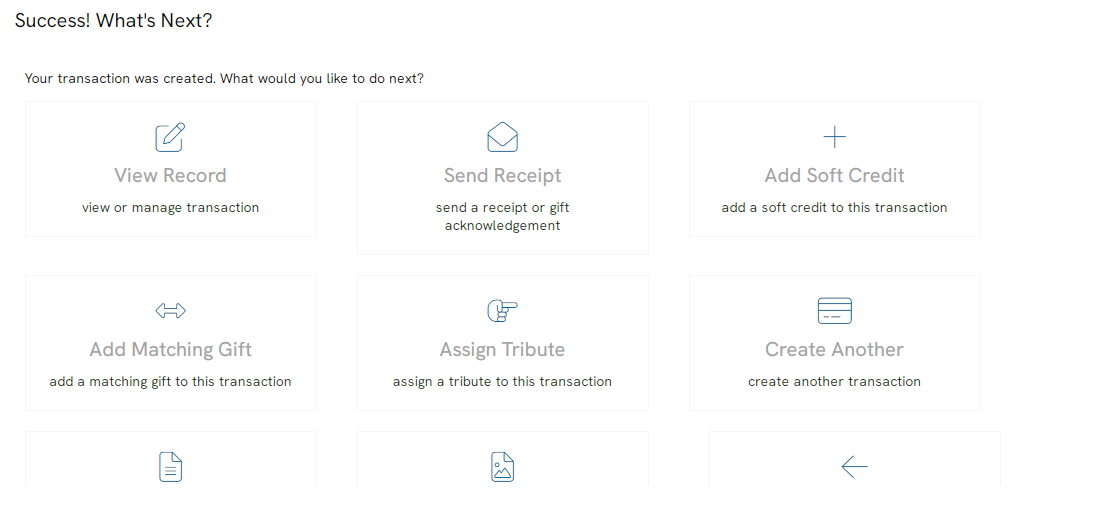
Step 11: From the Success! What's Next? pop-up, select Add Matching Gift
Step 12: If using the Matched By (to match back to the organization's matched donation transaction), use Actions and select search transactions
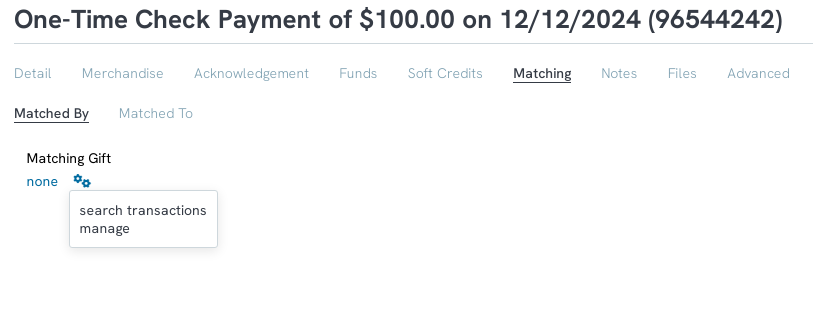
Step 13: Search for the organization's matched gift transaction and click select

Step 14: Enter the matched Amount based upon the organization's matching criteria. Click SAVE to confirm.

Step 15: Add Matching Gift Information & Send Acknowledgement
If applicable to your standard operating procedures (SOP), users can add notes, files, and create acknowledgements. Use the associated tabs for entry and appropriate actions.
Finding Matching Gifts Using Filters
To find transactions that are matched, you can use the filters on the transaction listing screen to view them. Navigate to Transactions App > Transactions > Search & Manage > Advanced Filters then Click on the Matched Radio button and select Yes to view any matched transactions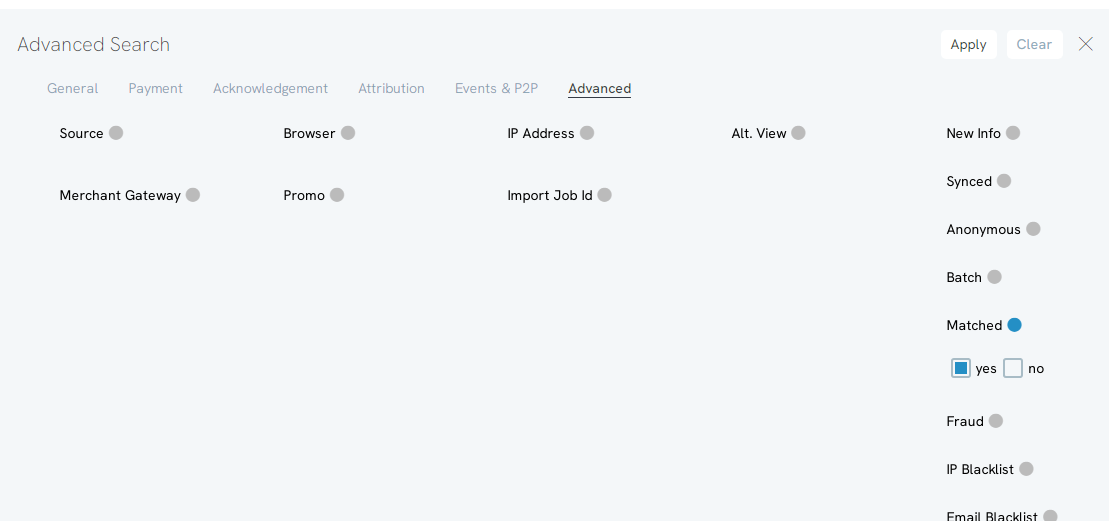
Donor Management - Data Governance
Update Donor Records
After saving the entry, ensure that donor records are updated to reflect the matching gift contribution and any associated changes to the donor's giving history or donor level. This is a great time to attribute the individual as an employee of an organization and/or update a donor's demographic information such as email, address, or phone numbers which may have been collected with the donation.
FAQs & Additional Reading
Q. Can I record an organization's matching guidelines?
A. Yes. Within an organization's contact record, a user can record the organization's matching ratio, matching ranges (min-max), and/or employee's max gift value. Learn more in our article Contacts: How to Create and Manage Organization Contact Records
Q. Our organization leverages "Double the Donation", can this be exposed within a web form for donors?
A. Yes. With a few simple steps, users can elect to add "Double the Donation" to any of your organization's web forms. See our article Adding "Double the Donation" to a Form
