Introduction
Combining the tools within the Automation & Workflow with Opportunities/Move Management can further assist you in identification and proactive creation of opportunities within your database. The following materials will assist you in designing a query and creating an automated data trigger job which can be used to create opportunities systemically. The Trigger Tool can be used to create opportunities for your donors. By creating these opportunities, you will be able to track grants that are awarded and how your donors are choosing to promote your mission while reducing time, effort and manual management of the creation step.
Table of Contents
Prerequisites
- Set up of your organization's moves management structure including configuration of the Opportunities feature
- Identification of a targeted query to which an assigned opportunity would occur
Instructions
-
Establishing your target query
Step 1: Navigate to the Automation App > General > Queries > Create New
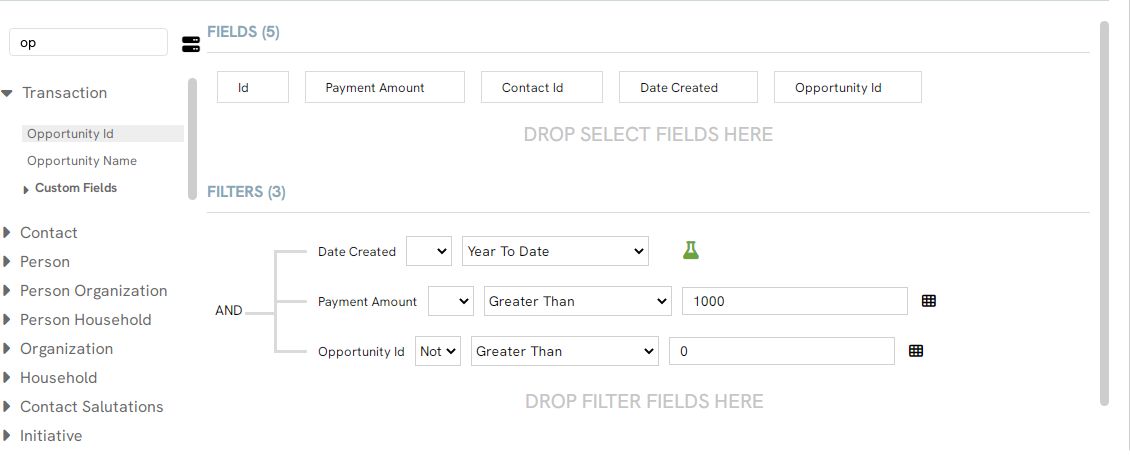
Step 2: In this example we will use the query tool to query the Donations: Transactions database in order to identify transactions created in an identified timeframe (Year to Date), donations that are > $1,000, and the transaction is not already assigned to an opportunity. Once you secured your query, click SAVE.
Note: Please ensure you have included the field Contact Id in the SELECT in order to properly assign the opportunity with a contact record.
-
Establishing your data trigger job
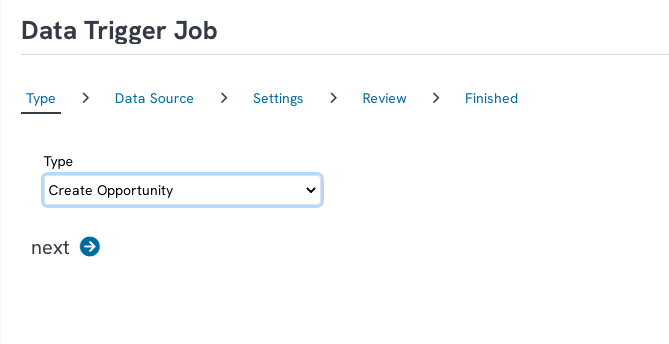
Step 1: Navigate to the Automation App > Workflow > Triggers > Create New > Type: Create Opportunity > NEXT
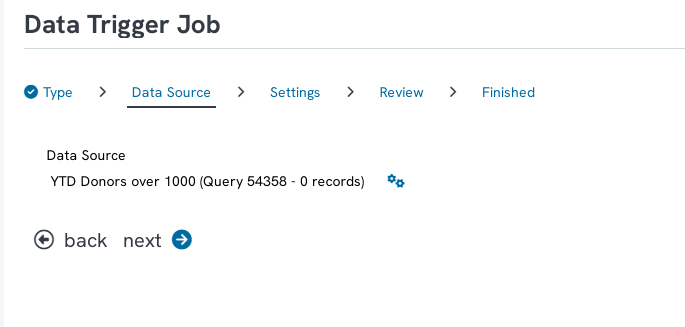
Step 2: Select the query (created from steps above) from which the contacts will be pulled from as the data source. Use the drop down to locate your query, select and click NEXT.
-
-
- Name (required) for trigger job
- Send Notification (optional change)
- Email Subject (optional change)
- Opportunity Setting (required):
- Track: determine which track should be automatically assigned with the trigger job
- Statue: determine which status should be atomically assigned with the trigger job
- Priority: determine which priority should be atomically assigned with the trigger job
- Click NEXT to proceed
- Note/Warning: Transforming data can cause irreversible changes to your database. Make sure you back up your data first.
-
Step 4: Review your final settings and click FINISH to finalize your data trigger job.
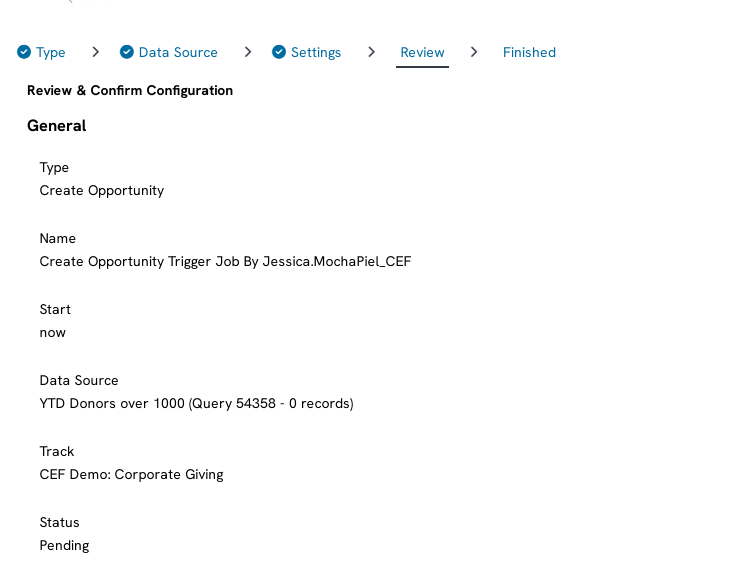
-
Scheduling your data trigger job
If you wish to schedule your data trigger job to automatically run at an assigned time, follow these steps to establish a recurring job - allowing you to further automate the opportunity creation process.
Step 1: Navigate to the Automation App > Workflow > Triggers > locate your trigger job > ACTIONS: hover to select Schedule
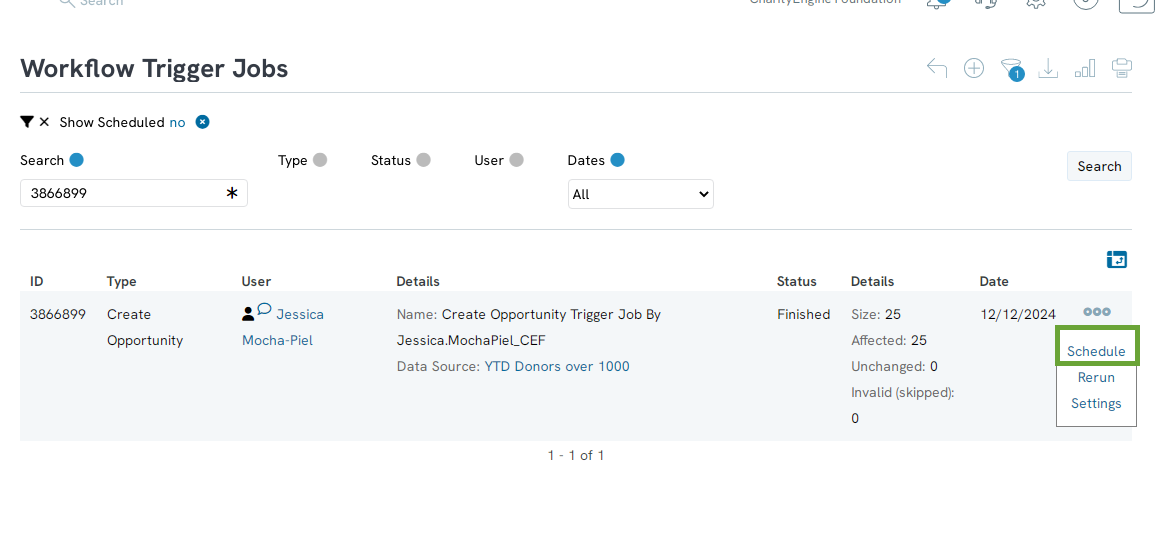
-
-
-
- Name: (required)
- Dates: leaving blank will default to initiate today; user also has the ability to set a future start and end date
- Data job: do not modify - this will default to the trigger job created above
- Click SAVE to secure
-
-

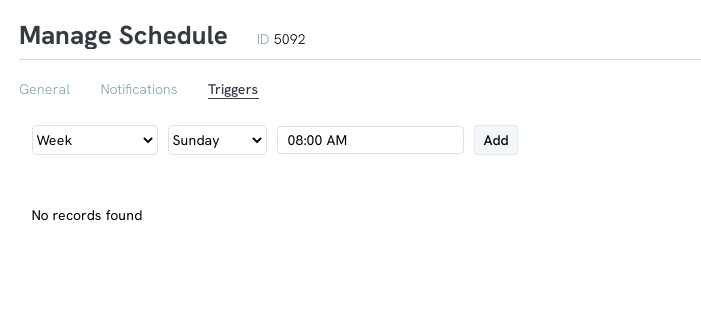
Step 3: Once you select SAVE, you will expose two additional tabs: Notifications and Triggers. Navigate to Triggers to set your automated schedule. From Select, the drop down will expose a variety of frequencies ranging from hourly to annually. Select your preferred frequency. Then select your time of day to initiate the trigger. Click ADD to secure.