Audience: Creating Segments in Initiatives
Introduction
When you are sending any sort of communication out to your donors through CharityEngine, you might want to consider segmenting your audience to gain a deeper insight on how certain groups respond to your organization. Segmenting your audience allows you to use native CharityEngine reporting which will allow you to change tactics for a specific group to increase engagement. Initiative segmentation can be as simple as segmenting based on the state that a donor lives in or more complicated with the use of subqueries to build your entire audience.
Note: It is important to note that in order to use initiative segmentation, your audience must be built using a query and not an opt in list, however you can use the opt in list as a filter in your query to populate anyone within that opt in list without having to re-build that list. The query also must contain the fields you want to create your segmentation based on. For example, if you want to segment based on state, your query must contain the Primary Address State field.
Instructions - Creating an Initiative Segment
To create a segment for your initiative, navigate to Campaigns > Create & Publish > Initiative and create a new initiative. Remember to use a query as your list source and not an opt in list, then click Save. Once saved, you will see that the Segments tab has appeared and a default segment has been created. This segment will contain all of the contacts within your source query.
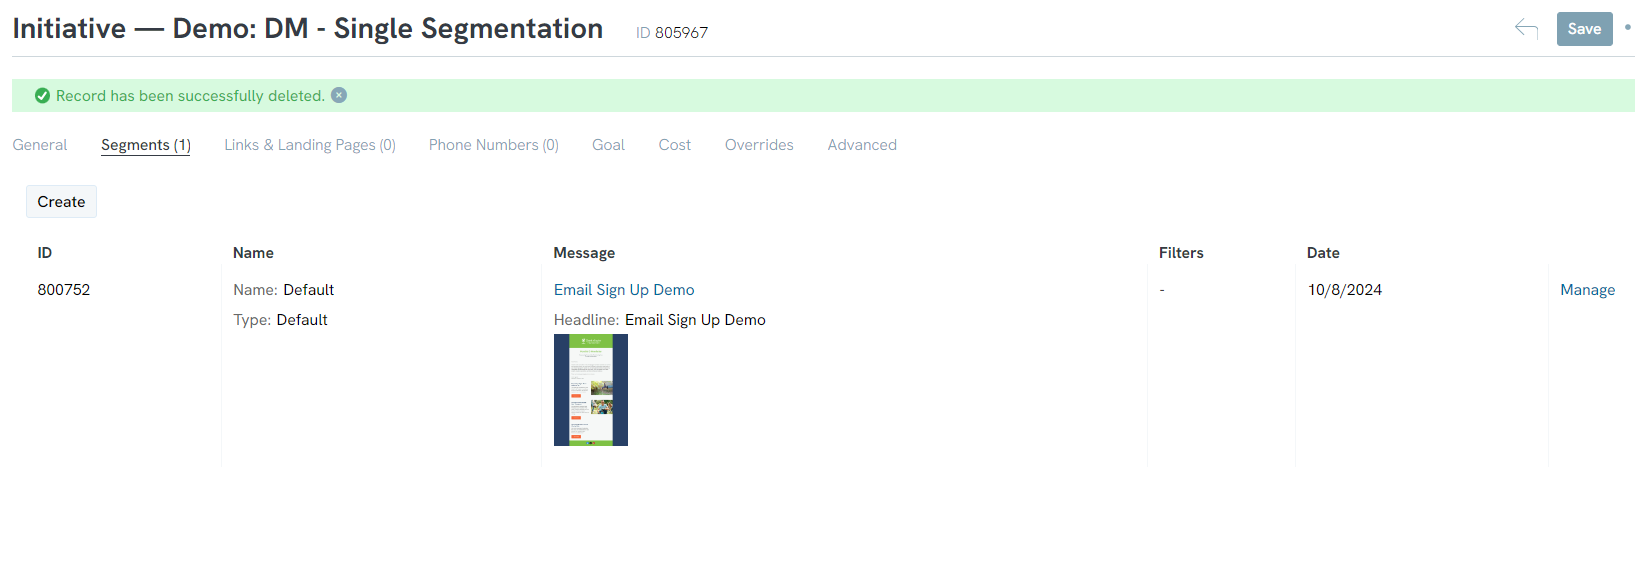
Click on Create to create a new segment for your initiative. Name your segment in a way that you will be able to easily distinguish what the segment is. In the below example, we will segment by the state the contact lives in, specifically people who live in Ohio.
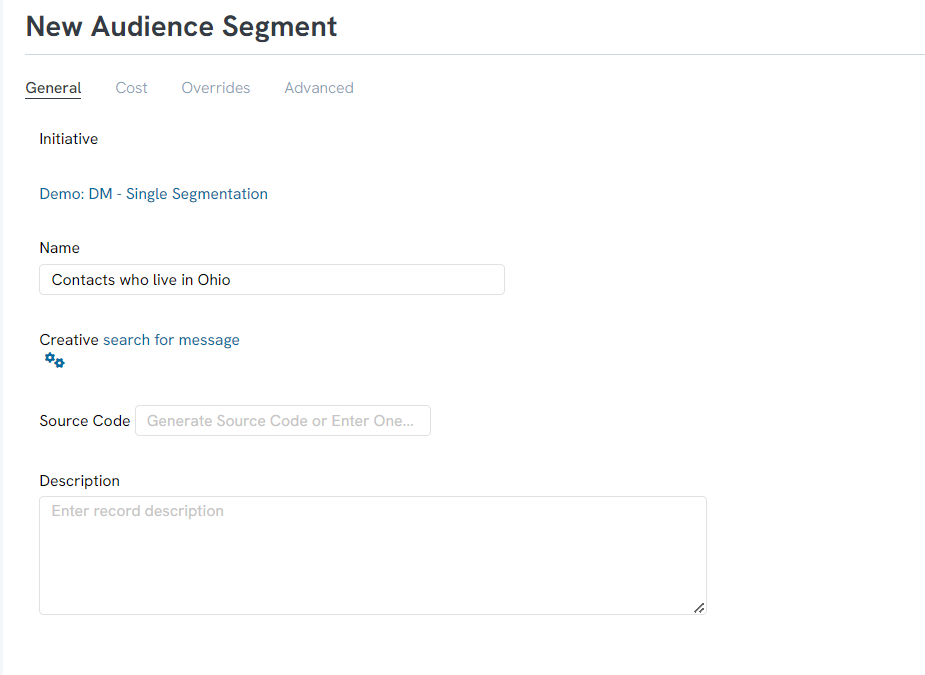
Then click Save. After you have saved the segment, a new tab will appear for you to add your filters to segment your audience using the initiative audience source query. Click Create to add a filter.

Configure your Filter
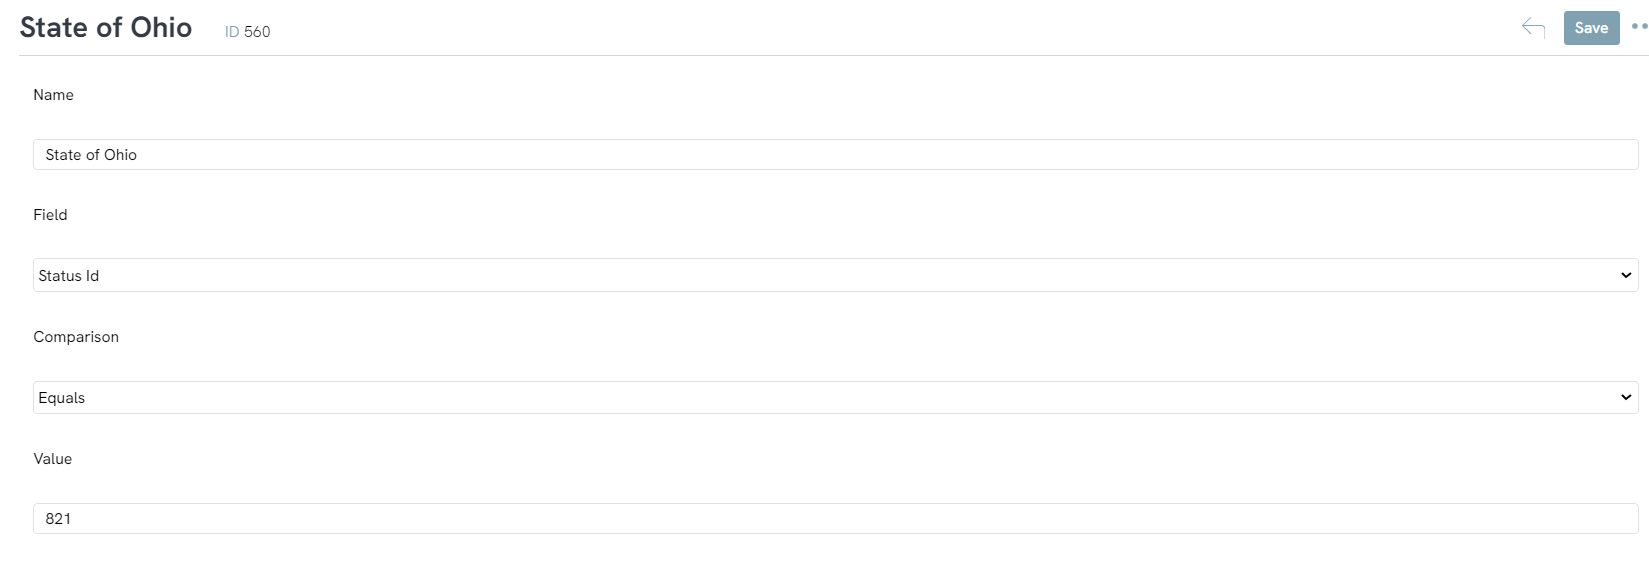
1. Name: Name your filter. If you add multiple filters to a segment, this will allow you to distinguish between the filters
2. Field: Select the field you want to filter on. The fields that appear in the dropdown are the fields in your audience source query. Make sure that the fields you want to filter on are in the query, or they will not appear in this dropdown
3. Comparison: Select from the dropdown how you want to filter the field. In the below example, we selected equals because we only want contacts who have a primary state of Ohio.
4. Value: this is the output you are looking for form the selected field. If you selected "is one of" form the comparison field, use commas to separate your values.
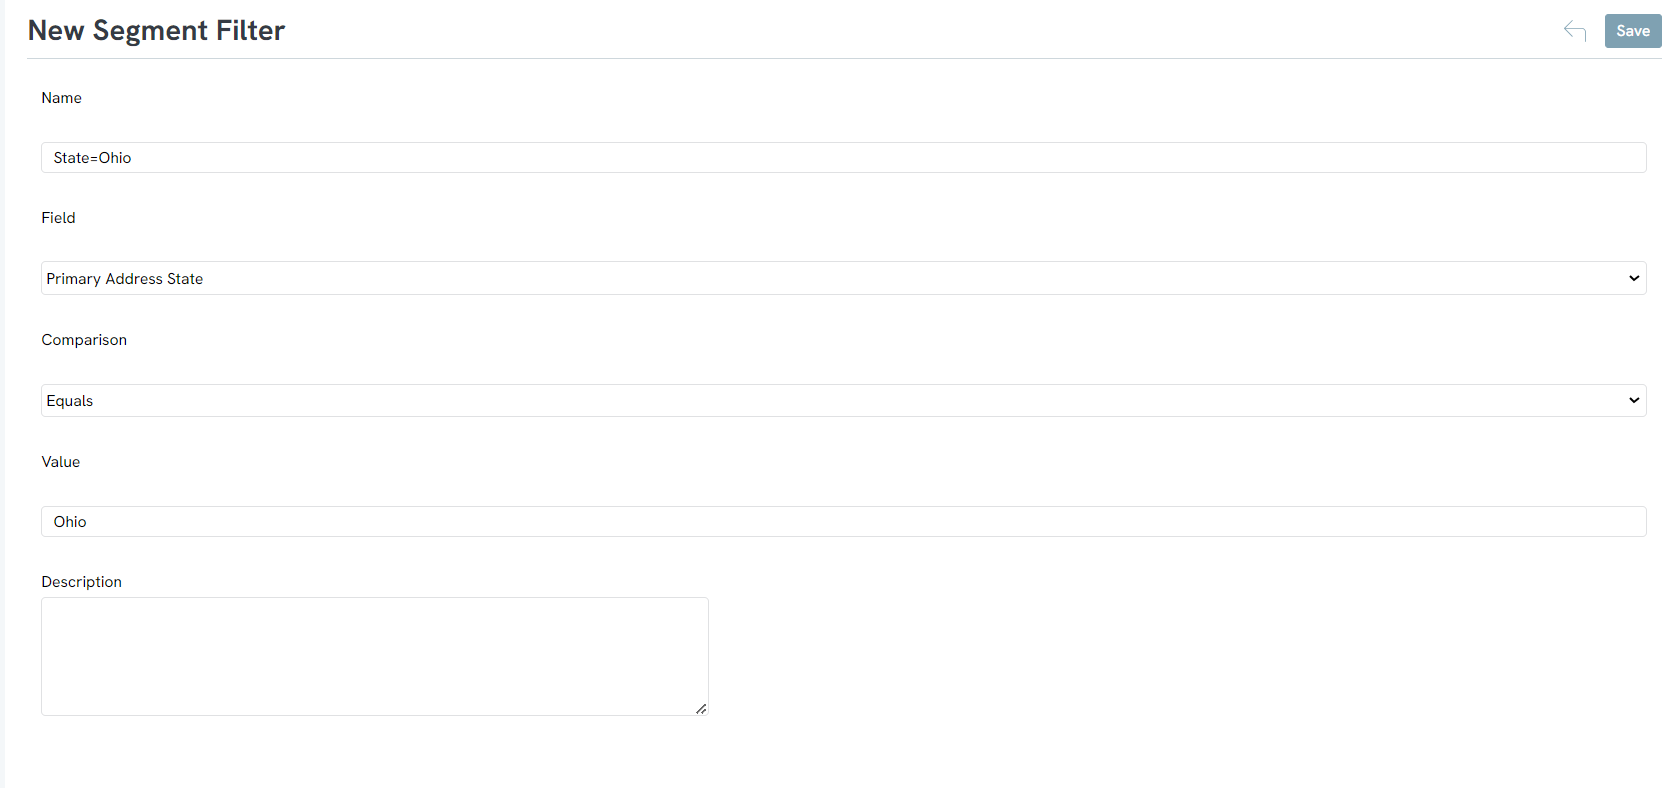
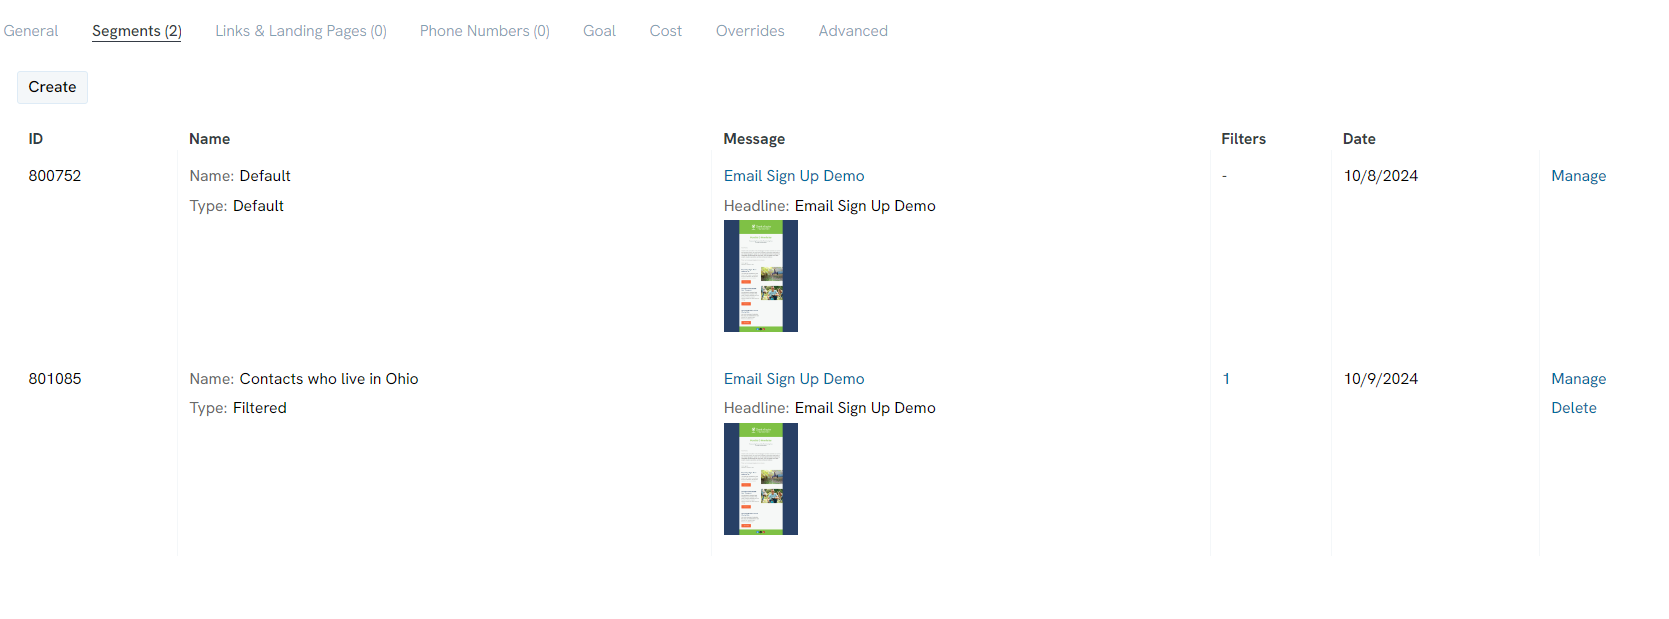
Click Save to create your segment filter. When you navigate back to your initiative, you will now see the default segment and the segment you created with the filter.
Once you run your initiative and your contacts start engaging with the content, you will be able to see how each segment preformed. Navigate back to the initiative listing screen and click on the number next to segments to view the segment analytics.
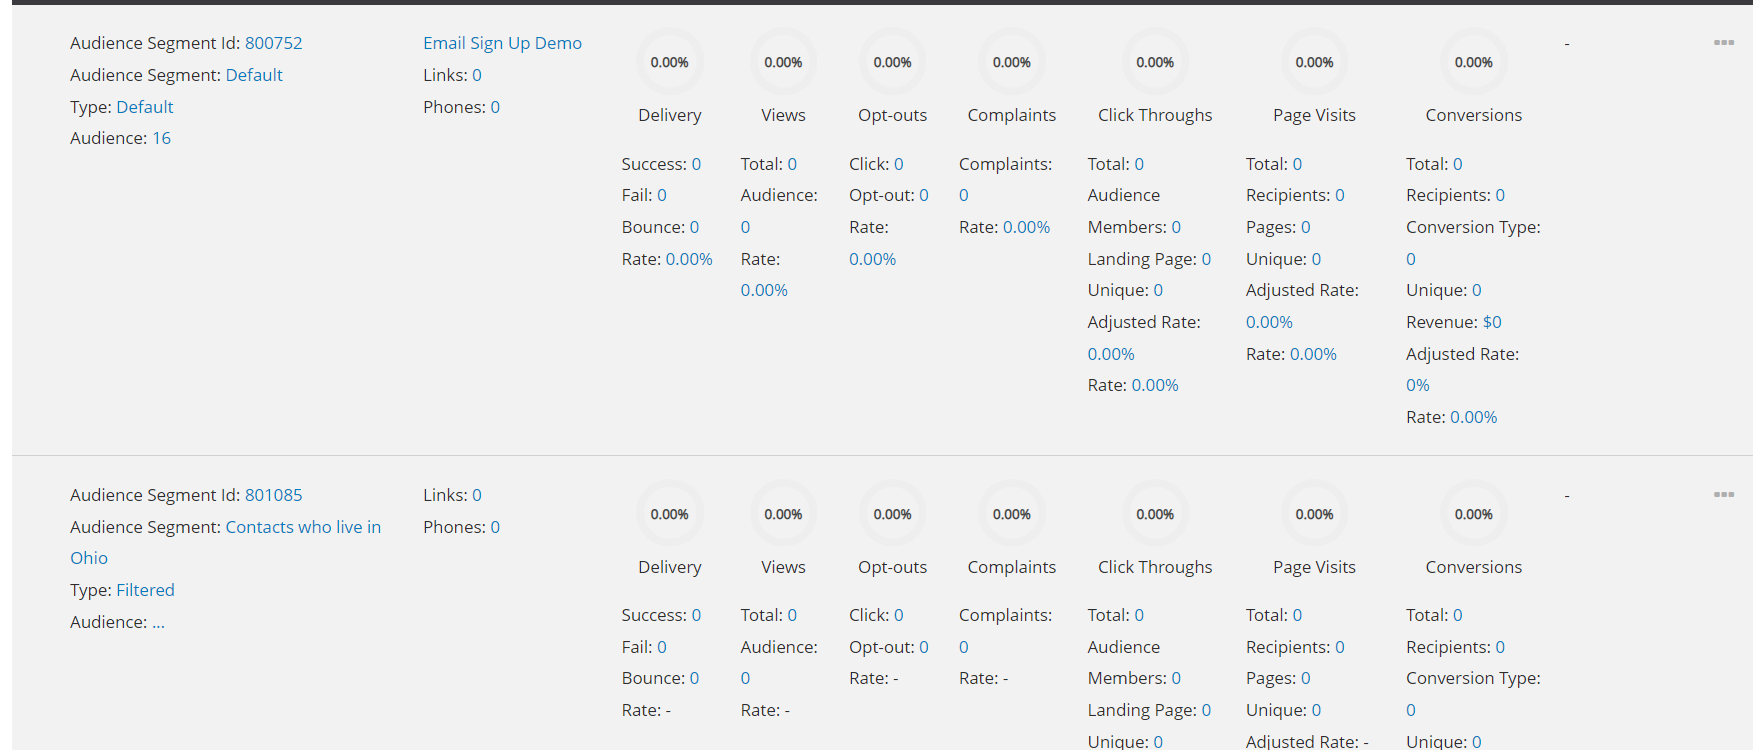
Use these analytics to better understand your audience and how to engage with them in the future.
Instructions - Advanced Audience Segmentation
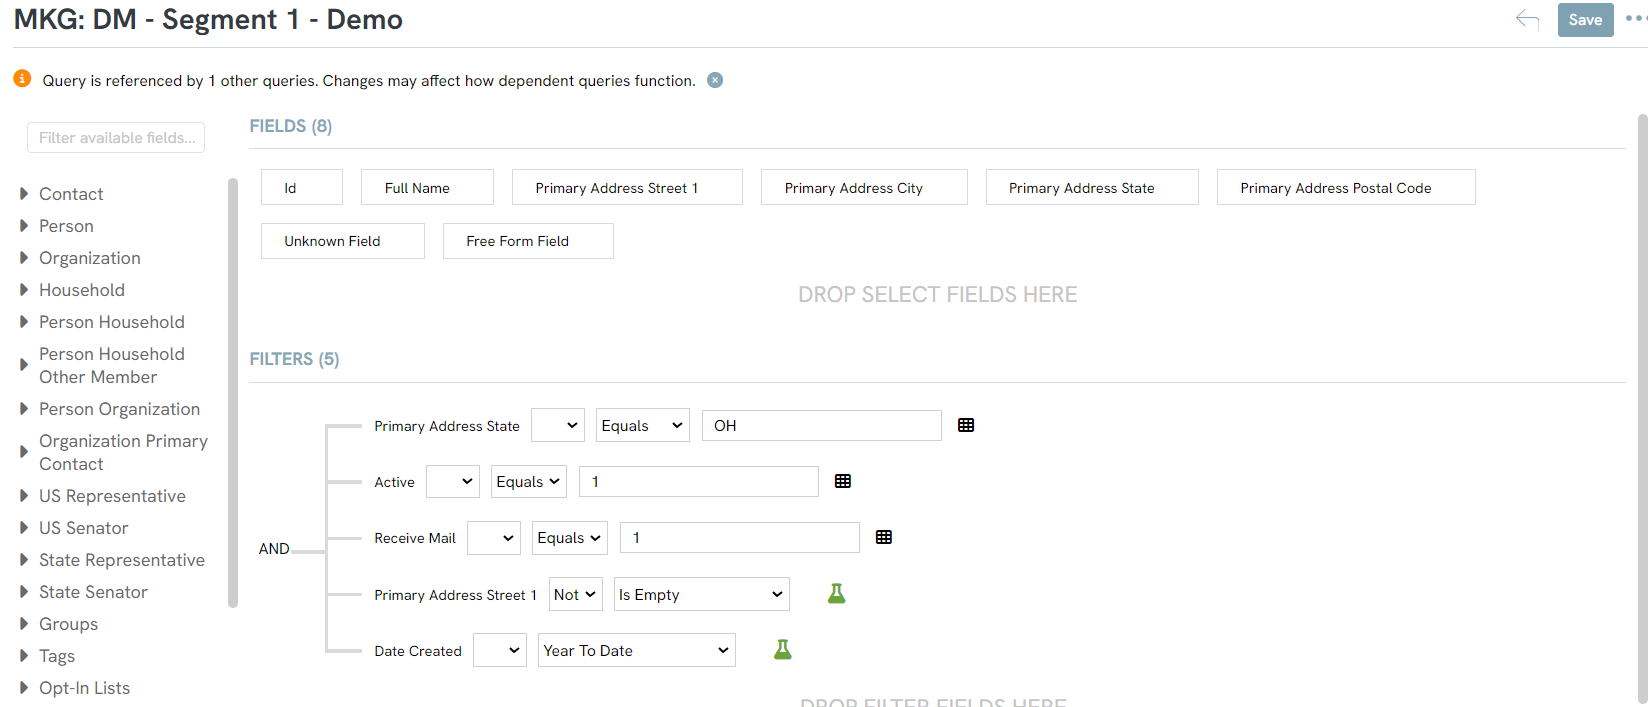
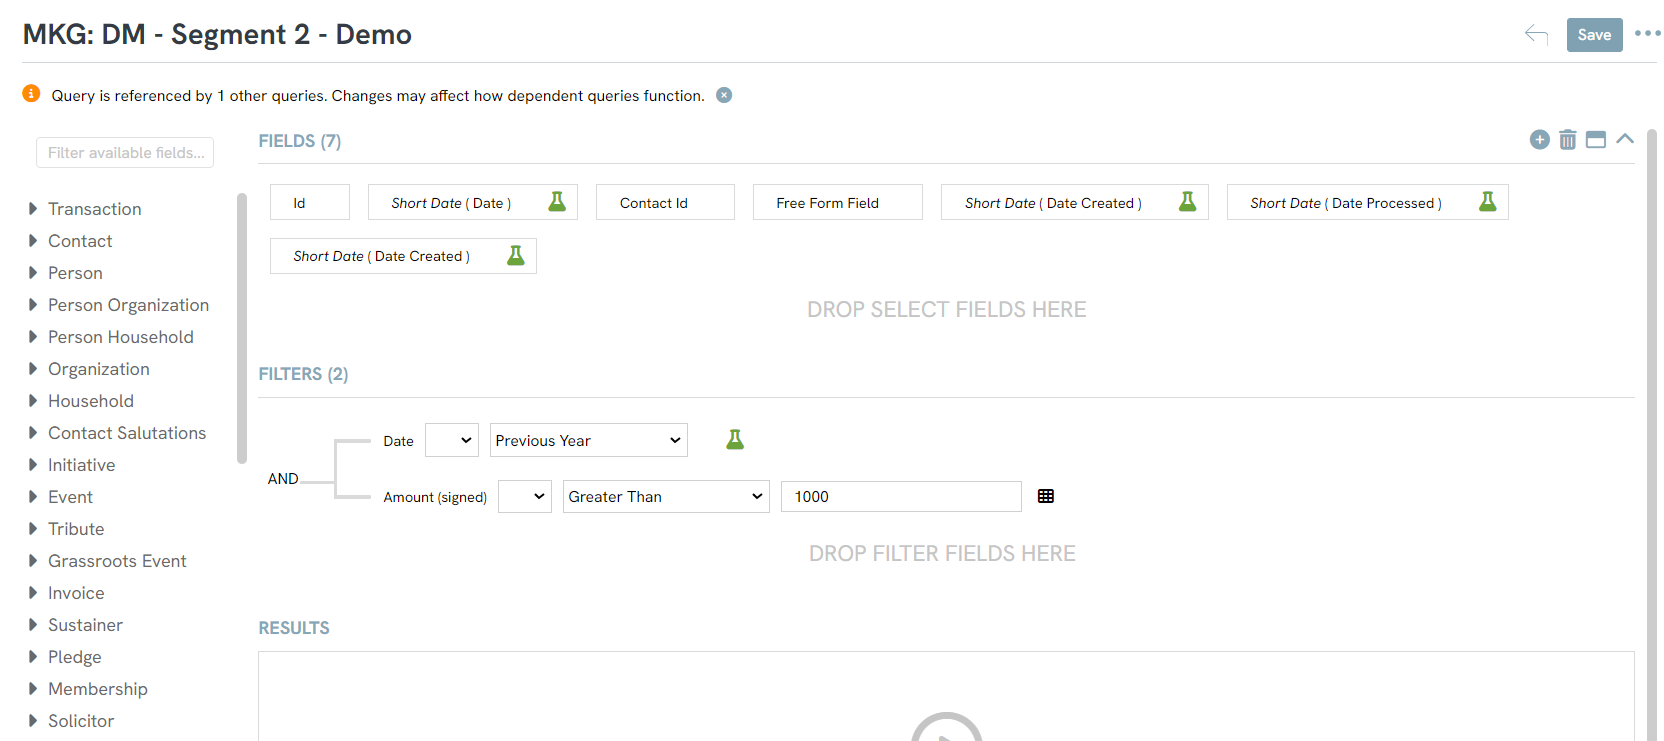
When building your audience for your initiative, your query may be more advanced and contain subqueries that you will want to use as your segmentation. This adds a layer of complexity when creating the initiative segments. For example, you may want to create your audience based off contact information and transaction information and have a query for each segment you would like to see in your initiative. This would require you to build several queries and use them as subqueries to build your whole audience. In the below example, our segments are:
1. Contacts who live in Ohio
2. Contacts who have donated more than $1000 in the previous year
These two queries are then combined into one query to build your audience
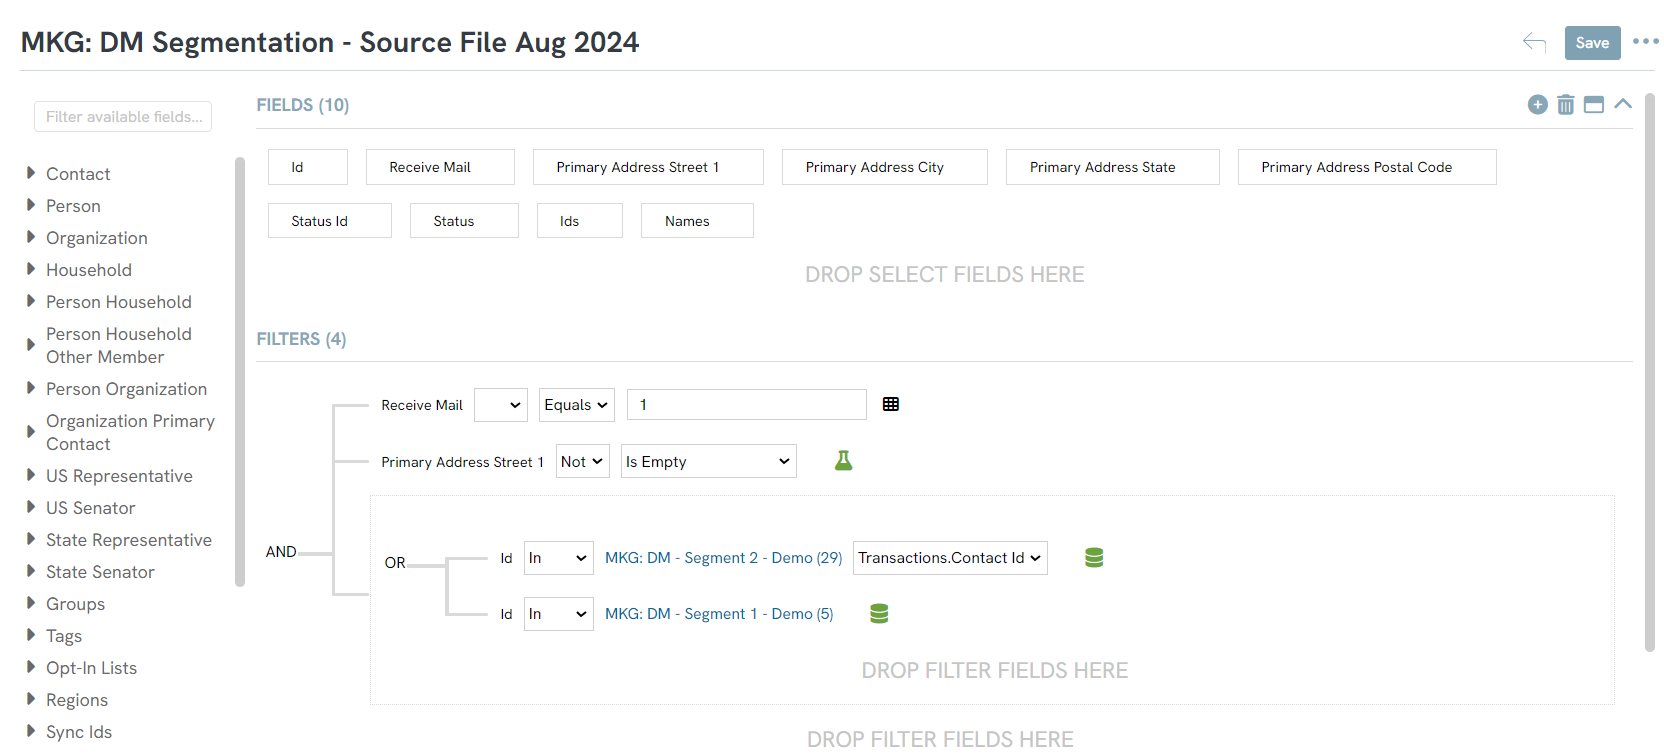
In the contact query that contains both subqueries, you may find that you do not have access to certain fields that will allow you to create the filter in the initiative, such as transaction data. Therefore we have to use an additional field, such as status to filter on. This will require you to assign the status to the population using the transformation tool.
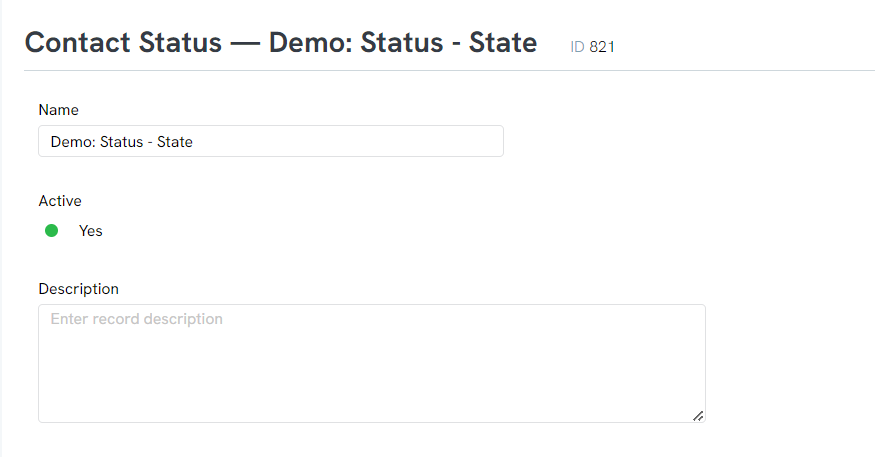
Before you can assign the status, you must first create the status in the Configuration Application. Navigate to Configuration > Contacts > Contact Status and create a new status. As you can see, we created two statues, one for State and one for Transaction.

You will need the status ID for your query and transformation job. Manage the status to obtain the status id.
Navigate back to your query and add a free form field to your query by clicking on the Plus Icon, then type in the status ID into the text box. Do this for each segment query.

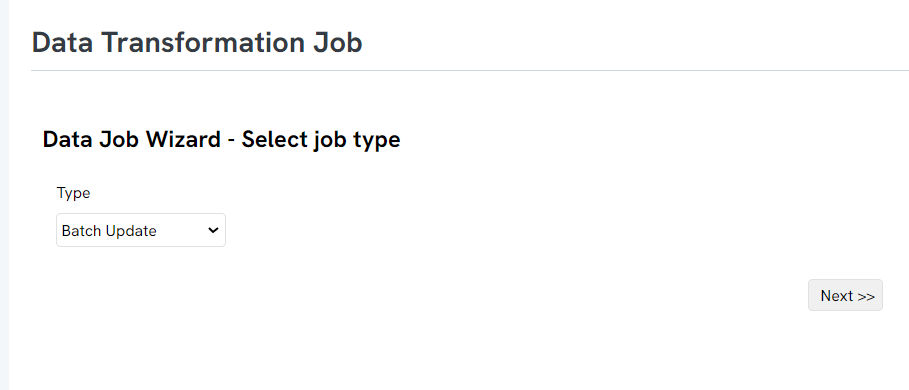
Once the field is added to your query, you can preform a transformation to update the status of the contact record. Navigate to Automation > Workflow > Transformation and create a new transformation. Select Bulk Update form the type dropdown
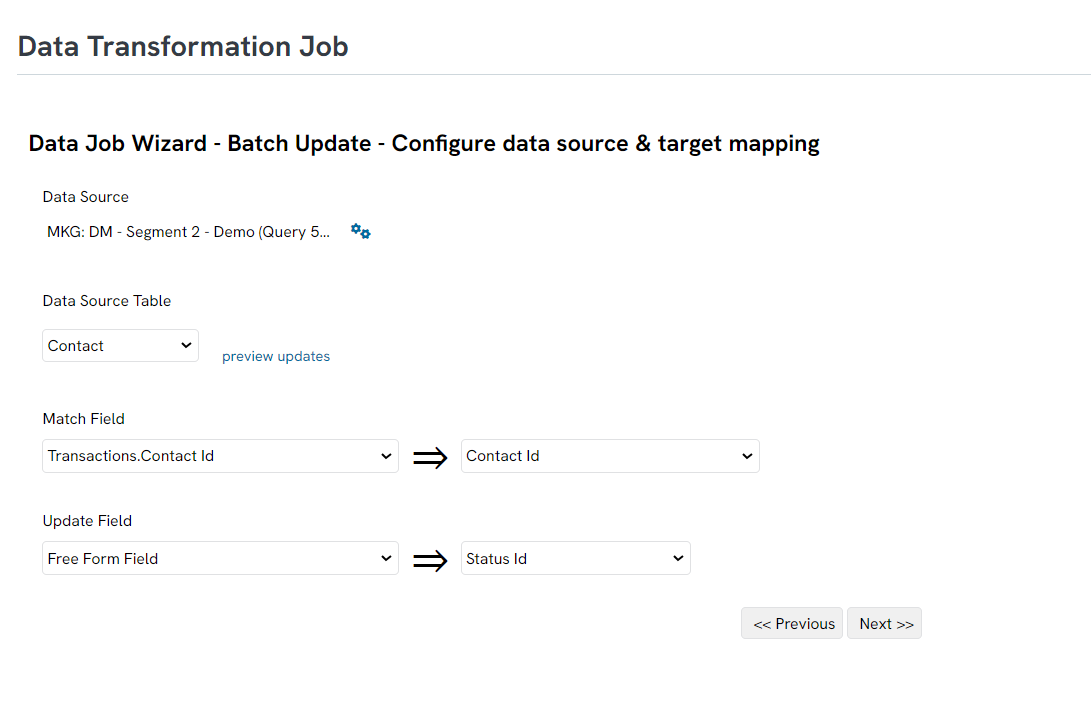
1. Select your Data Source - This is the sub query that the status id was added to
2. Select Table - Select Contacts because we are updating the contact record
3. Select Match Field - This is how the record will be identified.
4. Select update Field - the first dropdown field is the value we want and the second is the field we are updating.
Click Next and continue with the transformation job. Repeat the steps for every status and subquery you have created.
After you have updated the status for the contact records, add Status Id to your source file for your initiative.

Now that Status Id is a field in our query, we can use that field to segment our audience. Navigate to your initiative and create segments
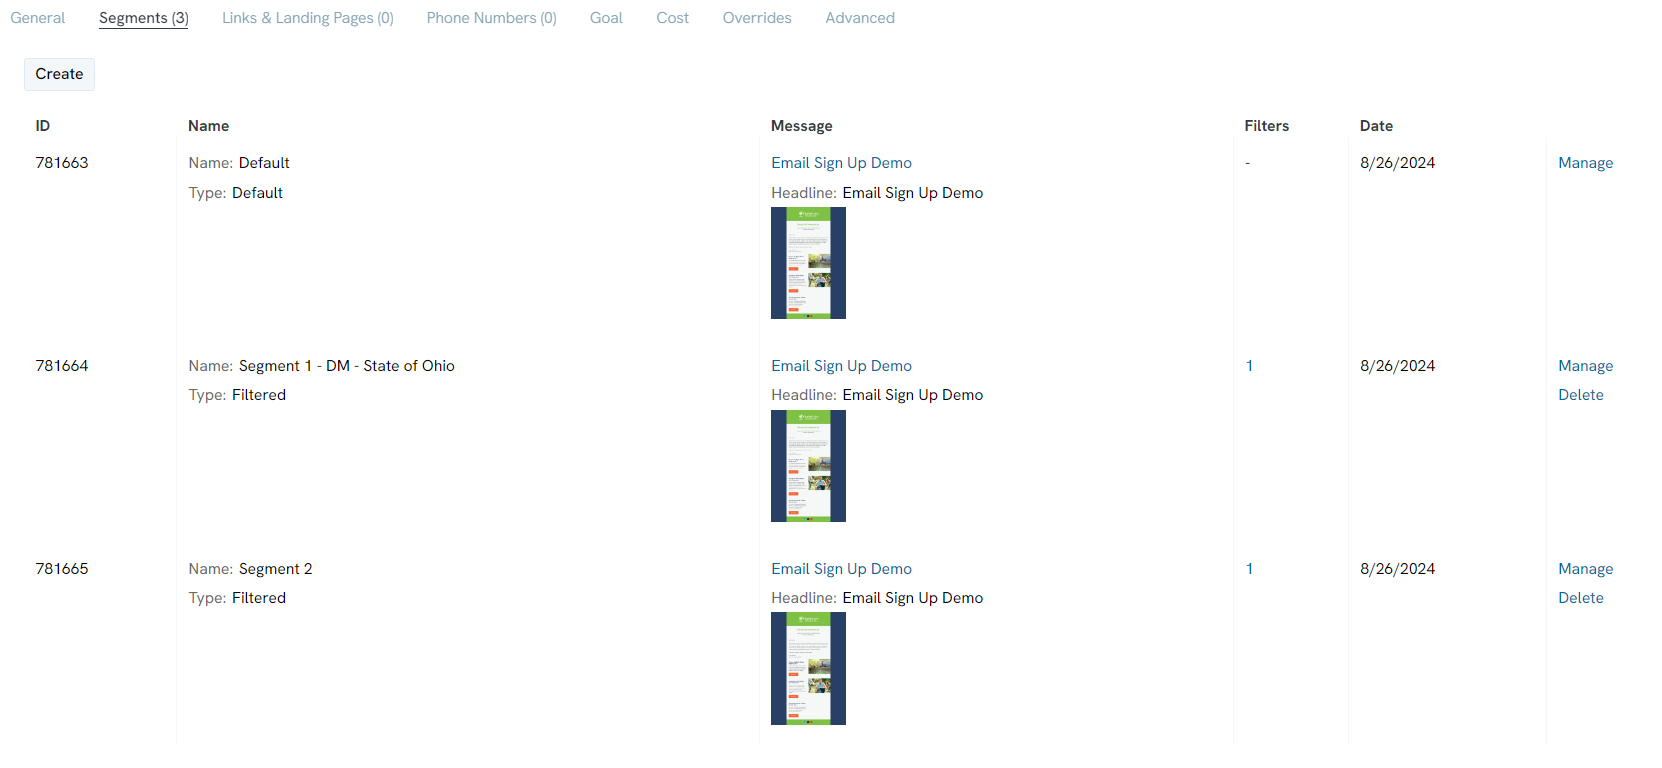
Each segment should contain a filter on the status ID.
Now you will be able to use multiple subqueries that you want as your segments for your initiative and have out of the box reporting on each segment.
