Introduction
The trigger tool can be used in a variety of ways to create lists and assign groups and tags to contacts. One of the most common uses of our trigger tool is adding opt-in lists to contacts that can either be scheduled to be updated daily, weekly, monthly, or as a one-time task.
Instructions
To add an opt-in list to a contact’s record using the trigger tool, navigate to Automation > Workflow > Triggers and click on create new. From the dropdown, select Contact List Assign and click the Next button.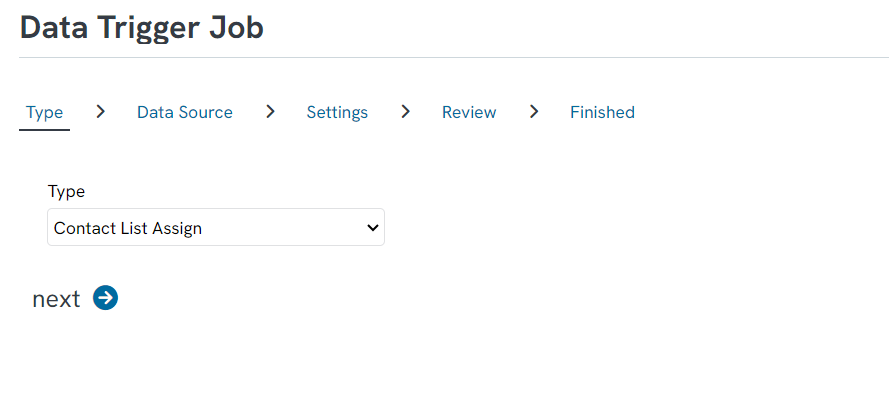
Search for the query that will be your data source. The contacts from the query will be added to your list.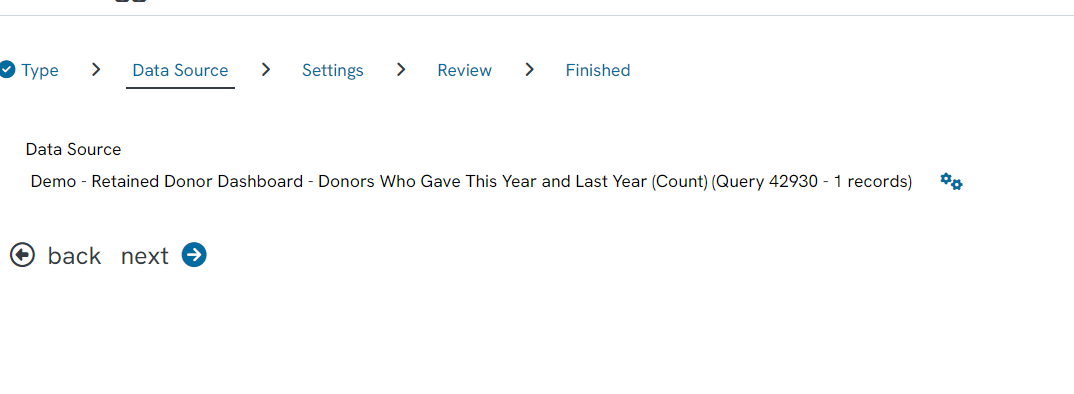
To add these contacts to a list, expand the List Assignment section and select your opt in list from the dropdown.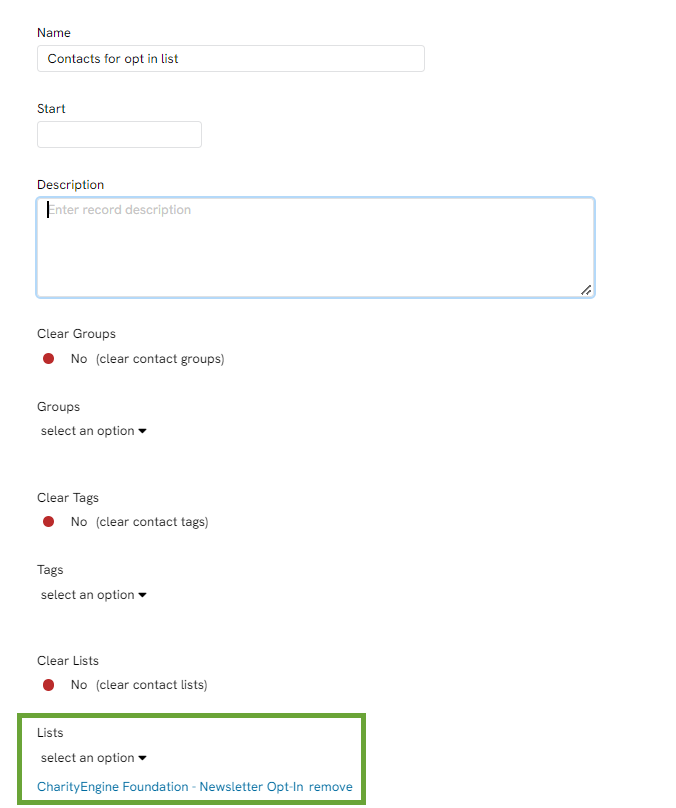
The contacts can be added to multiple lists at the same time by selecting a new list from the dropdown and clicking add. All lists the contacts have been added to will show in the assigned opt-in list field.
If you also want to assign the contacts to a group or tag, expand the respective sections and follow the same steps listed above for assigning to a list.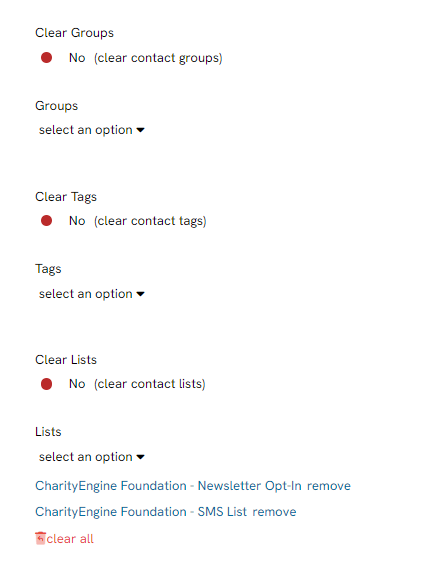
When you have finished assigning the contacts to your list, click next. You will be able to confirm your selections and save your work by clicking Finish.
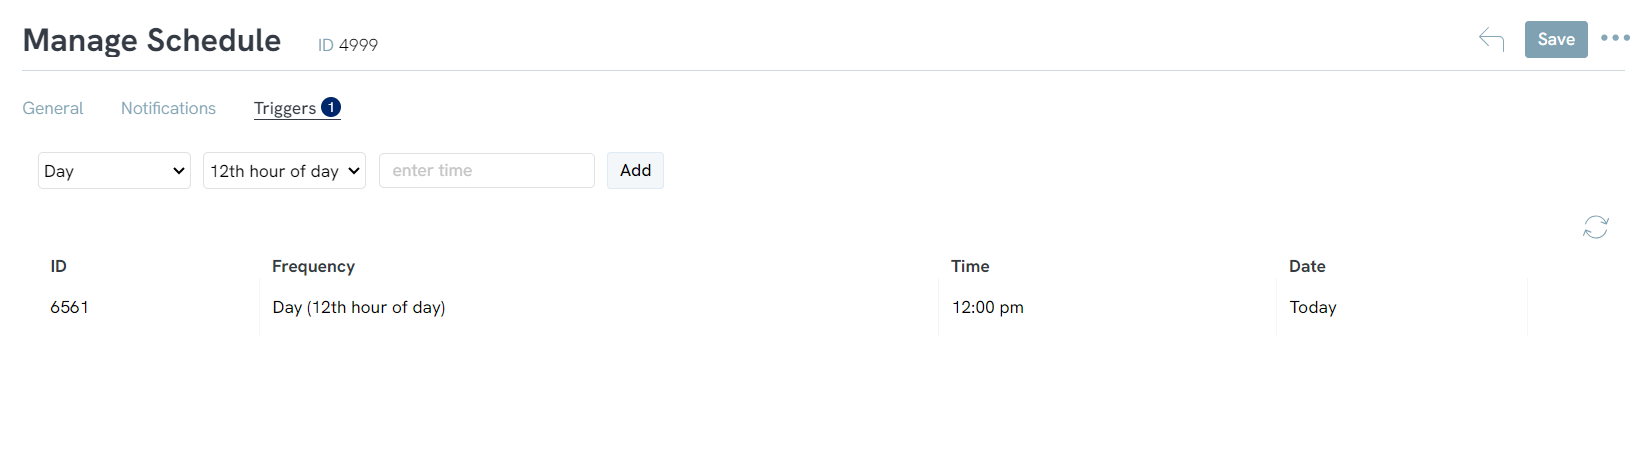
You will be able to schedule this to be triggered as often as needed once created by clicking Schedule, listed under the actions column.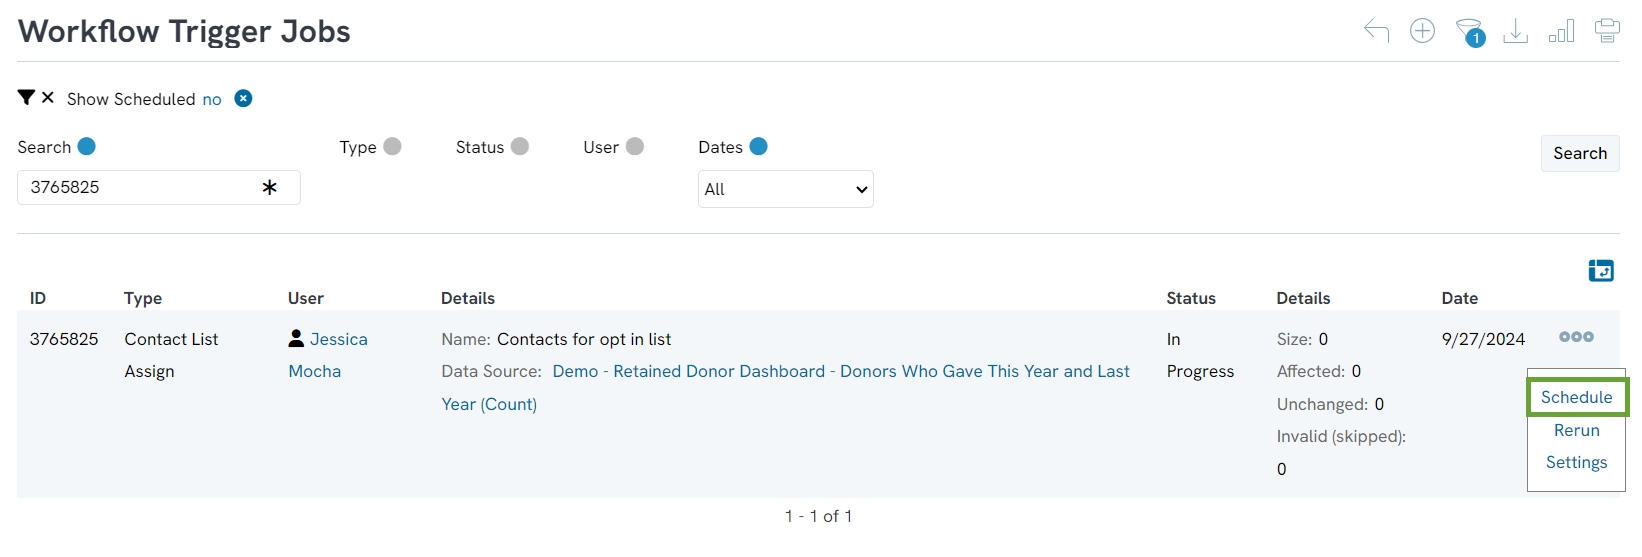
You will need to name and select a start date, then click Save.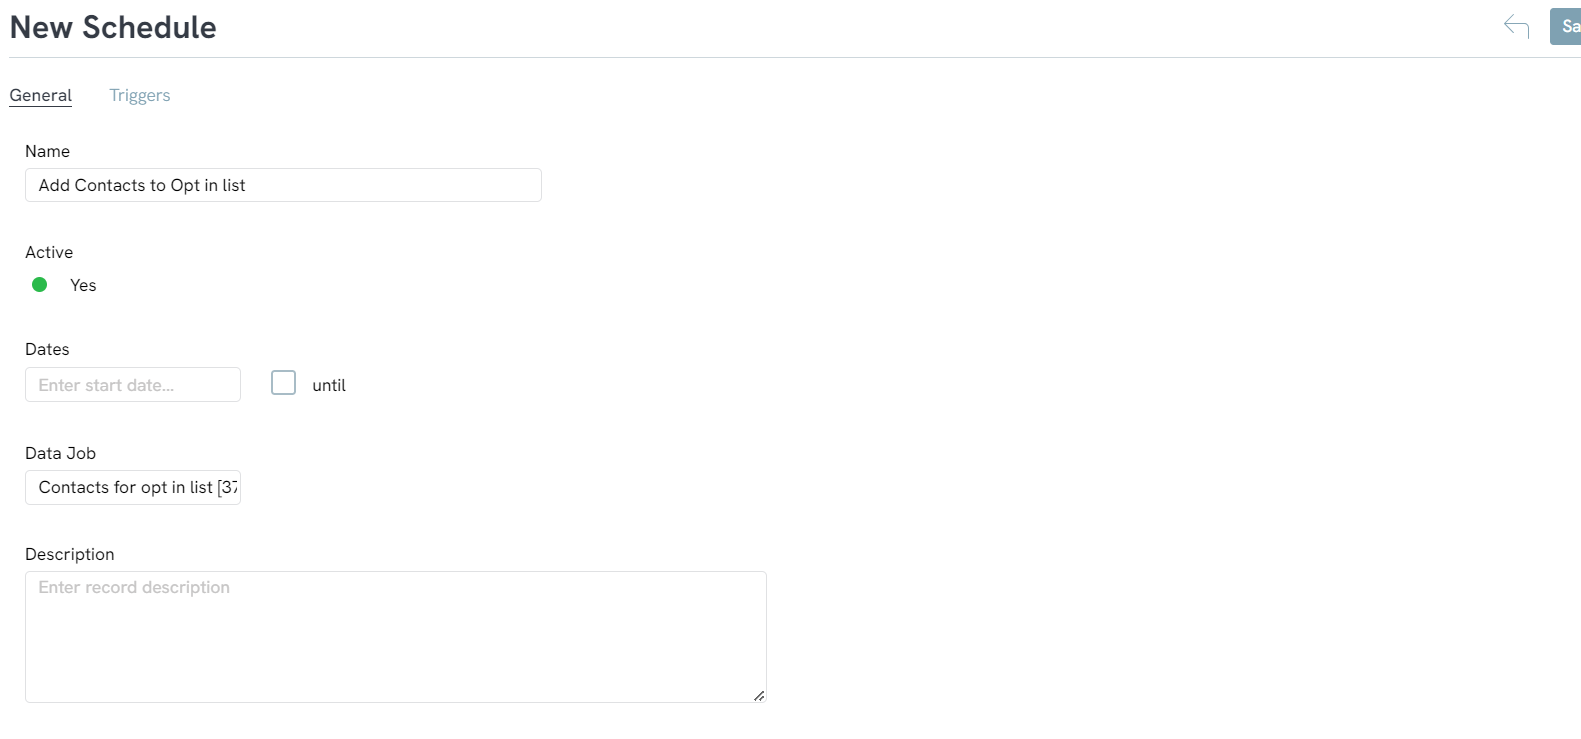
Once you click save, navigate to the Triggers tab and you will be able to configure the frequency this will be scheduled. The first dropdown will allow you to select how often it will be triggered and the second dropdown will allow you to select when it will be triggered. For example, if you want your list to be triggered daily, you would select Day and then select what hour of the day it will be triggered.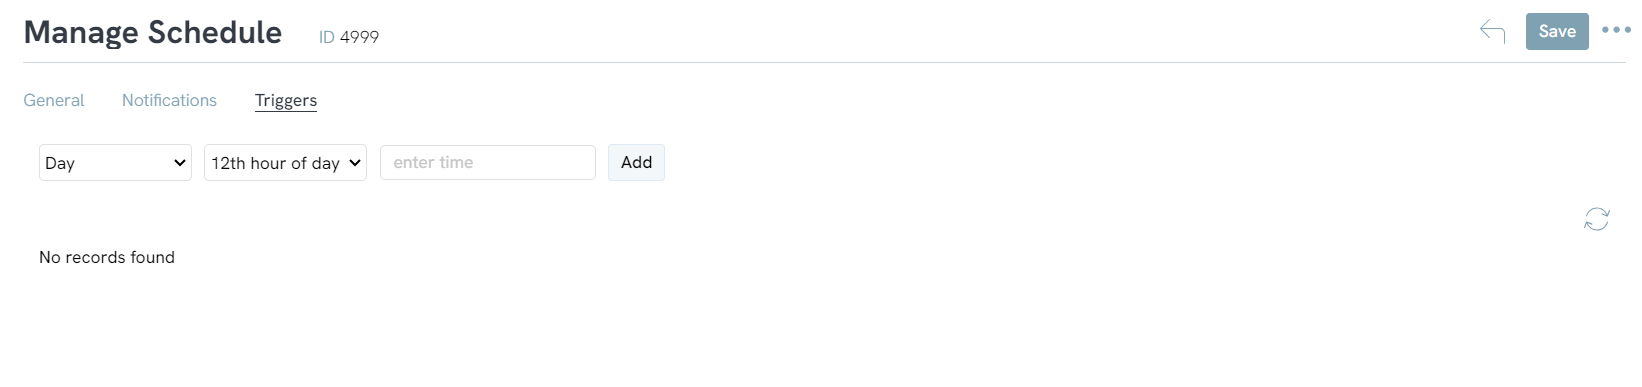
Click Add and your configuration will now be displayed.