Introduction
The trigger tool can be used in a variety of different ways.For example, the tool can be used to clear tags, groups, and lists from assigned contacts. If the users only want contacts to be assigned to one list or one group at a time, this tool will allow the user to easily remove all groups and lists assigned to those contacts. This can be done as often as needed by partnering with a scheduled job.
Table of Contents
Instructions - Locating the Affected Population
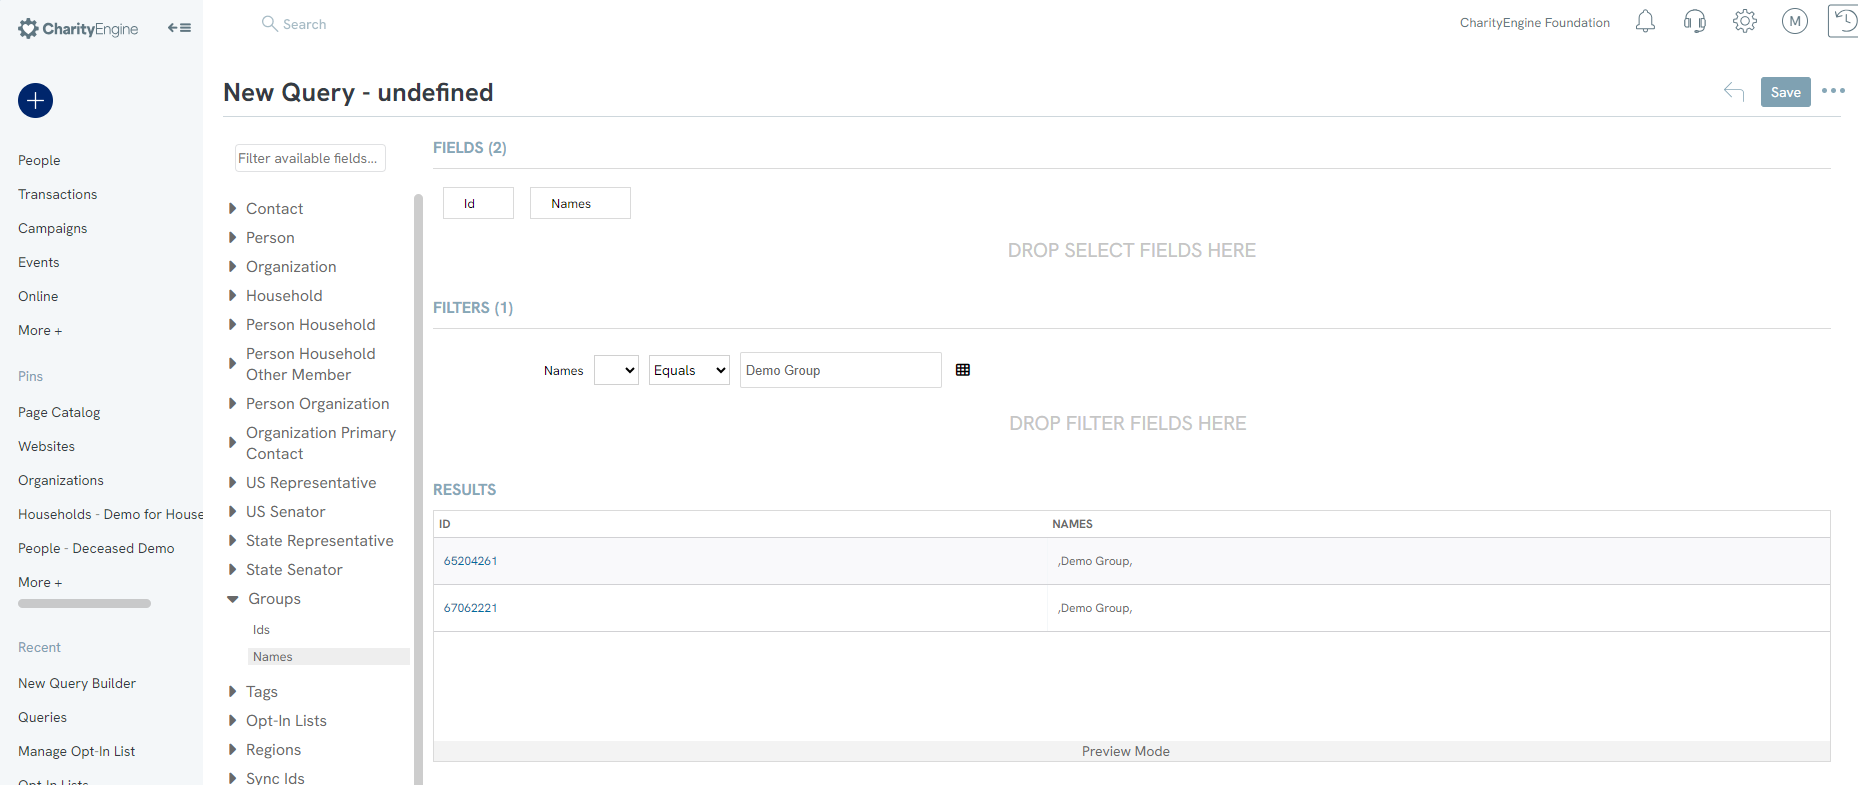
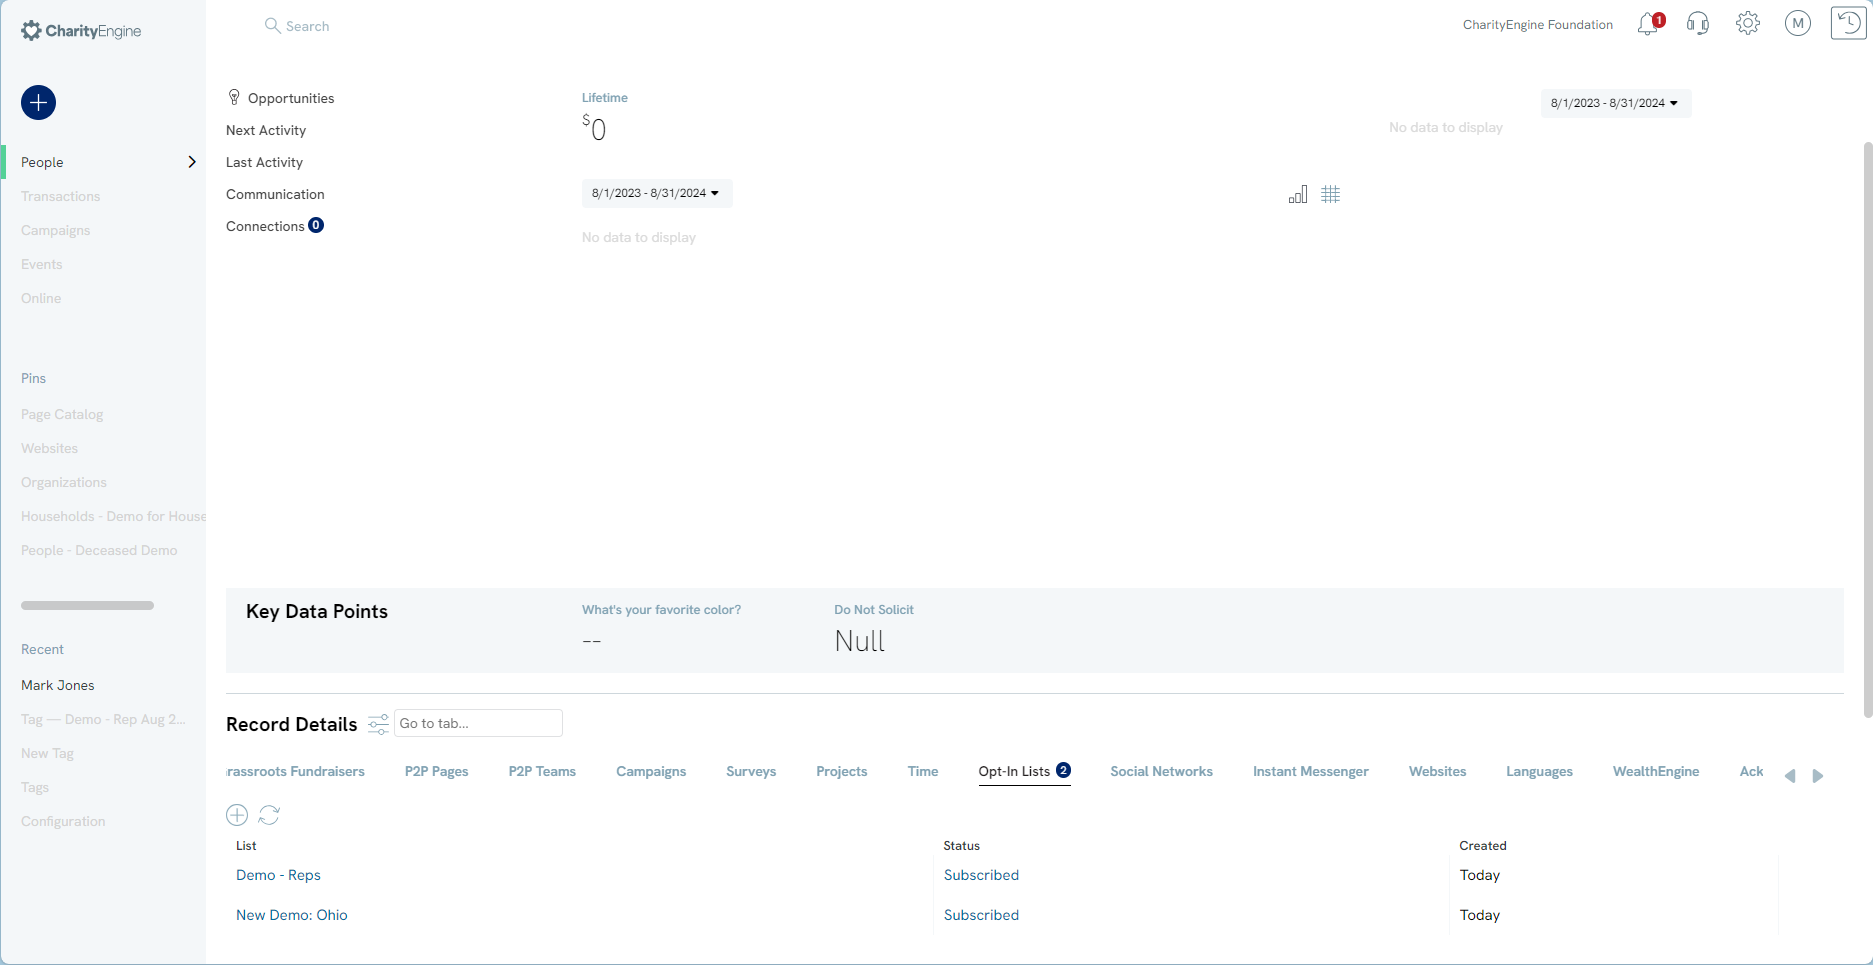
In this use case, the user will identify contacts with the Opt In list of "Demo - Reps" and remove all opt in lists from those contact records.
 ).
).
Instructions - Bulk Removal Steps
).
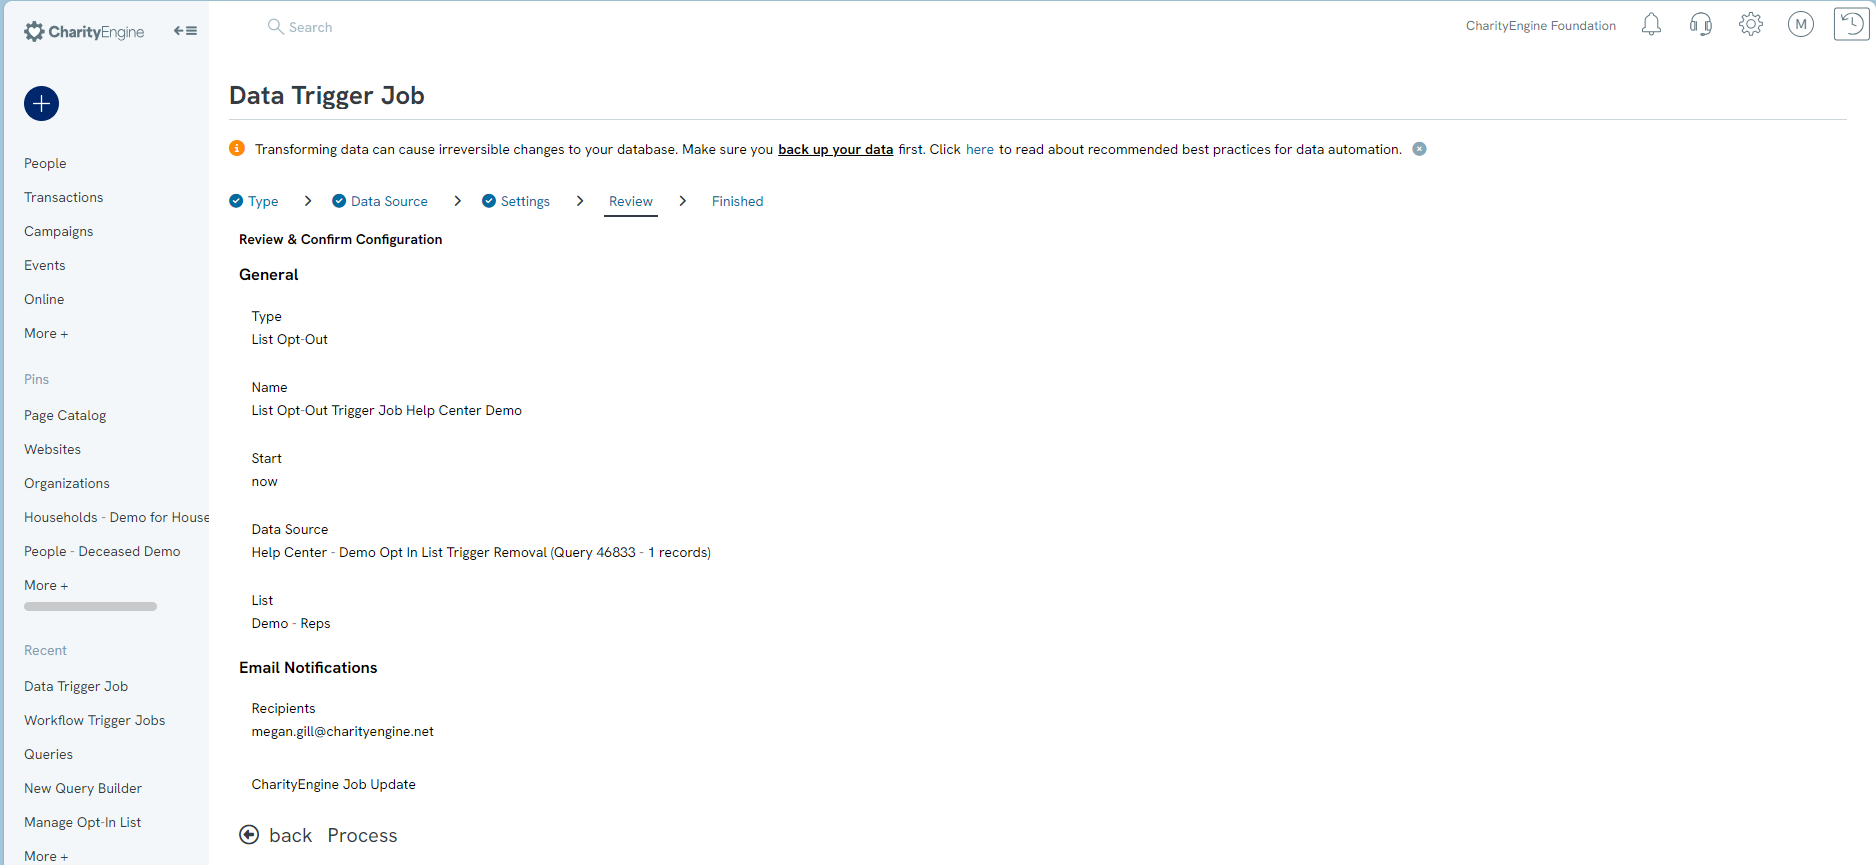
Step 3: Search for the query created above for removal of the list (or group/tag). Click next to continue.

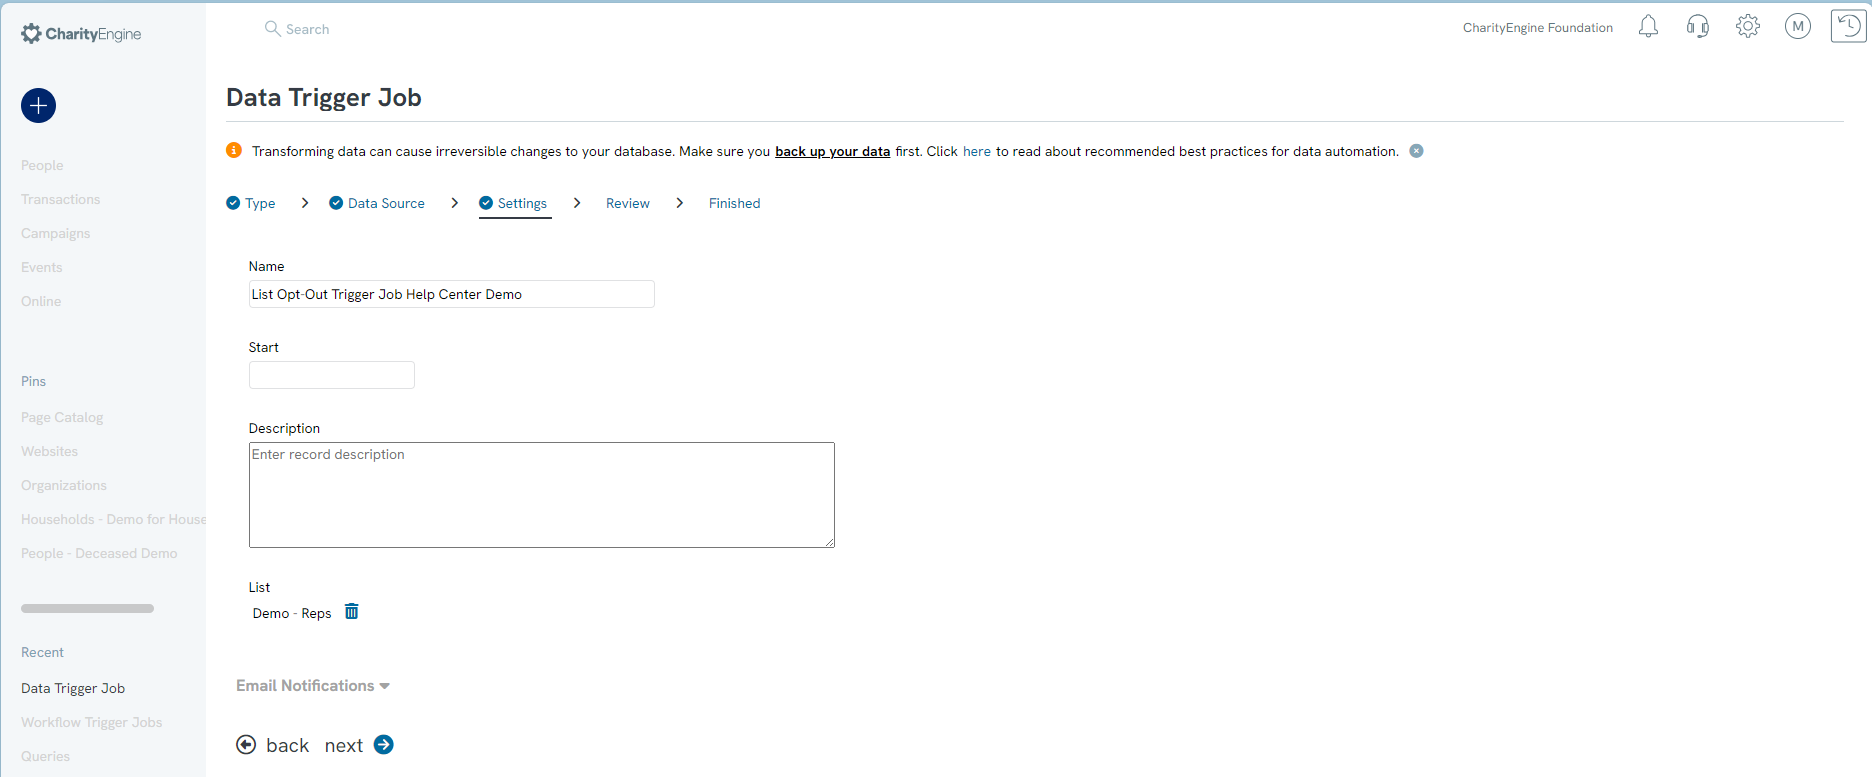
Step 4: Name the job and select a Start time if applicable.

Instructions - Scheduling a Recurring Bulk Removal
Once the initial job has been executed, the user can schedule the removal job as a recurring activity.
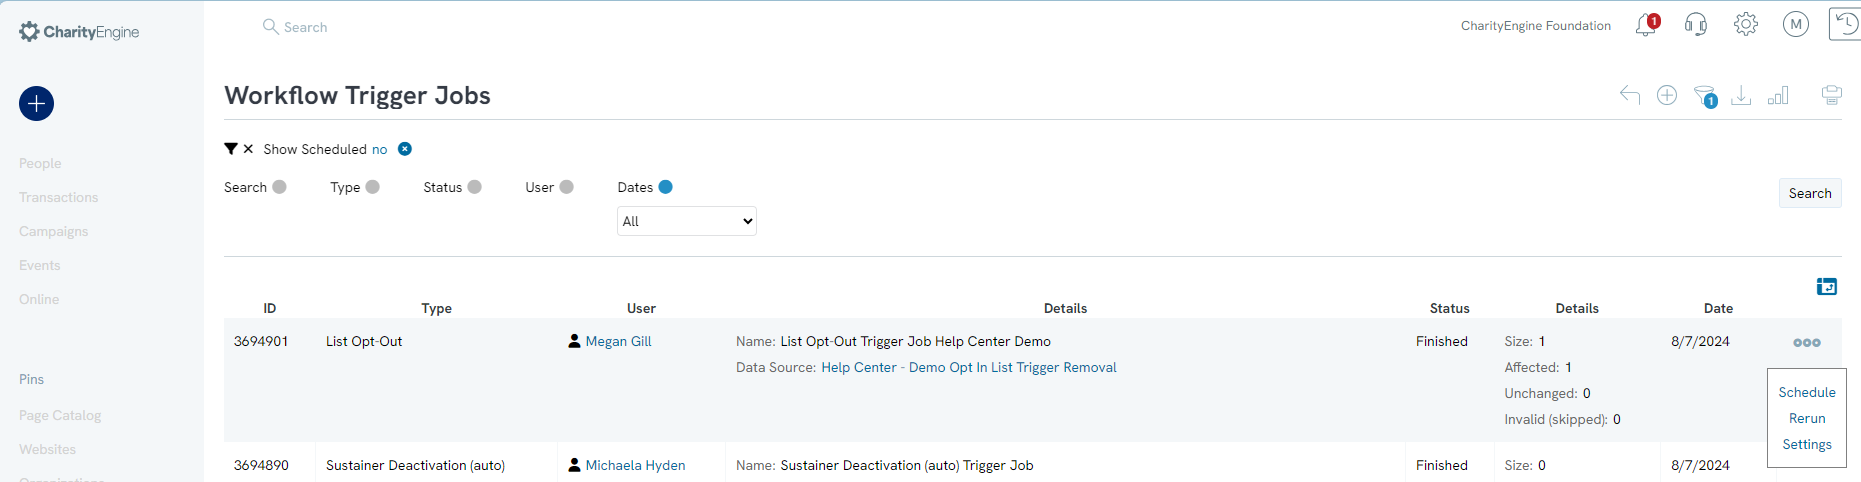
Step 1: To do this access the Automation & Workflow App > Workflow > Triggers > locate the job executed in the steps above.
Step 2: From the Actions column select Schedule
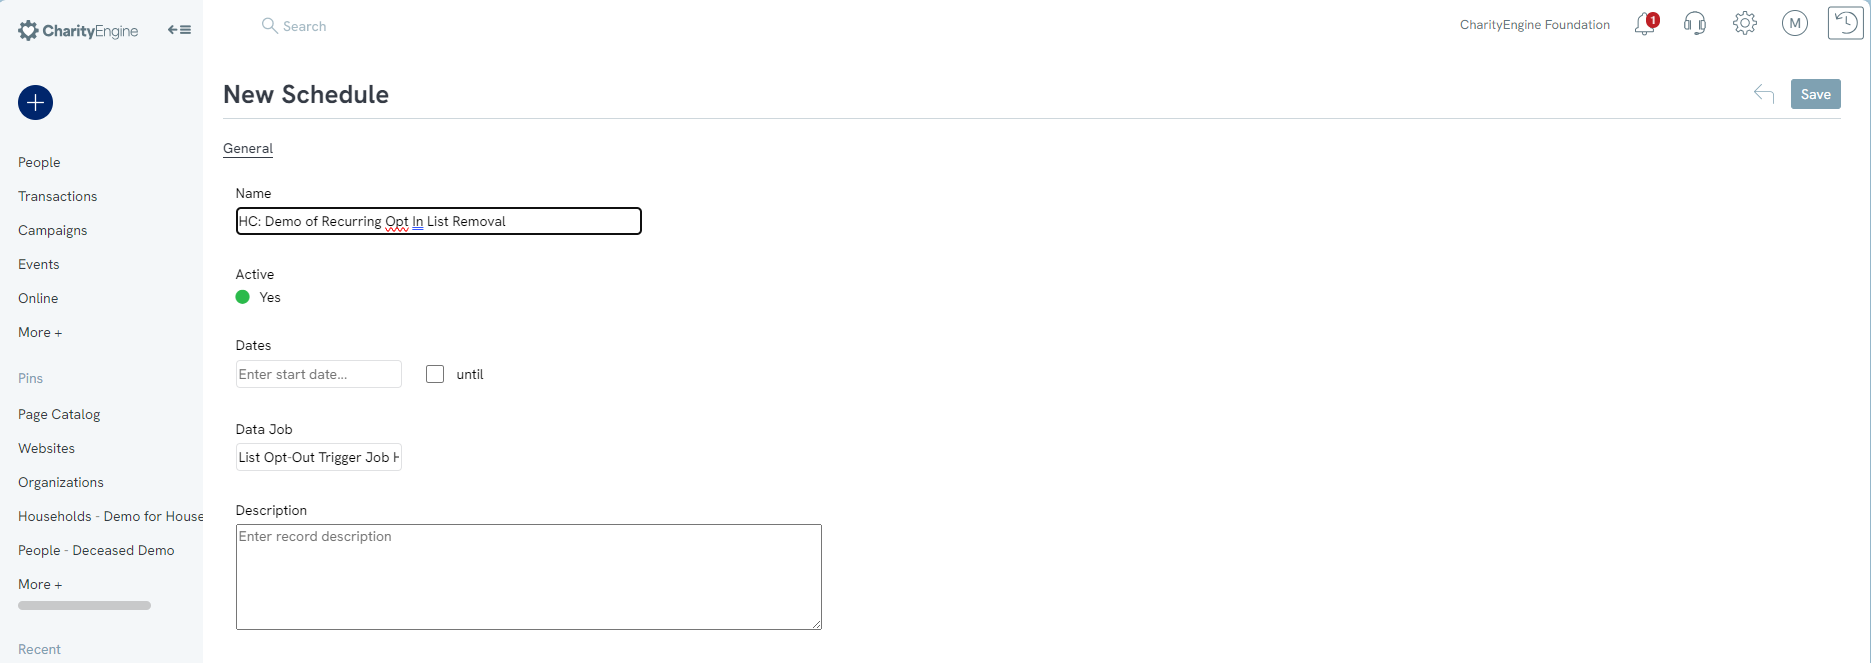
Step 3:Name the schedule, select a start date if appropriate and description if needed. Click Save to secure.
Step 4: Navigate to the Triggers tab.Use the first dropdown to select the frequency and the second dropdown to select when the action will be completed. For example, if the user wants the assignment to be removed weekly, select the week and then select what day the action will be completed.
Step 5: Click ADD and the selection will appear.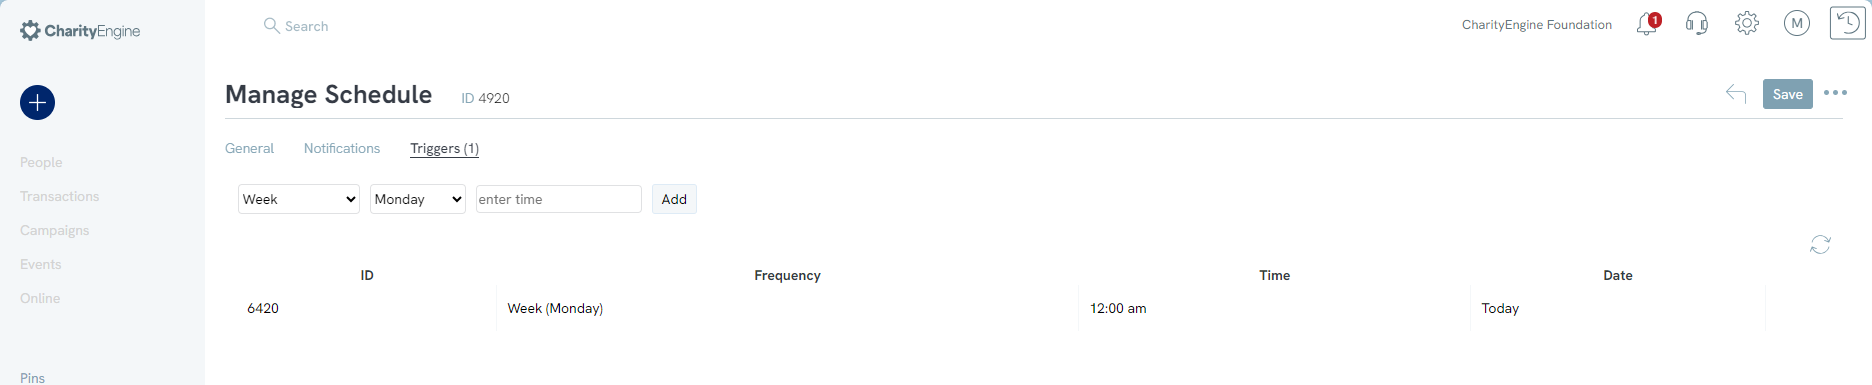
Note: The user can modify or deactivate jobs in the future by accessing the Automation & Workflow App > General > Job Schedule
FAQs & Additional Reading
Q. I would like to only remove one opt in list and not all opt in lists. How can this be achieved?
A. This is feasible through support of the Import Job functionality. See our Help Center Article Assigning Groups, Tags, and Opt- In Lists Through Importer. See the FAQs for use of the "Opt-In List (csv) (removal)" field.
