Table of Contents
Prerequisites
Before importing contacts and assigning them to a group, tag, or opt-in list, make sure the group/tag/opt in list has been created. Creating these attributions ahead of time will make it easier when selecting the attribution.
- If you need assistance in creating an opt-in list, read this article
- If you need assistance in create a group or a tag, read this article
Instructions
To assign these attributes while importing contacts:
Step 1: Navigate to Automation & Workflow App > General > Import and Export
Step 2: Click the PLUS icon to Create New
Step 3: Select Import, just as when completed upon initial importing


Step 4: The user will see three expandable sections under the Import To Drop-down named CRM Group Assignment, CRM Tag Assignment, and List Assignment. Expand the sections using the arrow beside the name of the section.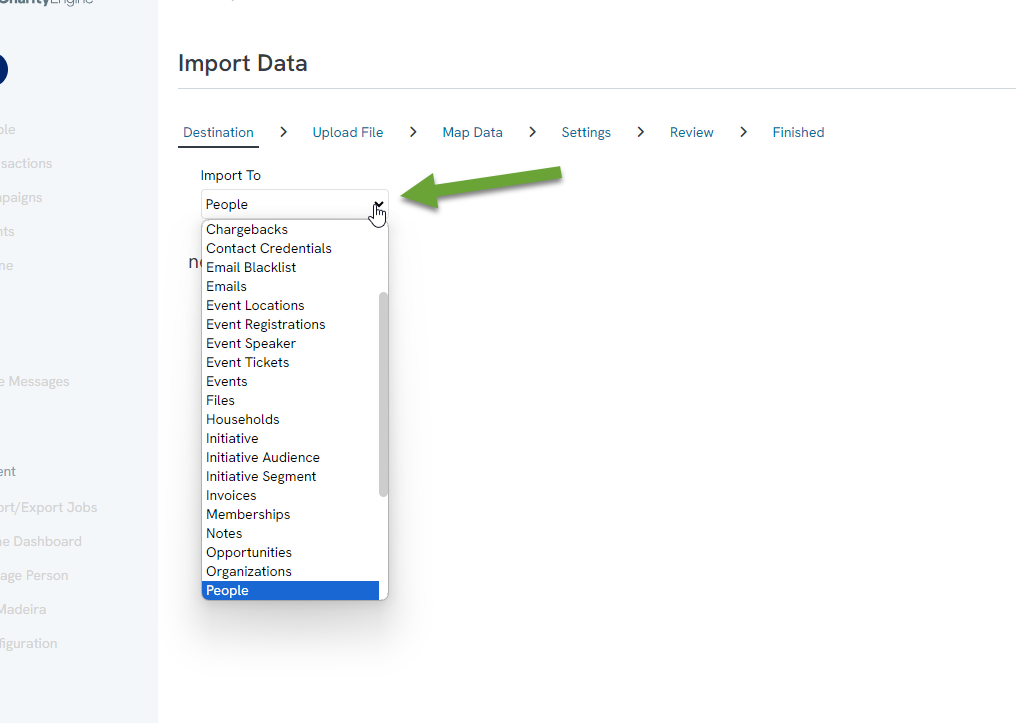
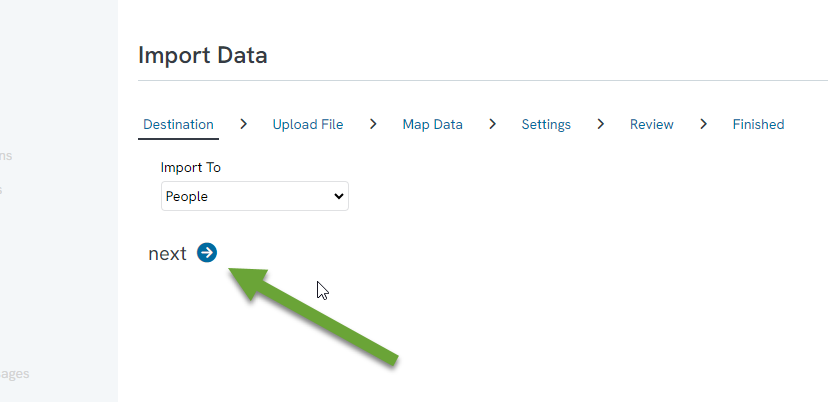
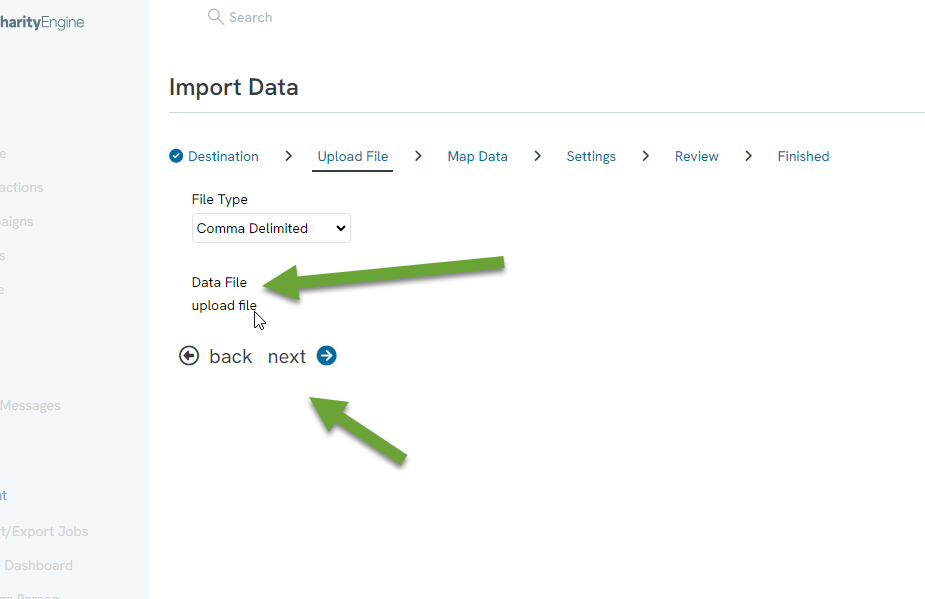
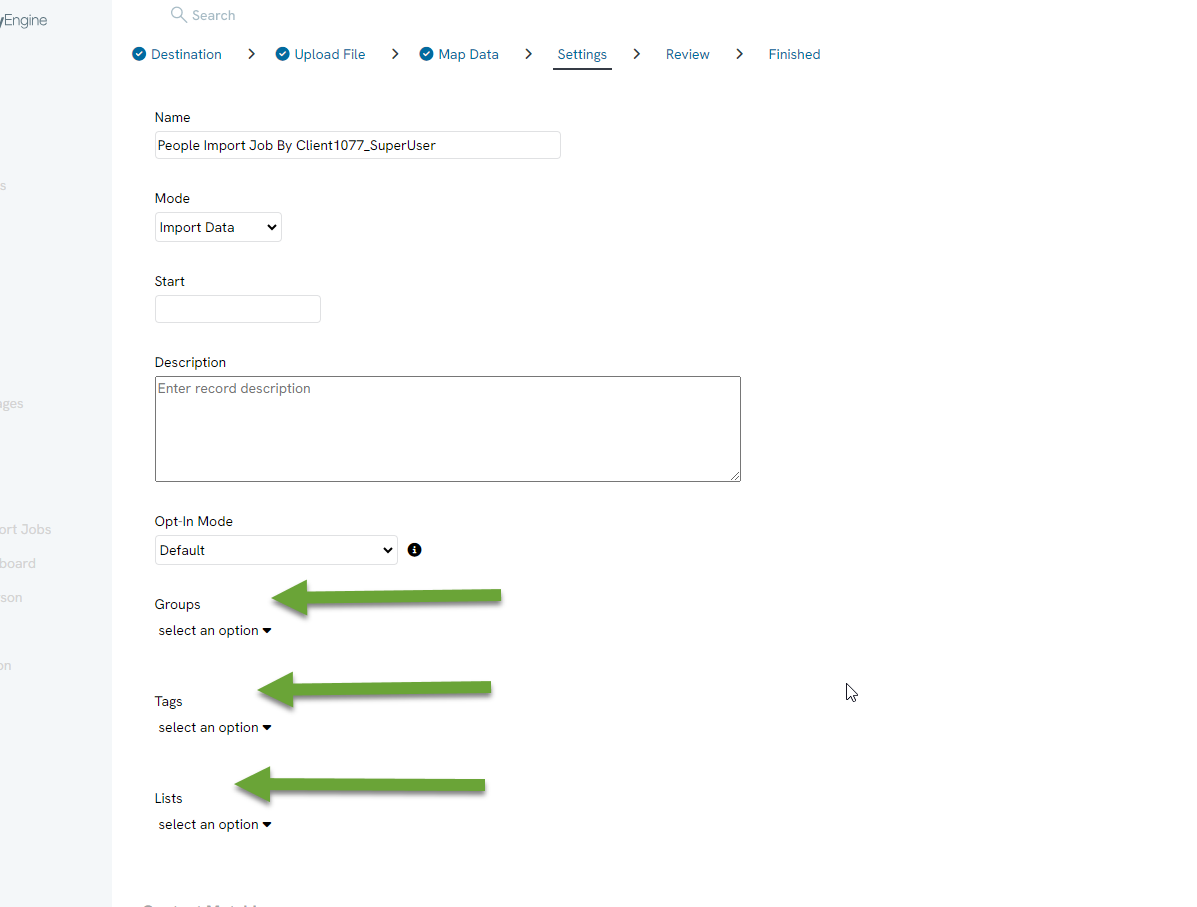
Step 5: Assigning and creating a Group, a Tag, and an opt-in list are done the same way. If the users has already created these attributions, use the drop-down to select the group.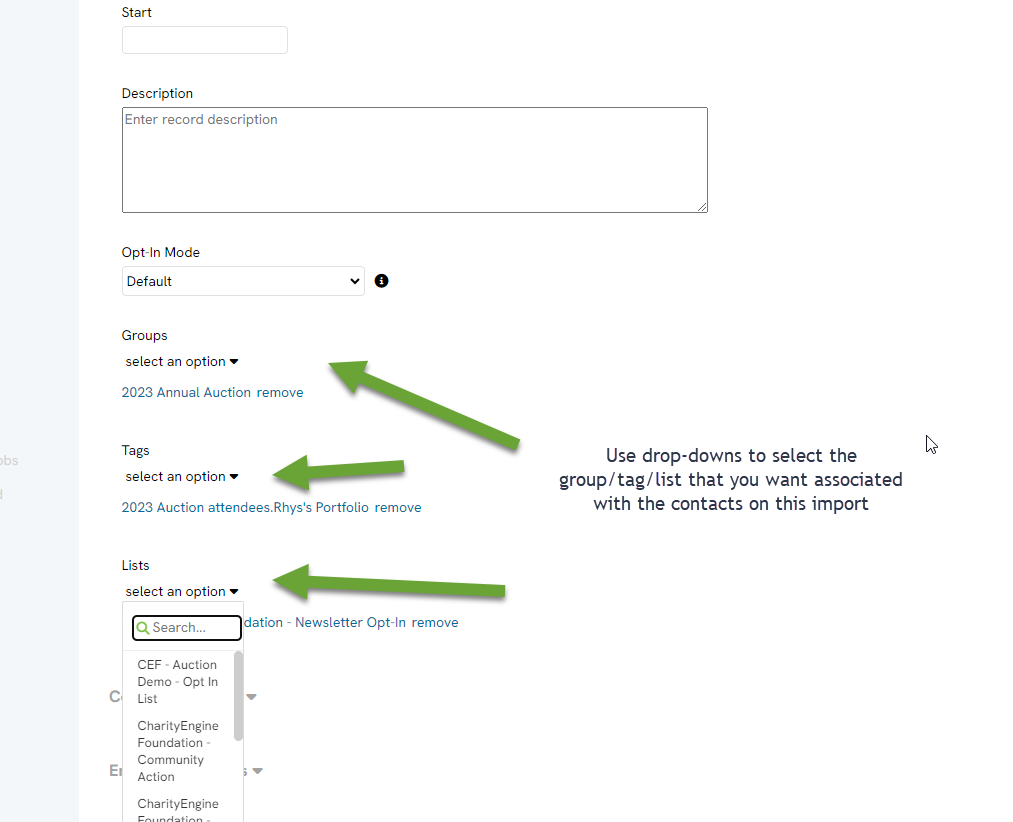
Note: If the user assigns the group, tag, or opt-in list to the contact record using the above method, all contacts within the import will be appended with the select attribution. .
FAQs & Additional Reading
Q. What is the process to bulk remove contacts from an Opt In List?
A. Similar to importing, the Import/Export feature will allow users to bulk remove from one or more opt in list. To begin, collect all contacts IDs and types (person, organization, or household) which should be removed from the Opt In List (name or ID). Navigate to the Automation & Workflow App > General > Import/Export > Create New > Import. In this use case, the steps will remove Opt In List XXX from all People records. From the Import To: select People > NEXT. Upload the file and then you will be able to map the fields. Click on the appropriate drop-down menus to map the fields for Contact ID and Opt-In List (csv) (remove) (for use with the name of the opt in list - alternatively use Opt-In List Ids (csv) (remove)).
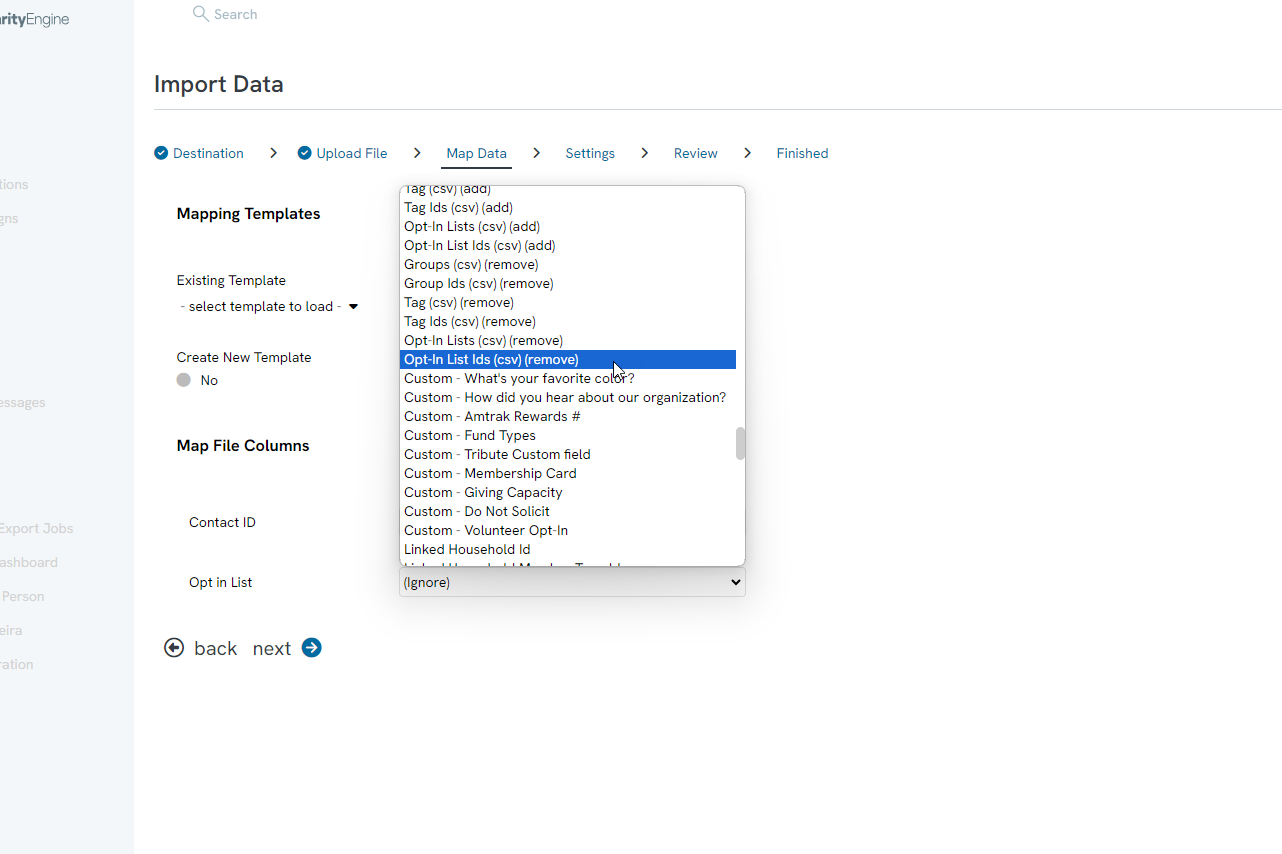
Next, click download import template. Enter each contact ID and opt list name (or opt in list ID if selected). Each line should contain one Contact ID and one Opt In List.
Save the import template to the local drive as a CSV file. Click NEXT and upload the file as a CSV. Continue with workflow steps.
