Introduction
There is the ability to easily create a new CMS website and its associated pages in one place!
Table of Contents
Prerequisites
This option is available with CMS contract features. For more information, please contact your account manager for pricing and details.
Instructions: Create a New Page
Step 1: Navigate to the Online App > Websites > + icon.
Step 2: On the General tab, fill in the basic information for the new website.
1. Name
2. Type: CMS is the recommended and default option
3. Active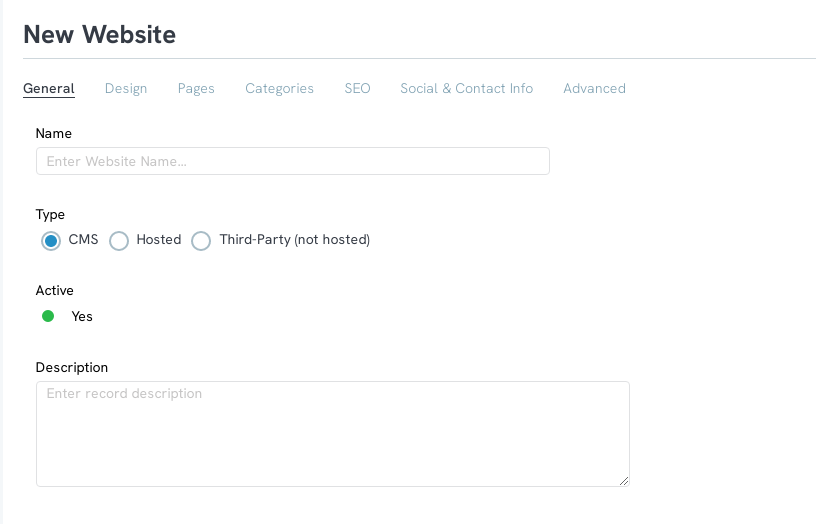
Step 3: On the SEO tab, configure the external website name and all other SEO configurations.
1. URL Mode: Choose Standard or No SEO
2. Website Name: this is the donor facing name
3. Meta Title: the title that will display in the tab of the browser
4. Meta Description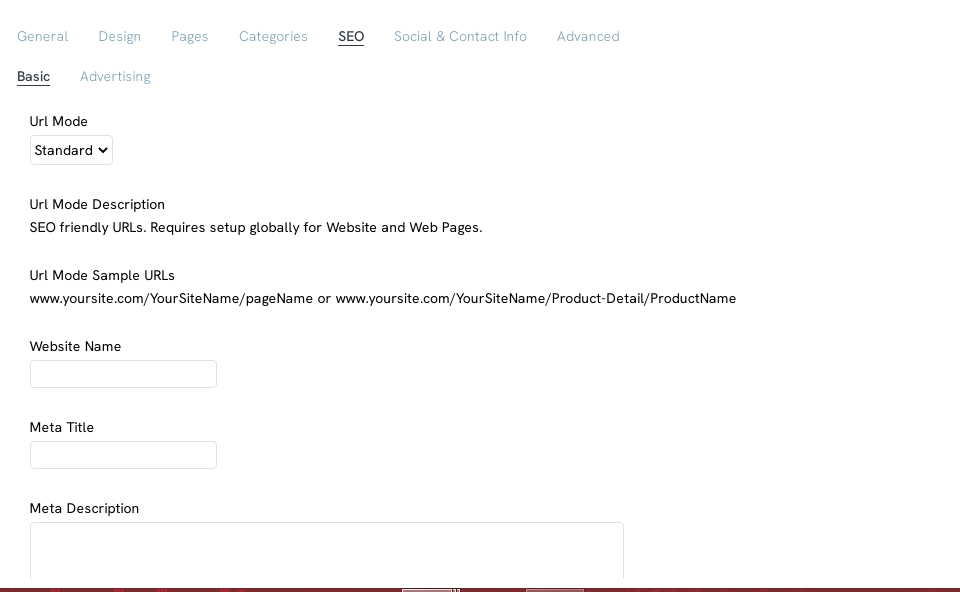
Step 4: Click Create. After clicking Create, the Pages and Categories tabs will appear. Use these tabs to configure the website further.
Instructions: Pages
Step 5: To create a new page, click on the + sign in the upper right hand corner.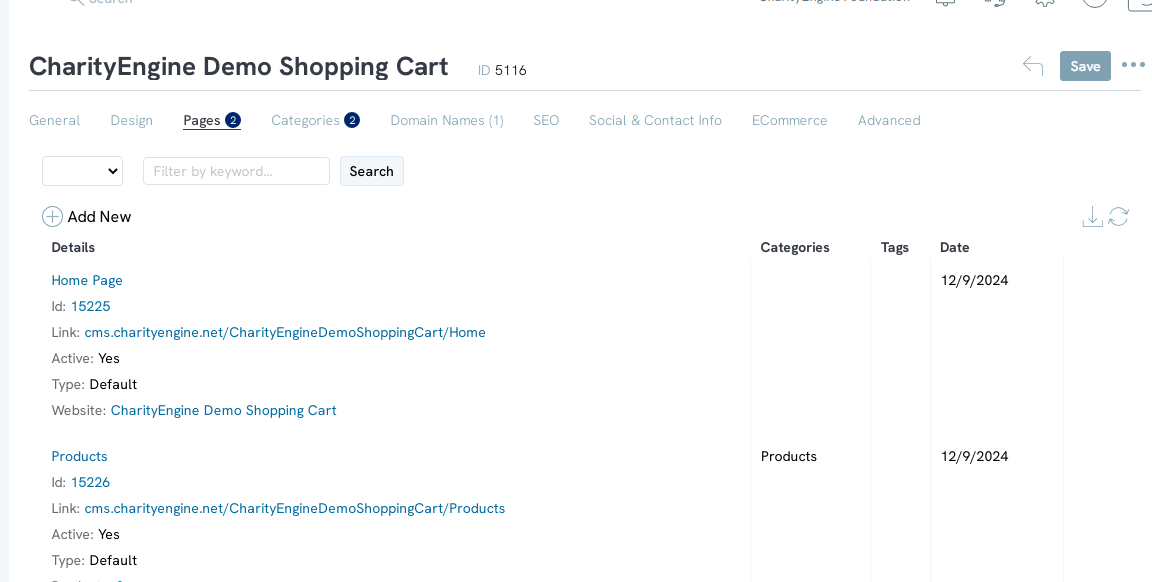
Step 6: Select the Page type. This can be customized in the configuration section with specific styles and designs for certain page types.
1. Name
2. Active
3. Type
4. Category
5. Tags
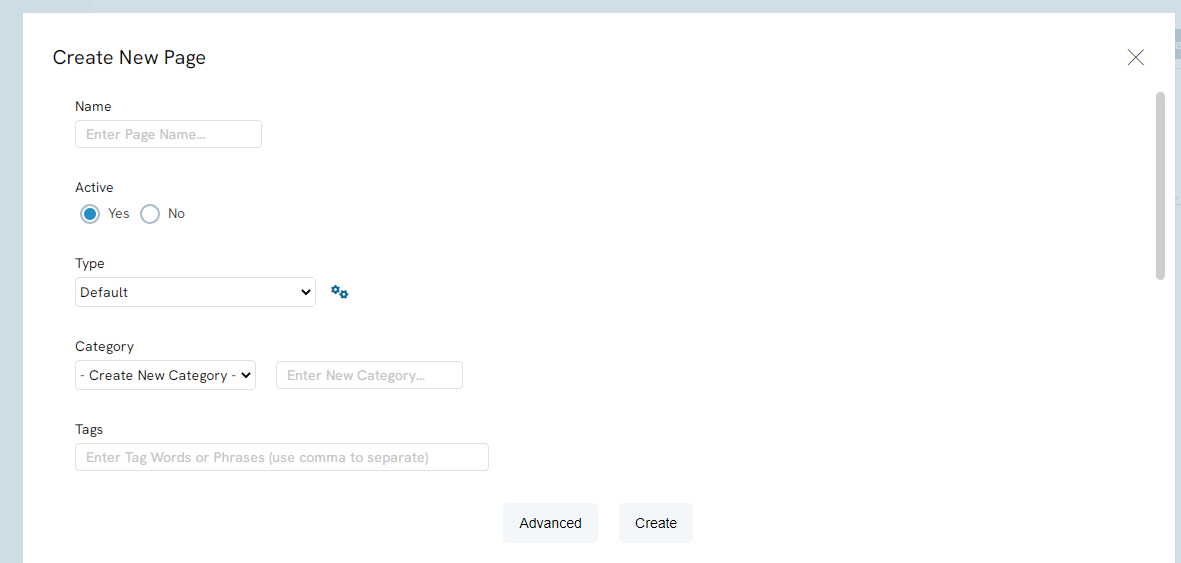
Enter the page content in the editor and click Create. After clicking Create, the user will see the new webpage listed on the pages tab.
Hint: The pages tab is searchable.
Instructions: Categories and Tags
Users can create a new category from the Create Page tab by adding it to the Enter New Category box. This way it is easier to find similar content when reviewing a specific page.
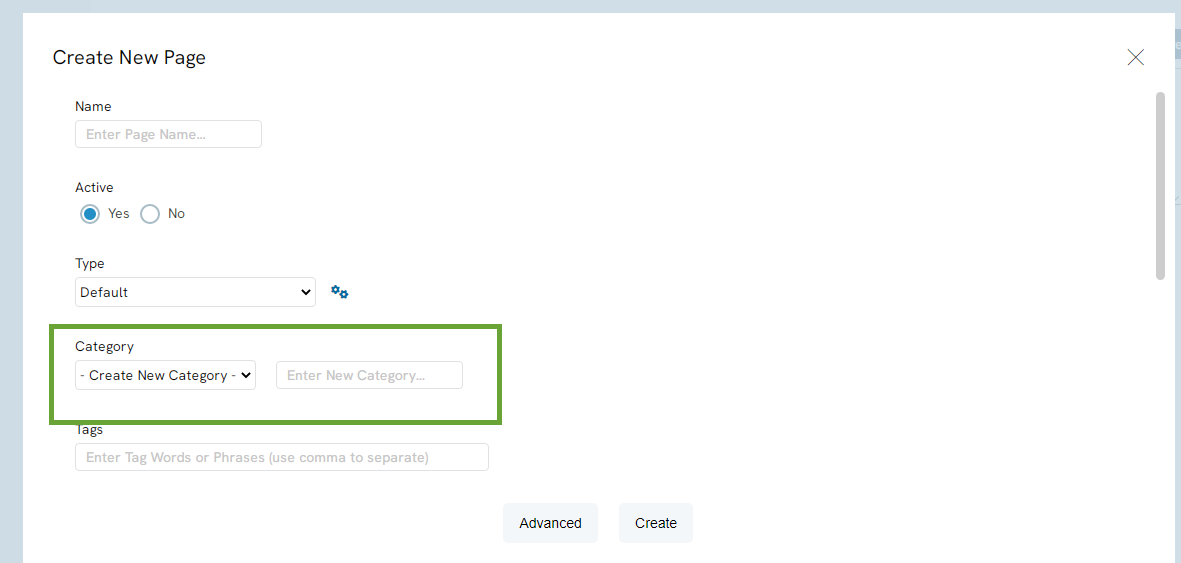
You can also select from an existing category by clicking on the down arrows.
Tags can also be created when you are creating a page. Simply enter tags separated by commas.
In the Categories tab within the CMS website, users can review and add other categories.
Create new categories by clicking on the + sign in the upper right hand corner. Fill in the new information in the pop-up box that appears.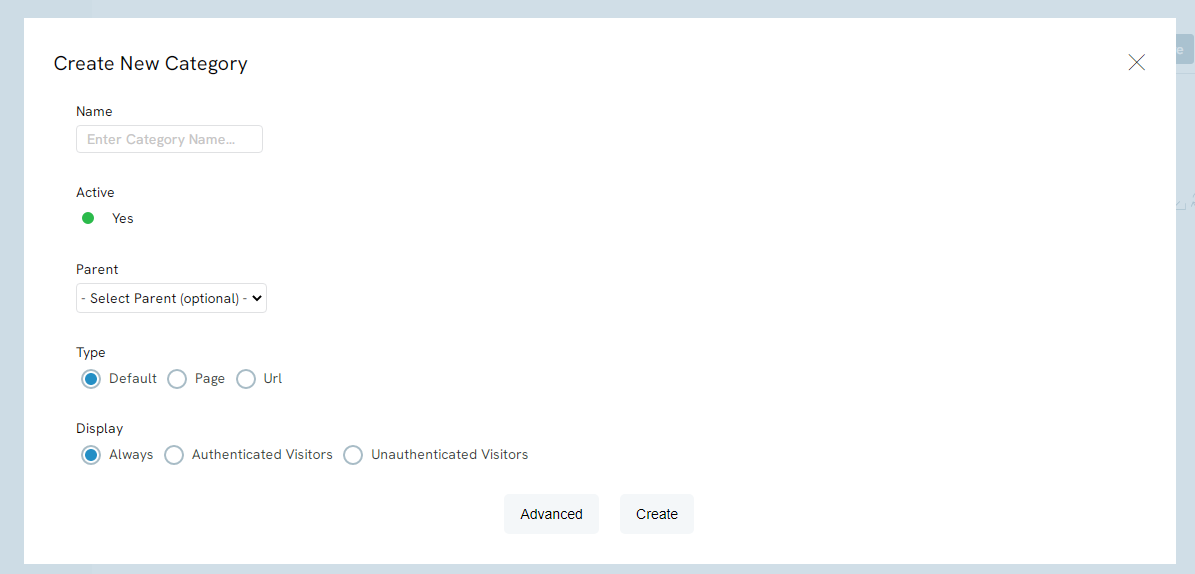
Hint: Categories are searchable.
