Introduction
In CharityEngine, Promos/Discounts feature empowers you to create unique codes tailored to your needs. These codes can be associated with various user-facing channels like Web Forms, Event Tickets, and more.
With Promos/Discounts, you have the flexibility to authenticate users and, if desired, offer discounts on ecommerce transactions. Moreover, these codes can serve as access keys, restricting entry to specific online forms exclusively to users with valid Promo Codes.
Explore the possibilities with Promos/Discounts and enhance your user experience with CharityEngine.
Table of Contents
- Introduction
- Best Practices When Using Promotional Codes
- Instructions: Creating a Promotional Code for Events and Web Forms
- Instructions: Creating a Promotional Code for Peer-to-Peer Events
- Searching for Promos
- View or Edit a Promo
- Delete a Promo
- Add a Promo Code to a Web Form
- FAQs & Additional Reading
Best Practices When Using Promotional Codes
When using promotional codes for non-profit fundraising, it's essential to follow best practices to ensure effectiveness, transparency, and compliance. Here are some key considerations:
1. Clear Communication: Clearly communicate the purpose and terms of the promotional code to your supporters. Provide information about how the code will be used, what benefits it offers, and any limitations or restrictions.
2. Targeted Audience: Use promotional codes strategically to target specific segments of your supporter base. Tailor codes to different donor segments or fundraising campaigns to maximize their impact.
3. Personalization: Whenever possible, personalize promotional codes to make supporters feel valued and appreciated. Consider using supporters' names or referencing their past contributions in the code.
4. Limited-Time Offers: Create a sense of urgency by offering promotional codes with limited-time validity. Encourage supporters to act quickly to take advantage of the offer.
5. Exclusive Benefits: Offer exclusive benefits or incentives to supporters who use promotional codes, such as discounts on event tickets, access to exclusive content, or special recognition.
6. Track Performance: Monitor the performance of promotional codes to assess their effectiveness and make data-driven decisions for future fundraising efforts. Track metrics such as usage rates, conversion rates, and revenue generated.
7. Compliance: Ensure compliance with relevant regulations and guidelines governing fundraising activities, including tax laws and regulations related to charitable giving and promotions.
8. Transparency: Be transparent with supporters about how promotional code usage impacts your fundraising efforts. Clearly communicate how funds raised through promotional code campaigns will be used to support your organization's mission.
9. Test and Iterate: Experiment with different types of promotional codes, offers, and messaging to identify what resonates most with your supporters. Continuously test and iterate your approach based on performance data and supporter feedback.
10. Thank Supporters: Show appreciation to supporters who use promotional codes by acknowledging their contributions and thanking them for their support. Consider sending personalized thank-you messages or offering special recognition for their generosity.
By following these best practices, you can leverage promotional codes effectively to drive fundraising success for your non-profit organization while maintaining transparency, compliance, and supporter satisfaction.
Instructions: Creating a Promotional Code for Events and Web Forms
To create a new Promo, follow these steps:
- Navigate Online > Cards & Promos > Promo Codes & Discounts.
- Click the Create New button located at the top right corner of the search promos screen. Fill in all of the required fields on each tab and enter any optional fields you wish to configure.
- Click the Save button at the top of the screen to create your new Promo code.
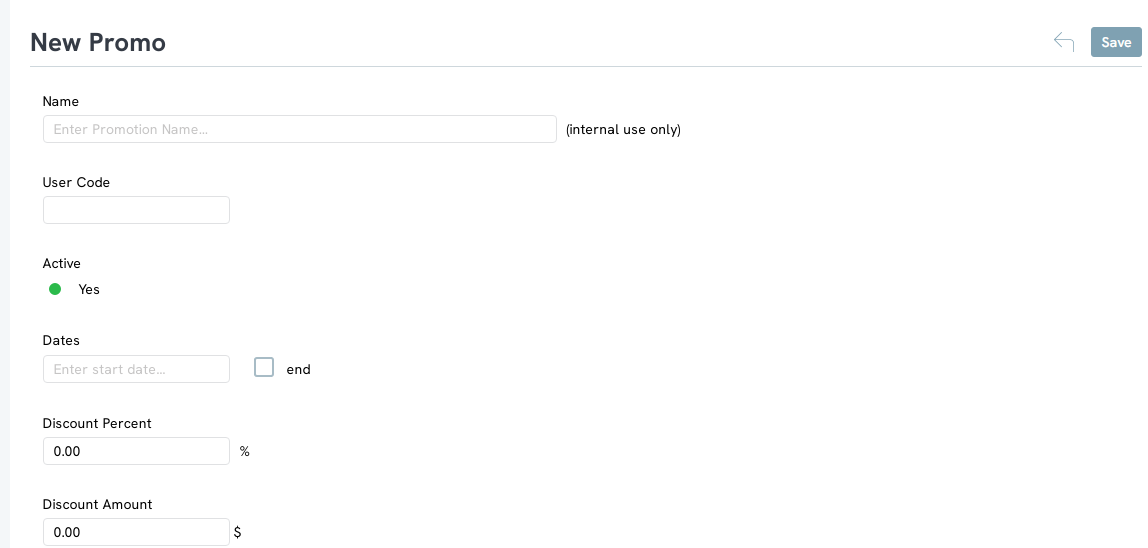
4. Navigate to Codes and select Create

5. click on the code to manage and configure any additional details.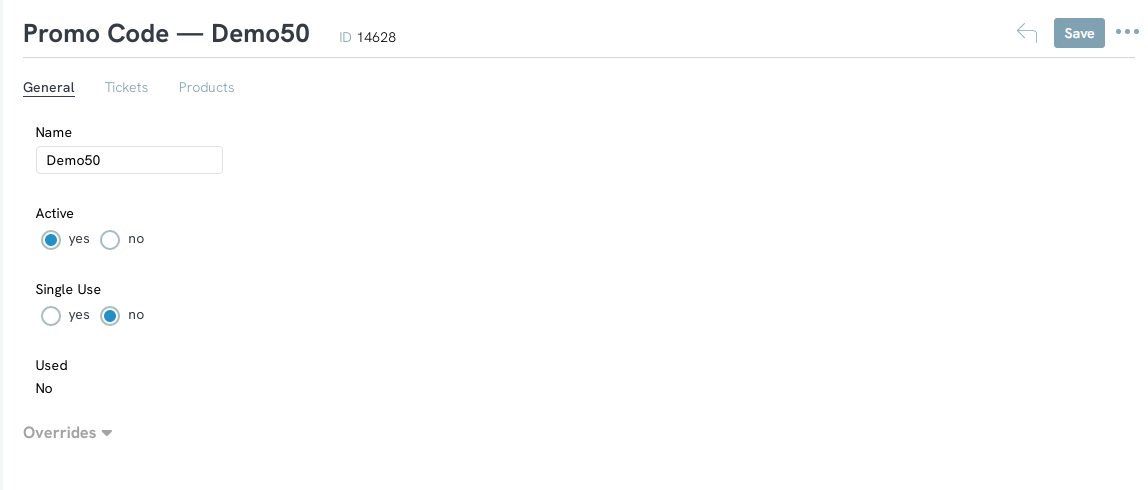 .
.
6. Assign the promo to one or more forms by navigating to Forms > select the form from the drop down > Add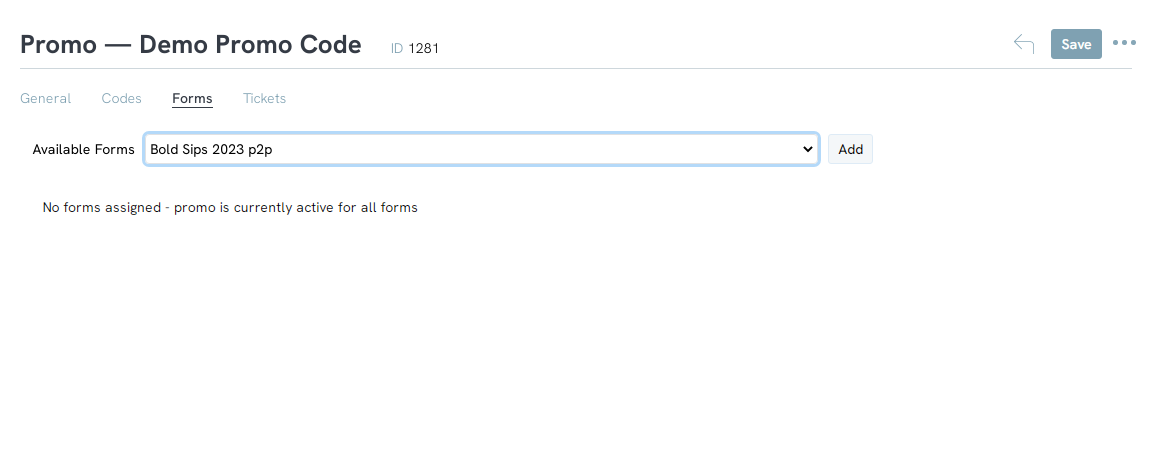
7. If Ticket Purchases Only was selected on General navigate to Tickets and select the applicable ticket from the drop down and click Add
Note: Application at the ticket level from this tab is applied to event tickets associated with the web form(s) form the prior tab
N
8. Click Save to complete your promotional code/discount code set up.
In this example, the Tennis ticket received a 50% discount using the code Demo.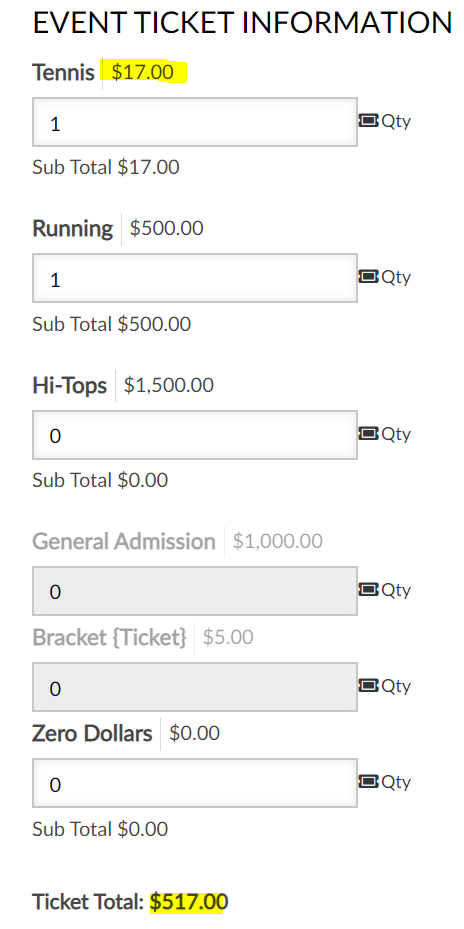

Searching for Promos
Promos are containers for a single promo or discount codes. The settings defined for a Promo apply to all of the Promo Codes that are applied to it, unless the Promo Codes explicitly overrides the Promo’s settings.
To search Promos, follow these steps:
- Navigate Online > Cards & Promos > Promo Codes & Discounts.
- Use the Quick Filter bar and the optional advanced filter at the top of the screen to enter your search criteria. The Quick Filter bar will automatically reload the search results when you change search options, while the advanced filter options require that you click the Apply button in the bottom right hand corner of the advanced search pane to refresh the search results. Hint: make sure you always check the Quick Filter default settings for Dates and Show Top when applying your search criteria.

View or Edit a Promo
To view or edit Promo settings, follow these steps:
- Navigate Online > Cards & Promos > Promo Codes & Discounts.
- Follow the instructions for searching promos/discounts to identify the Promo that you want to view or edit.
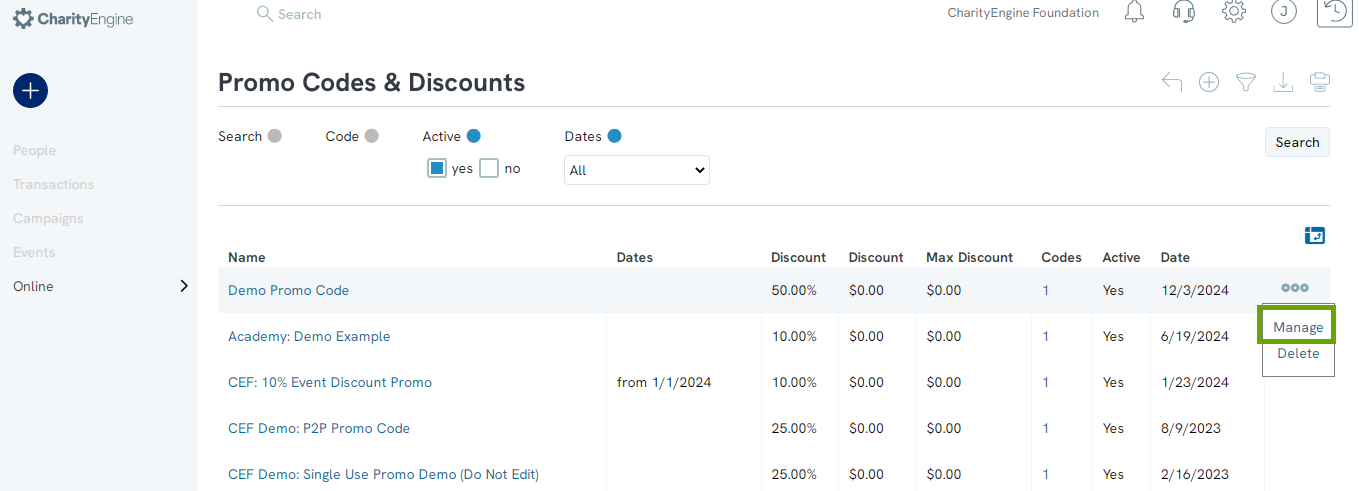
- Click the Manage link under the Actions column to the right of the Promo record you want to view or edit.
- Navigate the tabs on the Promo record screen to view or update.
- Click the SAVE button at the bottom of the screen to save your changes.
Delete a Promo
To delete a Promo, follow these steps:
- Navigate Online > Cards & Promos > Promo Codes & Discounts.
- Follow the instructions for searching promos/discounts to identify the Promo that you want to delete.
- Click the Delete link under the Actions column to the right of the Promo record you want to delete in the result set.
- Click OK when prompted to confirm your deletion of the record.
Add a Promo Code to a Web Form
To add a promo code to one of your web forms, follow these steps:- Navigate to Online > Web Forms > Locate a web form you would like to add a promo code to and open.
- Toggle to the Layout tab under the form.
- Add a custom field to a section by selecting the + icon to the right.
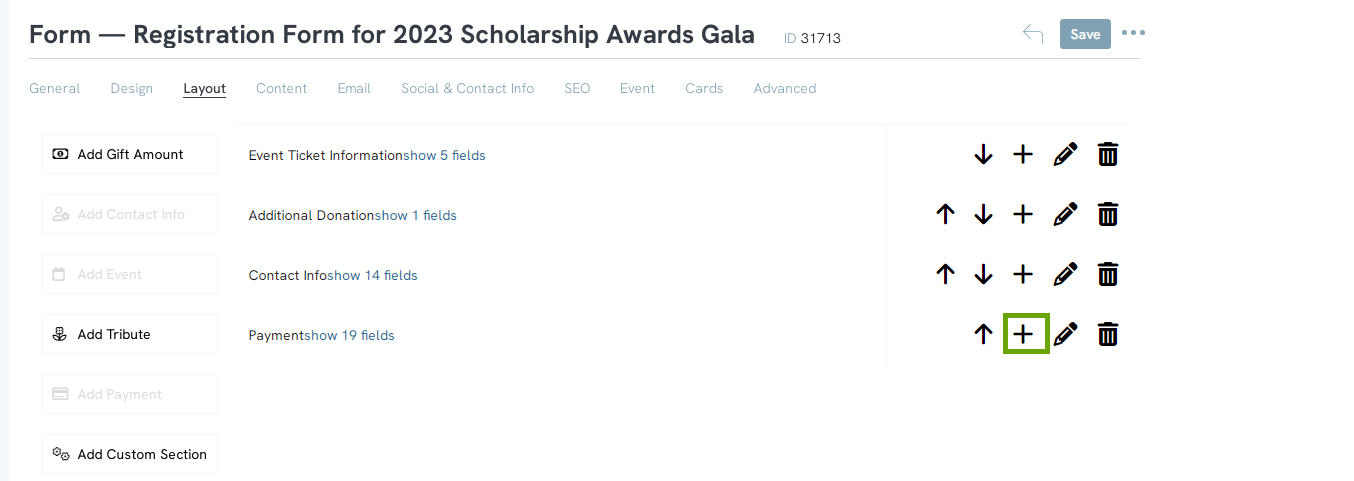
- Label to custom field "Promo" and then select Create Field.

5. Next, locate the newly created field in the appropriate section and select the pencil icon next to the field to edit.

6. Locate the Type setting under the General tab.
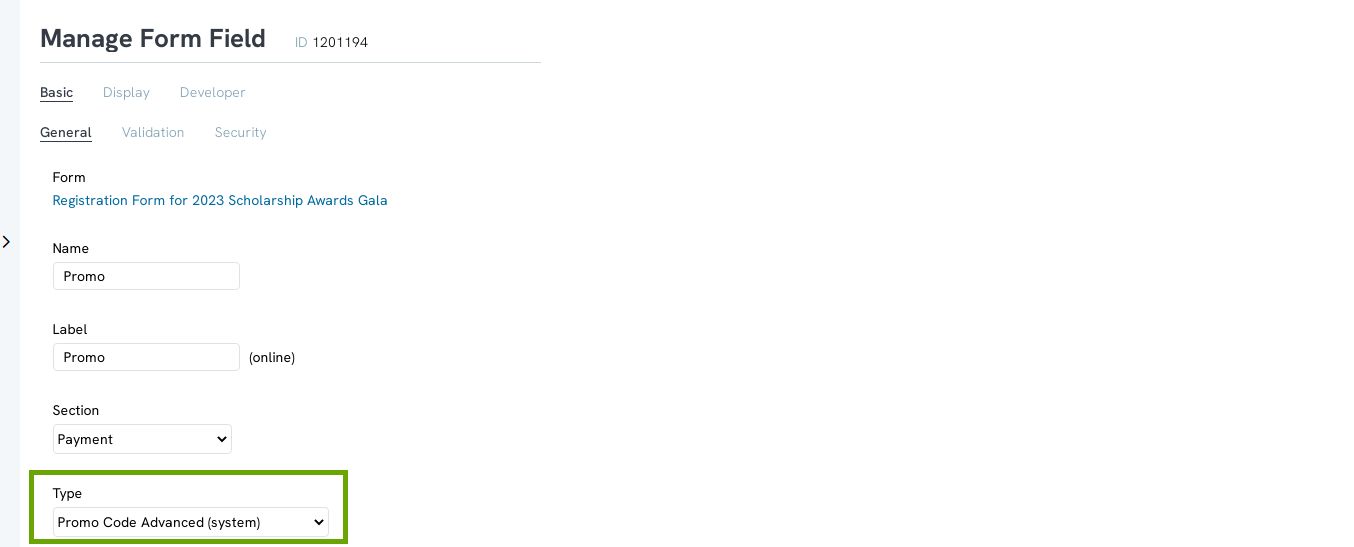
7. From the list, select Promo Code Advanced (system), then select Save.
Navigate back to your form and refresh.
