Introduction
An automated email communication series is a set of pre-planned and pre-written emails that are sent to a specific audience over a period of time. This series of emails is designed to deliver valuable content, nurture relationships, and guide recipients through a specific process or journey. Whether you want to onboard new donors, engage and cultivate donors and volunteers, promote events and campaigns, or educate subscribers, an automated email series can be an effective way to automate and streamline your communication.
Examples of automation can include:
- Welcome and Thank You series for new donors/volunteers
- Getting Started Guide to introduce your donors/volunteers to your organizational mission, activities, and events
- Personal Support and Assistance
- Exclusive offers or membership packages for donors/volunteers
- Feedback and testimonials
Remember to personalize these emails as much as possible and include relevant information based on your specific organization, mission, and opportunities. Test and optimize your email series over time to improve engagement and conversion rates. And leverage automated activity assignments to supplement a personal out reach through members of your donor services team.
This article aims to guide non-profit organizations in understanding and implementing effective communication drip series, emphasizing the importance of storytelling, personalization, automation, and relationship-building in nurturing engagement and support for their cause.

Table of Contents
Prerequisites
- Begin preparing the organization's workflow to consider:
- Audience: how your organization will identify the audience
- Consider creating a query via the Automation & Workflow App > General > Queries > Create New
- What: what actions and/or creatives will be needed for each step
- Consider creating email creatives
- Audience: how your organization will identify the audience
- Important Note: If using the Add Email Send step, email creatives cannot leverage custom tokens via the Communication Series feature. If you wish to send email creatives, use the alternative schedule mechanism via Automation & Workflow App > Campaigns > Communication Scheduler. If custom tokens are included in the creative, the email initiative will fail to send via the Communication Series feature.
Nurturing Support: Crafting Effective Communication Drip Series for Non-Profits
Non-profit organizations thrive on engaging and maintaining connections with their supporters, donors, and advocates. Drip series, a sequence of automated emails strategically designed to communicate and nurture relationships over time, are a powerful tool for non-profits to foster engagement, share stories, and rally support for their causes. Let's delve into the art of crafting effective communication drip series for non-profit organizations.
Understanding the Concept of Drip Series
A drip series is a sequence of pre-scheduled, automated emails sent to subscribers at predefined intervals. These emails are strategically designed to deliver targeted content, tell stories, provide updates, and encourage action while nurturing relationships with recipients.
Defining Goals and Objectives
Before creating a drip series, define clear objectives aligned with your non-profit's mission. Whether it's building awareness, nurturing donor relationships, encouraging volunteerism, or sharing success stories, clearly outline the goals each email in the series aims to achieve.
Mapping Out the Drip Series
Create a comprehensive plan or map outlining the sequence of emails and their content. Consider the subscriber's journey and segment your audience based on their interests, engagement level, or donation history. Design a series that gradually guides recipients toward deeper engagement with your cause.
Crafting Compelling Content
Each email within the drip series should offer valuable and engaging content. Tell impactful stories, share success stories, provide updates on your non-profit's initiatives, and offer actionable insights or calls-to-action that encourage recipients to take part in your cause.
Personalization and Segmentation
Personalize your drip series by addressing recipients by name and tailoring content based on their preferences or past interactions. Segment your audience to ensure that each recipient receives relevant and targeted content that resonates with their interests.
Timing and Frequency
Determine the optimal timing and frequency of emails in your drip series. Consider the ideal intervals between emails to maintain engagement without overwhelming subscribers. Analyze data to understand recipient behavior and preferences for sending times.
Automating the Series
Utilize CharityEngine email marketing software to automate your drip series. Set up workflows that trigger emails based on subscriber actions, such as sign-ups, donations, or event registrations. Automation ensures timely delivery and efficient management of the series.
Monitoring and Iterating
Track and analyze the performance of your drip series. Monitor open rates, click-through rates, conversions, and unsubscribes to understand how recipients engage with your emails. Use these insights to refine and iterate the series for improved effectiveness.
Building Relationships and Cultivating Engagement
The primary goal of a drip series is to build and nurture relationships. Use these emails to engage recipients beyond soliciting donations—share impactful stories, offer valuable content, express gratitude, and provide opportunities for involvement and participation.
Conclusion
Communication drip series serve as an invaluable tool for non-profits to foster engagement, share stories, and inspire action. By strategically planning, crafting compelling content, personalizing messages, segmenting audiences, automating workflows, analyzing data, and nurturing relationships, non-profits can leverage drip series to build lasting connections and drive support for their mission.
Remember, effective communication is about building trust, fostering connections, and inspiring change—use drip series as a medium to achieve these goals and make a meaningful impact on the causes you champion.
Creating a Series
Step 1: Navigate to the Campaigns App > Automate > Communication Series
Step 2: Click on the Plus icon to create a new series
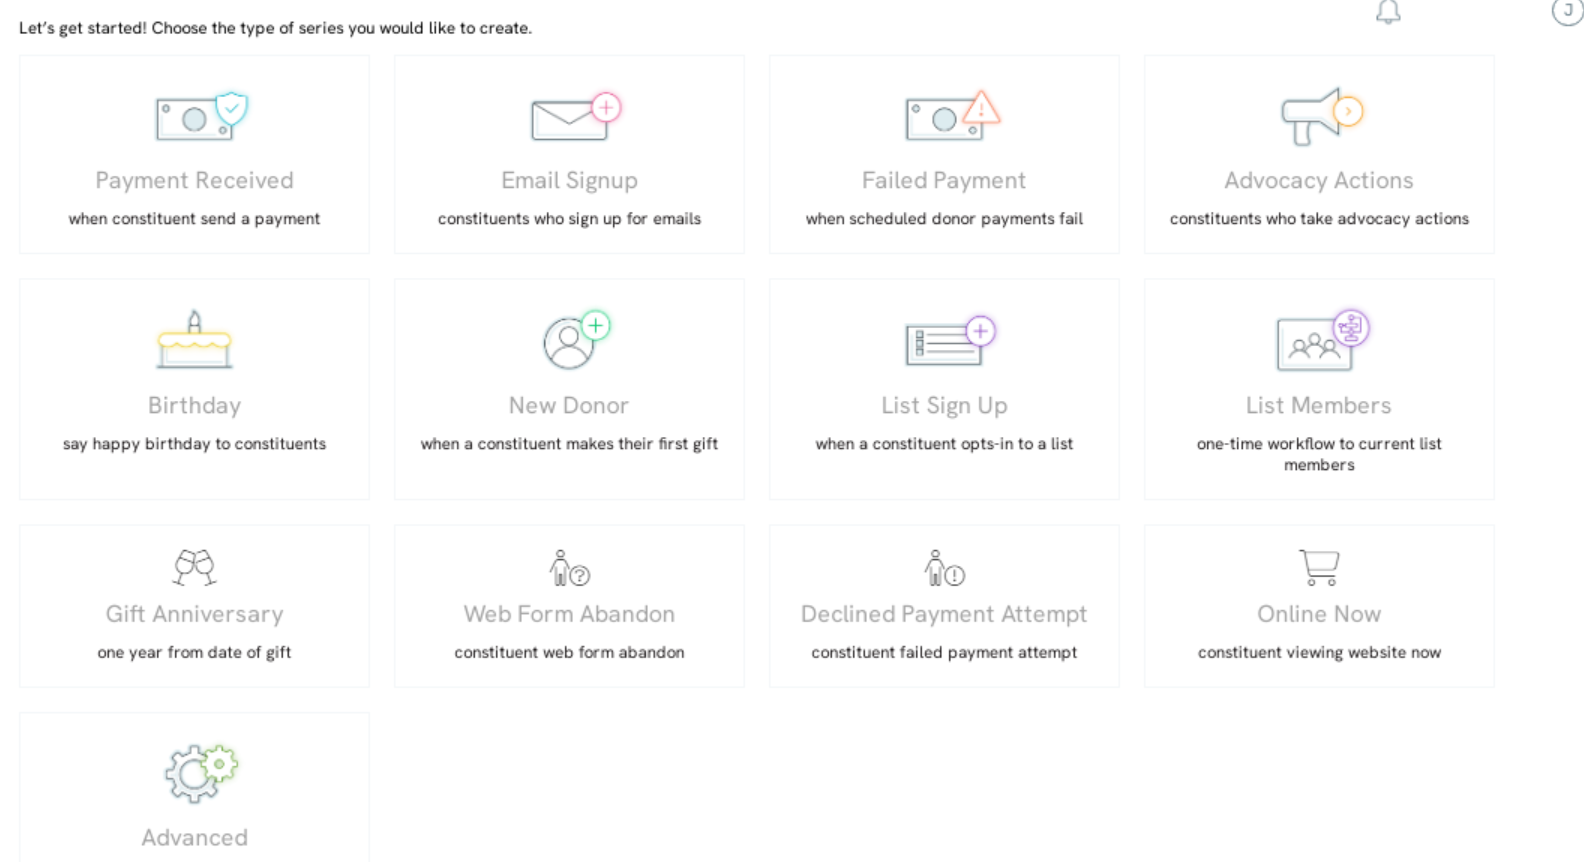
Step 3: There are several out of the box options including:
- Payment Received to create automated email acknowledgements for received/confirmed payments
- Email Signup to encourage donor/volunteer/constituent sign up
- Failed Payment to remind donors of automated failed payments including sustainers, pledges, memberships
- Advocacy Actions to encourage automated advocacy actions
- Advanced for customized communication series
- Birthday to say happy birthday to constituents
- New Donor for when a constituent makes their first gift
- List Sign up for when a constituent opts-in to a list
- List Members a one-time workflow to current list members
- Gift Anniversary to celebrate one year from date of gift
- Web Form Abandon for when a constituent abandon's a web form
- Declined Payment Attempt to notify a constituent when a one-time payment attempt declines
- Online Now to contact the constituents who are viewing your website now.
Click on Email Signup, then click on continue at the bottom of the screen

Step 4: On the next screen, users can configure their series settings.
If Enable Suppression is toggled to Yes, select the suppression list. 
Step 5: After clicking CREATE, the Communication Series creation wizard will appear.
Step 6: As the first step of the workflow, you will want to select your audience. Depending on the type of series, the audience may be automatically populated for you. Click on Start and then click on the edit icon to set your audience.
If the audience is already selected for you, you will see a message that states this. Some series will allow customization of the audience, like the List Sign up series where you will be able to select the list you want to use for the series. 

Step 7: Once the audience has been defined, begin to build the communication and workflow by dragging the action into the series
The following actions can be applied to the communication series - see the next section for additional details and information of each action:
1. Email Step
2. Mail Step
3. SMS Step
4. Split
5. Trigger
6. Transfer
7. Wait
Note: The Add Trigger feature allows the organization to:
- Create Opportunity
- Create Activity
- Assign List (Groups and/or Tag attributions)

Step 8: Once the steps have been created, click SAVE in the top right corner.
Step 9: Confirm the Name, frequency, entry mode, and date range, then click SAVE
Note - Run Frequency: If you are creating an Advanced Communication Series, you will have an additional configuration to have the series run Continuously, Daily, or One-Time. If you select continuous, the series will run every time a contact is pulled into the query, daily will run once a day regardless of the query, and one time will only run one time and never again.
Note - Entry Mode: Select of Once will allow the constituent to proceed through the full workflow one time only. Whereas Non-Parallel will allow the constituent should be selected if the donor meets the criteria/or takes action on a step more than once. This will allow a donor to potentially re-enter workflow and go through steps multiple times.
Step 10: After saving, from the listing screen, navigate to ACTIONS > Launch to initiate the Communication Series.
Steps: Defined
Note: The questions and settings will vary across the different series types available. The example below includes the Advocacy Action filters. To add steps to your Series, drag the action into the series from the right hand side.
Email step
Configure the email step with your email message and settings by clicking the edit icon for that step.
Select your message by clicking select message under creative
Set your email defaults in the Step Settings. Add an email that the message will appear from and a 
Mail Step
Configure the email step with your email message and settings.
Select your message and your mail defaults, like Campaign, in the Mail Step Settings.
SMS Step
Note: SMS feature must be activated within the account to leverage. To learn more, please contact your account manager.
Configure your SMS step with your message and settings.
Configure 
Adding a Split
In the Add Split, users can choose to reroute or remove from a series, audience members who meet certain criteria. Set the criteria in the settings.
Trigger
A trigger step will allow audience members who meet the criteria to have an opportunity added to their record.
By clicking on settings and selecting opportunity, you can choose the Opportunity Pipeline and Status.
Additional, click on Create Activity to create a standard title, priority, status, and assignment.

Also, click on Assign List to create and assign a group and/or tag. 
Transfer
By adding a transfer step, all audience members can be added to a different series at a specific step.

After configuring your series, click Save.
Instructions: Managing Existing Communication Series
To manage a communication series, navigate to Campaigns > Automate > Communication Series and search for the series you want to manage. click Manage under the Actions column

From the communication series listing screen you also have the ability to pause/unpause the series by clicking on pause/ unpause

You can also see the execution history of the series by clicking execution history,


Once in the communication series, you will be able to view all the steps, initiatives that have been sent, the audience, the message that is sent, and add step to the series.
To add steps to the series, use the tiles on the left-hand side. The step will automatically be added to the end of the series.
By clicking on the initiative details icon, you will be navigated to the initiative listing screen to view the results such as the delivery rate, views, any and donations received as a result of the initiative. By viewing the details, you will be able to learn if the initiative was successful or not. If the initiative was unsuccessful, the message can be changed or modified in order to produce the results wanted.

If changing the message is needed, click on change message and search for the creative you want to send.


You can also view the audience of the initiative to confirm that the correct people are receiving the message. A pop up will appear when you click on the icon and will display all audience members for that step.


If contacts are not displayed that should be included, click on Audience Settings to confirm the settings are correct.

Use the check boxes to filter your audience and click on advanced to view the query being used.

Note:
The Communication Series email workflow is designed for static email sends such as drip campaigns. As a result, custom tokens cannot be used within this feature and will result in failures for creation of the initiative. If you have a recurring email series and require the usage of custom tokens, this can be achieved by scheduling a recurring initiative.
To do so, navigate to the Automation > General > Queries > locate the query for use with your custom tokens and email audience > ACTIONS > Automated Email.
Complete Name of your email job (required), start date, end date if appropriate, campaign assignment (optional), Message - locate your email creative, Select Email Address (to select primary email), Notify emails optional. Click SAVE and you will be exposed with a Trigger tab to schedule your frequency requirements.

FAQs and Additional Reading
Q. My email continues to report as 'failed' from the initiatives listing screen. How can I troubleshoot the communication series?
A. From the Campaigns App > Create & Publish > Initiatives, leverage the listing screen to locate the email initiative generated from the communication series. Hover over the Status: Failed to review the details for failure
Examples may include:
- Audience Empty - this will occur if the query or audience source did not return any values at the time of the scheduled email send.

- Invalid Message Merge Tokens - This indicates that a custom token was included in the creative. As a reminder, only system tokens can be used in the communication series feature. If custom tokens are needed, please leverage the Automation & Workflow > Campaigns > Communication Scheduler feature

Q: If I have multiple sending domains, how do I choose the domain I want the email to send from
A: You can select your sending domain by clicking on the gear icon next to the email and then select the domain from the Service dropdown
Q: How can I see what step a specific donor is on?
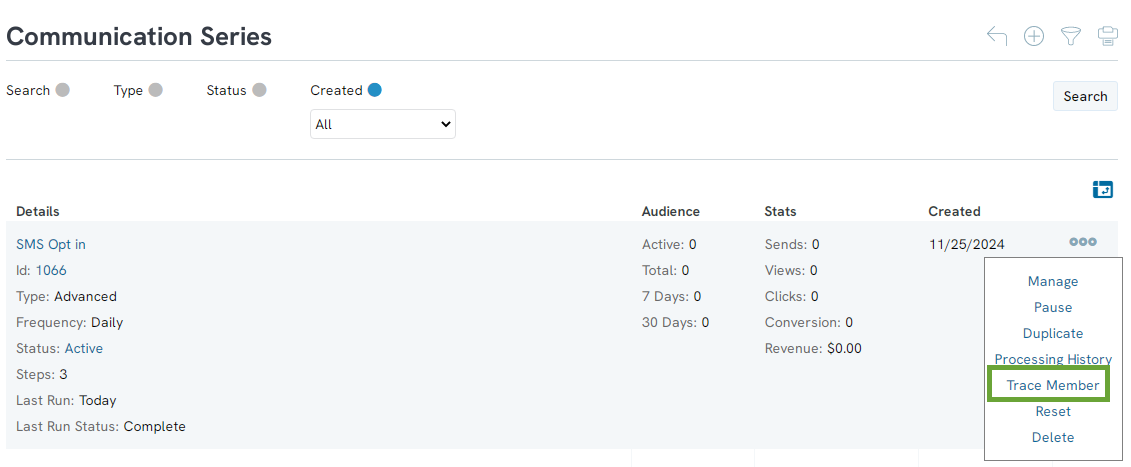
A: When you are looking at a Communication Series, there is an option within the actions drop down to "Trace Member". Once clicked, you can search for the specific donor by contact ID or email address.


Q: Can I manually add constituents to a series?
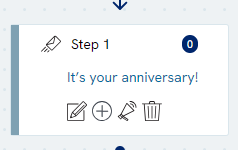
A: Yes, when reviewing a step, click on the plus sign to add a constituent manually.

Q: Can I restart a series?
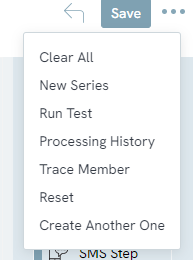
A: Yes, next to the save button click on the three dots to get the Actions menu. In the menu select "Reset". You will be given the options to keep members or delete members.


Q: How can I test my series?
A: In the right corner, next to the save button, click the three dots to get the Actions Menu. When you click on "Run Test" you will be able to add in your contact to test all steps of the series.


Q: I set my series to run at a specific time. What time zone is it scheduled in?
A: All series run on Eastern Standard Time.
Q: I set my series to go out on a certain day. What time will it start?
A: It will always send at midnight, Eastern Standard Time.
Q: I am using the wait step. I would like to have my wait step be for a day and a half. How can I accomplish this?
A: If you are wanting to achieve a wait step that is outside of a day you will want to convert the wait step to hours. For your example you will want to choose to wait for 36 hours.
