Introduction
QR codes make doing things that much easier for organizations like your. Use QR codes to allow donors to navigate to event registration forms, check-in your event attendees, and/or managing event tickets. CharityEngine allows users to insert a QR code into response channels such as emails which can be sent to donors to make these activities easier without having to type in a URL.
Table of Contents
Prerequisite
Before you can add the QR codes to your event emails, you must create the event and the event form for donors to register on. If you need assistance in creating your event or form, please read the below listed articles:Events & Volunteers : Events - Search & Manage
Events: Creating an Out of the Box Web Form
Instructions - Checking in Attendees with QR Codes
Step 1: To do this, navigate to your form via the Online App > Web Forms > Search & Manage > identify your form > ACTIONS > Manage
Step 2: Navigate to the Email tab
Step 3: From the Email Message field, click on the gear icon, then manage to edit/manage the email template.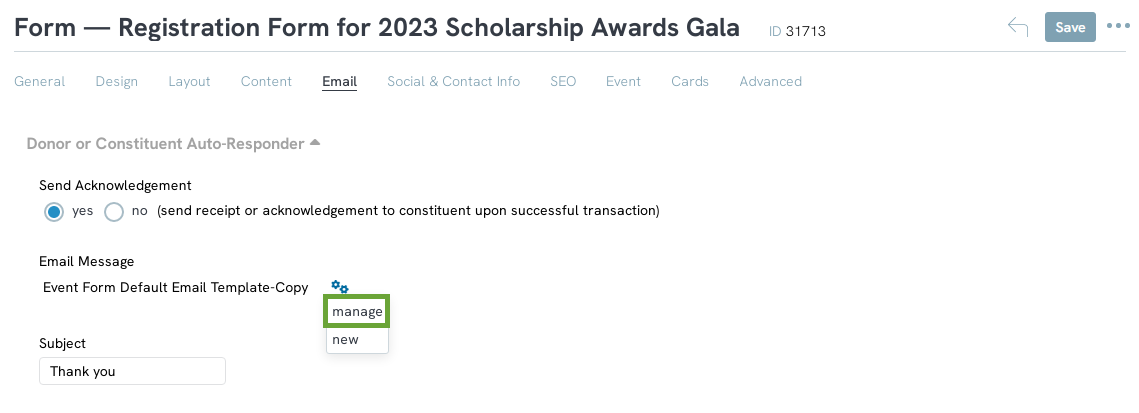
Step 4: You will be navigated to manage the email message. From here you will need to add the token that will populate the QR code on the registration email. Click on Tokens in the WYSIWYG tool bar.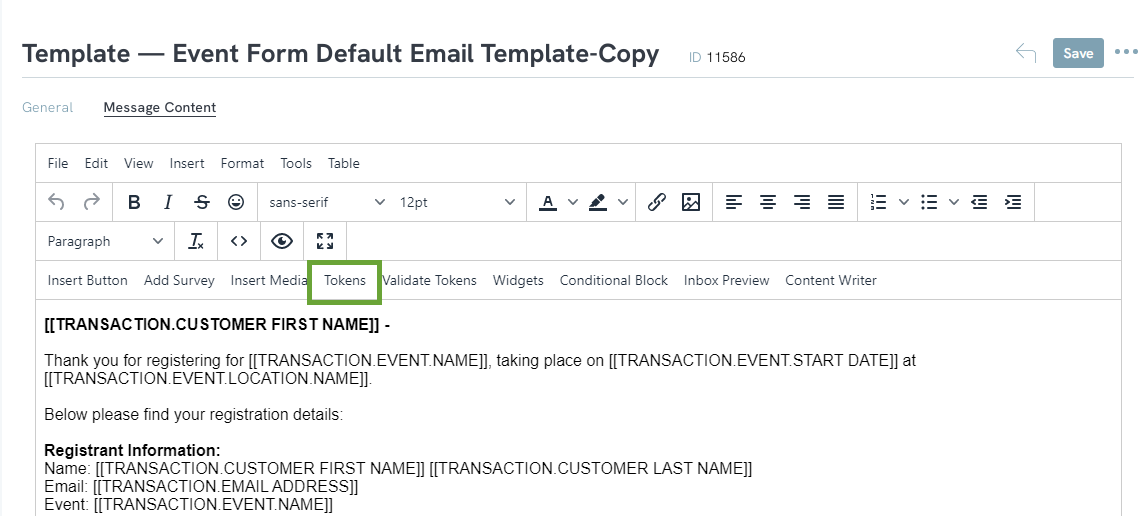
Step 5: Then type in QR Code in the search box.
Step 6: You will see two options, one for check in and and one for ticket management. Click on the Guest Check In QR Code URL, then click on INSERT SELECTED
Step 7: Your token will then appear in your message as shown below.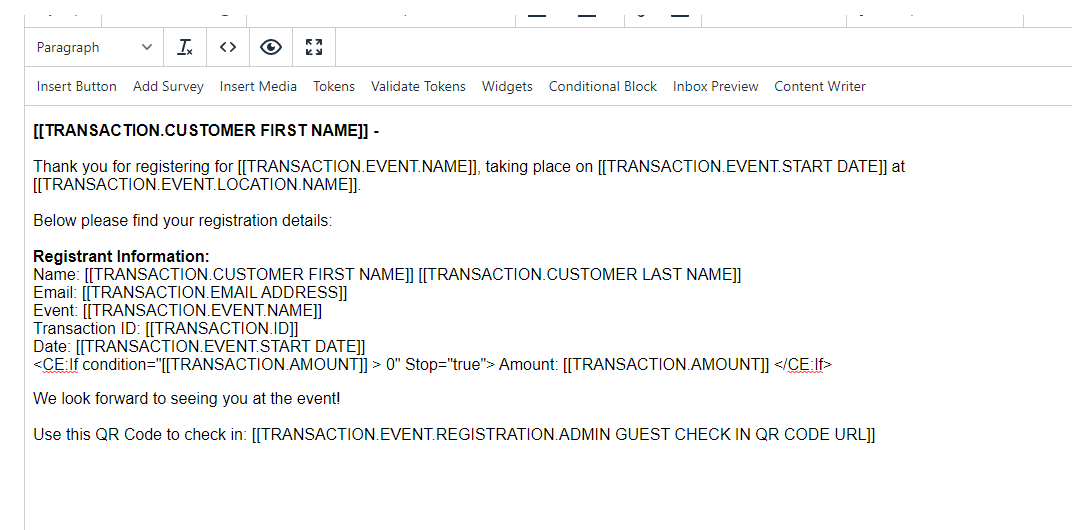
Step 8: From here, locate the Source Code option from the top menu listing.
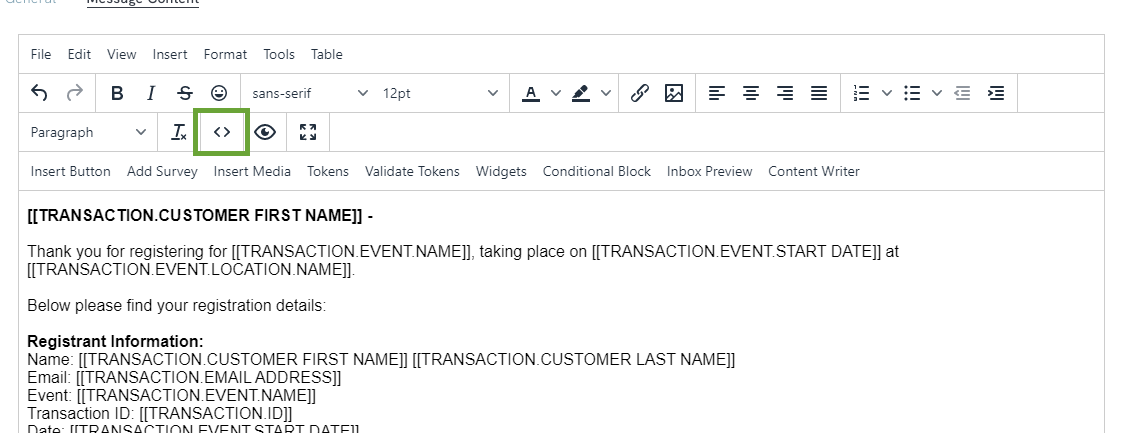
Step 9: Next, locate the QR token that was added to your message. The user will wrap the token using <img src="" />
Example:
Using this token and wrapper: <img src="" />
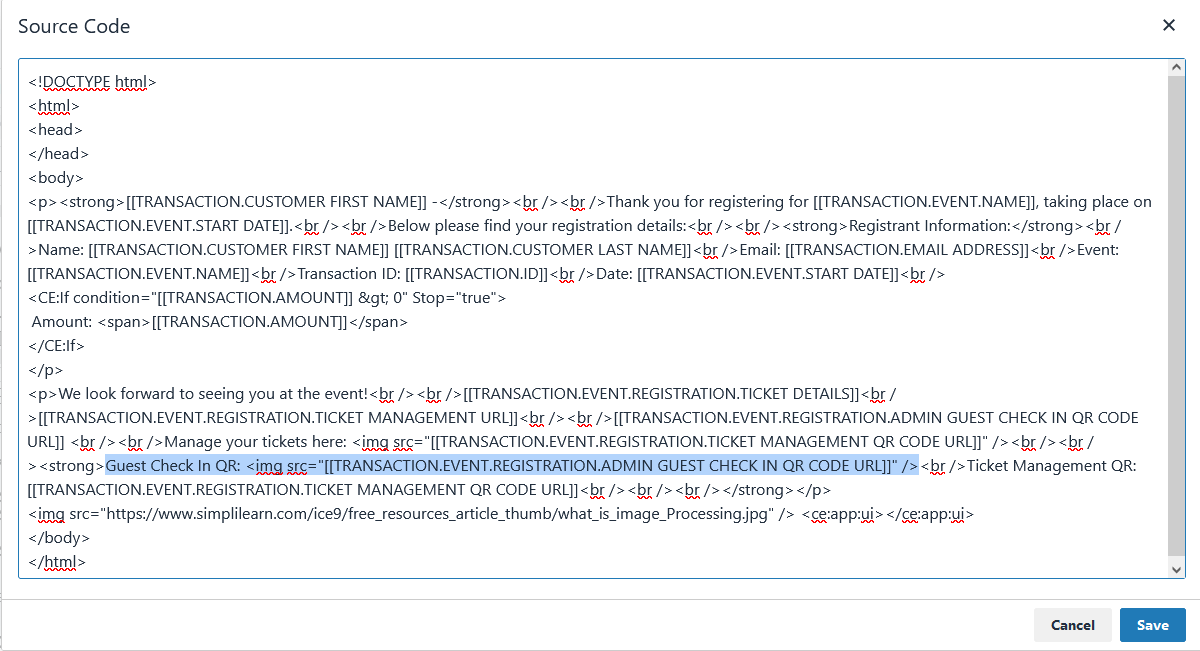
Step 10: When the registrant submits on the form, they will then have a link at the bottom of their email that will lead them to the QR code.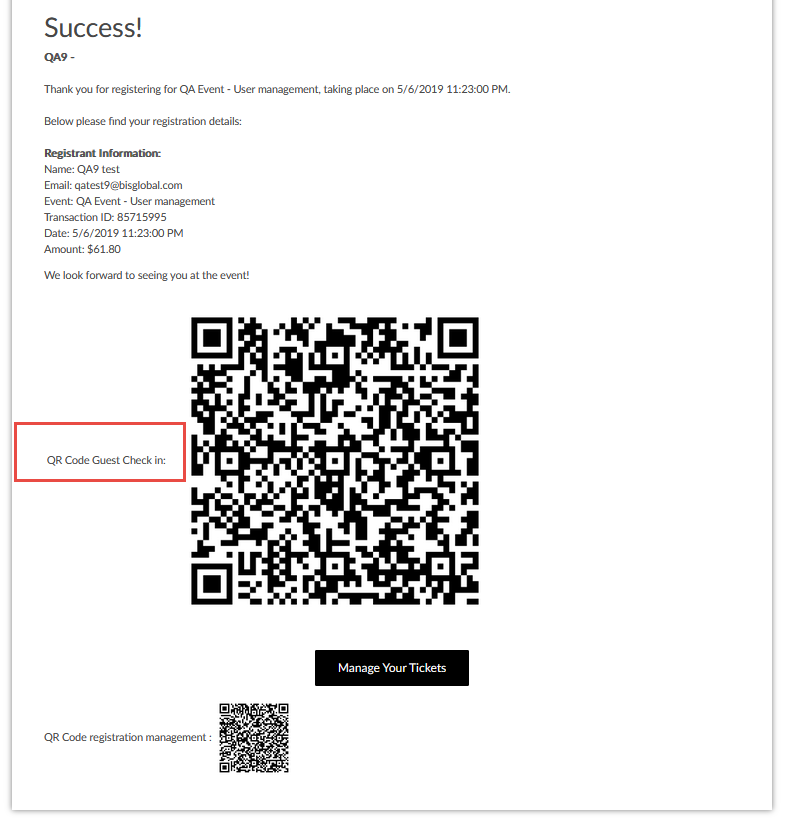
Step 11: The QR code can then be scanned at the event. Once scanned, the action will take the CharityEngine User directly to the donor's registration record.
Step 12: To check the attendee in, simply click on "No" under the Checked- In Column.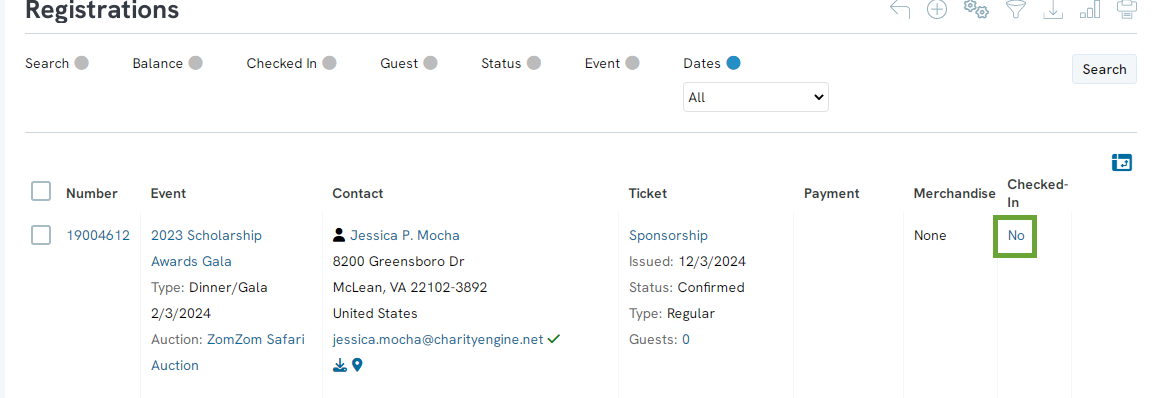
Step 13: A pop-up will appear asking you to confirm the attendee check-in. Click CHECK IN to proceed. At this stage, you can also collect the registrant’s credit card information if they plan to participate in an event auction or other paid activities later. 
Step 14: The attendee with then show as checked in on the listing screen.
Event Checkout Process
At the end of your event, attendees can be checked out and charged for any auction items or merchandise they purchased.
Access an Attendee Registration
- Navigate to Events > Events > Registrations.
- Locate the attendee by scanning their QR code or searching by name.
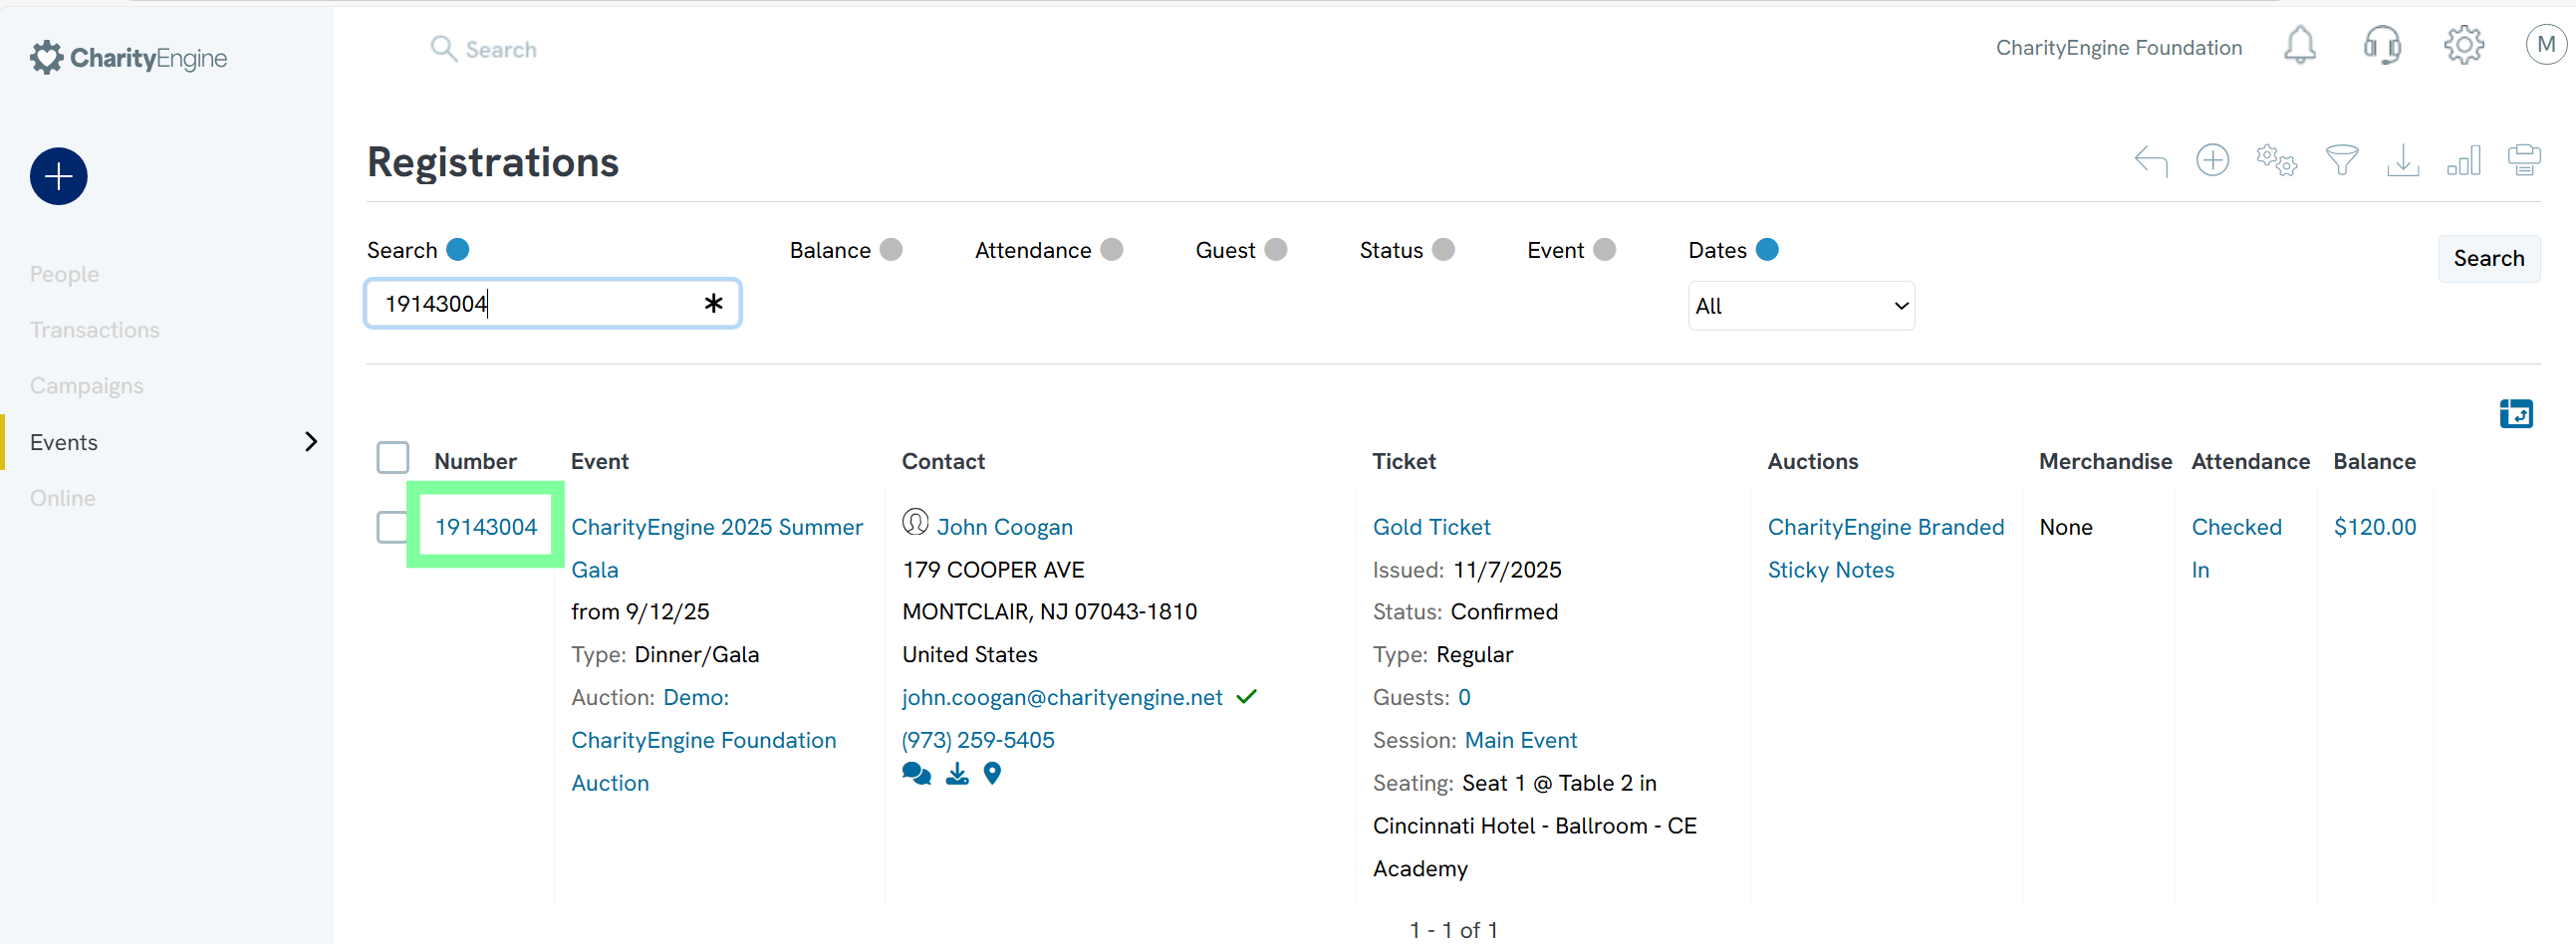
- Click the attendee’s Registration Number to open their registration record.
Process Auction Item Payments
If the attendee won an auction item:
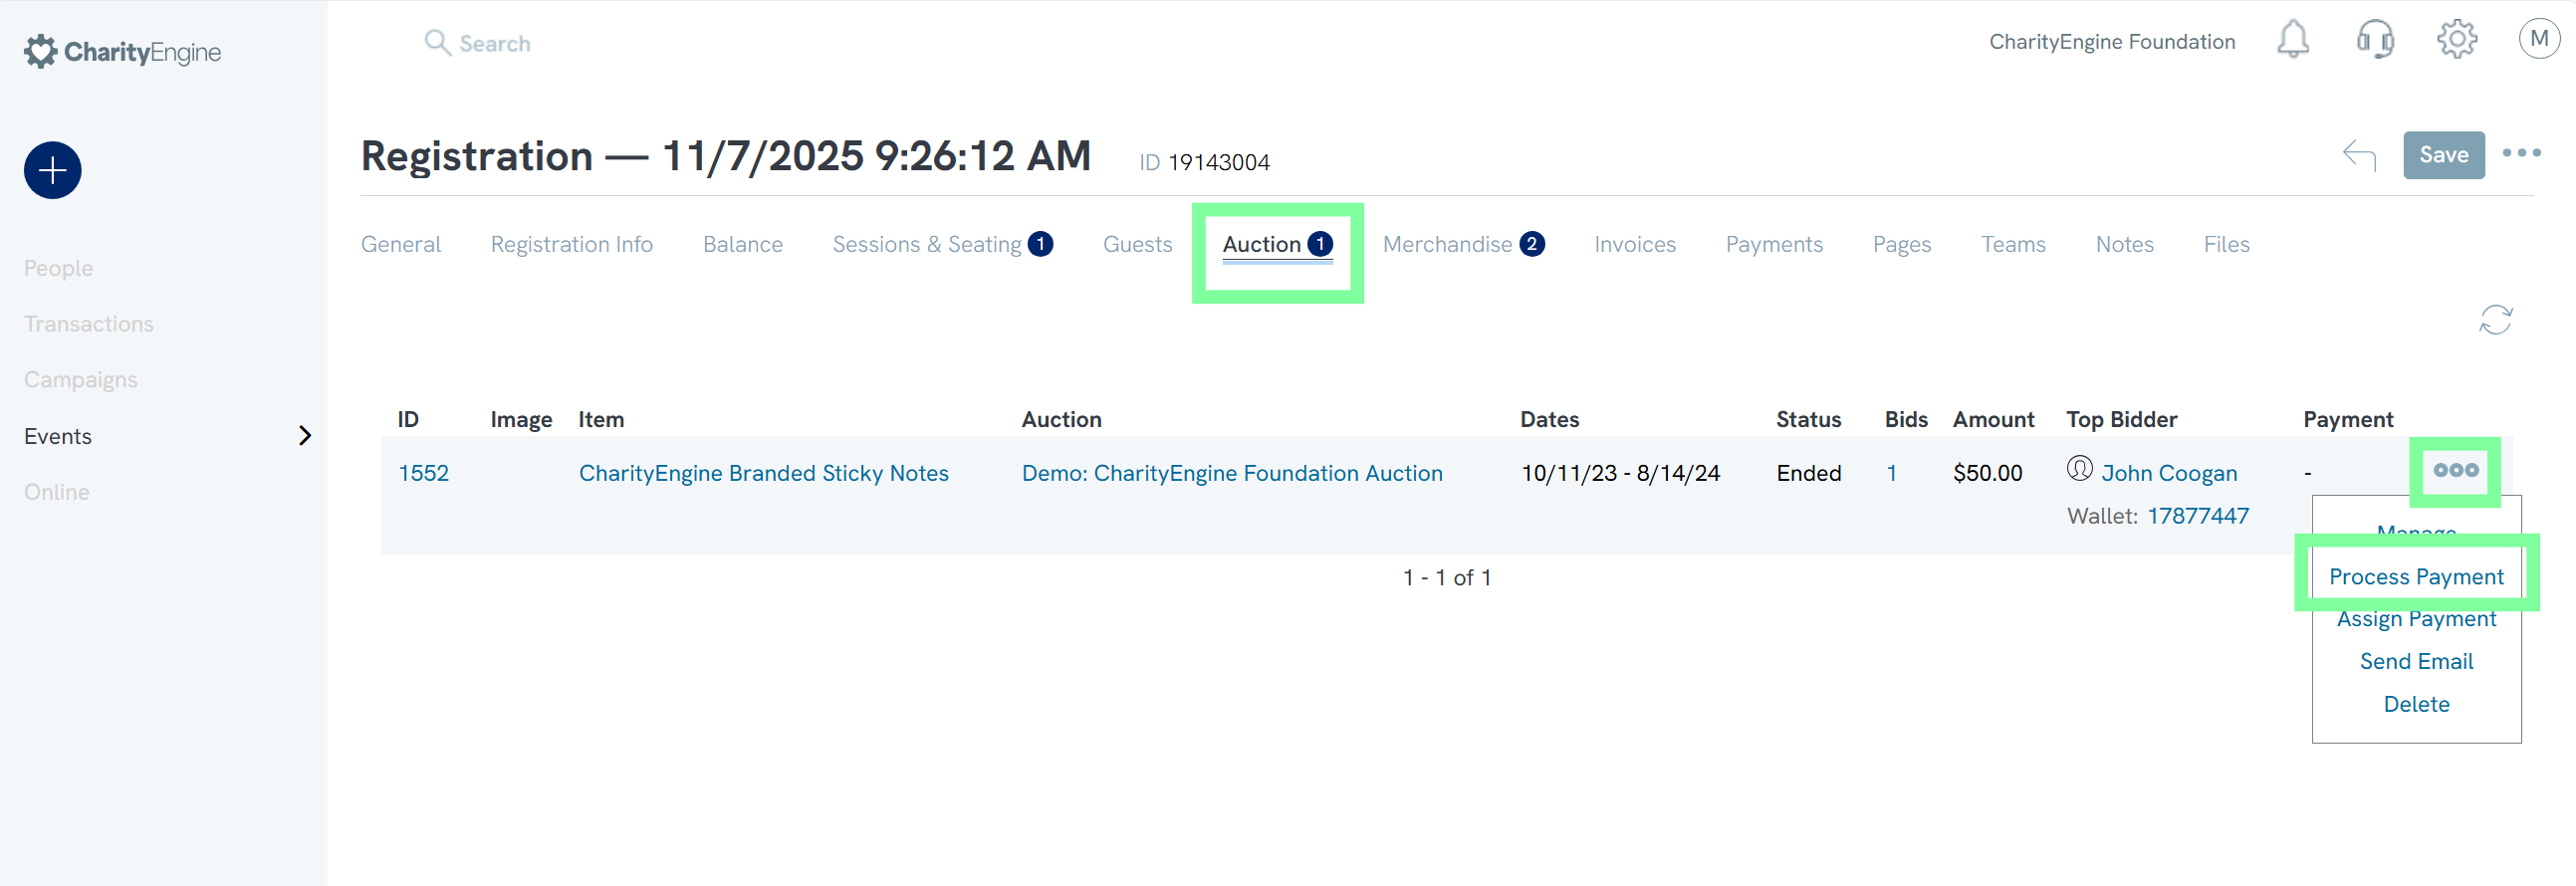
- Open the Auction tab within the registration.
- Hover over the three-dot ellipses next to the item.
- Select Process Payment.
Add Merchandise Purchases
If the attendee purchased merchandise at the event:
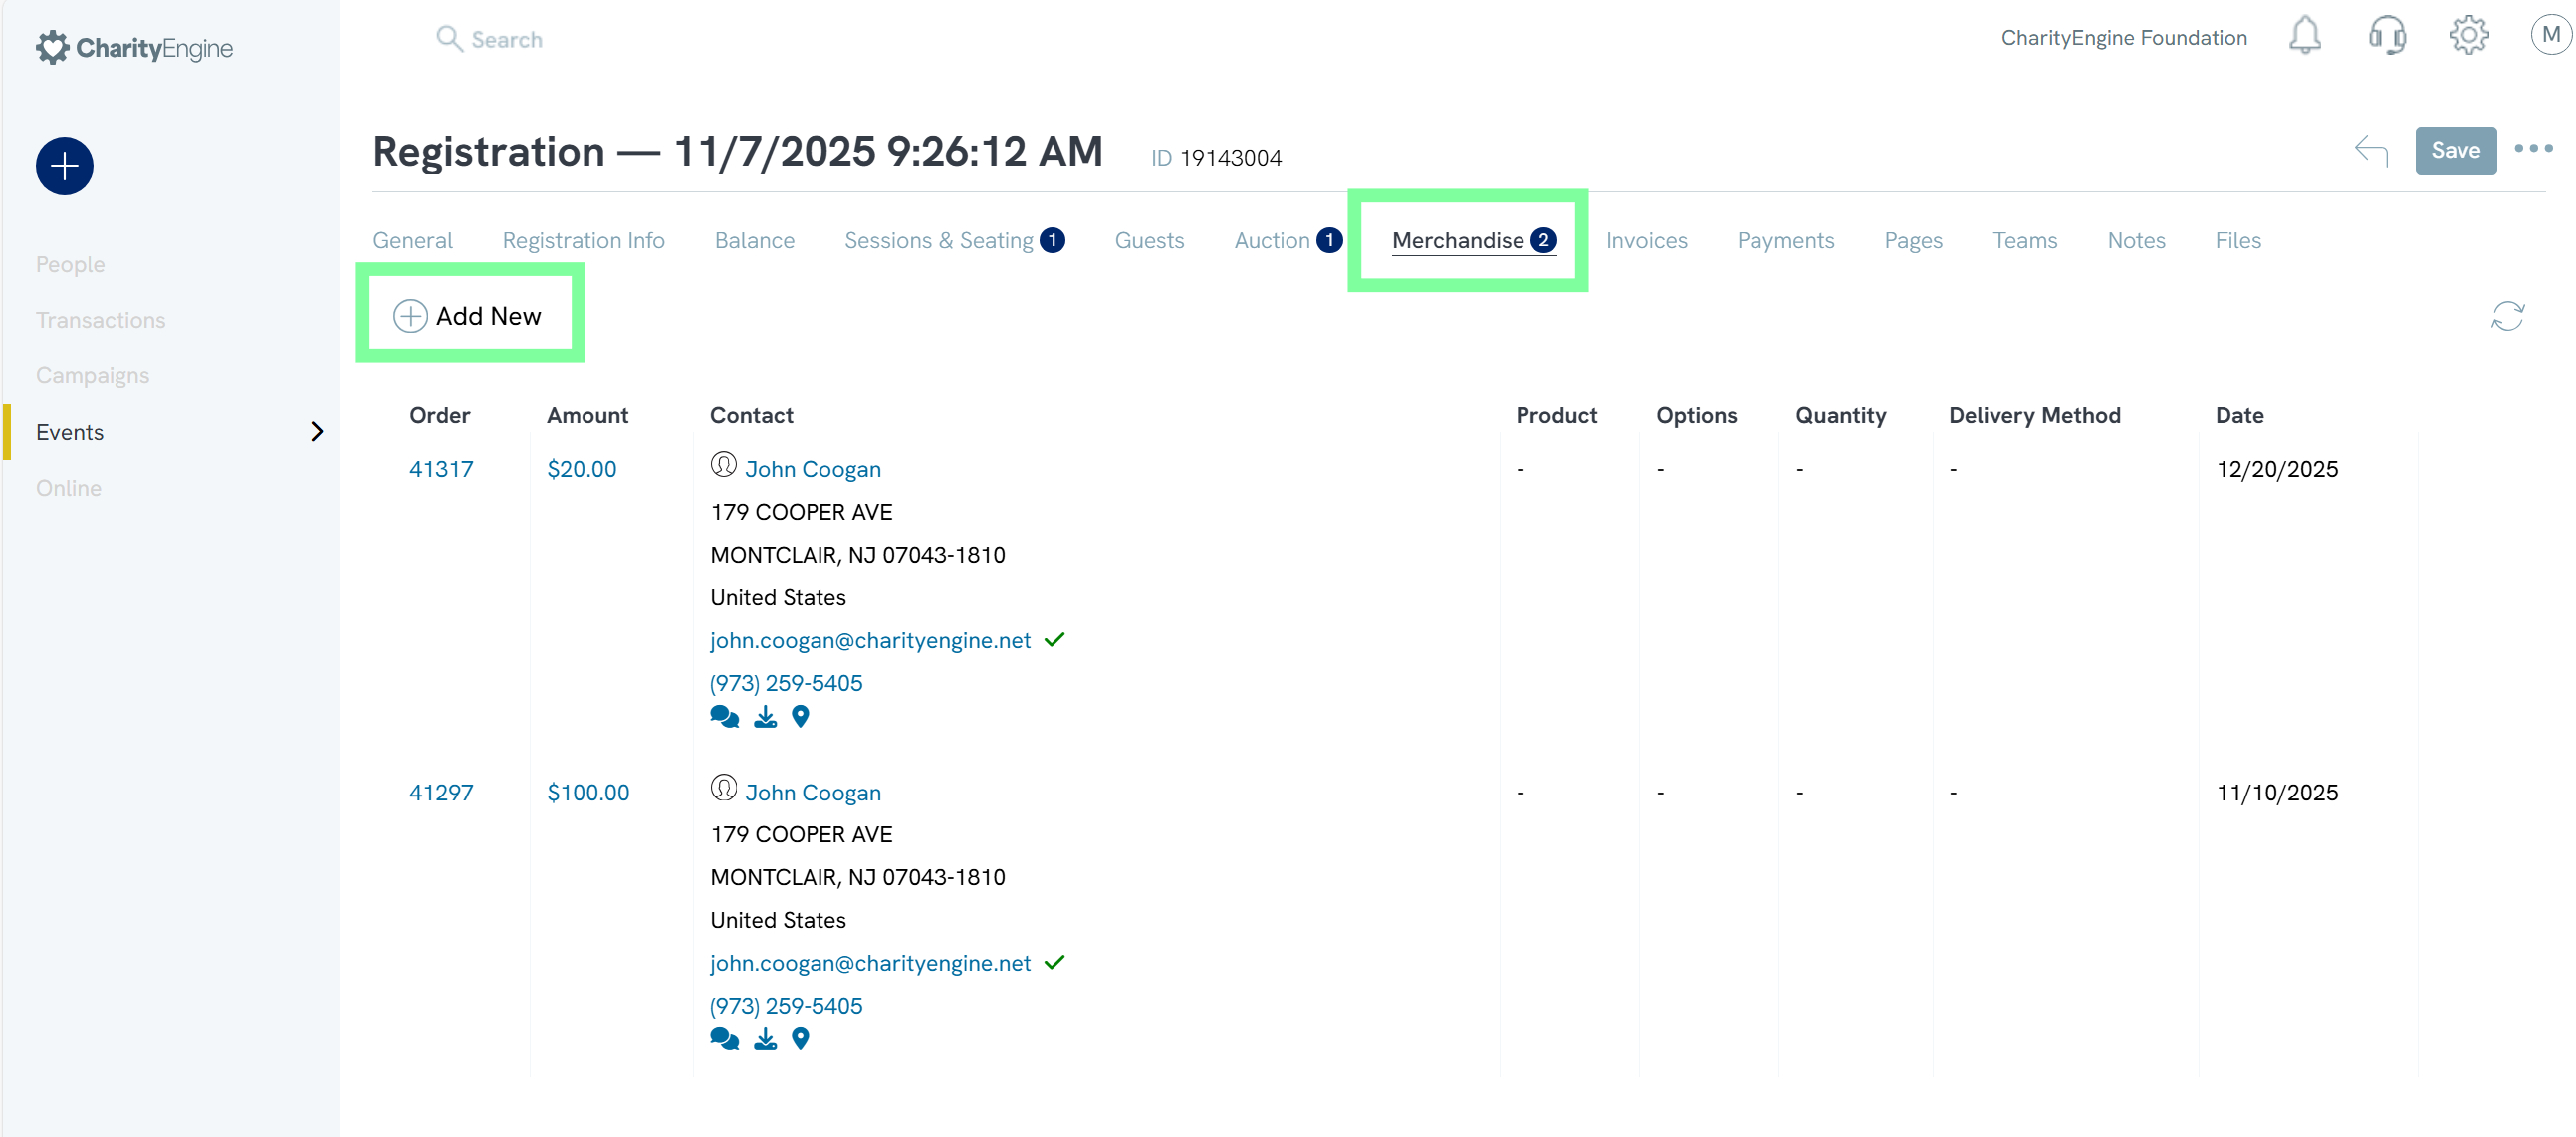
- Open the Merchandise tab on the registration.
- Click Add New.
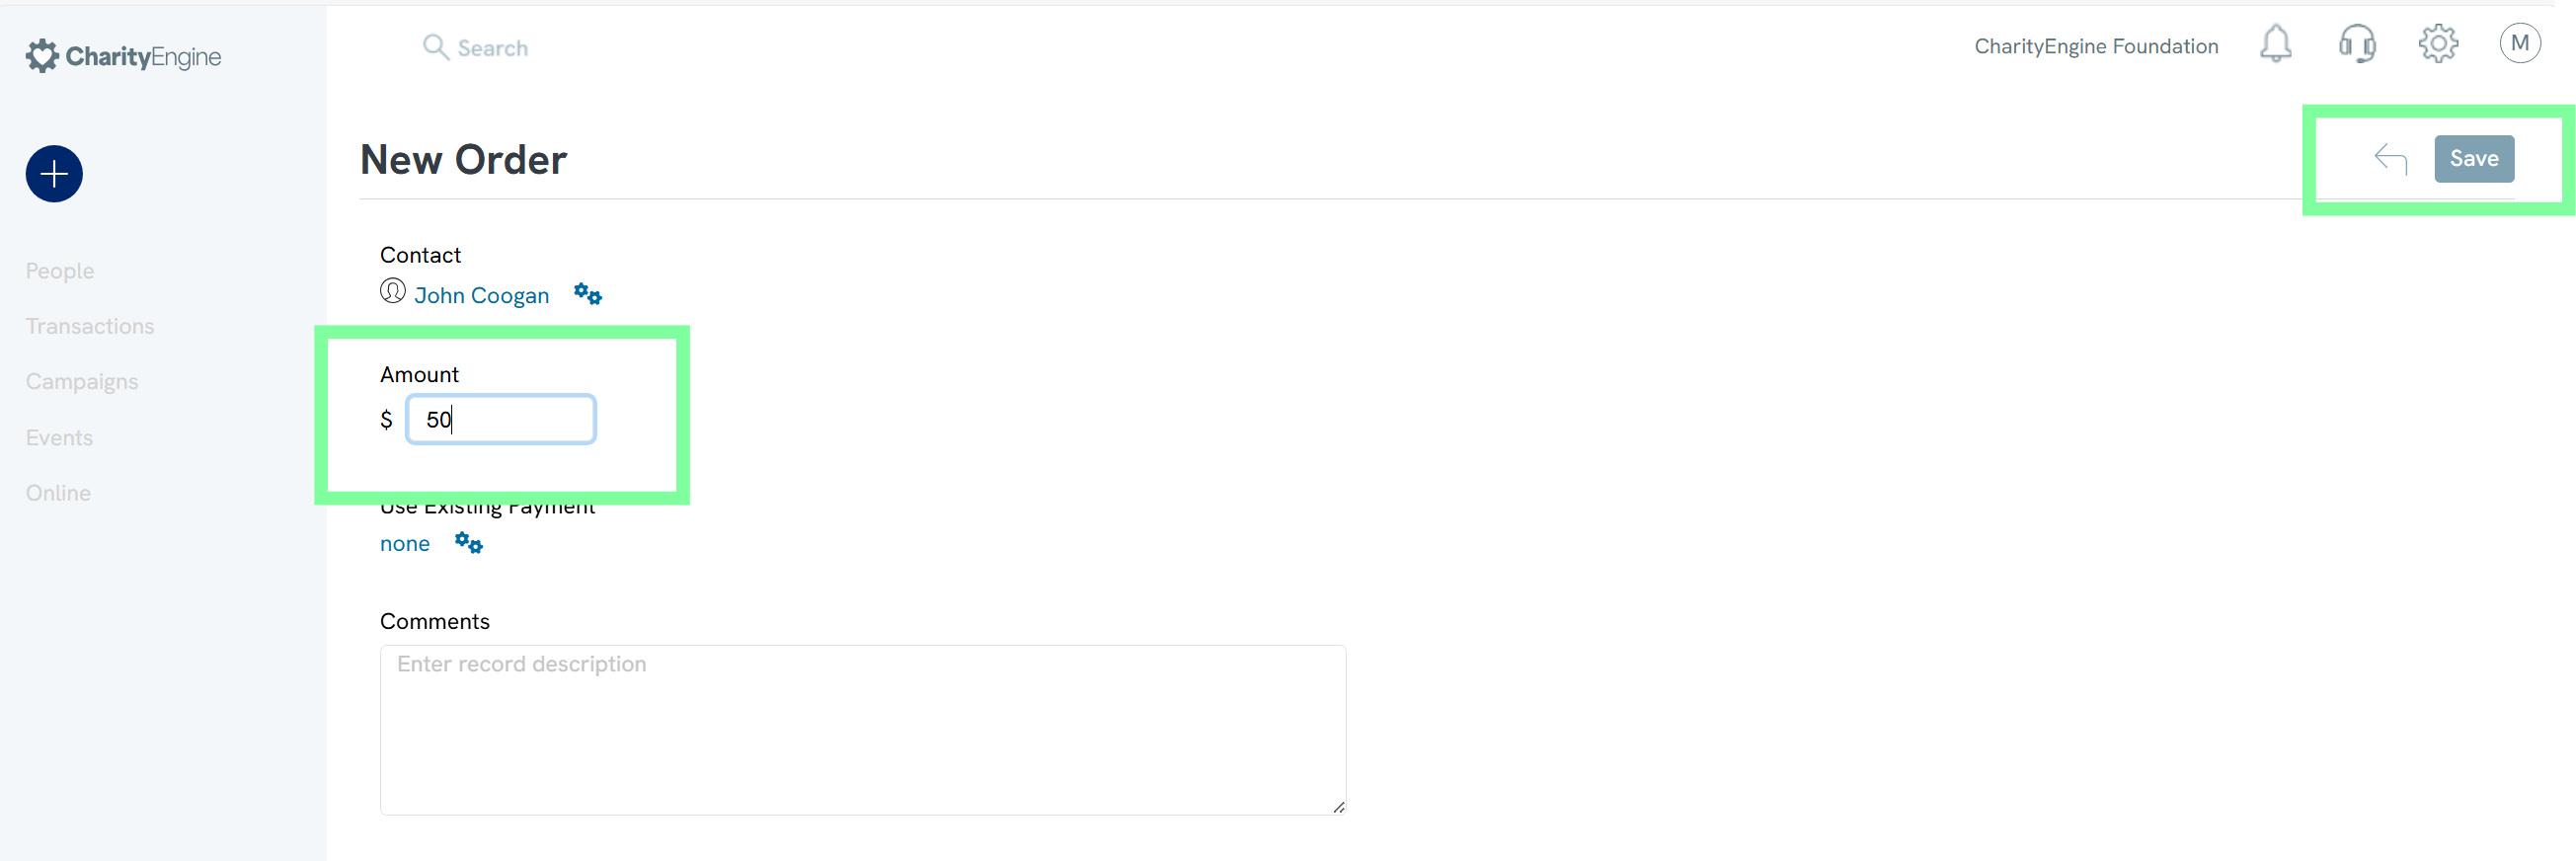
- Enter the total order amount and click Save.
Record Merchandise from Inventory (Optional)
If merchandise inventory is tracked in CharityEngine using the E-commerce module:
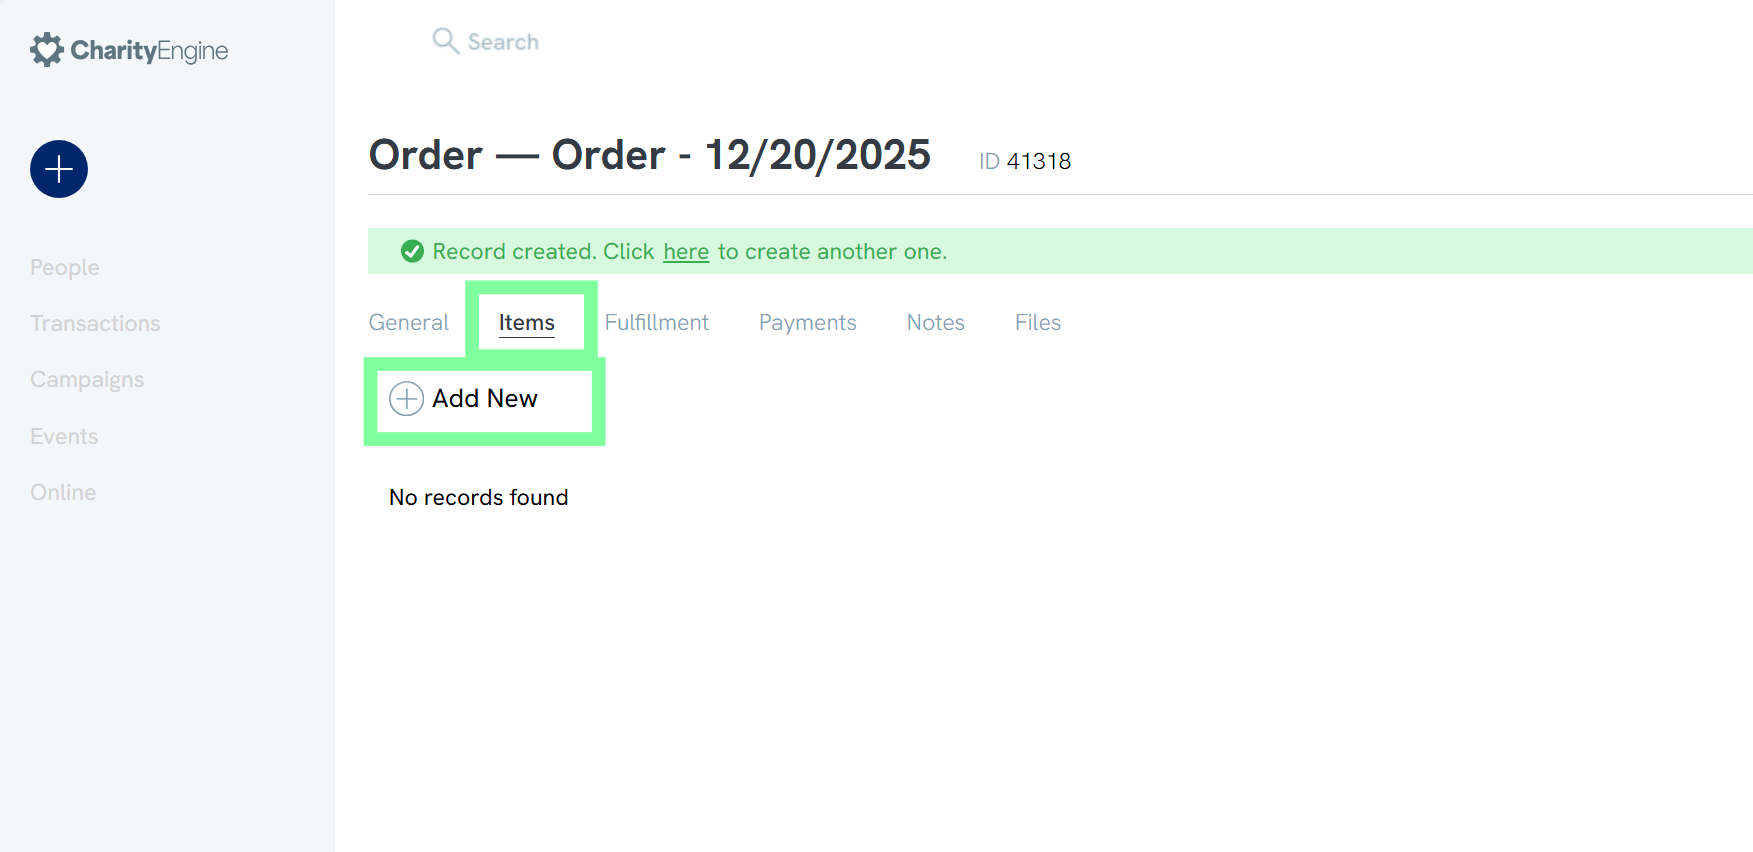
- Open the Order Items tab.
- Click Add New.
- Select the product from the Product dropdown menu.
This ensures accurate inventory tracking and purchase history. 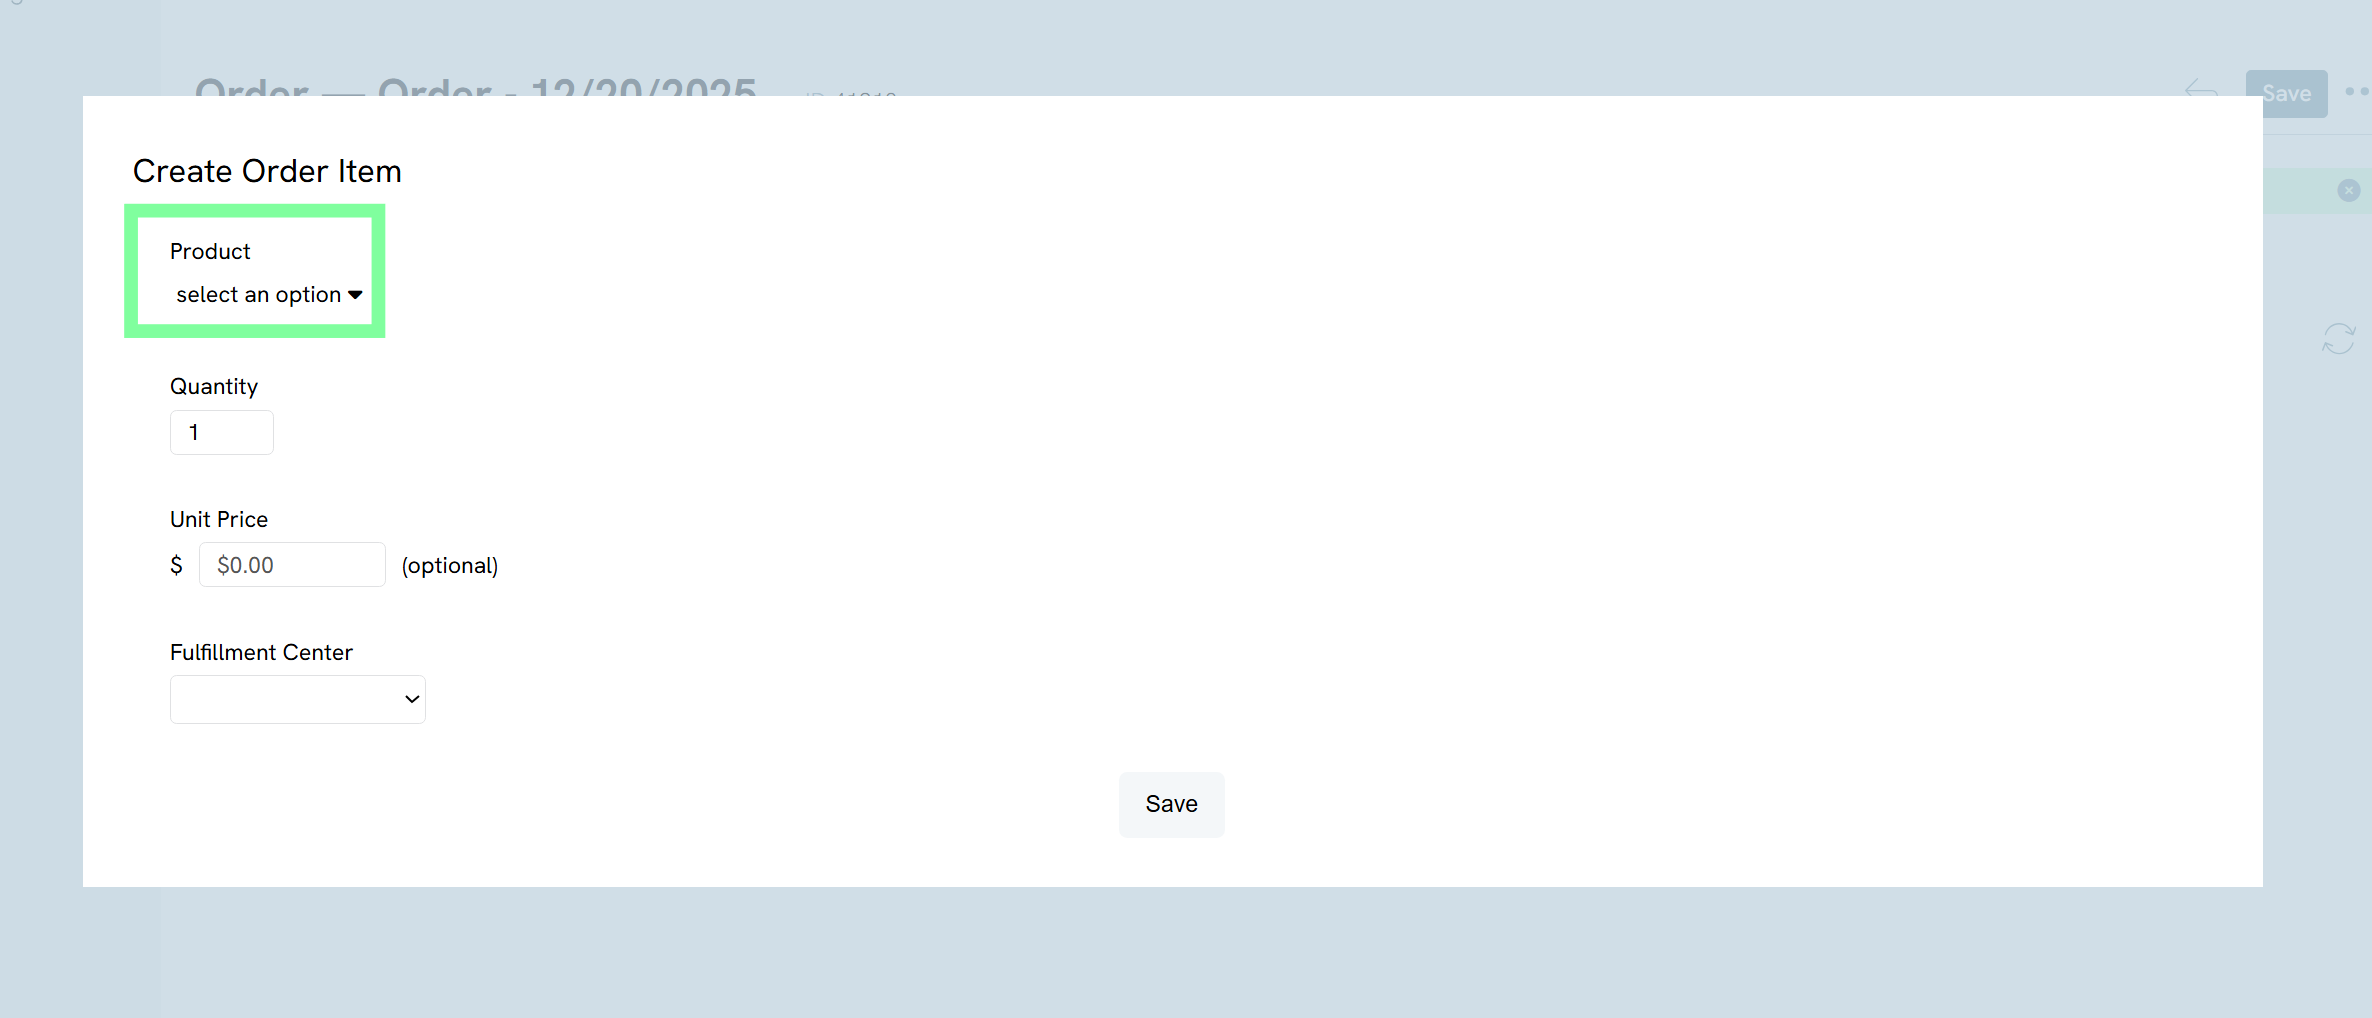
Note: You do not need to enter the unit price. The Unit Price field reflects your organization’s cost for the item, not the amount charged to the attendee.
Check Out the Attendee
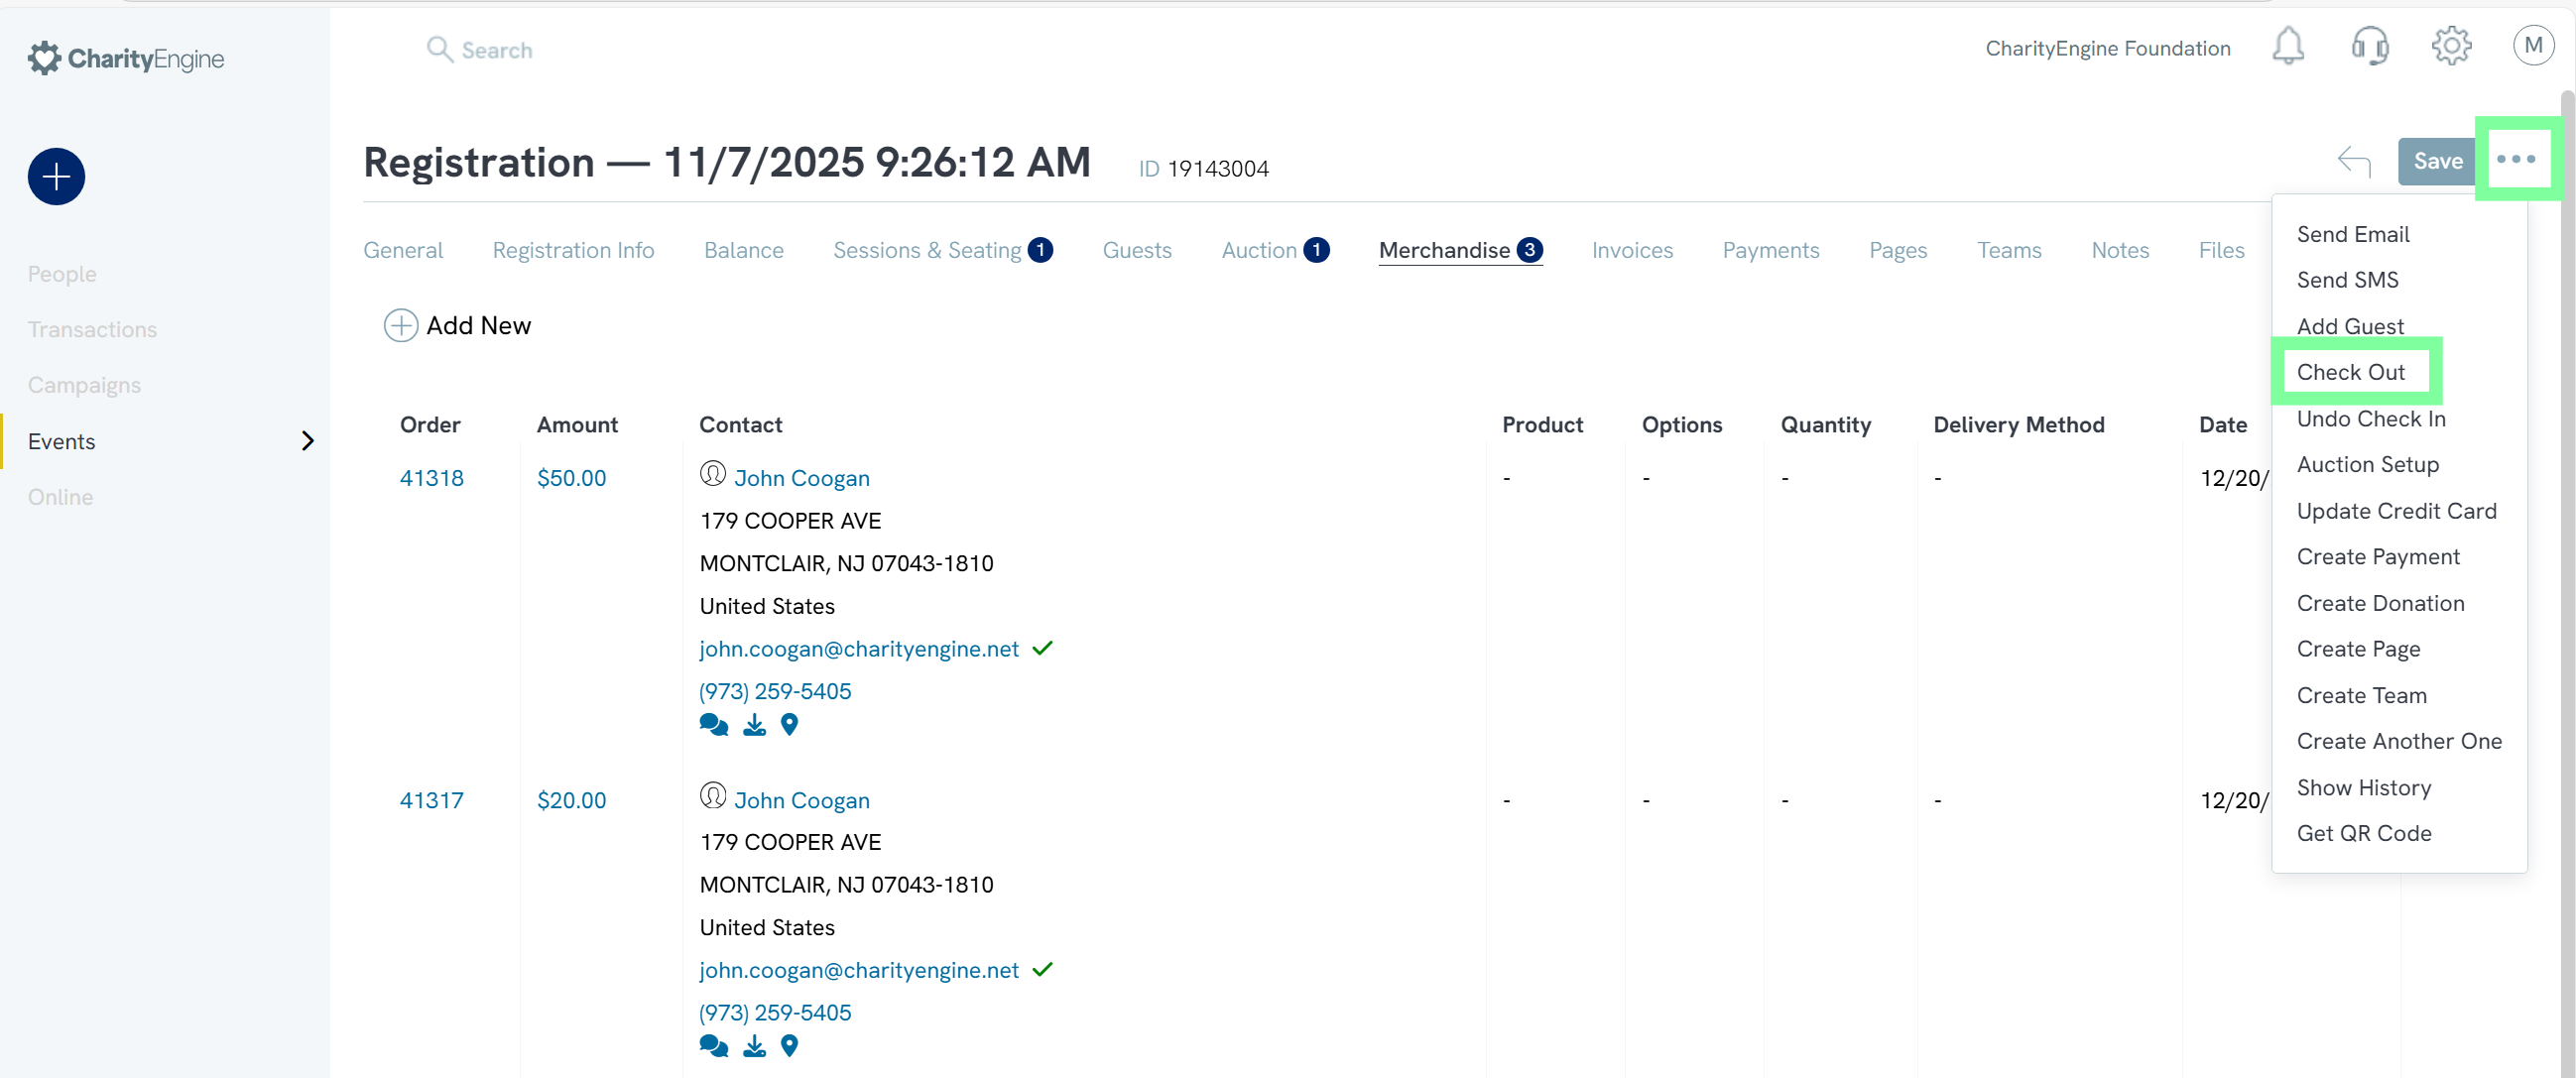
- From the registration page, click the three-dot ellipses.
- Select Check Out to view the attendee’s total balance.
- If the attendee is ready to pay, select Pay Now and click Check Out.
- You will be prompted to charge the credit card on file.

Instructions - Managing Event Tickets through QR Codes
To make navigating to the user center easier, CharityEngine does allow guests to scan a QR code and navigate directly to manage their tickets. In order to enable this ability, you do have to add the QR code to the auto-responder email that is sent to the registrant after they have submitted on the form.
Step 1: To do this, navigate to your form via the Online App > Web Forms > Search & Manage > identify your form > ACTIONS > Manage
Step 2: On the Email tab, hover over the gear icon next to the Email message and then click on the pencil to manage the email.
Step 3: You will be navigated to manage the email message. From here you will need to add the token that will populate the QR code on the registration email. Click on Tokens in the WYSIWYG tool bar.
Step 4: Then type in QR Code in the search box.
Step 5: You will see two options, one for check in and and one for ticket management.
Step 6: Click on the Ticket Management In QR Code URL, then click on INSERT SELECTED.
Step 7: Your token will then appear in your message as shown below.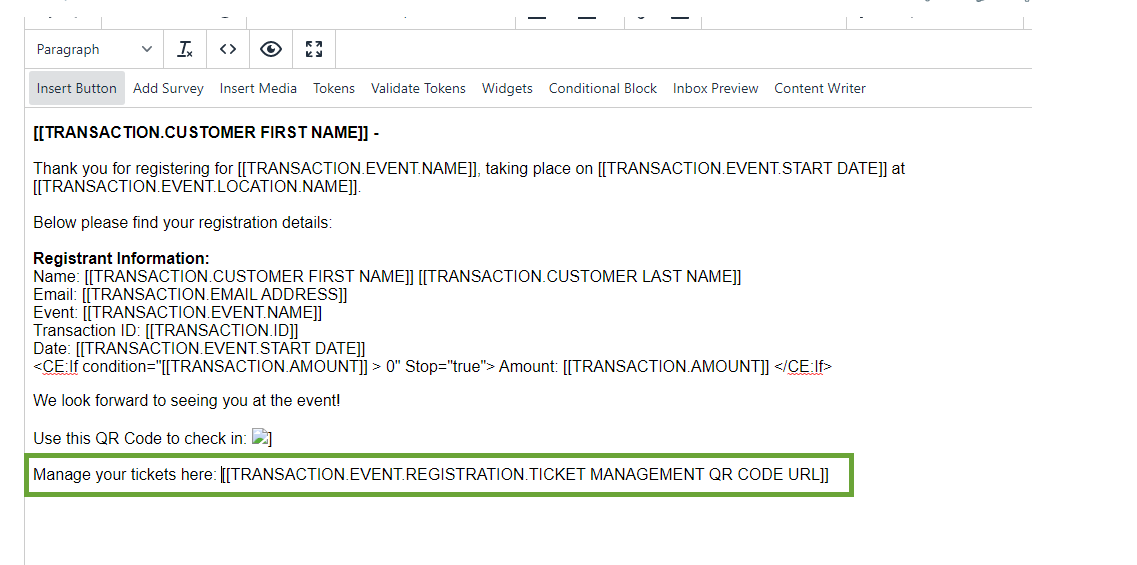
Step 8: From here, locate the Source Code option from the top menu listing.

Step 9: Next, locate the QR token that was added to your message. The user will warp the token using <img src="" />
Example:
Using this token and wrapper: <img src="" />

Step 10: When the registrant submits on the form, they will then have a link at the bottom of their email that will lead them to the QR code.
Instructions - Adding Calendar URL Token on Receipting
CharityEngine does allow guests to populate an iCalendar token within the receipting template allowing guests to "add to my calendar".
Step 1: To do this, navigate to your form via the Online App > Web Forms > Search & Manage > identify your form > ACTIONS > Manage
Step 2: On the Email tab, hover over the gear icon next to the Email message and then click on the pencil to manage the email.
Step 3: You will be navigated to manage the email message. From here you will need to add the token that will populate the QR code on the registration email. Click on Tokens in the WYSIWYG tool bar.
Step 4: Then type in ADD TO CALENDAR URL in the search box.
Step 5: Click on the Add To Calendar URL, then click on INSERT SELECTED.
Step 6: Your token will then appear in your message as shown below.
FAQ & Additional Reading
Q: Is there a QR Code for the event registration form?
A: Yes, you can view the QR Code on the General tab of the form and then save the image and use in a variety of different communication methods, such as social media and direct mail pieces.
