Introduction
CharityEngine allows users to create and use regions as a way of grouping data. This data can then be used to send communications to a specific group that resides within a region or be used to analyze events, transactions, and form submissions. Use cases for regions include geographical locations (Northeast, Southwest), chapters, lodges, etc.

Table of Contents
- Introduction
- Prerequisites
- Instructions
- How to create a region
- How to Assign Regions in CharityEngine
- 1. How to Assign Regions within a Contact Record
- 2. How to Assign Regions While Creating a Transaction Record in CharityEngine
- 3. How to Automatically Assign Regions on Web Forms (All transactions to one region)
- 4. How to Automatically Assign Regions on Web Forms (Allowing Donors to Select a Region)
- 5. How to Automatically Assign Regions on Events
- 6. How to Automatically Assign Regions to Contact Records Using Triggers
- 7. How to Append Regions to Transactions Records
- How to use the Data
- FAQs & Further Reading
Prerequisites
- Prior to using regions, consider your organizational structure and needs.
- Regions can be nested with a "Parent".
- Regions can also be assigned a solicitor in mass.
Instructions
How to create a region
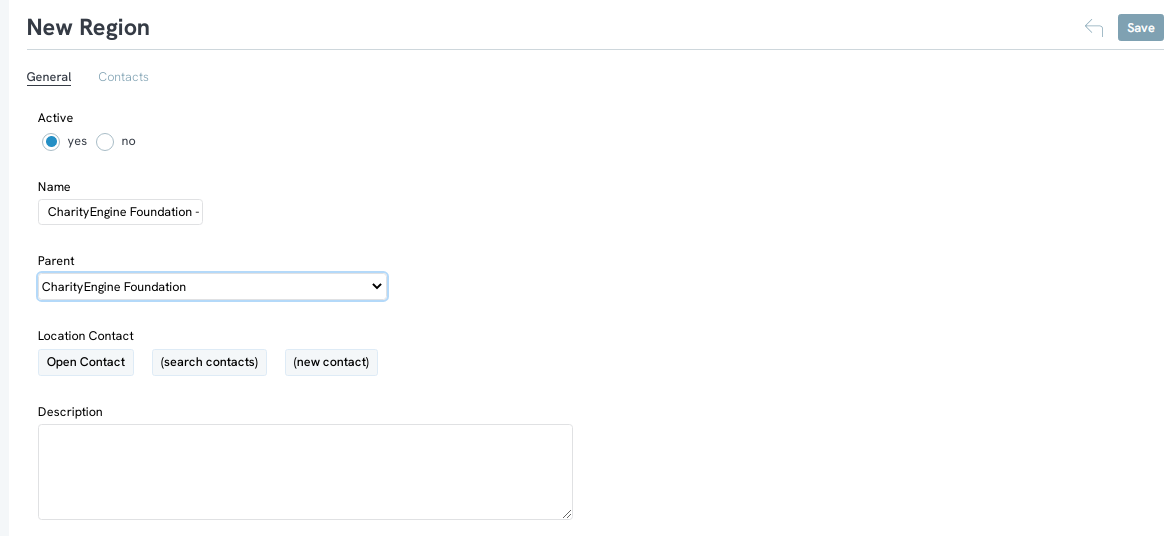
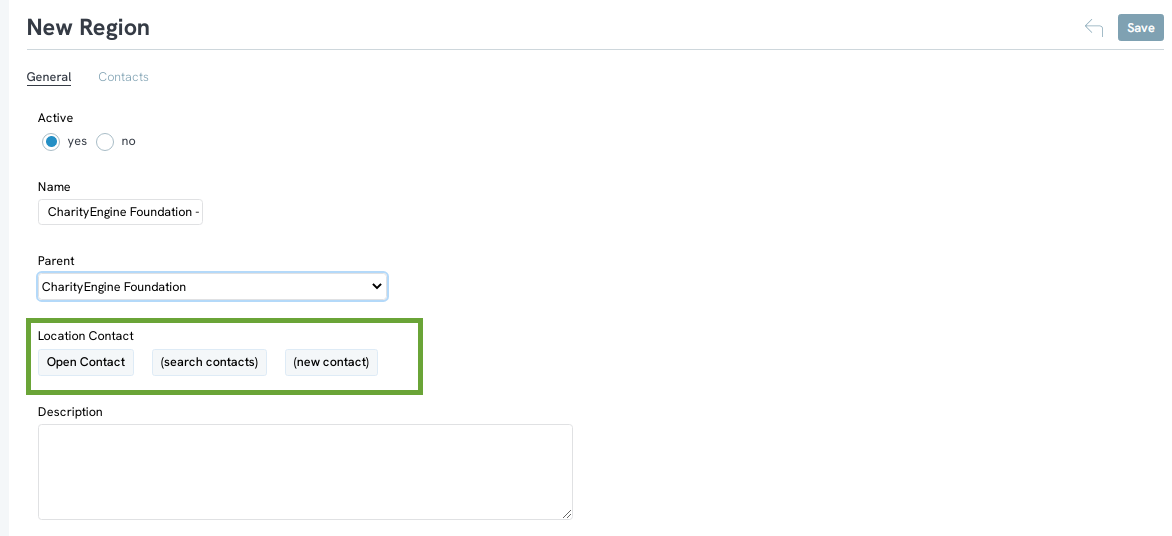
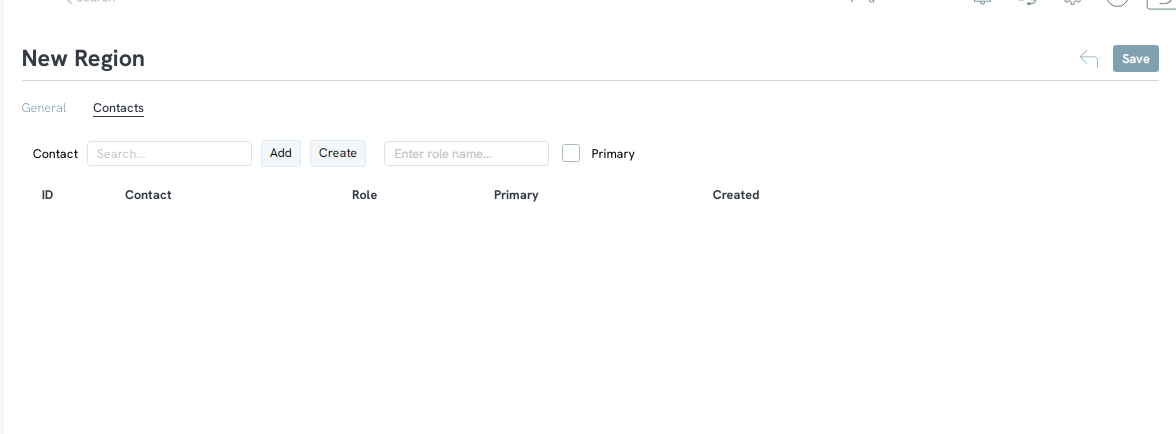
Before you can use regions within CharityEngine, you must first create the regions.
-
-
- Note: If you require a Parent, create the parent region first.
- Click SAVE
-
How to Assign Regions in CharityEngine
Once your regions have been configured and saved, you will be able to use them within CharityEngine to collect data.
1. How to Assign Regions within a Contact Record
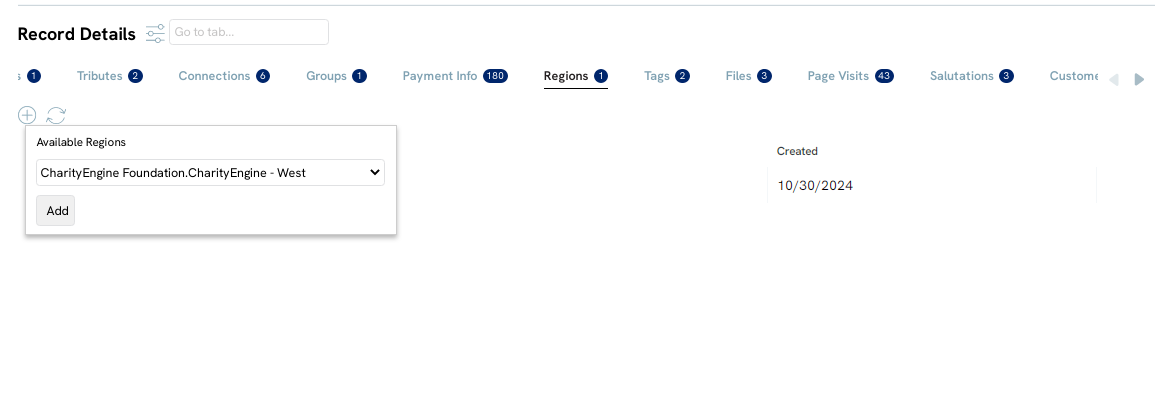
One area that regions can be used in is Contacts. Contacts can be assigned to a region allowing them to be grouped with others in that region. Users can then send communications to contacts within a region and also analyze specific data of contacts within a region.


-
- Note: Contacts can have more than one region assigned to them.
2. How to Assign Regions While Creating a Transaction Record in CharityEngine
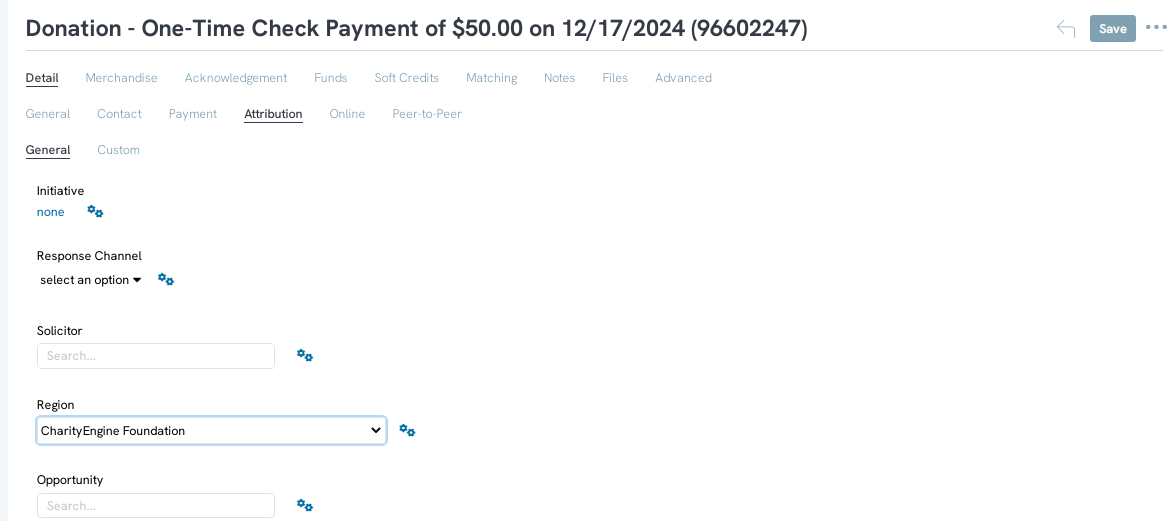
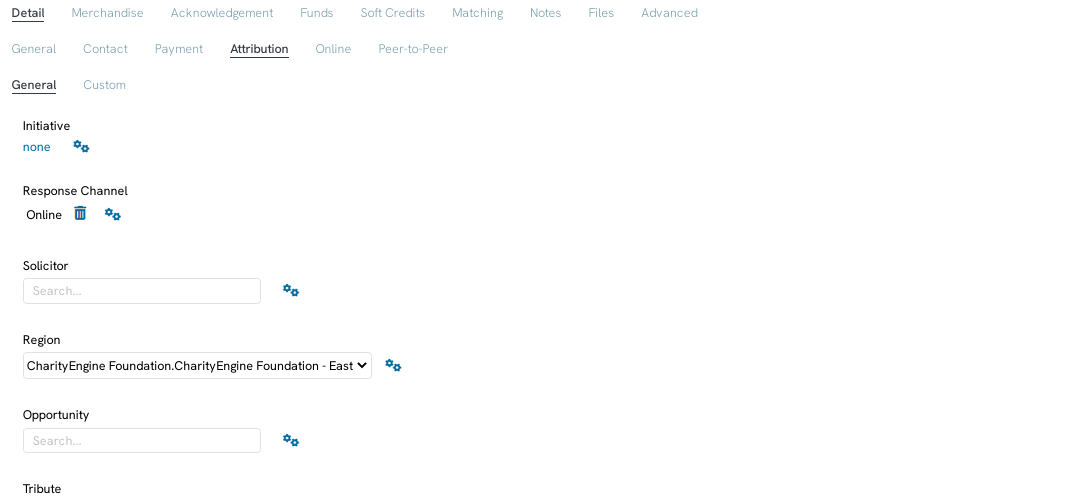
Regions can also be captured in a transaction when the transaction is created or by managing the transactions after creation. By capturing the region on a transaction, users will be able to analyze the profitability of a region. This data can also be used to learn what regions solicitors should focus their energy on to continue gaining from a region or to promote more giving in a failing region.
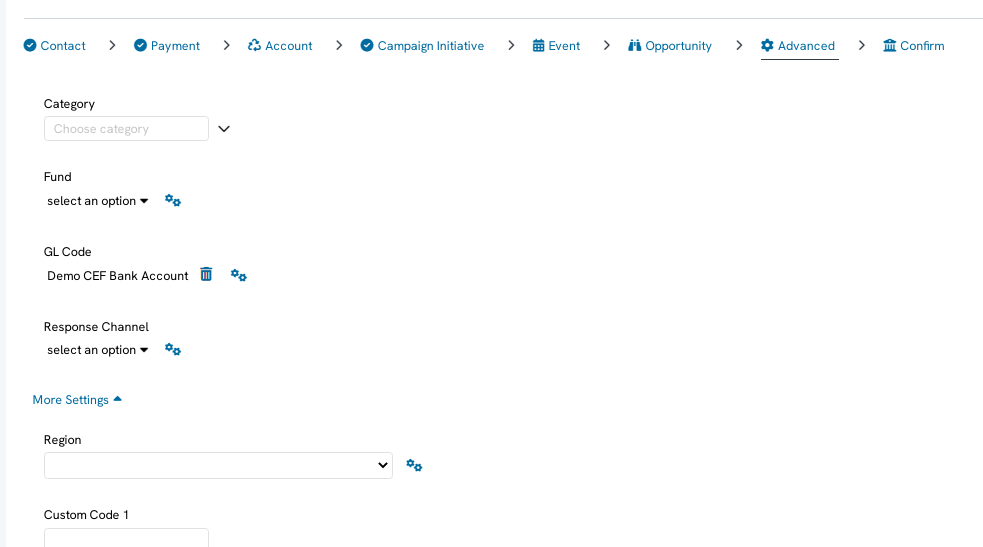
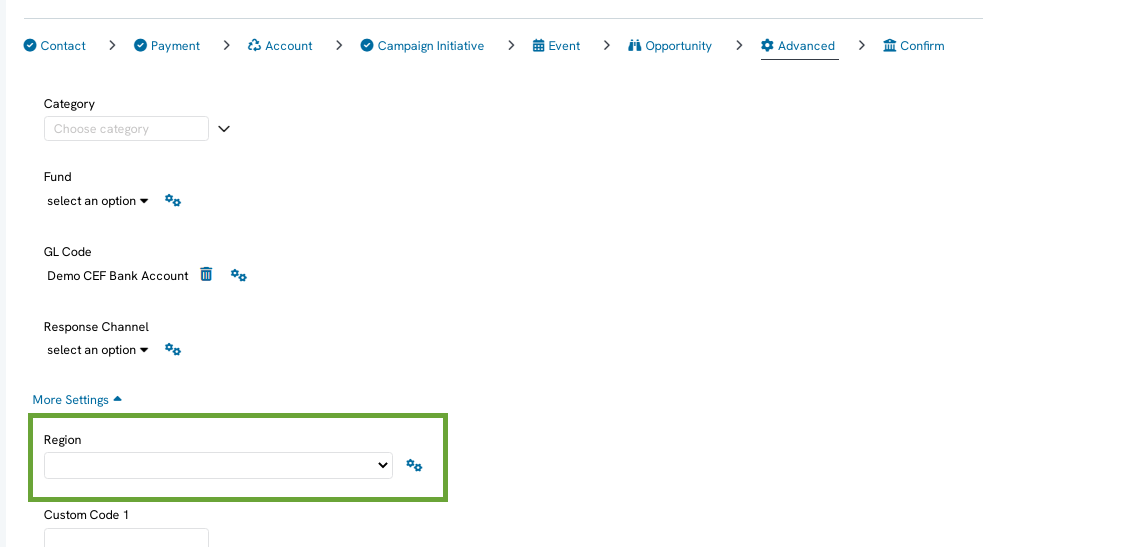
3. How to Automatically Assign Regions on Web Forms (All transactions to one region)
Regions can be set on Web Forms as a way of data collection. Depending on the type of form, the data is collected in different ways. For example, if the form is a donation form, when the form is submitted, the region will automatically be attributed to the transaction.

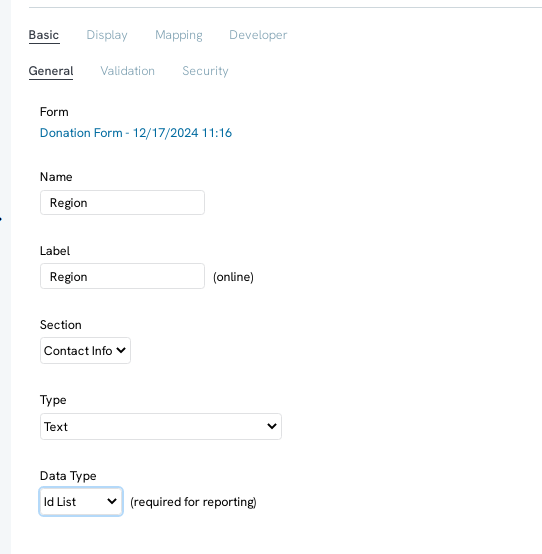
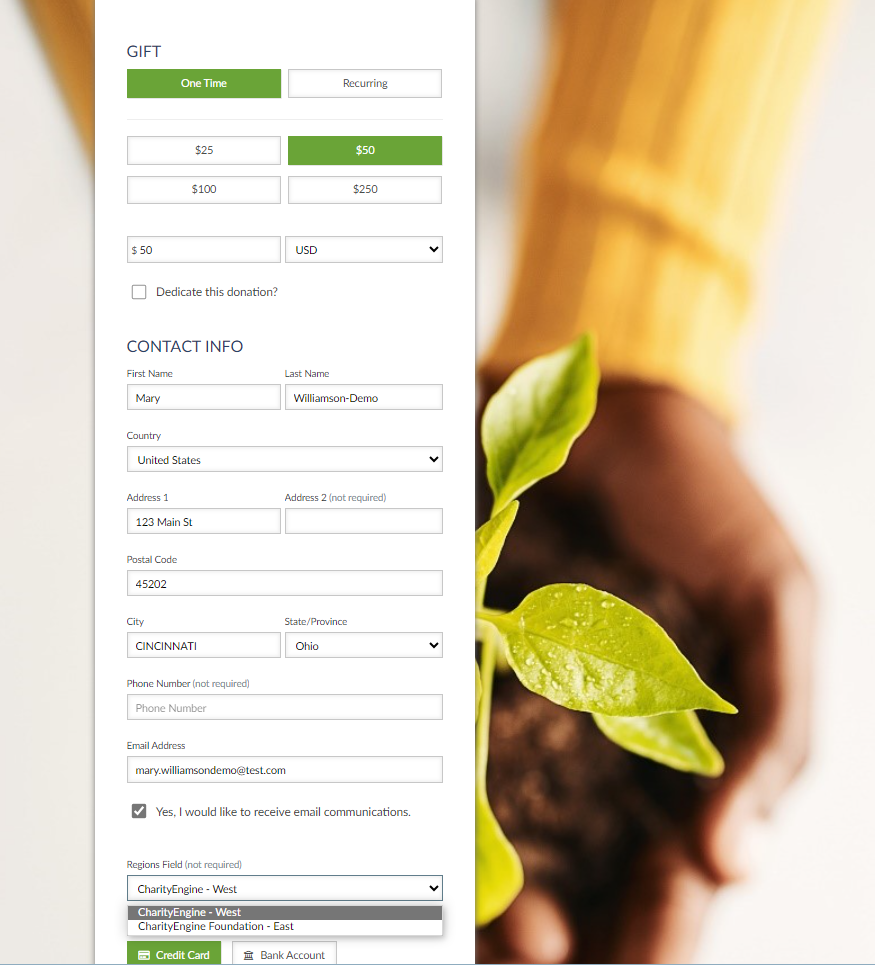
4. How to Automatically Assign Regions on Web Forms (Allowing Donors to Select a Region)
Regions can be set and mapped on Web Forms as a way of data collection. Depending on the type of form, the data is collected in different ways. For example, if the form is a donation form, this use case demonstrates how to allow a user to select the region and once the form is submitted, the region will automatically be attributed to the transaction.


5. How to Automatically Assign Regions on Events
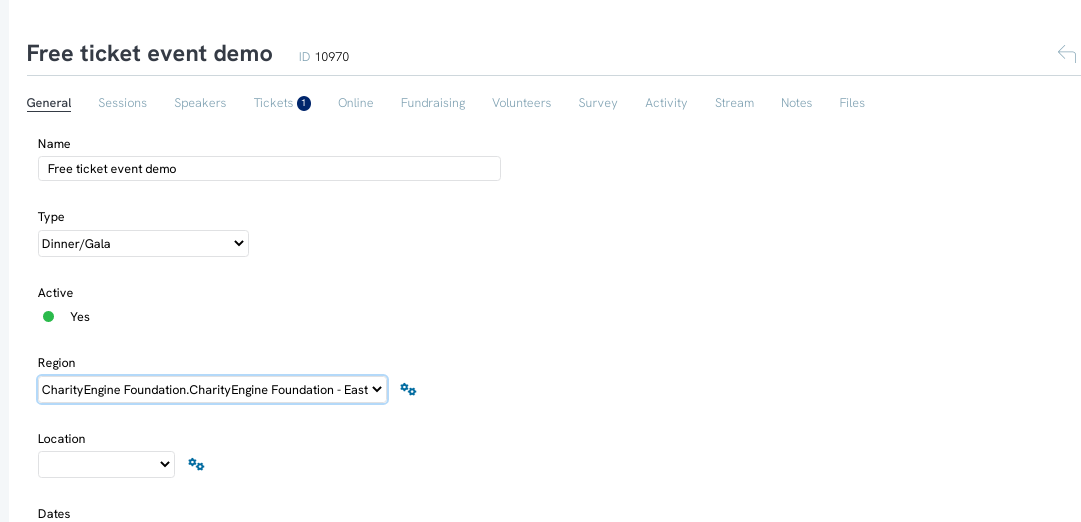
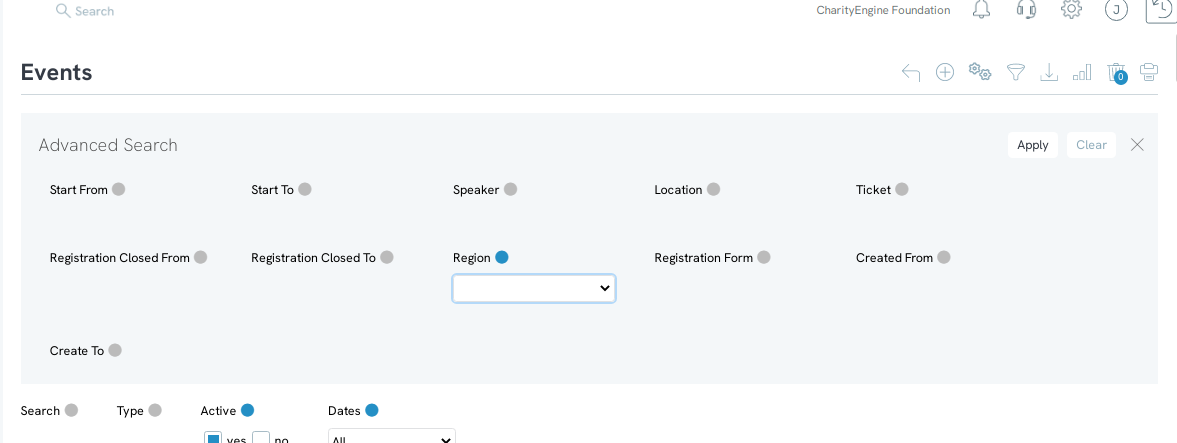
When creating an event, users can attribute a region to that event. This will allow users to filter the event by region and analyze the event by region.
6. How to Automatically Assign Regions to Contact Records Using Triggers
For data governance needs, users can leverage the Triggers feature to ensure regions are assigned and maintained automatically.
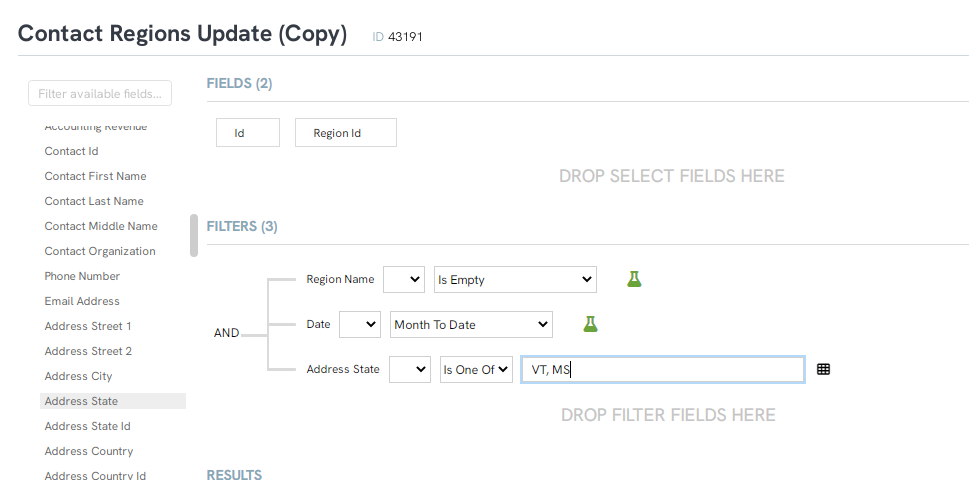
In this example, we will establish a quarterly job that will locate new contacts created in the last previous quarter, with a primary state address of Ohio, and any contact that has not already been assigned a region.
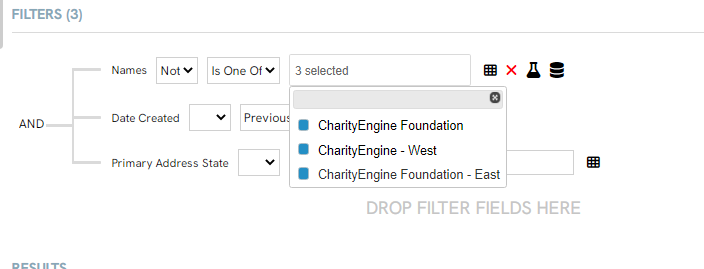
Step 4: Create your trigger for the update by navigating to the Automation & Workflow App > Workflow > Triggers > Create New > Type: Assign Contact Regions > Next
Step 5:
-
-
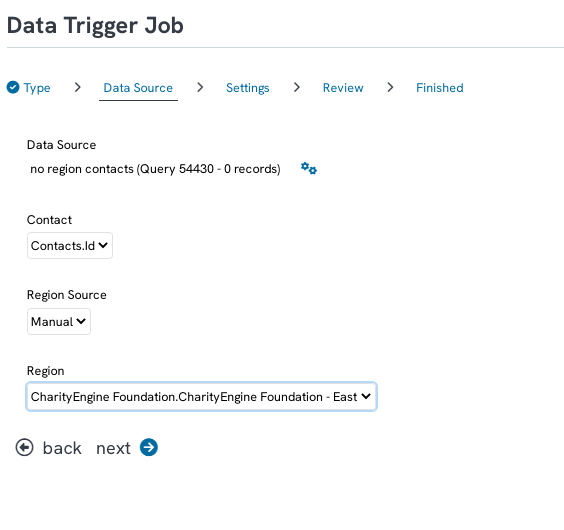
- Data Source: select the query created in step 3
- Contact: select the Contact.Id - this identifying the field within the query used to locate the record
- Region Source: manual
- Region: select the region to be assigned to the contacts
- NEXT: click here to proceed
-
Step 6: Set the details for your trigger
-
-
- Name (required): Name your query
- Start: optional date assignment to begin your trigger
- Description: optional
- Send Notification: default to owner, add additional emails with use of comma
- Clear Existing: default to No - do not clear previously assigned region attribution; toggle to Yes if you wish to override; note, contacts can have 1 or more regions
- NEXT to proceed with trigger set up
-
Step 7: On the confirmation screen, click FINISH
Step 8: Here, the trigger completed an update of 13 records. To schedule this for automatic and repetitive update, select Schedule under ACTIONS
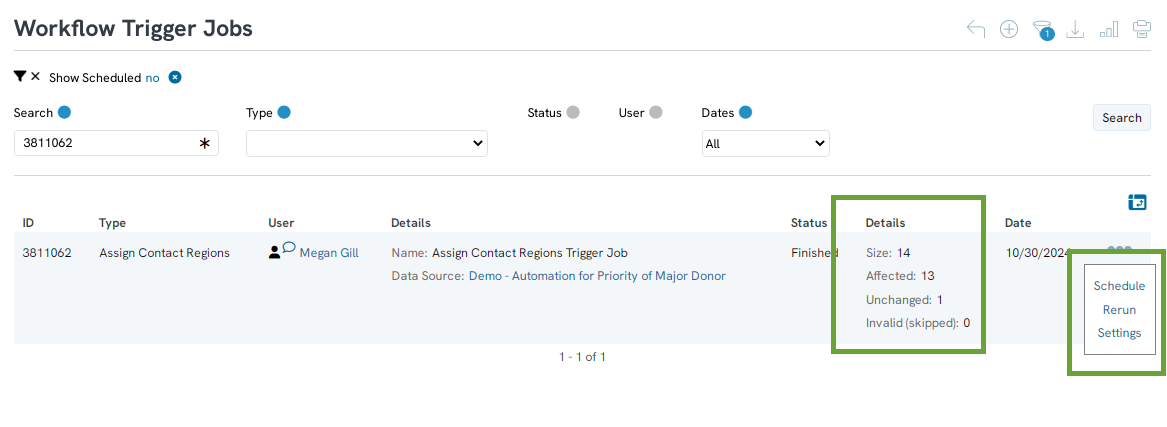
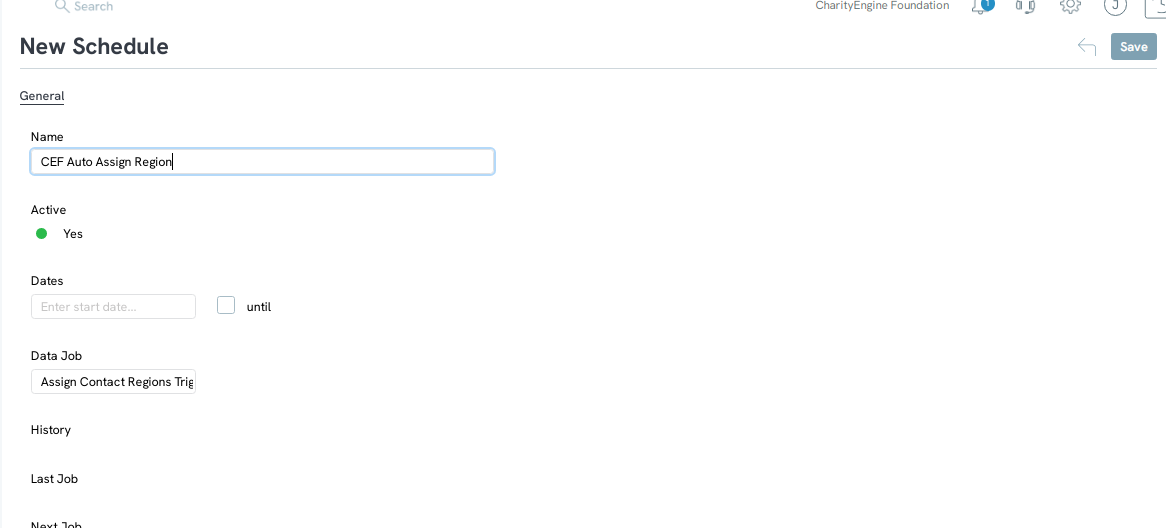
Step 9: Create your schedule details
-
-
- Name: required
- Active: default to yes
- Dates: select start/end dates; in this example, the next job will be scheduled to begin the first calendar day of the 2nd quarter
- Data Job: defaults to your job created in step 6
- Description: optional for details/notations
- SAVE: click here to secure your schedule details
-
Step 10: Navigate to the Triggers tab and Select to identify your preferred frequency. Use each drop down to determine time frequency and time of day. Click ADD to assign the trigger. And complete by clicking SAVE.

Now, your automated job will run and update your identified contacts with the region. No additional action is needed by the end user. Regions will be assigned and can be located on the contact record.
7. How to Append Regions to Transactions Records
For data governance needs, users can leverage the Import/Export feature to ensure regions are assigned to transactional records.
In this example, we will establish a query designed to capture transactions created this month, with a primary state address of Vermont or Mississippi, and the transaction region is currently null.
Step 4: Download your transactions and save to your local drive. In this example, we will delete the column Transactions.Address State as this will not be required for the appending activity. Add the Region ID to be assigned to the transaction in a column header named Transactions.Region. This will become your import file for the data append.
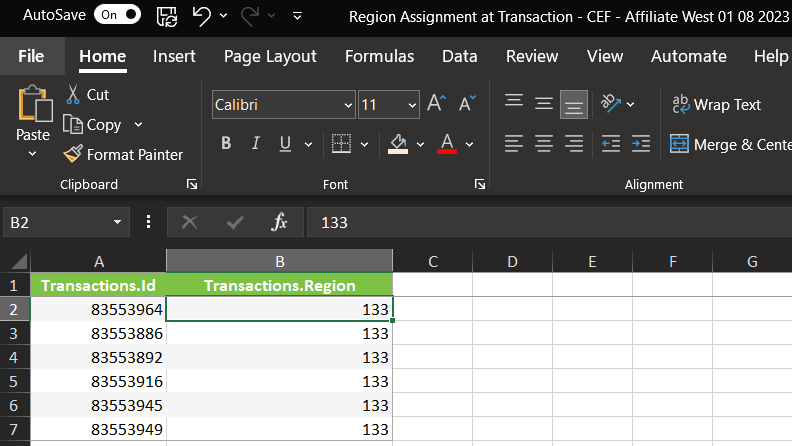
- To locate your Region ID, navigate to the Configuration App > Regions & Chapters > Regions. And from the listing screen, locate the region id (in this example we will use 133 for CEF - Affiliate West)
Step 5: Next navigate to the Automation & Workflow App > General > Import & Export > Create New: Import> Import To: Transactions > NEXT
Step 6: Upload our file
Step 7: Use the dropdowns to map your file fields to CharityEngine fields.
Step 8: Update your additional job setting details and proceed to NEXT for confirmation.
Step 9: Review your confirmation page and click FINISH to initiate your data append job. Click on View Job Status if you wish you immediately monitor.
Once your data job has finished, review for any errors. A successful transaction record will present your Region assignment as displayed on the Detail > Attribution > General tabs.
How to use the Data
The data collected by using regions can be used in a few different ways. As shown above, attributing regions to contacts, transactions, and events can allow for easy filtering on the listing screens, but additional actions such as building a query and viewing reports can also be preformed if regions are assigned.
1. Query builder
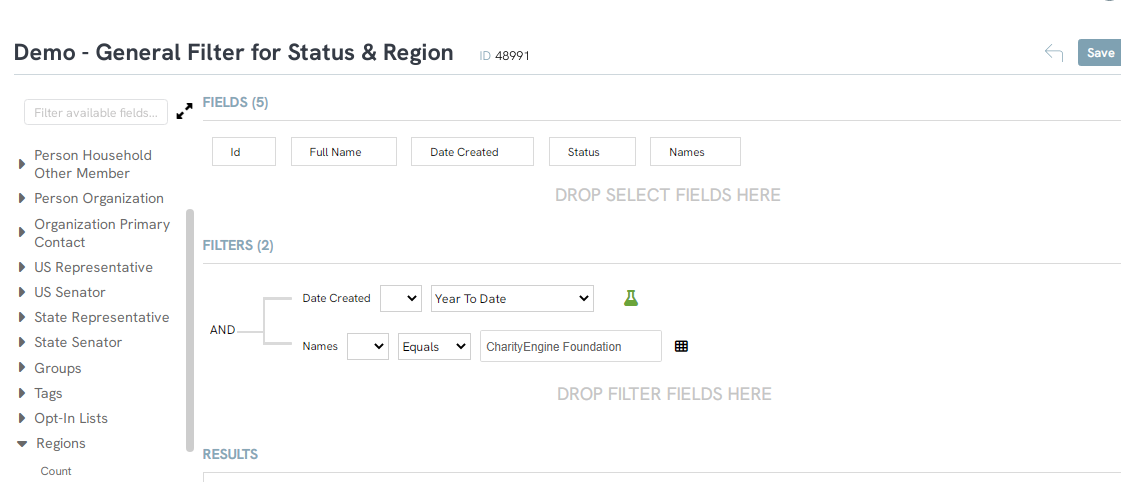
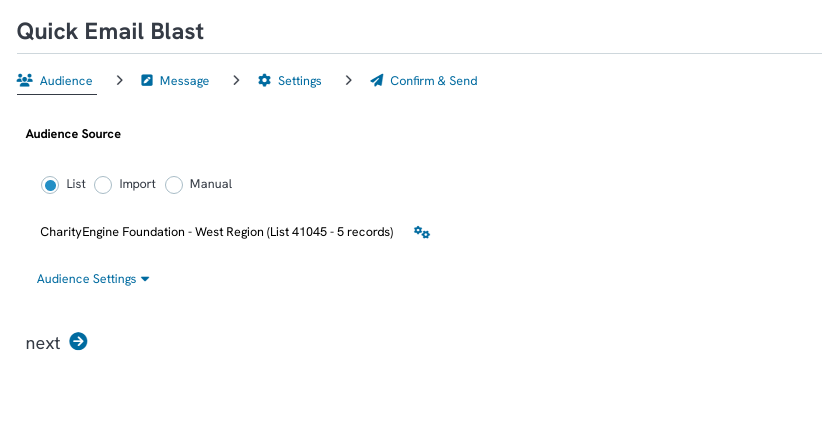
Regions can be used as a filter in the Query Builder tool to compile a list. The most common use for filtering for regions in queries is to create a list of contacts to send an email blast to.
-
2. Reports & Analytics
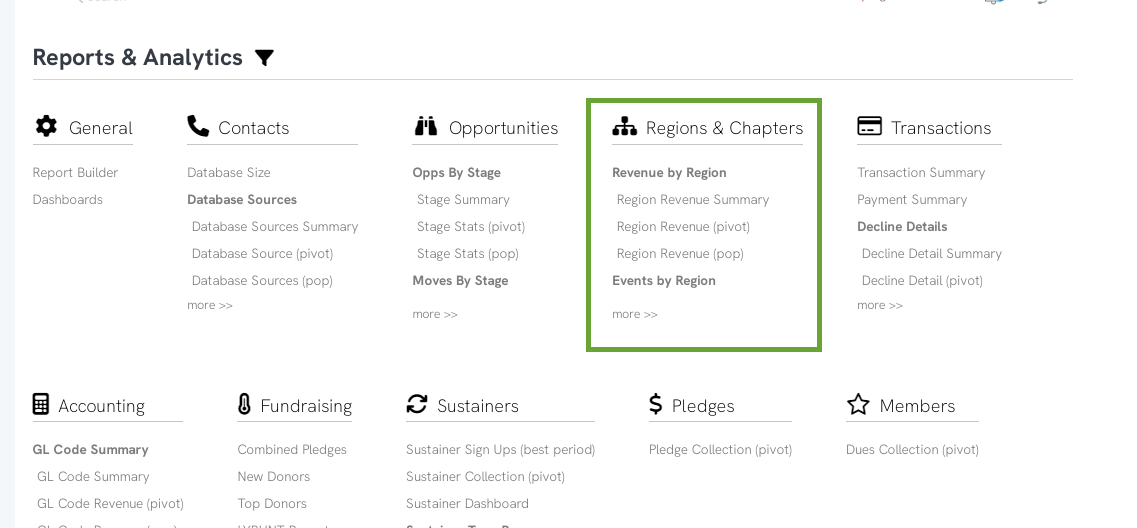
Navigate to Reports & Analytics App > Regions & Chapters. There are several reports that focus on Regions that can be found, such as Revenue by Region and Events by Region. These reports will analyze data captured by using regions throughout CharityEngine.
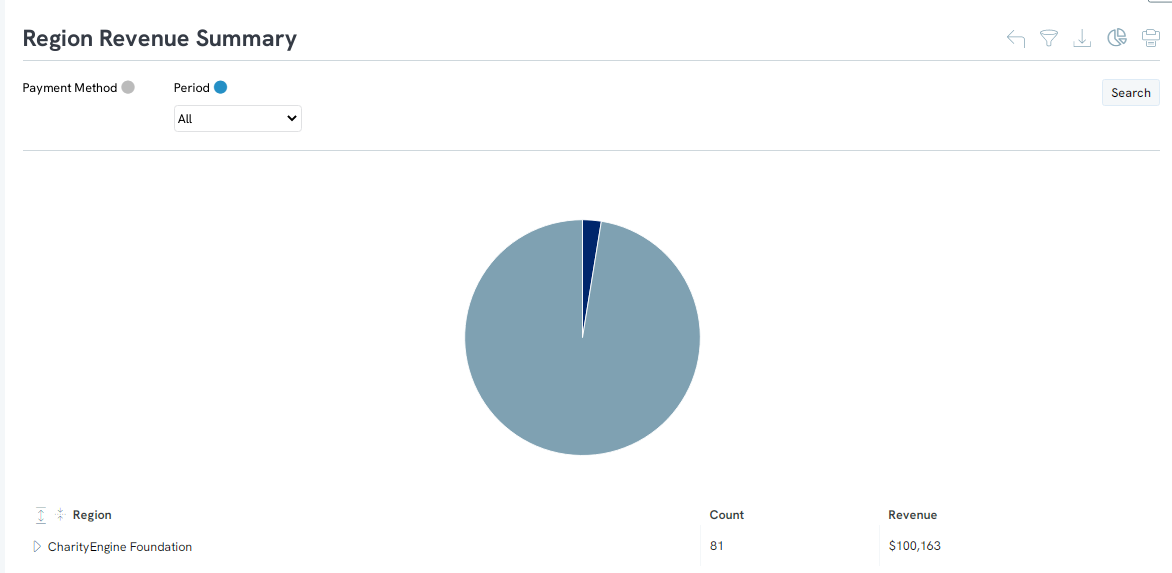
Below is an example of the Region Revenue Summary report.
The Revenue by Region is also available for period over period comparison.
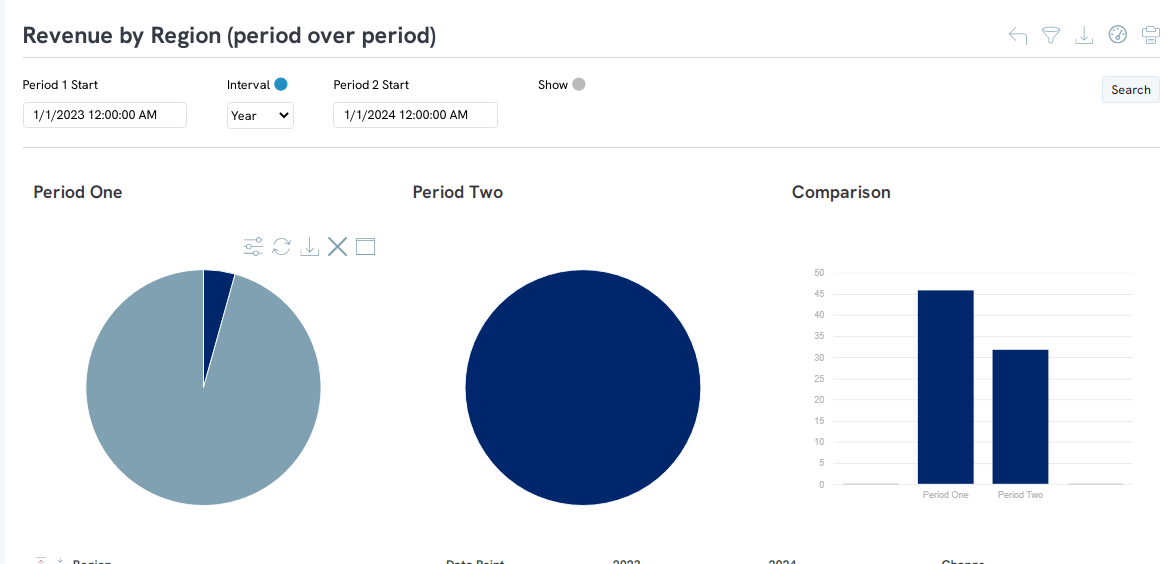
These pre-configured reports will allow you to take a deeper look on how productive a region is and help to focus energy and resources on regions that either need help to promote giving or continue promoting in regions that are successful.
-
3. Basic Search/Reporting Options for Contacts (from listing screen)
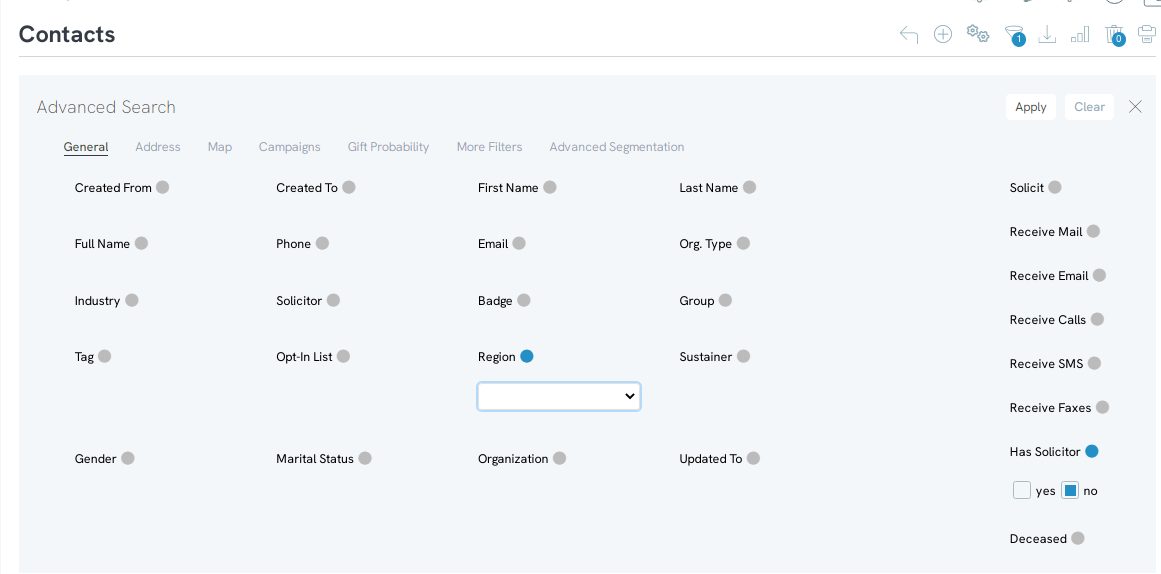
-
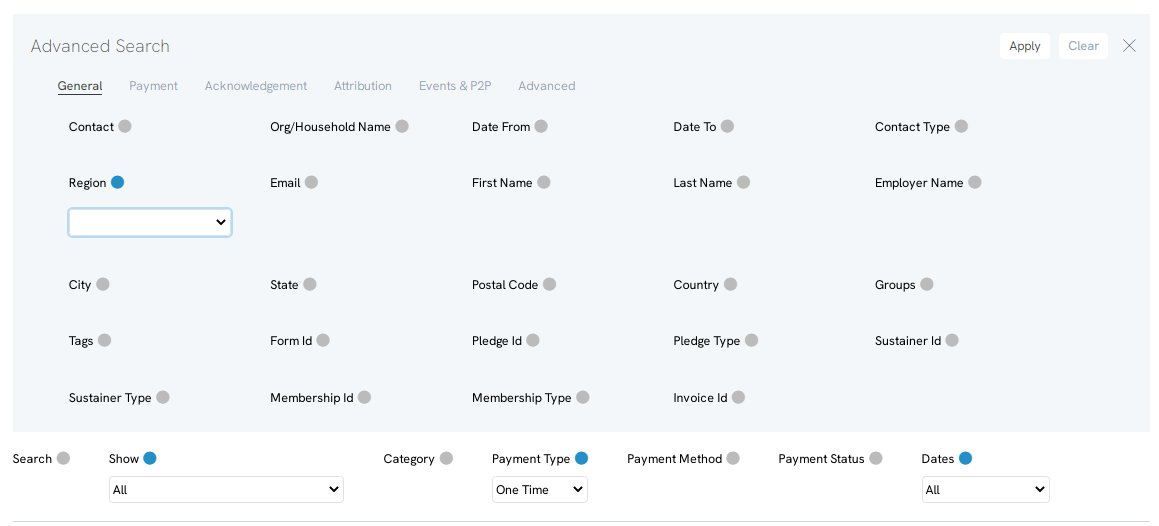
4. Basic Search/Reporting Options for Transactions (from listing screen)
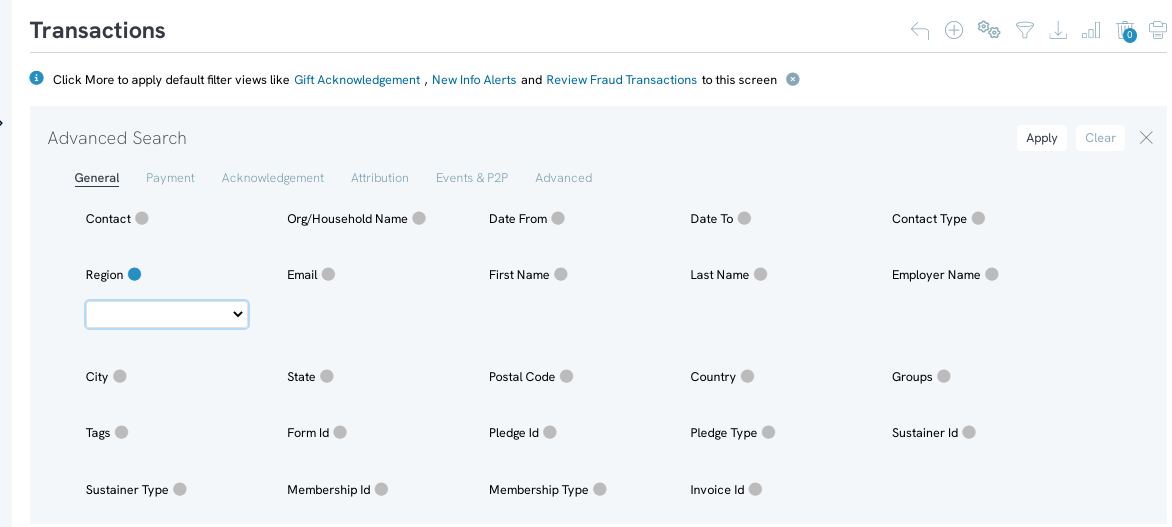
FAQs & Further Reading
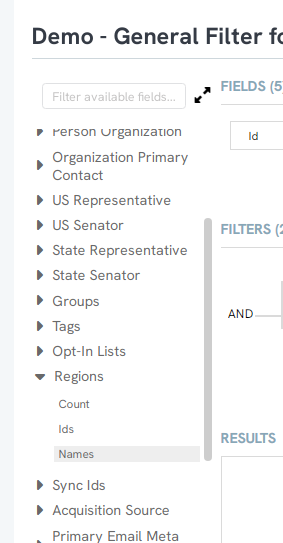
A. When querying from the Contacts database, the following region fields are available
A. Yes - as you create your email blast, under Settings > Additional Settings > Regions - you can assign your region for the assigned email blast.
