Introduction
CharityEngine provides an easy way to focus on the opportunities created in the system. Opportunities are CharityEngine’s moves management functionality. This feature is used to track progress with major donor asks, grant proposals, or any other contacts that the organization wishes to follow a specific workflow. This article will guide users on the available filters to narrow down your opportunities review as well as a walk through of each component of the opportunity record.
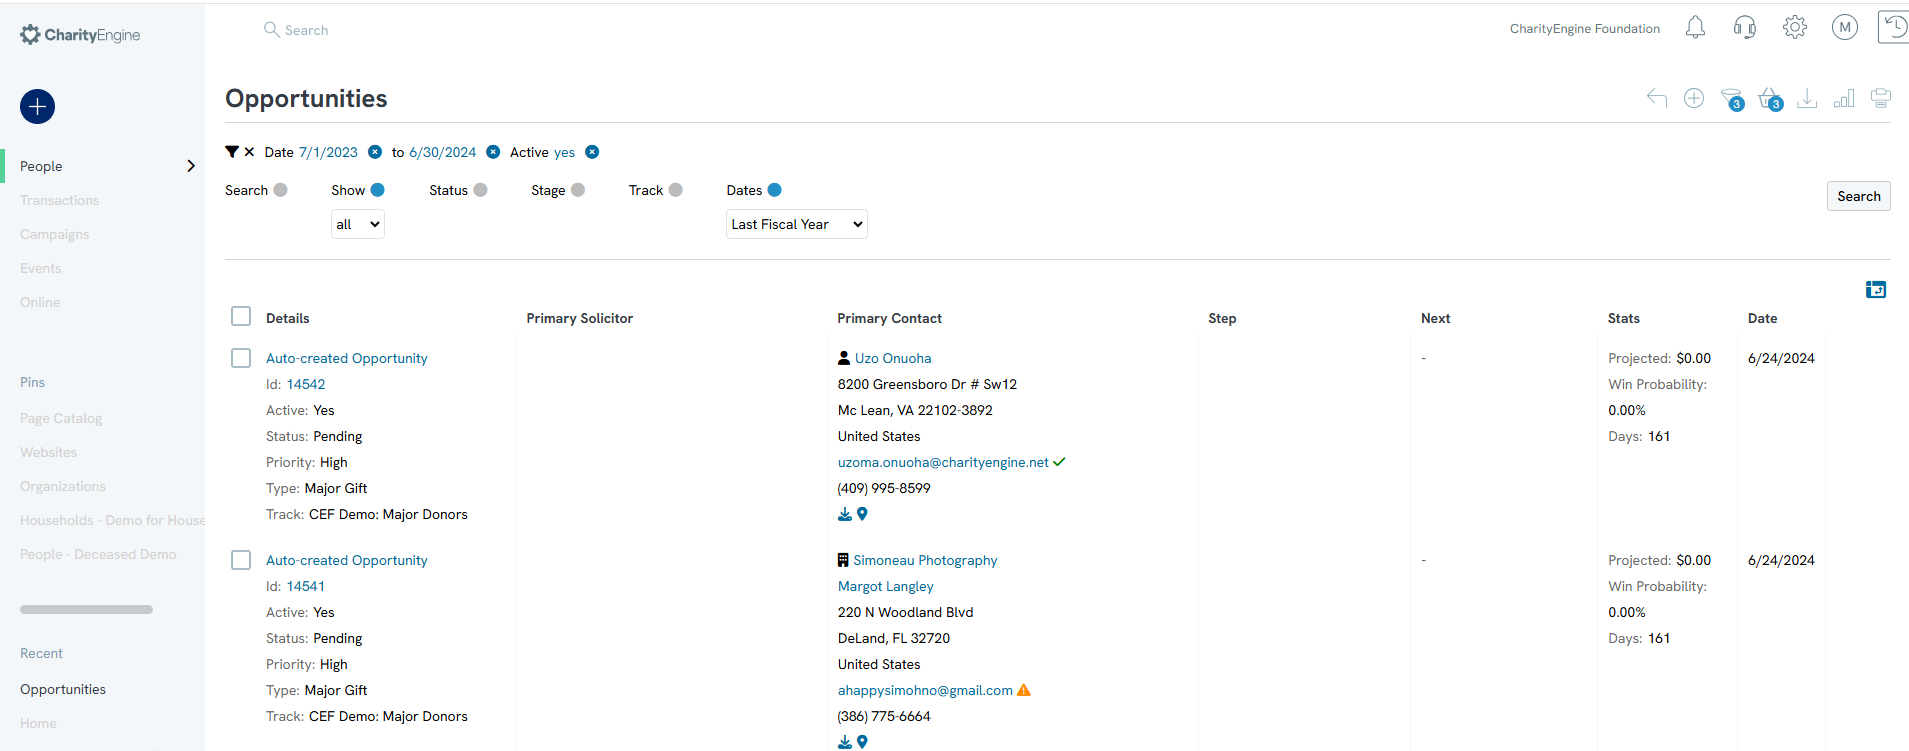
Table of Contents
- Introduction
- Prerequisites
- Instructions: Locating an existing opportunity
- Instructions: Managing an existing opportunity
- Opportunity: History
- Return to: Opportunities & Moves Management: Comprehensive Guide for Set Up, Configuration, and Reporting
Prerequisites
- Create one or more opportunities to explore the advanced filter feature.
Instructions: Locating an existing opportunity
-
-
- Search: Type a specific search
- Show: Choose to display all opportunities or just the ones assigned to you as the user
- Status: Filter by the status of the opportunity
- Stage: Filter by what stage the opportunity is in
- Track: Filter by the track
- Dates: Filter by specific dates
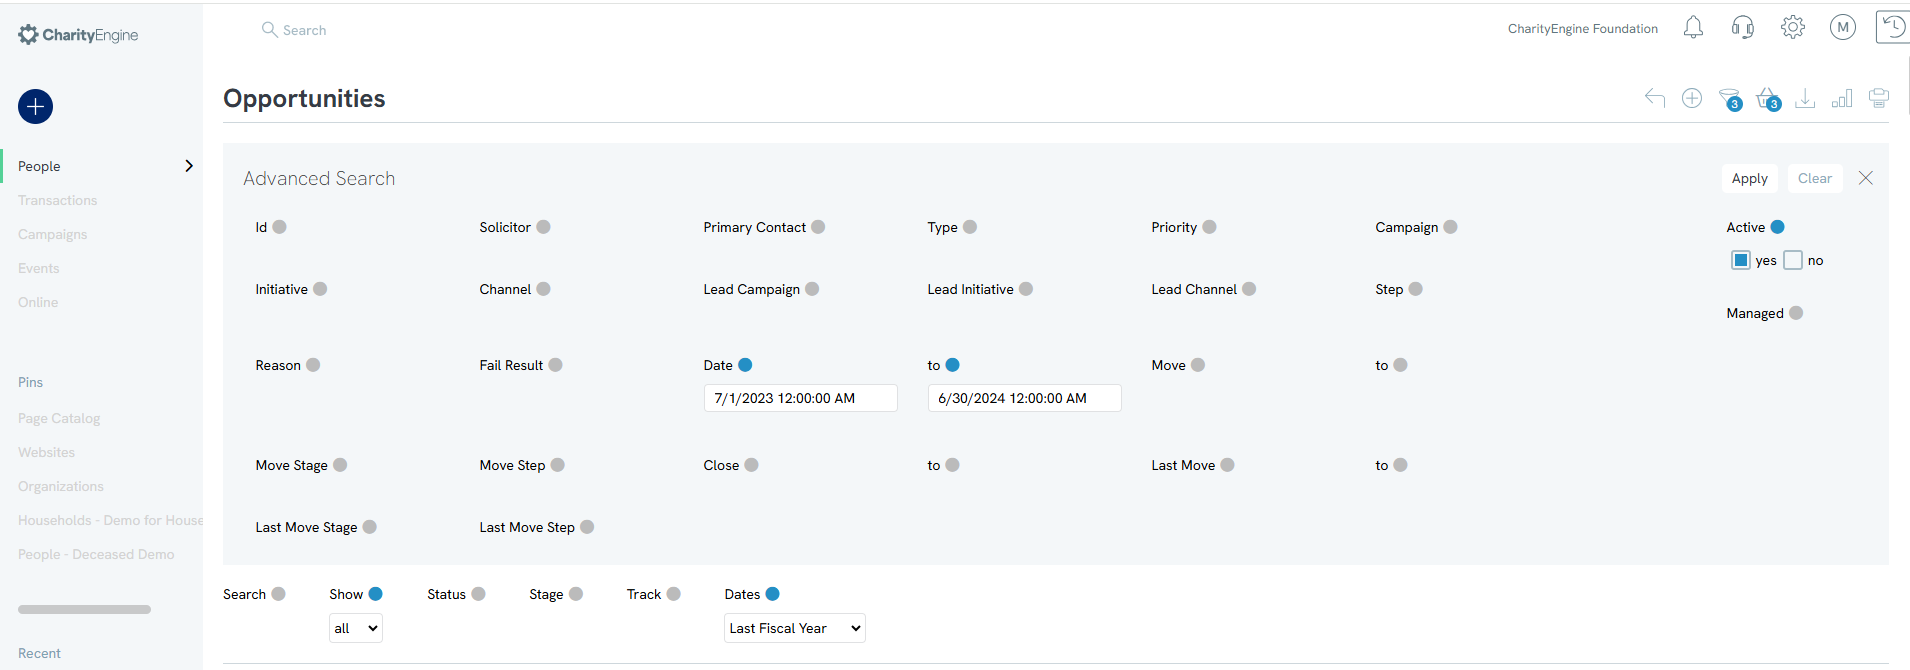
- Advanced Filter: Click the advanced filter to narrow down a search
-
Step 4:Once you find the opportunity you want, hover over ellipse (three dots to the right of the listing). Click Manage.
Instructions: Managing an existing opportunity
-
Opportunity: General Tab
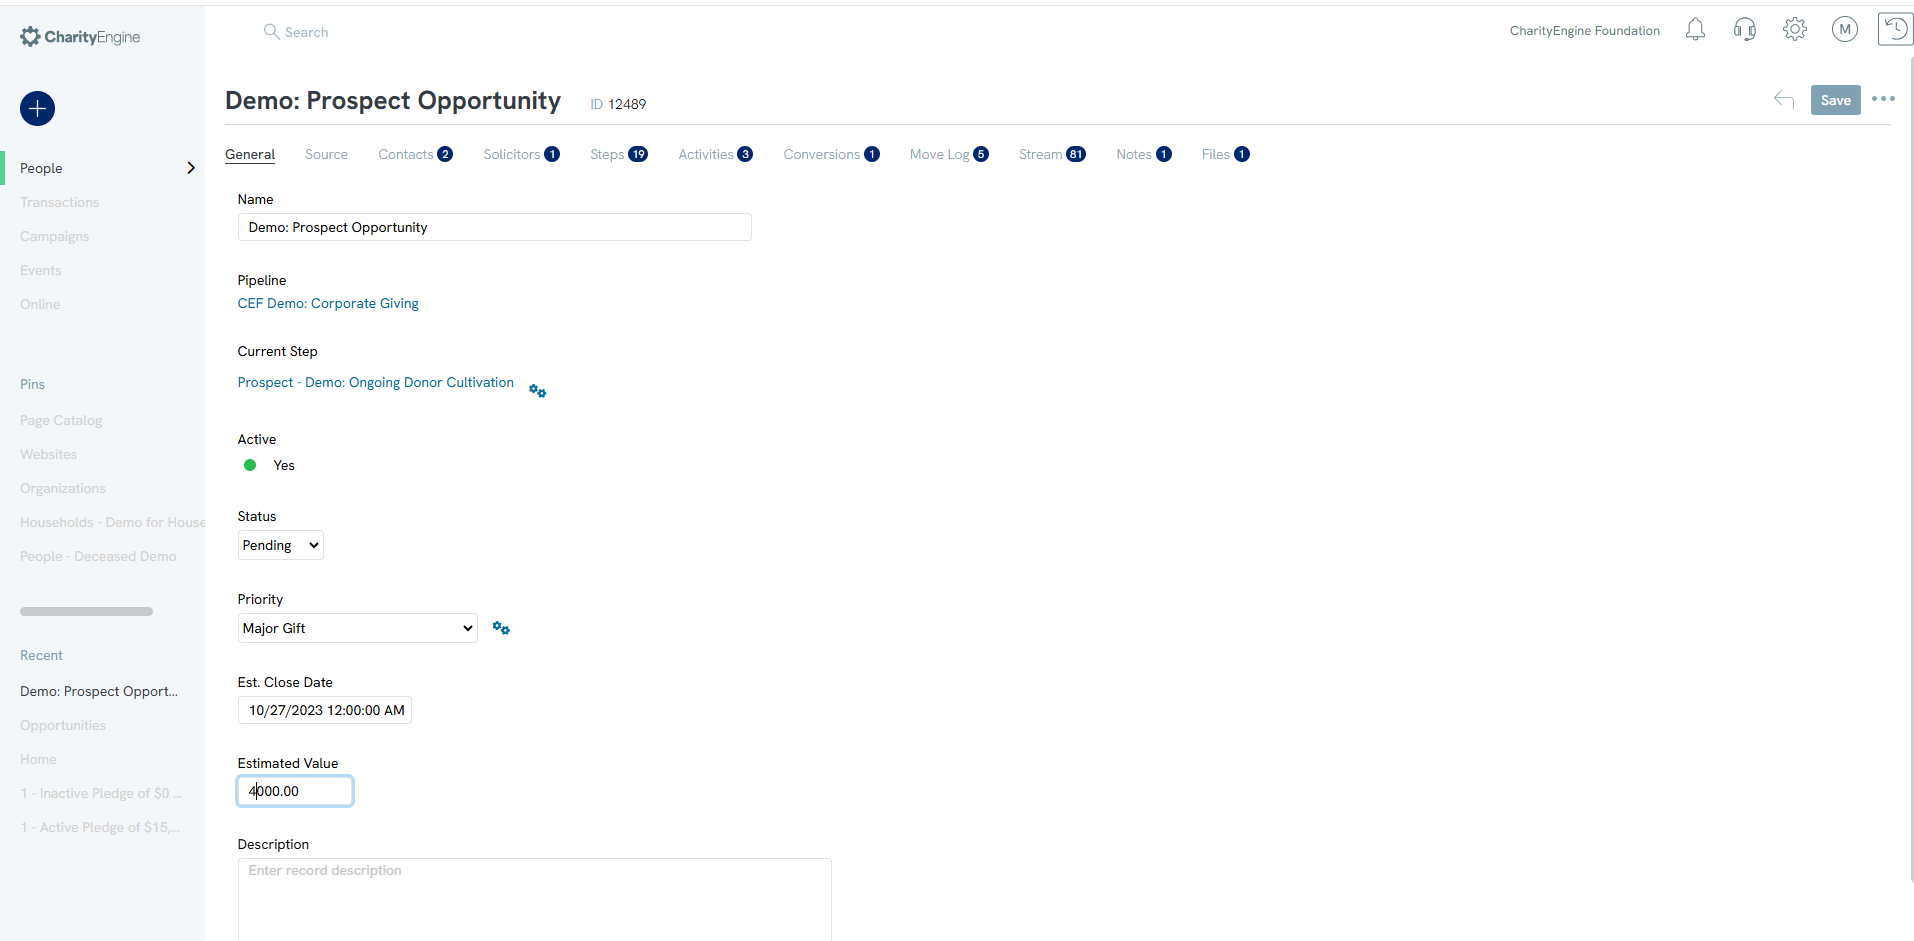
Under the General tab is the information that was written in when the opportunity was first created.
-
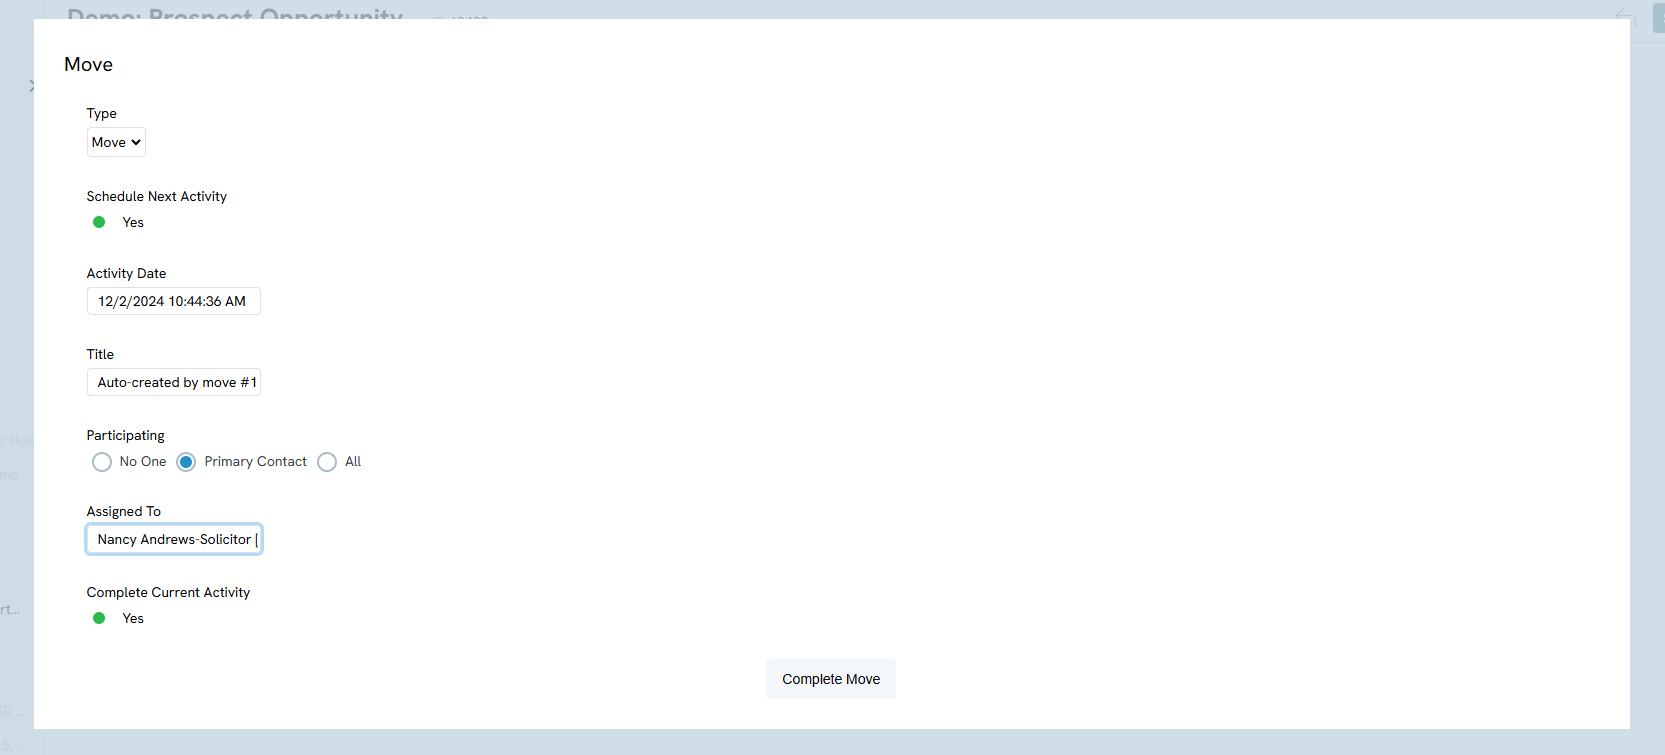
Current Step > Move to Next Step
-
Estimated Value/Date vs. Approved Value/Date
From the General tab, users can also manage the future, forecasted value and estimated secure date. Once the gift has been secured, the user can then capture the final gift value and date. Both values are captured for the user as it may be beneficial for organizations to store and monitor the forecasted value and compare to the actual, secured final value.
If the user wishes to include a forecasted value and/or date, when the status = Pending, the user will have access to enter values into the Est. Close Date field and/or the Estimated Value. Be sure to select Save to secure the value. 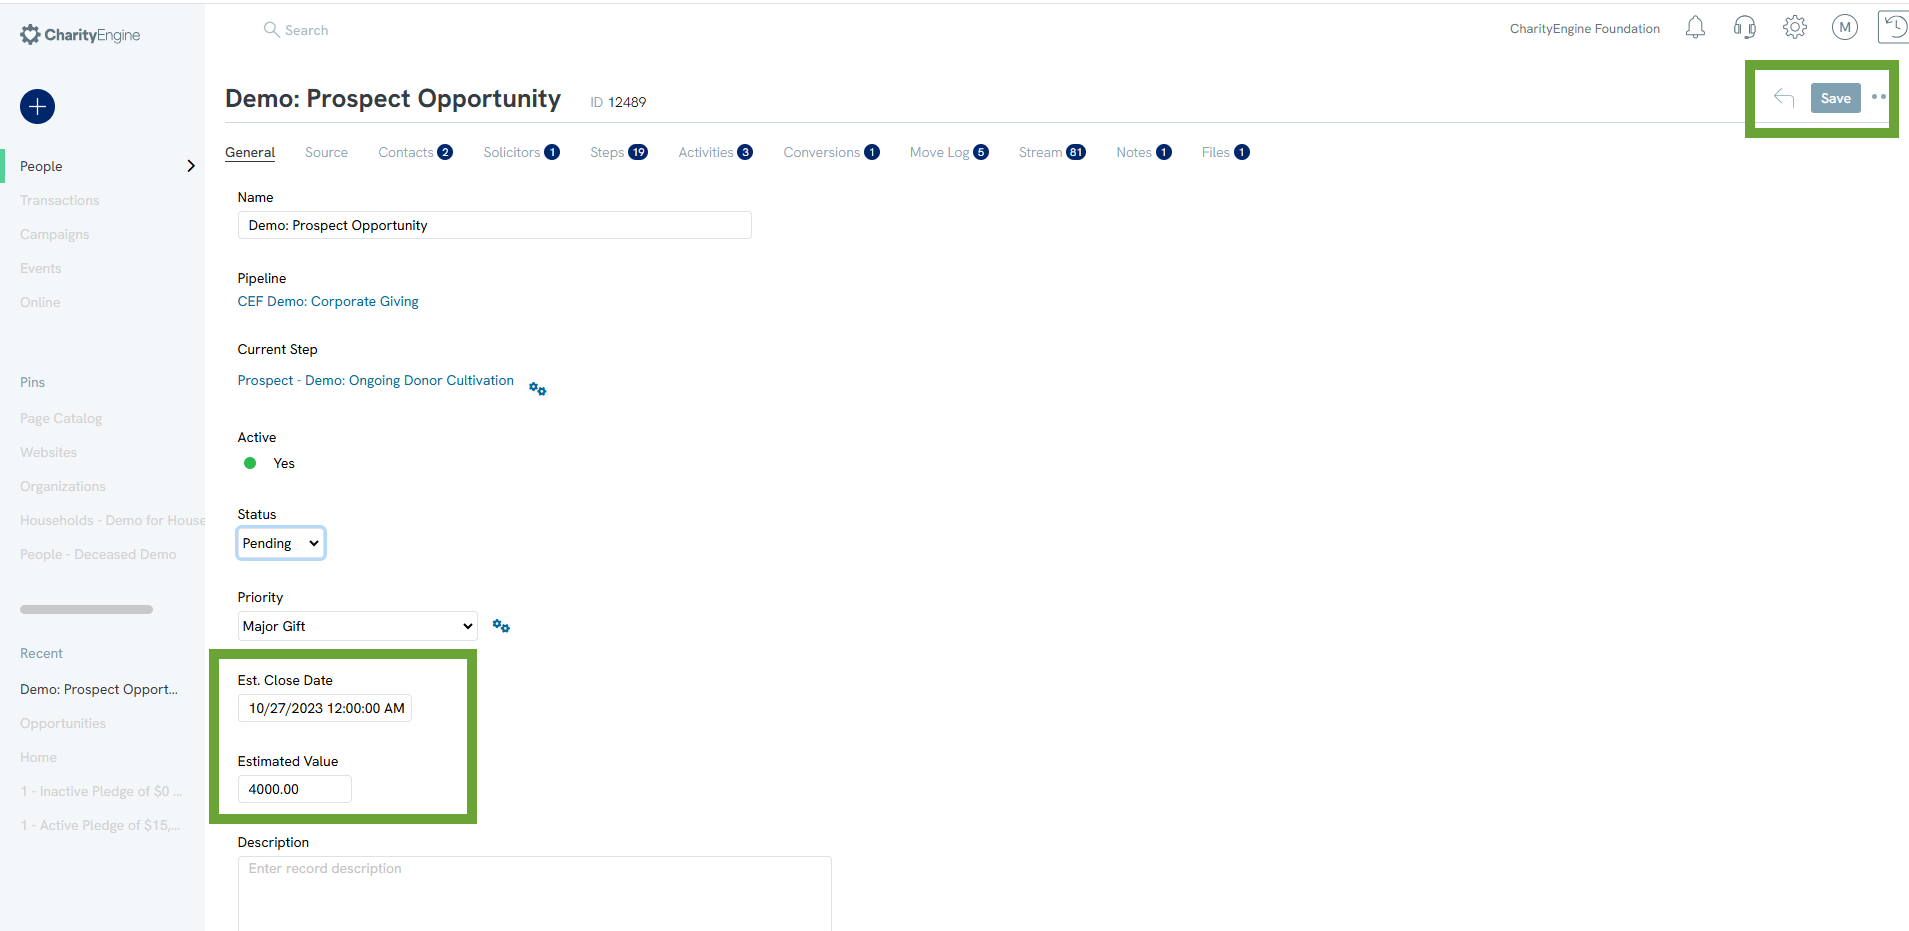
If the user selects a status of Approved the Completion Date and Value field will be exposed for the user to submit the final value and date. Select Save to secure the date point.
Note, a user can access the prior forecasted value and date by selecting the status = Pending to expose the original forecasted values.
Note, this financial value is a manually entered value and is not driven by transactions associated with the Conversations tab. This allows the user to provide a final value in the event additional transactions will be added in a future date while allowing the organization to track the total won value. 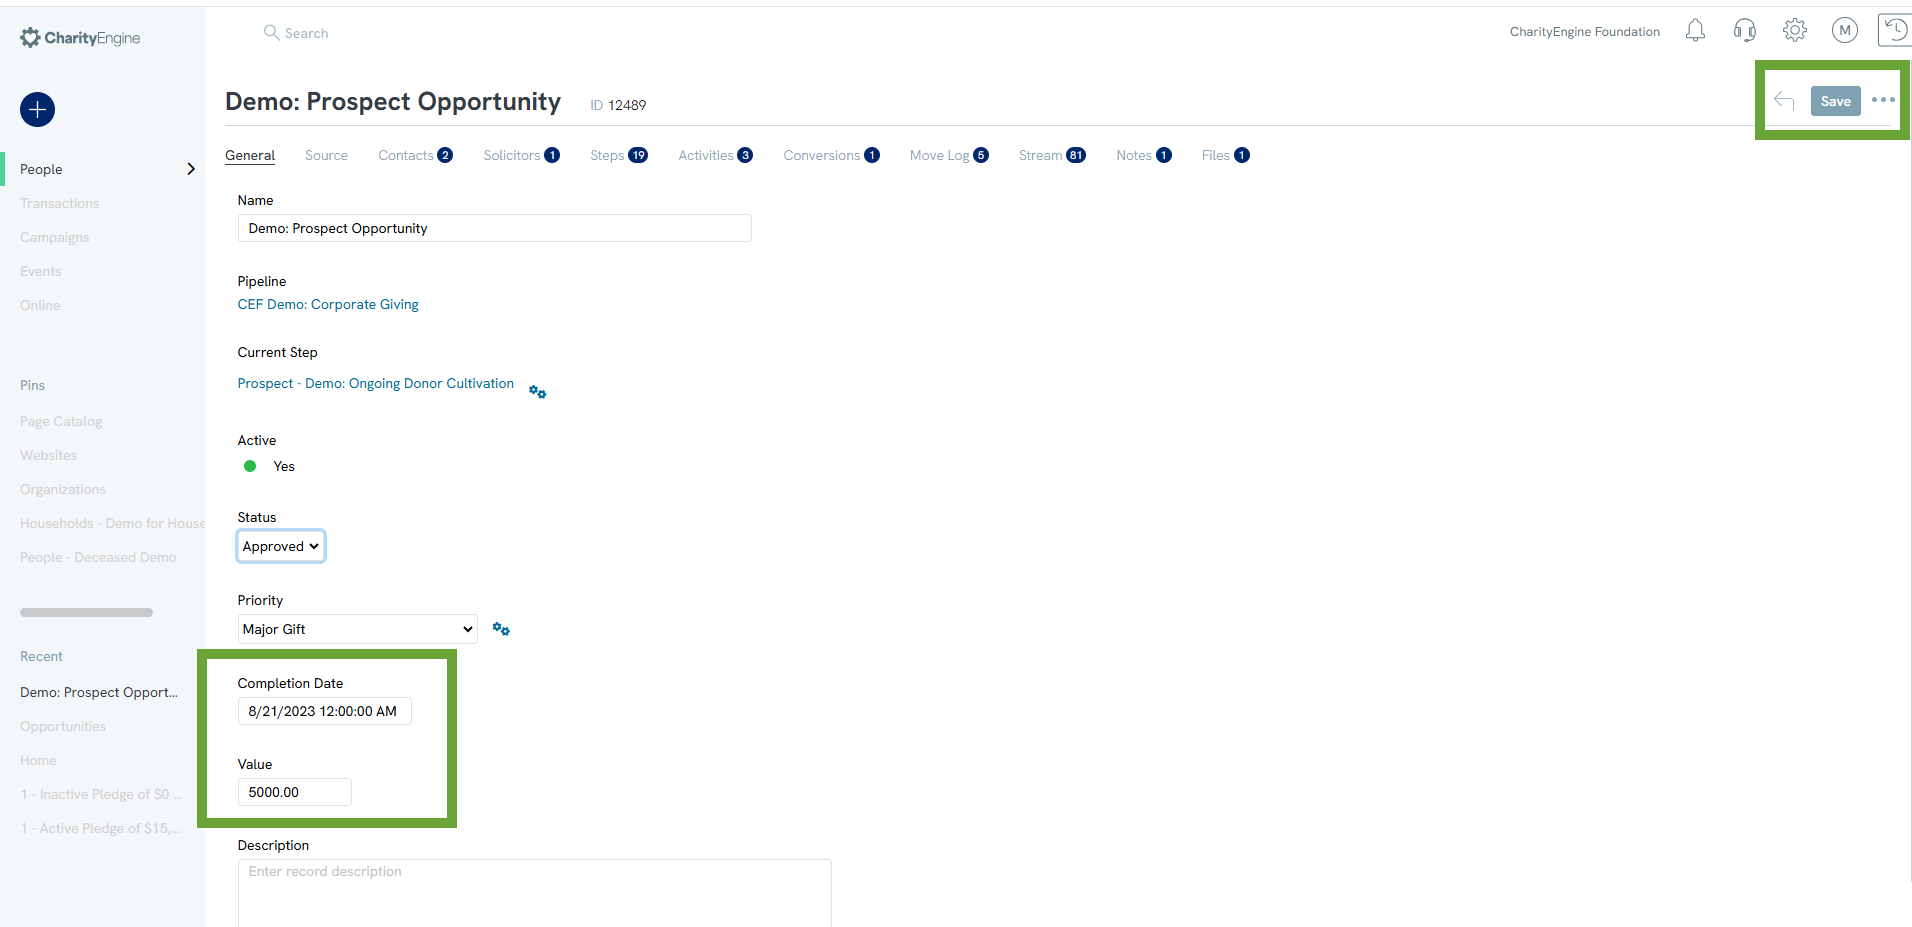
Opportunity: Source Tab

-
Opportunity: Contact Tab
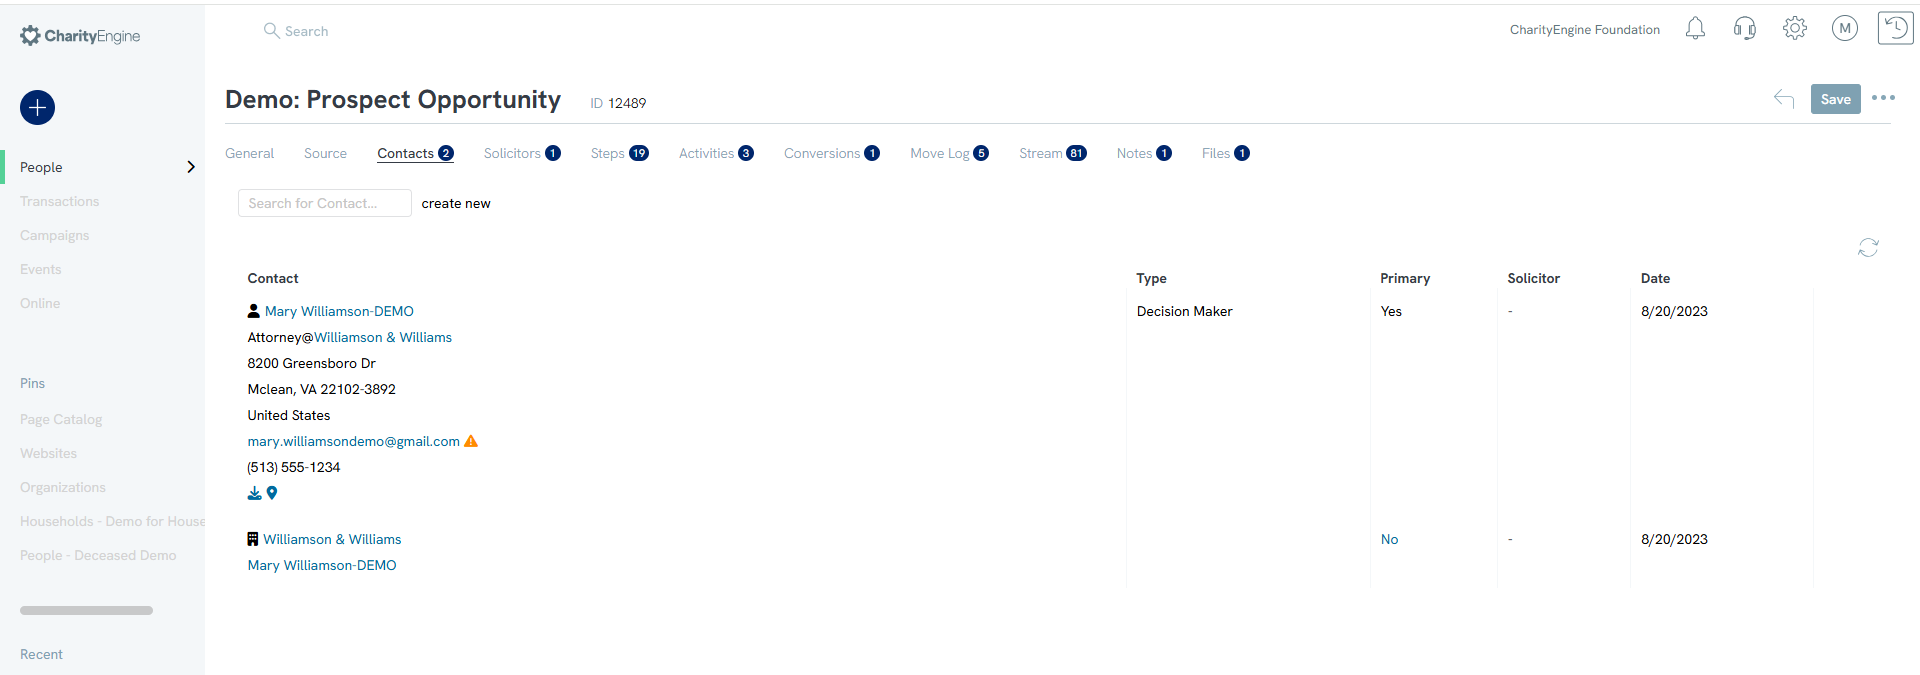
The Contacts tab displays the contacts associated with the opportunity. Here you can assign the type of contact (i.e. Decision Maker, Gatekeeper, Stakeholder, Other). You can also assign the solicitor and determine the primary contact. Add new contacts to the opportunity under this tab.
Note: There can only be a single primary contact. Choose the primary contact carefully—this will be the contact that shows up in reporting on the opportunity.
-
Opportunity: Solicitors Tab
Find the solicitor of this opportunity under the Solicitors tab. Interact with the existing solicitor and create new ones here.

-
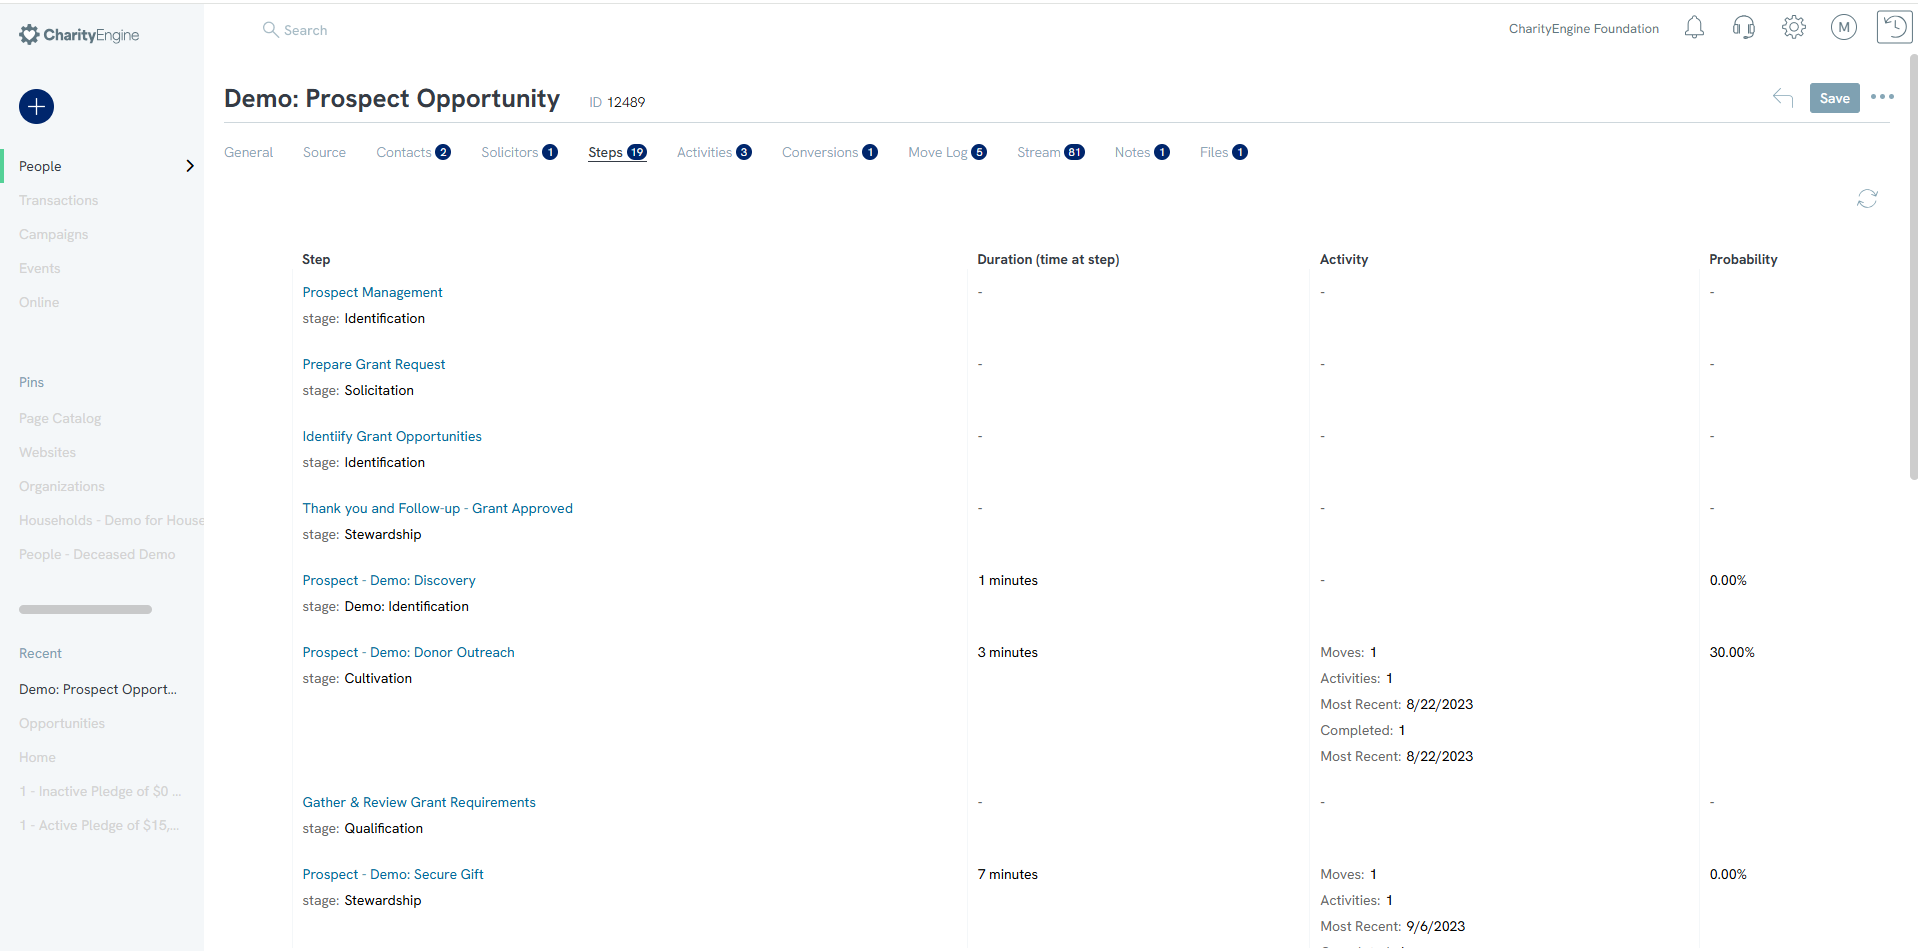
Opportunity: Steps Tab
Under this tab, find the listing of steps your organization will take to succeed in the opportunity.
-
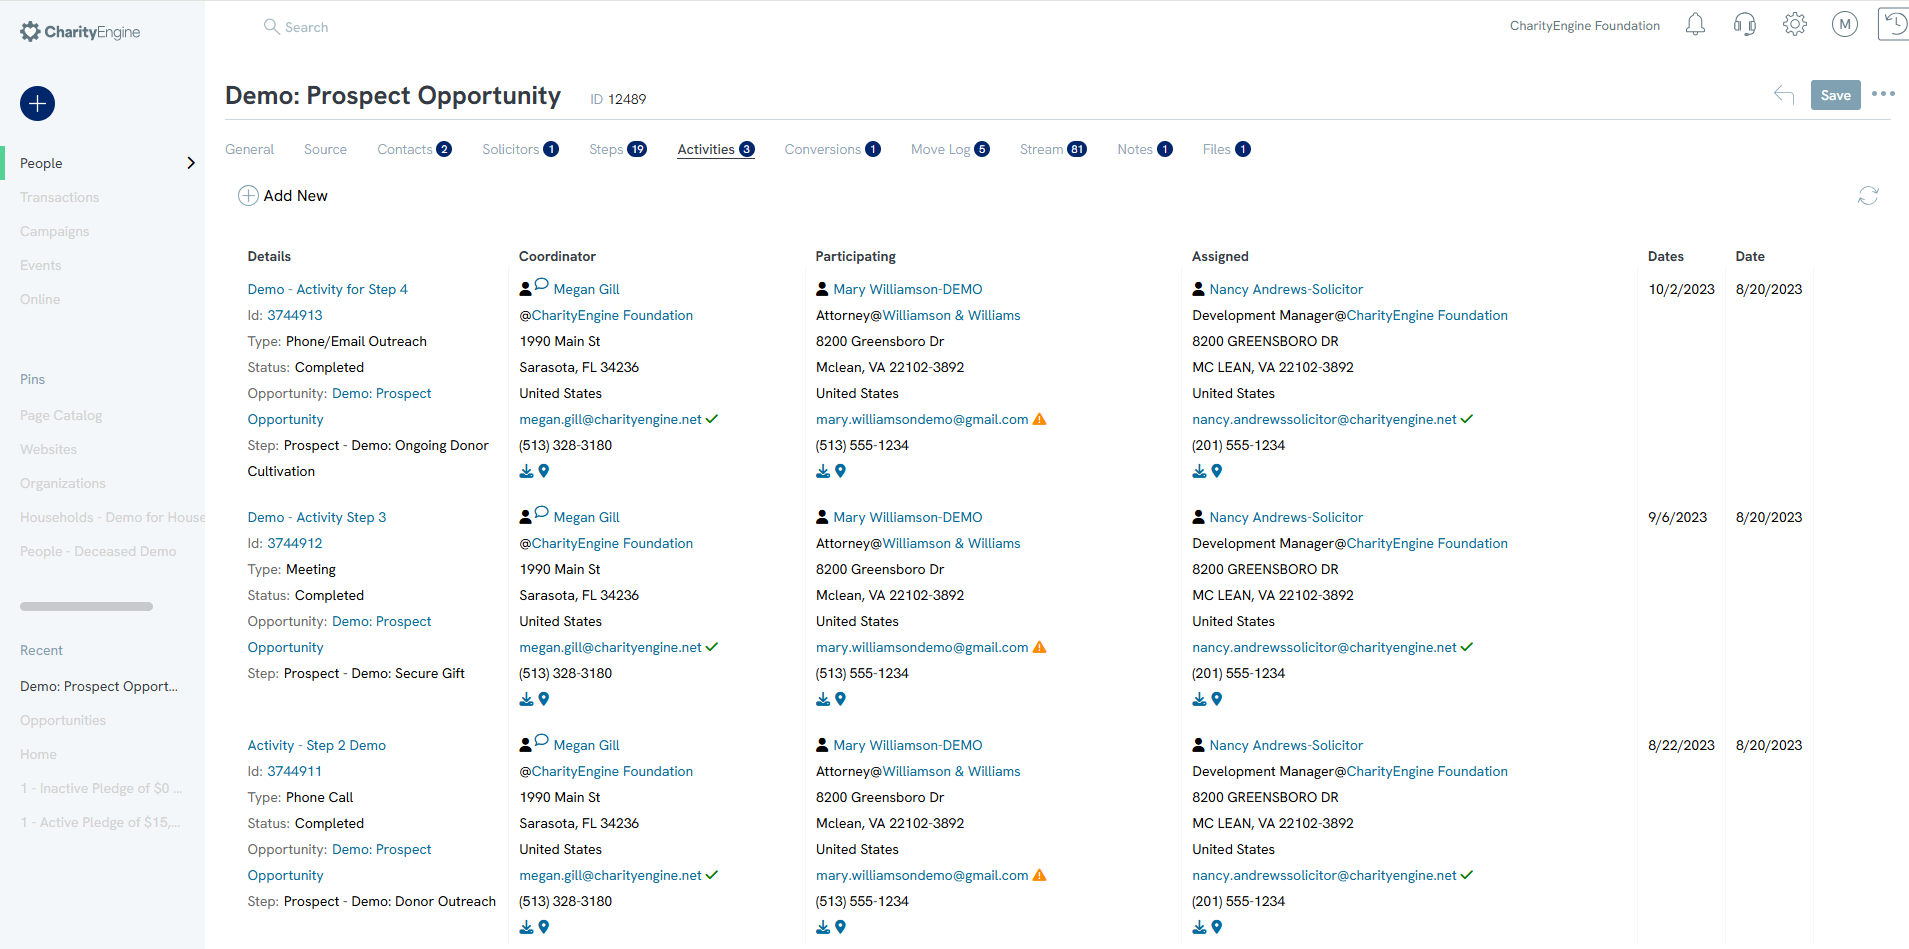
Opportunity: Activities Tab
The Activities tab lists all of the activities associated with the opportunity. This space will automatically populate with completed activities after steps have been marked as complete. There is a Create button at the top of the listing to manually add activities that were not part of any specific steps, but still contributed to the opportunity. In addition, use the ellipse under ACTIONS to manage or update changes to an existing opportunity.
-
Opportunity: Conversions Tab
The conversions tab is the space to find or create transactions, pledges, sustainers, or members that have been populated into this opportunity. Buttons labeled with each type are available for manually creating new listings.
-
Opportunity: Move Log Tab
The Move Log section tracks activities that have been moved or skipped. Find the dates and duration of each step under this tab.

-
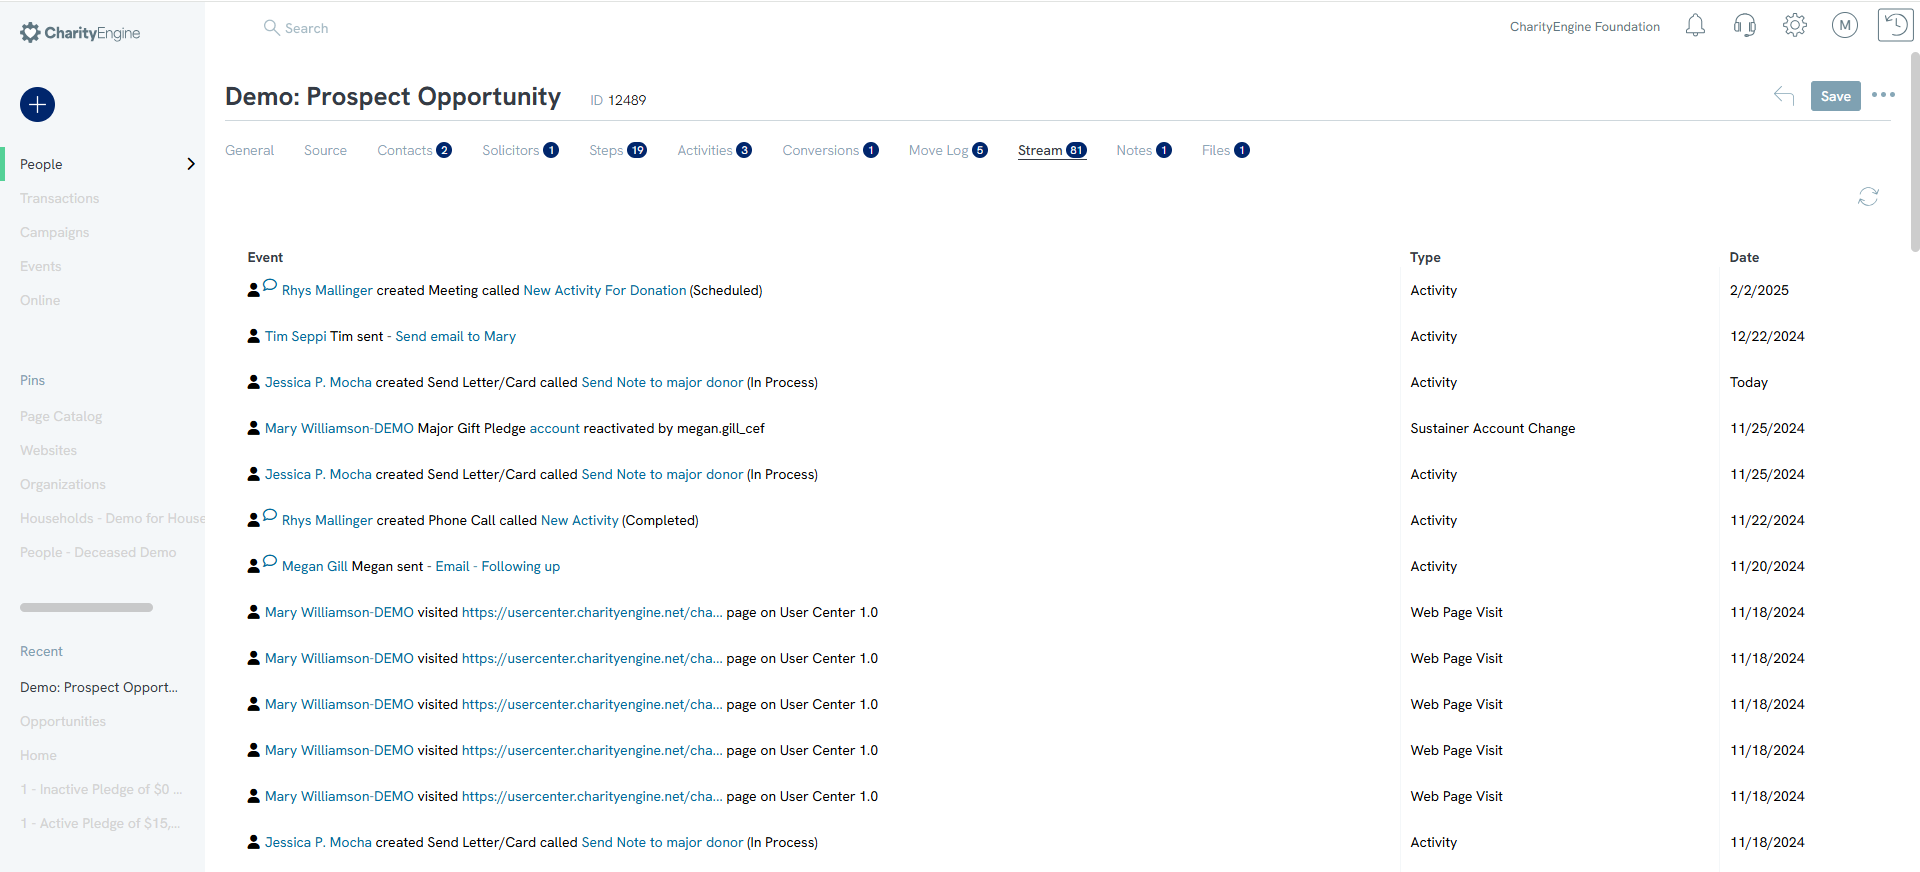
Opportunity: Stream Tab
The Stream tab tracks everything done with the opportunity. Under the Stream tab, see every change made to the opportunity. Each listing will be marked with a type (Transaction, Activity, Case, Peer-to-Peer, etc.), a date, a contact, and a description of what occurred.
-
Opportunity: Notes and Files Tabs
Add notes or files associated with the opportunity.

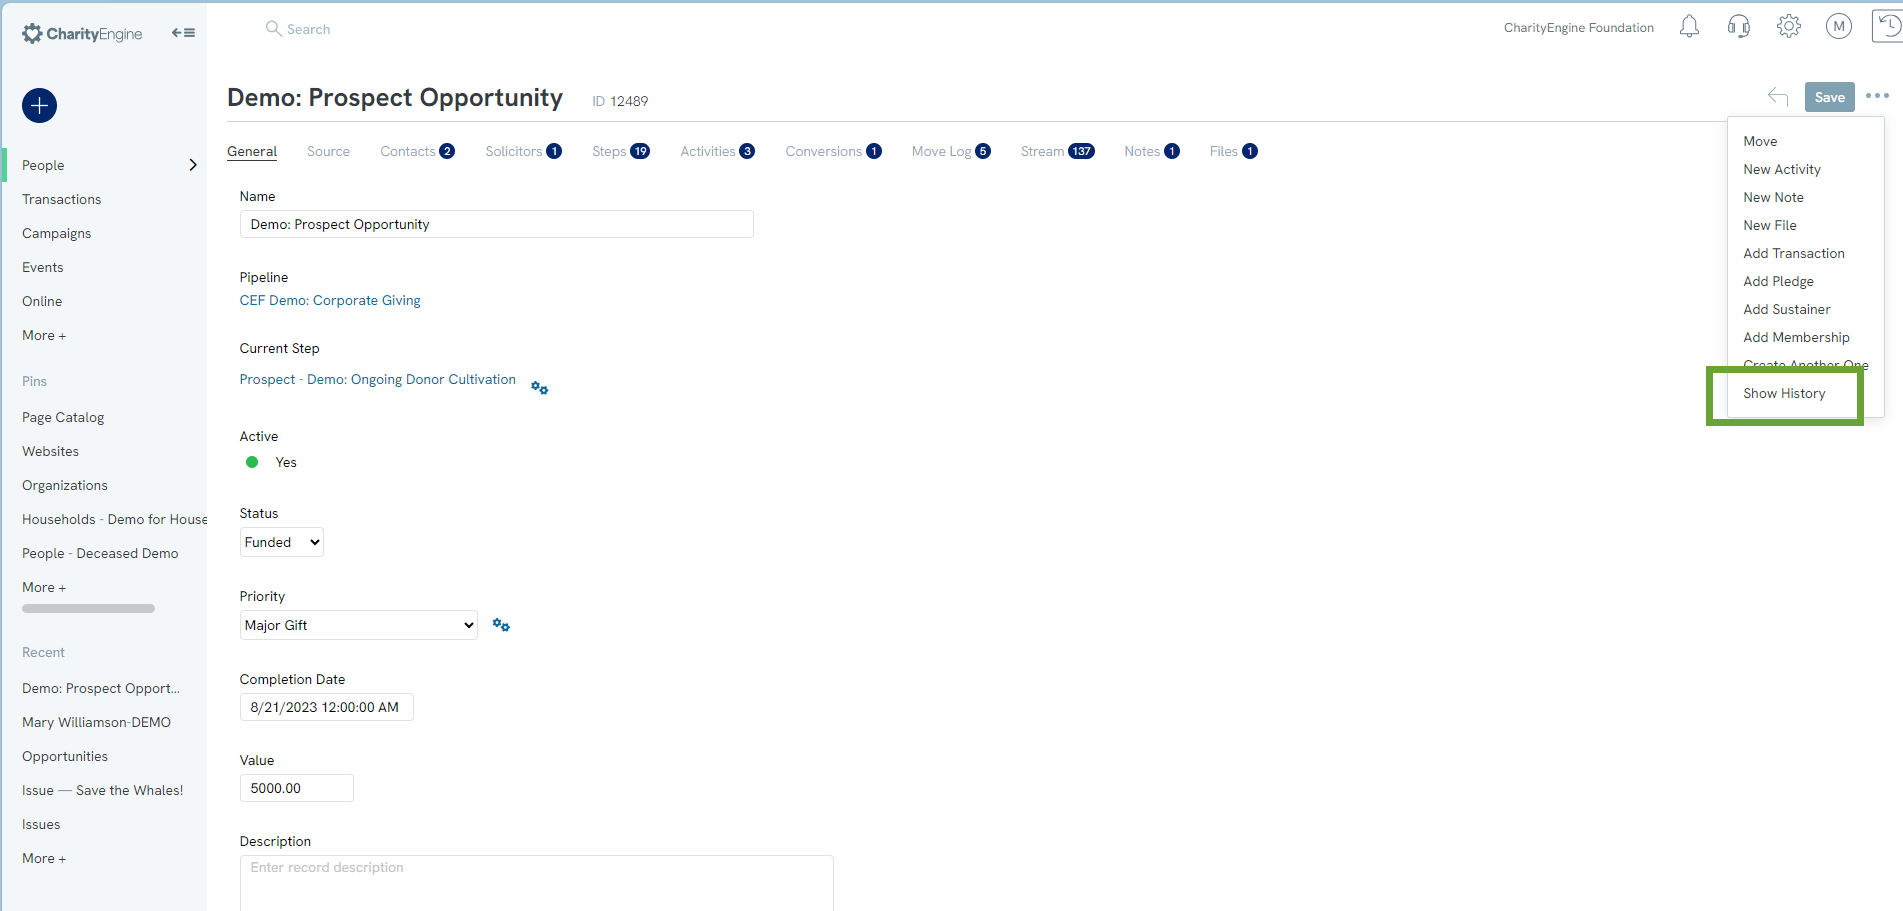
Opportunity: History
Tracking changes to your opportunities just got easier with the new Change History option. To view an opportunity's change history, click the ellipsis (...) manage icon from the opportunity screen. This feature empowers you to stay informed and maintain control, making opportunity management easier than ever.
