Introduction
Non-profit organizations who need to easily and quickly identify a core list of people (not in a household), households, and organizations for recurring mailing or email communication efforts, this article will provide you with a quick and easy walk through of how to identify a full list of people, households, and organizations. If your organization actively uses households, often you will find the need to exclude the 'people' contacts as you expect to target the household contact record only. This set up with lead you through those steps. This is also a great base report to leverage as a source file and use as a subquery for other ongoing query needs.
Table of Contents
Determining the desired end state
As a best practice in query building it is always import to consider the desired end state. Following this best practice is a great first step before jumping into building a query. In this use case, the desired end state is to:
- Create a source list of all people (who are not in a household), households (excluding the individual people records), or organizations
- Expose the salutation for purposes of mailing a letter campaign
- Only target active contacts and non-deceased persons
- Only target contacts who have elected to receive mail
- Expose limited giving history for internal awareness including:
- Current Fiscal Year Giving (direct financial donations - including soft credits)
- Affiliate Current Fiscal Year Giving (important for households or organizations - exposing direct contributions this fiscal year from members of the household or organization)
- Last Year Amount (direct financial donations from last calendar year)
- Affiliate Last Year Amount (important for households or organizations - exposing direct contributions last calendar year from members of the household or organization)
- Lifetime Amount (total overall giving for direct financial donations)

How to Create the Query
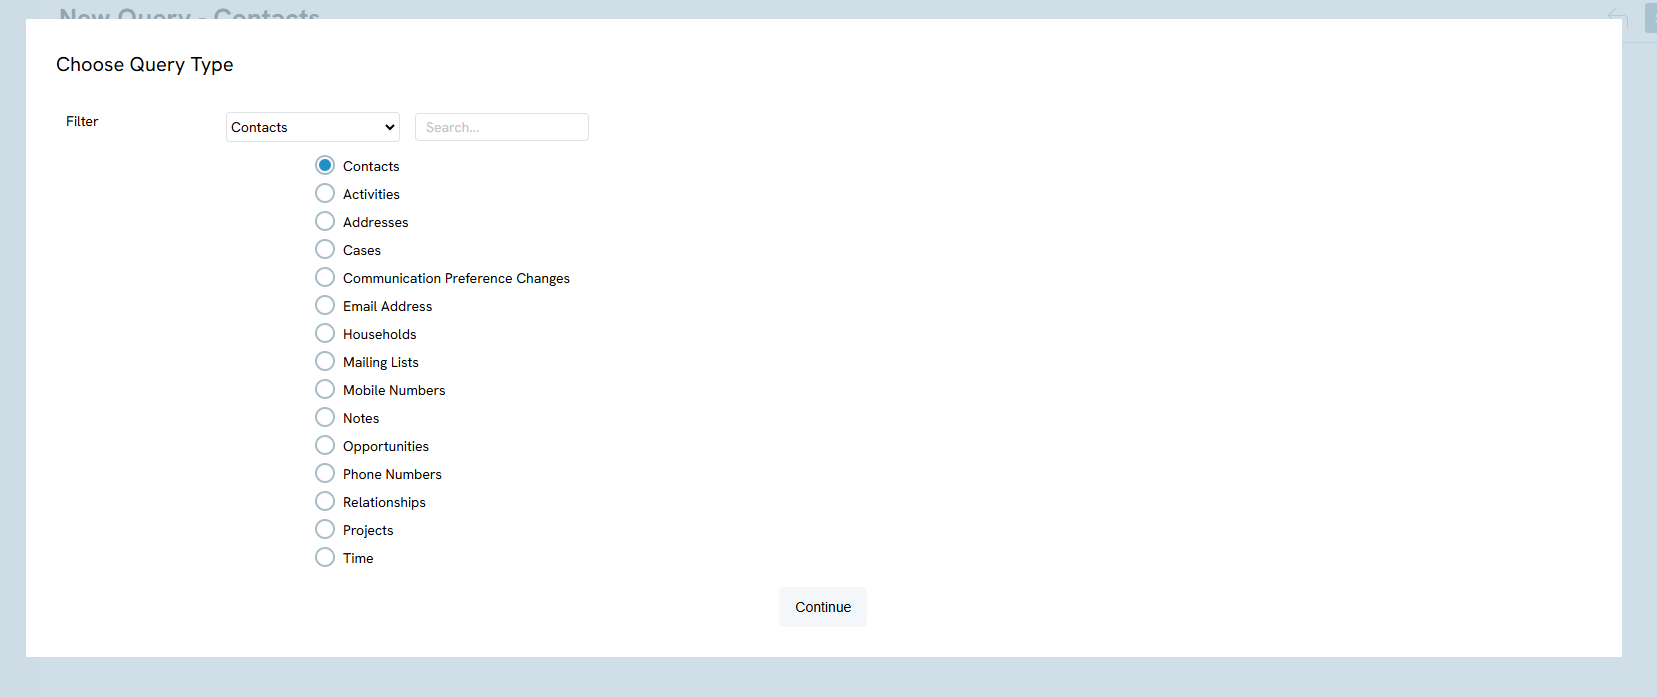
Step 1: To create this query navigate to the Automation & Workflow App > General > Queries > Create New (upper right hand corner) > Filter: Contacts Database > Select: Contacts table > Click CONTINUE

Step 2: Next we will begin to build the fields that are needed in the source file to be presented to the organization. If you are using this for use within the email/mail blast feature within CharityEngine, always include the Contact ID.
In the SELECT field, add:
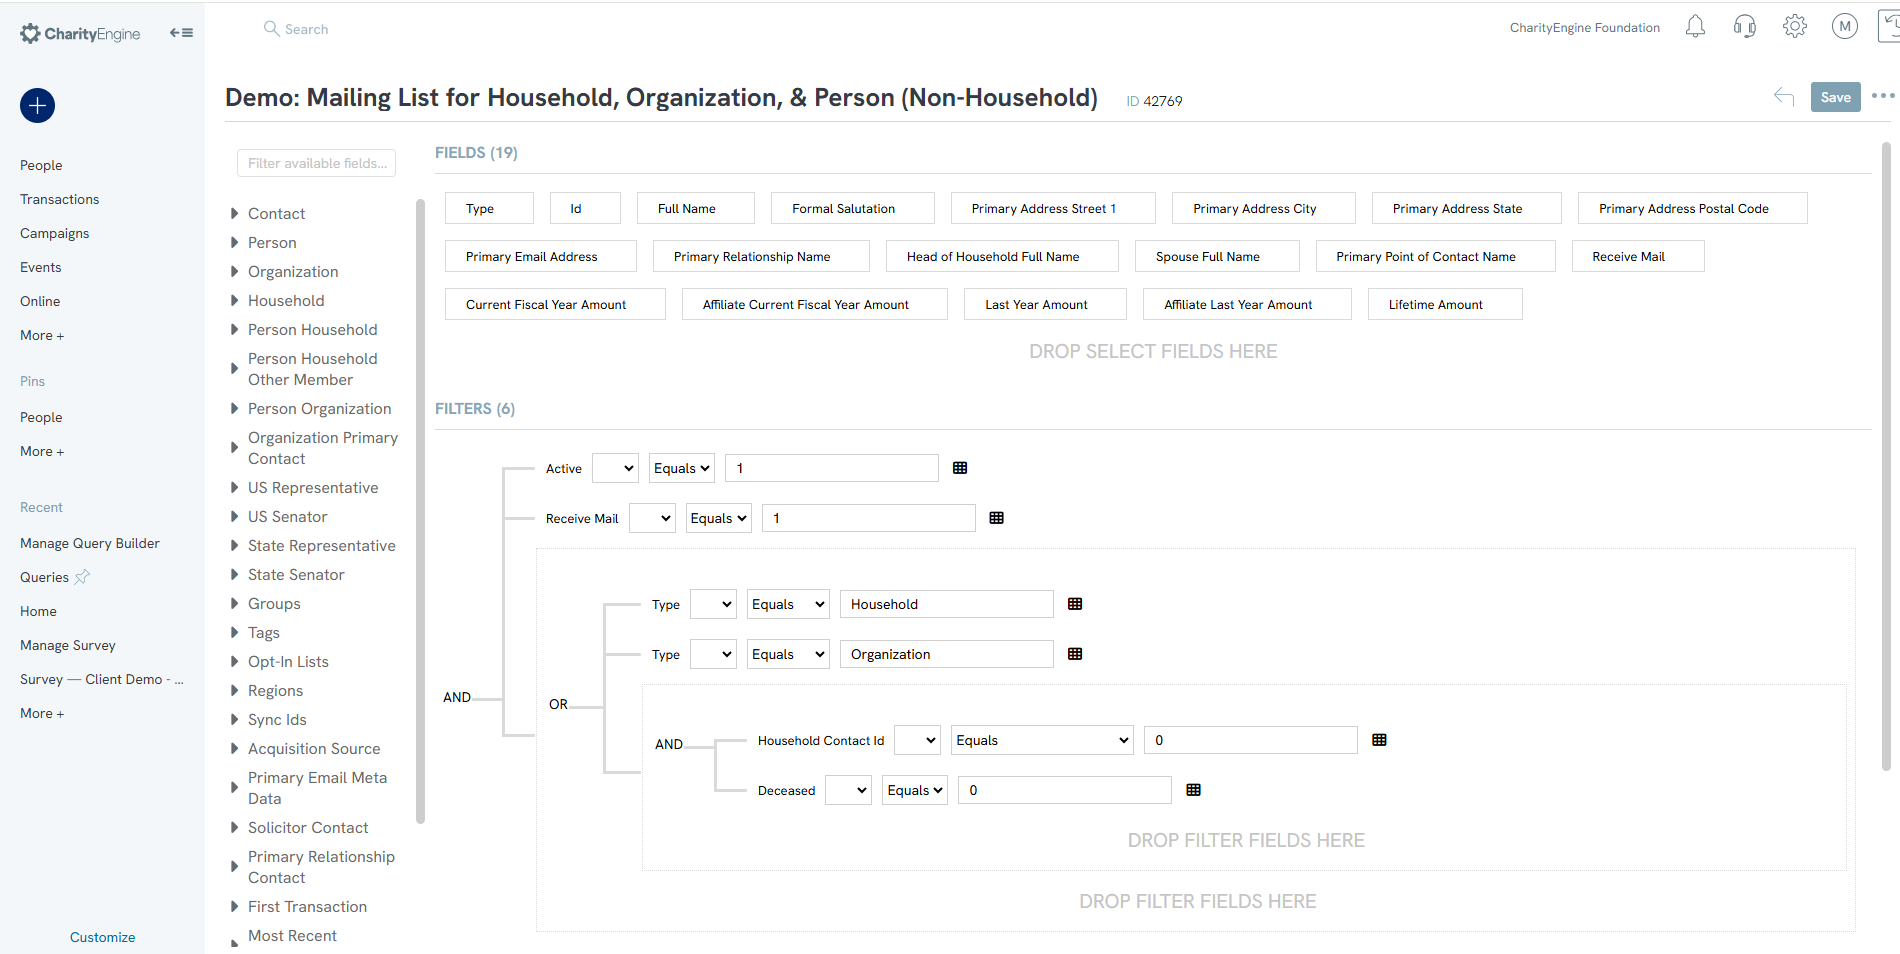
- From Contacts data subgroup: Id, Full Name, Type, Receive Mail, Formal Salutation, Primary Street Address 1, Primary Address City, Primary Address State, Primary Address Postal Code, Primary Email Address
- From the Organizations data subgroup: Primary Point of Contact Name (not required for mailing purposes)
- From the Households data subgroup: Head of Household Full Name, Spouse Full Name (not required for mailing purposes)
- From the Giving History data subgroup: Current Fiscal Year Amount, Last Year Amount, Lifetime Amount (reflects direct contributions including soft credits)
- From the Affiliated Giving History data subgroup: Current Fiscal Year Amount, Last Year Amount (reflects indirect contributions including employee giving or household member giving)
Note, the user can move the fields within SELECT to order in the final desired state for the organization.
Pro-Tip: Click SAVE to secure changes and avoid lost work.

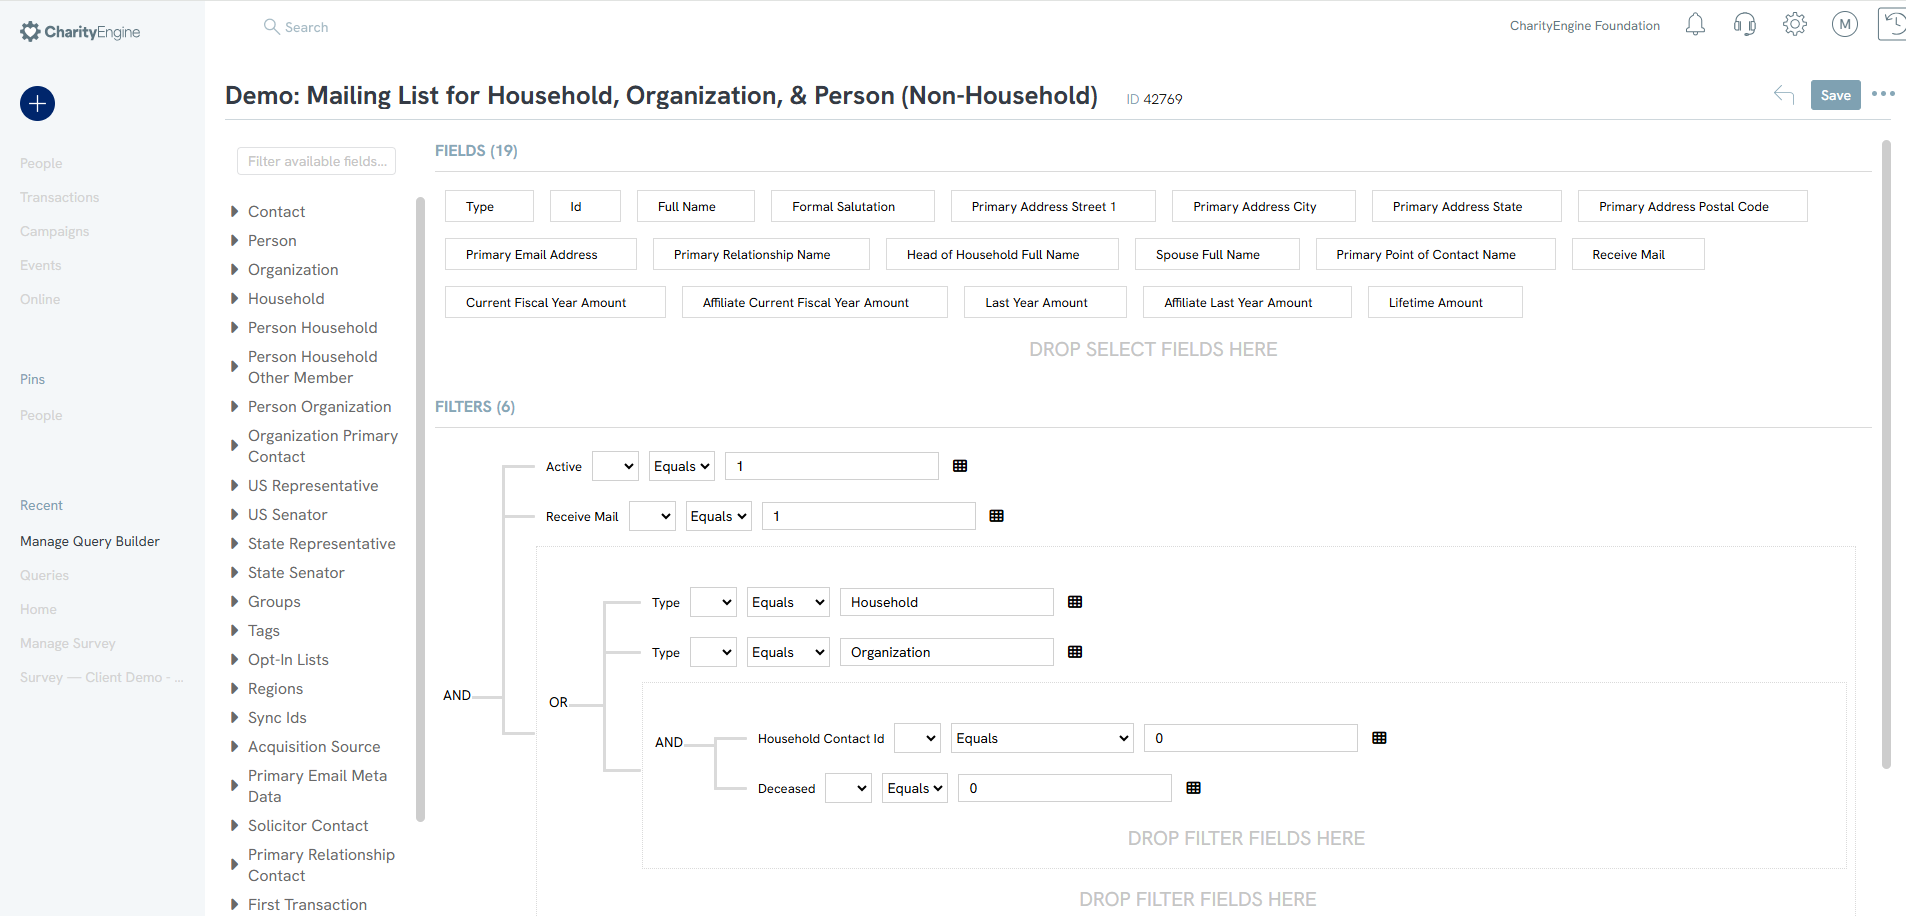
Step 3: Next we will begin to build the filters to narrow down the outcomes. This filtering feature will ensure to that people who are a member of a household are excluded, while also including only people who are not a member of a household.The first conditions as outlined in our preparation include Active contacts and Receive Mail and a Person/Household/Organization.
In the FILTER field, add:
- From the Contact data subgroup:
- Active Equals True (or 1) - this excludes any non-active contact records
- Receive Mail Equals True (or 1) - this includes only contact records that have a communication preference of yes, receive mail
Note, that because this is an AND the filter connector should reflect AND.
Now, we need to begin locating the person, household, or organization. In this use case, we need to create nested filtering using an Or statement - in order to achieve this, the user will click the Plus icon in the top right hand corner within the FILTER section. This can also include nesting filters within a nested filter.

Click on the Plus icon within the FILTER section to add the first nested filter. Continue by adding:
- From the Contact data subgroup, add:
- Type Equals "Household" - note, this will identify any contact type that is a household which is a target goal outlined in step 1
- Type Equals "Organization" - note, this will identify any contact type that is an organization which is a target goal outlined in step 1
Now that we have identified households and organizations, we need to identify people who are NOT part of a household and are NOT deceased. Because we have an AND statement for this segment, we need to add a nested filter within the OR of household, organization contact filtering. Click on the Plus icon within the sub filter to add a new grouped filter.

Now, begin building out the filtering to identify people who are NOT in a household AND not deceased. Continue by adding:
- From the Person data subgroup add:
- Household Contact Id Equals 0 - this identifies only people contact records that are NOT connected to a household as a member.
- Deceased Equals False (or 0) - not deceased status on contact record
- Ensure that the filter for this sub filter is set to AND as the condition is NOT in a household AND NOT deceased.
Note: Now that we have identified Household, Organizations, OR People (identified as not associated with a household contact id and not deceased), ensure that the sub query for contacts is set to OR
Pro-Tip: If a user is creating a a multi-filter and/or nested filter, we recommend adding one data filter at a time to build the query and ensure the filtered data point that was added returns the expected results. This helps with faster and easier troubleshooting for the end user. Multi-step filters can quickly become complex - so add one filter at a time to ensure you are meeting your conditions.
Step 4: Click on RUN to generate the query results.
Pro-Tip: Use the Sort icon next to RUN to apply sorting condition. Or click on the EXPORT icon to export results. Always click SAVE to secure your changes.
FAQ and Related Resources
Q. Where can I learn more about CharityEngine reporting tools?
A. Learn more in our article Reports & Analytics: An Introduction to Frequent Reporting Options within CharityEngine
Q. How do I create a listing of transactions for People (not associated with a household), Households (and the members associated with the household), and/or organizations?
A. Learn more in our article Queries: What Can I Do with Queries - Creating A Transaction List - People, Households, Organization
