Introduction
CharityEngine offers a Case Management Tool to assist you with both internal and external requests from donors and others within your organization. The Case Management Tool is a great resource to provide personalized customer care, assist with and automate workflow, while also creating a centralized location to provide collect, monitor, and analyze inquiries.
Table of Contents
- Introduction
- Prerequisites
- Instructions - Configuration and Set-Up of Cases
- Instructions - Creating a "Case Notification Template"
- Instructions - Creating a New Case
- Instructions - Managing Existing Cases
- Instructions: Creating a Case Intake Web Form
- Reporting: Case Management Dashboards & Other Available Reporting
- FAQs & Additional Reading
Prerequisites
- To begin usage of the case tool feature, please follow the configuration steps below.
- If you are interesting in adding on this feature, please contact your representative.
Instructions - Configuration and Set-Up of Cases
CharityEngine offers the option for customization and configuration of your case management tool. Use the configuration app to customize - or simply use the out-of-the-box settings to get started.
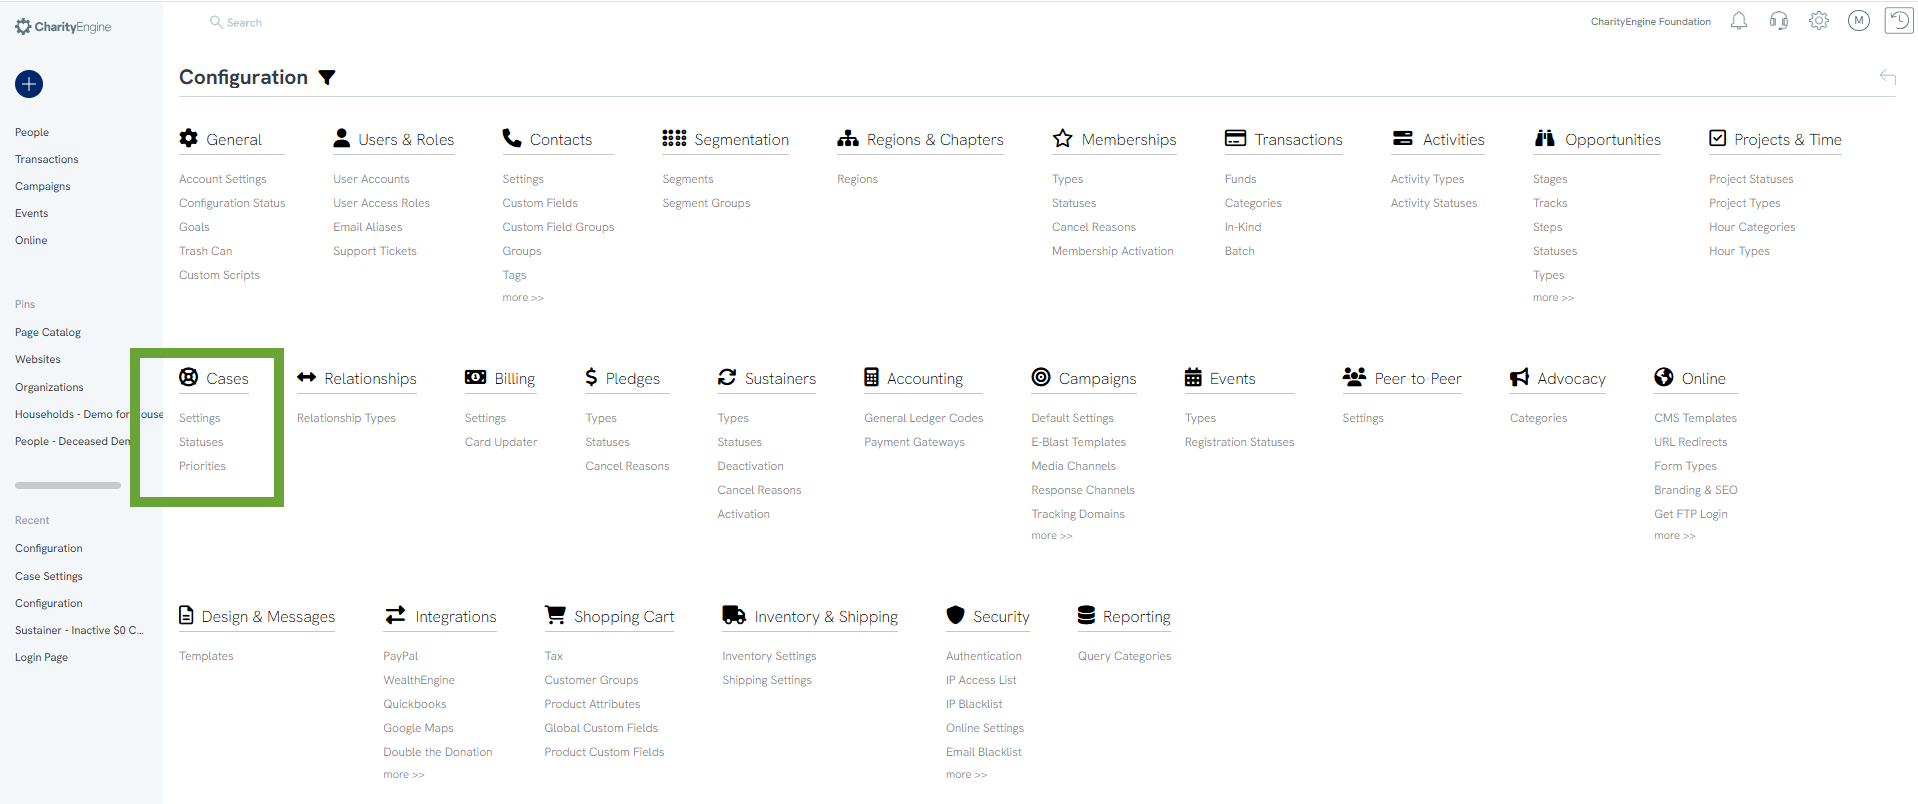
Step 1: Navigate to the Configuration App > Cases
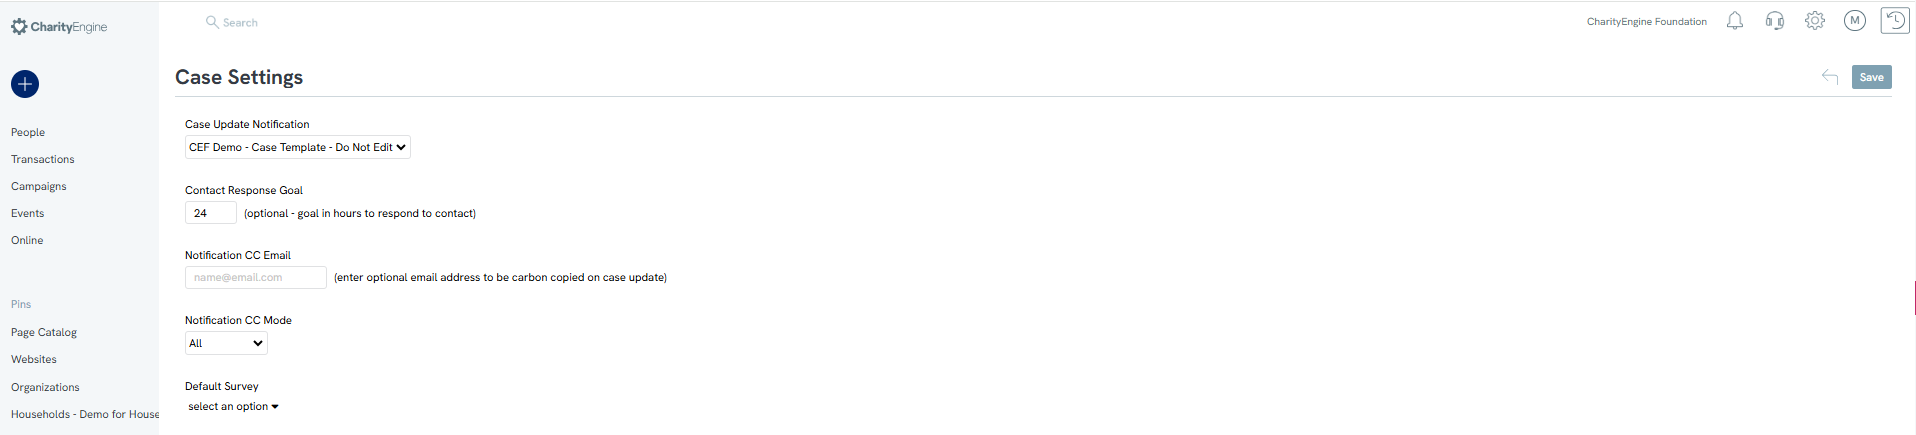
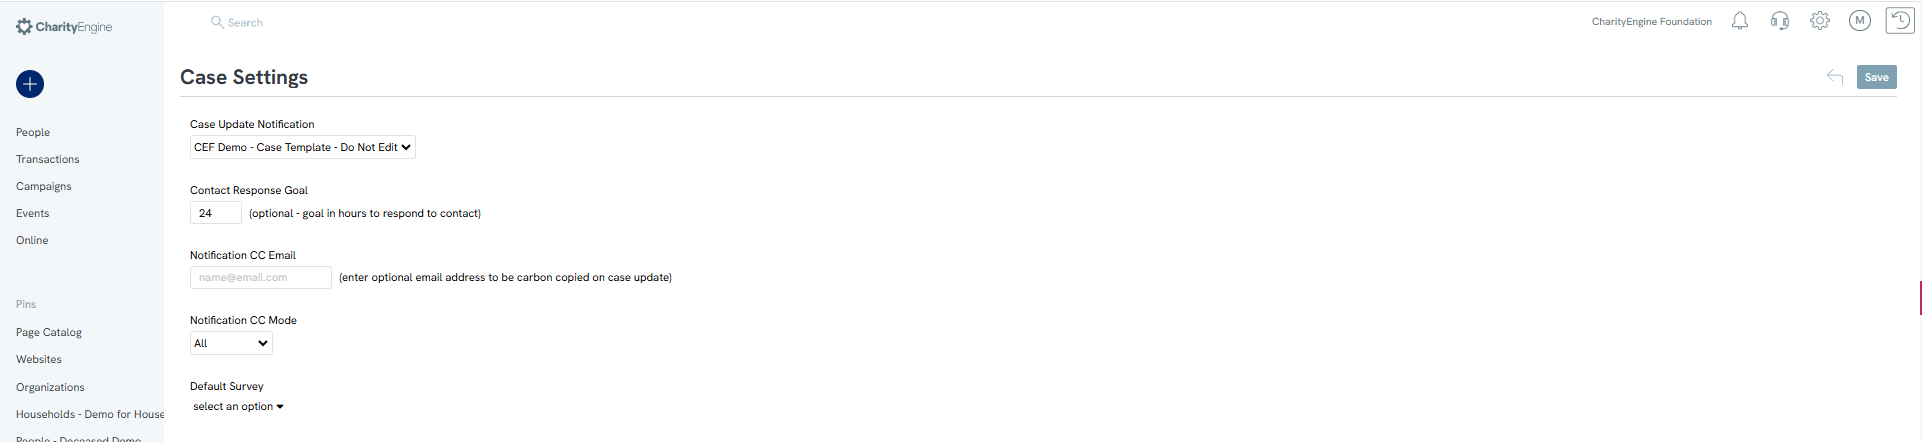
Step 2: Case Settings can be used to select general elements of your case management and workflow including:
- Case Update Notification: please select the template for notification
- If a template is required, see below for steps to create a case template
- Contact Response Goal: set response time goals for your organization; set in hours with 0 defined as no goal
- Notification CC Email: all users added will receive a carbon copy regarding cases and their status/progress
- Notification CC Mode: elect to have users from above be CC'd on all status changes or just upon creation of a new case
- Default Survey: leverage an existing survey from the Campaigns App > Survey to incorporate a survey within your case workflow
Step 3: Create custom priorities codes by selecting Create New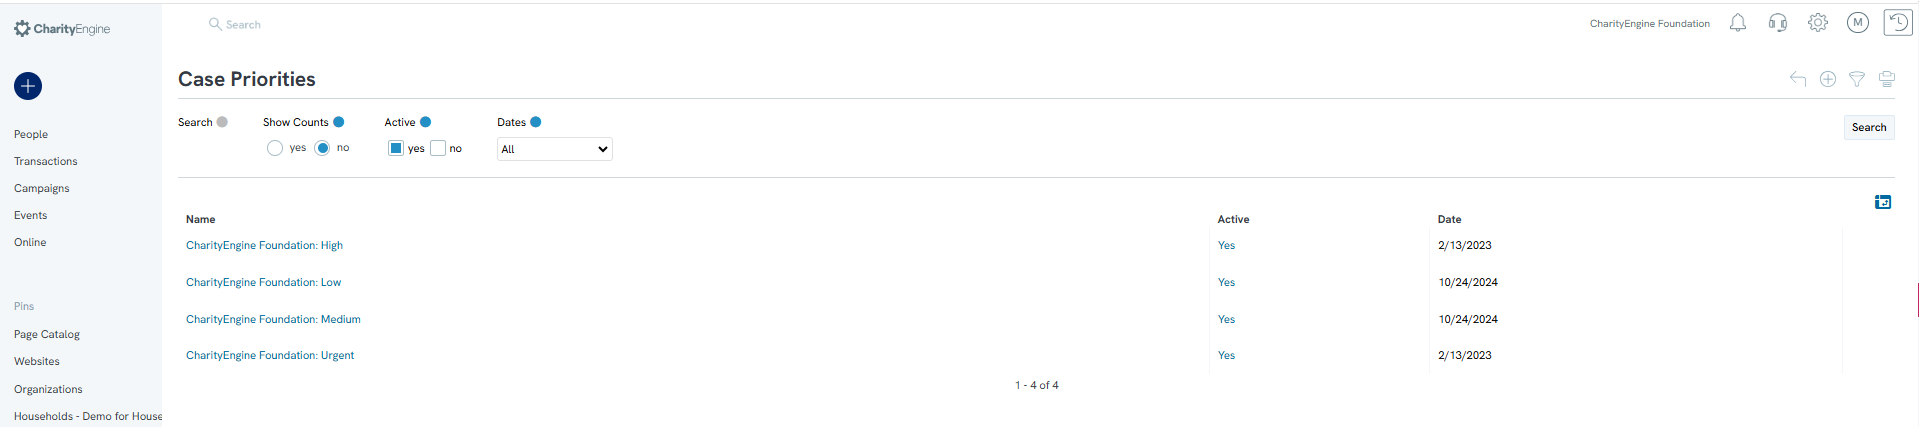
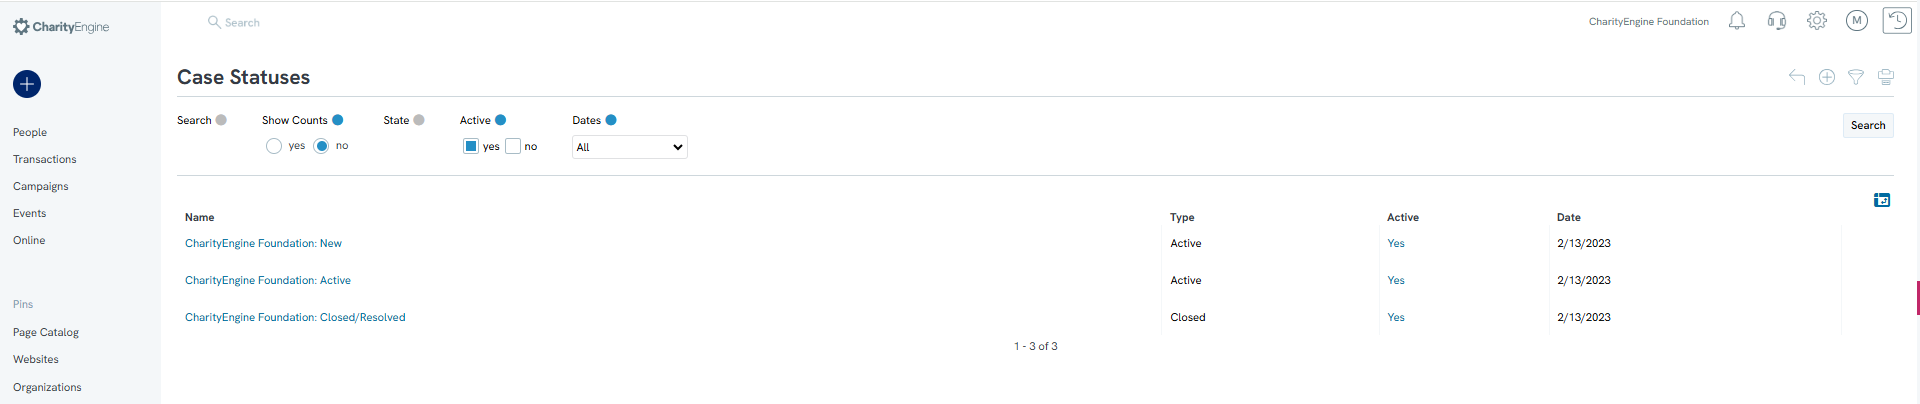
Step 4: Create custom case statuses by selecting Create New
Step 5: Create custom case Categories for more personal categorization. For example, organizations can create their own categories such as donation issues, donor account support, event support, communication preferences, etc. This functionality helps better organize incoming donor requests, improves donor experience, and enhances case tracking and reporting. Navigate to Cases > Categories > + icon to create a new category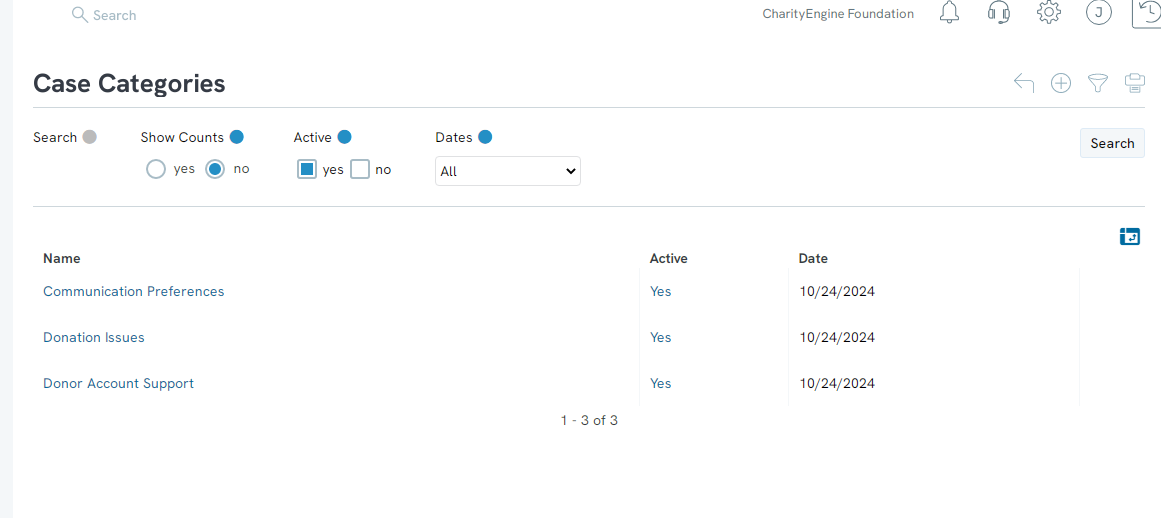
Instructions - Creating a "Case Notification Template"
If you wish to have contacts, owners, and/or assigned to email notifications when a case is assigned or modified, you will be required to first create a case template and assign within case settings.
Step 1: Navigate to the Configuration App > Design & Message > Templates > Create New
Step 2: Name the template, Type: Case updates Notification Email, Active: Yes, click SAVE
Step 3: Navigate to the Email Contact tab and create your email content. Click SAVE once complete.
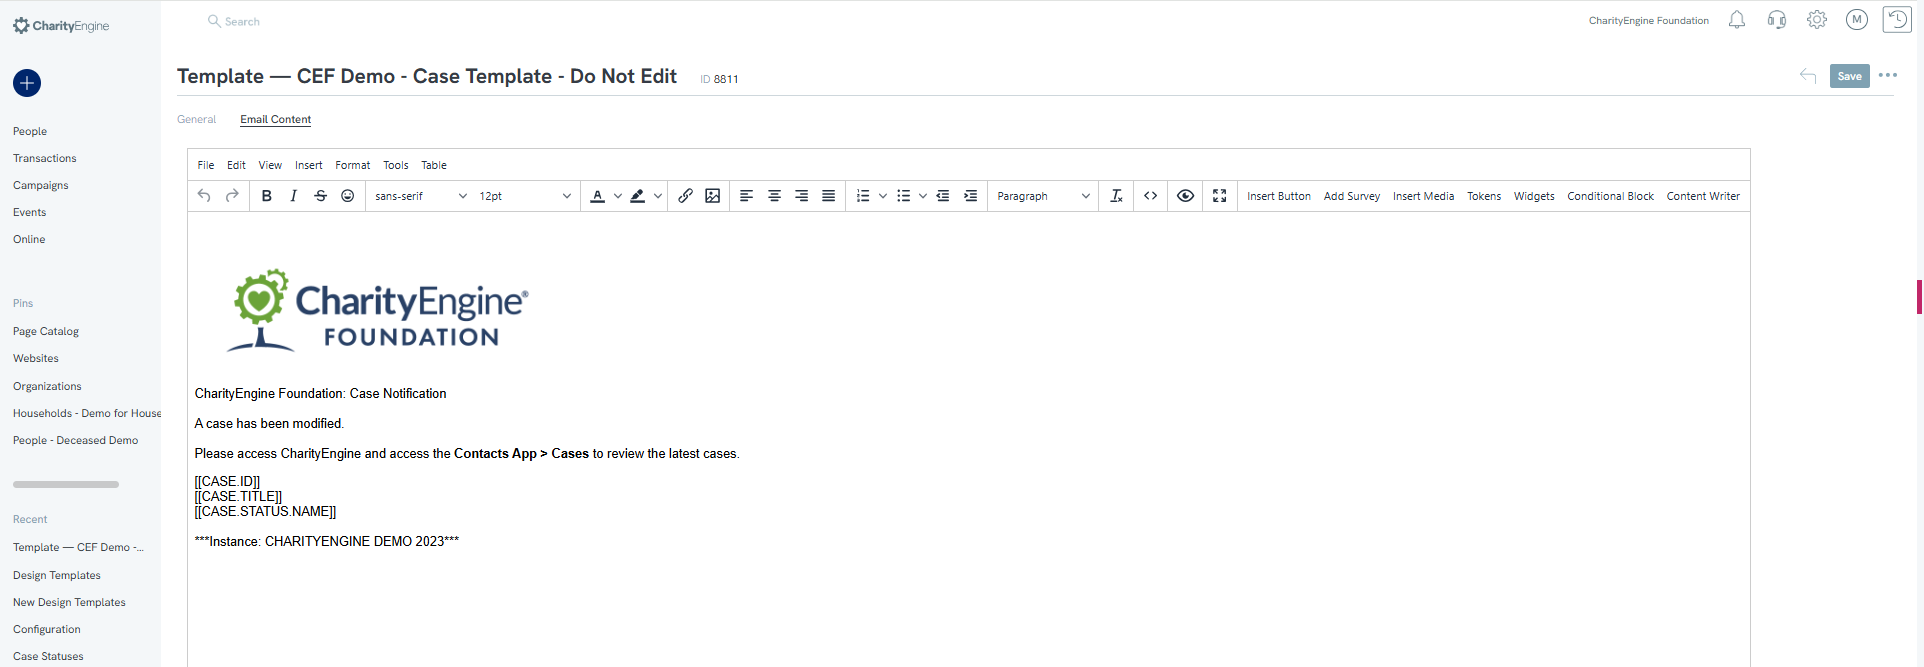
The user can also leverage system tokens by selecting "Tokens" 
Step 4: Once your template has been saved, assign the template to your Case Setting. Navigate to the Configuration App > Cases > Setting > Case Update Notification: <select template created in step prior> > click SAVE
Now, when a case has been set to receive alerts, any changes to the case will result in an email notification to the Contact, Owner, and/or Assigned To contact email. 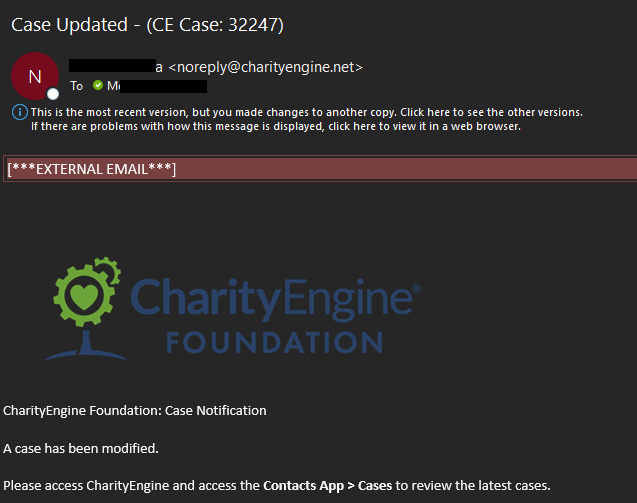
Instructions - Creating a New Case
Within CharityEngine, users can leverage the Contacts App to create a new case.
Step 1: Navigate to the People App > Quick Actions > New Case
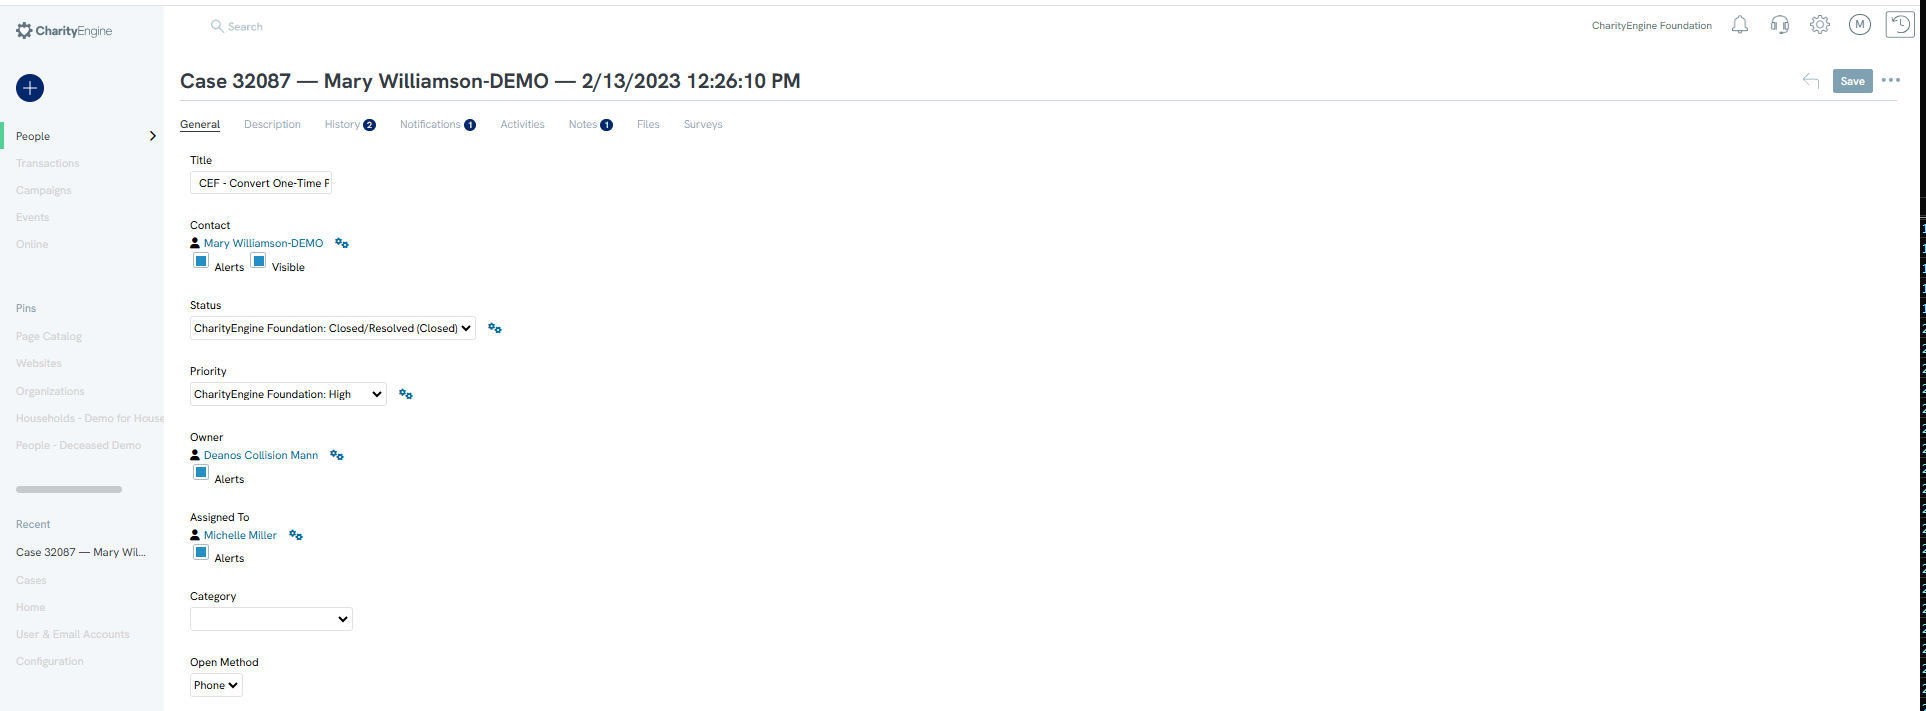
Step 2: Enter data points from the General tab including:
- Name (required): Description of the case
- Contact: person, organization, or household related to the case
- Status: if available
- Priority: if available
- Owner: will default to user creating, but manage if reassignment required
- Assigned To: select person who will be responsible for the case
- Category: select a type of case
- Open Method: select method for quick case was receive
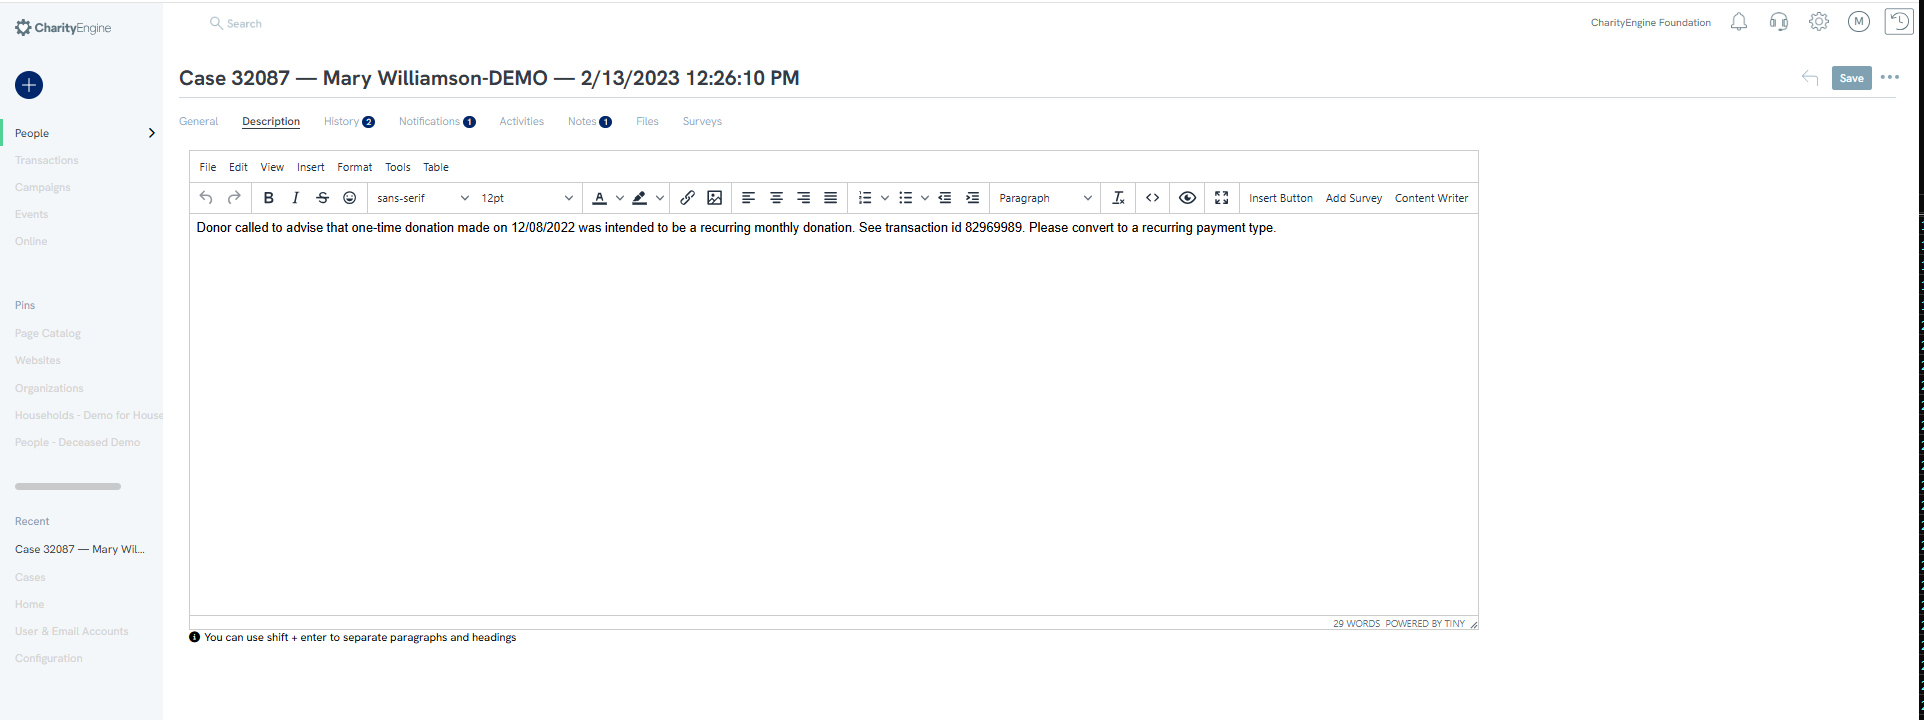
Step 3: Navigate to the Description tab to enter further details regarding the case. Click SAVE to secure entry and expose additional tabs.
Step 4: After clicking SAVE the user can leverage the remaining tabs as needed, including:
- History: view of all updates, edits to the case record
- Notifications: email notifications to other users
- Activities: create an new activity record
- Notes: add additional notations that may be beneficial to assist in case research
- Files: add files that may be beneficial to assist in case research
- Surveys: results of surveys associated with this case
Instructions - Managing Existing Cases
Within CharityEngine, users can leverage the Contacts App to track, monitor, and report on new and existing cases.
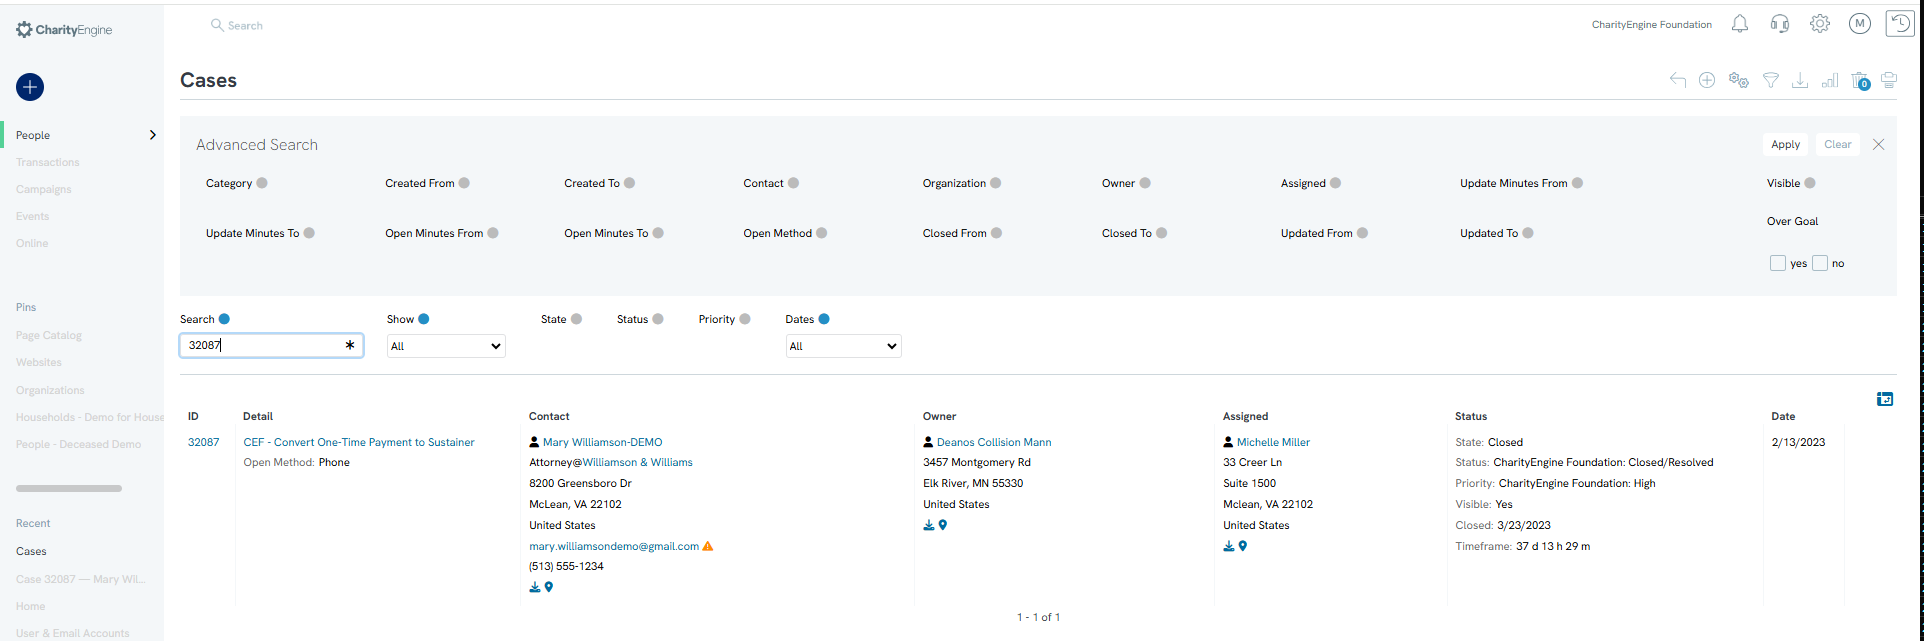
Step 1: Navigate to the People App > Cases to access the Cases listing screen
Step 2: Use the Quick Filter and/or Advanced Filter to sort or locate cases dynamically, including by status, priority, category, etc. From this screen, the user will also see a quick view for the Status of the case
Step 3: Once you have located your case, navigate to ACTION > Manage to access the case details. From the General tab, users can modify all fields including the Status. This is useful when moving a case from open/active to closed/resolved. Click SAVE to secure your changes.

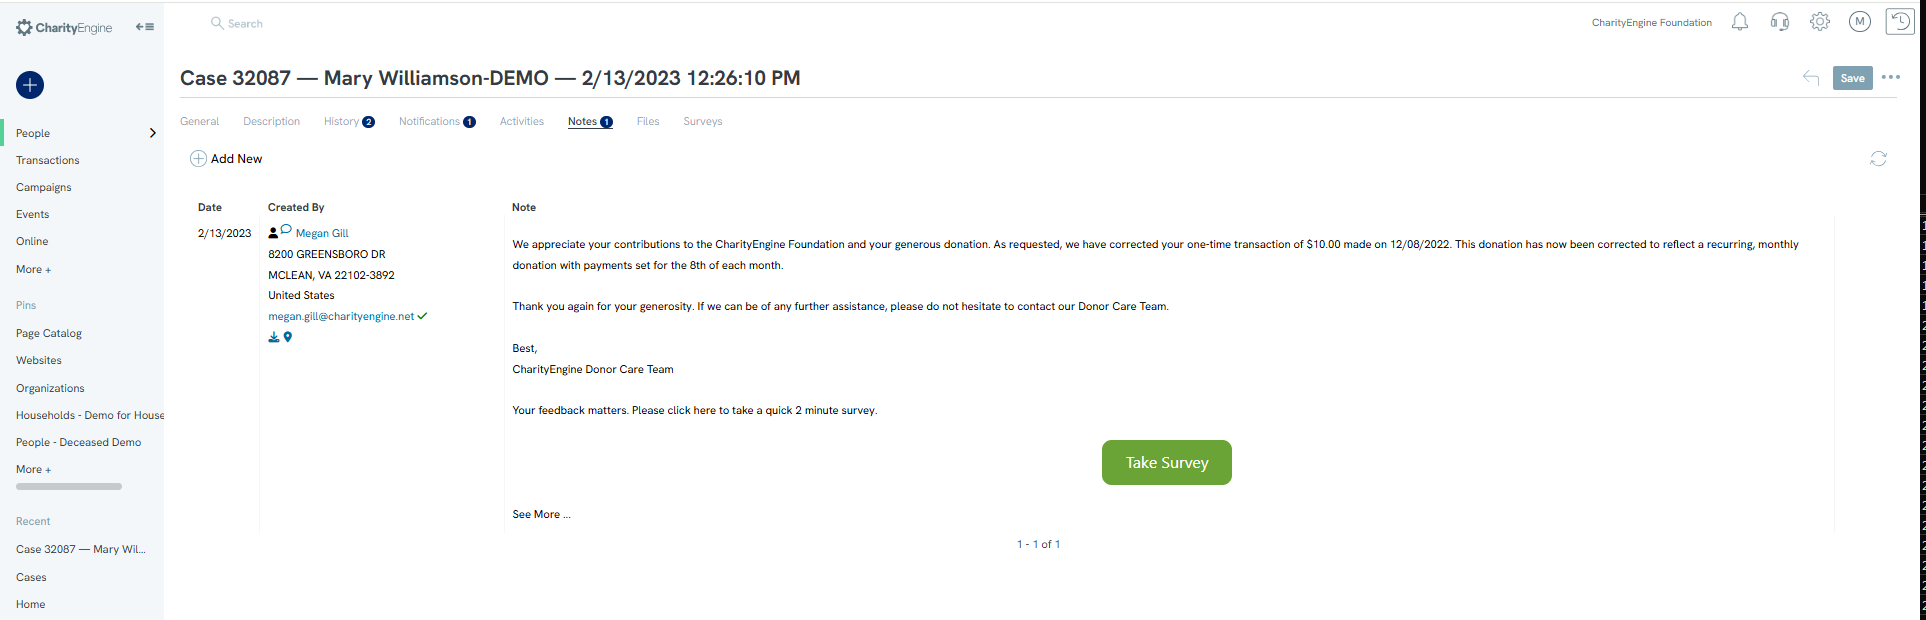
Step 4: Navigate to the Notes tab to add internal notes and/or communication directly with the Contact. Simply click on Add New to craft a new note. In this example, the donor will be emailed with a response for resolution. A survey has also been added for a customer satisfaction survey. Click on CREATE to send.
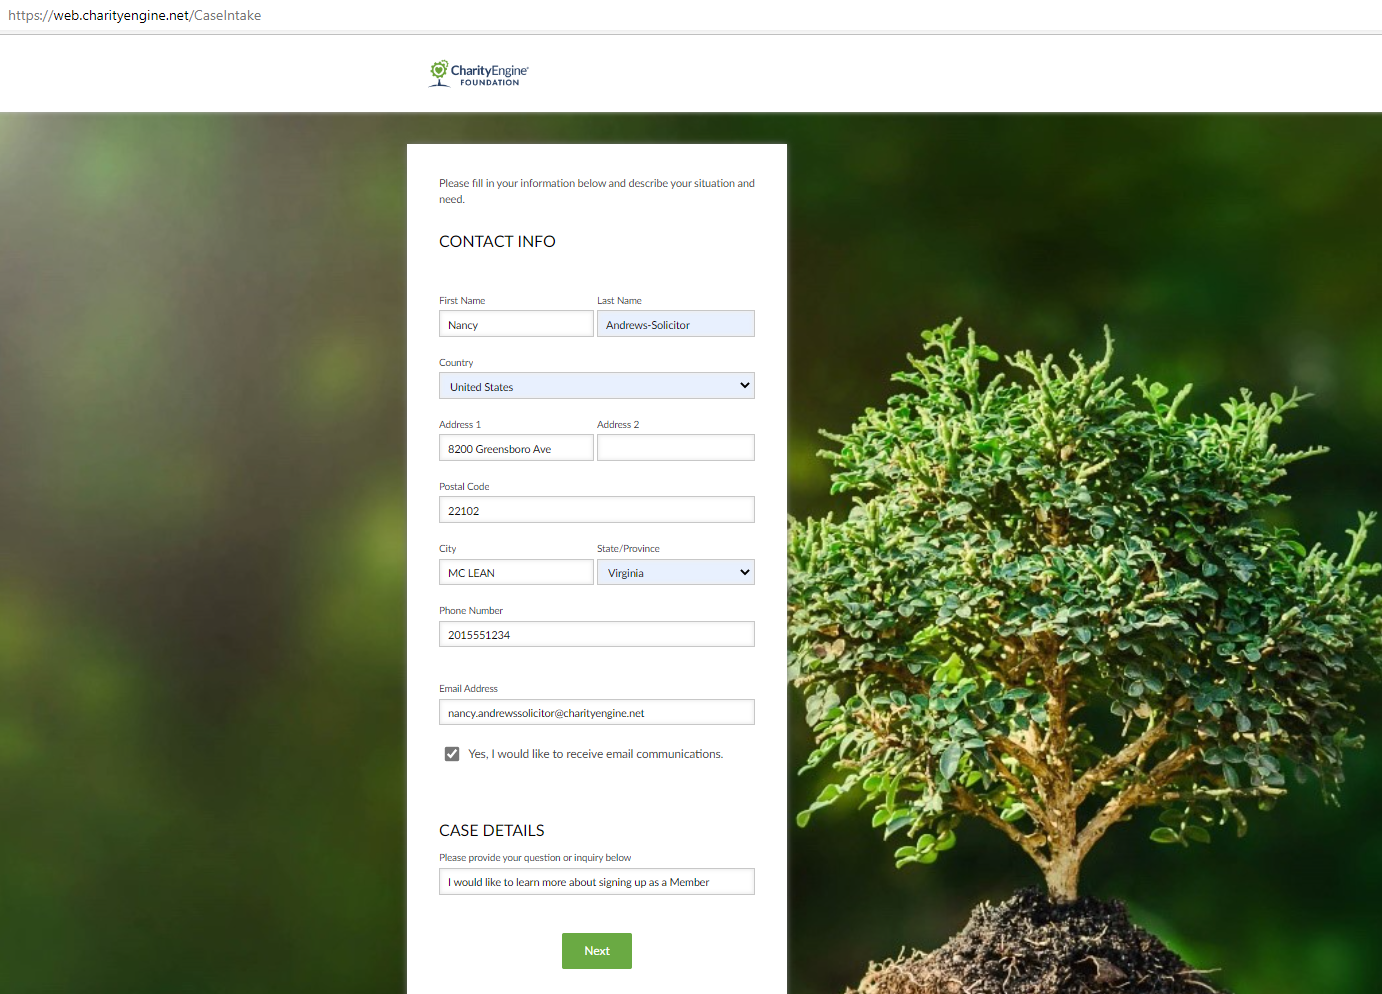
Instructions: Creating a Case Intake Web Form
To help track and follow cases, we have created a Case Intake Form through our New Form Wizard. With this form, when anyone submits a case, the web form will initiate a case for one of your users to then track and follow. This can be used as a social work tool to help anyone in need, grant applications or donor care issues.
Step 1: To create a Case Intake Form, navigate to the Online App > Web Forms > Quick Actions > New Web Form > Case Intake Form > Continue. 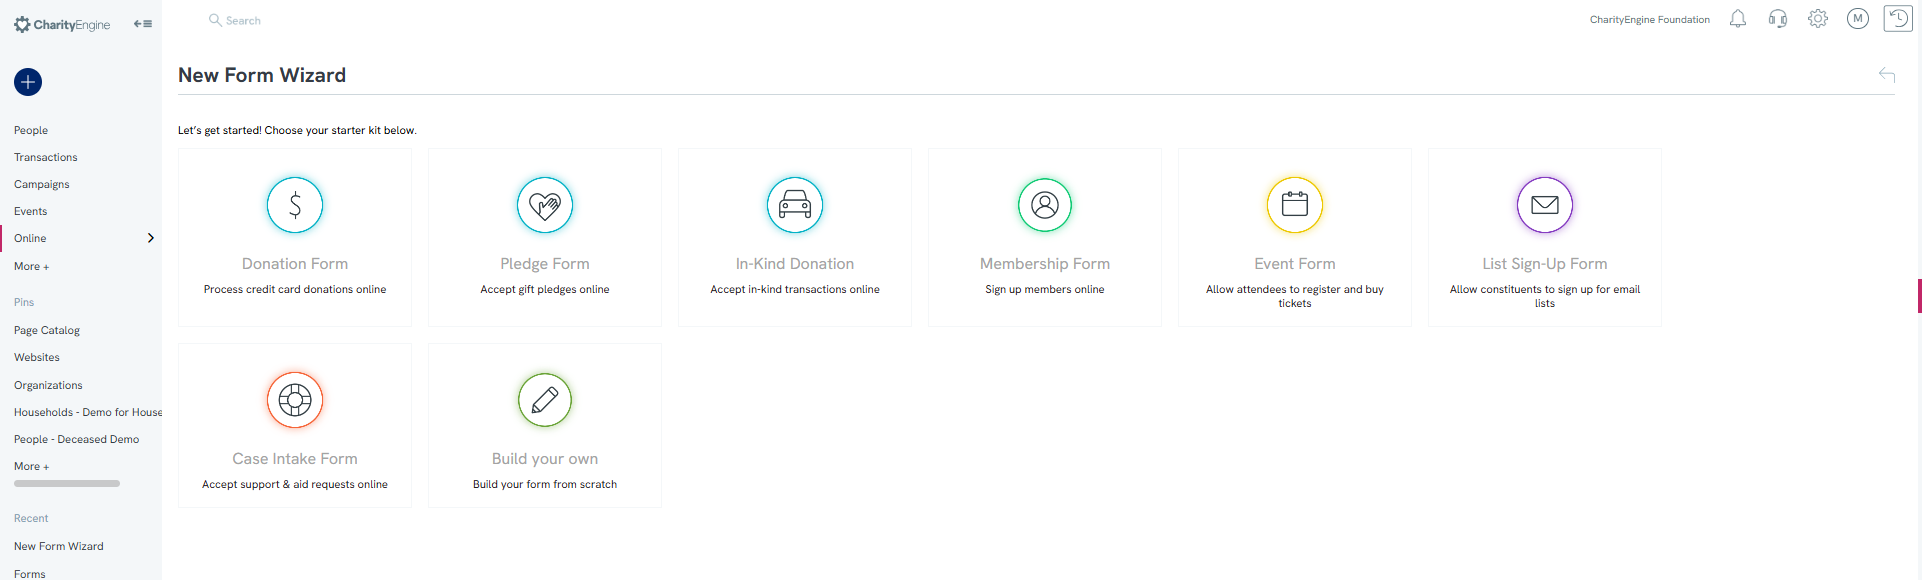
Step 2: You will be navigated to configure the settings of your form. Modify the Name (required), Type = Case Intake, Link can be used to modify the suffix, set Availability noting that if you place in a future date the link will not be available for immediate review/testing. Response Channel can be set to online or other channel type, Default Fund and Default GL Code can also be set as needed. The user will also have access to a QR Code for usage in email or other marketing content by accessing the ellipsis in the top right hand corner. 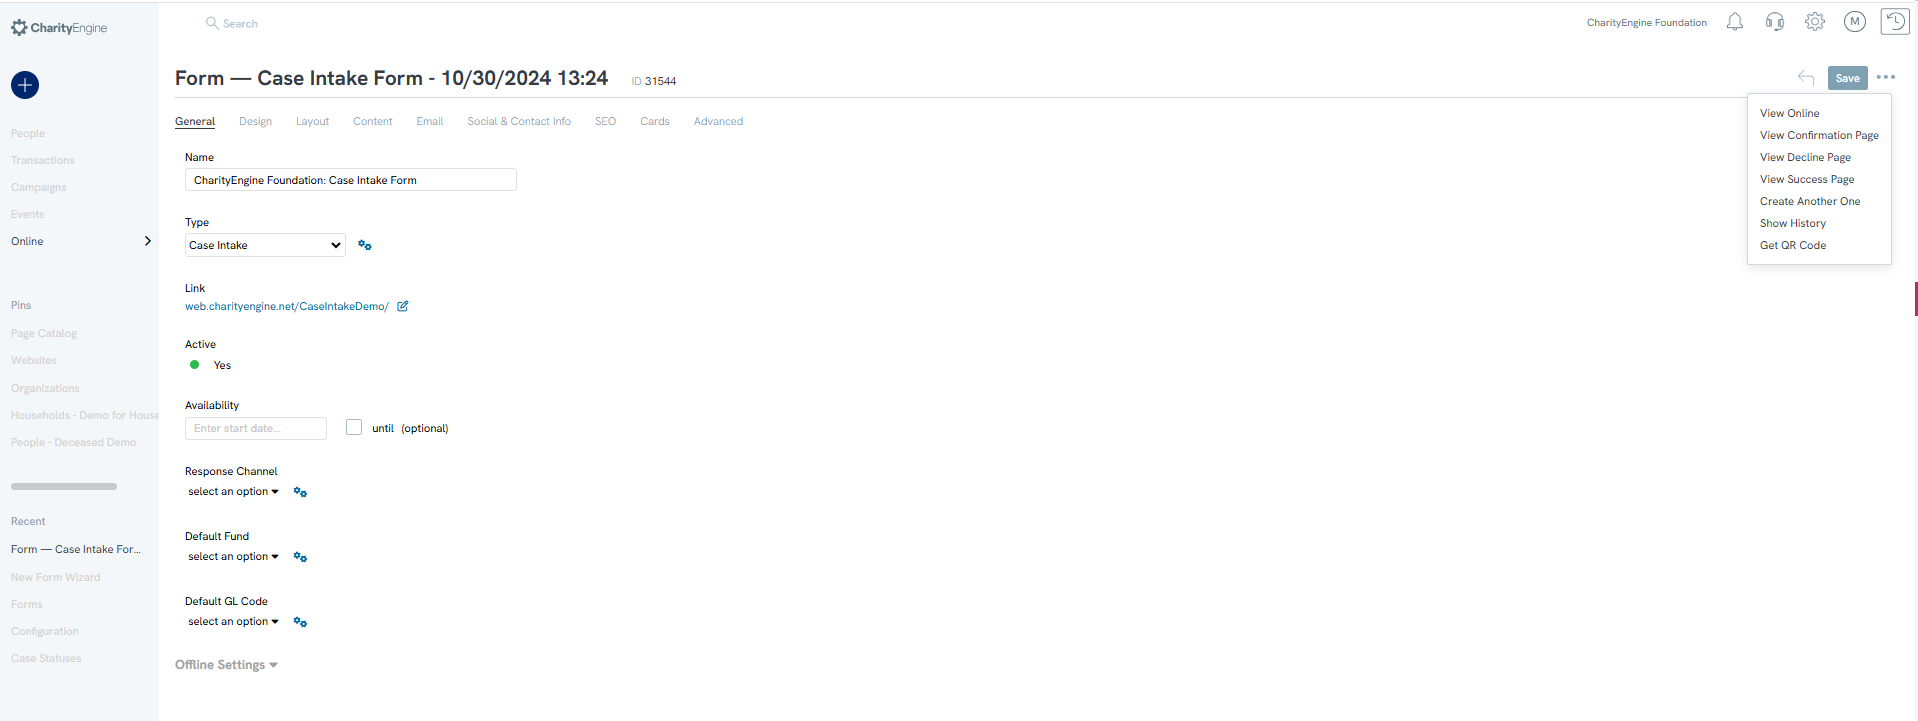
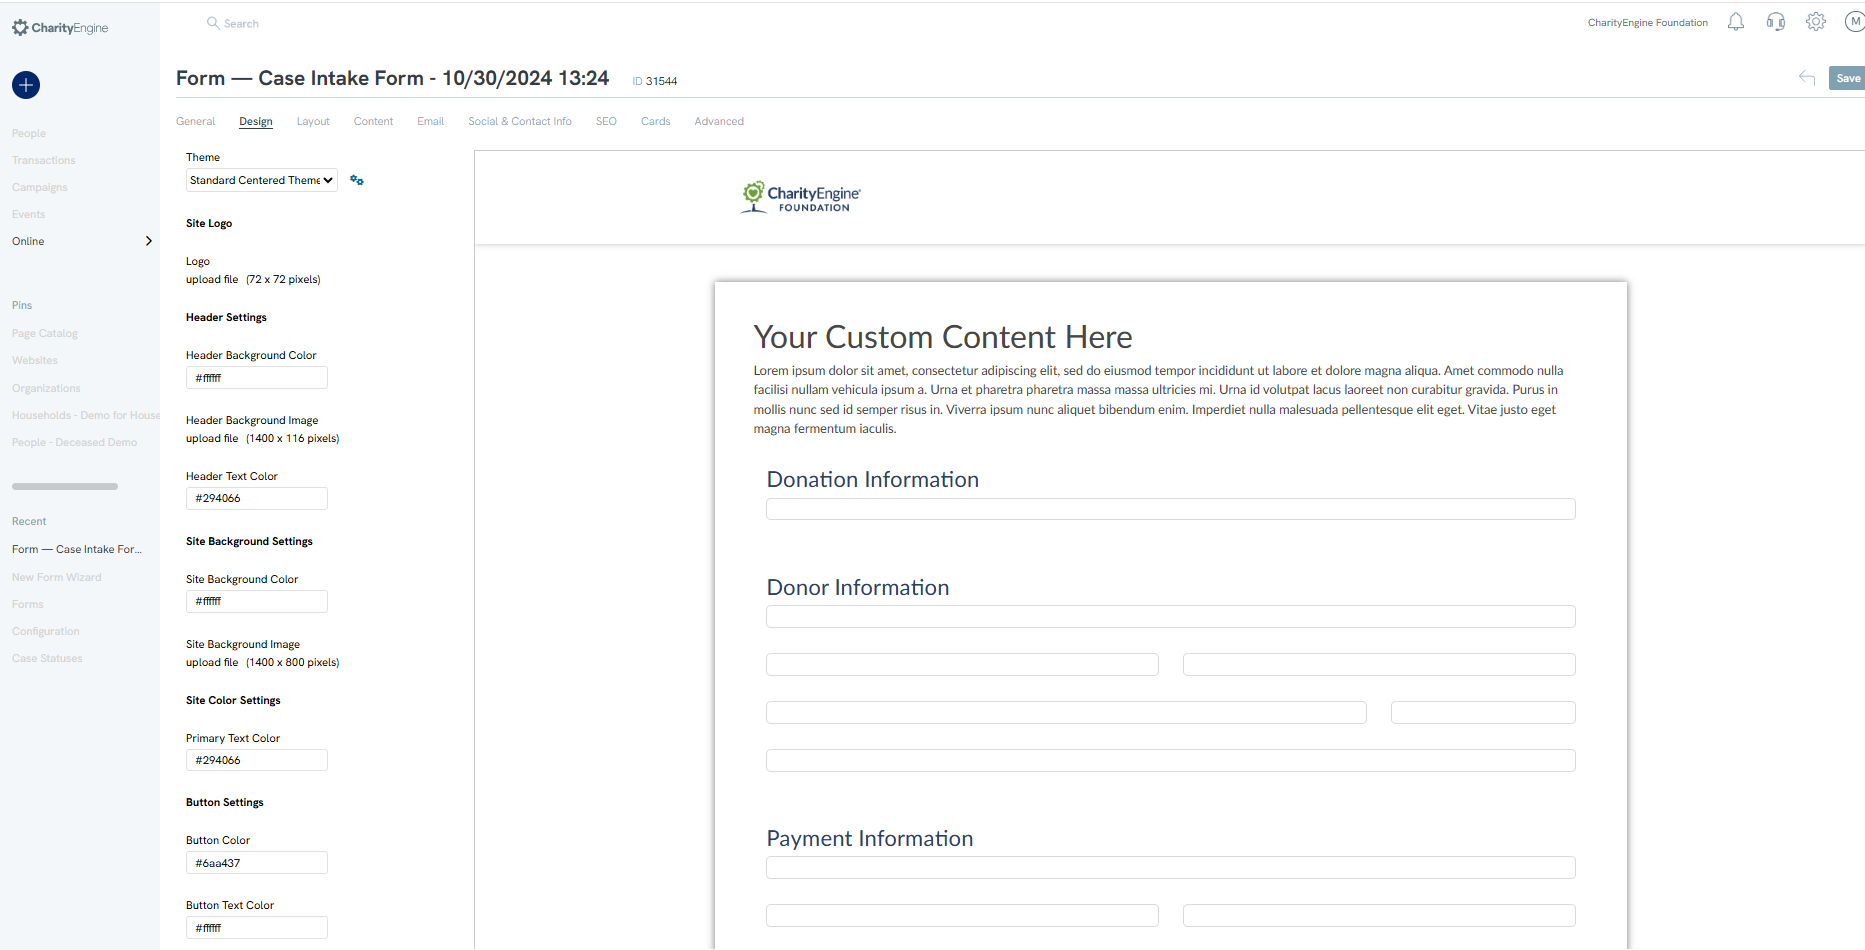
Step 3: Navigate to the Design tab to customize form layout
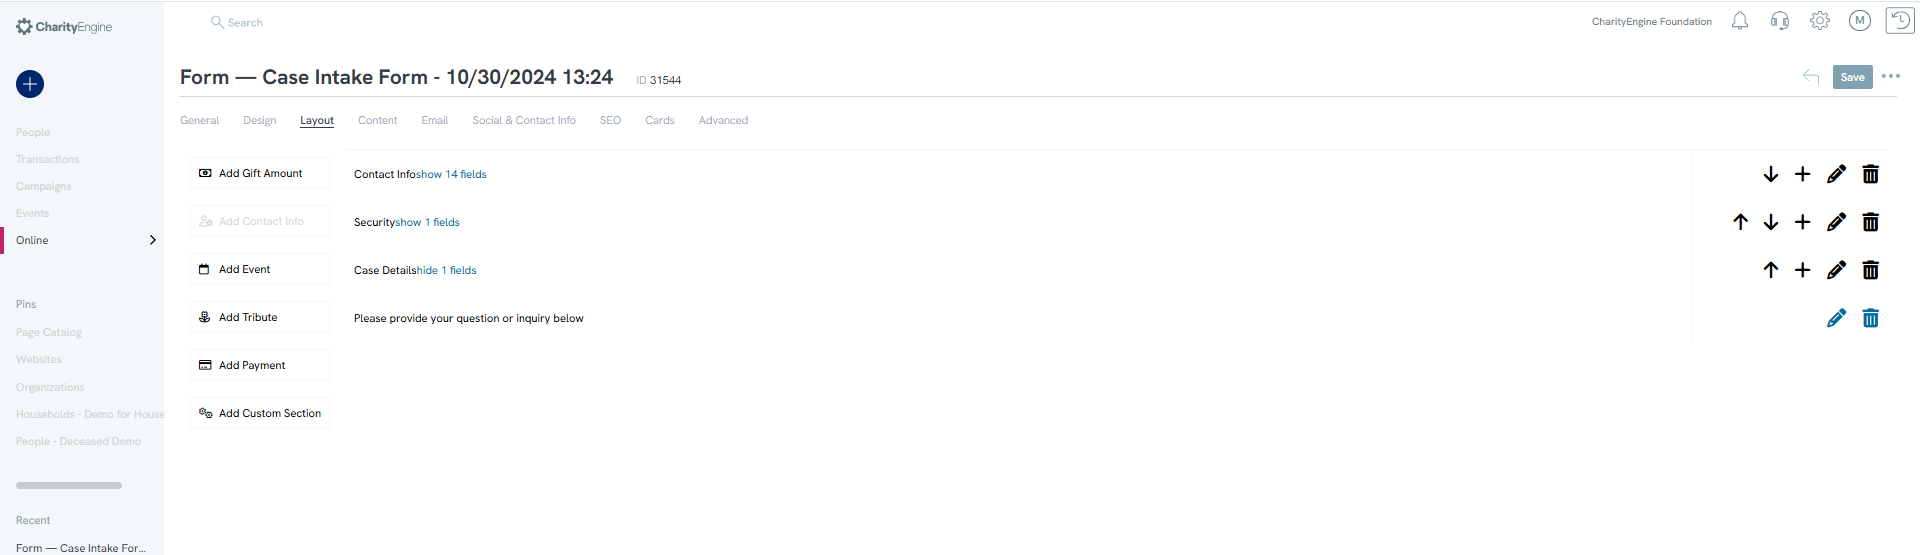
Step 4: Navigate to the Layout tab and use Add Custom Section to add a section to capture case details.Add Label and click Save to secure the changes.

Step 5: Add a new Field using the + icon. Name (required) your field, select Type and click Create Field.

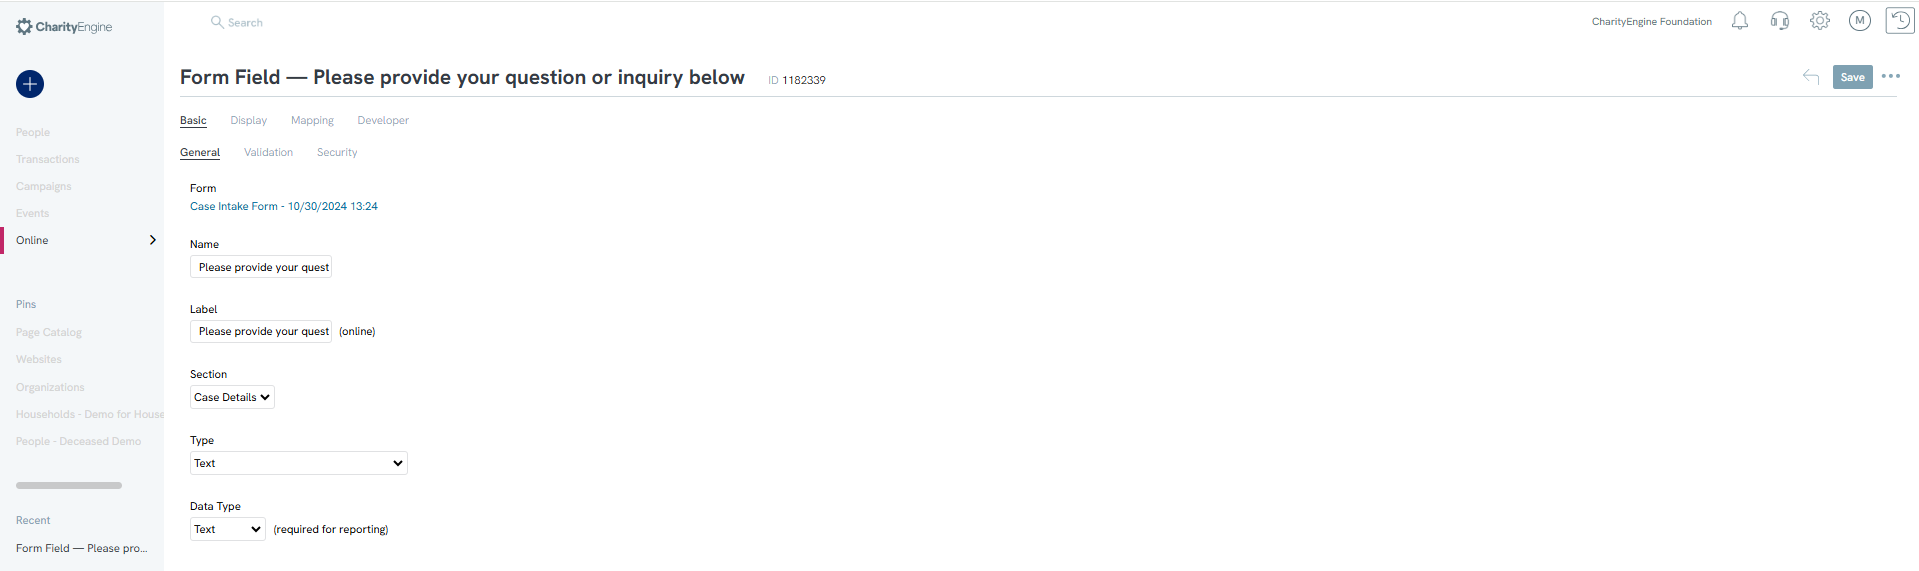
Step 6: One the field is created, edit the field by clicking on the Pencil icon
Note: From the General tab, you can also modify the language to be presented to your end user under the Label field. In this example, the field will be a Type: Text and Data Type: Text as we will be collecting the donor's question/inquiry.
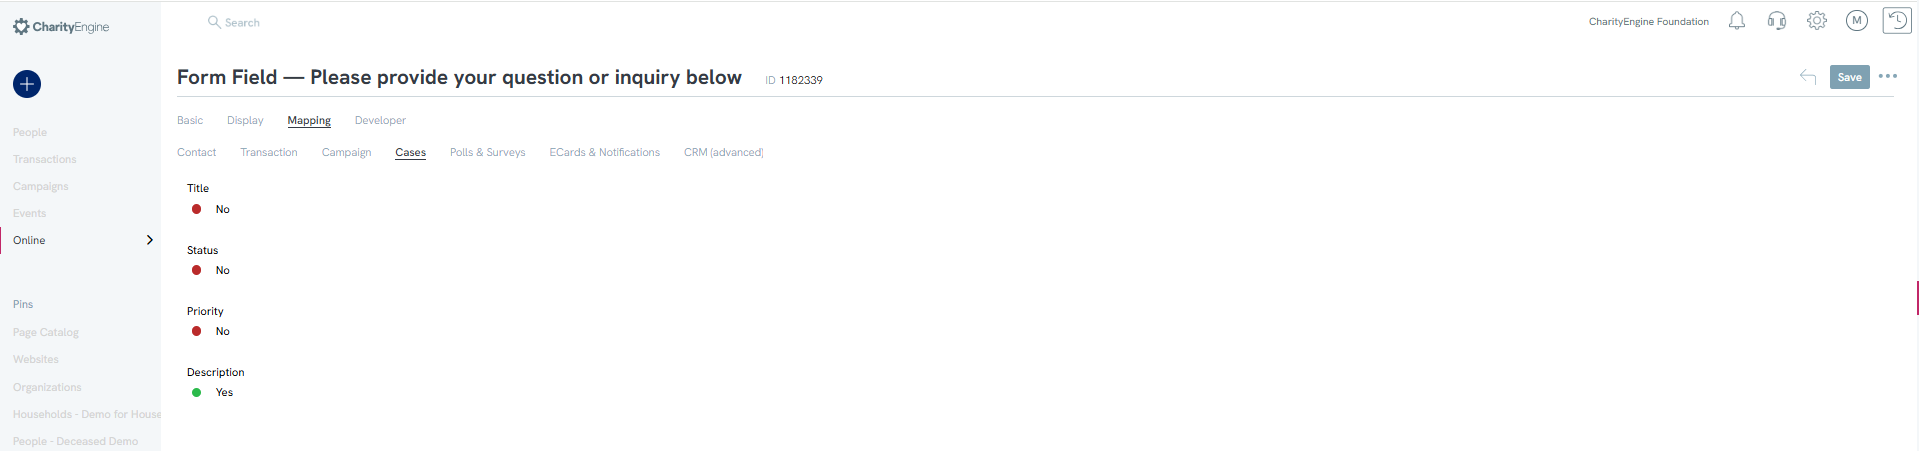
Step 7: Navigate to the Mapping tab, then Cases sub tab/option and toggle Description = yes. This will map the user's case details to the Case Description field. Click SAVE to secure your change. Then navigate back to your web form to proceed to the next step.
Note: If you wish to also allow your web form user to add a title, create a status, or assign a priority, follow step 5 & 6 above to continue to add fields to your custom section
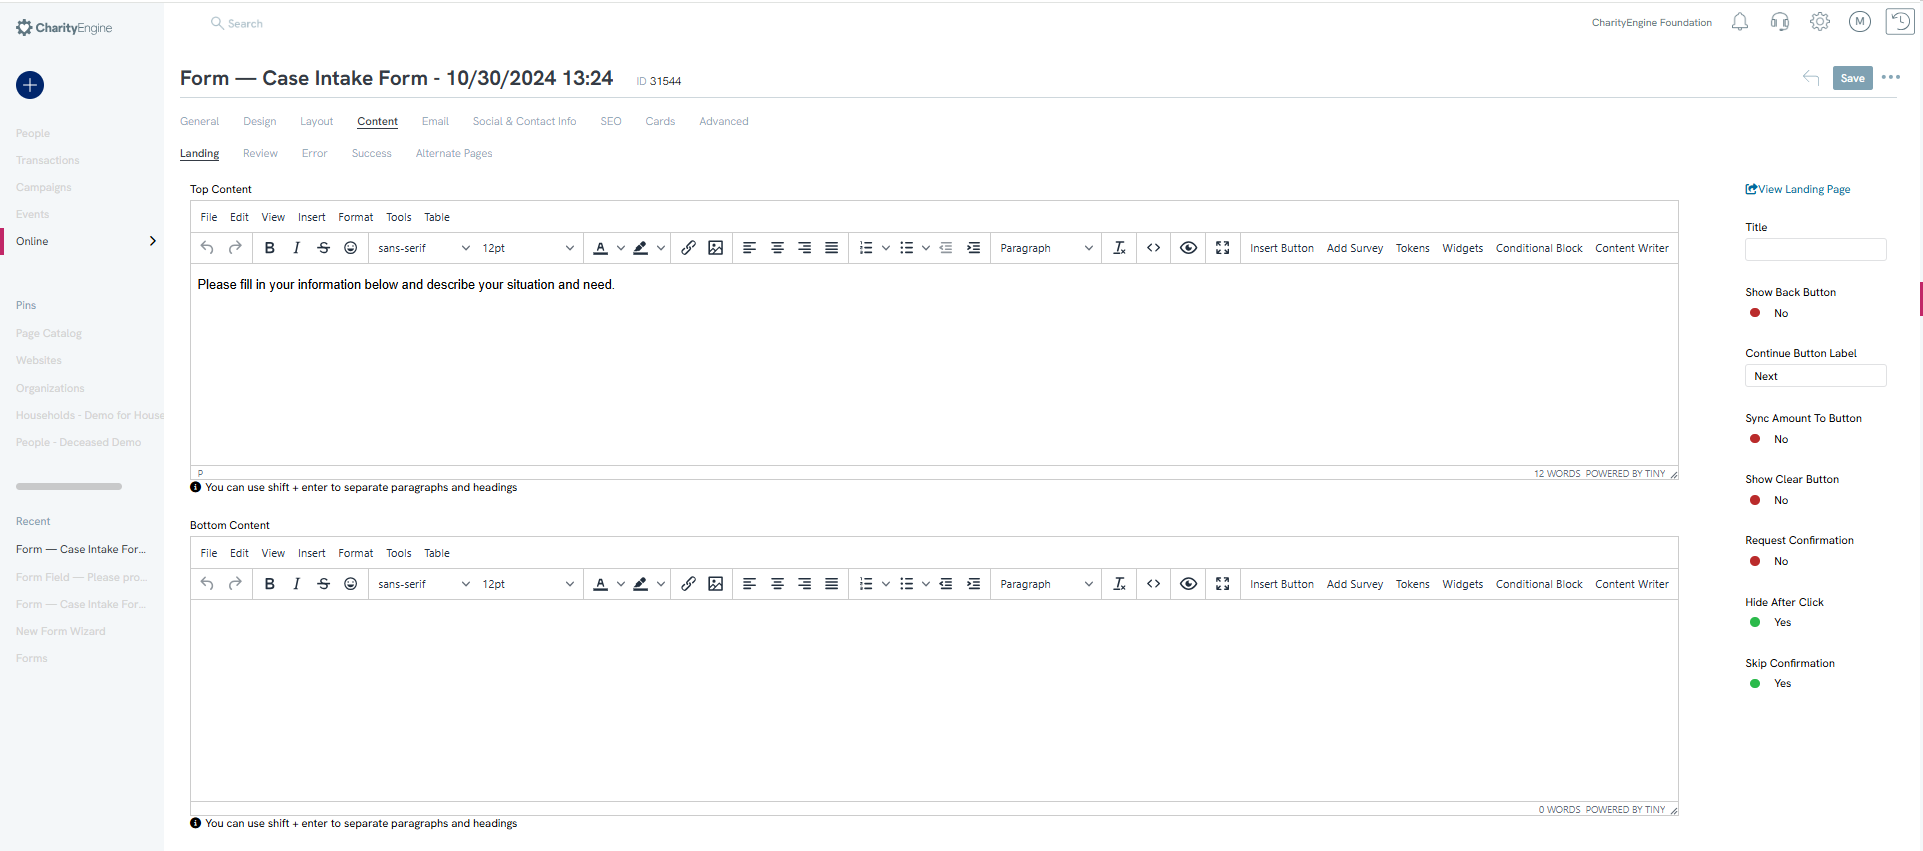
Step 9: Navigate to the Content tab to customize language on the landing page and success page.
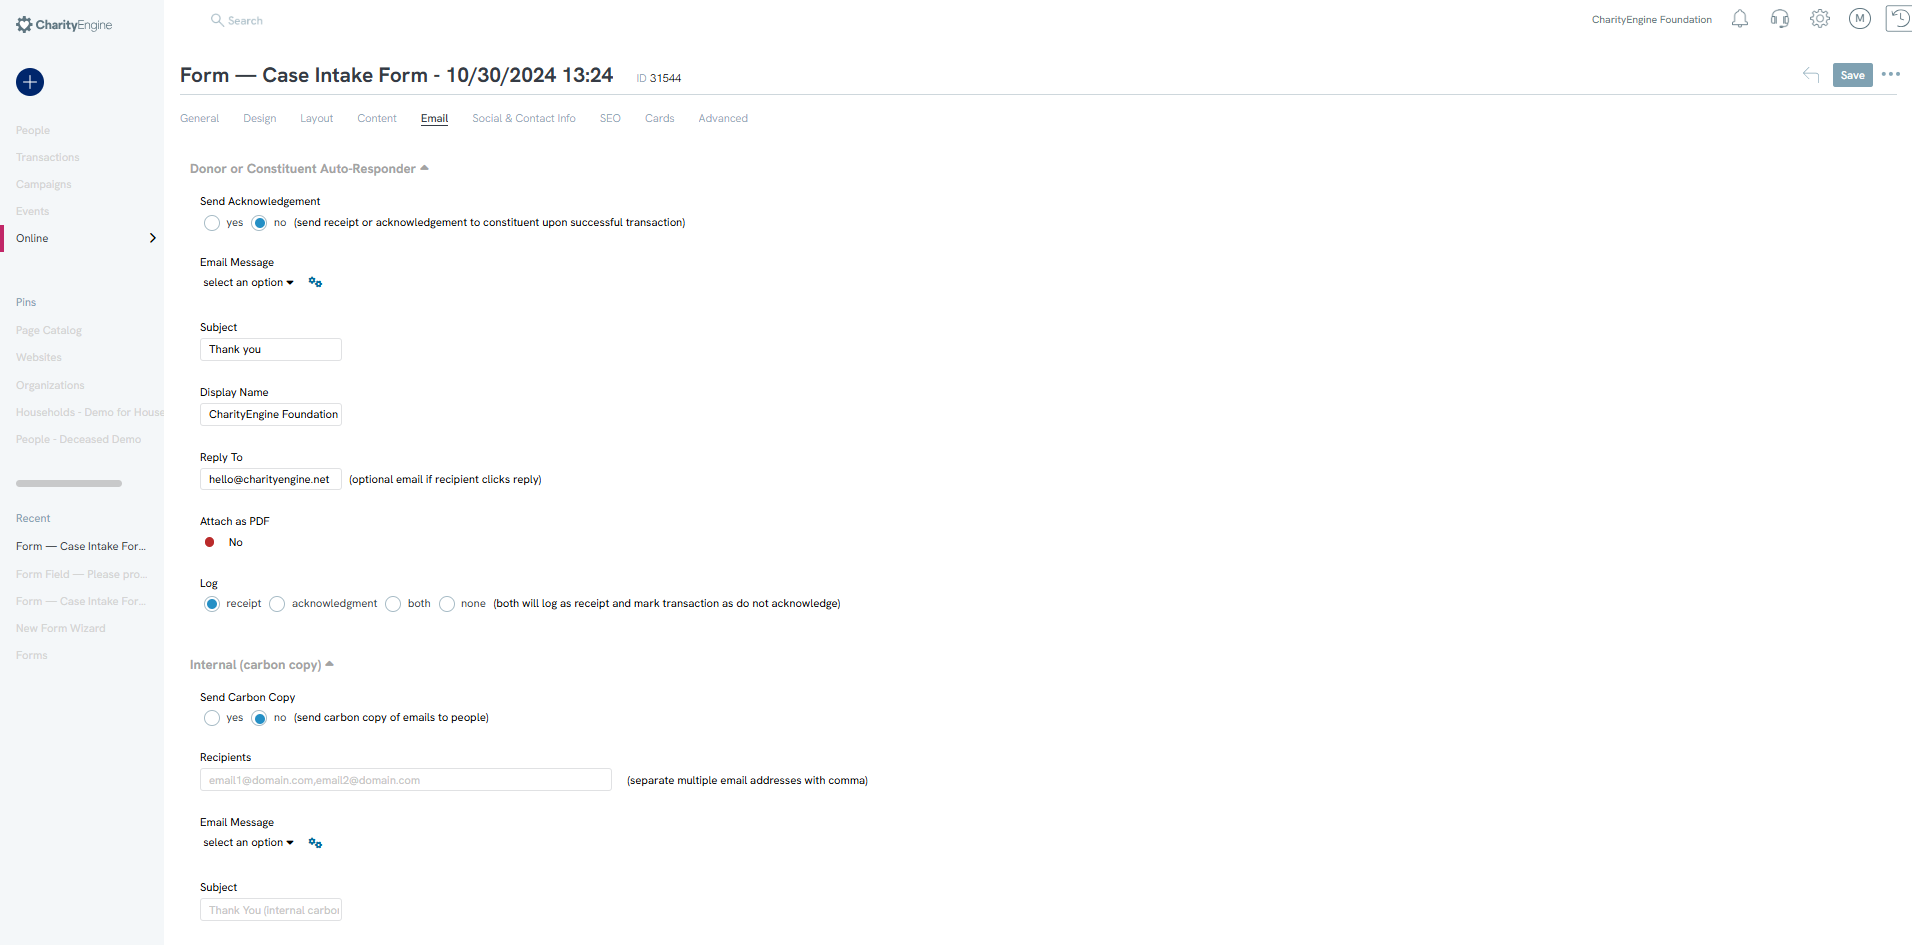
Step 10: Navigate to the Email tab to configure any auto-responder email requirements and/or to add any Internal (carbon copy)
Step 11: Navigate to the Advanced tab for any additional attribution or customization needs. From the various subtabs, leverage attributions such as assigning groups, tags, opt in lists, campaigns, regions, etc. Click SAVE to secure your changes.

Step 12: Review your form and complete testing as needed
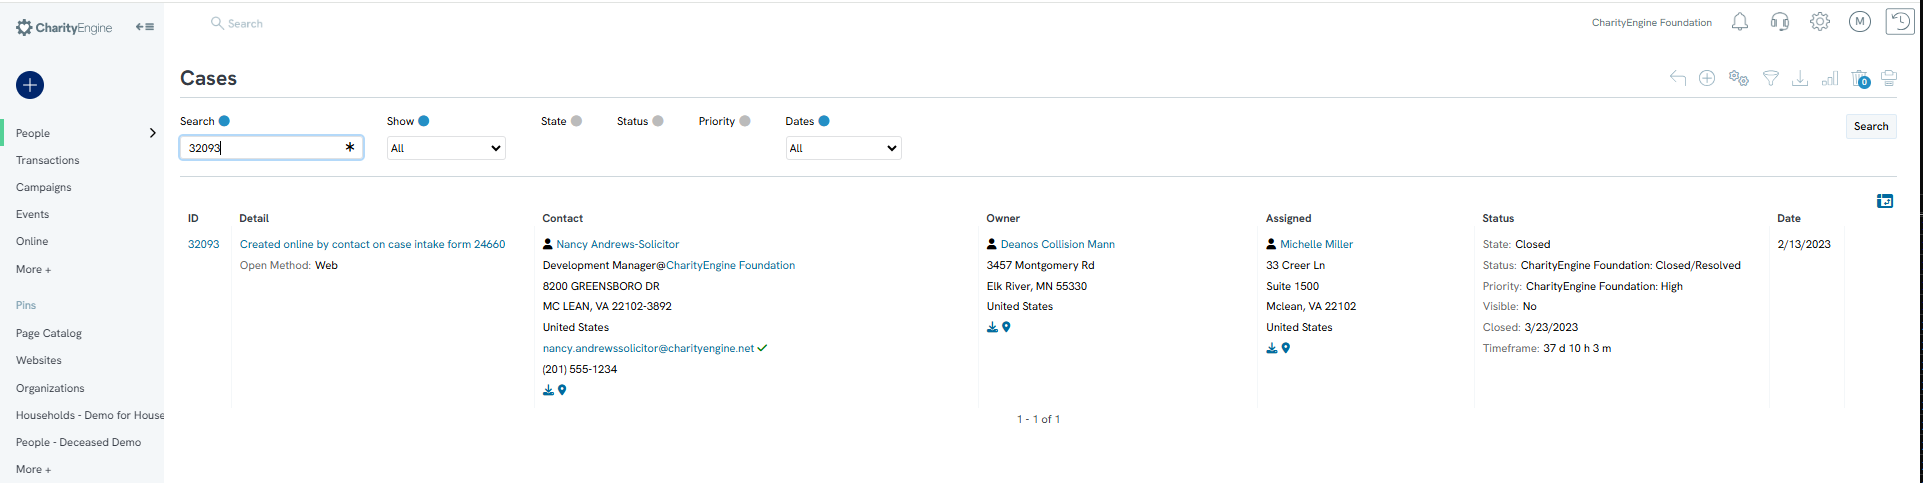
Step 13: Once a Case Intake form submission has been completed, the case will be created within the Contacts App > Cases > Go. From here, use the Quick Filter to Show: Unassigned.
Step 14: Navigate to ACTIONS > Manage and after reviewing the case details, assign the appropriate owners, status, priority, category, etc.
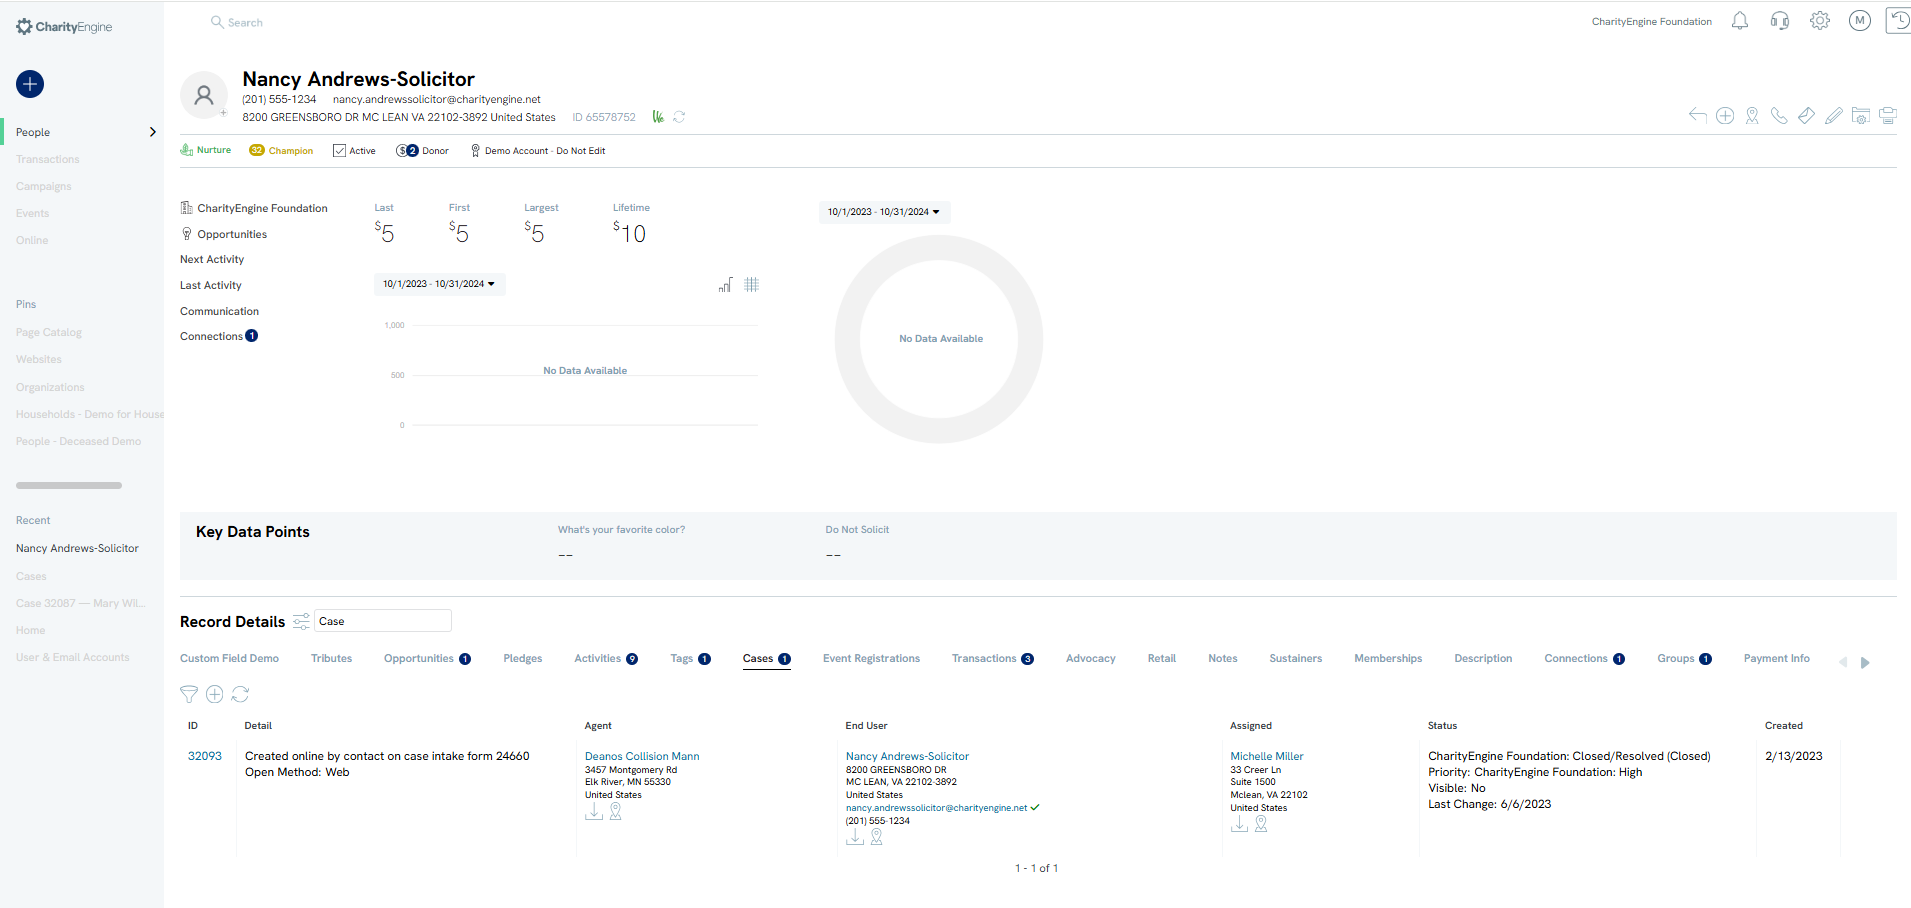
Step 15: The case will also be associated with the contact record and can be individually accessed by navigating to the People App > Organization & People > Contact > locate your contact > ACTIONS > Manage > Record Details: Cases
Reporting: Case Management Dashboards & Other Available Reporting
As with most listing screens, by navigating to the People App > Cases > Go, from the listing screen you can leverage the Quick Filters and/or Advanced Filters to segment your data for reporting needs. Once a your filters have been set, you can leverage the Report Builder to create Saved Reports as well as Schedule those reports for distribution in the future. The user will also have the option to export using the 4 Box icon.
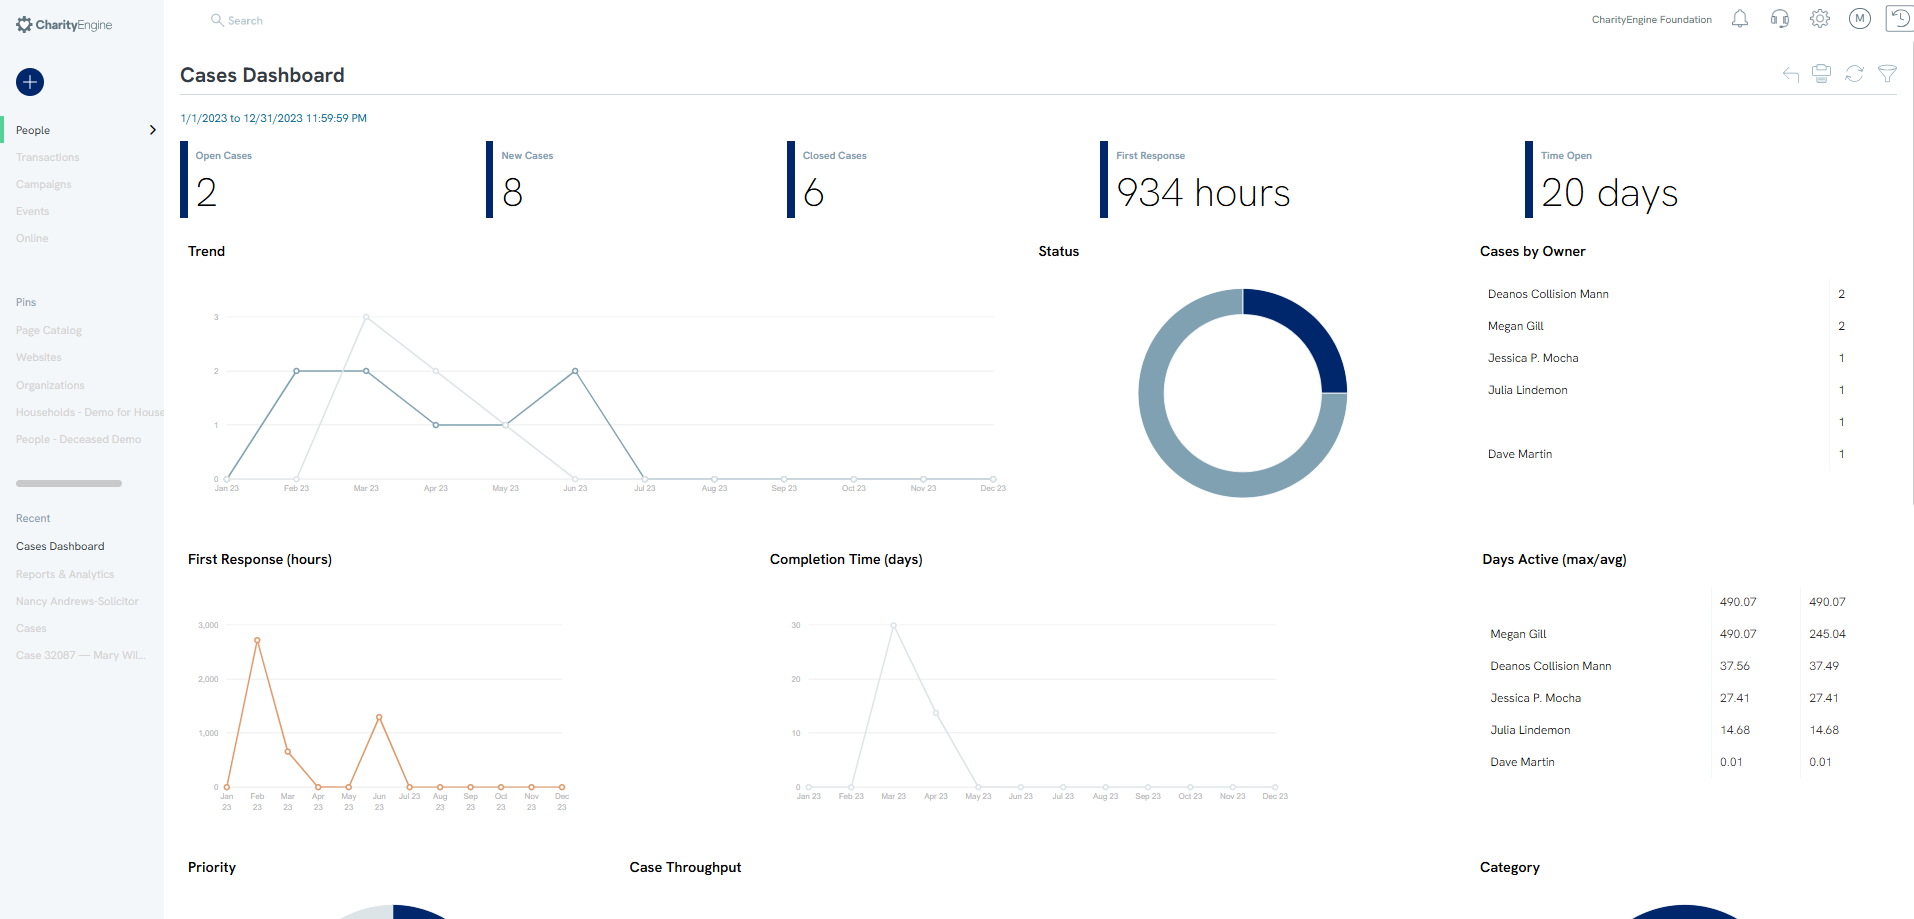
Additionally, CharityEngine offers an out-of-the-box Cases Dashboard.
Navigate to the Reports & Analytics App > Cases > Case Dashboard
See the Cases section within the Reports & Analytics App for additional detailed reporting options.
FAQs & Additional Reading
Q. From the Case listing screen via ACTIONS, what does Take represent?
A. The user who is logged in can easily 'take' the case by clicking on Take. The case will then be assigned to the user who selected Take.
